Water World – at 200 points! September 2nd, 2016

VASSAL Game 17 
9/2/2016

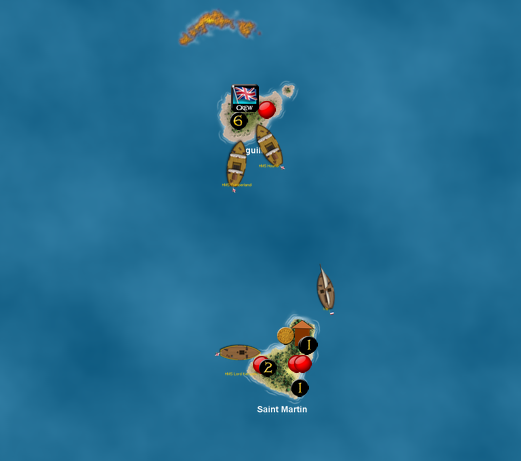
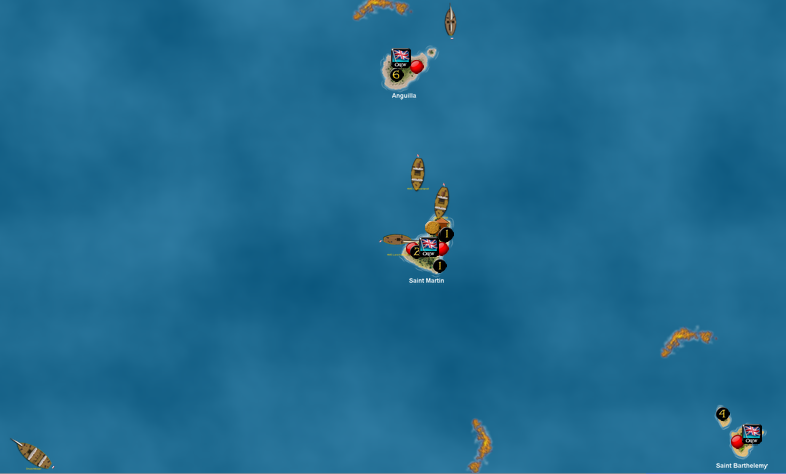
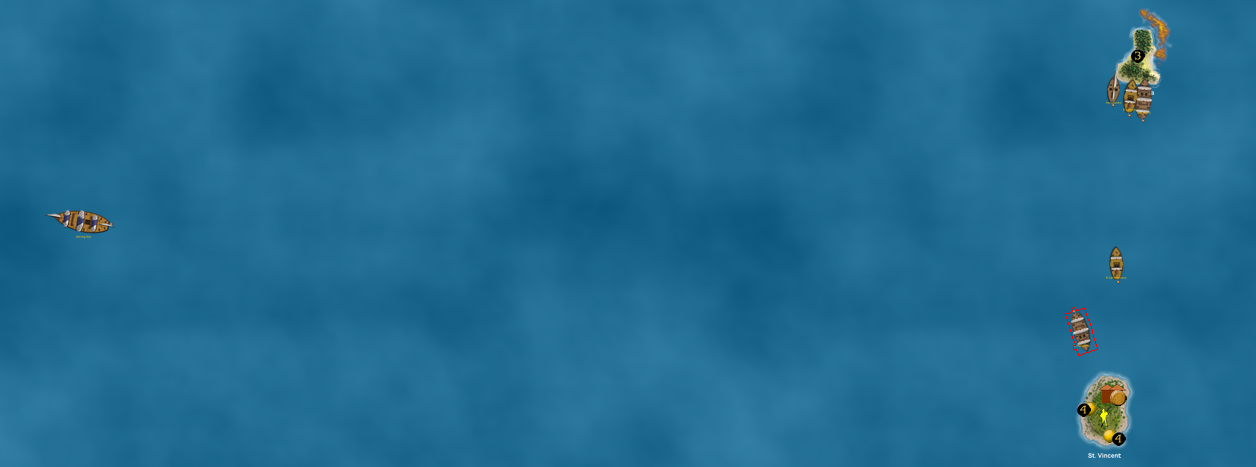
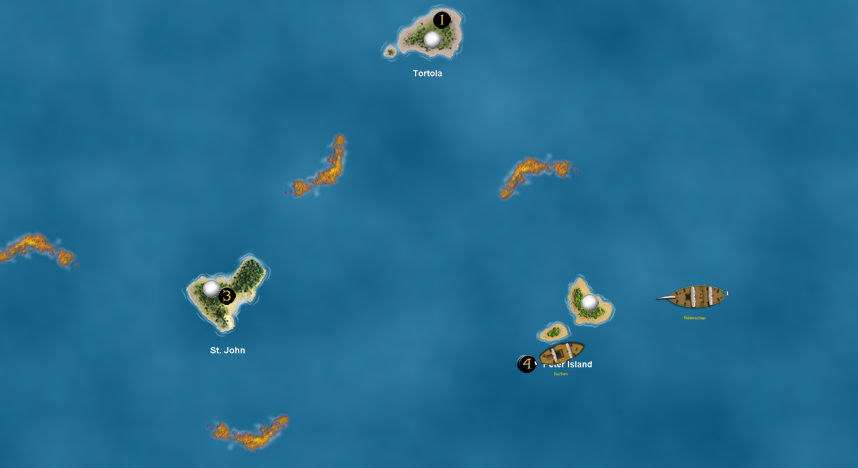
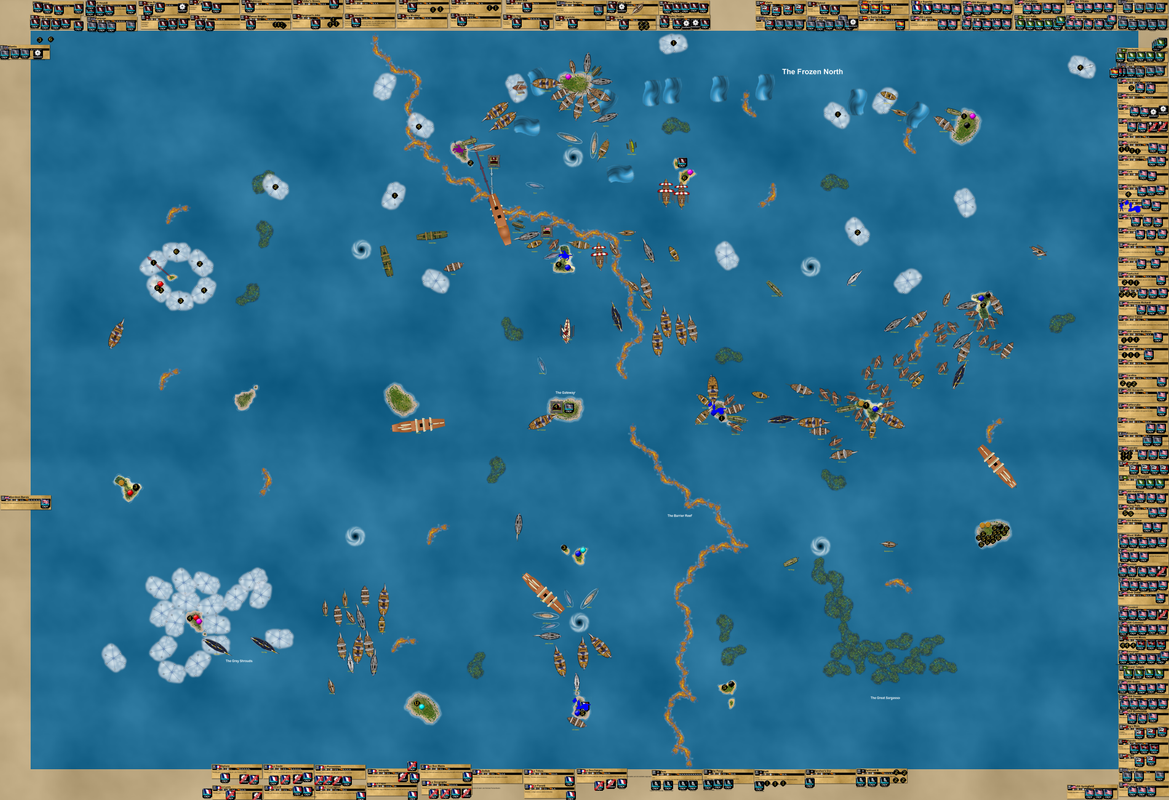
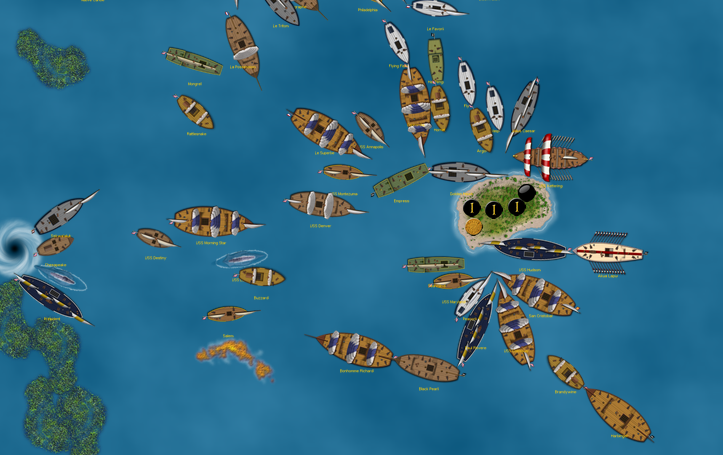
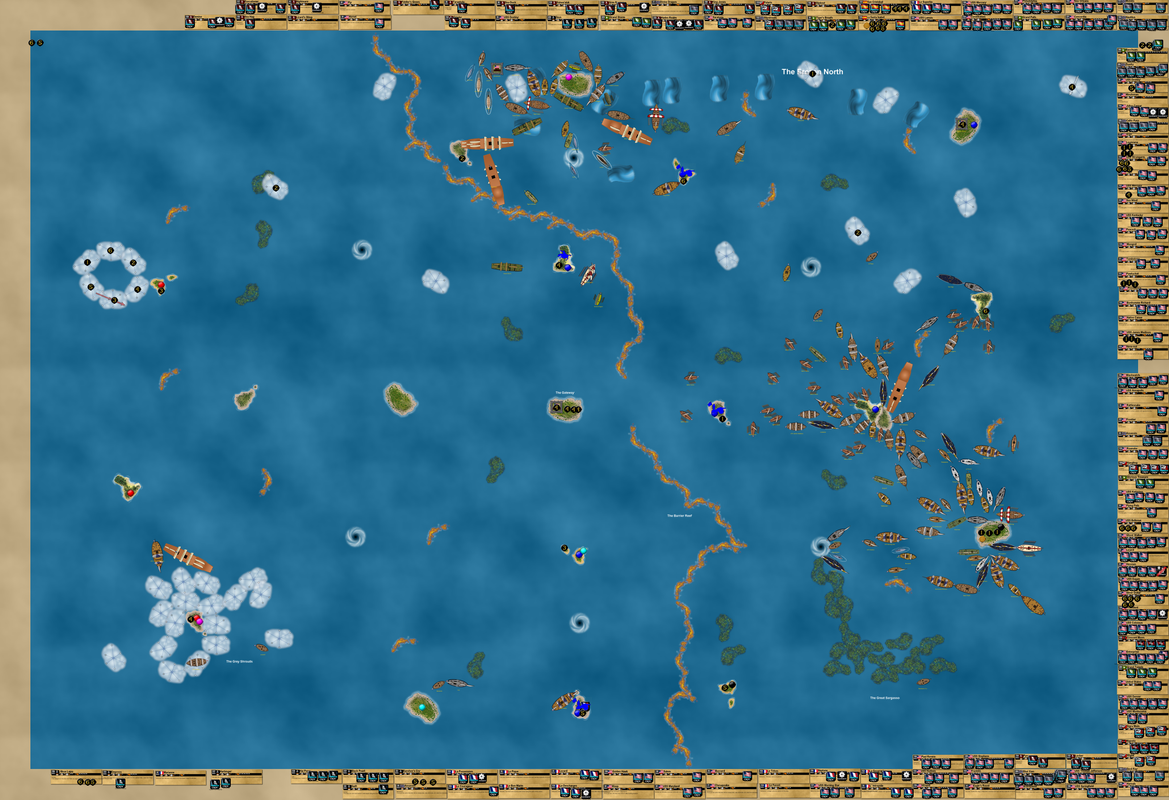
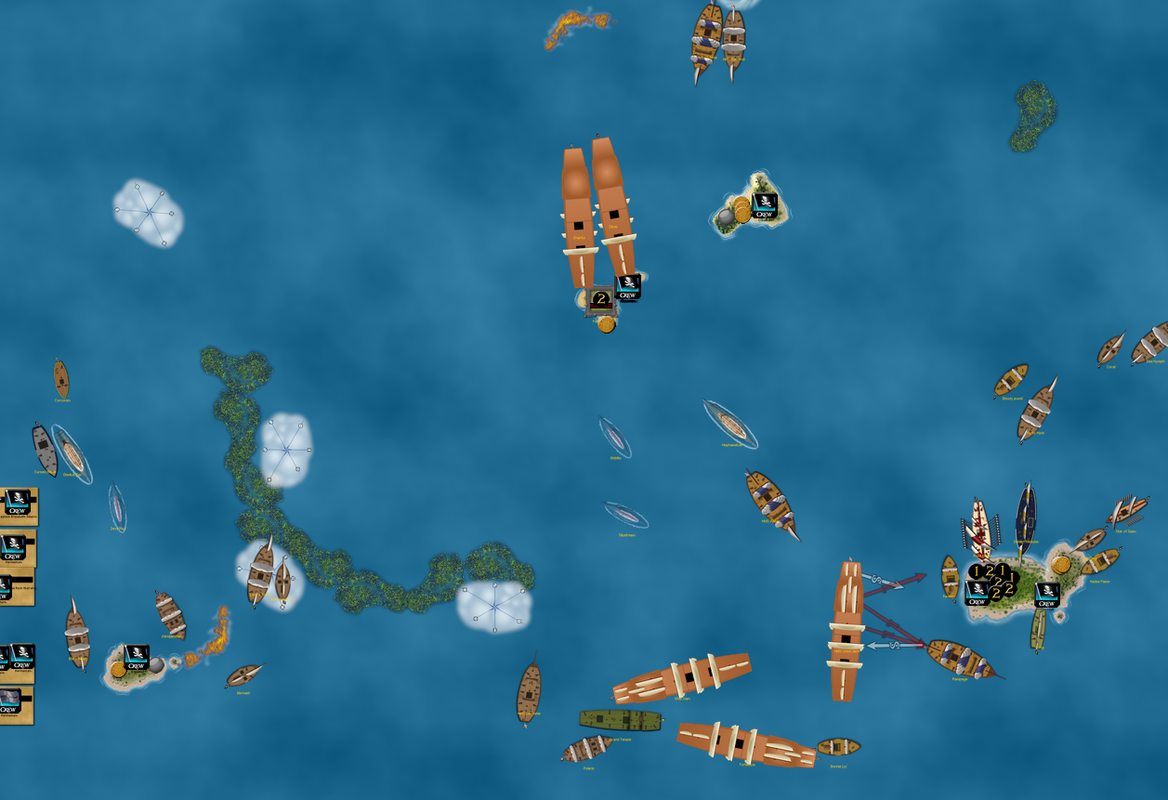
Xerecs and I have played a 200 point game of Water World!

I went first with this fleet while Xerecs used a similarly powerful fleet with multiple 10 masters. When creating my fleet, I was quite inspired by some of the ideas I presented here. With 200 points at my disposal, any combo was possible, even that monster one with the Guichuan. I’ll admit this report is a bit biased towards my perspective on things, but that’s entirely because this was one of the best games I’ve ever played. (as in, I played it really well, not that the game itself was that exceptional) Hopefully it won’t sound too conceited haha!

My strategy going into the game was as follows. The whole premise of the fleet was to basically sail the Guichuan up to the enemy fort, flip Grim to steal all the gold (or at least 7 coins anyway), and then be immune to cannon fire with the Haulers. Then, after stealing all the gold from said fort, proceed to sink it to add insult to injury! The Oxford is the sidekick to the Guichuan, chosen for her speed (able to keep up with a Guichuan going 4S per turn with Mycron’s help) and ability. The canoes provide transfer backup if needed. Honestly, the rest of the fleet was just created as a distraction. Realistically, the only thing that can distract an opponent from the Guichuan is another 10 master. Thus, the Celtic Fury. I chose her because France has some crew with the Parley ability, and using Parley as offense is another thing I’ve been wanting to test further. Roimata’s captain/SAT was the perfect complement to Lenoir’s reroll, while a stinkpot specialist was added to fill out the points and provide some insurance against tough foes. The support gunships are other distractions – with this many points available the Constitution was a support gunship! The Black Coral was added for another RtSS piece, and I thought she could be a backup gold runner, with Secret Hold being extra-useful in the Water World scenario. The Mercure is a ship I’d like to use more often, and was the perfect fiery pest to fill out points with.

I wondered to myself if this grand plan was even plausible. Somehow, it worked.

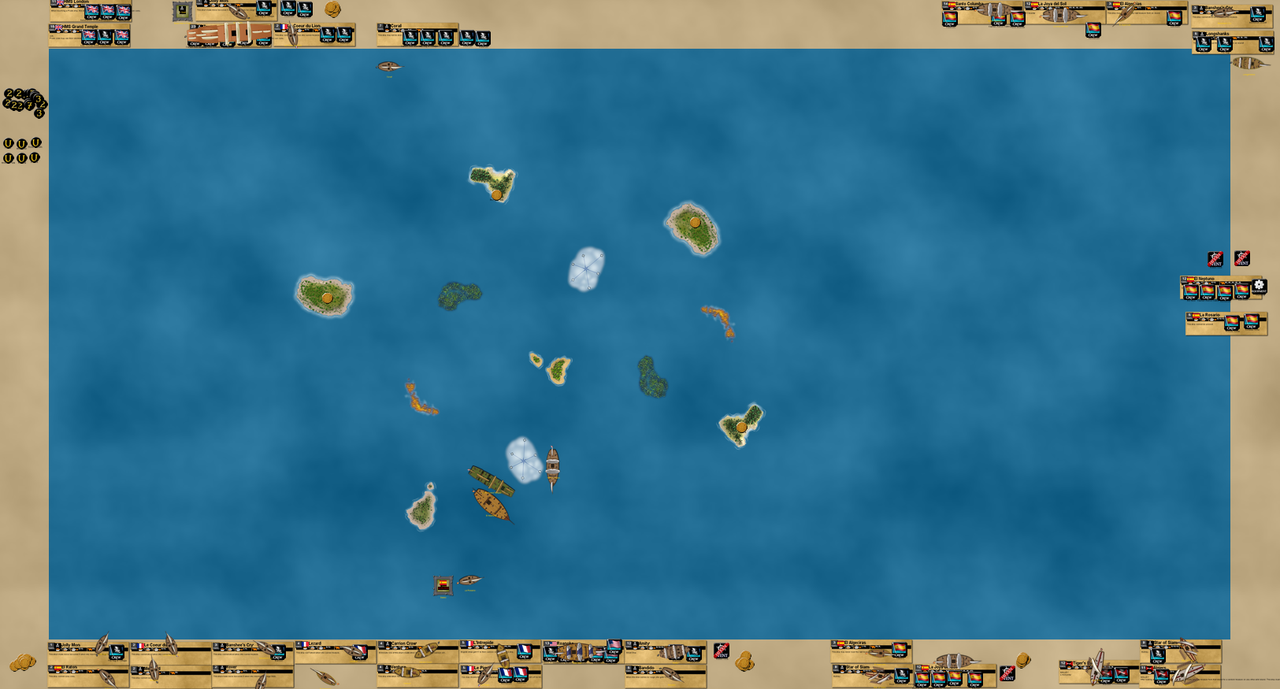
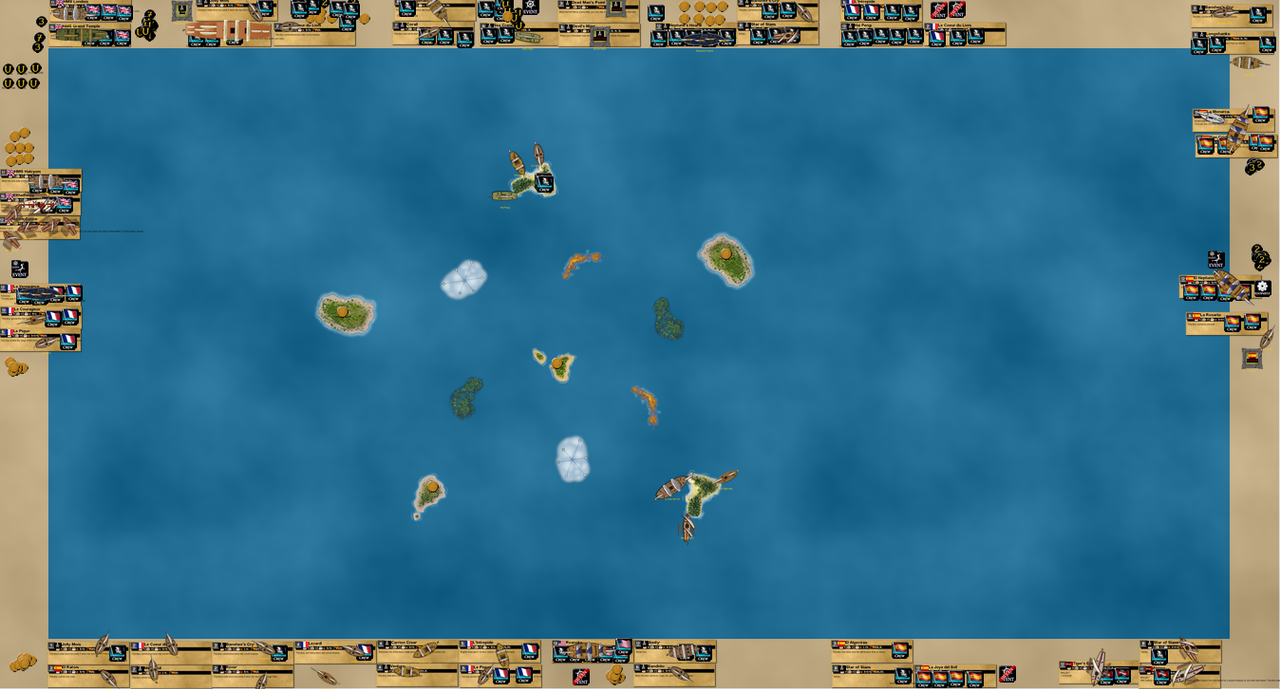
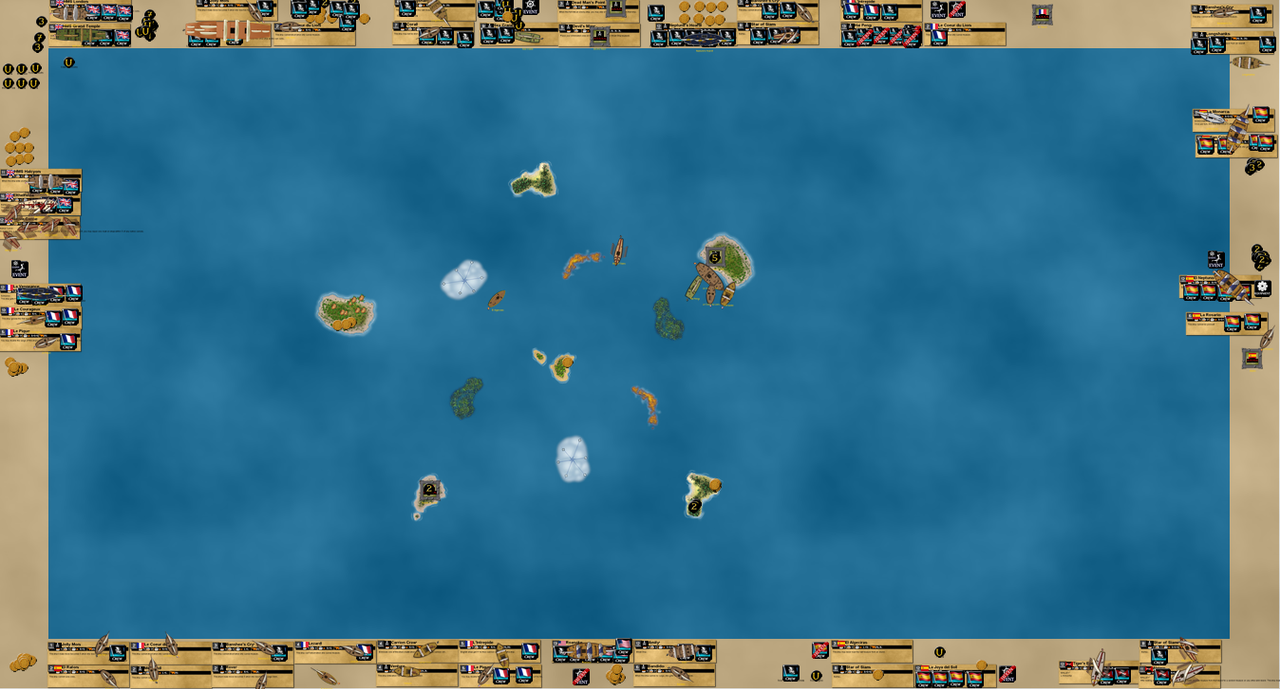
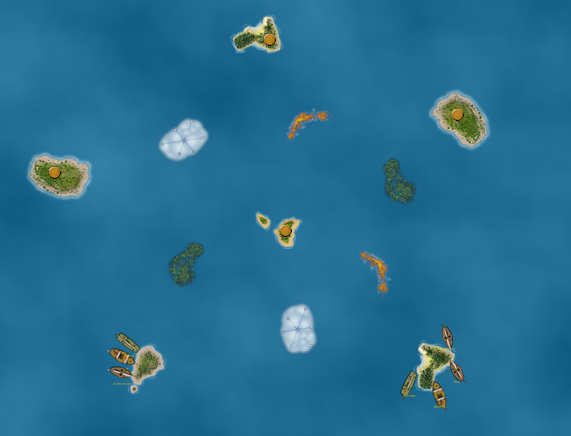
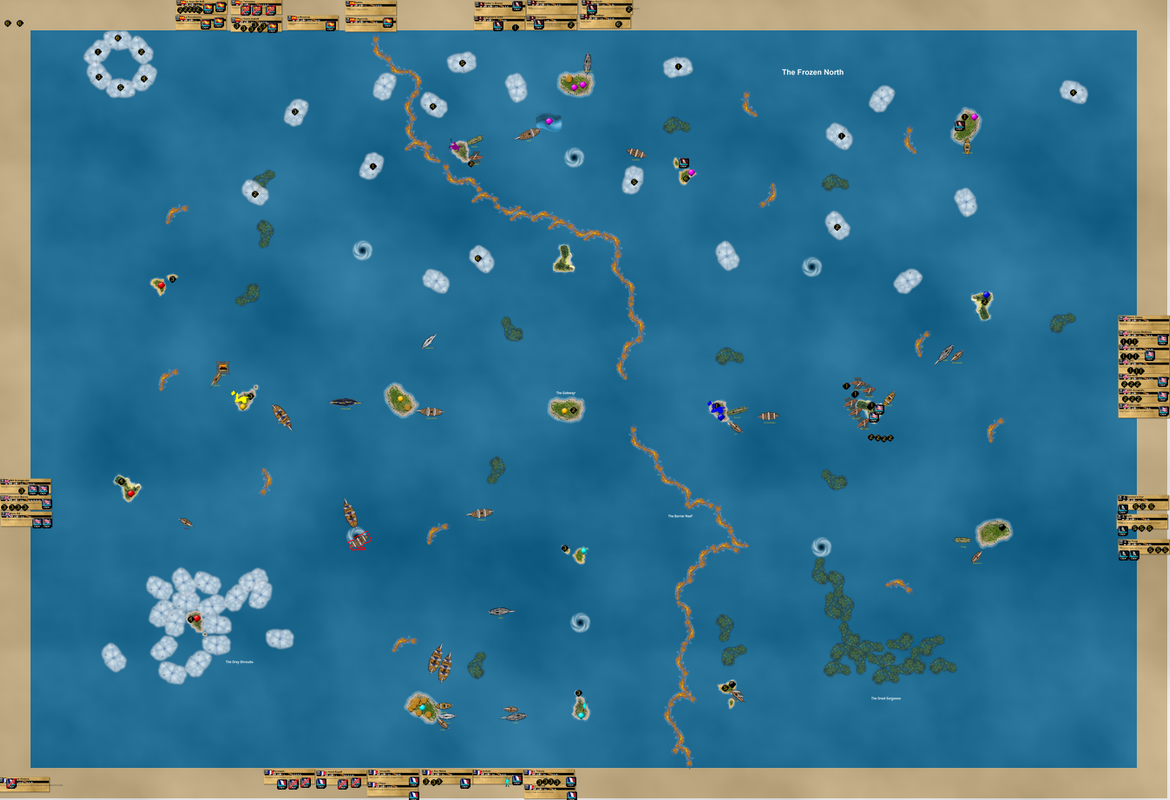
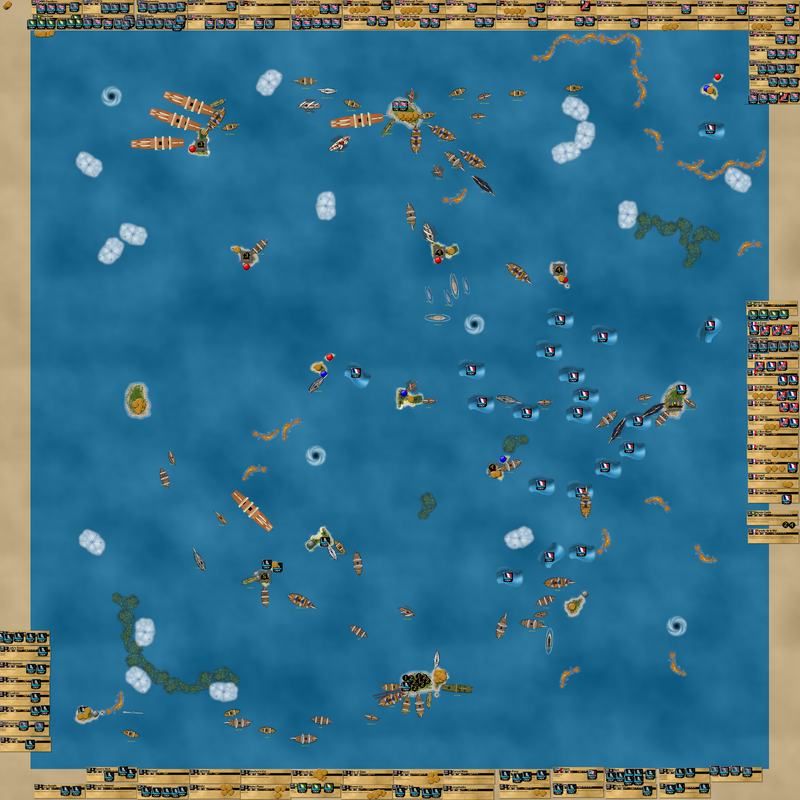
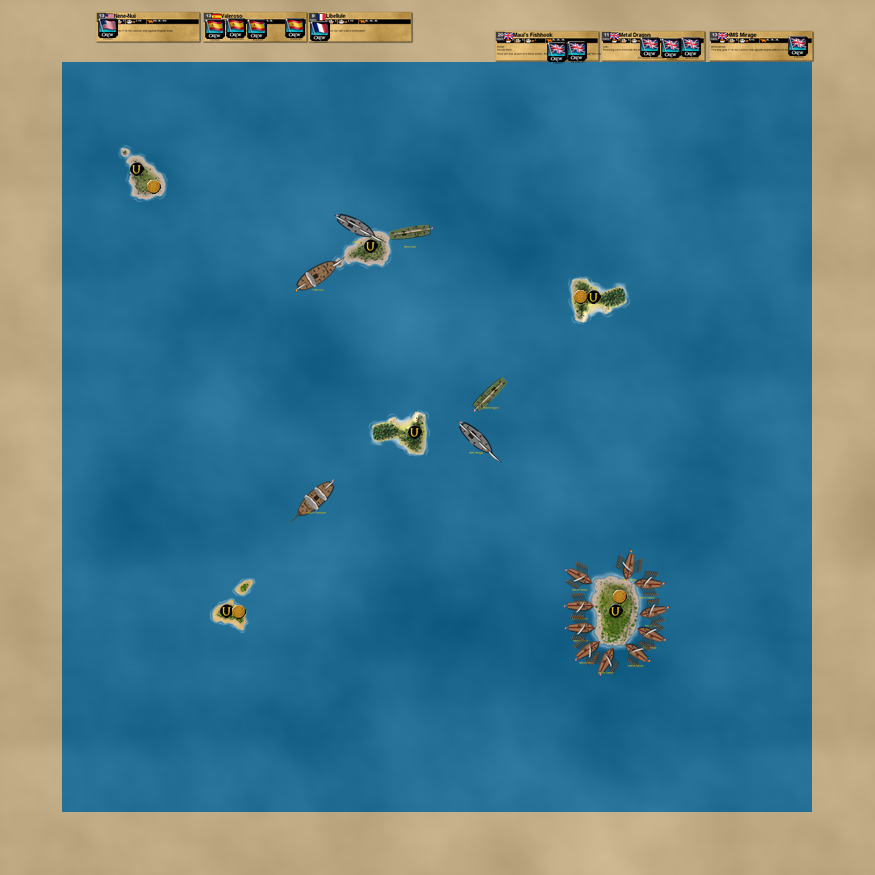
6 wild islands, 8 coins per island, round earth rules.
Water World

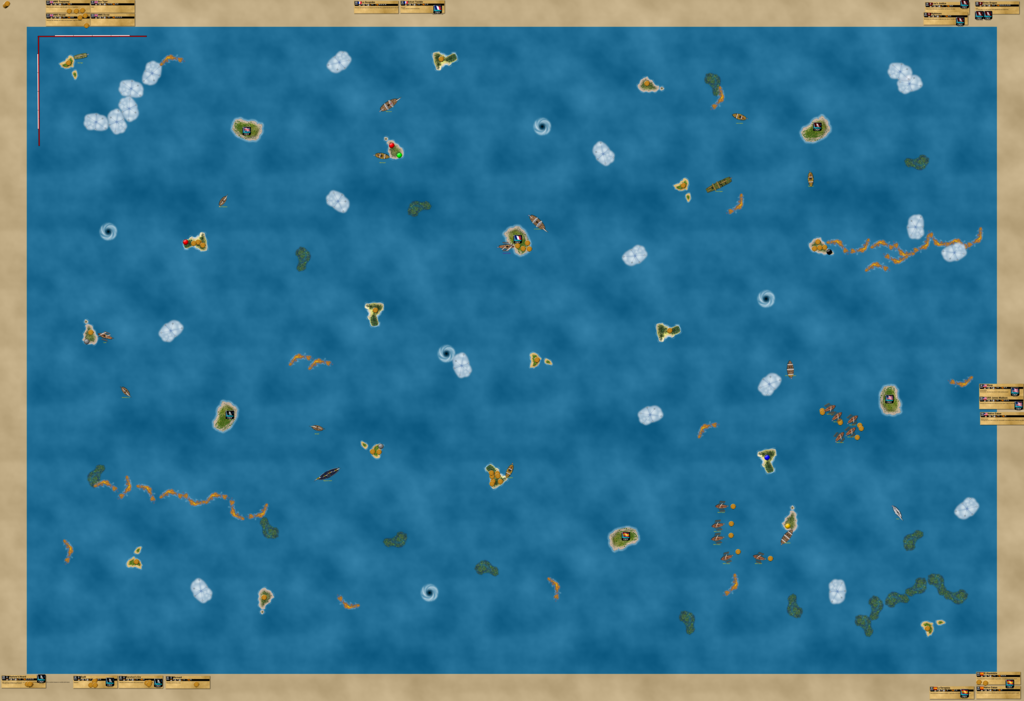
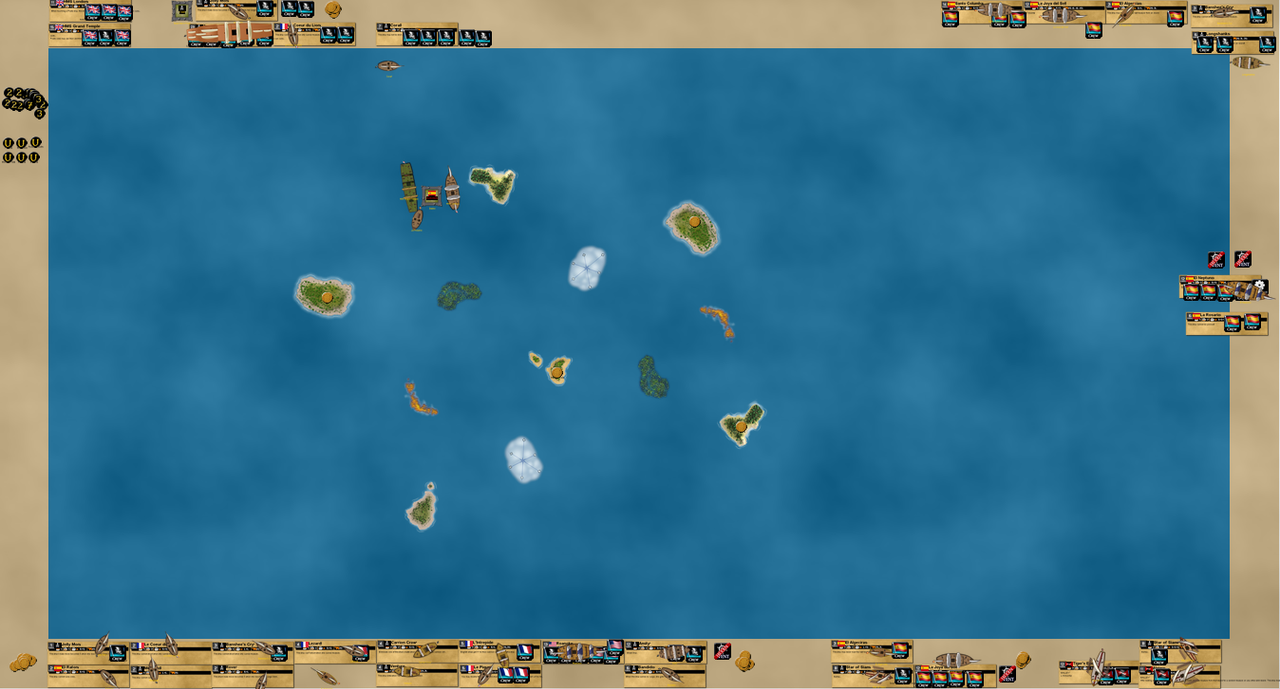
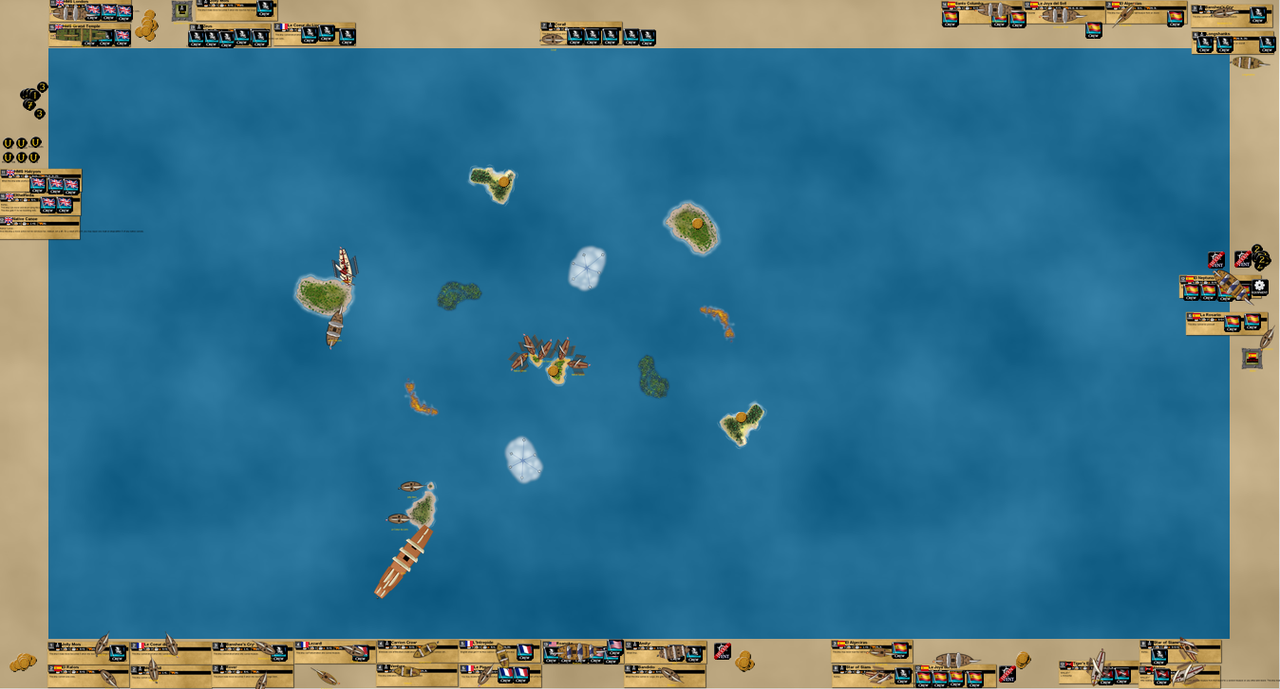
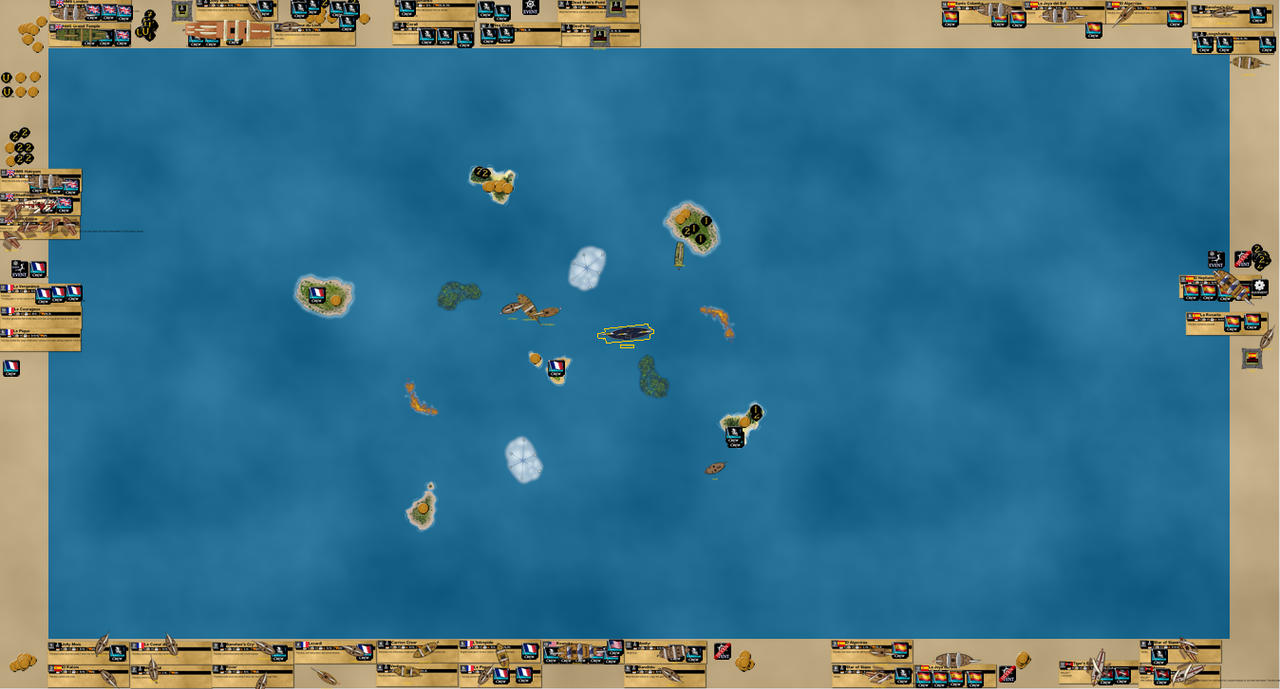
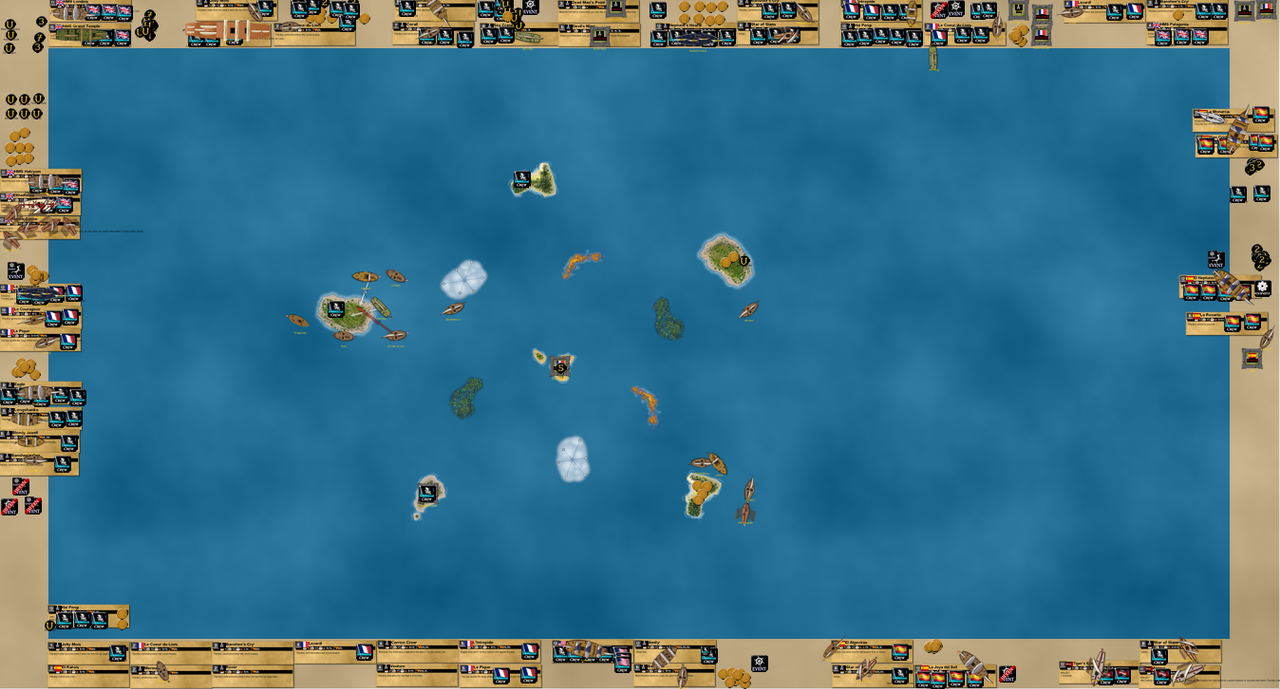
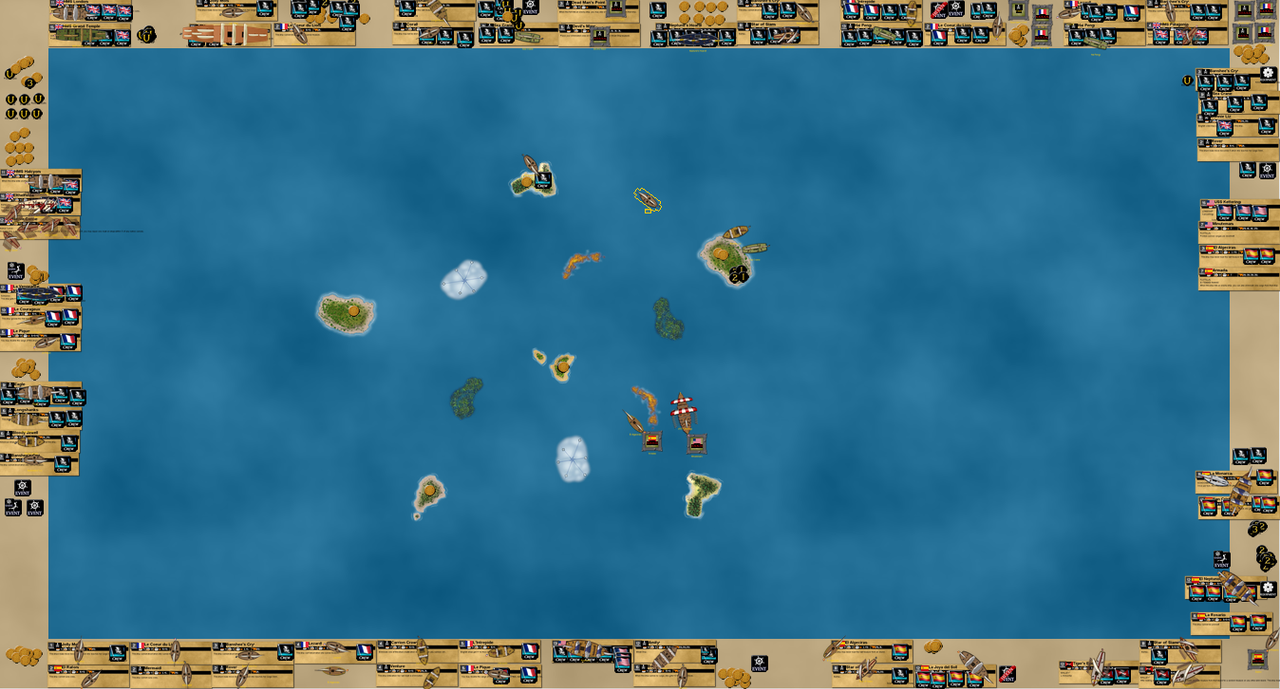
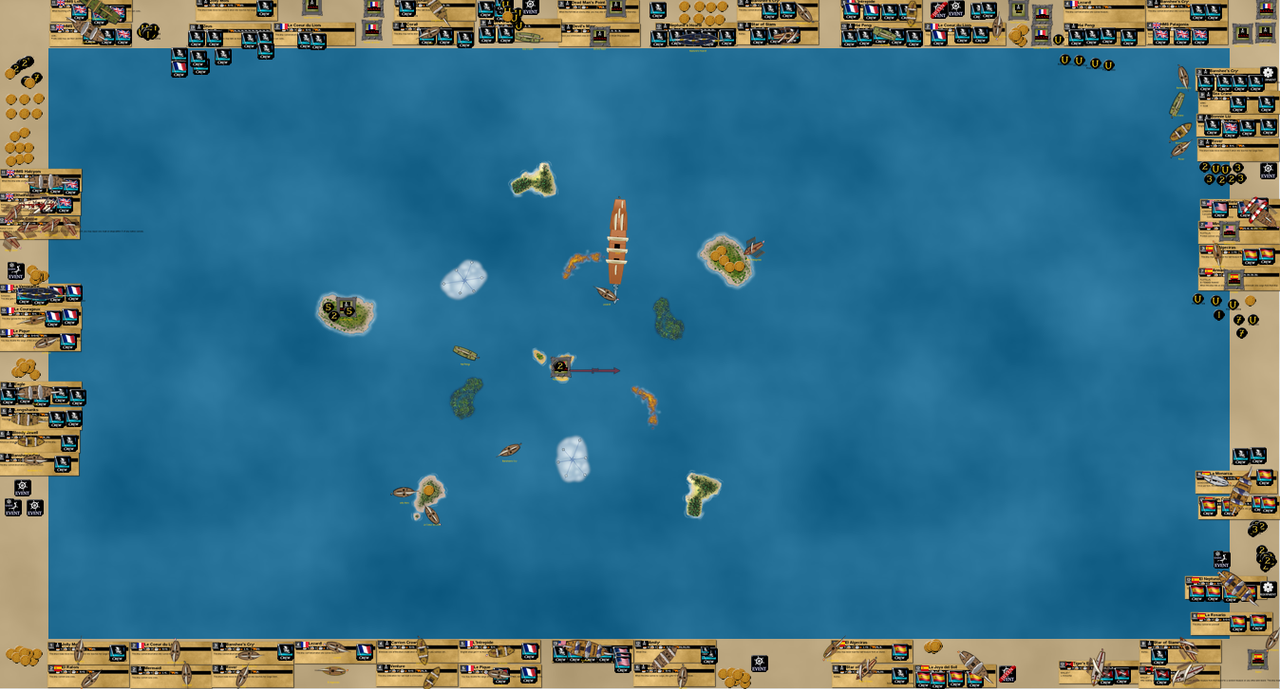
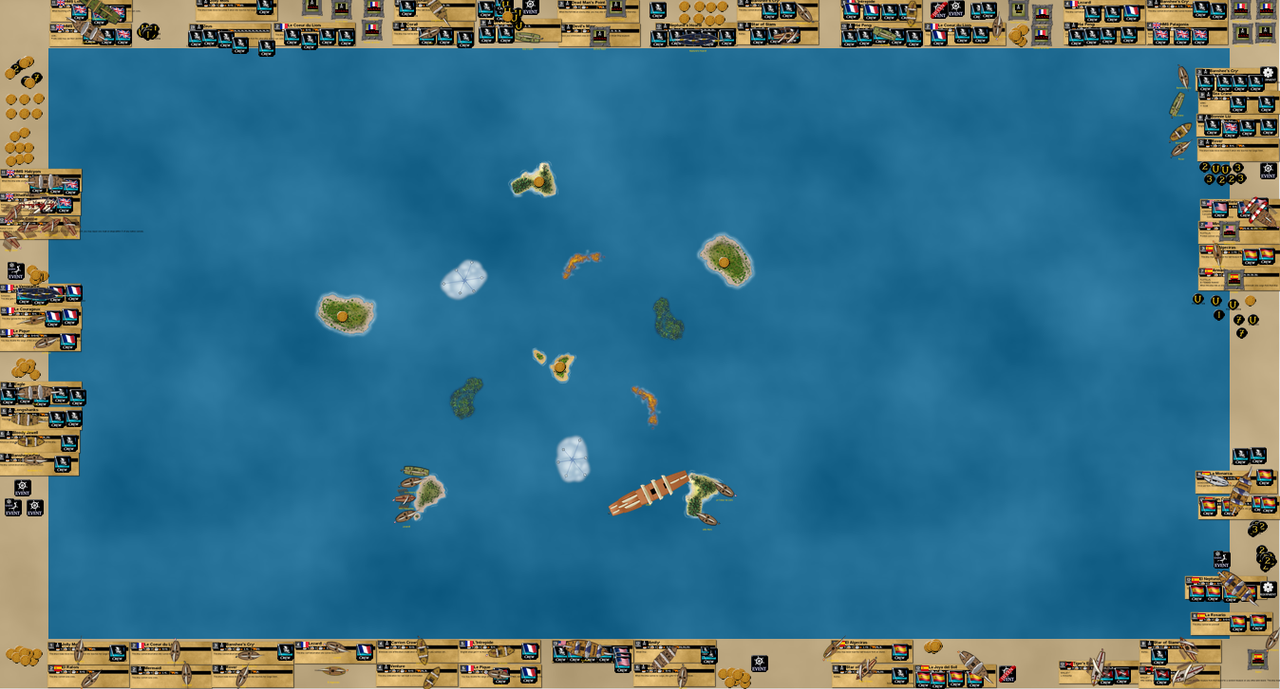
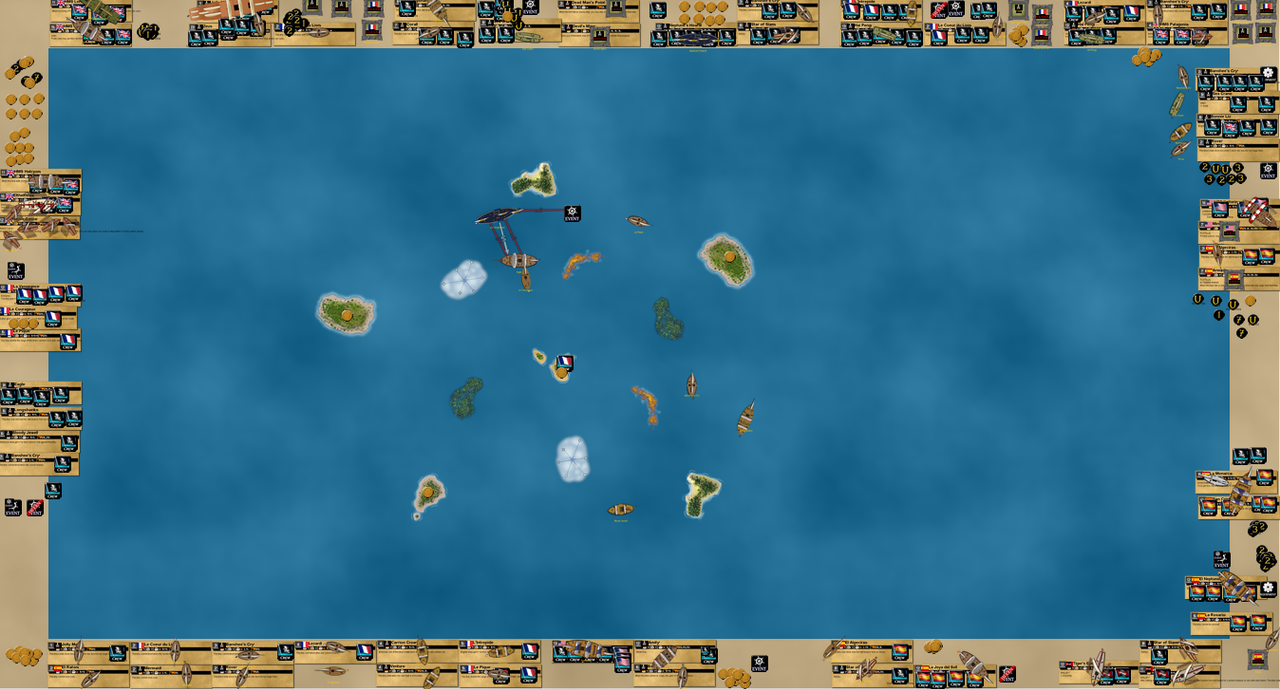
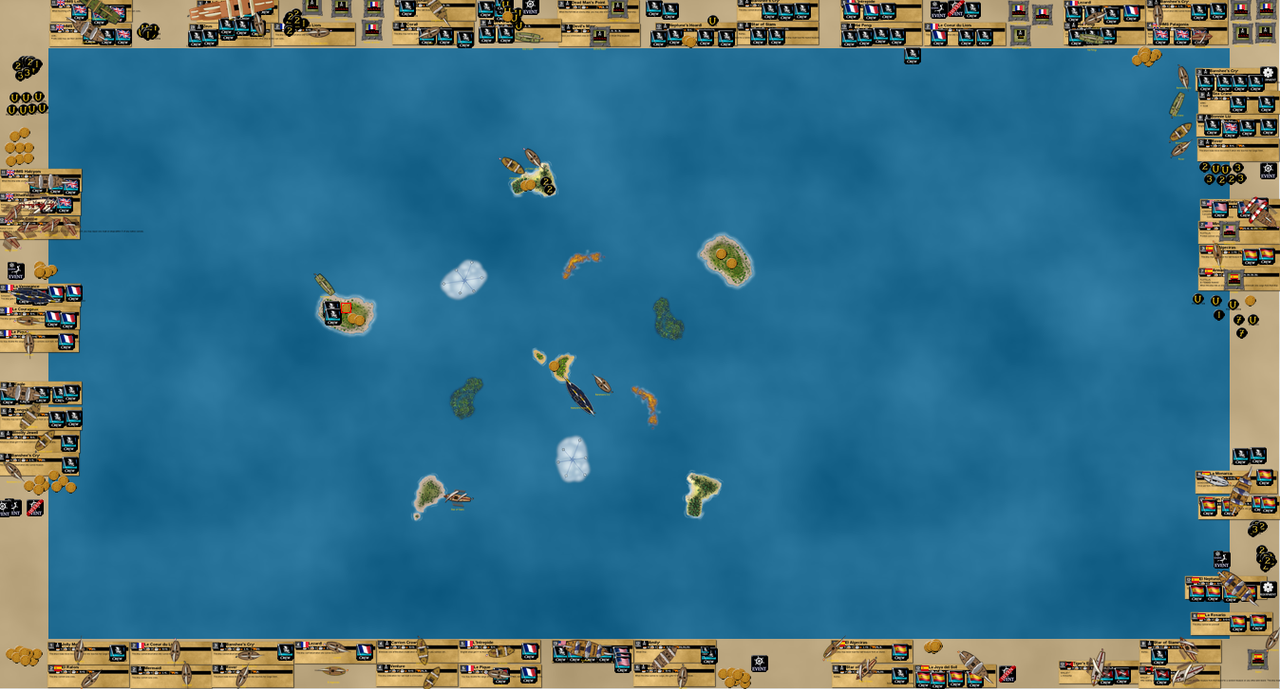
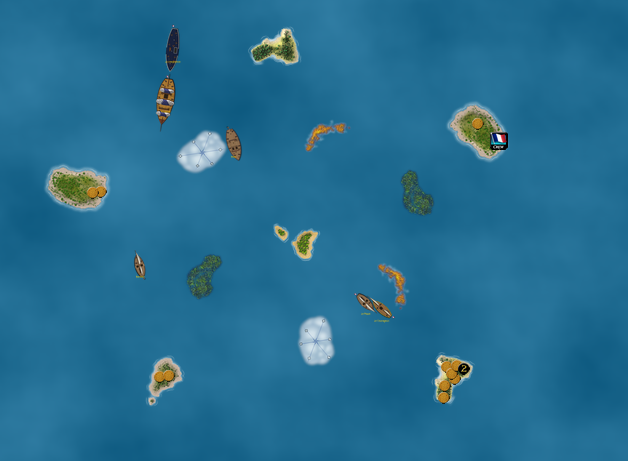
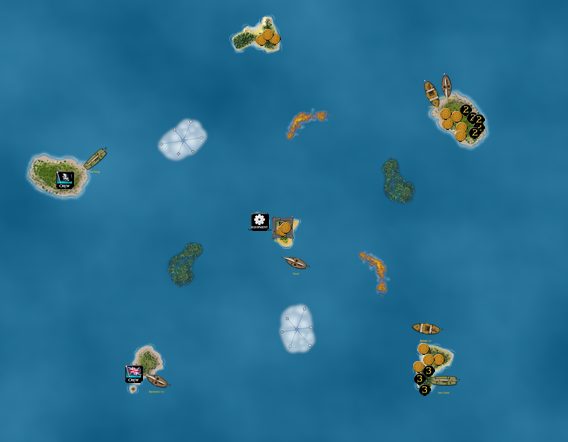
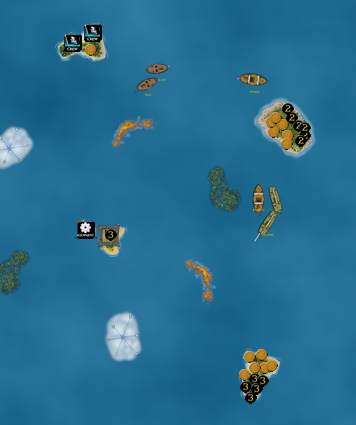
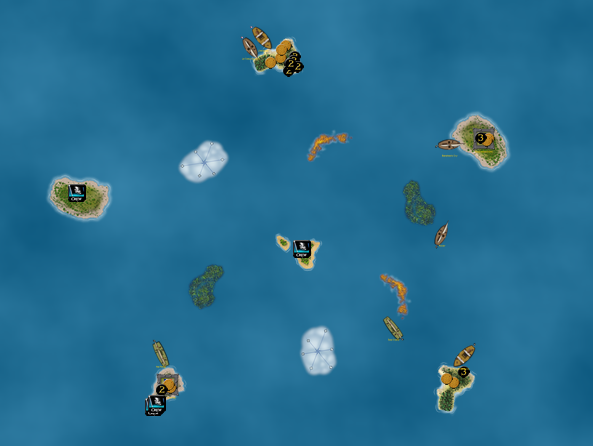
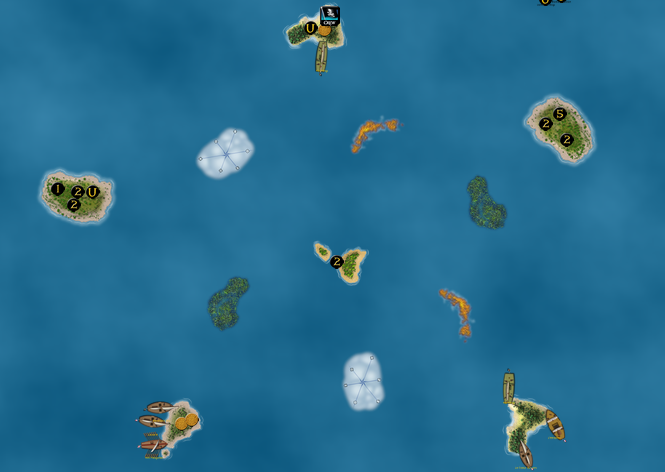
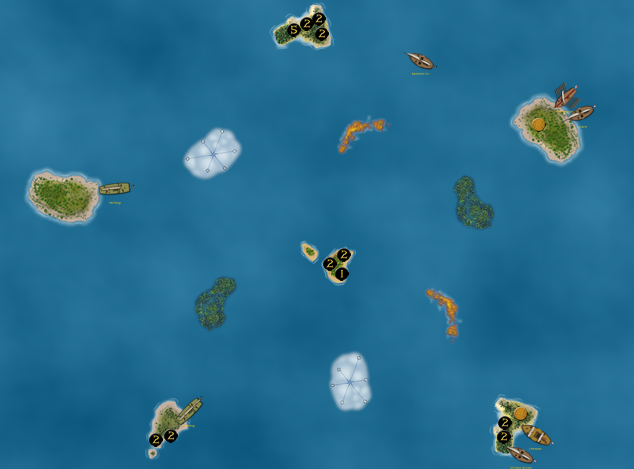
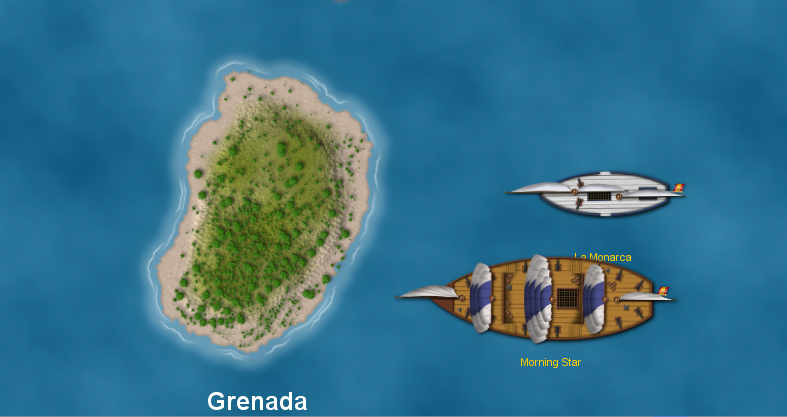
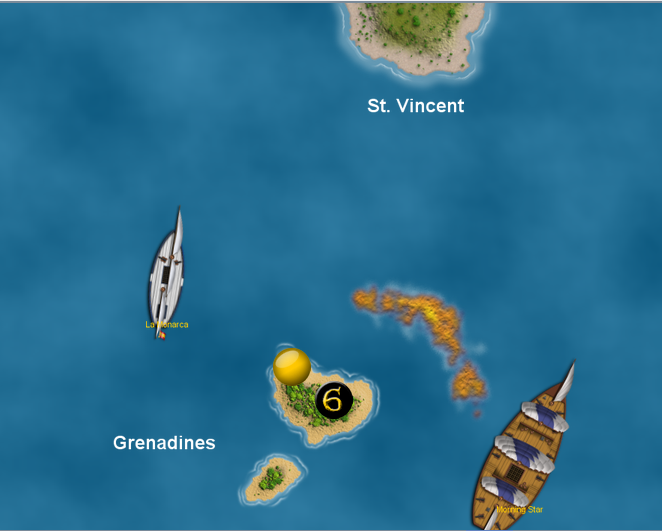
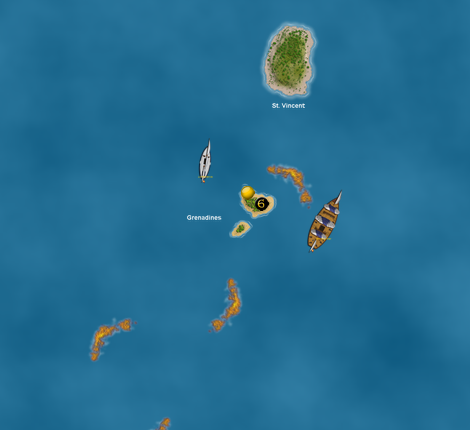
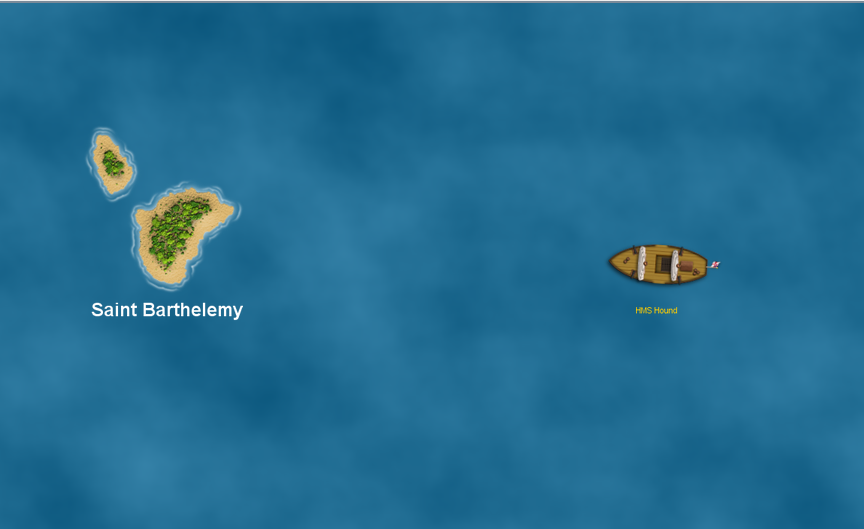
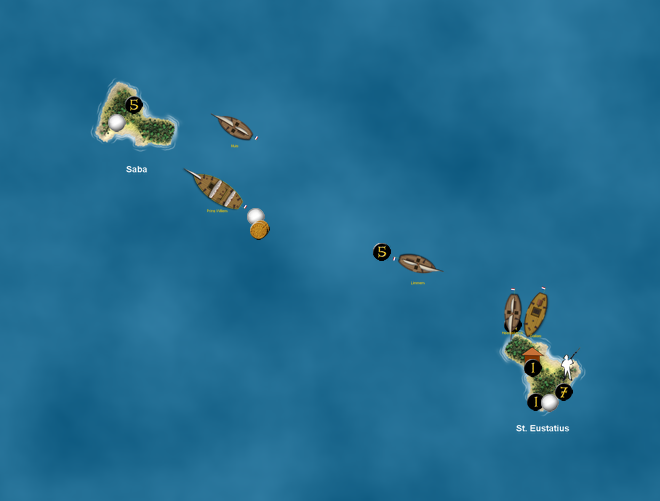
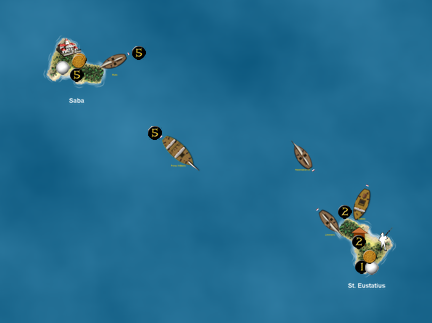
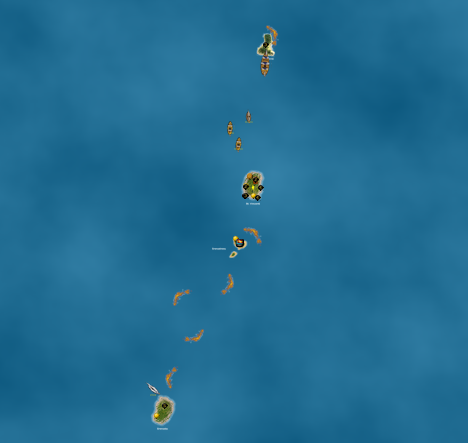
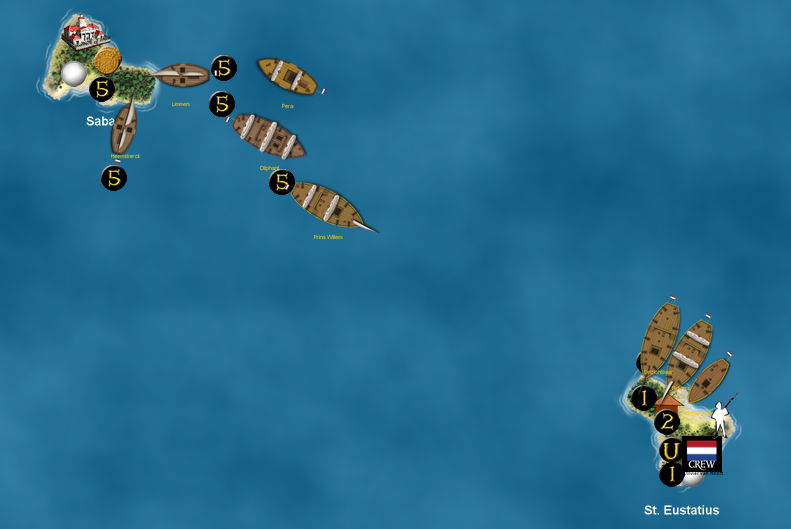
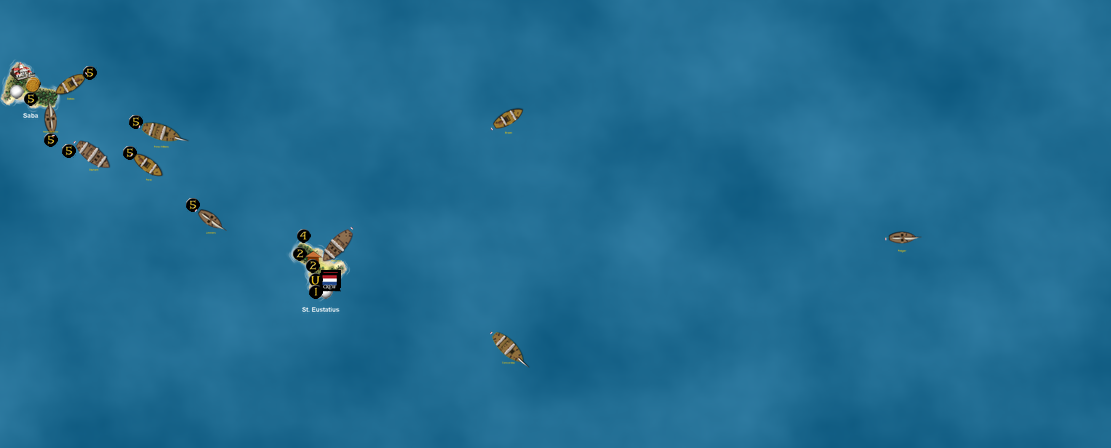
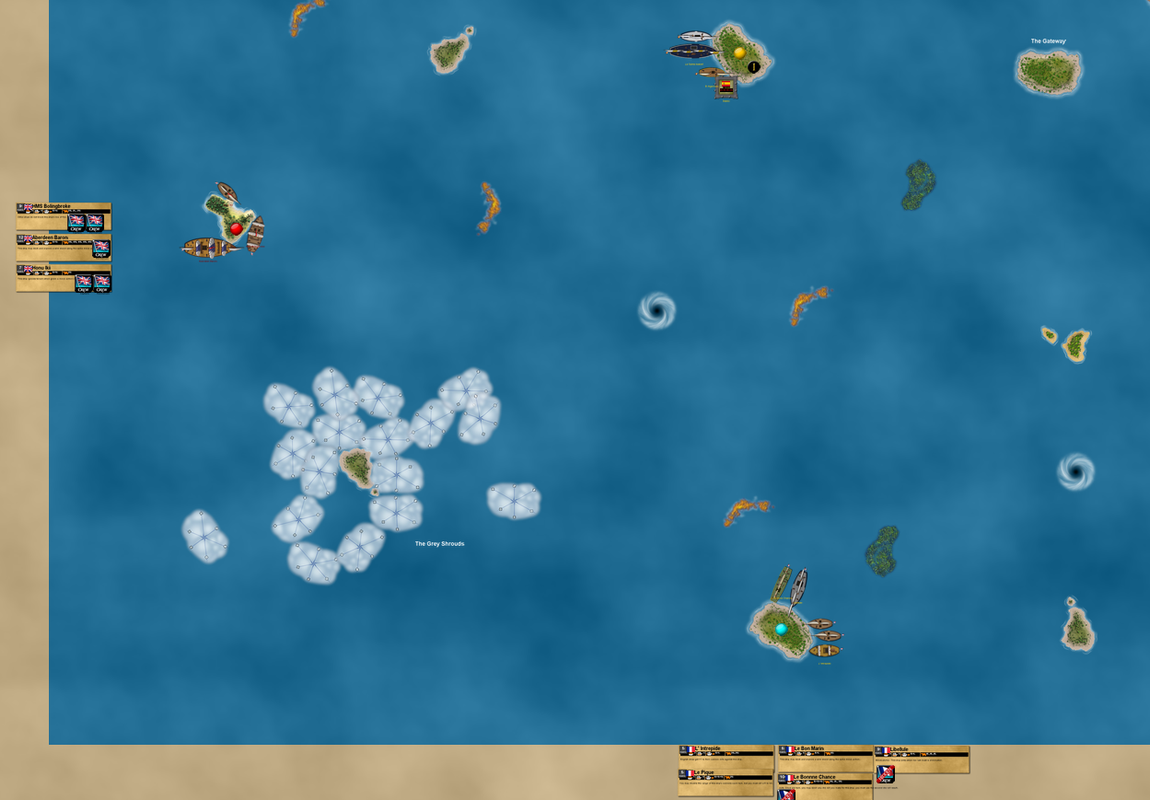
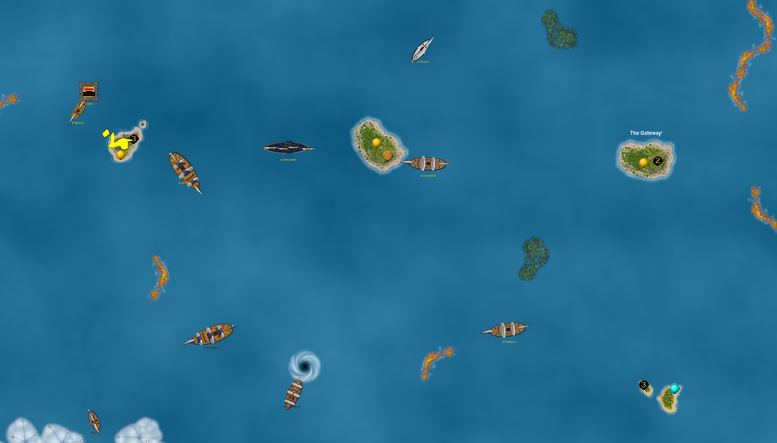
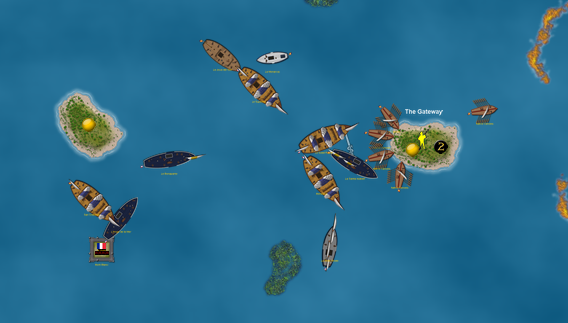
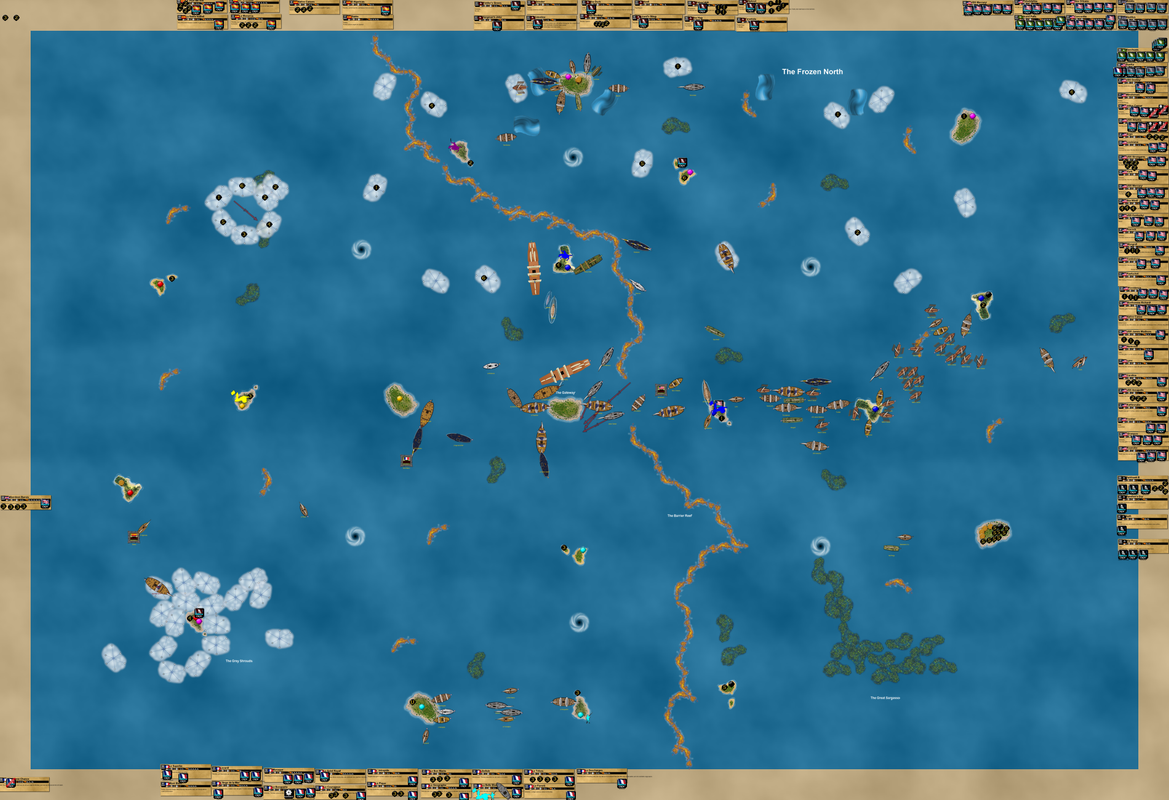
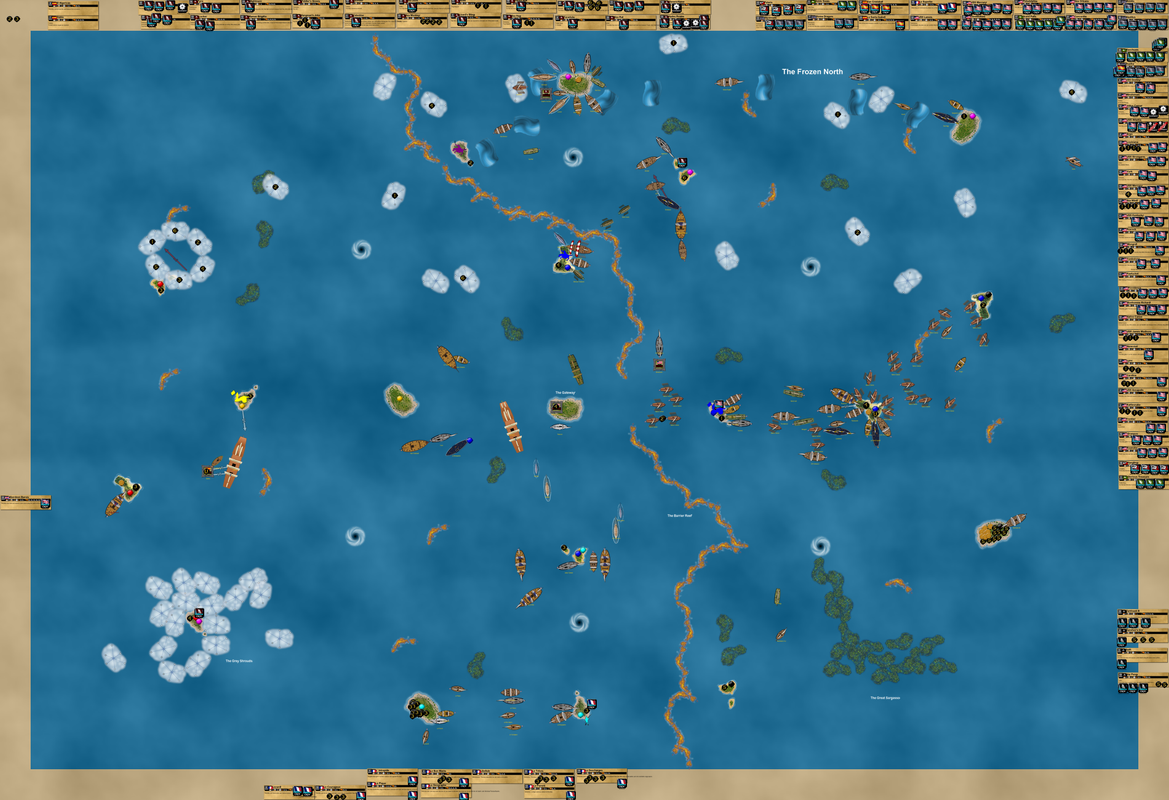
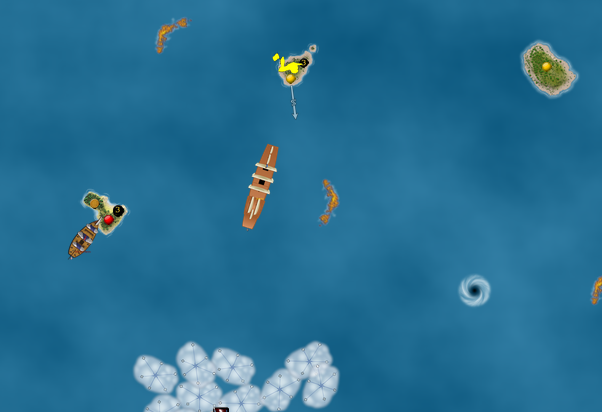
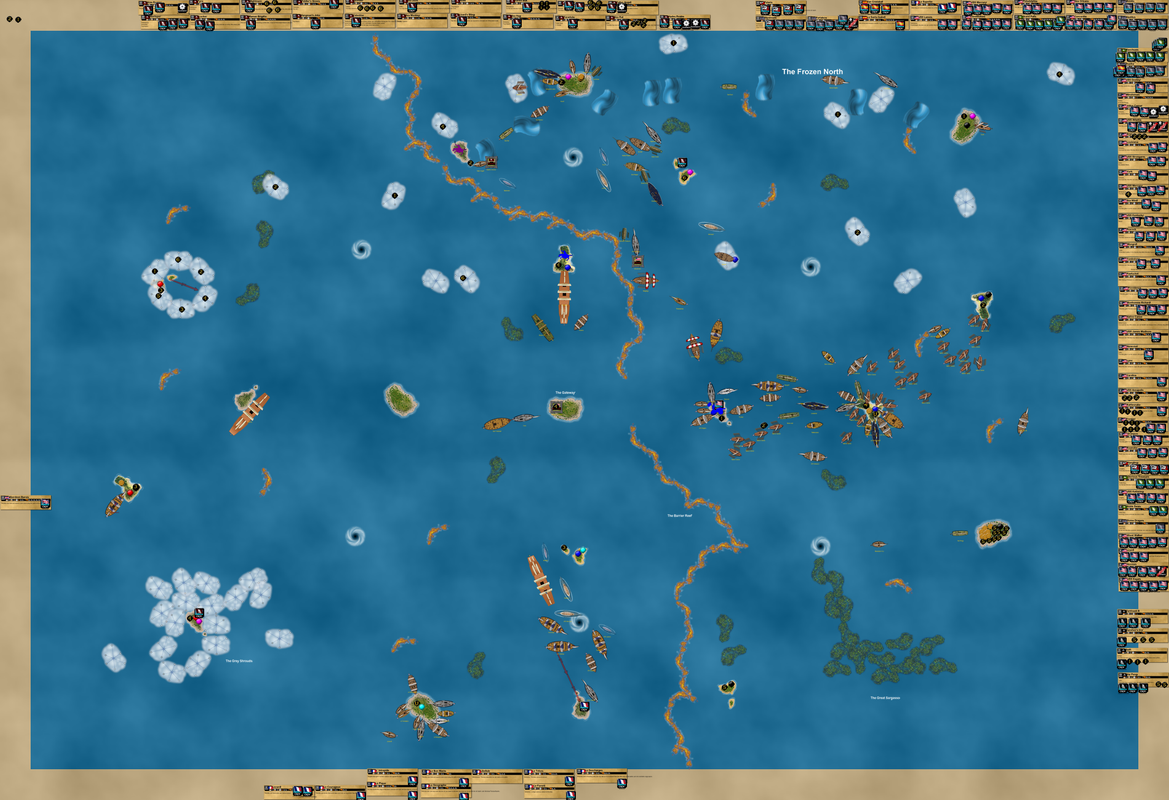
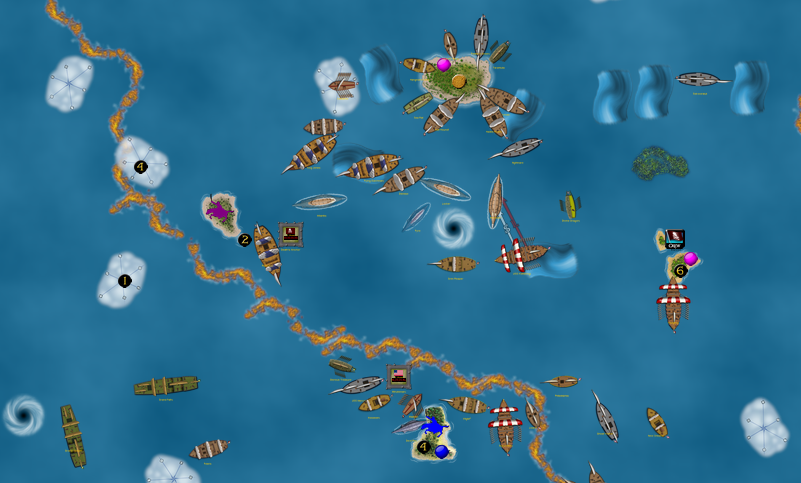
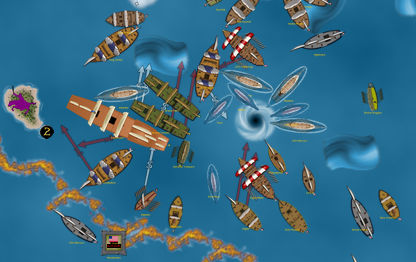
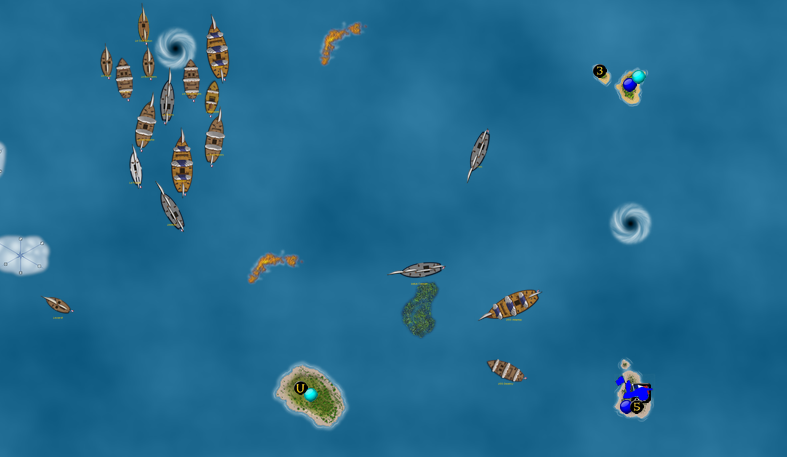
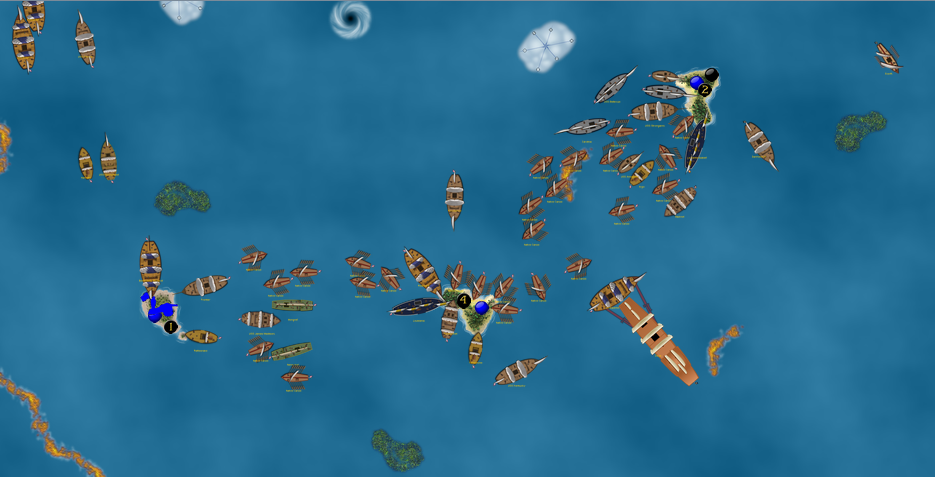
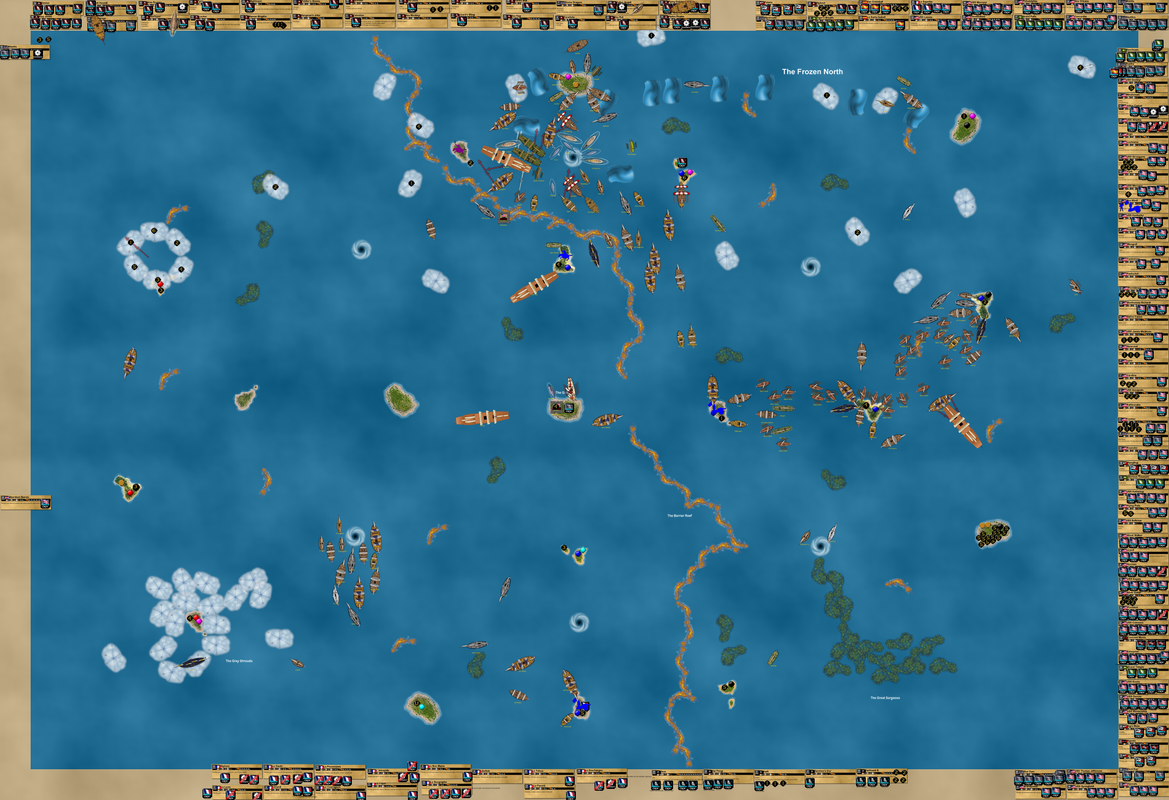
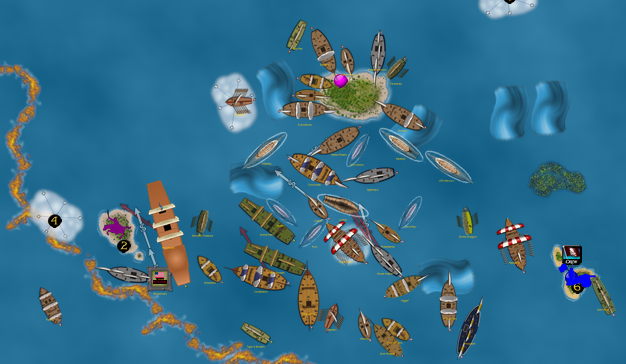
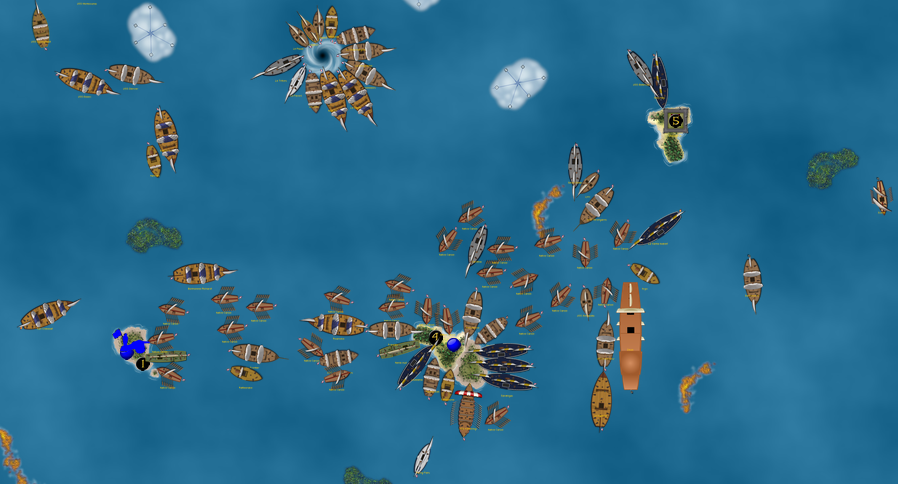
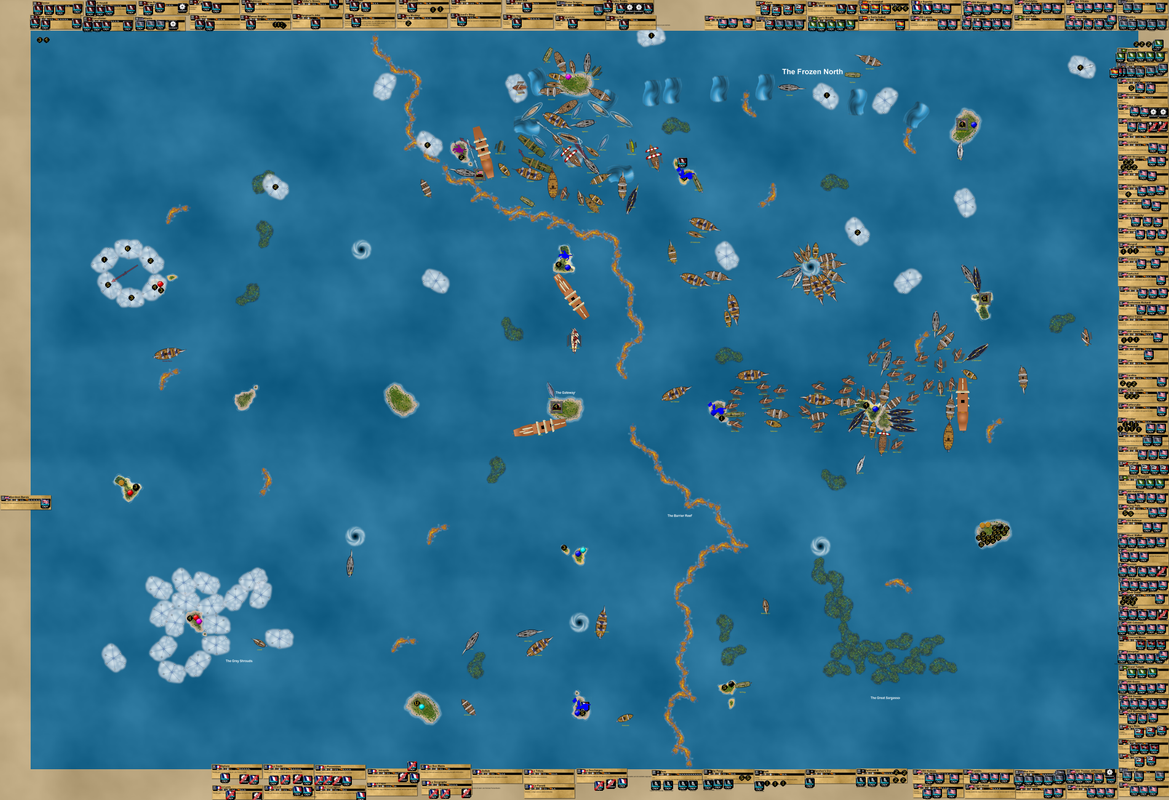
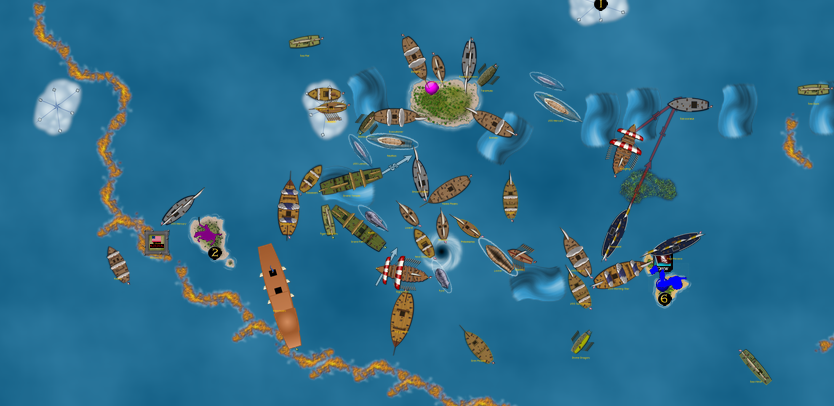
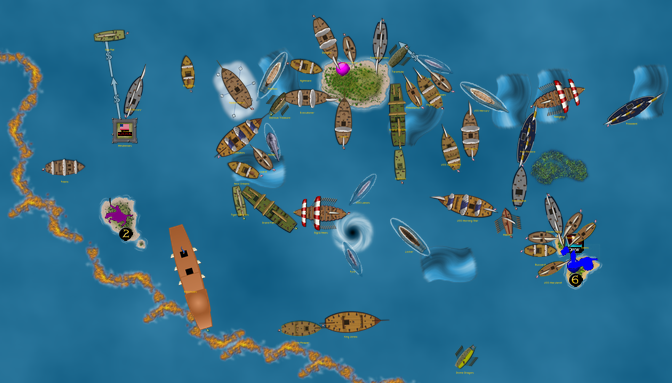
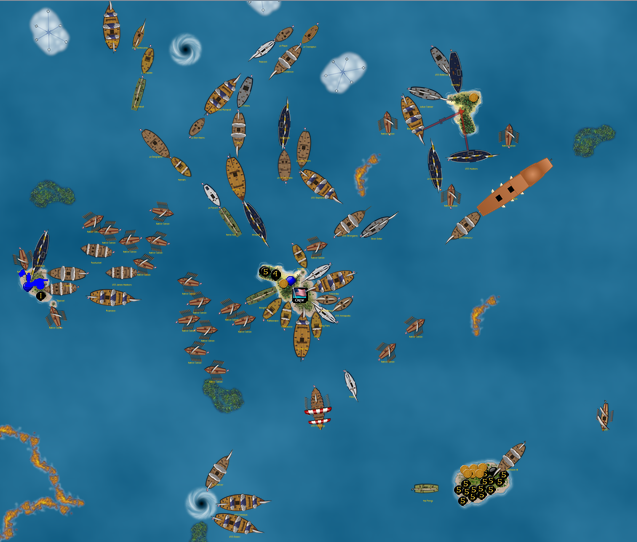
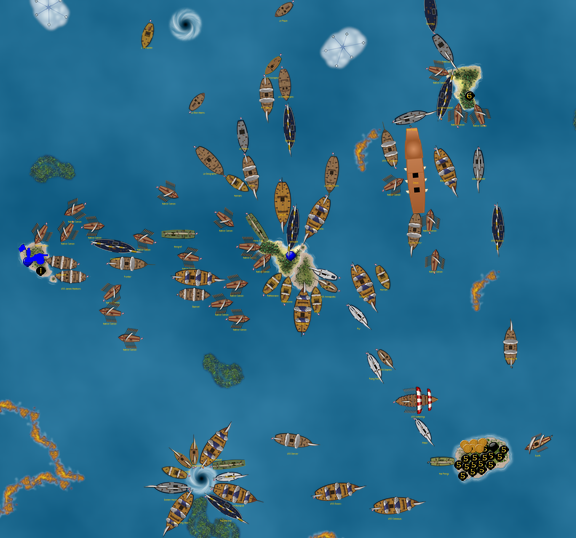
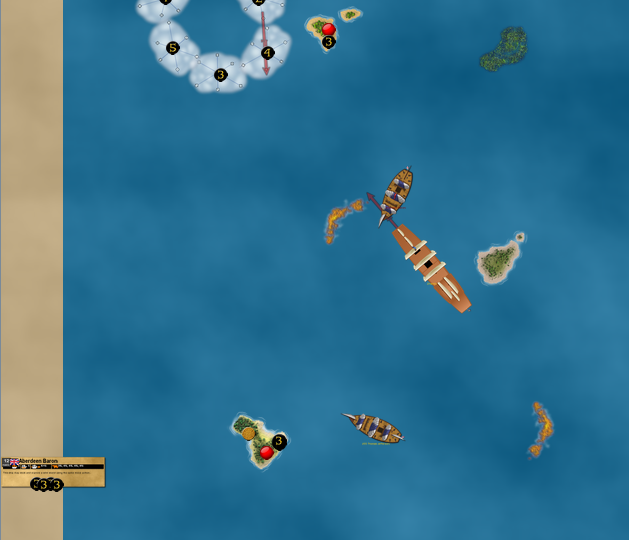
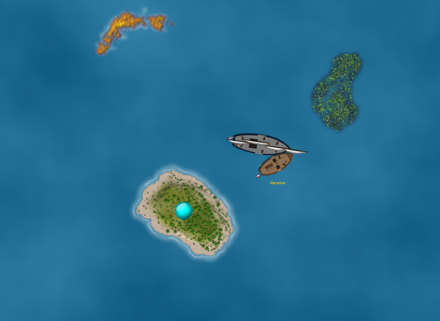
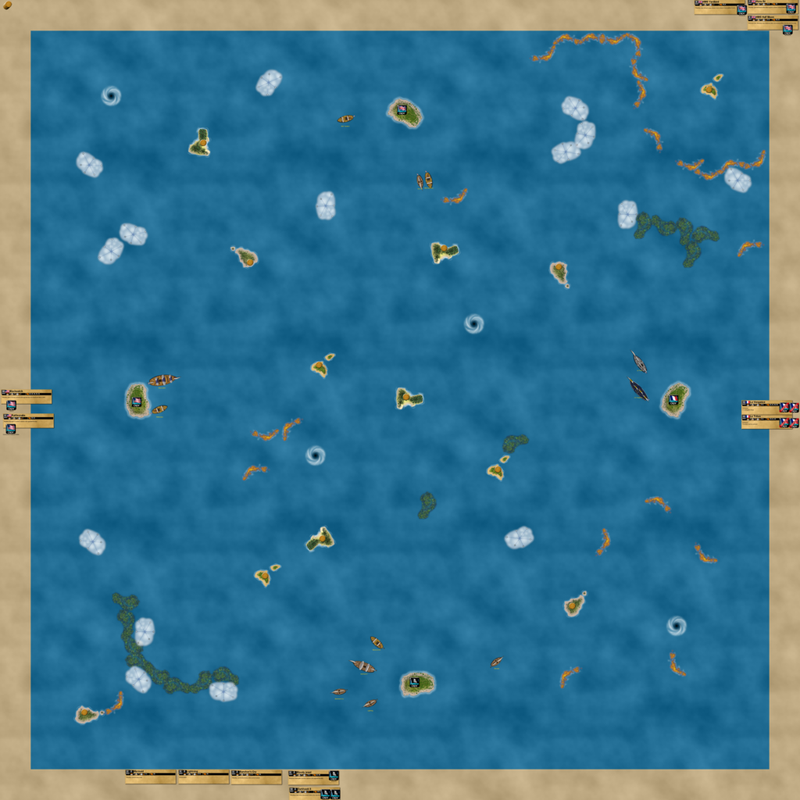
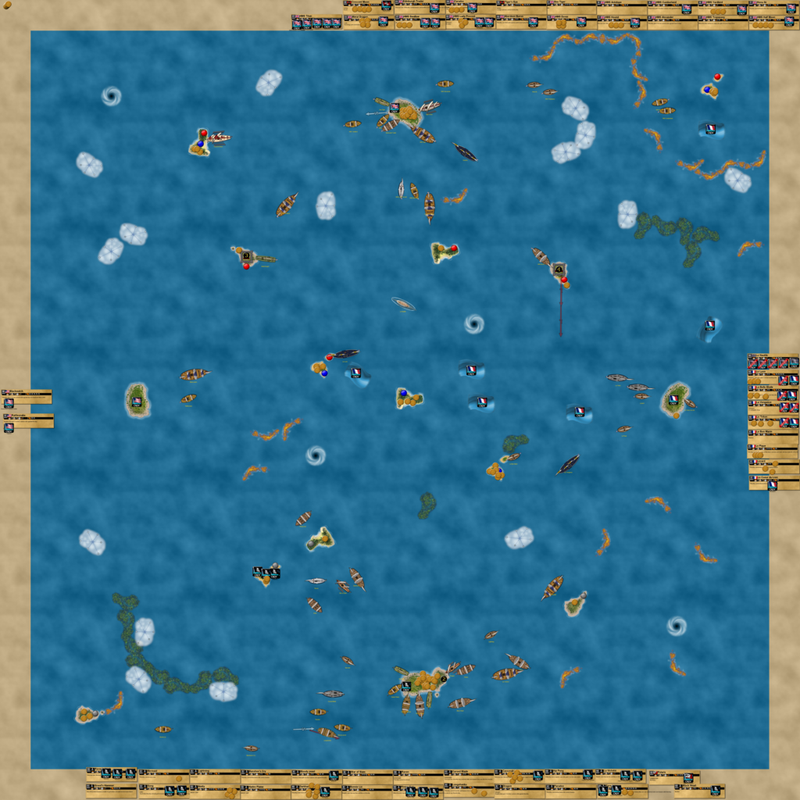
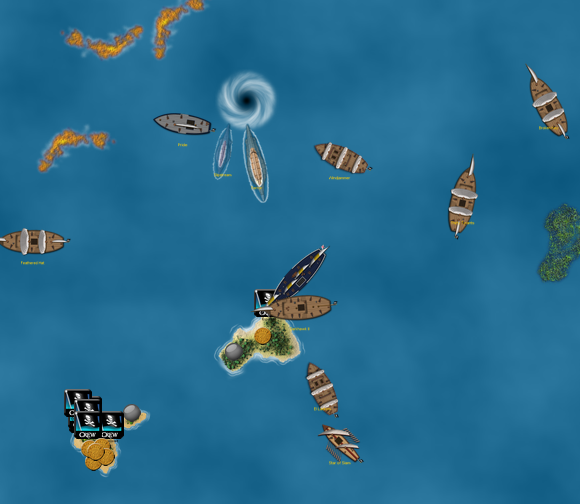
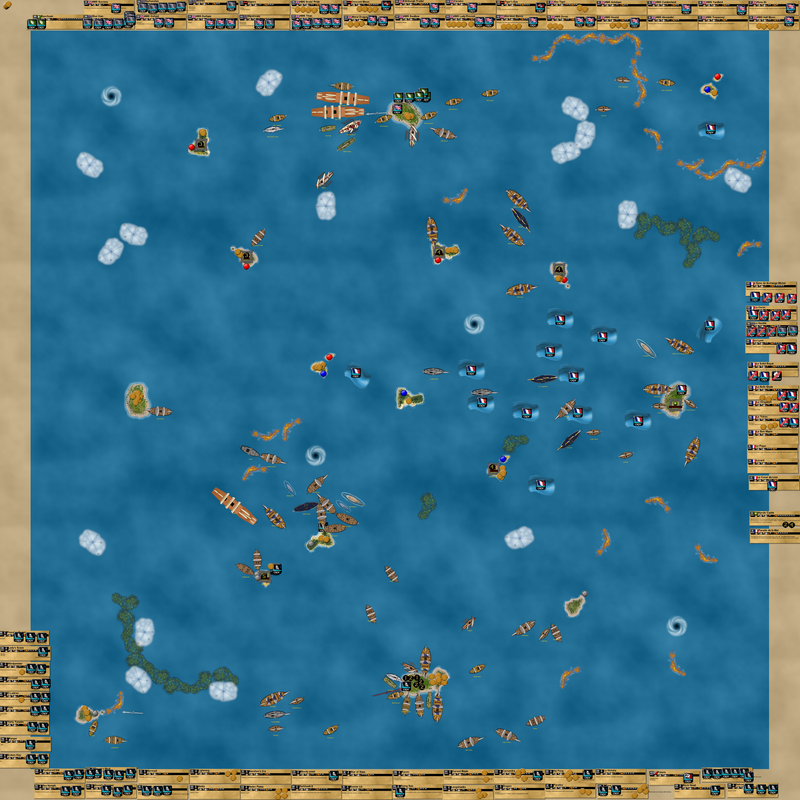
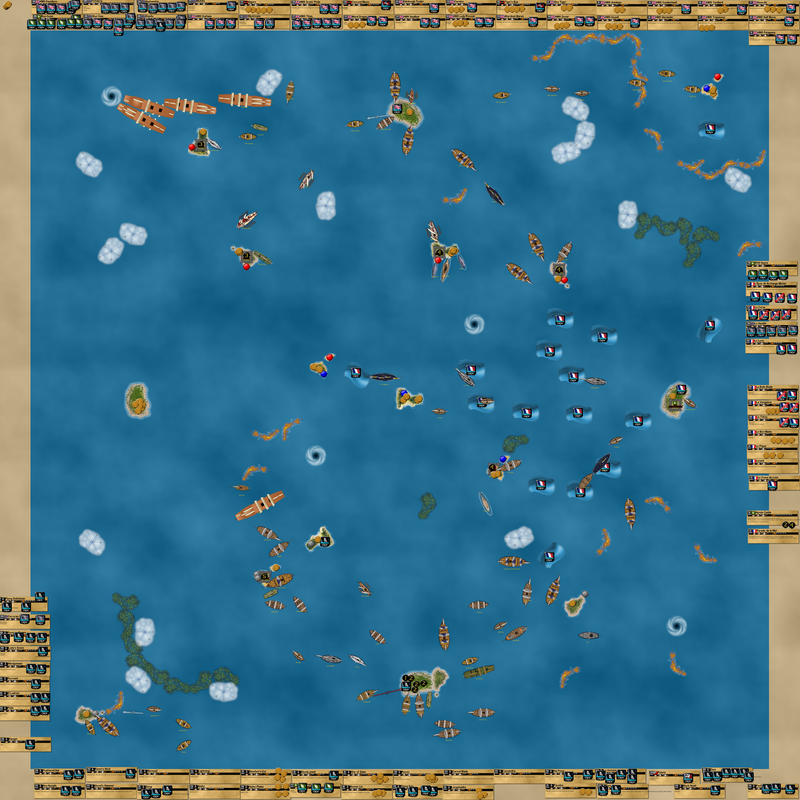
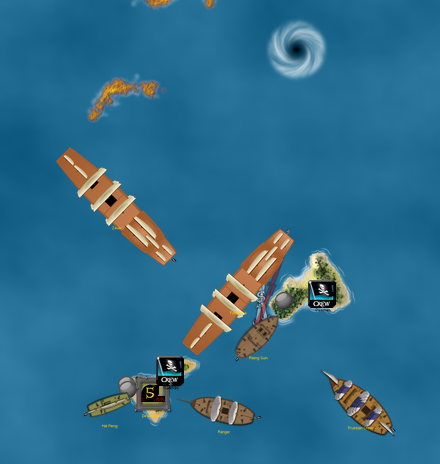
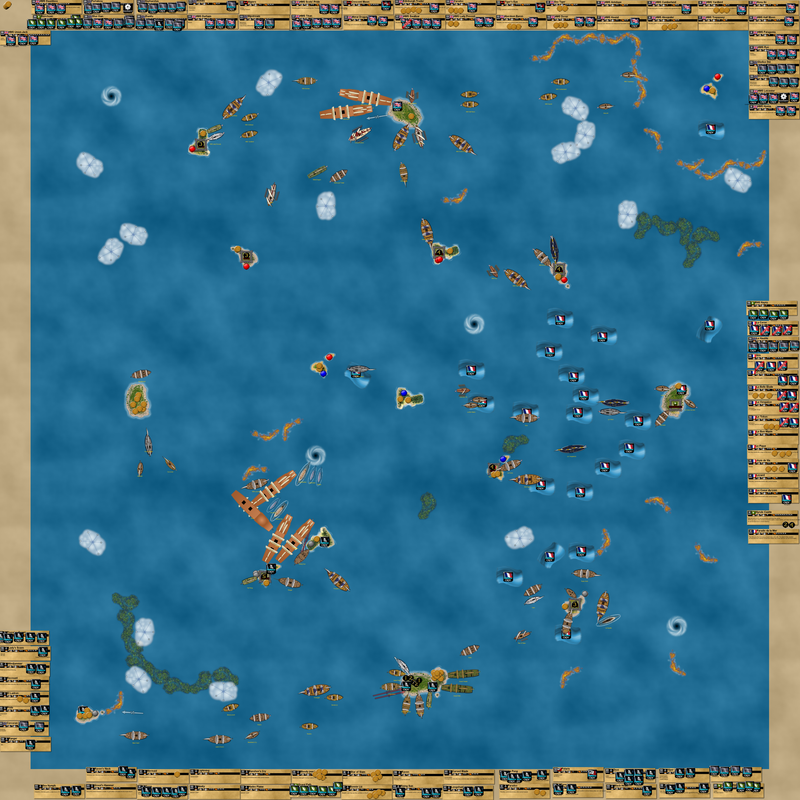
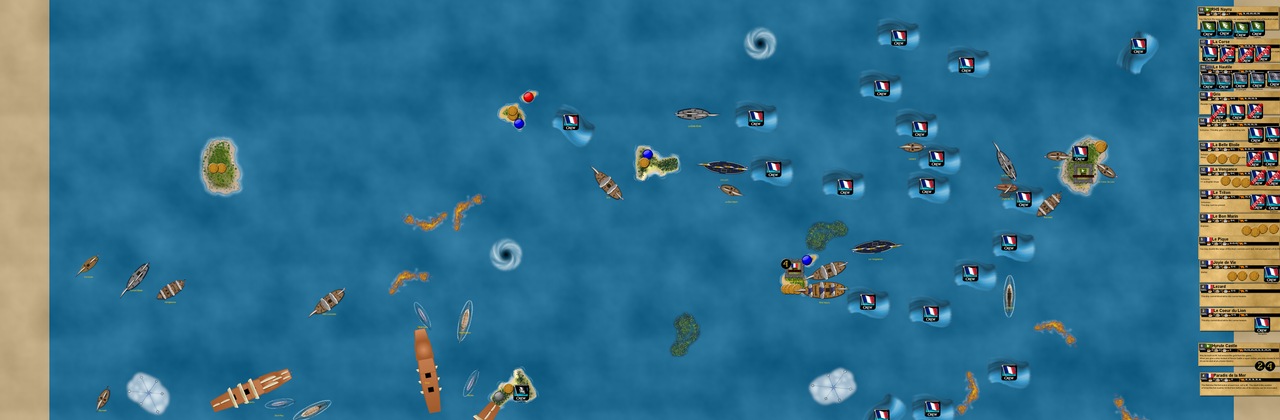
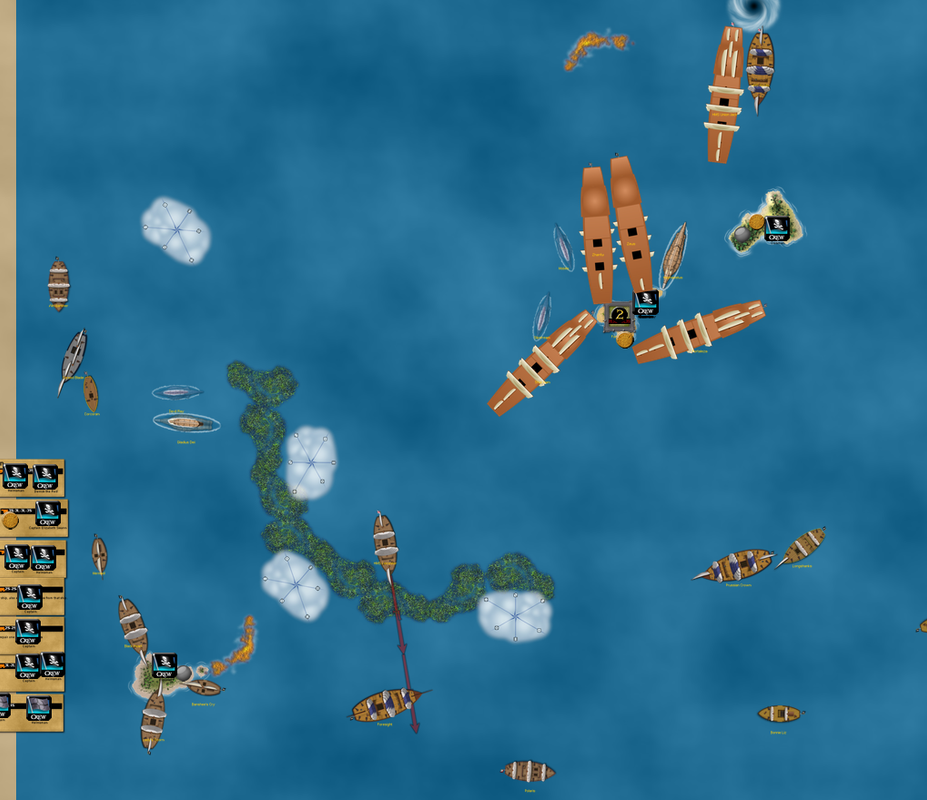
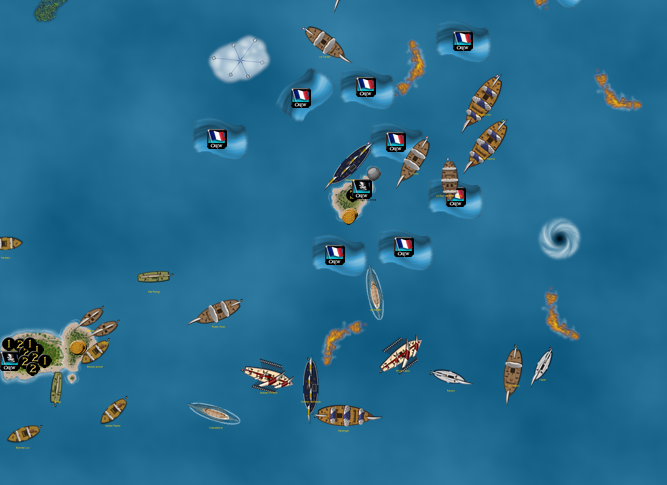
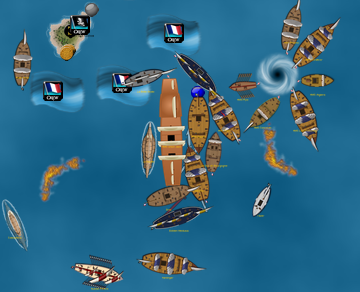
The canoes explored, and the first island sank beneath the waves. I was hesitant to make my strategy obvious early on, but knew I needed to strike Xerecs’ fort when he was least expecting it, preferably early in the game soon after some gold had been unloaded there. The Celtic Fury was to be a distraction, and a suicidal one if need be. She and the Mercure headed straight for the enemy 10 masters, with the Constitution not far behind. The San Cristobal grabbed a bunch of gold but also found Scurvy.

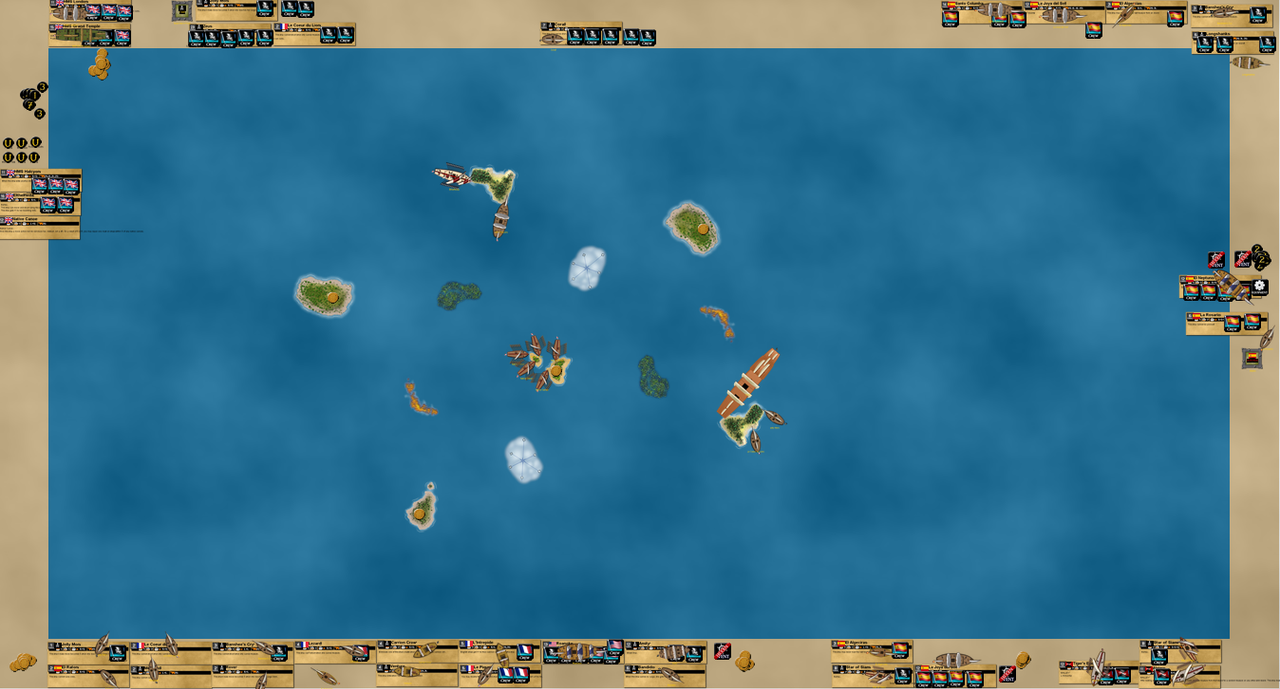
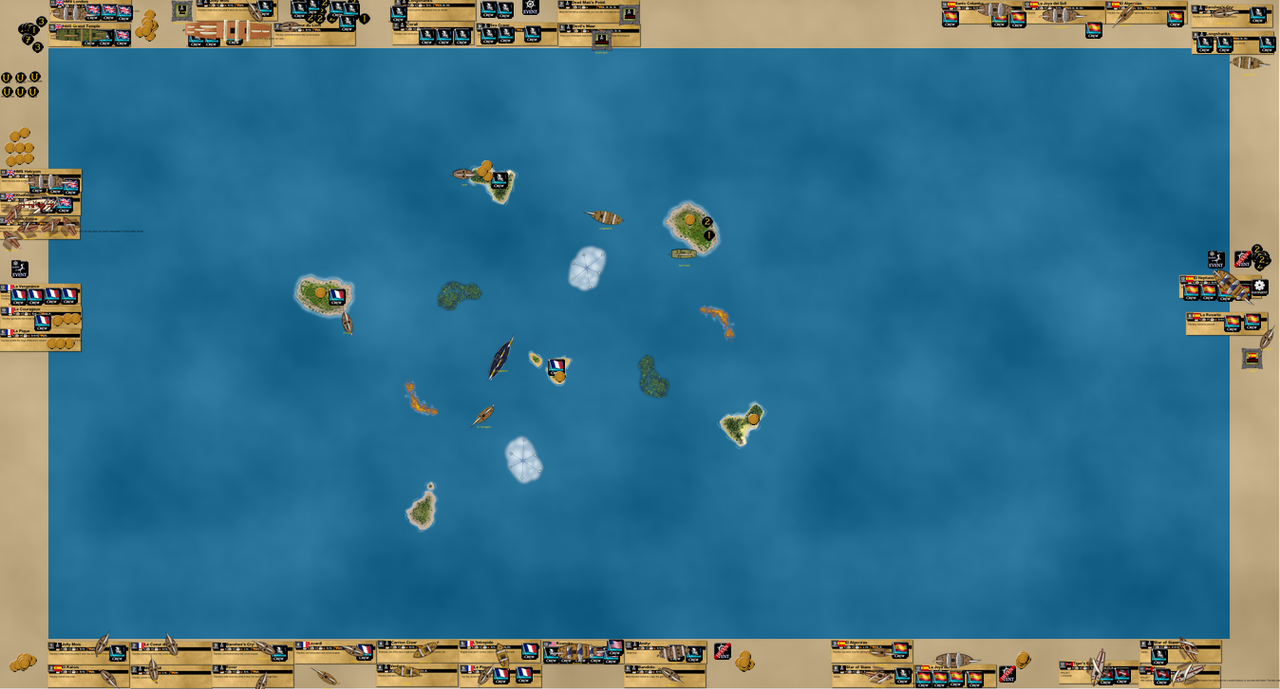
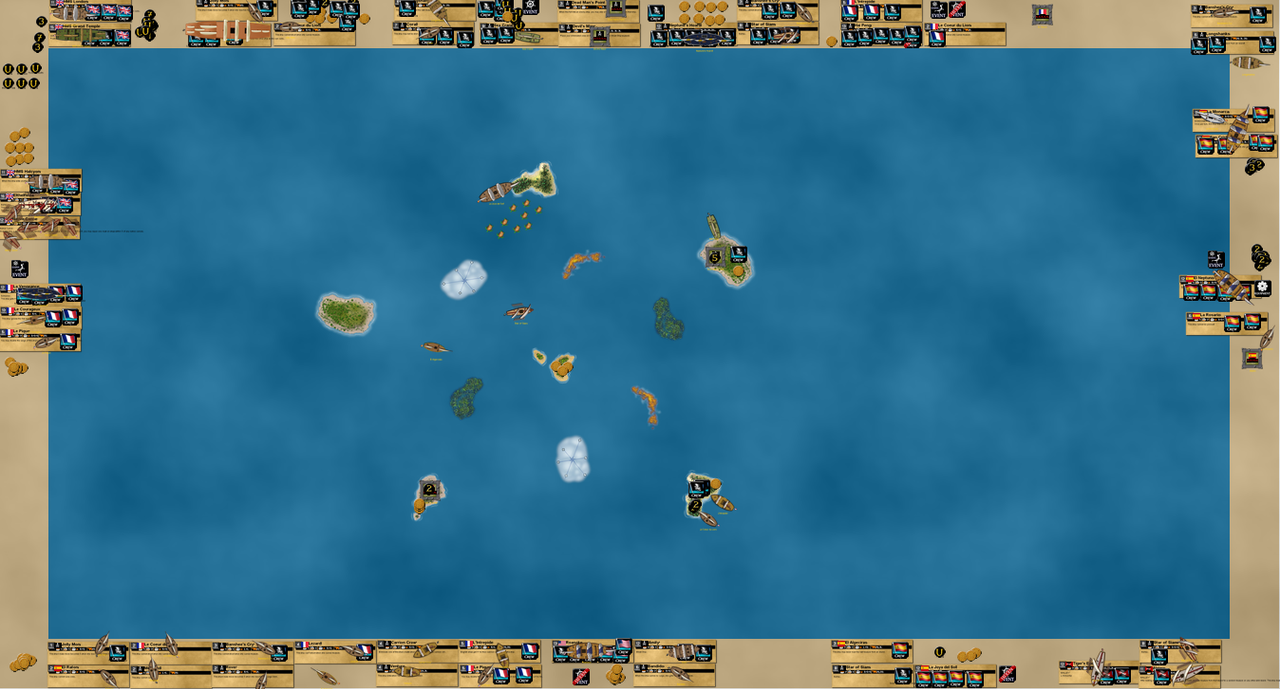
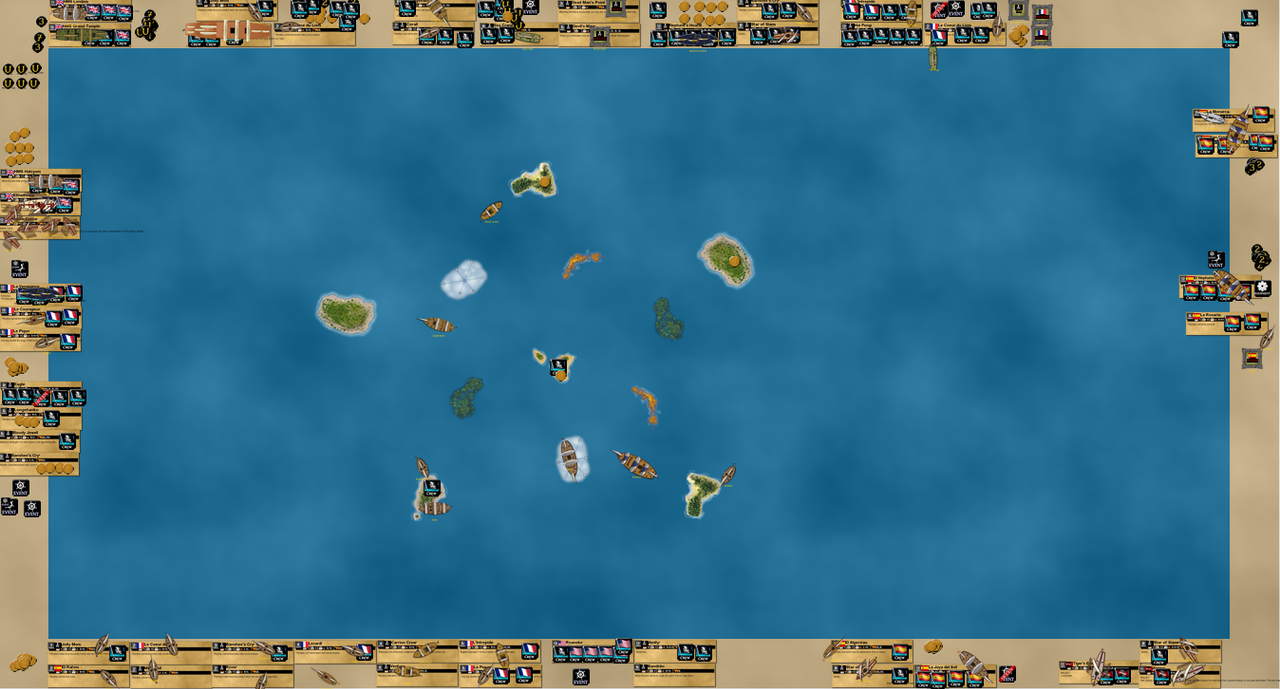
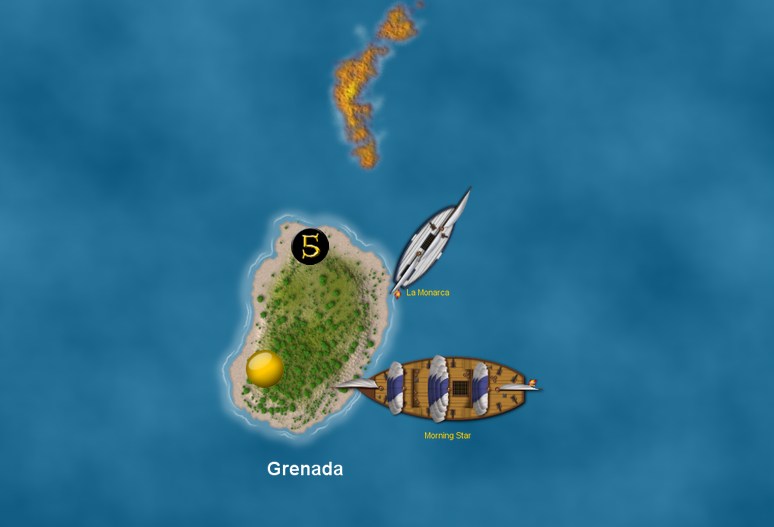
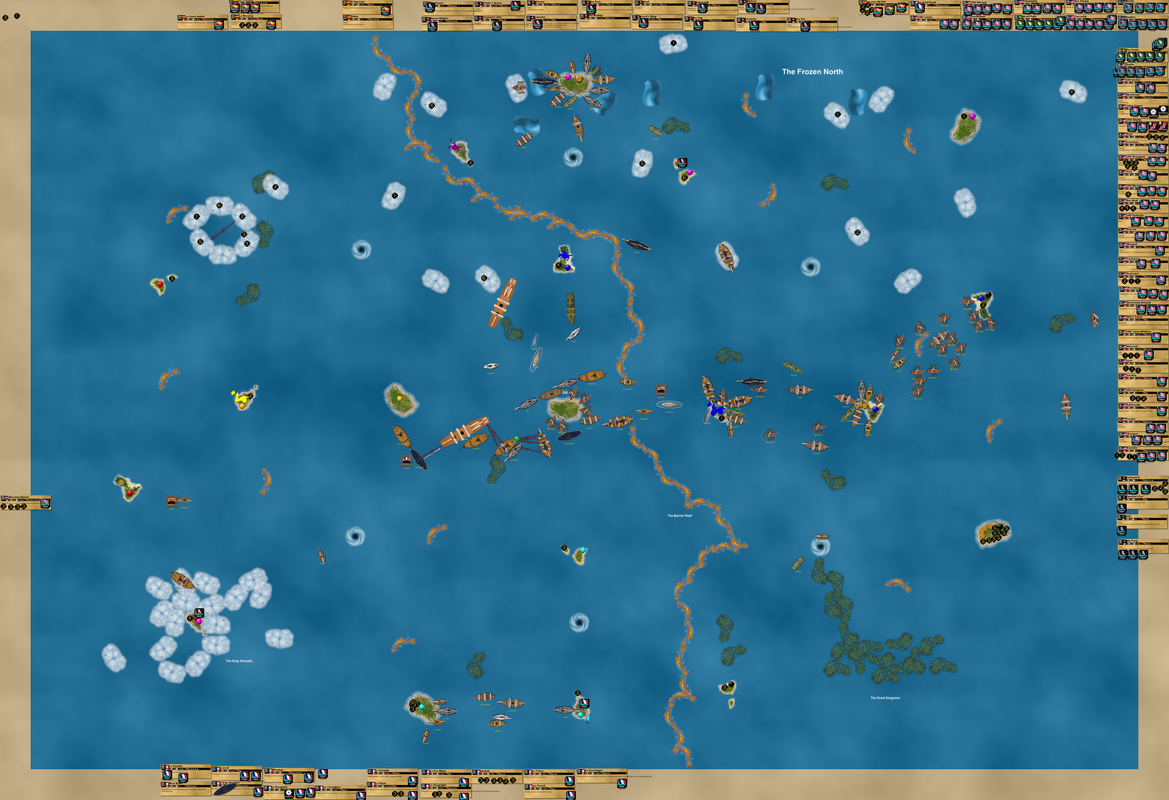
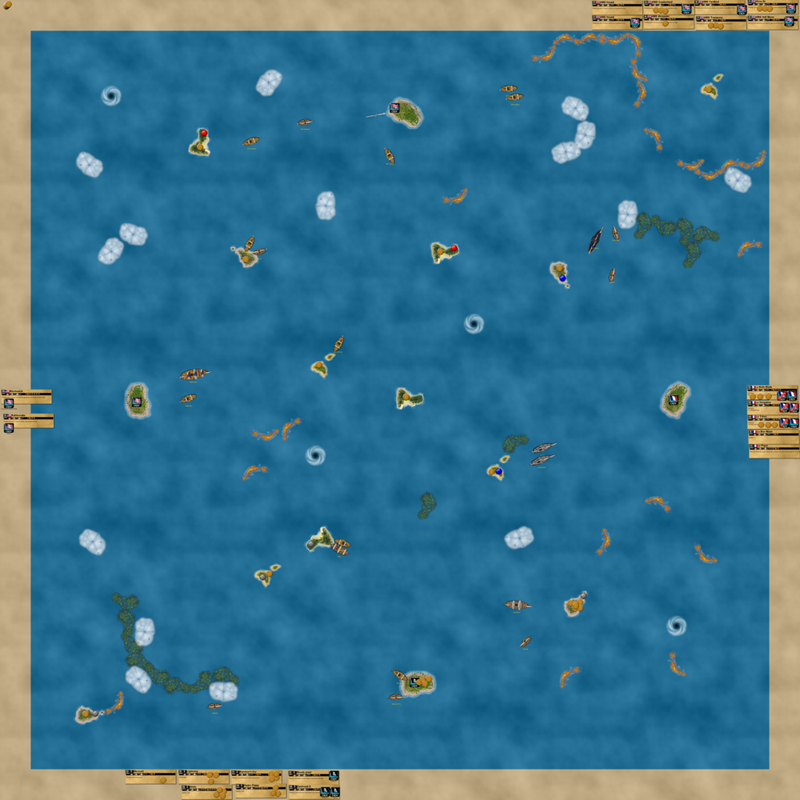
The Frontier grabbed the SC’s gold with her hoist, and I began to maneuver the Guichuan and Oxford into position in anticipation of Xerecs unloading gold at his home fort. After the Black Pearl was distracted by Natives at a northern wild island, the Celtic Fury moved to strike. With Lenoir still face down, I actually gave Mycron’s action to a native canoe in order to get some gold in my fort. I wanted Parley ready in case the Zeus was able to strike first with an SAT from Crimson Angel.

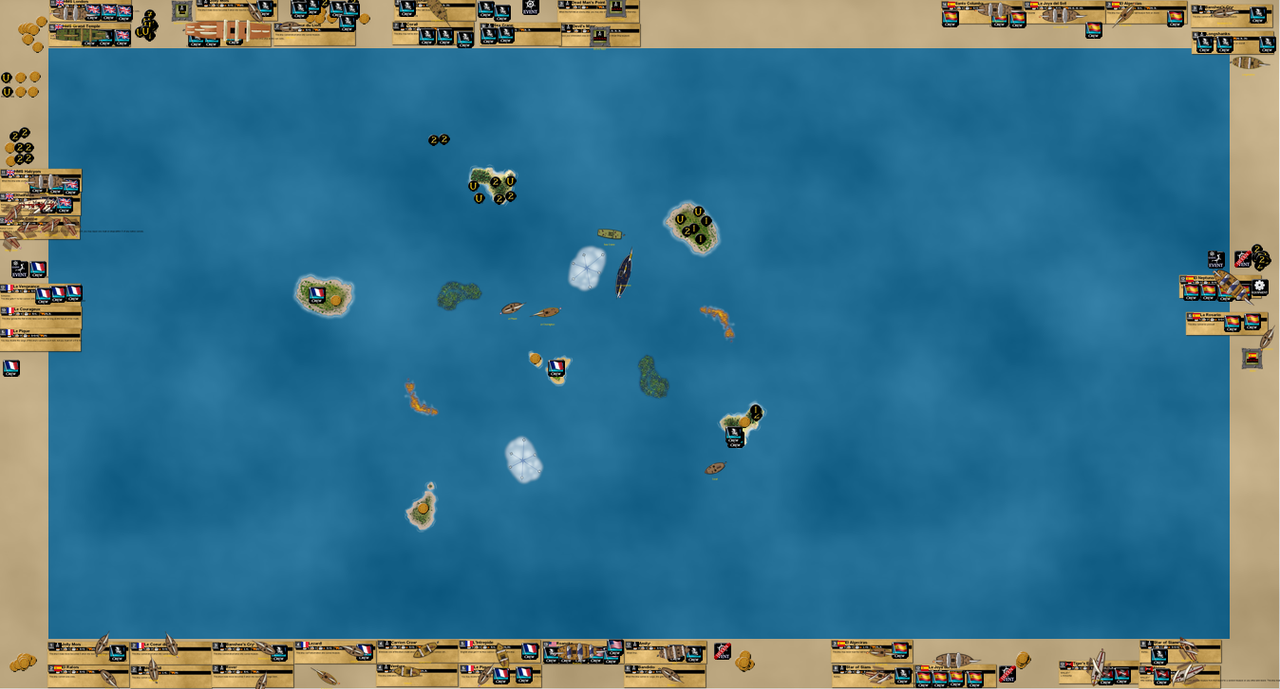
Xerecs was able to drain two islands completely, meaning that half of the wild islands were already gone. This worried me, since I didn’t know if the Guichuan’s potential haul would even be enough to tip the treasure game in my favor, especially if the heist didn’t go as planned.

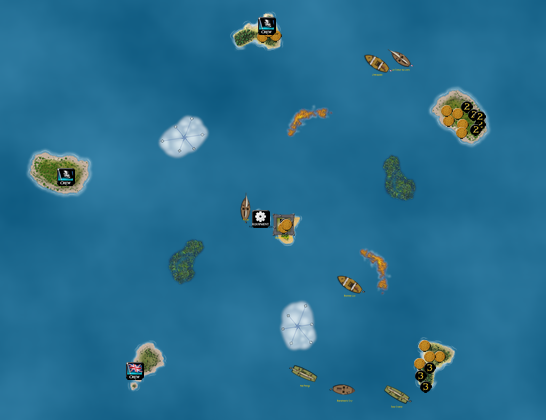
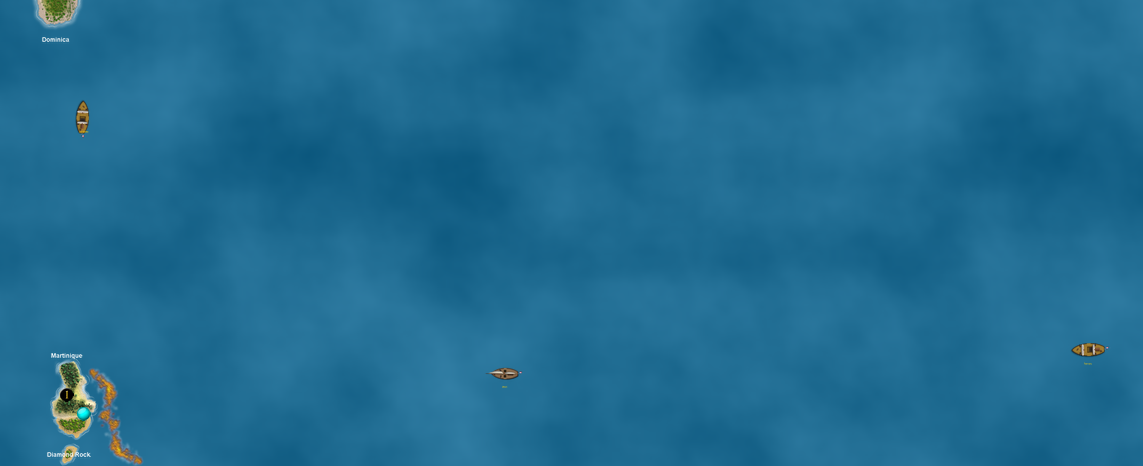
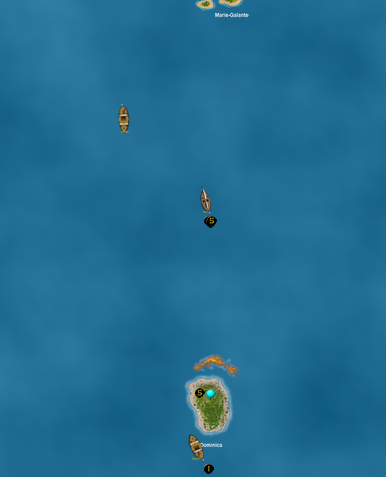
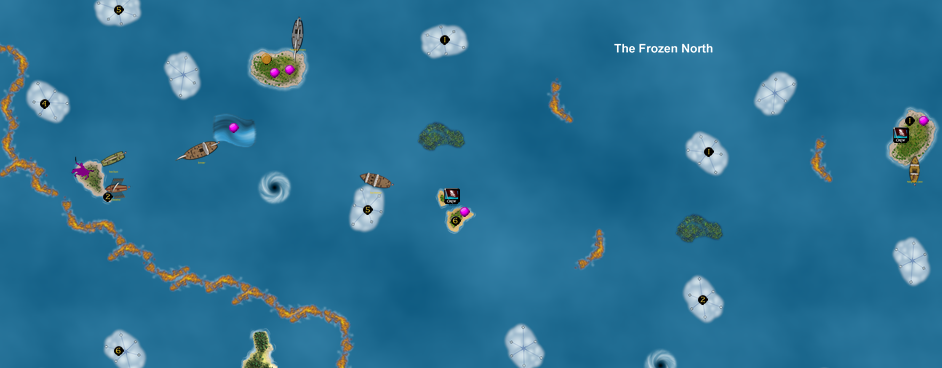
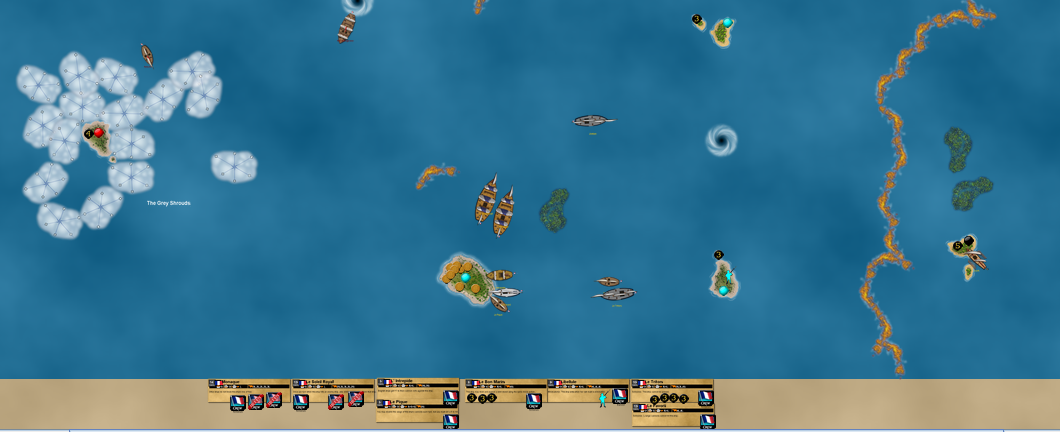
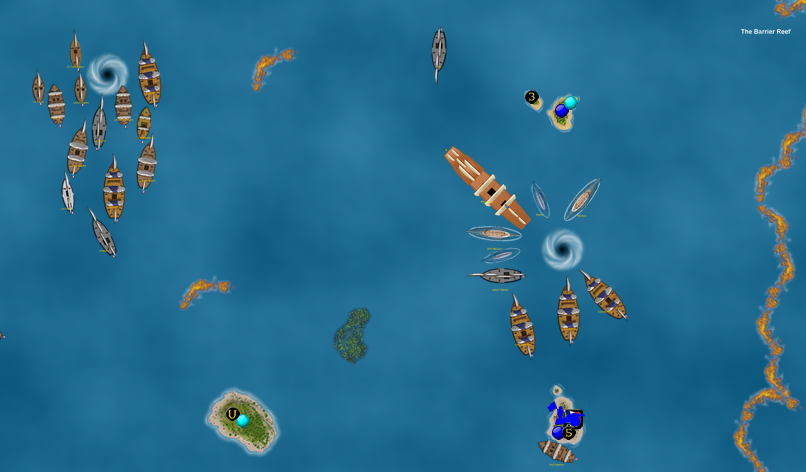
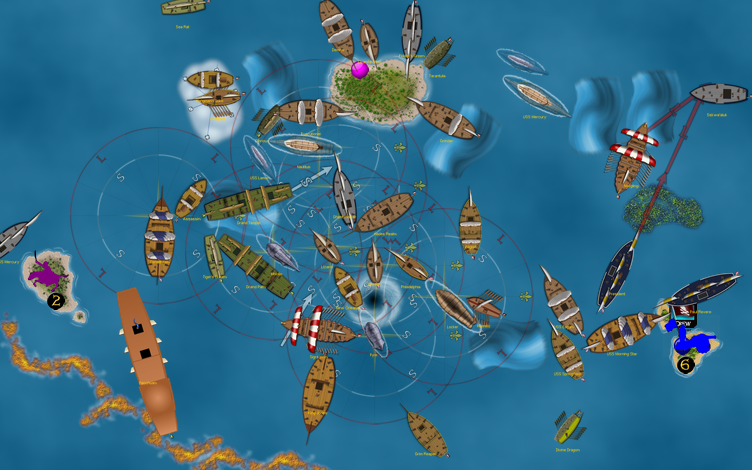
I nearly attacked the Black Pearl since she was a sitting duck with the Natives UT affecting her for 3 turns, but decided not to risk it. Tia Dalma aboard the Zeus could easily cancel Lenoir’s Parley, leaving the Celtic Fury open to a devastating broadside. The Constitution was coming, but she wouldn’t arrive in time. At the bottom of the frame, I decided to not explore with the Black Coral since I knew some of the negative UT’s I put into the mix, and to provide support for the Guichuan from the west if needed.

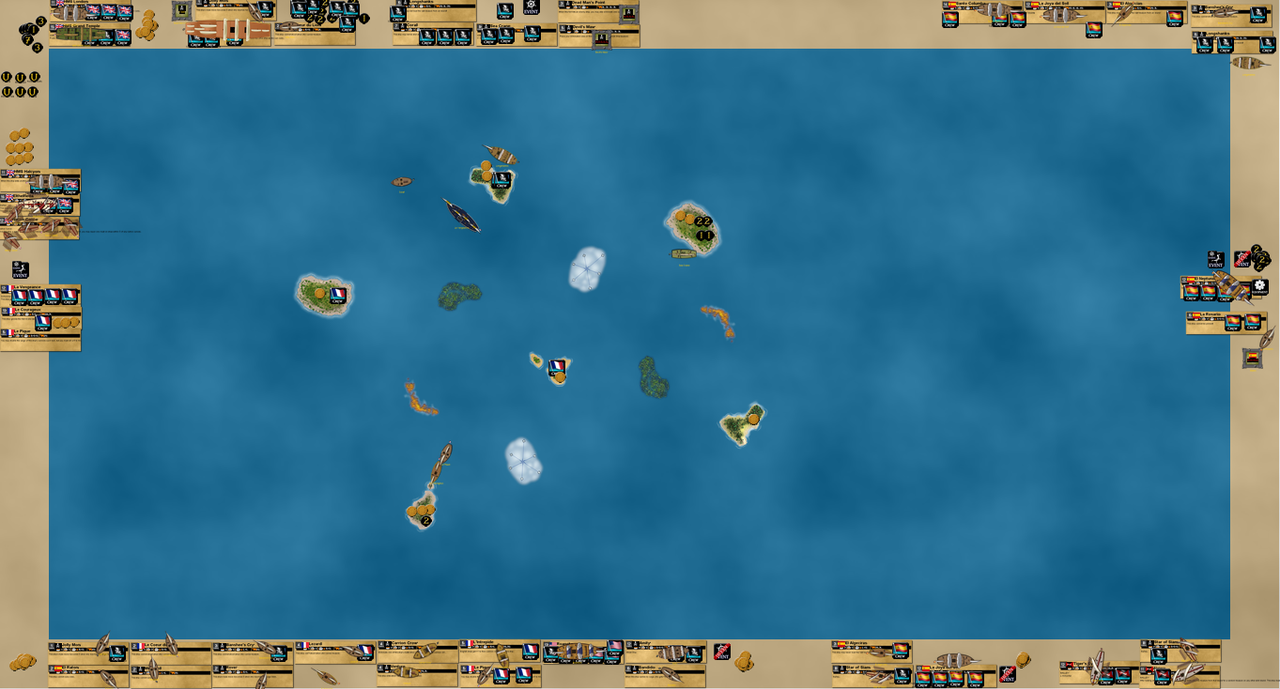
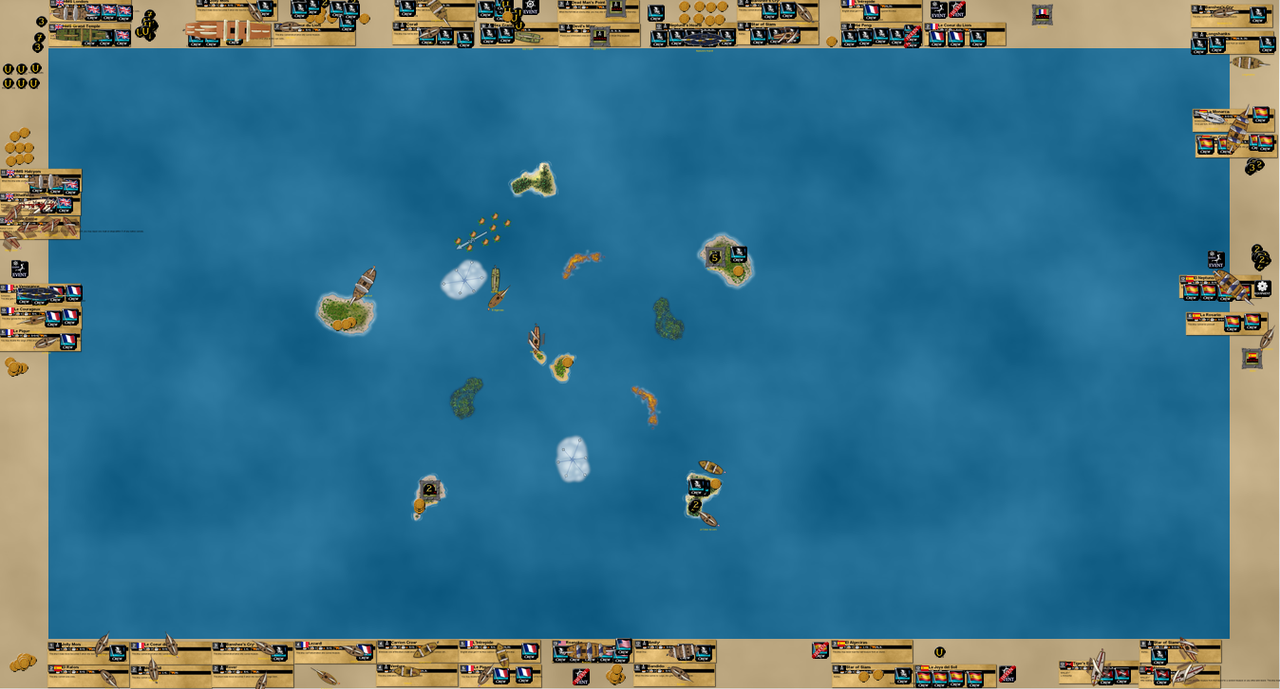
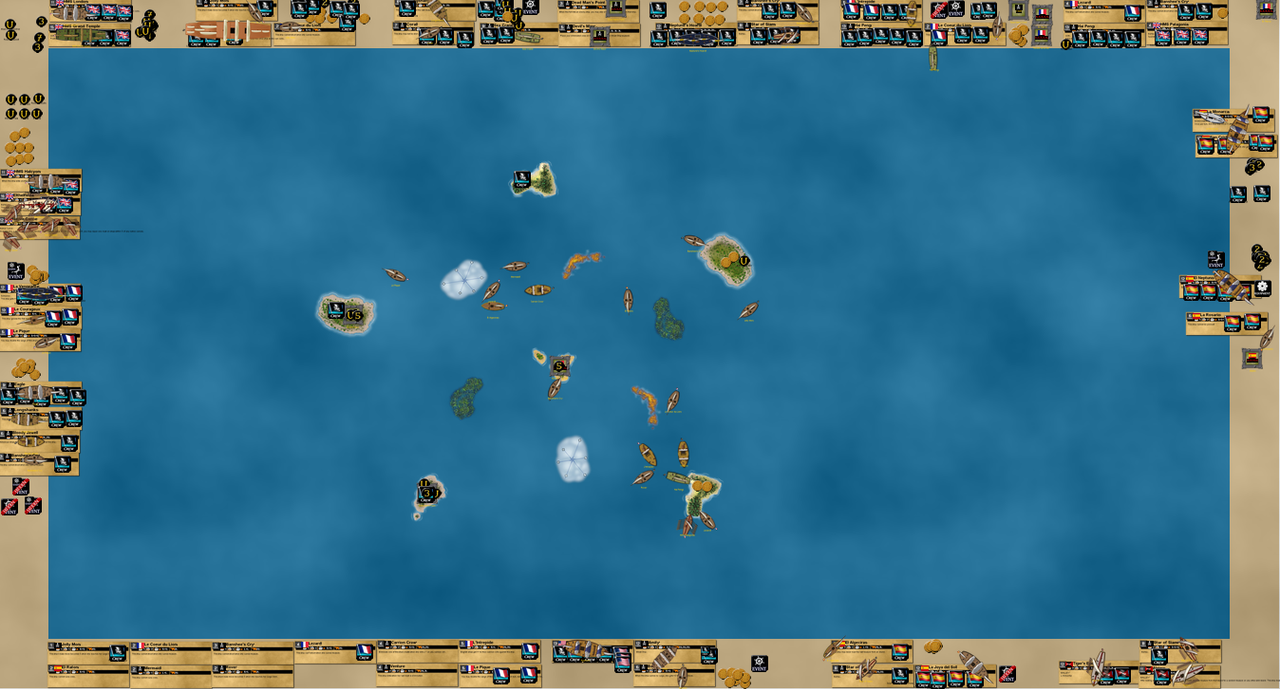
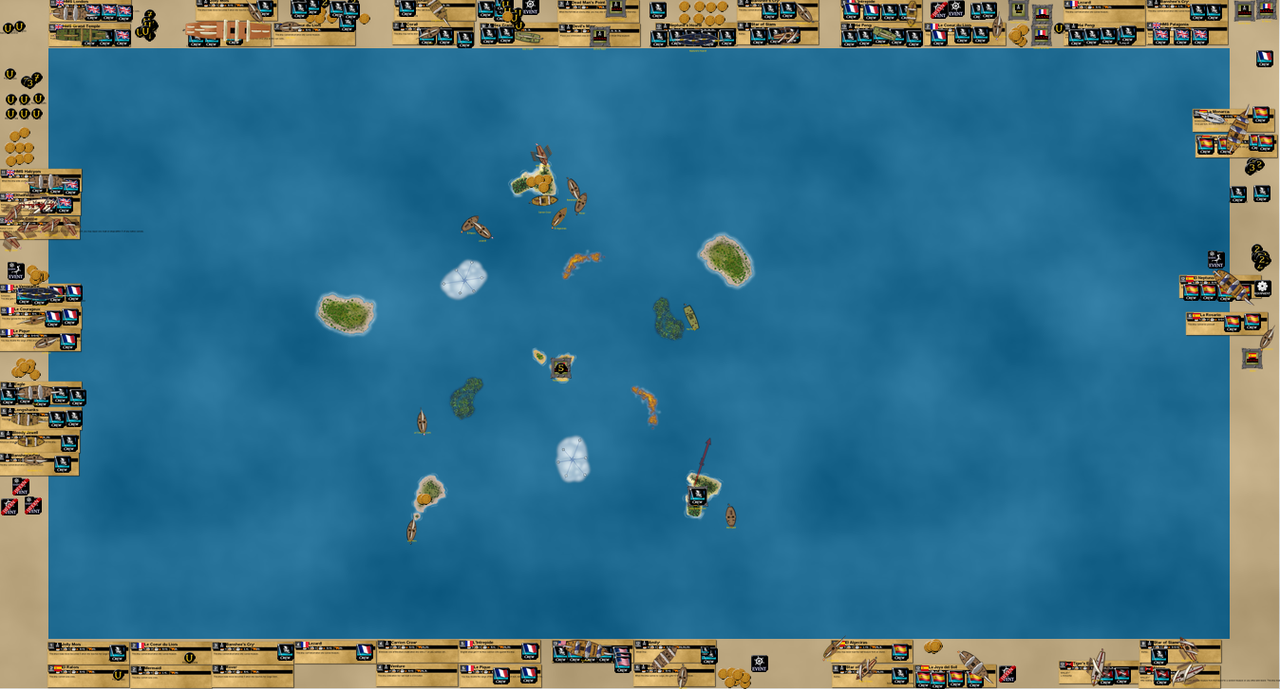
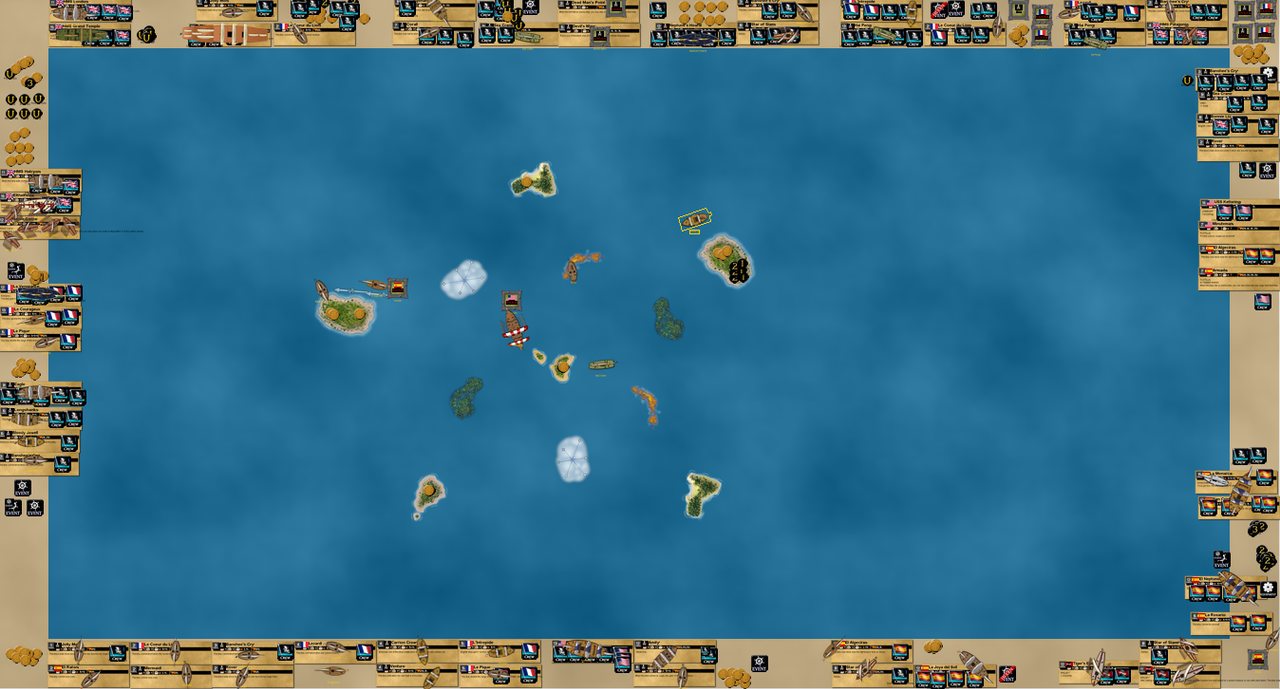
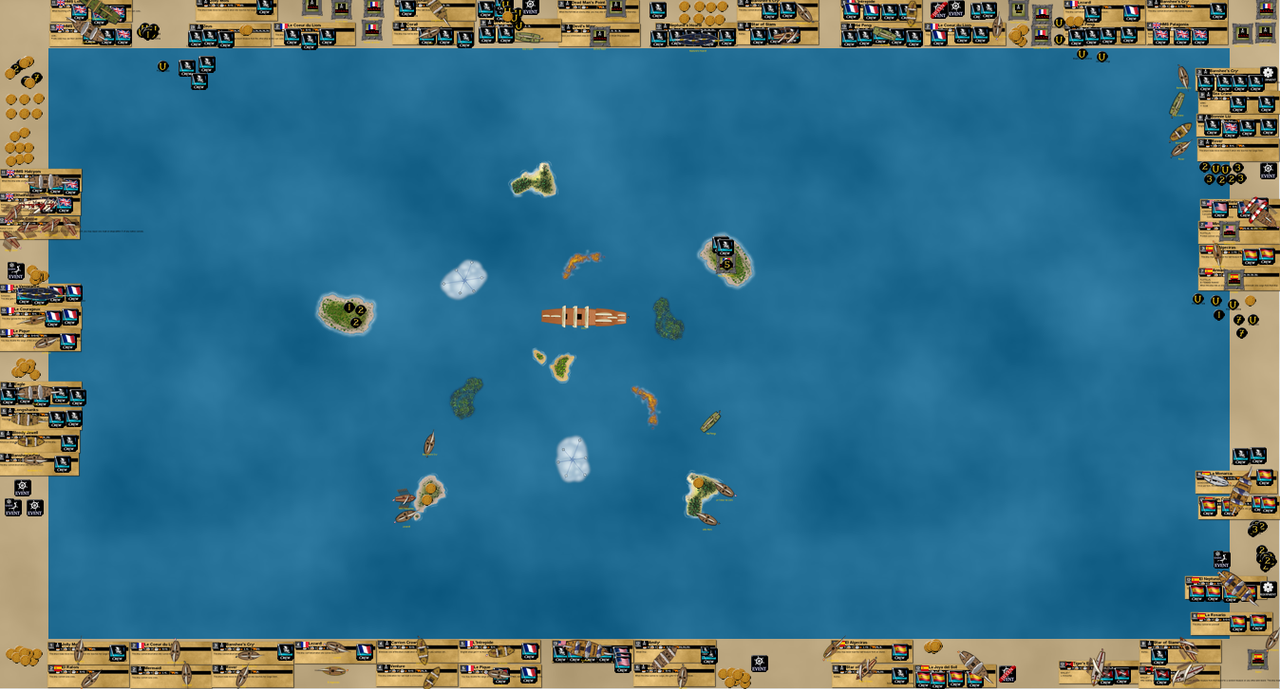
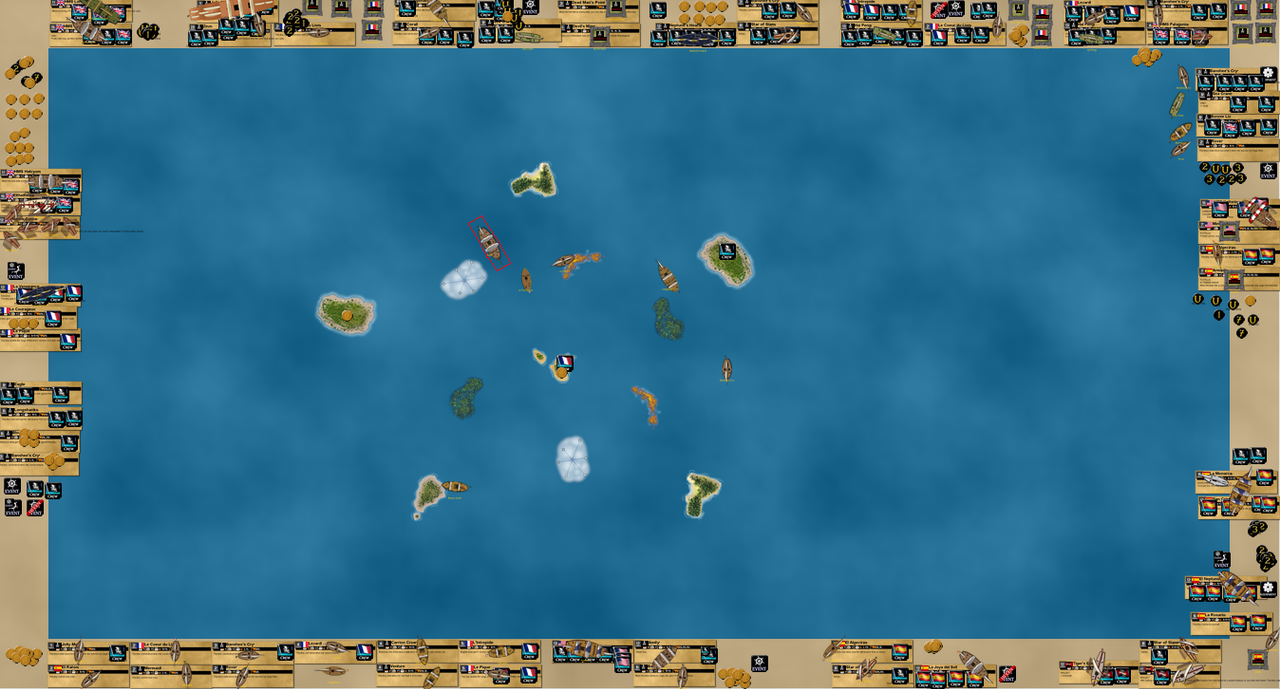
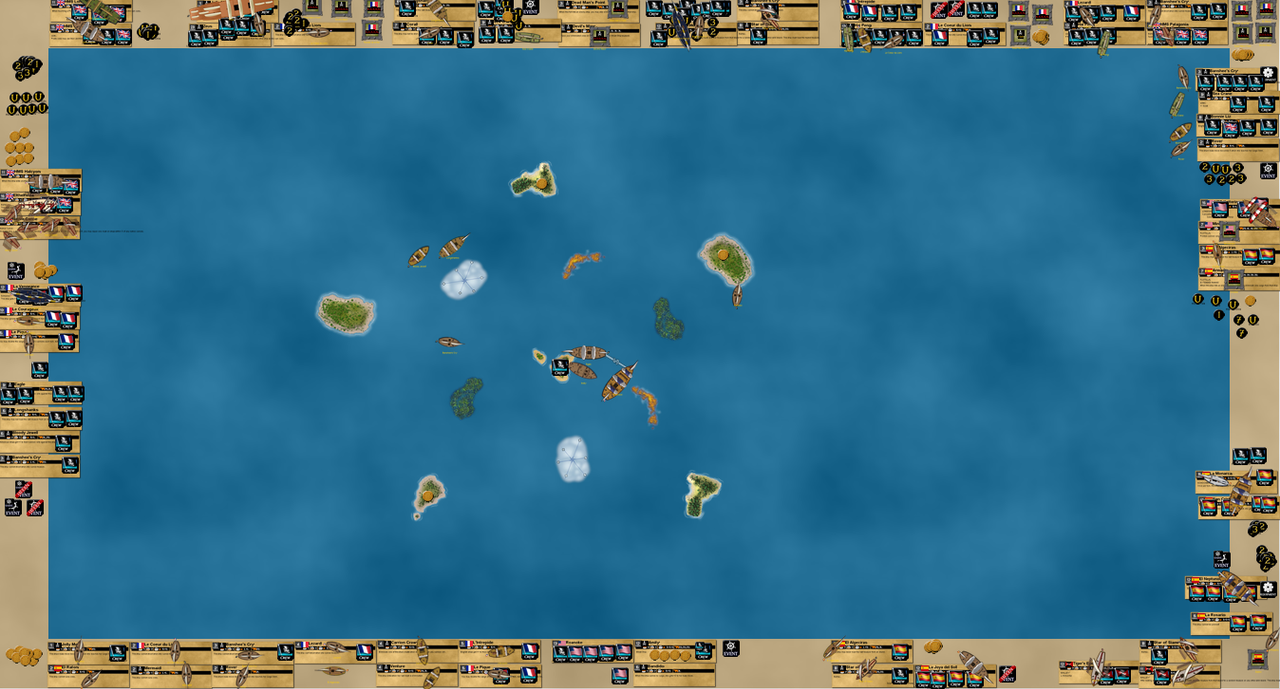
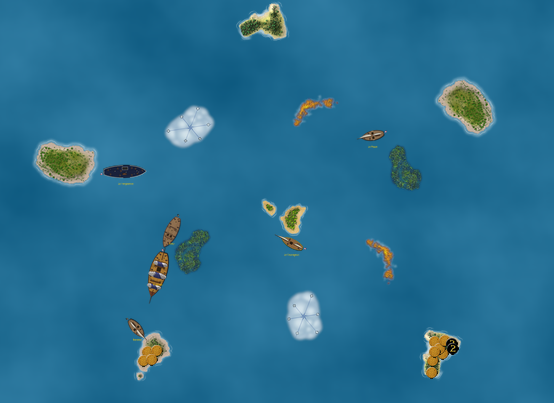
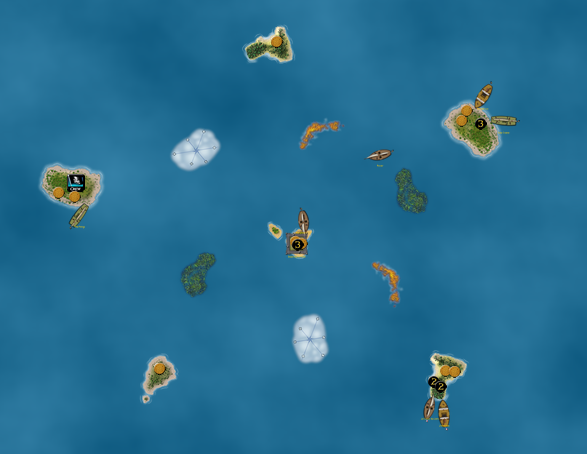
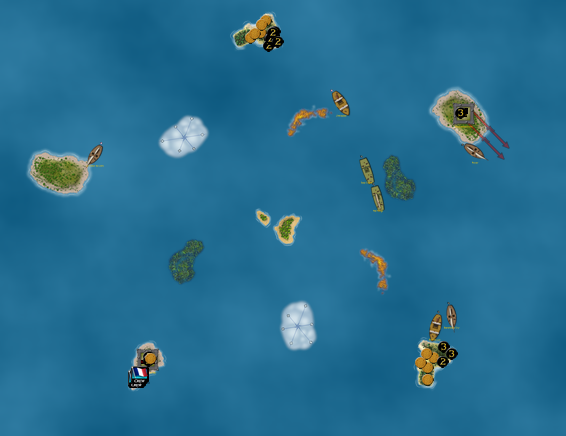
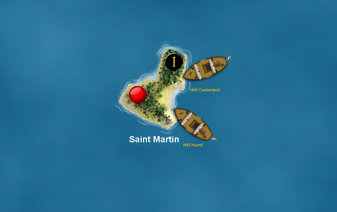
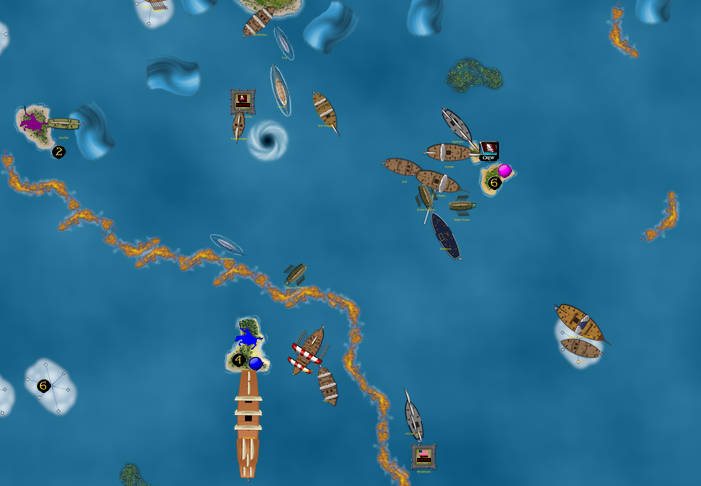
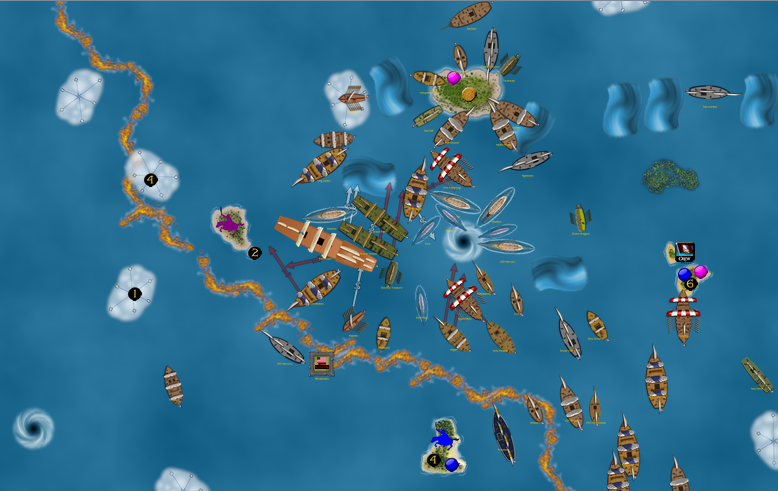
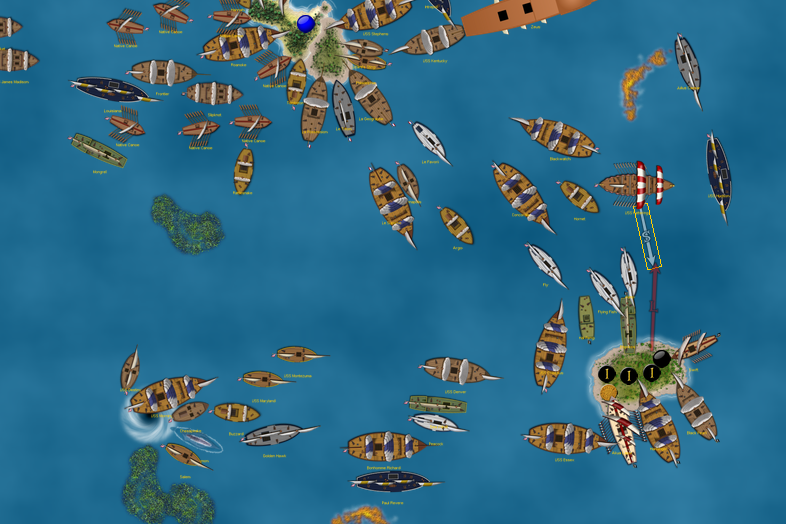
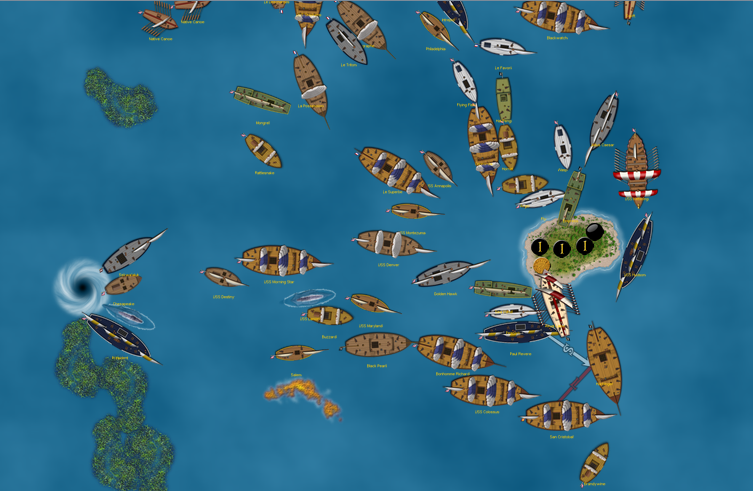
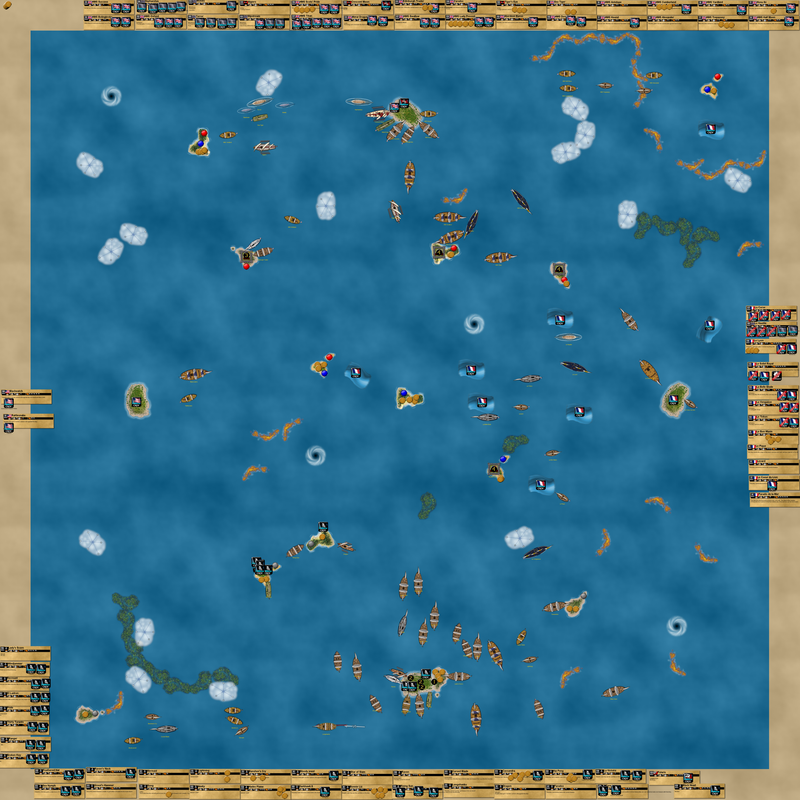
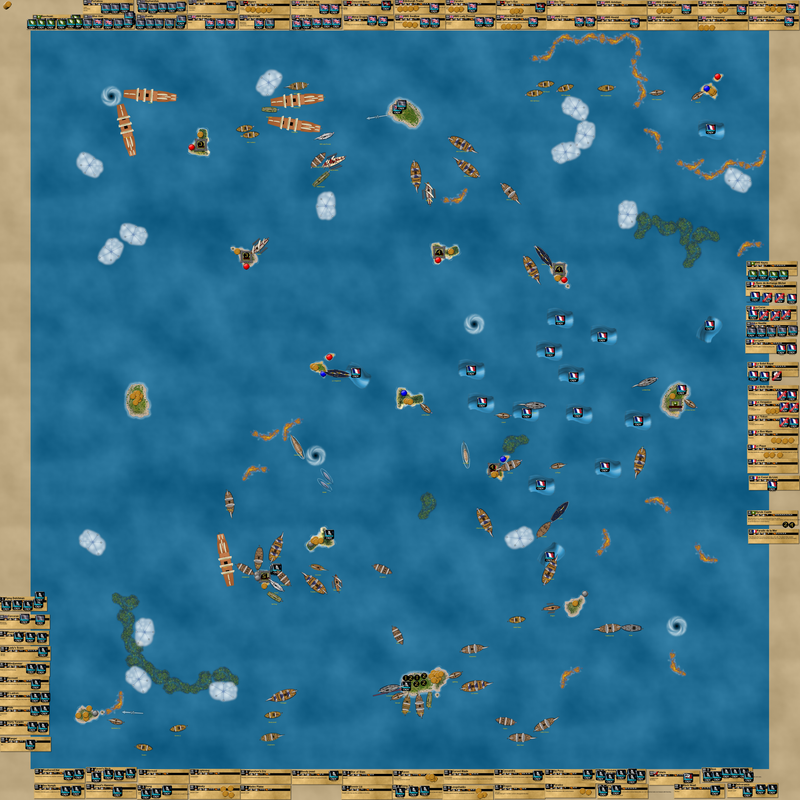
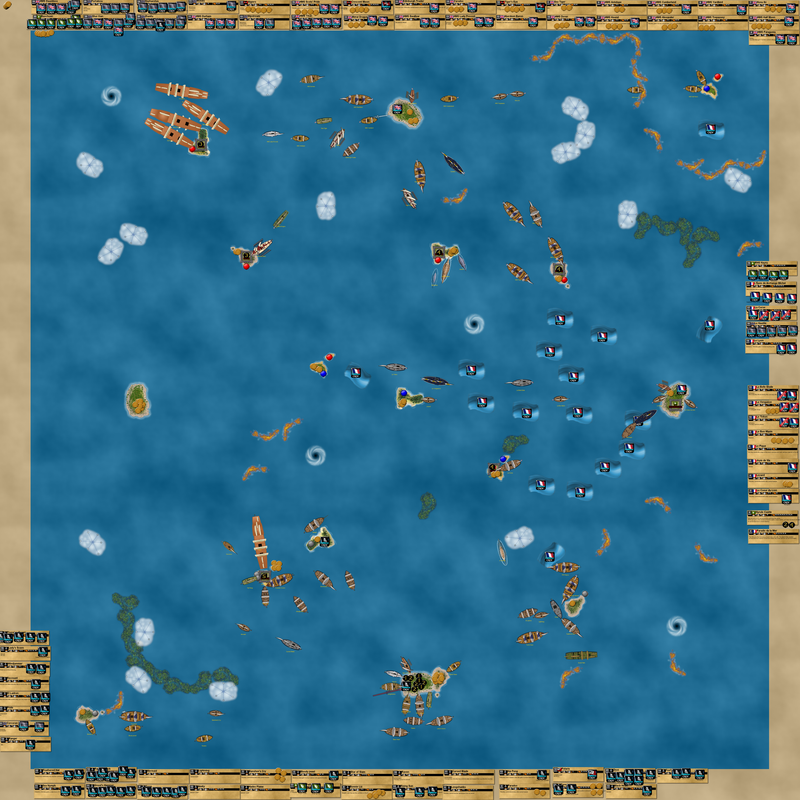
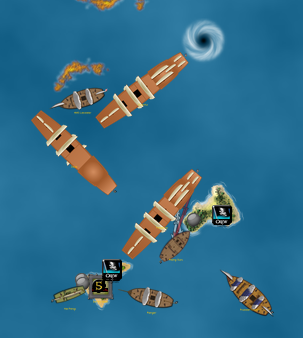
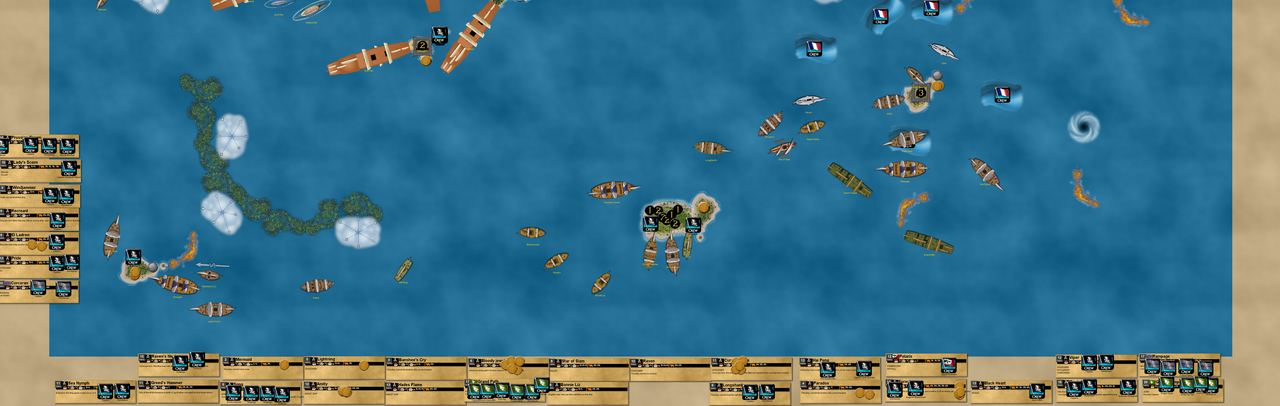
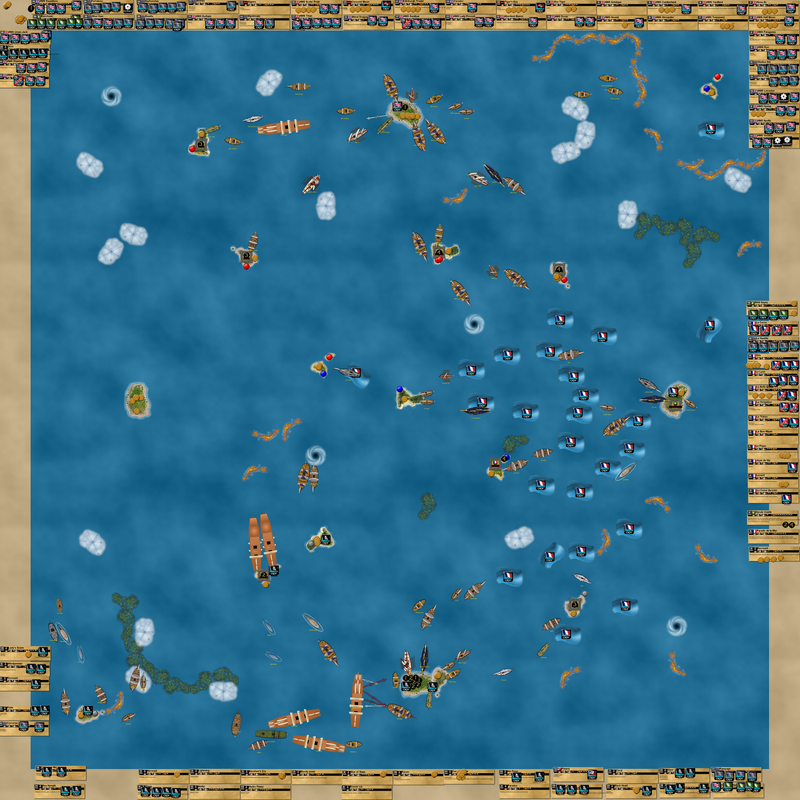
Xerecs moved the Zeus west a bit, allowing the Celtic Fury to SAT into position. However, she only knocked one mast off the Pearl, being careful to stay out of Tia Dalma’s cancelling range. The Mercure ducked into a fog bank to hide from the Zeus, while the Constitution arrived on the scene. In the meantime my canoes had finished unloading gold, while the San Cristobal did the same on the opposite side of the sea. With the Celtic Fury getting some action going in the north, the distraction was in place. The Guichuan and Oxford turned their bows west, towards Xerecs’ fort accessible via round earth.

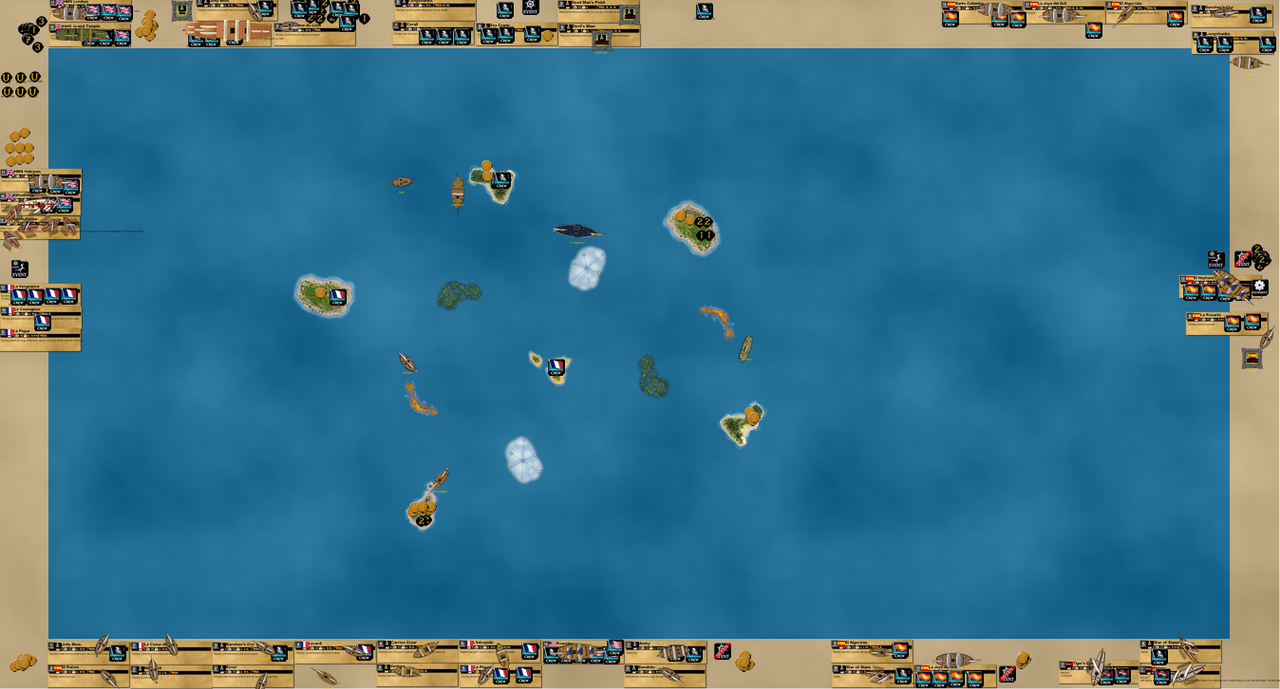
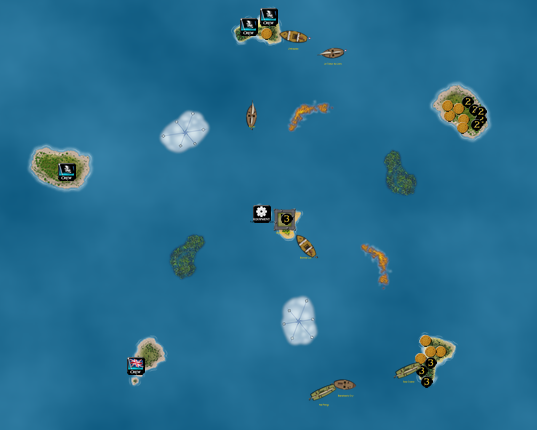
The Zeus sped north, while the Baochuan took over against the Celtic Fury. However, I flipped Lenoir to Parley my way out of the situation! The random coin chosen from my home fort was a 1, and the Celtic Fury was safe!

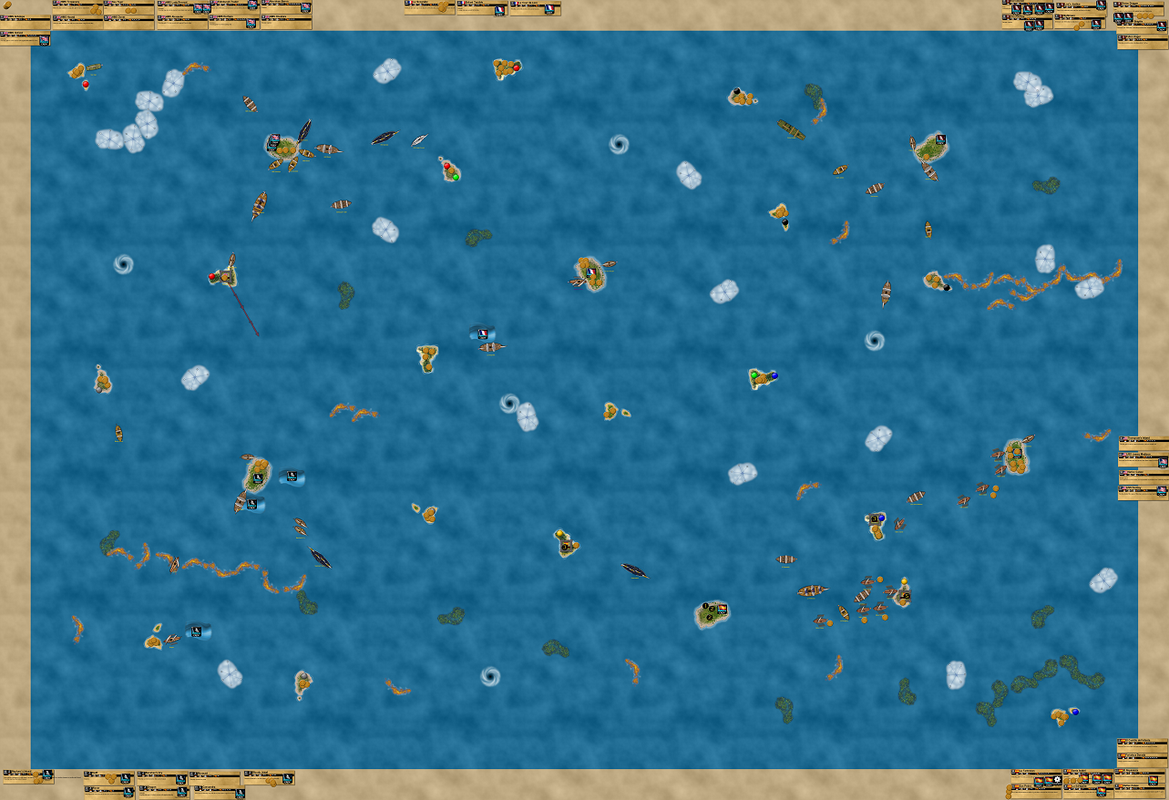
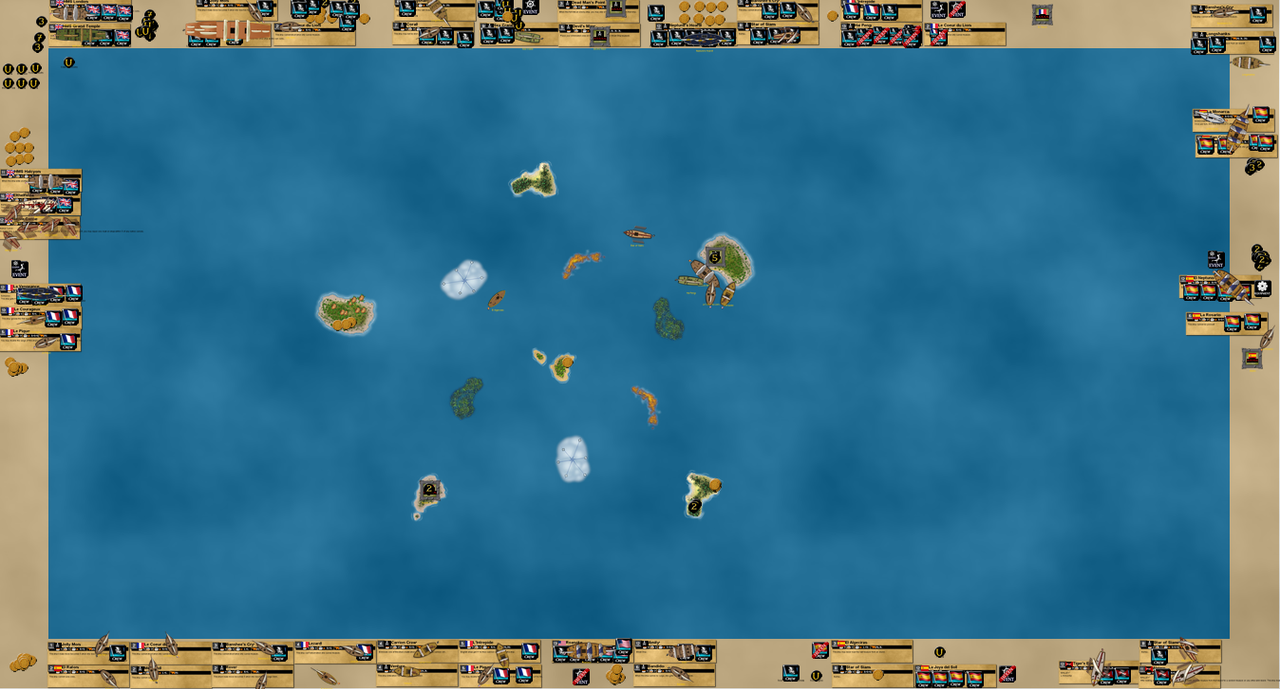
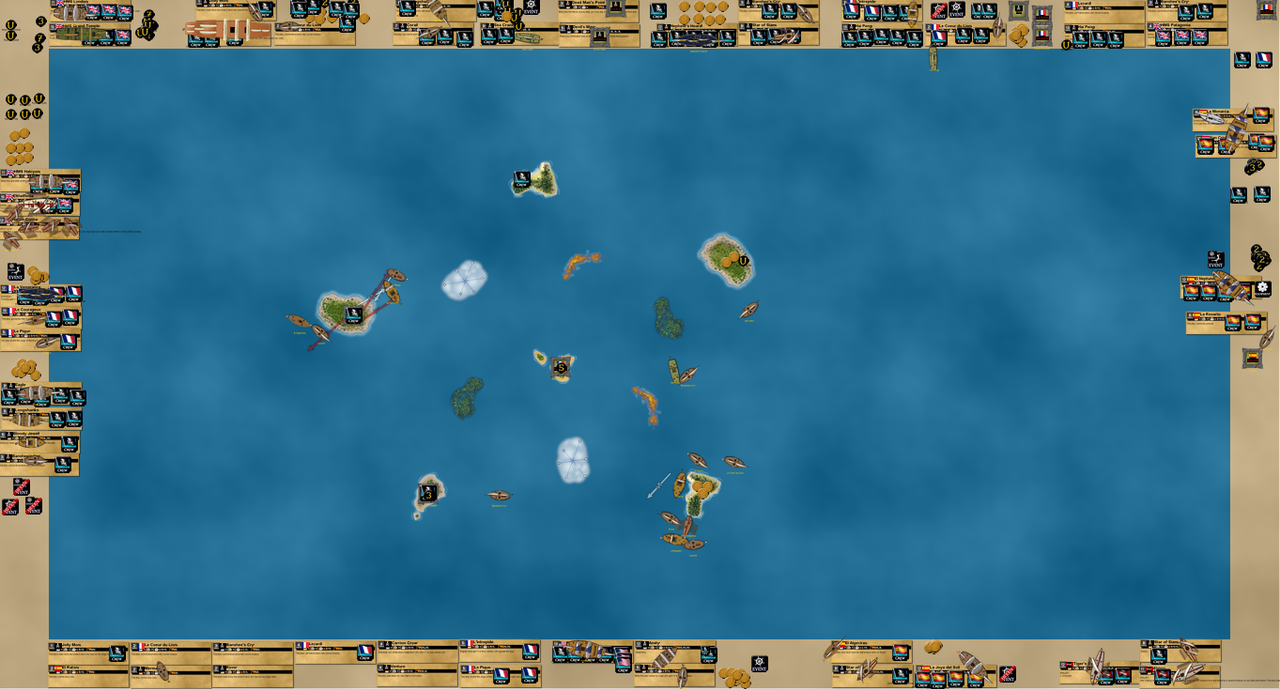
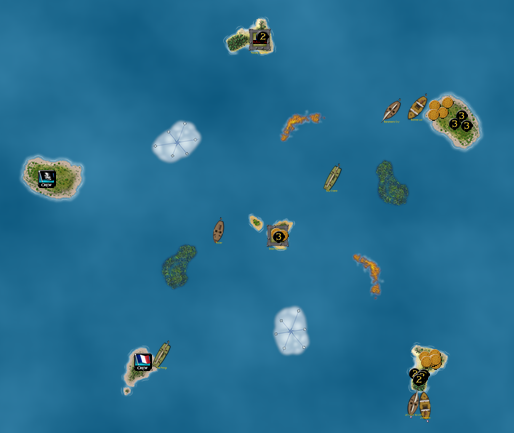
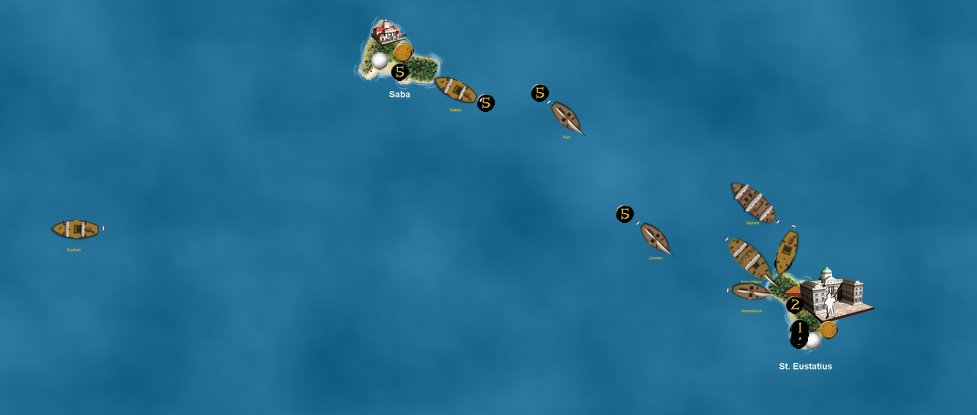
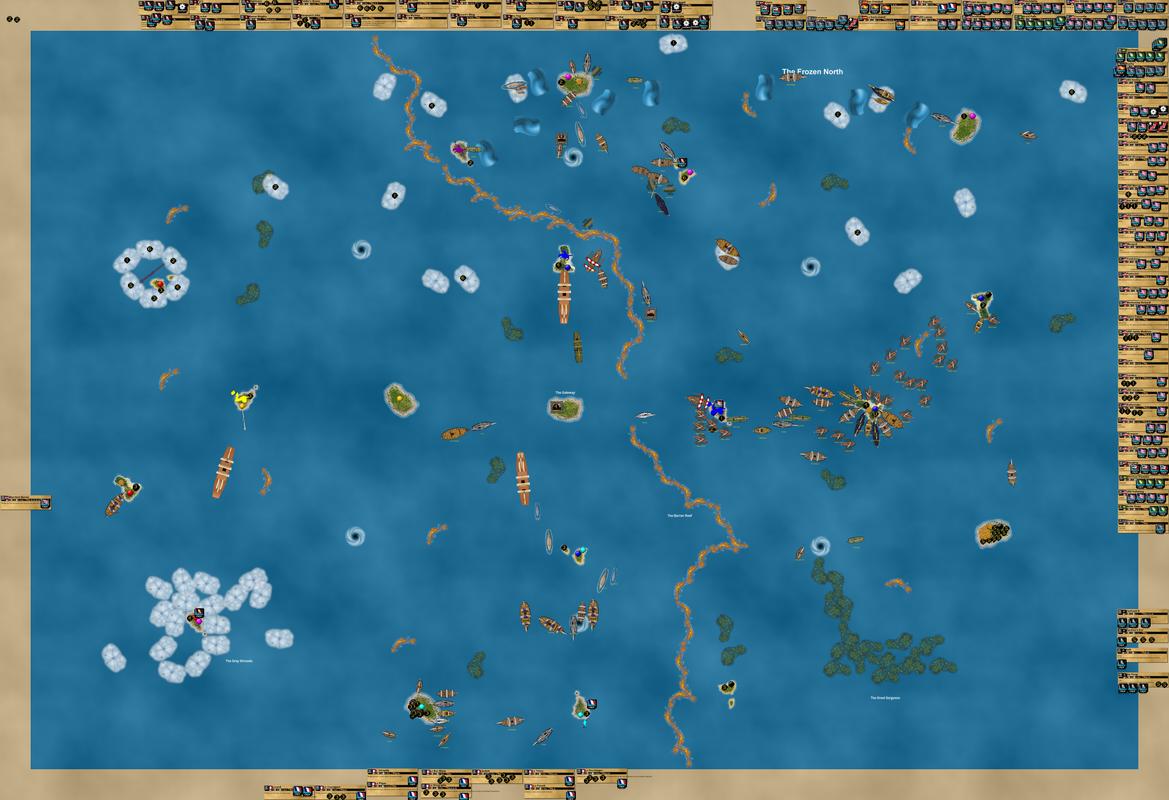
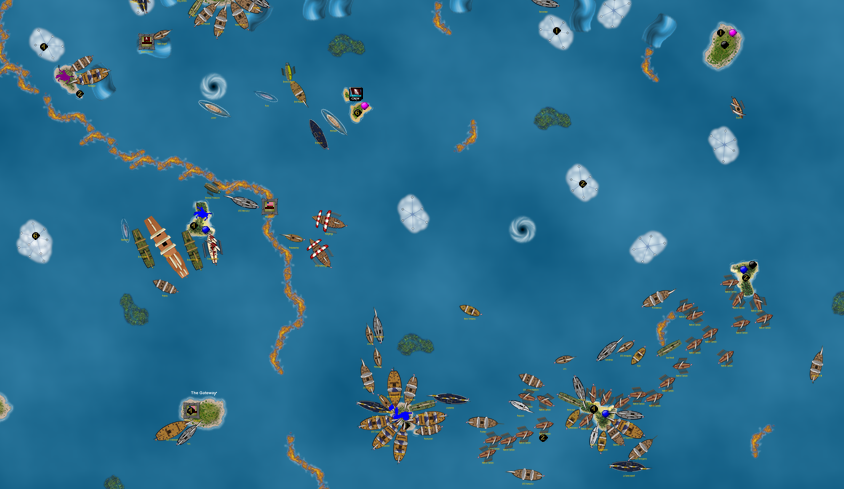
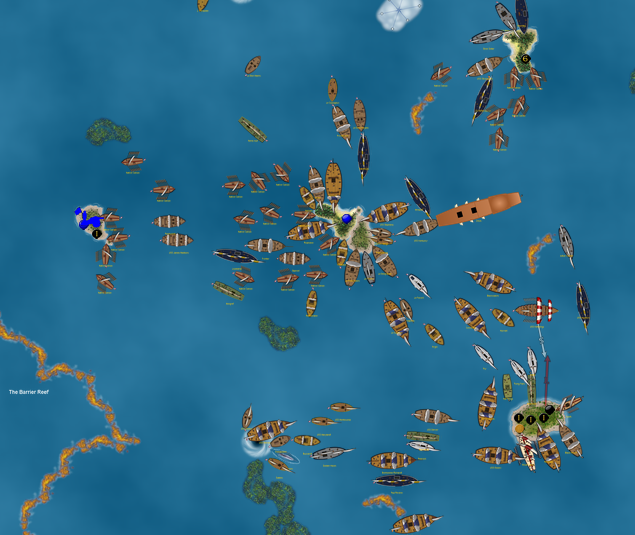
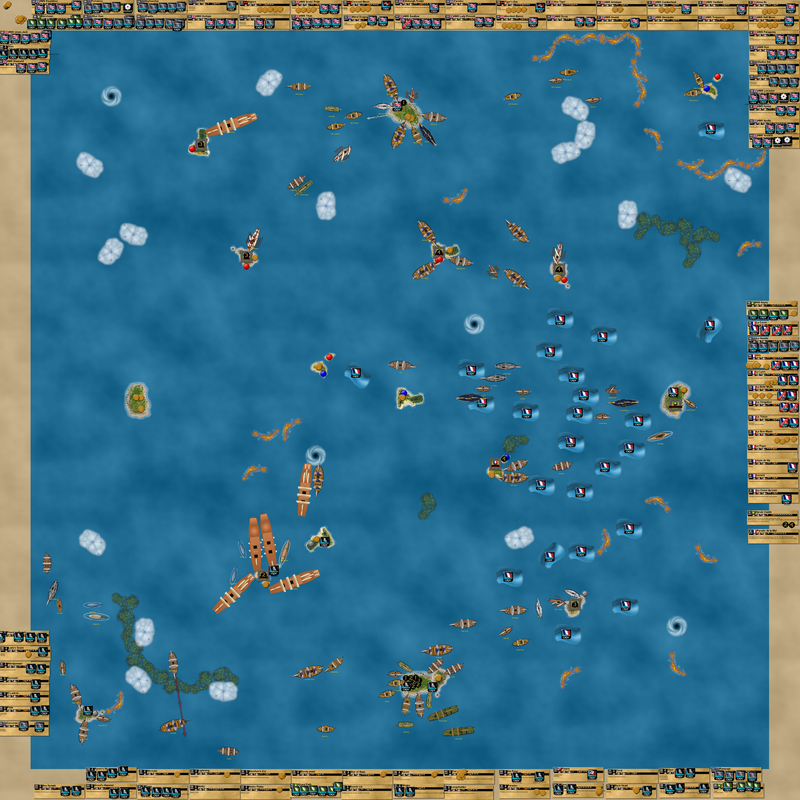
The Celtic Fury responds with a thunderous broadside, crippling the Baochuan! The Constitution and Mercure team up and sail north, possibly to pursue the Zeus. At this point the game was in a relatively flexible state, but I knew one thing for sure: I was going for it. The Guichuan and Oxford round earthed their way to the east, where the San Cristobal was the only ship guarding the home fort. In the meantime, the Black Coral attacked the Joya del Sol, who was headed north with an abandoned musketeer to take out the Wolves that were found on the same island with the Natives.

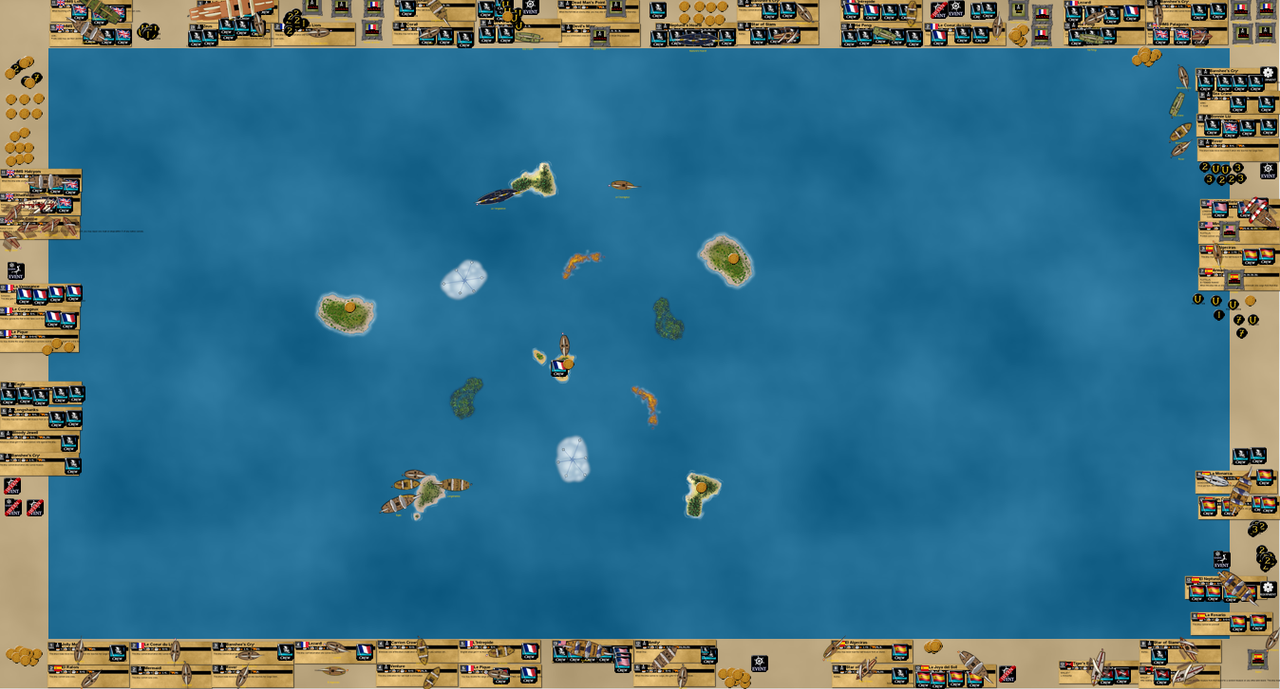
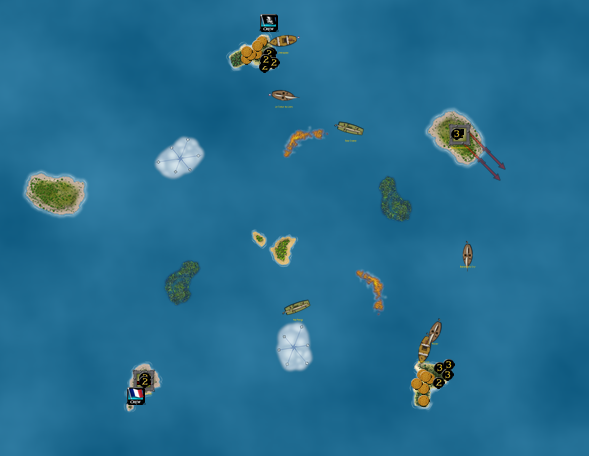
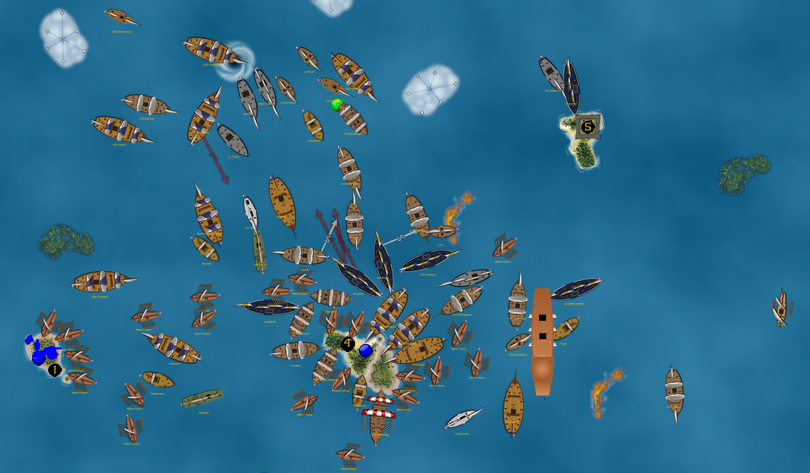
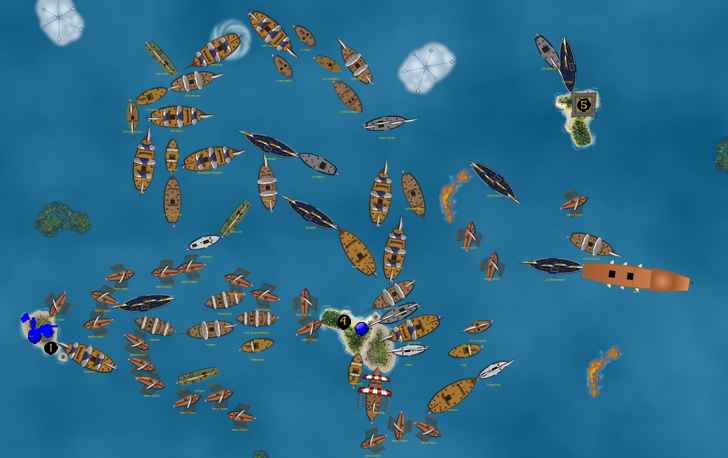
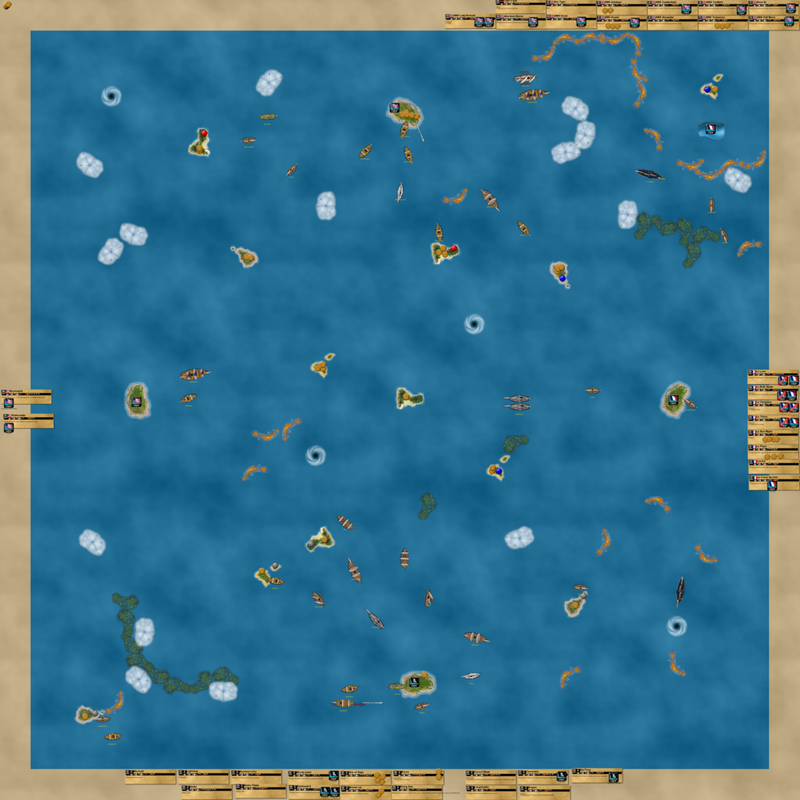
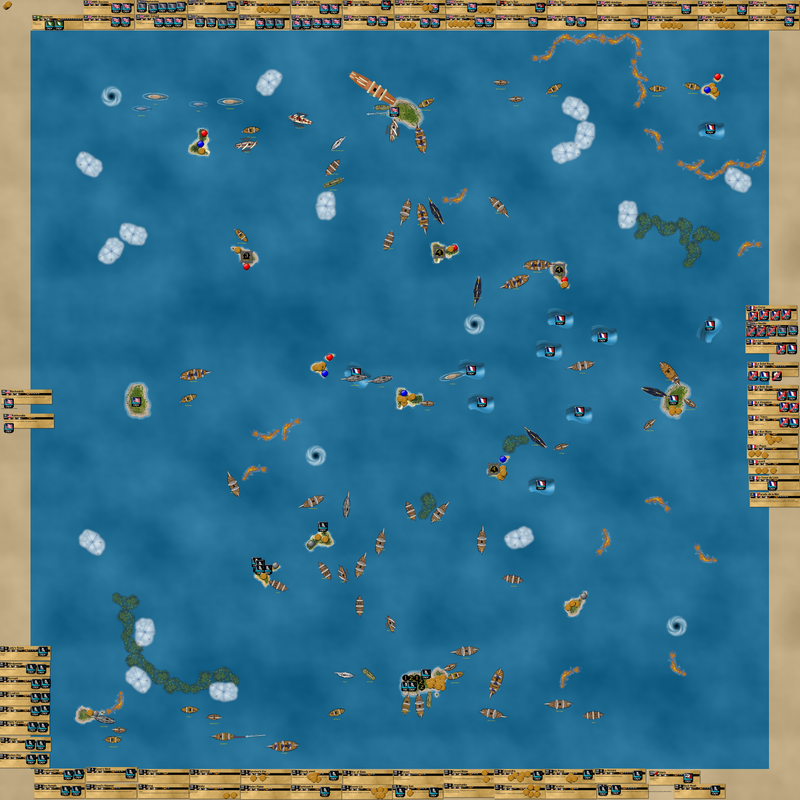
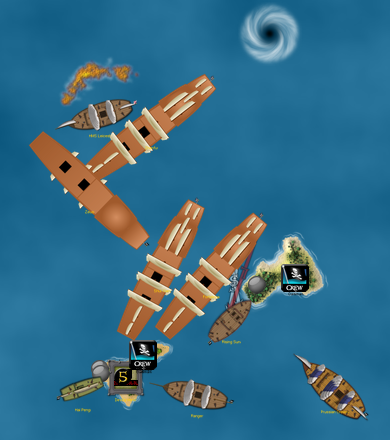
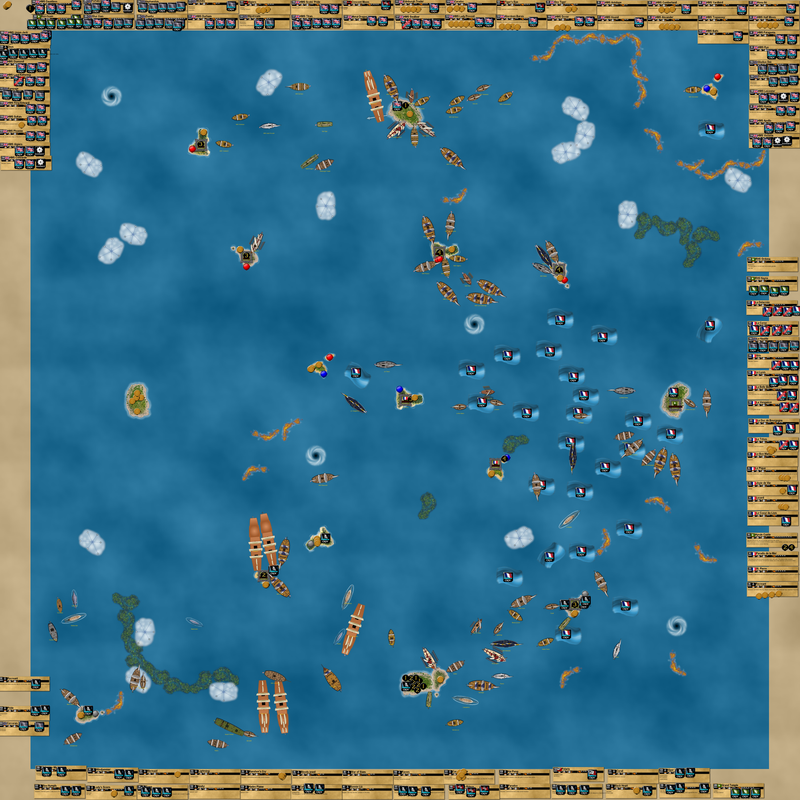
Attack! The Celtic Fury dismasts the Baochuan, while the Constitution and Mercure team up to take the Black Pearl down to 1 mast. The Morning Star went through a whirlpool and aimed her bow at my home fort, which funny enough, I had left unguarded! I interpreted this as a potential raid, but my ships weren’t close enough to deter it. However, the Guichuan was ready to strike, while the San Cristobal sailed away from danger.

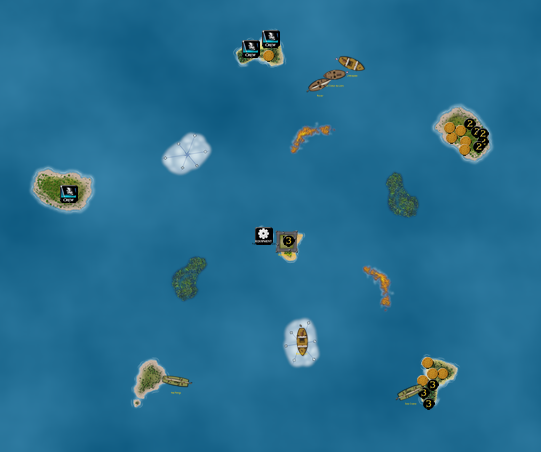
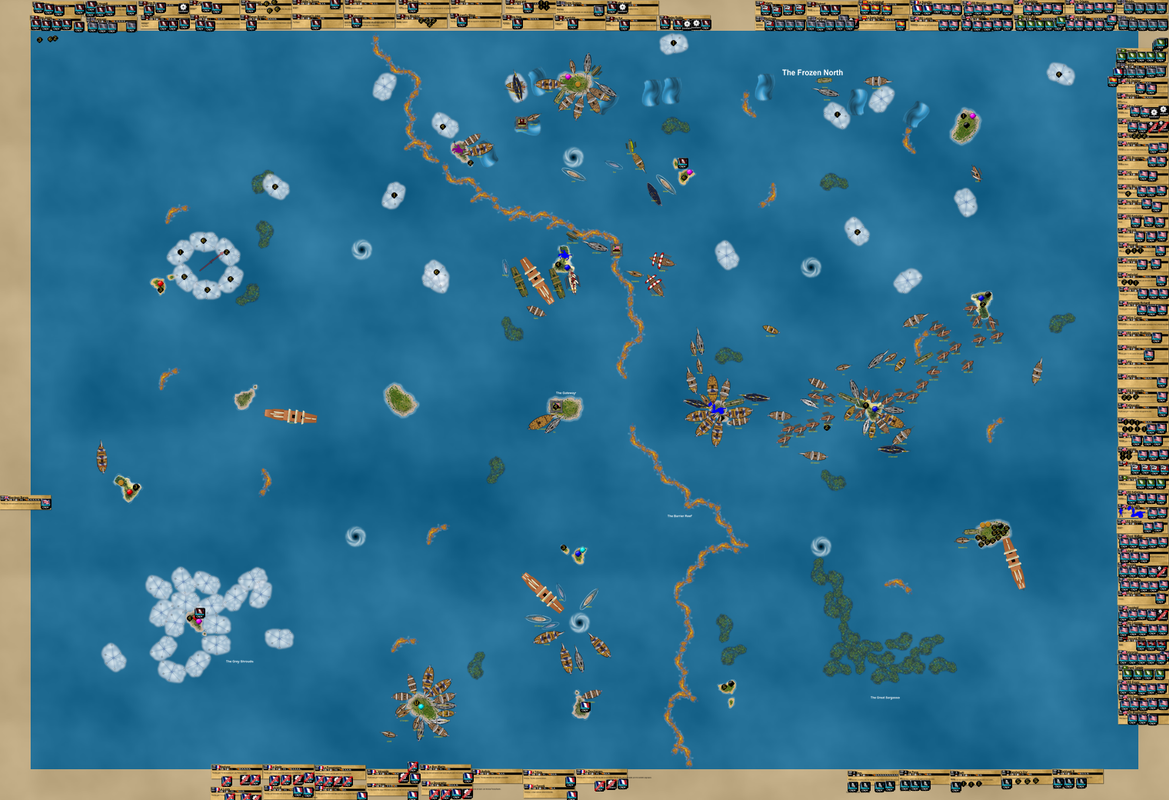
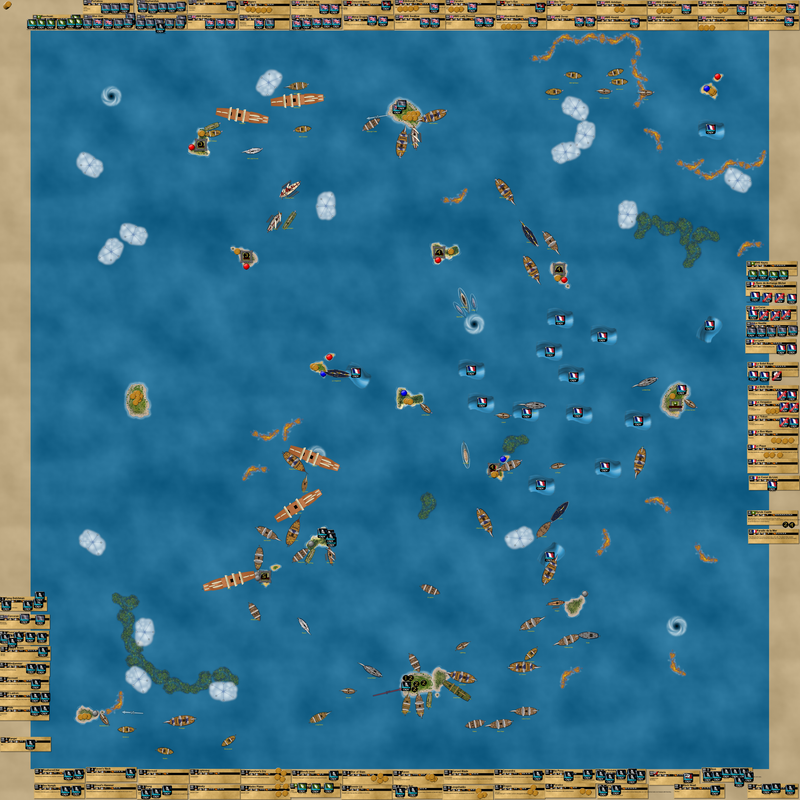
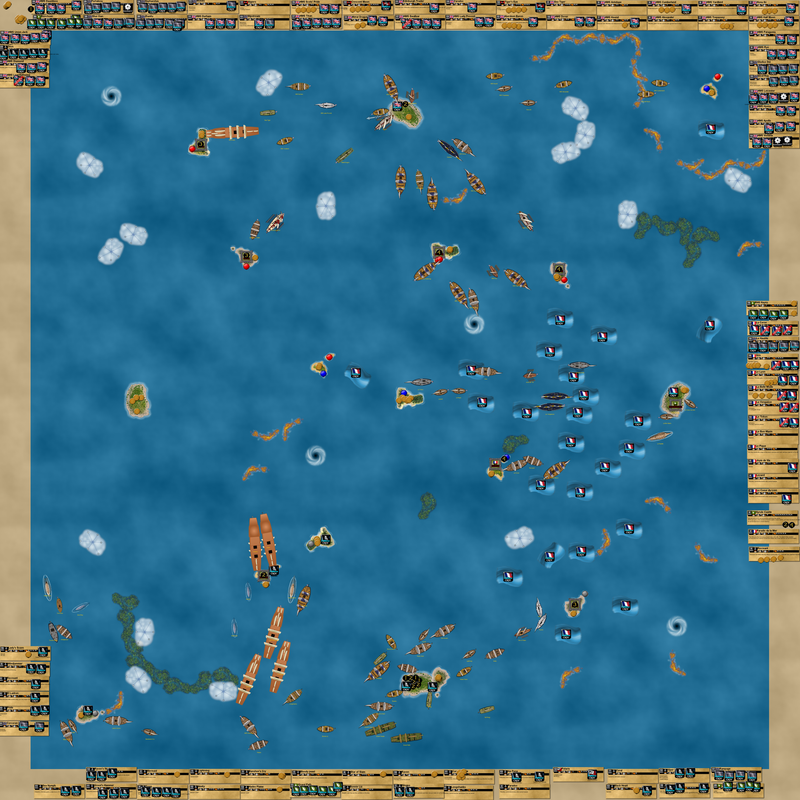
The Frontier discovered a mess of UT’s at a middle island, which sent the hoist into a whirlpool. The Morning Star turned south, alleviating my fears for a moment. However, the Zeus was on her way to my home fort. Uh oh. The Joya escaped into a fog bank, while the Black Pearl joined the Zeus with her high speed and an EA from Calico Cat. I was a bit worried, but my excitement level was also very high, as the game was about to hit its climax.

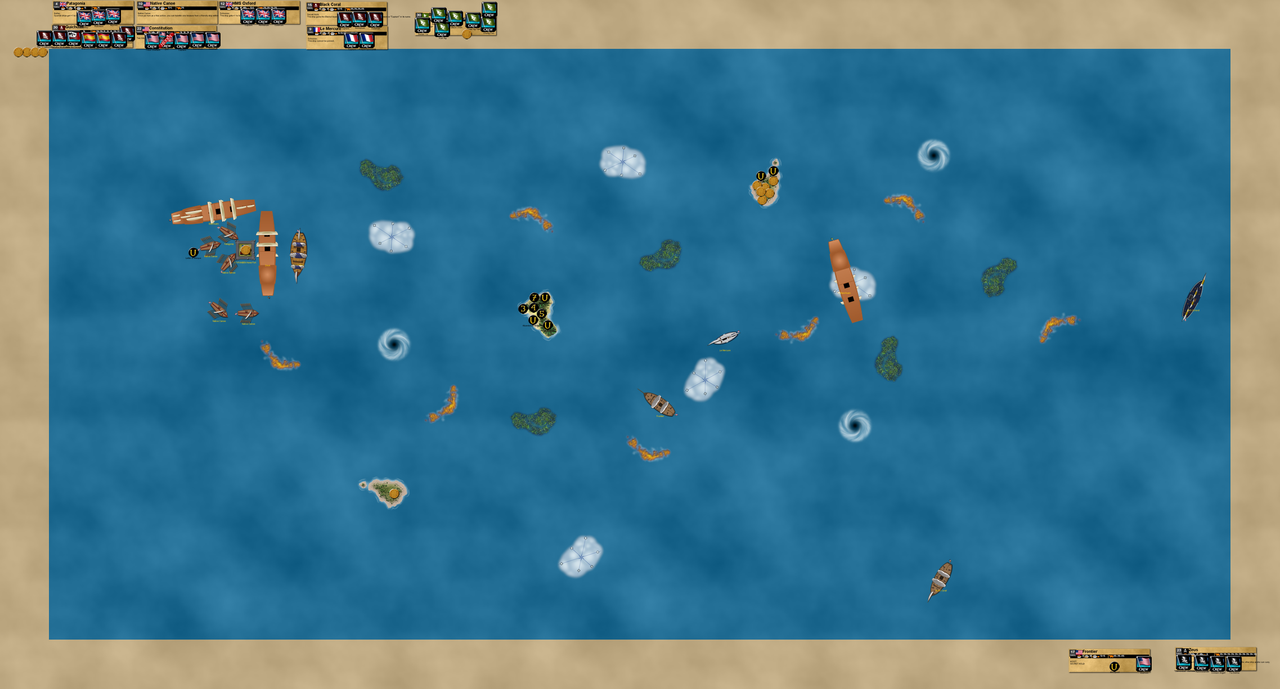
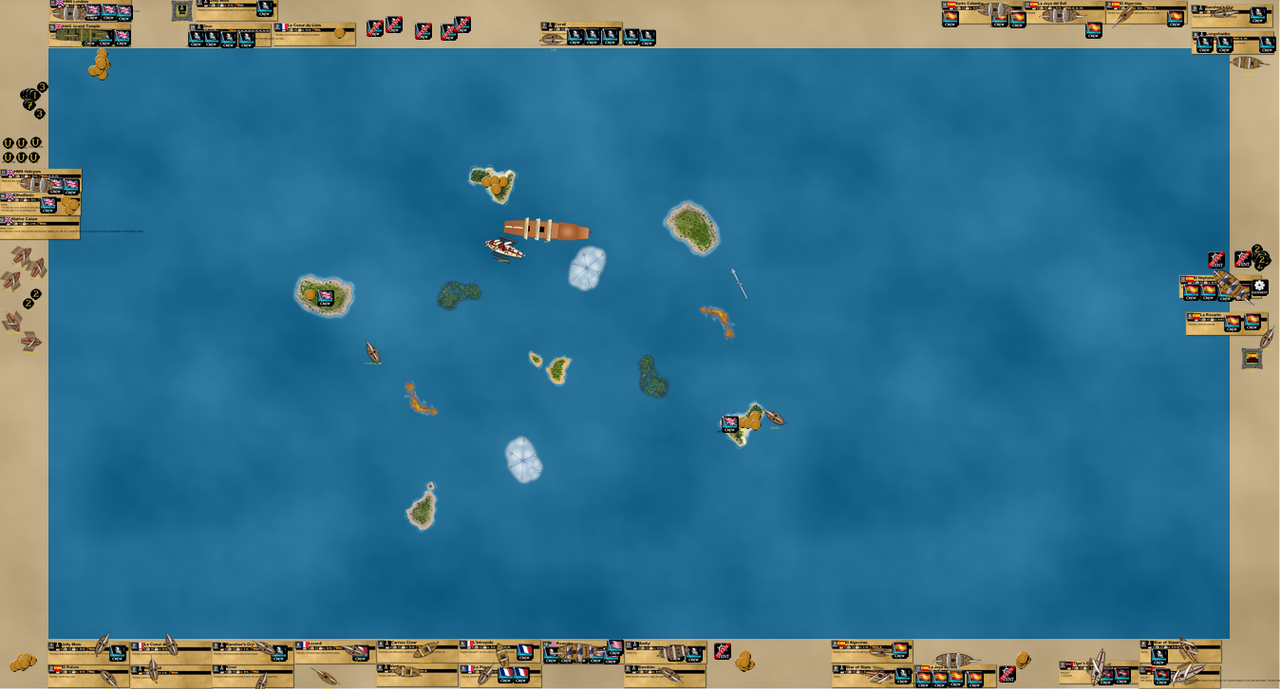
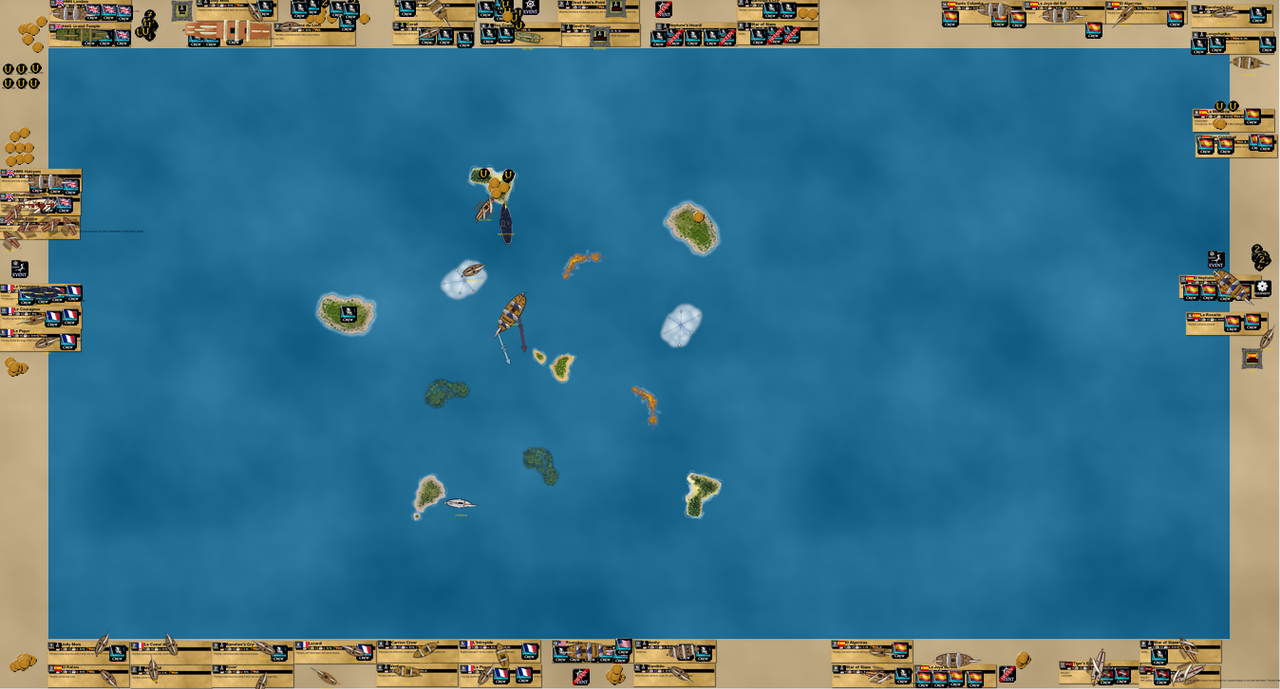
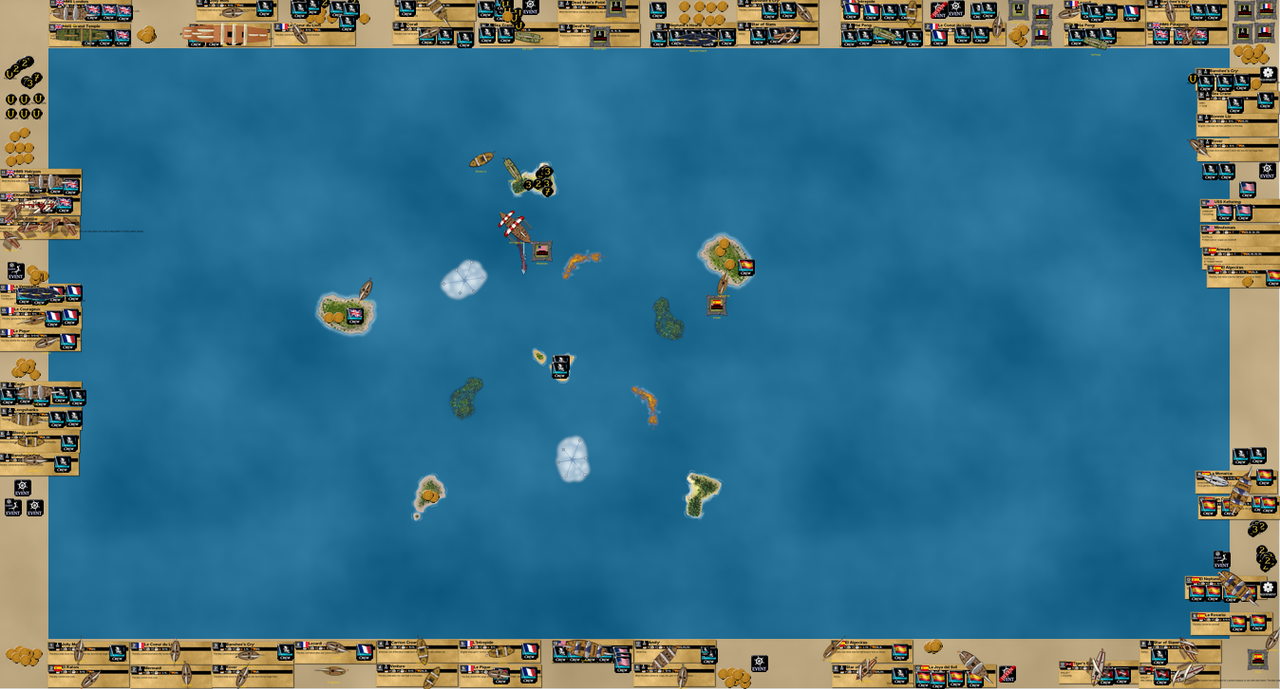
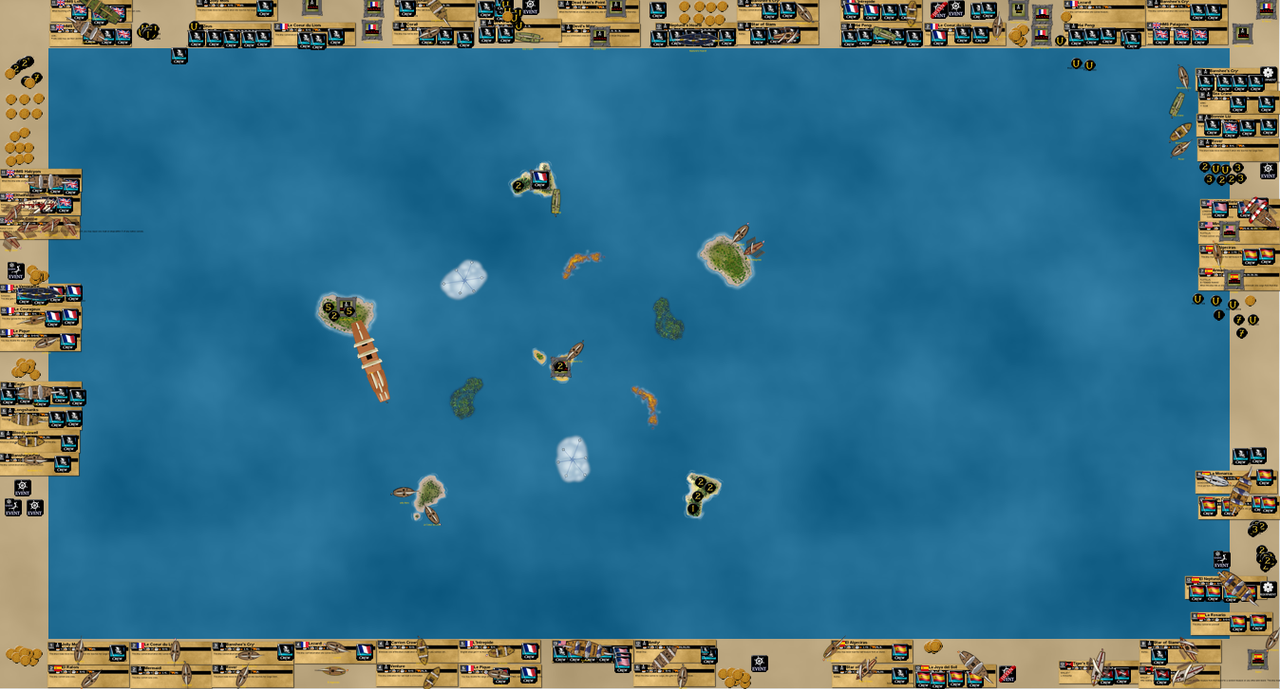
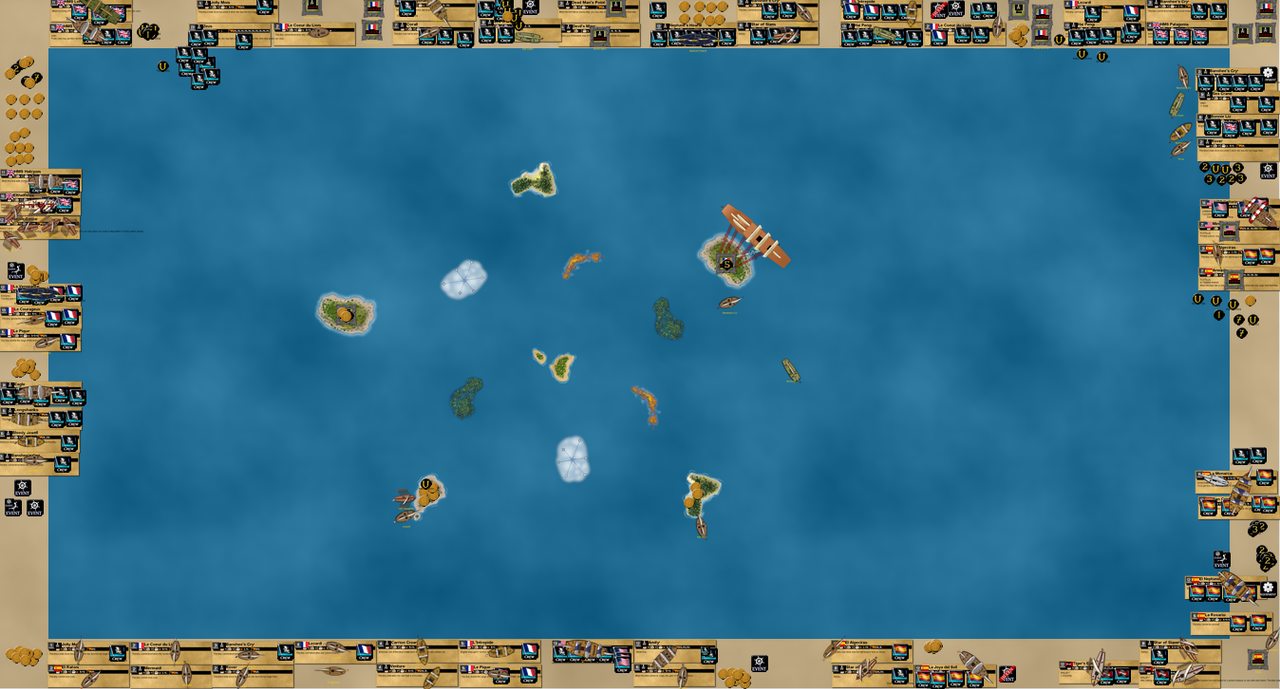
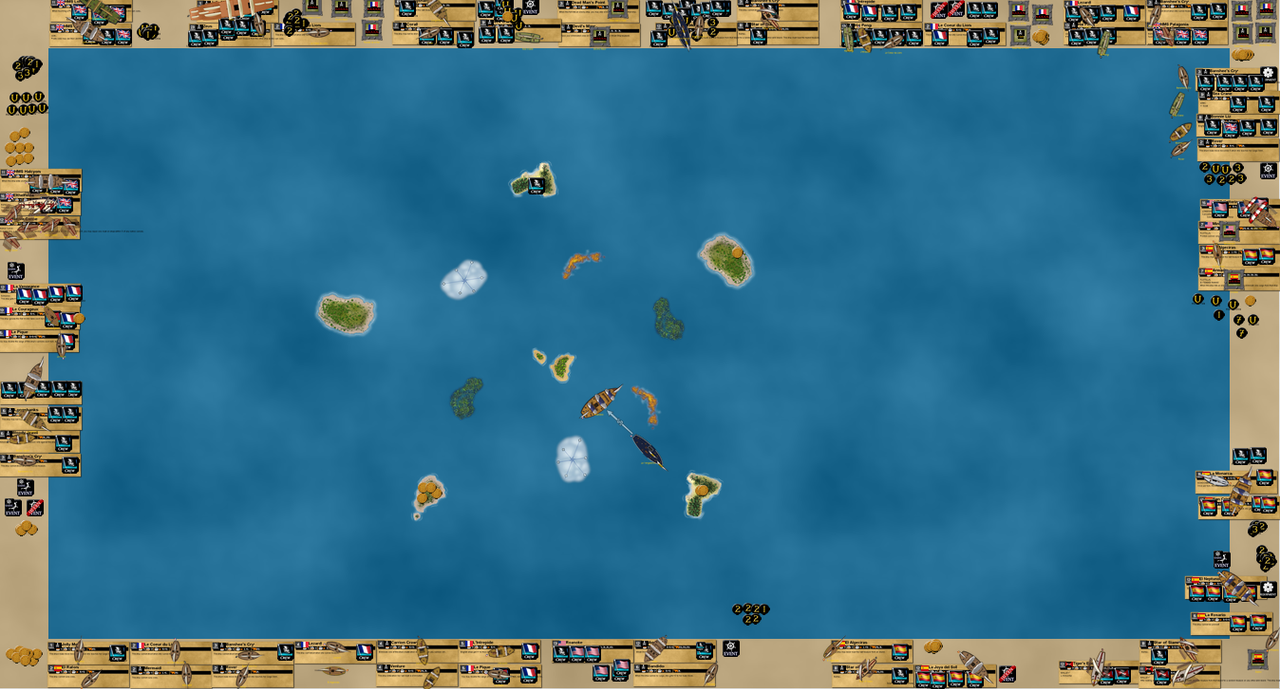
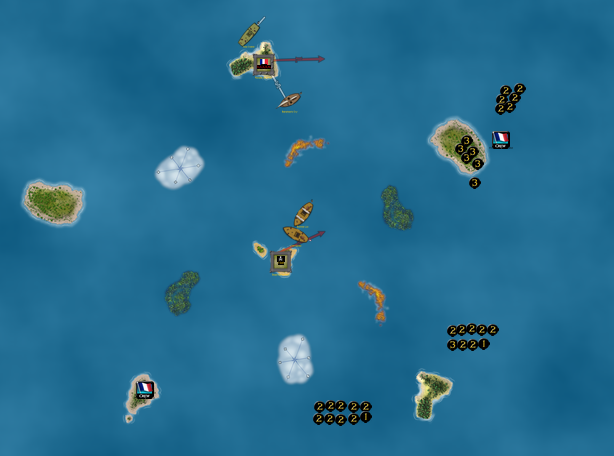
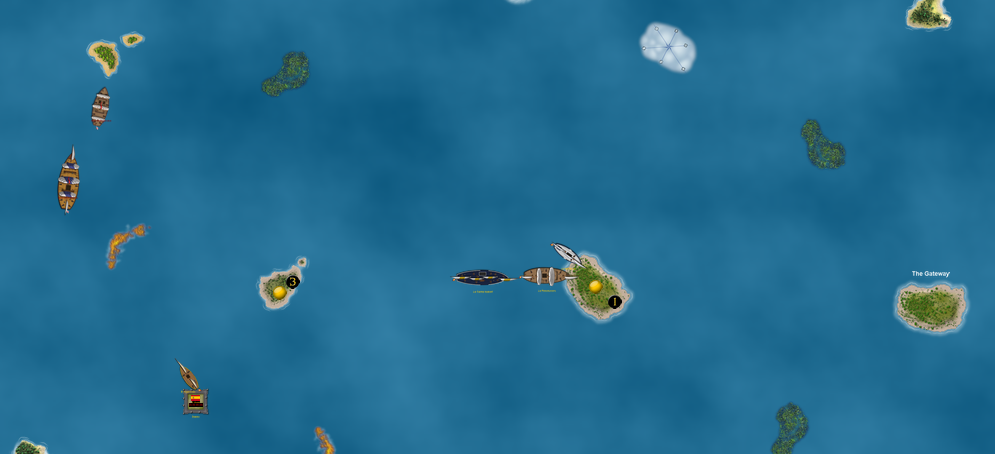
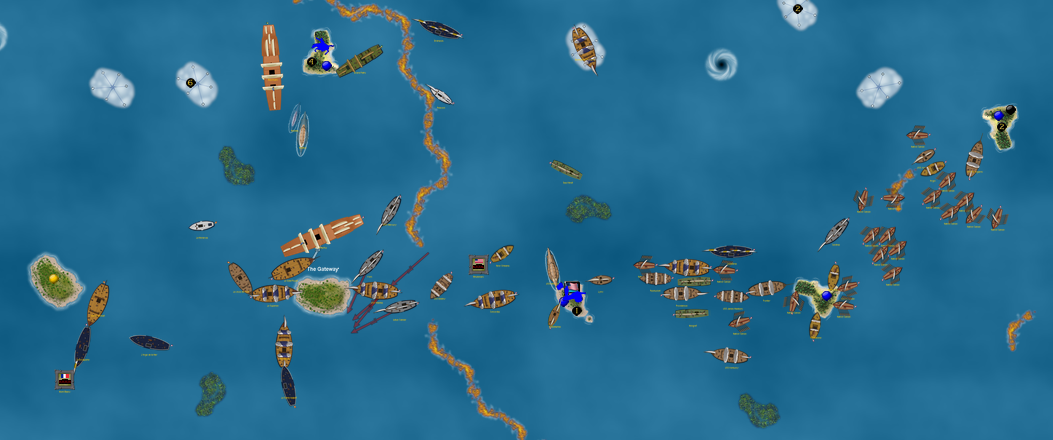
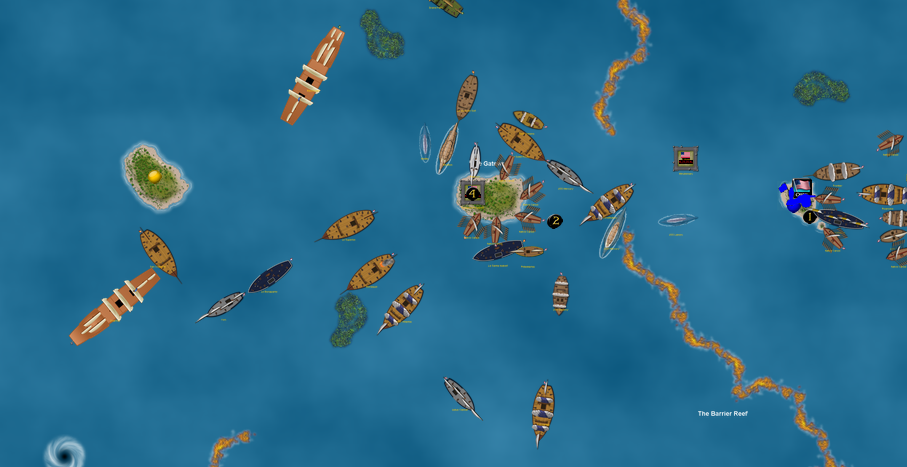
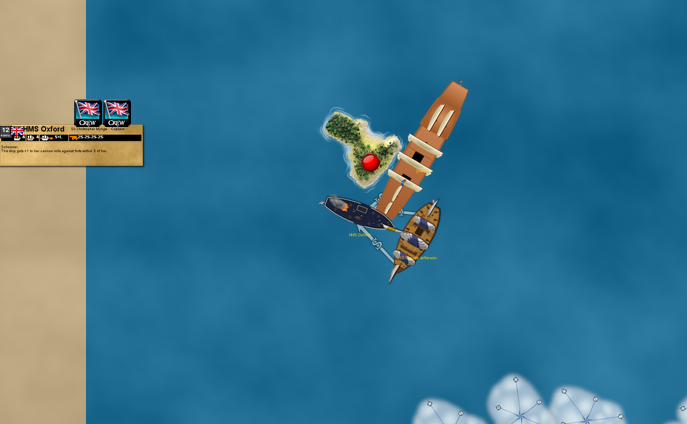
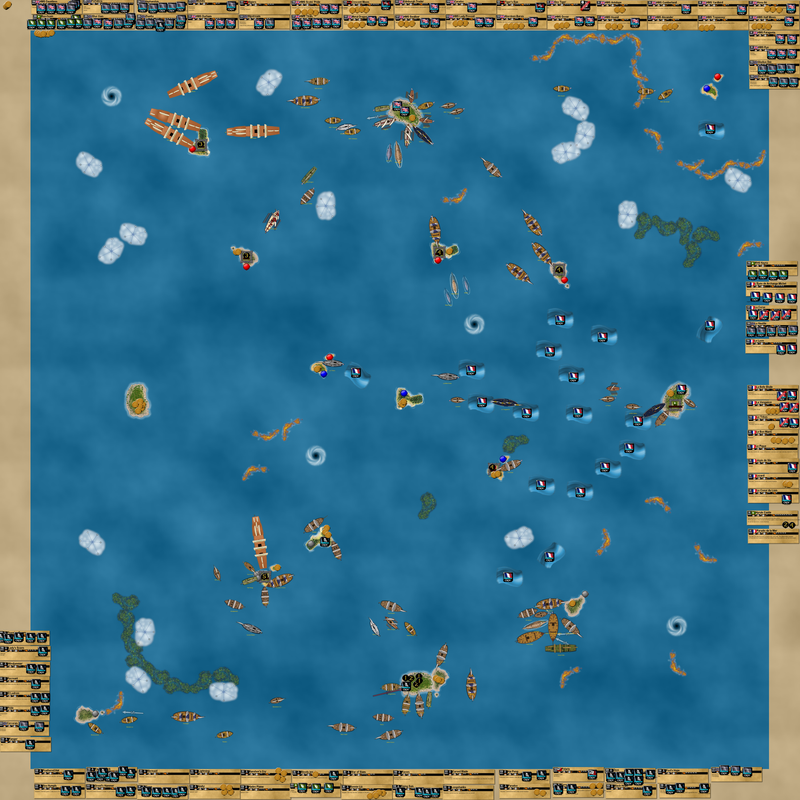
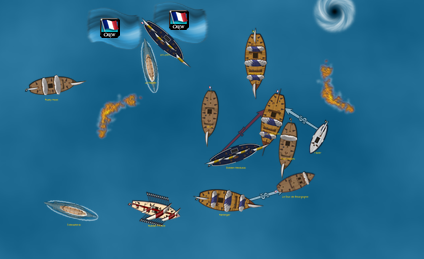
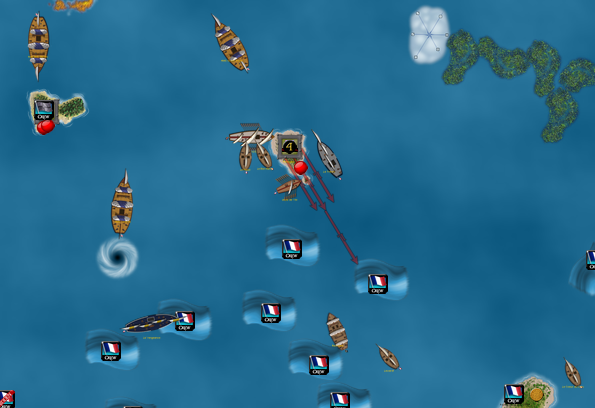
Chaos! The Guichuan raids the home island! Grim steals everything! Bianco’s Haulers is also flipped, and I realized something. Originally I planned to dock, steal as much gold as possible, and then sink the fort all in one turn. However, with the Haulers available, I could purposely stay docked while not sinking the fort, meaning the Guichuan couldn’t be shot at until I sailed away or sank the fort. It worked to perfection – the Guichuan damaged the fort on the approach and while docking, getting a lot of help from the Junk keyword. Once the loot was loaded, it was the Oxford’s turn. She blasted the final cannons off the fort while simultaneously firing at the still-dangerous San Cristobal. However, I was just getting started. The native canoes round earthed to the east, and the full extent of my plan became clear – the canoes could use their transfer ability to grab gold from the Guichuan and then scatter! This was a variation on my Golden Cranes idea.

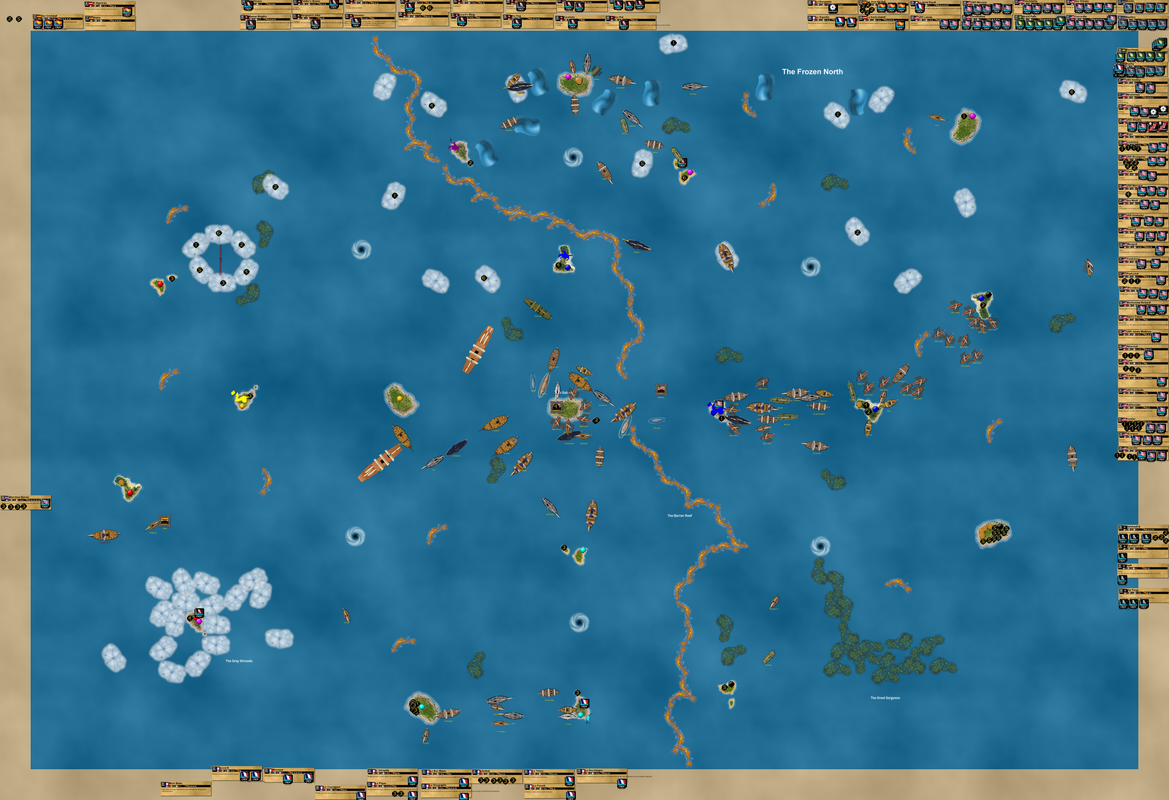
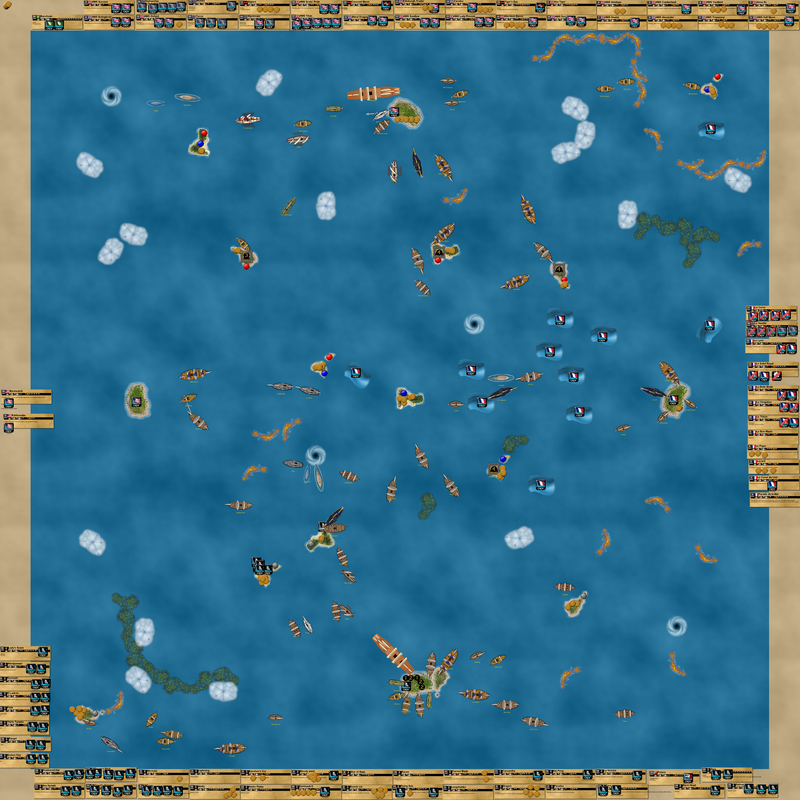
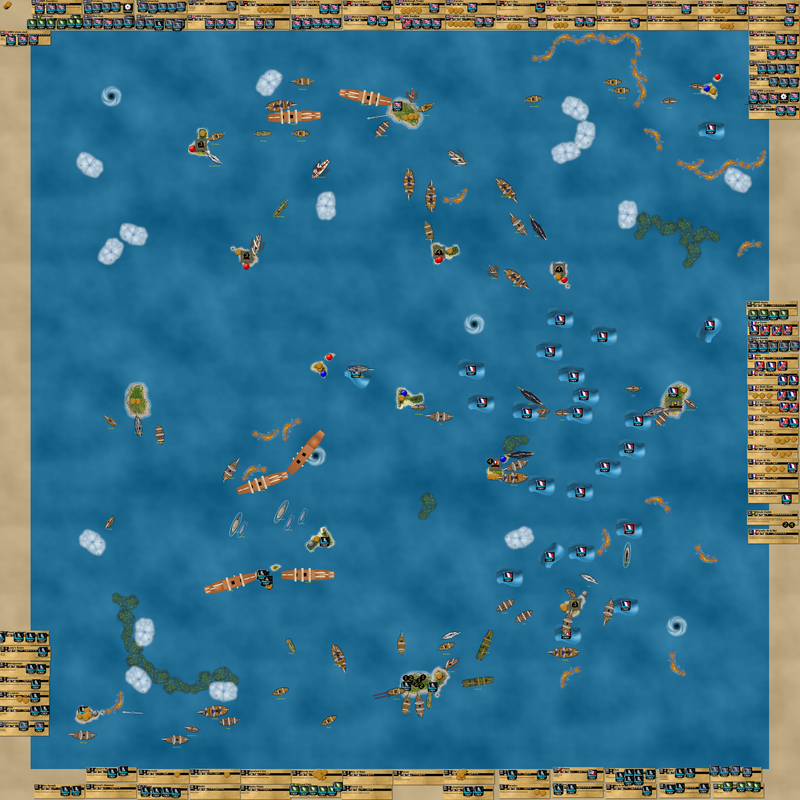
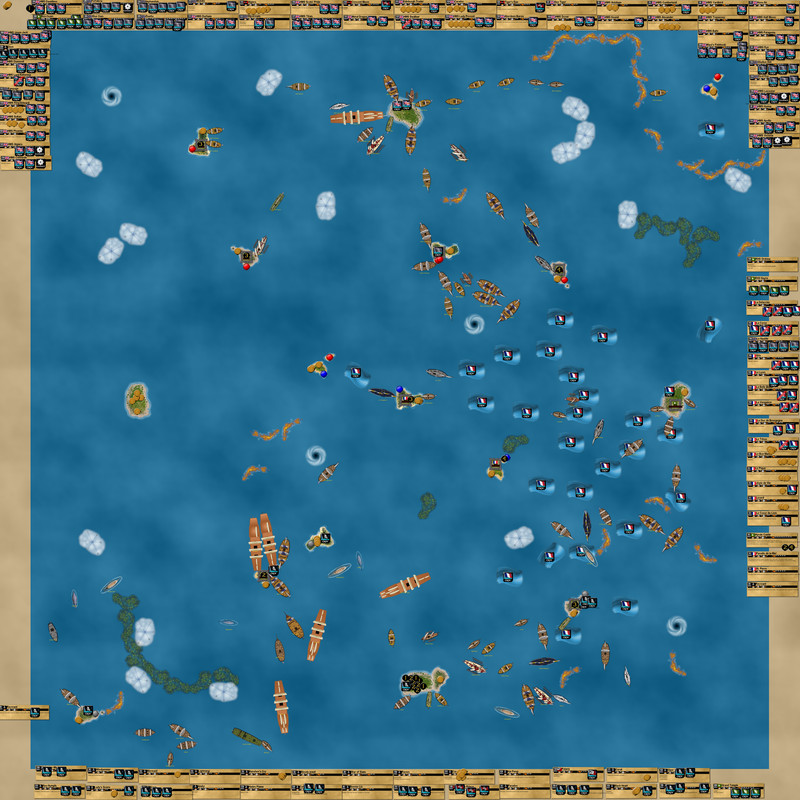
With the Joya in the fog, the Black Coral turned her attention to a new opponent: the Frontier. She hit once, but it was a good example of the Black Coral being my ultimate utility ship in this fleet. To the north, the Constitution began sailing back to my home fort, desperate to get there before the Zeus did. The Mercure stayed in the northeast, and nearly sunk the Baochuan (which in hindsight is what I probably should have done haha). What about the Celtic Fury? Well, I knew I’d need her for home defense, so I sent her through a whirlpool to intercept the Zeus. With an SAT from Roimata she was able to dismast the Morning Star after teleporting! All in all, this turn saw me dismast one ship, damage two others, and steal 6 coins all at once!

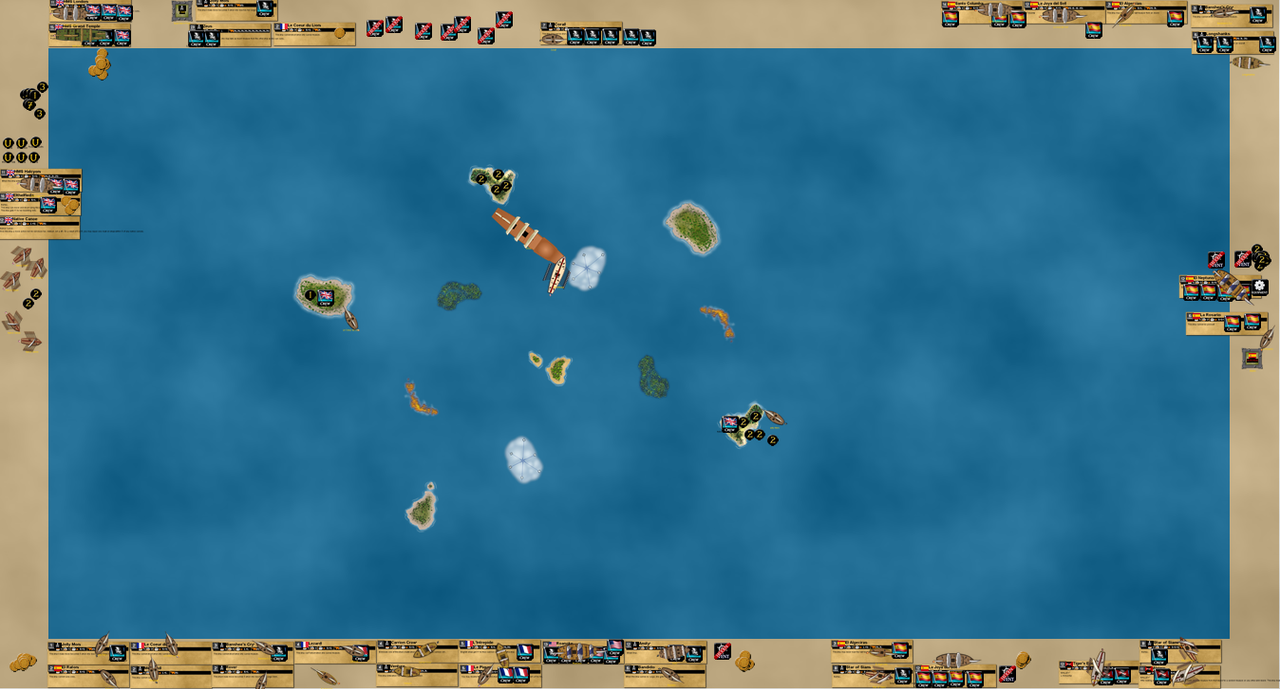
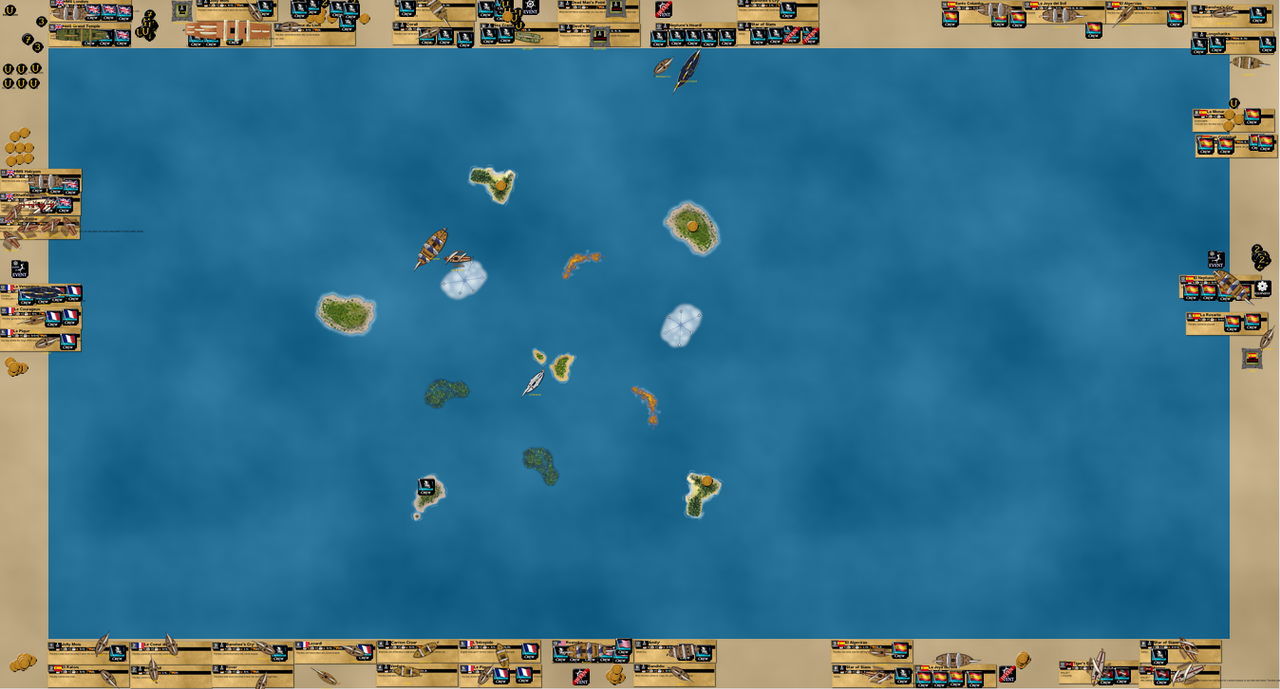
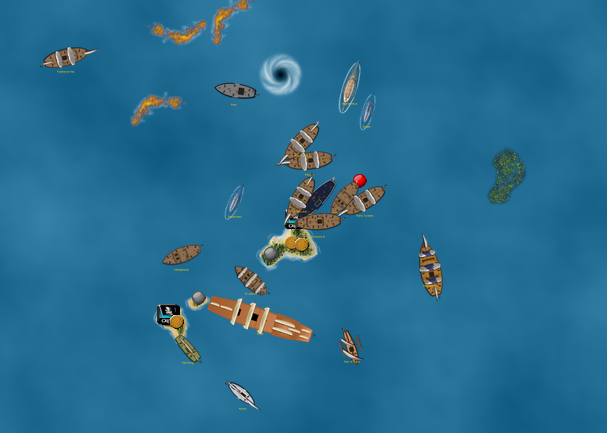
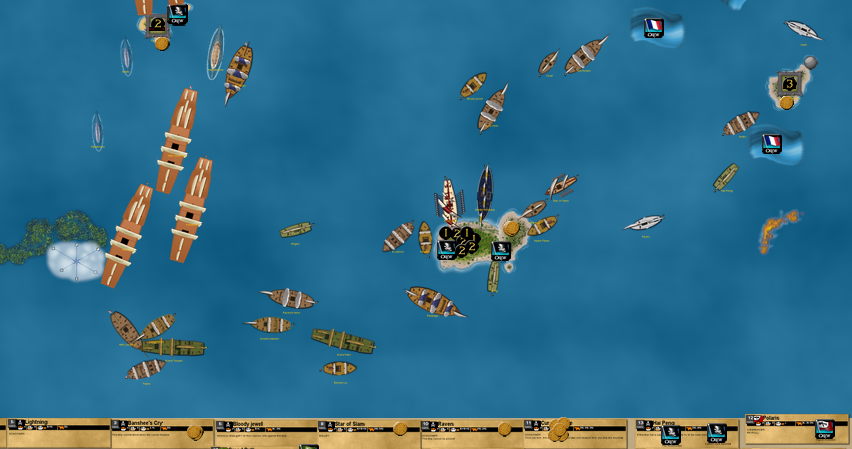
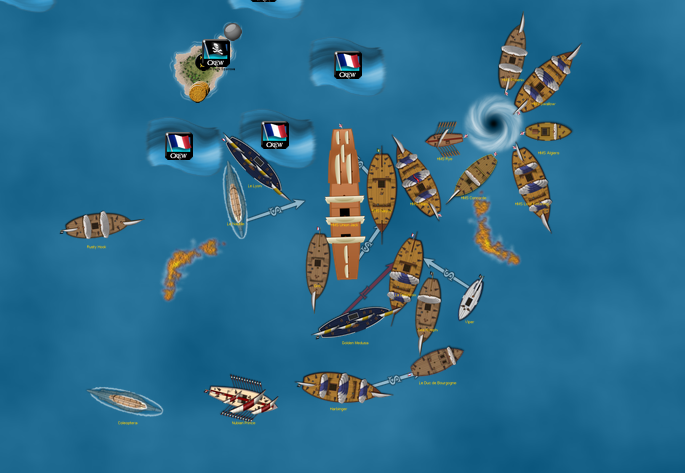
Knowing full well that Parley would be cancelled, the Celtic Fury had to make a stand – she was only in the fleet to be a distraction anyway. She positioned herself right between the oncoming ships and her home fort. The Constitution was going to be late, similar to the earlier battle. The Joya emerged from the fog to kill the Wolves, but was set aflame by the Mercure. The grand plan was nearly complete! The Guichuan began sailing for home with her stolen gold, while the Oxford easily sank the remains of Xerecs’ home fort, leaving the Black Coral utility player to deal with the weakened San Cristobal (making the SC the 3rd ship the Black Coral engaged during this game).

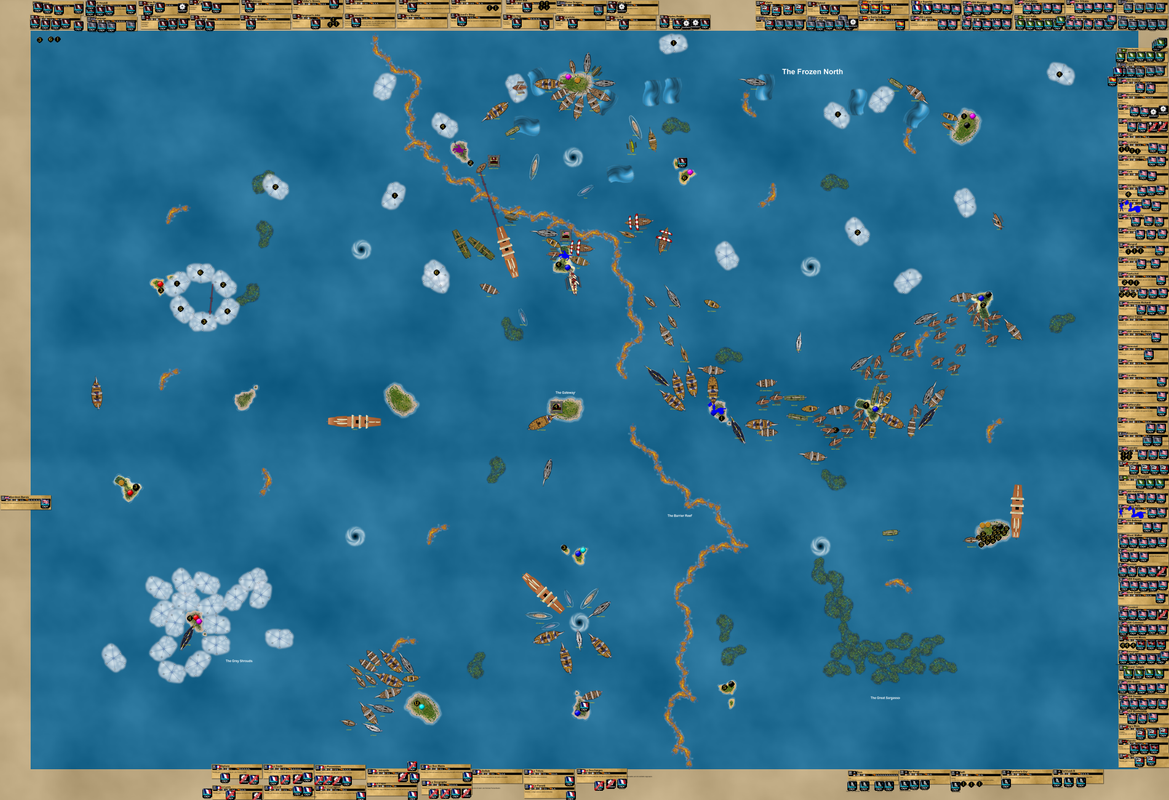
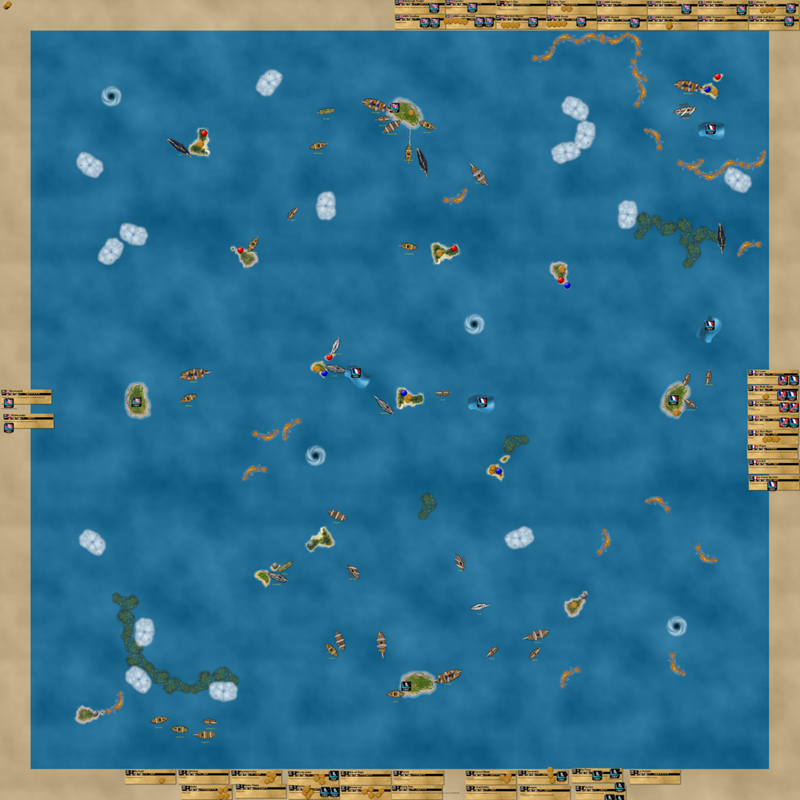
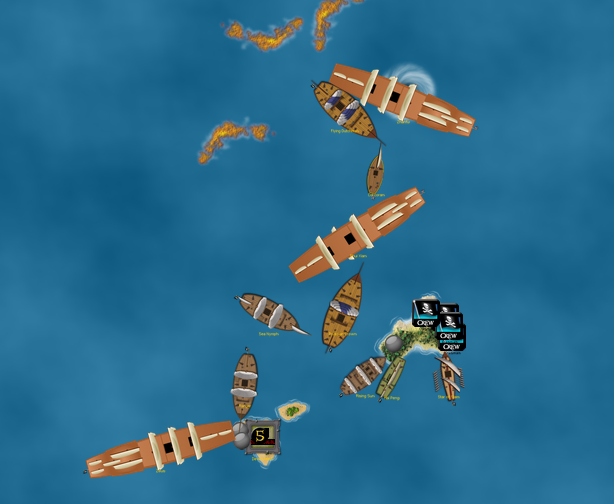
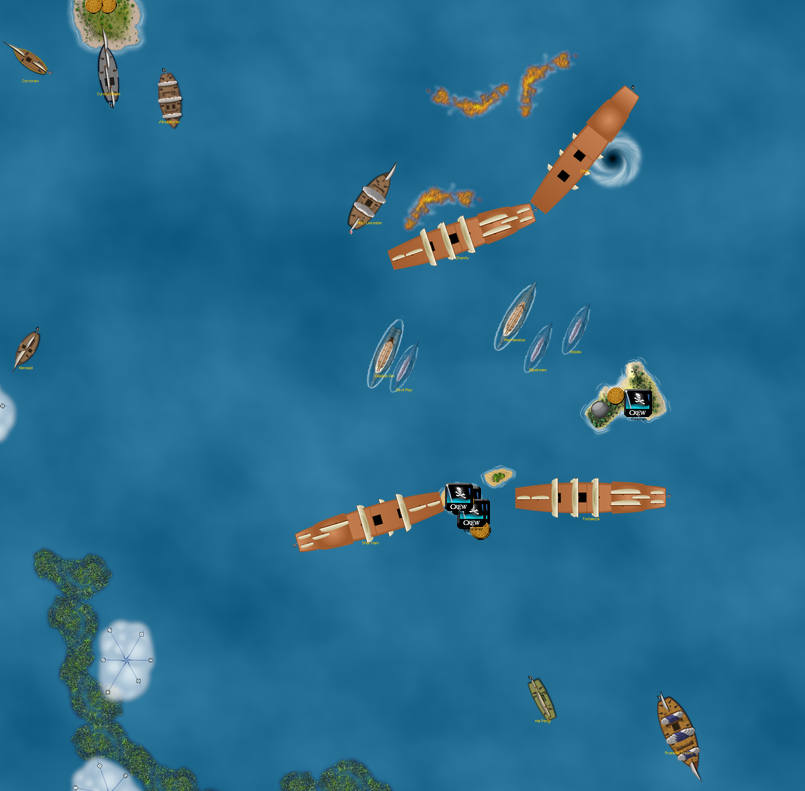
Here the Zeus has blasted the Celtic Fury to pieces! 8 shots hit their mark, and a second 10 master was ruined.

For trivia reasons I wanted to do what could have been the first inter-world (?) gold transfer: using the canoe’s ability to transfer a coin from a canoe in the west to a canoe in the east. It didn’t quite happen, partly because I was in a rush to get home. Predictably, the Celtic Fury hit with a regular cannon but not with her stinkpot specialist, which could have given the Zeus some big problems if it had hit. In other news, the Black Coral missed the San Cristobal all three times while the Mercure captured the Baochuan! Knowing how unlikely it would be to tow her home and use her, I was mostly after the Baochuan for Zheng He’s admiral ability, which would give me two along with the Headhunter. At this point I wasn’t worried about the gold remaining on islands – I knew I had enough to win between the gold in my fort and the gold coming home from the Guichuan’s heist. The last thing I wanted was the game to end since the islands had disappeared, because I knew I had an inferior gold fleet.

The Zeus sinks the Celtic Fury! The showdown is at hand! (and the Black Coral finally dismasts the San Cristobal heh)

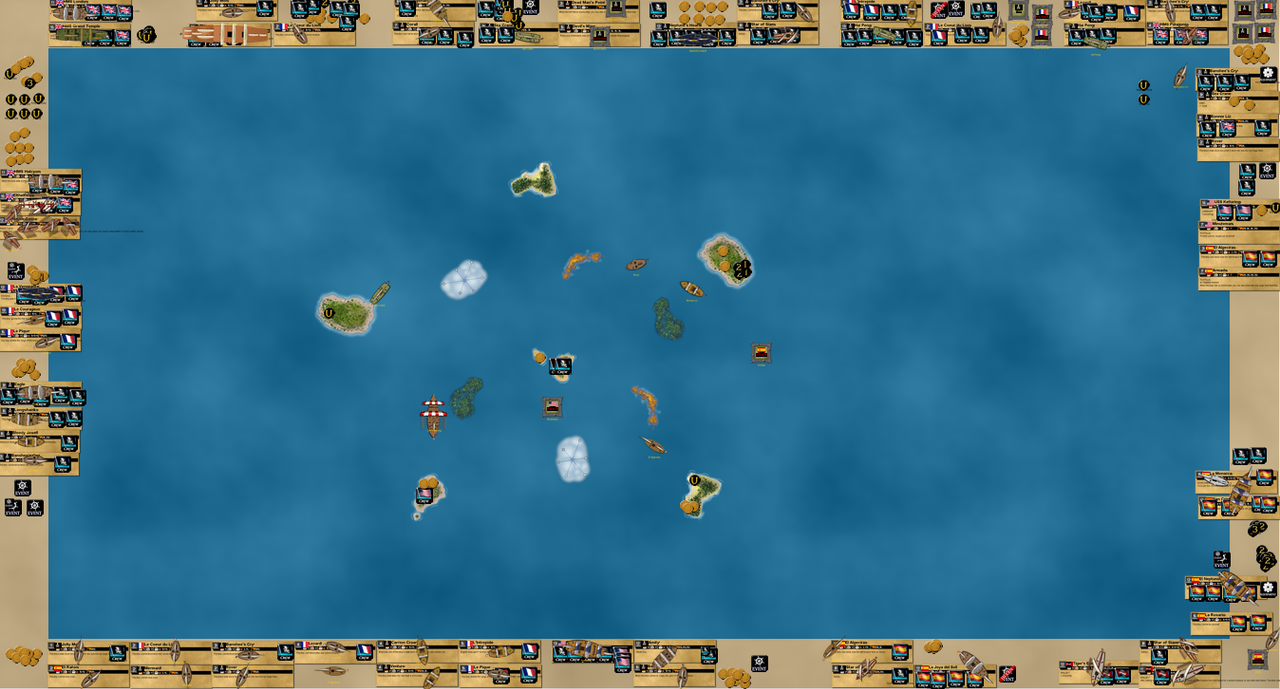
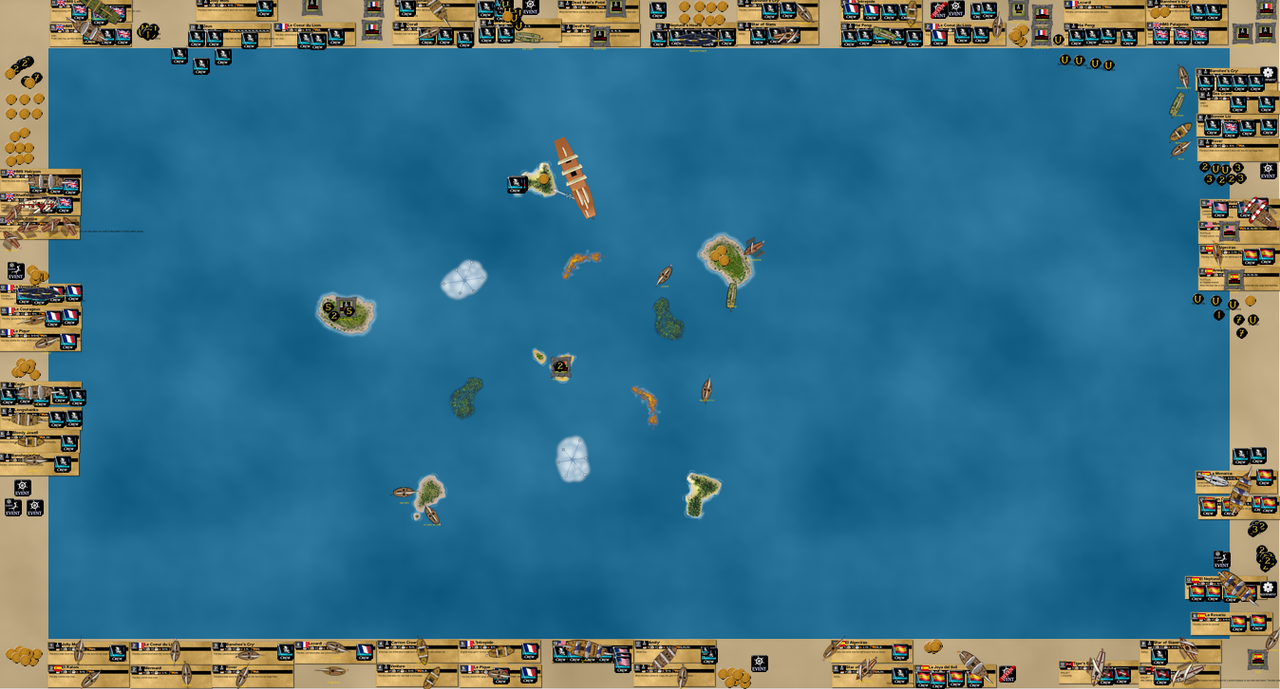
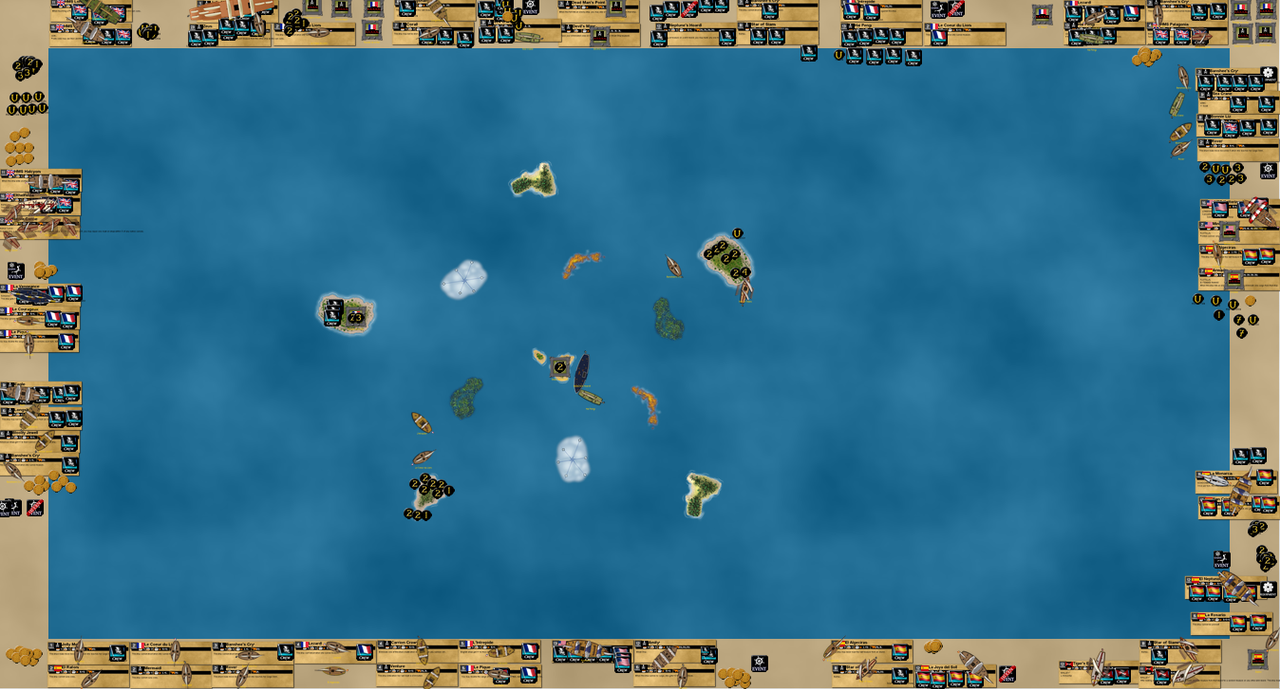
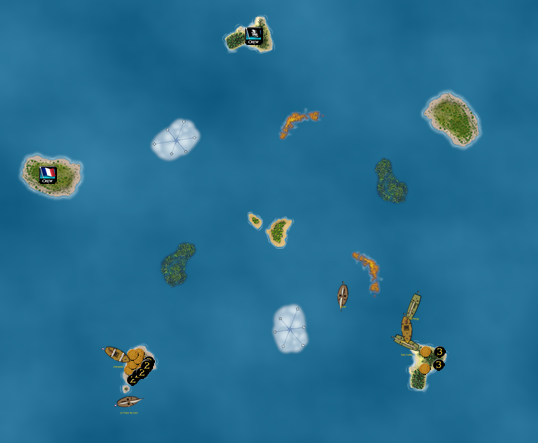
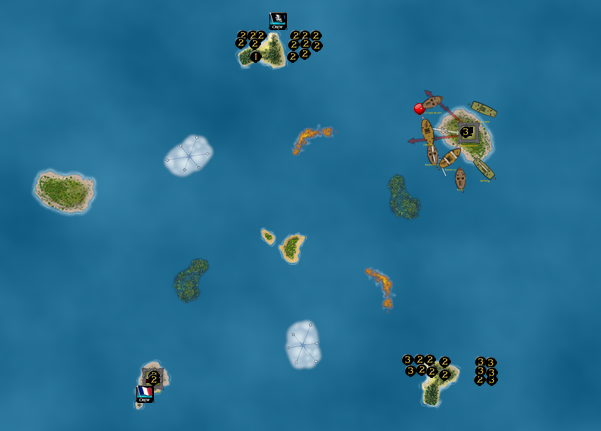
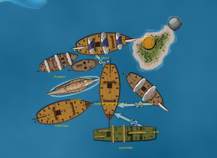
The Zeus reaches my fort and blasts away! She hits 6 times in 9 shots – if all 9 had hit, my fort would have sunk. Alas, the odds were not in Xerecs’ favor at this point. I returned fire with my fort, the Constitution, and the Guichuan, who was just able to get some guns in range. The ending was rather bizarre, with two 10 masters fighting with a floating fort in between them. The canoes had just docked home some gold from the heist. To add to the strange finale, Lord Mycron’s ship (the Patagonia) was actually in the Guichuan’s way of getting more cannons in range, but the Patagonia couldn’t move out of the way since that would mean Mycron wouldn’t give his action to the Guichuan and the Guichuan wouldn’t have any guns in range in the first place!! The Mercure abandoned the Baochuan in the fog (I just wanted her for Zheng He’s ability, which I never rolled a 6 with haha), going after the Frontier. The Black Coral sank the San Cristobal.

I docked home my stolen loot and sank the Zeus and Frontier to end the game! To make things even more strange, the gold I originally had in my home fort was gone! The Guichuan’s heist totaled 22 gold, but in reality the final score was about 35-0. I had won the game in a complete shutout despite the big build total. I only lost one ship, the Celtic Fury (plus one canoe haha). I had captured or destroyed Xerecs’ entire fleet.  I was also happy because I was intimidated when I saw the enemy fleet – the Zeus and San Cristobal (by some people’s accounts the 2 best gunships in the game), along with the Baochuan and some of the best gold runners in the game. However, with some negative UT’s, effective crew placement, and brilliantly executed gimmick strategy, I was able to pull off the victory!

I have to admit, this is one of the best performances I’ve ever had. There aren’t many games that go this well – almost my entire gameplan worked to a T. It was truly a perfect game.

VASSAL Campaign Game 4

VASSAL Campaign Game 4

With considerable interest from various players, the fourth grand adventure on VASSAL has been planned!!

VASSAL Campaign Game 4 features 3 players and a whopping 12 factions, with each player controlling 4 factions completely independently. (as if they were separate players)

Without further ado, here are the participants in the order of play:

Xerecs
1. Spanish
2. Jade Rebellion
3. The Conglomerate/The Alliance
4. English

A7XfanBen
5. Pirates
6. Cursed
7. Vikings
8. Barbary Corsairs

PirateAJ14
9. Dutch
10. Americans
11. Mercenaries
12. French

A few notes on the factions:
-“The Conglomerate” is made up of ANY and ALL custom game pieces not part of the main 11 factions (Wizkids’ 10 + the Dutch). Any customs from other factions are automatically part of this permanent alliance that functions as a single faction.  Any new factions that are made are automatically part of The Conglomerate.  Crew within factions that comprise the Conglomerate can use their abilities on each other’s ships. (ex: Swedish crew can use their abilities on Ionic ships, and vice versa/etc.)  Here is a non-exhaustive list of all the factions included in the Conglomerate: Ionics, Nexus Alliance, Hyrule, Denmark, Germany, Privateer, Russian, Swedish, Portuguese, Irish, Japanese, Outcast, Prussian, Atlantean, Neutral
-The Mercenary keyword will be ignored in full for the Mercenary faction. (including as part of the Ex-Patriot keyword)

Now for the rules!

Modified version of cannonfury’s Economy Edition rules

Errata

Duplicates Rule – There cannot be duplicate Wizkids ships in play until a faction has purchased every single standard ship (including flavor duplicates (such as all three versions of the 5 master HMS Apollo, for example, but not including customs)) available to them. Once a faction has every official Wizkids ship in its fleet in play, that faction can launch duplicates of those official Wizkids ships. Only one duplicate ship is allowed, but if a faction has two of every ship in play, they can begin a third set of duplicates. However, once a ship is sunk, it MUST be replaced before duplicates can be launched again. (This is also known as the “complete the fleet” rule)  Unreleased game pieces designed by Wizkids are not included in the Duplicates Rule.  Wizkids faction fleets cannot have duplicate custom ships.  Since the Dutch and Conglomerate factions have no official Wizkids ships, their entire fleets of custom ships are subject to the Duplicates Rule.  For example, if ALL custom Dutch ships are in play at once, they can begin a second set of each custom Dutch ship.

-Named crew that have multiple versions can be used as long as it’s not at the same time by the same fleet (one has to be eliminated or removed from the game before hiring a different version). Generic crew may be used as many times as you can afford.

-Unique Treasure may be used, but note that due to the nature of some rule changes, they may no longer function as intended.  There may be gold replenishments at some point in the game.

-Resources are represented through tokens; players may choose whatever kind of tokens they wish as long as all players agree. Ships can carry any number of any resource types up to their cargo limit. After a ship rolls for the resource type and loads resources, the ship will load face-up gold coins that correspond to the numbered resource (for example, a ship with lumber on board would have 1’s). When the ship unloads the resources at the home island, the 1’s (in this case) may be unloaded just like treasure.  At any point during a player’s turn (usually at the beginning of the launch phase, after the play phase ends), any resources on the home island can be swapped out for the value of the resource in gold. If the value of lumber was 4, the 1’s are swapped for face-down gold 4’s on the home island (HI), which can then be used to purchase ships and crew during the launch phase at the end of the turn. Players may use UT tokens to represent total gold or resource quantities on their home islands, but should keep in mind that a UT worth 400 gold could be stolen by a home island raider with a single open cargo space.

-Game time is measured in rounds. A round begins with the start of the first player’s turn and ends with the finish of the last player’s turn.

Starting Conditions

-Players begin with 30 points to design a pure nationality fleet.

-There are 48 total islands, all of which will be wild at the start of play. All islands currently have unique treasures on them, but most will produce resources.

-Factions will be sailing in from the edges of the map. The first island a faction explores immediately becomes that faction’s home island.

-Round earth rules are in effect.

-Map details are below.

Players take turns and move their ships, using normal Pirates CSG rules.

Victory Conditions

-Last Fleet Afloat: the final fleet remaining in the game will be the winning faction.

-If we cannot play until only one fleet remains, the fleet with the most total points in play will be the winner.
Players may surrender if they feel that they no longer have a chance at fulfilling any of these victory conditions.

Action Modifications

Explore Actions: An explore action at a wild island takes a turn, as usual. When a wild island is explored for the first time, the player that performed the action rolls a d6—match the result to the number of the corresponding resource. That island now produces that resource for all players, and you may load tokens of that resource onto this ship up to its cargo limit; each token fills one cargo space. Abilities that remove exploration markers may reset the resource of an island.

Repair Actions: Repair actions occur normally, with the exception that a ship carrying both lumber and textiles may repair a mast at a wild island, per the shipwright rules; these resources are used in the process.

Combat Actions: Combat actions occur normally, although boarding actions have received updates and new actions, blockading and razing, have been created.

Resources

Resources are the main source of gold production in the game, but must first be converted for a variable price at the home island into treasure coins, which can then be used to purchase ships, crew, equipment, etc.  Resources count as cargo, and abilities that affect treasure coins also affect resources (i.e. each of these coins is worth +1 gold…turns to each of these resources is worth +1 of whichever resource is in question).

The value of a resource is determined by a die roll. At the beginning of the first player’s turn, a d6 and a d20 are rolled. The d6 roll determines the values of all resources (refer to the quick reference for exact values) while the d20 roll determines the number of turns this value will hold.
Lumber: (1) Fundamental for ship and settlement building, lumber is the basic building block of any naval civilization.
Textiles: (2) Needed for sails and clothing, textiles are a key part of the trading industry.
Metals: (3) Stronger than wood, metals allow for the construction of sturdier ships and deadlier weapons—as well as providing the means for paying for them.
Food: (4) A food source from the sea, fish are bountiful and whales provide a large source of oil.
Spices: (5) Useful for preserving and improving the taste of foods, spices were highly sought after
Luxuries: (6) The rare items crews find on their journeys through the world’s seas—from the beautiful to the wild to the truly cryptic.

Die Roll……1……2…….3…….4…….5…….6
Lumber……1……6…….5…….4…….3…….2
Textiles……2……1…….6…….5…….4…….3
Metals……..3……2…….1…….6…….5…….4
Food………..4……3…….2…….1…….6…….5
Spices……..5……4…….3…….2…….1…….6
Luxuries…..6……5…….4…….3…….2…….1

cannonfury wrote:
So let’s say hypothetically that I dock at an island and I roll a 1. That means that island now produces lumber. There are the two main die, a d6 and a d20, that control that market in the game. If I roll a 3 on the d6 and a 14 on the d20, you go to the chart value of 3 for die roll and read down. For the next 14 turns, lumber is worth 5 gold, textiles 6, metals 1, and so on.

-If an island produces a resource, it has that resource face up on it.  If other resources are present on the island, they are placed face up next to the island or on the shoreline.

-Players may agree to change the resource system. Instead of simply rolling a d6 for values and two d6 for duration, other options may be added for more randomness.
Example: A round of turns begins with the d6 roll. A 1 is rolled (on a 2-6 the resources stay the same, until a 1 is rolled). Since a 1 was rolled, roll again. If the second roll is a 2-6 (anything other than a 1), the resources only change value for that turn. On the next turn, they revert back to whatever they were on the previous round, or a different system is once again agreed upon by all players (such as starting over with regular EE rolls, or using the system described in this example). However, if the second roll is a 1, the current EE rolls are disregarded, and new rolls are made (both for values and duration).

Changing the rules for how resources change could really make things interesting, so we may also implement additional/different economy/resource rules as we see fit.

Island Upgrades

Islands: An island upgrade is bought at the home island; a token representing that upgrade can be loaded onto any ship, and fills one cargo space. That ship must return to the previously explored island and may unload the token as a free action. On the next turn, the island is upgraded. If a ship is sunk on transit, the token is eliminated. Upgrades must happen sequentially – an island can be explored in one turn, upgraded to a town on the following turn, and upgraded to a colony on the third turn. This cannot be accomplished faster, as there is no skipping levels. Ex: For each island, that island can only be upgraded once per turn.

-Encampment: Automatically created after an explore action. Abilities that remove explored island markers eliminate encampments. Encampments simply mark that this island has been explored by the player; enemy encampments may exist on the same island.

-Fort: An encampment may be upgraded to a fort by bringing the fort’s gold cost to an island (no teleporting the gold and fort like in a regular game). A fort generates no resources OR gold. Crew may be hired at this island. Resources can be unloaded at a fort, but they cannot be converted. Forts may be upgraded by paying 40 gold for a fort upgrade; a Shipyard token (in the module) must be taken to the fort to upgrade it. Once upgraded, forts can be used to buy ships, crew, and equipment using gold stored in the fort or gold from your home island.  No more than 2 of the same custom fort can be in play at once.

-Lighthouse: An island can have a lighthouse built on it by bringing 3 times the lighthouse’s regular cost to the wild island, similar to how forts are built.  Other island upgrades can be built on the same island a lighthouse is on, as if the lighthouse wasn’t there – the lighthouse still functions as normal.  The island a lighthouse is on still produces resources or gold normally unless another island upgrade supersedes it.  No more than 2 of the same custom lighthouse can be in play at once.  Lighthouses will be represented by the tavern structure within the module.

-Town: An encampment may be upgraded to a town by paying 10 gold for the town upgrade token and bringing it to the island. Abilities that remove explore actions do not eliminate towns. Having a town on an island gives control of that island to a player; other players may no longer take resources from that island. Towns can be razed by enemy ships, they have no natural defenses and after three hits are considered destroyed. A town may also be captured through a boarding party. Once destroyed, the island becomes unexplored in regards to all players, and its resource value may be reset. Towns are represented by the associated faction’s infantry unit in the module.

-Colony: A town may be upgraded to a colony. Players have a choice between either a trading or a military port; an island can only accommodate one.
1) Trading Port: 25 gold. Allows a player to trade any two resources for one other resource, of any type. An opposing player’s ship may also dock at your trading port to trade commodities, but they must pay one resource to the owner in addition to the two resources being traded. Ships with the Parley keyword do not have to pay this fee. A trading port can be blockaded by any ship. Trading ports are represented by cavalry units.
2) Military Port: 50 gold. Allows a player to repair ships docked at this island as if it were a home island. Ships, crew, and equipment may be purchased at a military port using gold from your home island. A military port cannot hold gold like an ordinary fort. A military port cannot be blockaded, and acts as an 8 flag fort with 3S cannons. Military ports are represented by artillery units.

Crew

-Explorer: Explorer crew has been updated. If a ship performs an explore action with an explorer on board, that ship may reroll for the initial resource value. Hoists also benefit from this ability.

-No 0LR +5 crew

-0LR reroller crew will cost 3 points so they’re not free; they will function as basic reroll crew without the Limit and Ransom keywords (no links either)

Updated/New Mechanics

-Boarding: When a ship wins a boarding party, the winner decides whether they will take gold/resources or eliminate crew. The winner chooses which gold/resources to take, but the loser chooses which crew is eliminated. After a successful boarding party, the winning ship may, in addition to taking gold or killing crew, take any resources of any type up to their available cargo space. To initiate a boarding party against a town, an enemy ship must dock at the island or use a boarding ability that allows for boarding without touching. A town can be considered to have 2 masts in a boarding party, and can be captured by the winning ship. If a ship loses a boarding roll against a town, the attacking ship must remove a mast and move +S away.

-Blockading: A trading port can be blockaded by a ship. If a ship docks at a trading port and declares hostilities, that port is considered to be blockaded; all trading ceases and the player loses all bonuses, including the production of commodities. The blockading player gains the resource bonuses, and can choose to take resources up to their cargo limit or remove them from the game.

-Razing: A colony can be razed after a successful boarding party, it is considered to be a 4 mast ship. If the boarding ship wins, the colony is removed from the game, and the boarding ship receives all the resources available, up to that ship’s cargo limit. If the colony wins, the opposing player takes that ship, but all crew on board are removed from the game.

-Raiding: A ship with the home-island raiding ability can dock at an enemy home island and take as many resources as she can carry, in addition to any gold. If able, she must leave on her next turn.

-Storm terrain: Storms are a custom terrain piece. At the end of a round of turns, a d6 is rolled. Match the result to the number printed on any Storms in play. Roll the d6 again. Match the result to the number printed around the edge of the Storm and move the Storm L in a straight line in that direction. If two or more Storms collide or move into contact with one another, they merge and move as one Storm. If any part of a game piece touches a Storm, it is immediately placed inside of it. Roll a d6, the result is the number of masts, segments, flags or damage points removed from the game piece. If the result is more than the number of remaining masts, segments, flags or damage points remaining, the game piece is eliminated from the game. If a storm spends more than three rounds over a body of land, it is removed from the game. Storms can move over other terrain types and affect ships that are in/on that terrain.

House Rules

-All game pieces require two hits to eliminate one mast, flag, or segment.  These hits do not need to come from the same shoot action or player, and do not need to occur on the same turn.  Partial hits that do not eliminate a mast can be repaired with a repair action, but a fully eliminated mast only requires one repair action as normal. Any damage done due to fire needs to be done on the second hit of a mast, meaning you cannot just use fire hits to ignore the 2 hits per mast rule. Stinkpots and Chainshots are exempt from the 2 hits per mast rule (each hit of their type takes effect since they don’t eliminate masts). Flotillas must be hit 4 times overall in order to eliminate their flag (none of the hits have to come from a specific shoot action). Partial hits on masts are represented by adding a pennant flag to the ship in the module. If a ship has the ability “Two hits from the same shoot action are required to eliminate one of this ship’s masts”, it does benefit from the 2 hits/mast (needing 4 hits to eliminate 1 mast), but the hits do not need to come from the same shoot action. To represent such a ship that has 2 or 3 hits on it already, we can edit the title of the ship in the module to include “2 HITS”/etc for maximum clarity.
-Game pieces being towed behind ships do not have to be docked automatically at every island the towing ship docks at.
-Ships cannot do damage by ramming, with the exception of submarines which can do ram damage both surfaced and submerged. Ability “Ramming cannot eliminate this ship’s masts” is changed to “This ship gets +1 to her boarding rolls.”
-Ships docked at their home islands can be shot at.
-Ships can load face-down treasure and resources from their home island with an explore action. Face-up Unique Treasure can be loaded and unloaded to and from islands as part of the free transfer rules.
-If both players agree to it, opposing ships can touch without ramming, boarding or pinning. While touching, they can be given an explore action to transfer cargo freely between them.
-Home island raiders can look at all treasure on an opponent’s home island and choose which treasure to take, rather than having it be random.
-Forts can be given repair actions if they have a shipwright in them. They cannot repair and shoot on the same turn unless they have an extra action available.
-Terrain can be placed anywhere on the play area, and each piece can touch any other piece of terrain or islands as long as they are not directly on top of each other.
-Whirlpools take effect on a roll of 1-3 instead of 4-6 (since you almost never want to roll low in this game).
-On negative whirlpool rolls, equipment is now one of the items that players can choose to eliminate. (instead of just mast/crew/treasure if desired)
-Return to Savage Shores and Wizkids Unreleased game pieces are available (found in the Master Spreadsheet)
-Custom game pieces are allowed, but they may be modified or banned in-game (through a vote) if they are overpowered (OP). [Modifications: Streamlined Hull costs 3 points.]
-Trade-In Rule: If a faction brings a captured ship back to their home island, military port, or upgraded fort, after repairing ALL masts on the ship, they can then remove the ship and all her cargo from the game and convert the total points she and her cargo was worth into gold that is then placed on that island.
-Relaunching Rule: Non Big-6 factions (Big 6 being England, France, Spain, Pirate, America, Cursed) can relaunch Wizkids AND custom game pieces without restrictions other than the No-Duplicates rule being applied to their own fleet. (this is to give the minor factions more of a chance if their best pieces are captured and not traded in)
-Changing Home Islands: A faction may choose to move or relocate their home island. To do this a faction must remove ALL items from their current home island location. The island of choice must not have any island upgrades already on it; none of the 5 Archipelago islands can ever be a home island. Once a faction declares their new home island location they must explore it to make it official, at which point the island will not produce resources or gold. Once that happens, their previous home island reverts to an unexplored wild island that can produce resources.
-Celestine’s Charts and the S-Exploring ability will reset the resource values of islands.
-Native Canoes cannot be given an explore action on their first turn in play.
-Only up to 3 copies of each unique set of native canoes can be in play at a time.
-Other house rules may be instituted during the game if players are in favor of them.

Ban List: All Events, Odin’s Revenge, Kharmic Idol, Pirata Codex, Flood UT, Missionaries UT

~~~~~~~~~~

The Ocean

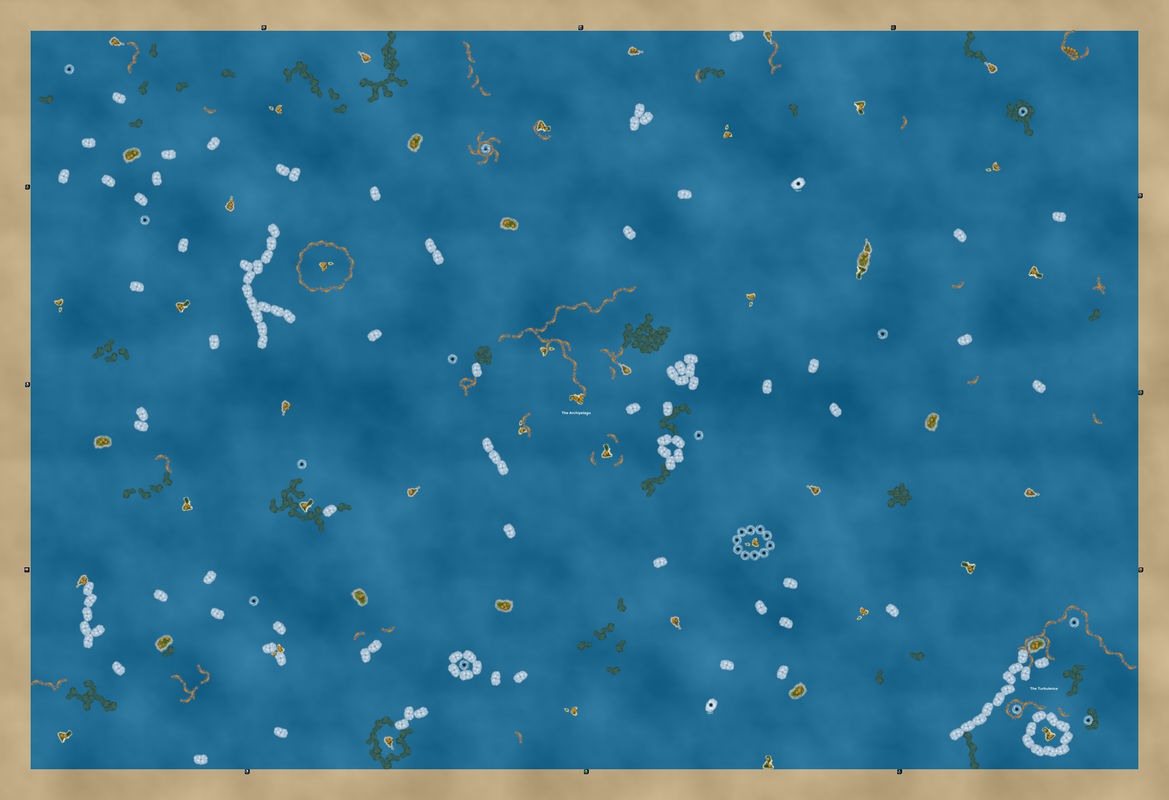
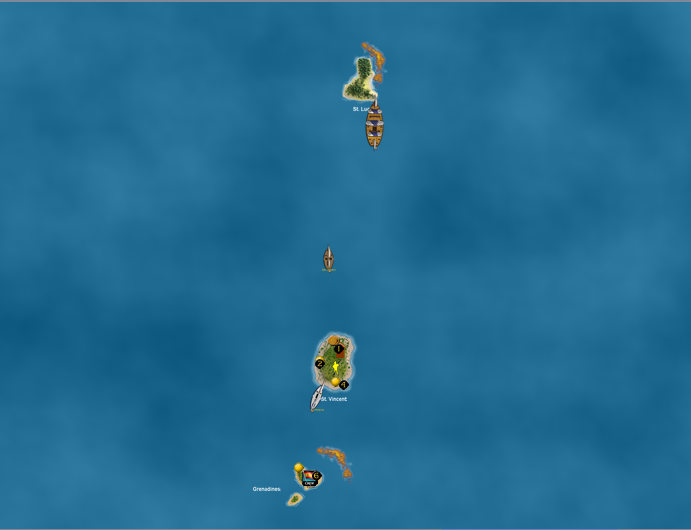
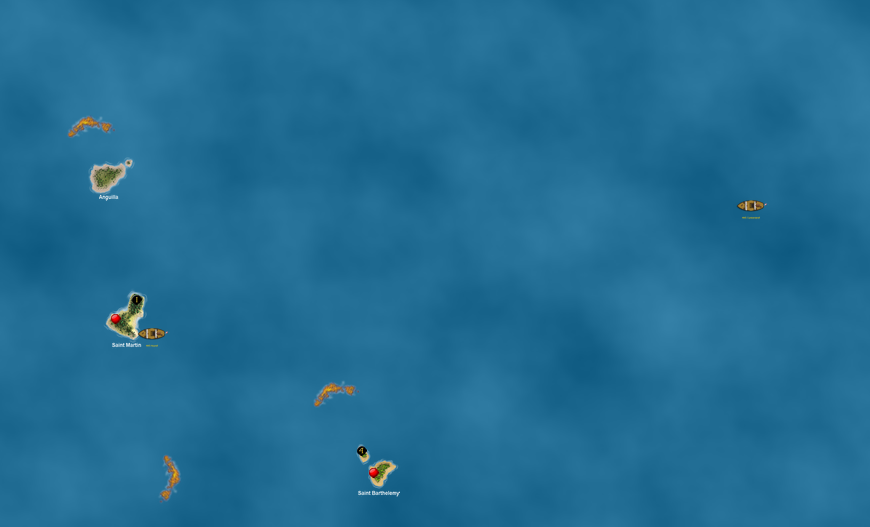
This ocean is my best VASSAL ocean outside of the Caribbean and World game oceans. It is 6 ocean tiles wide by 4 high, twice the dimensions of the oceans of CG1 and CG3 (3×2). In 2025 I made a new VASSAL module specifically for CG4 that greatly expands the border areas outside the ocean, so we should have enough space for deckplates.

Islands: 48
All of these are wild as of now, but eventually there should be 12 home islands and 36 wild islands.

We rolled to determine both player and faction turn order. I then figured out how to place the factions in their starting locations. From my email to all players: It is hard to explain exactly how I went about doing this in text form, so it might be pretty confusing. XD

Each of the 4 sides of the map has 3 factions assigned to it. Each player has a faction assigned to 3 of the 4 sides, starting in player and faction order. I decided to go in reverse turn order, since that’s how we would have picked HI’s if we had done it that way. For example, I started with pirateaj14’s last faction (the Mercenaries) in the east, then one of his in the north, then west. This is because I was doing things backwards so the first player (gingerninja) would end up with the “leftover” spots. My whole thought process was basically one of each player’s factions on one side of the map, going clockwise the whole time. However, since I reversed the order, it makes it more confusing to read about. This gives us a bit of a clockwise motion for the turn order (which I don’t really care about, but with 12 factions it should help a little XD). I didn’t mix up the factions more because there is already a bunch of randomness built in when we rolled for faction order and player order.

From there, I went in reverse faction turn order (with each player’s third faction going last of their three) and rolled to see which of the three locations a faction would end up in on their side of the map. I went clockwise with the numbers (but anticlockwise with the factions!) so (in the north) 1-2=western location, 3-4=center, 5-6=eastern, etc.

Each player has one faction on three consecutive sides of the map, going clockwise and starting in the north with the first player. So gingerninja’s factions go clockwise from North-East-South, xerecs: E-S-W, a7xfanben: S-W-N, pirateaj14: W-N-E. Almost like 3 half-circles per player rotating around the map. The die rolls were to determine which of the 3 spots on a side that a faction would start in.

Now for a “map tour”.  😀

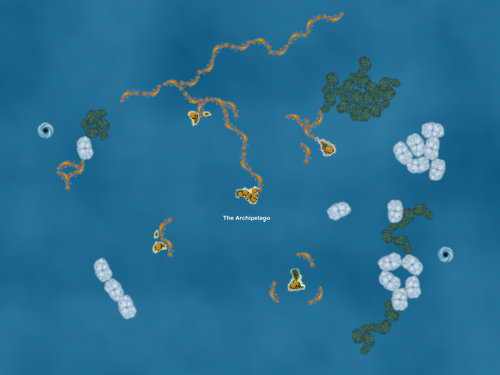
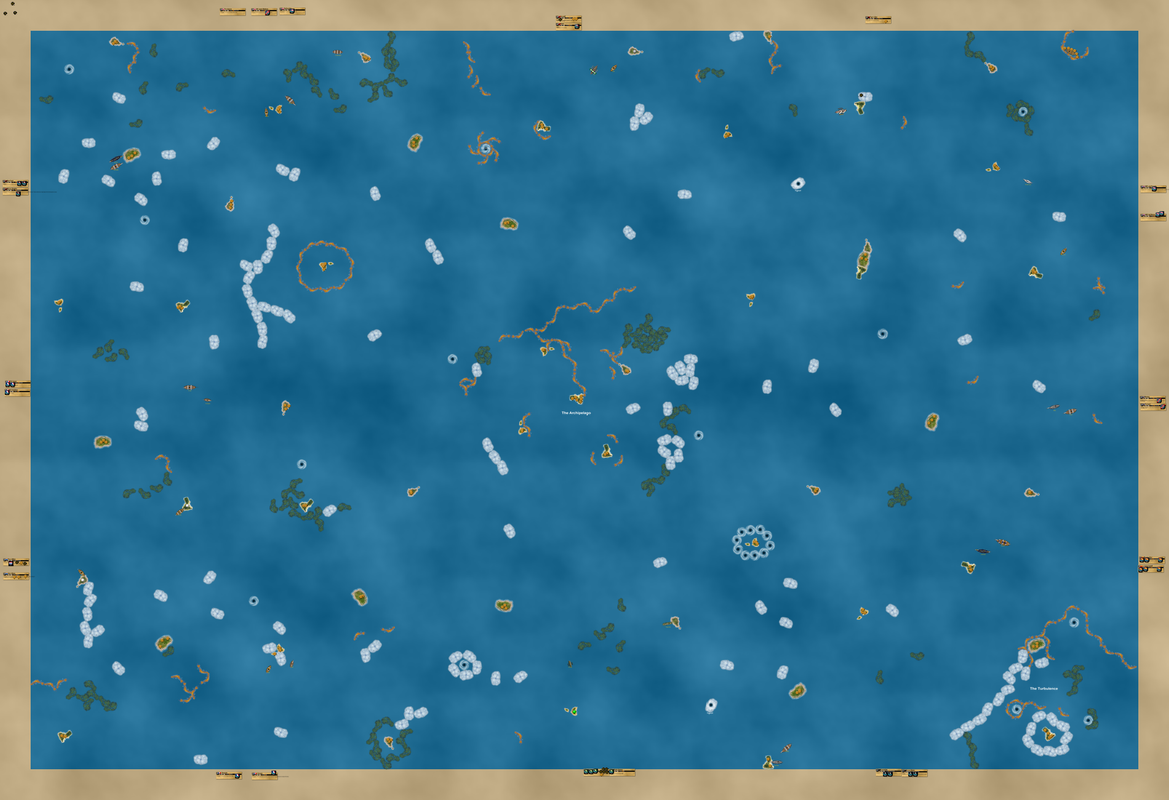
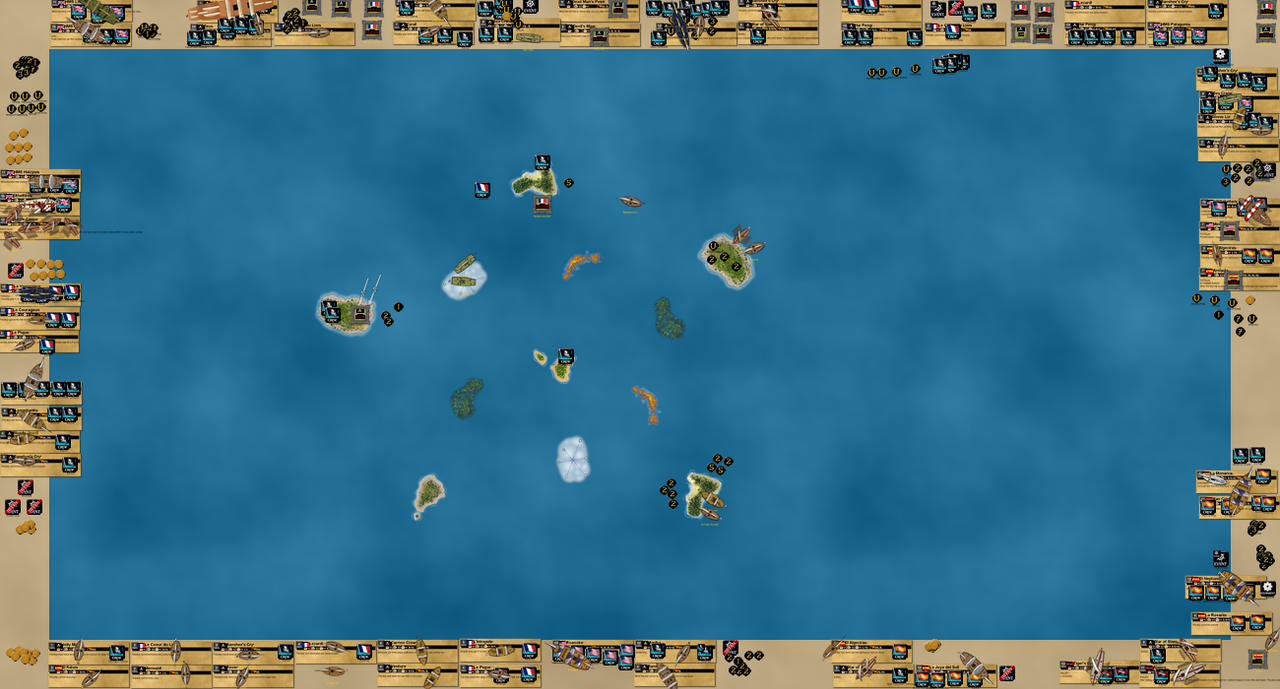
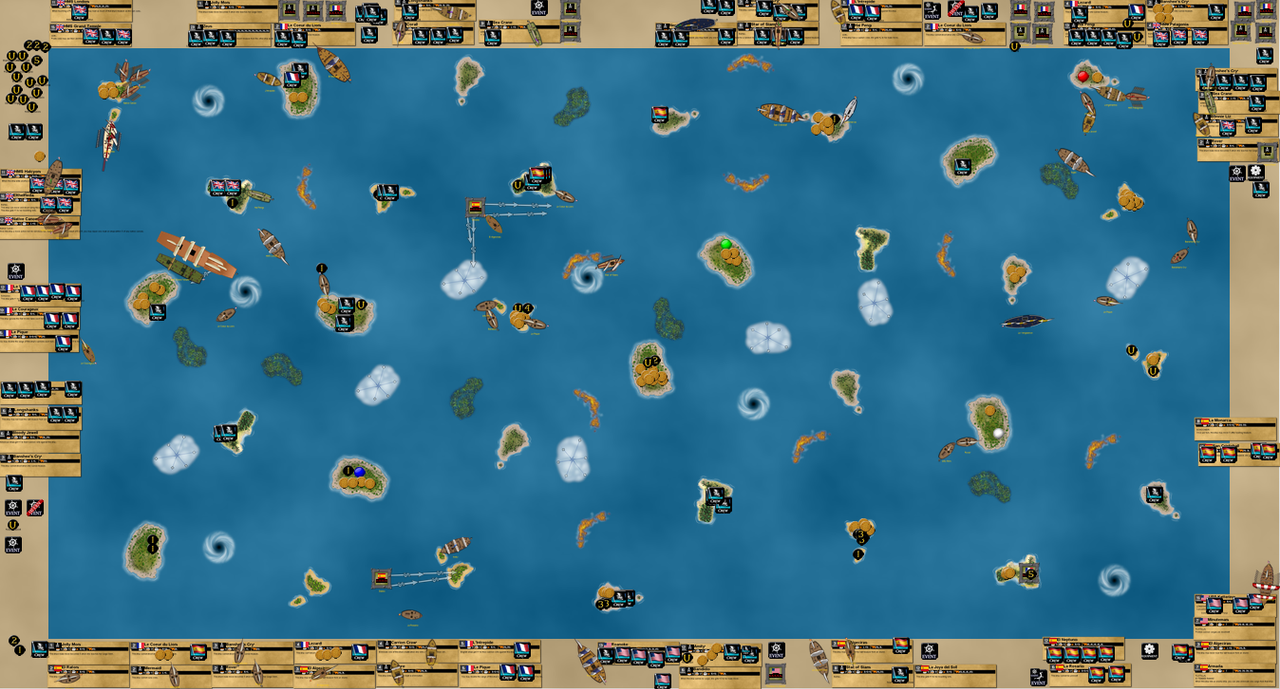
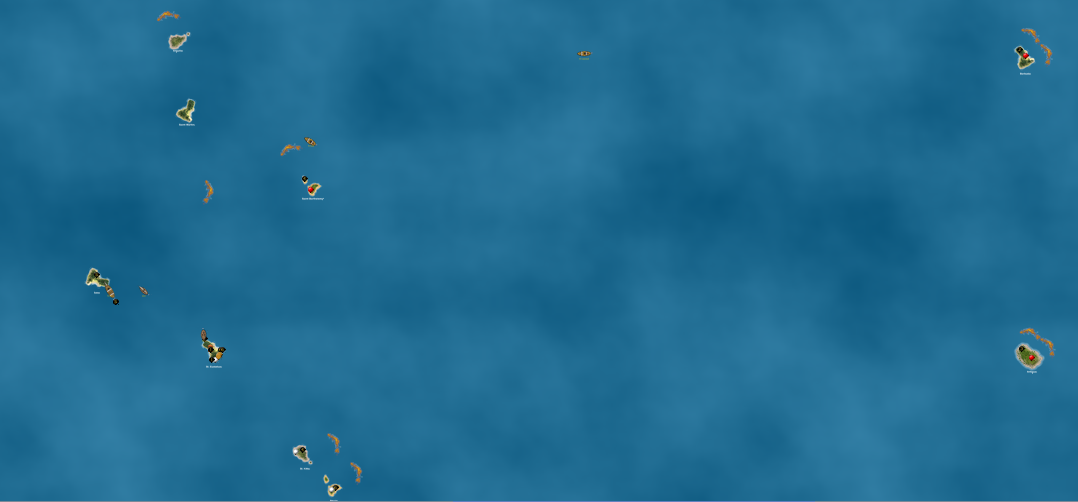
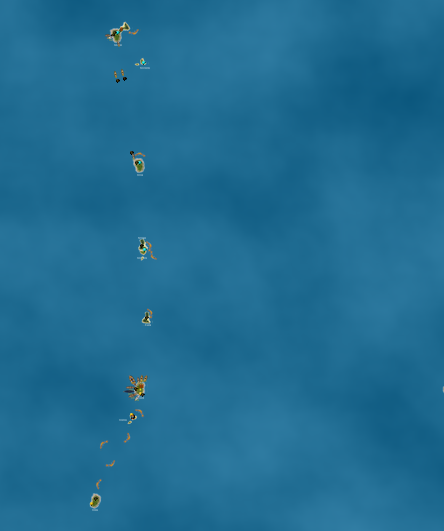
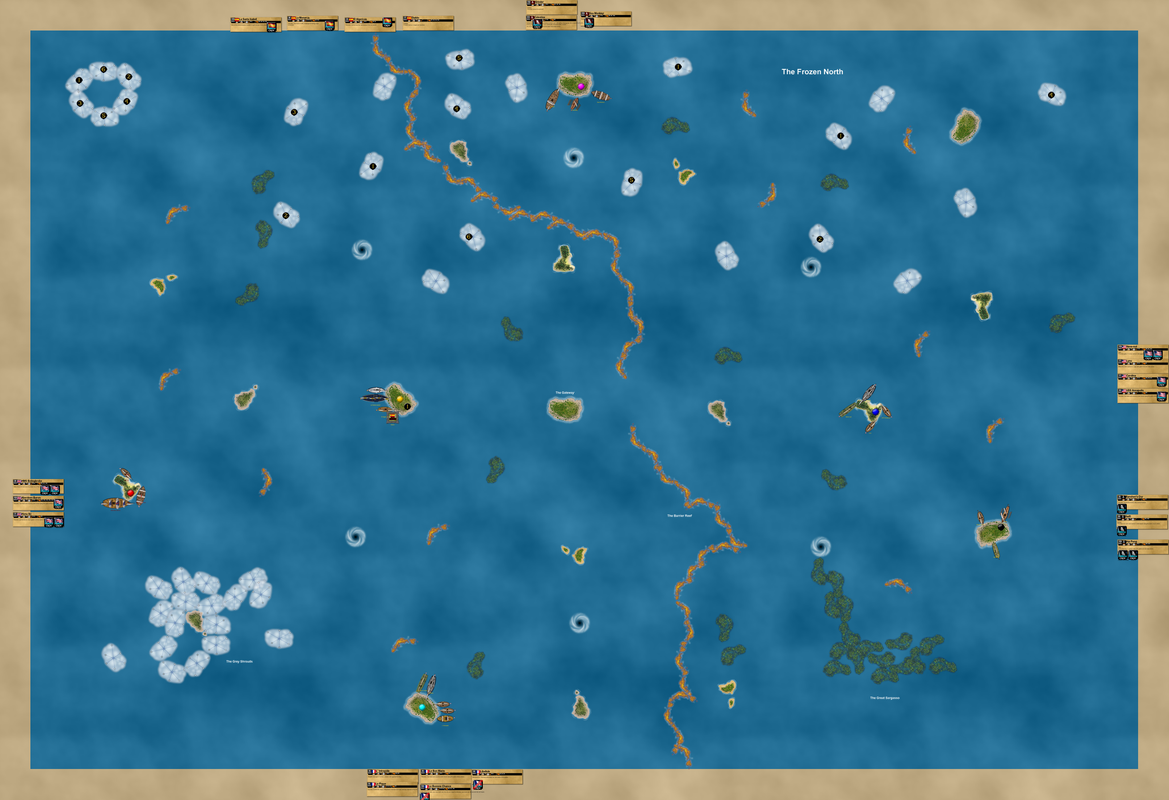
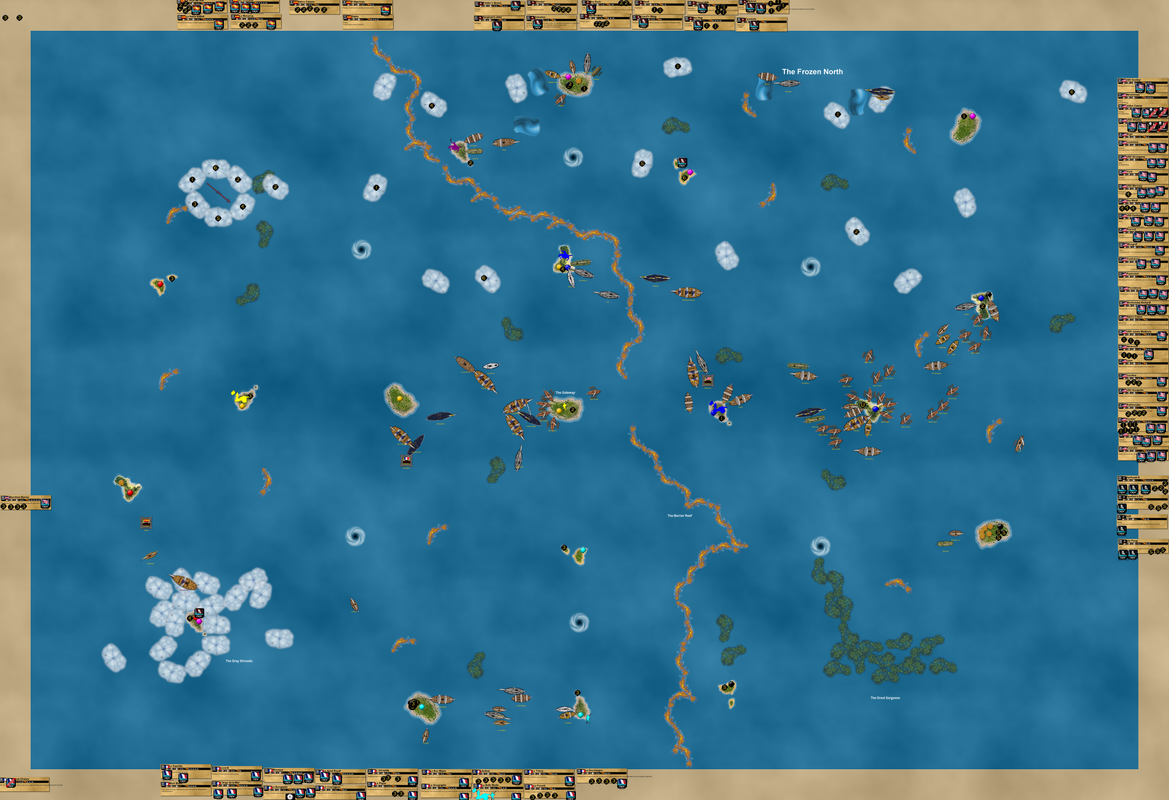
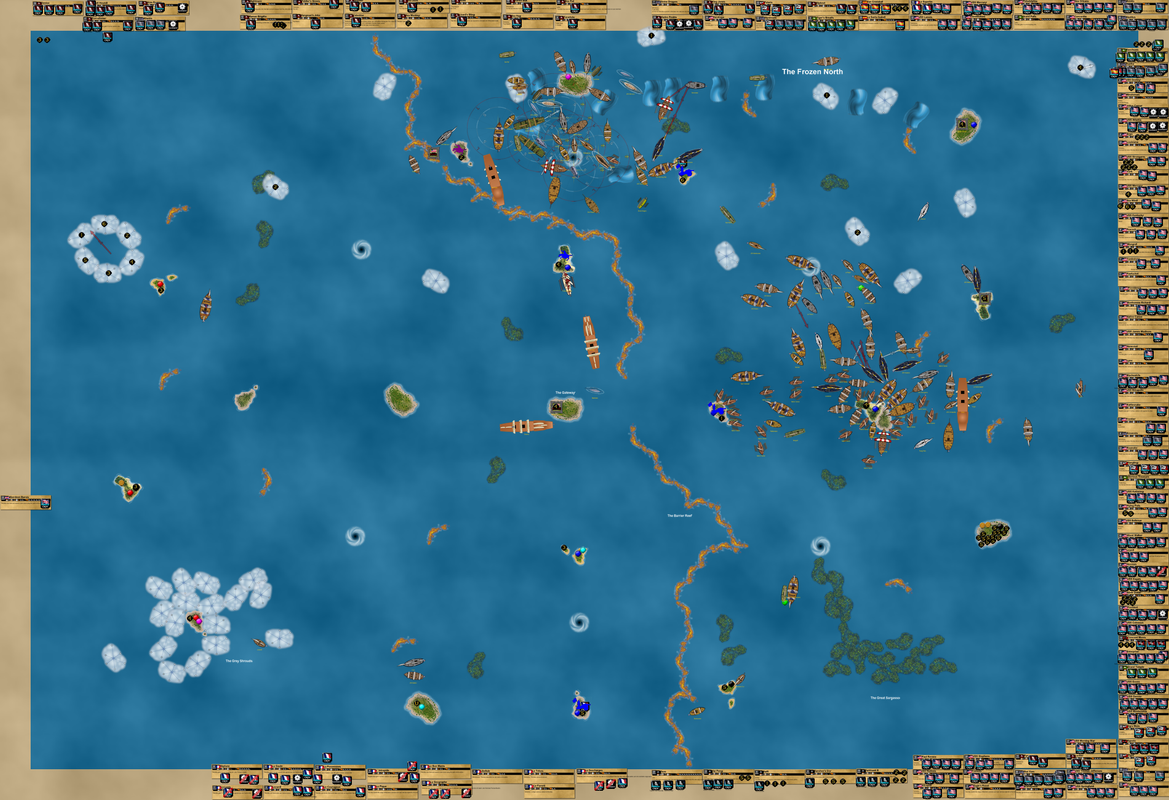
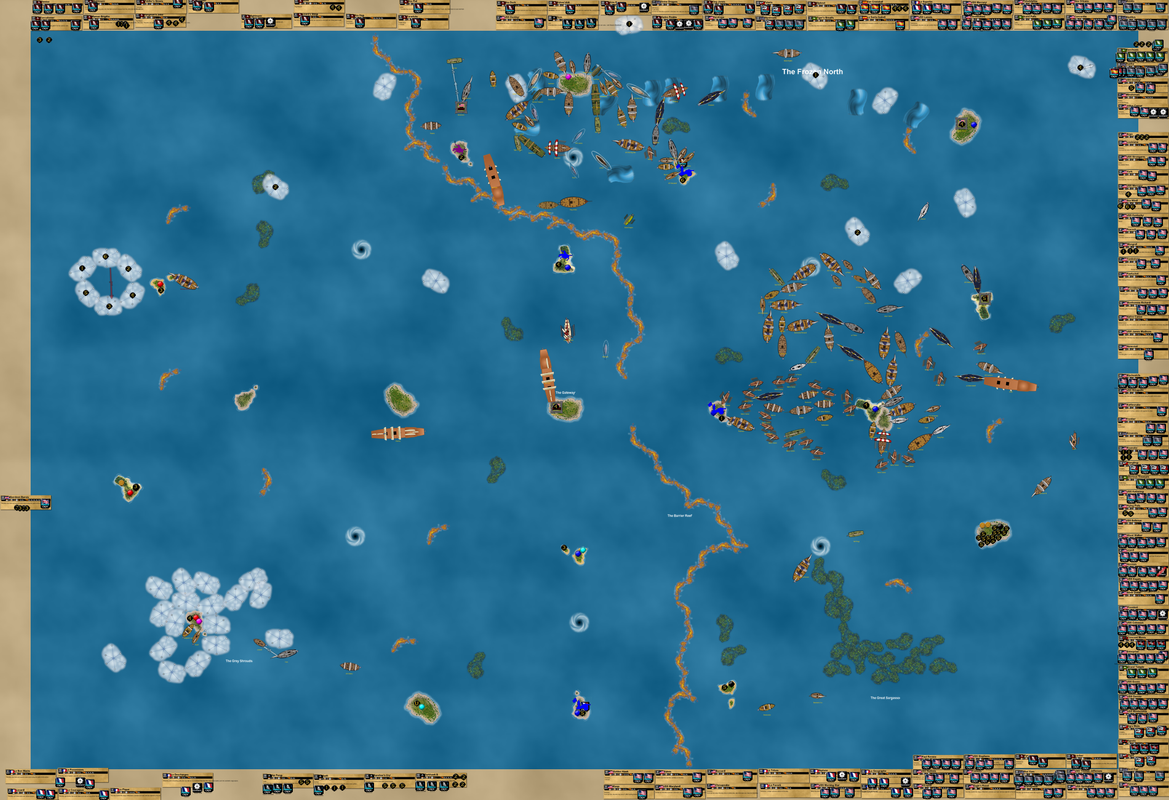
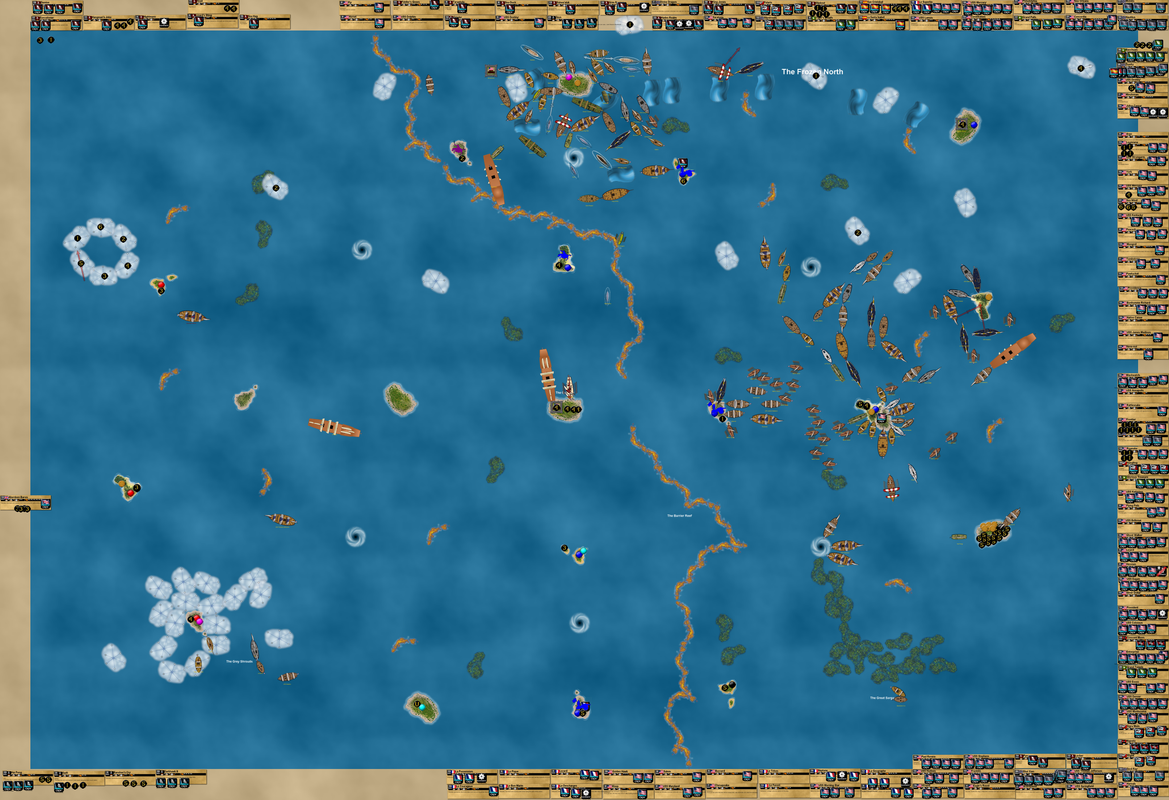
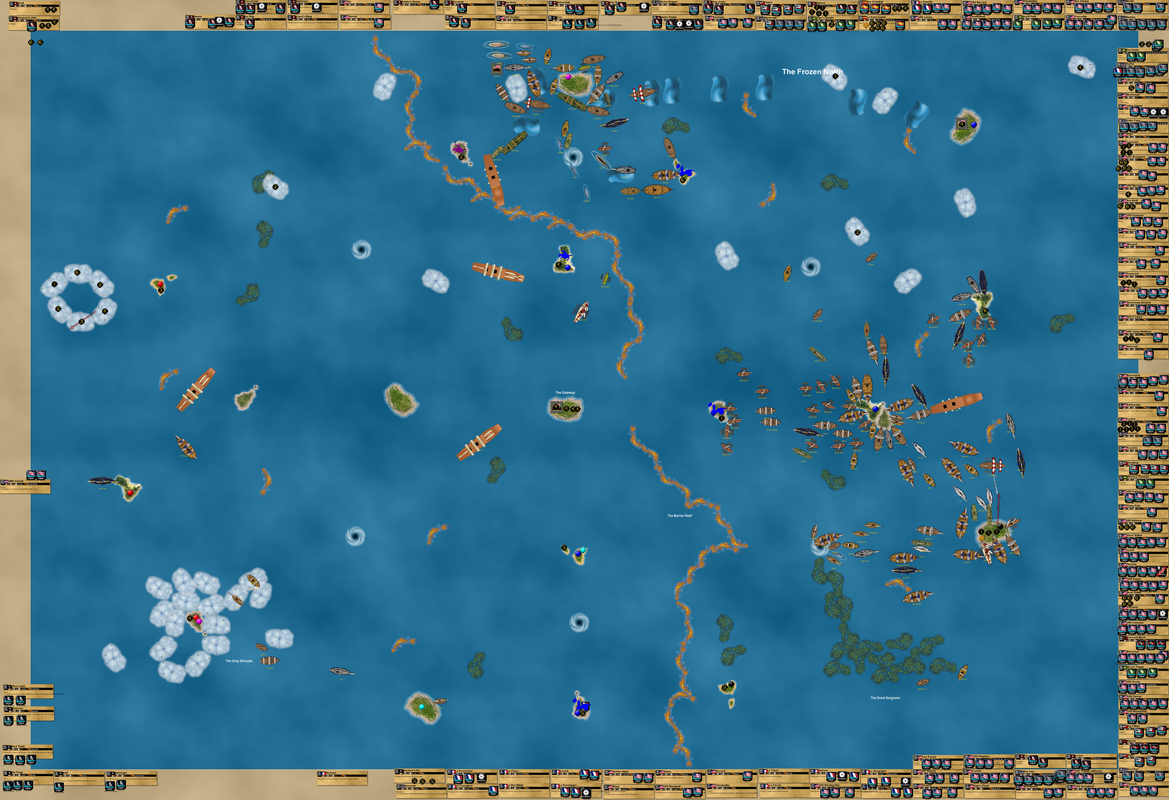
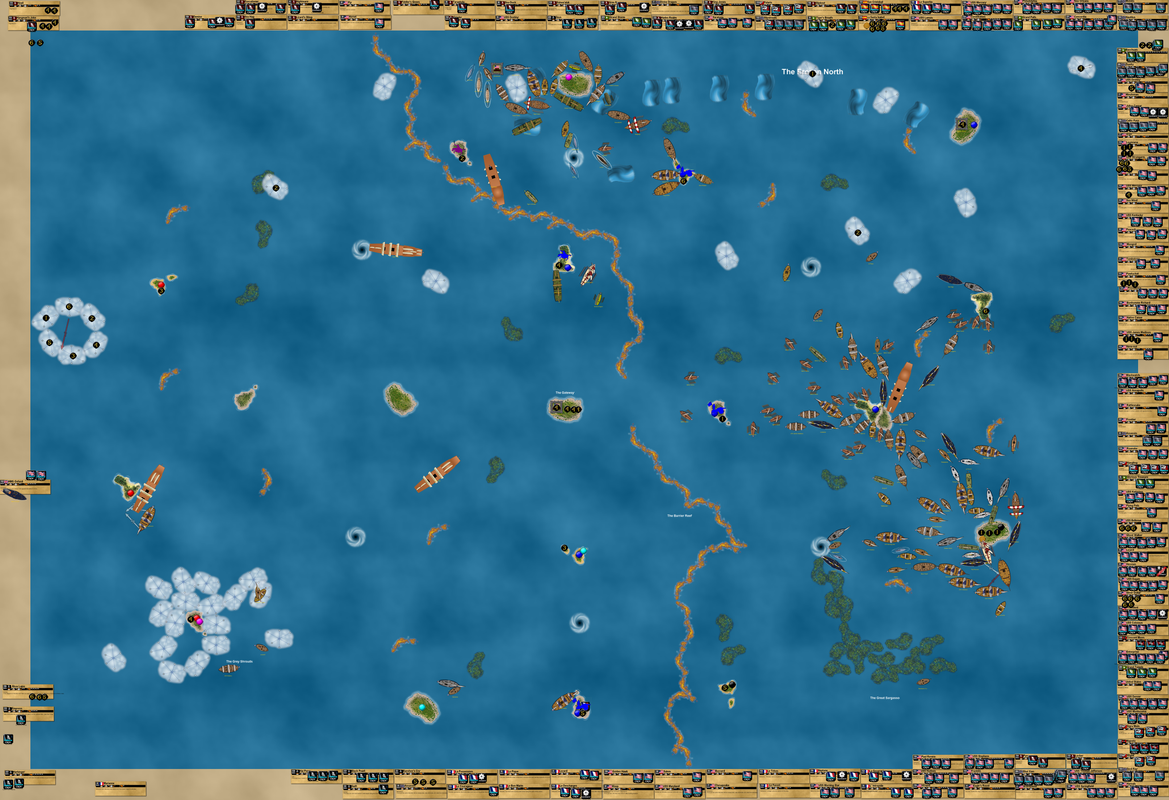
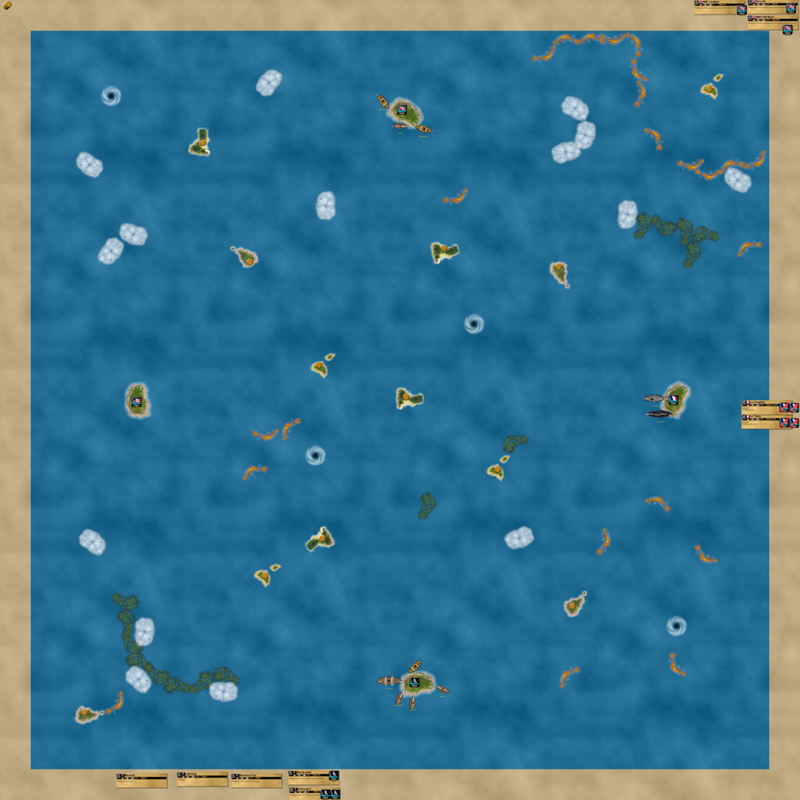
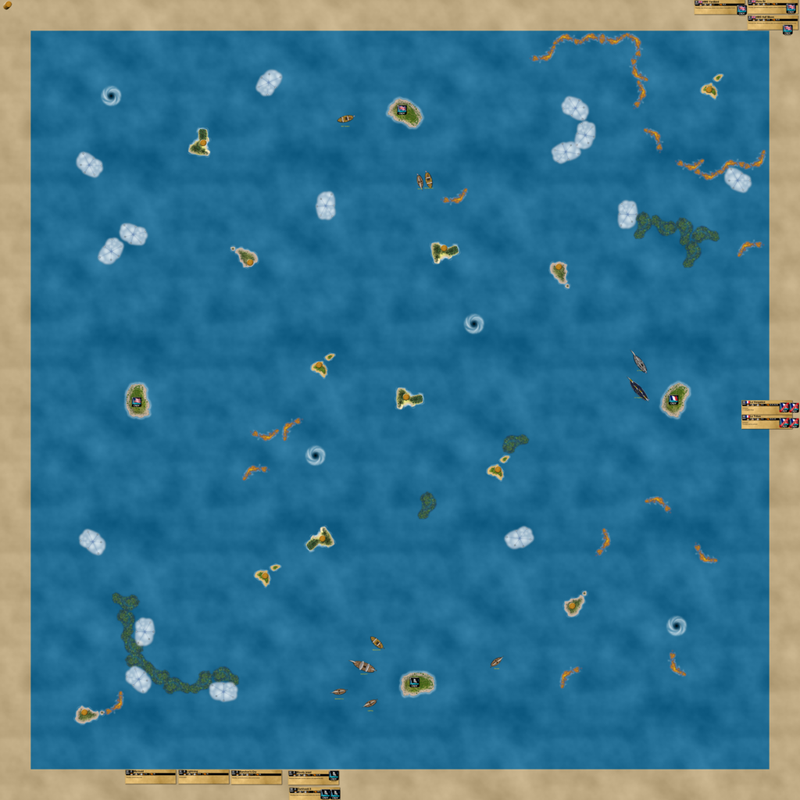
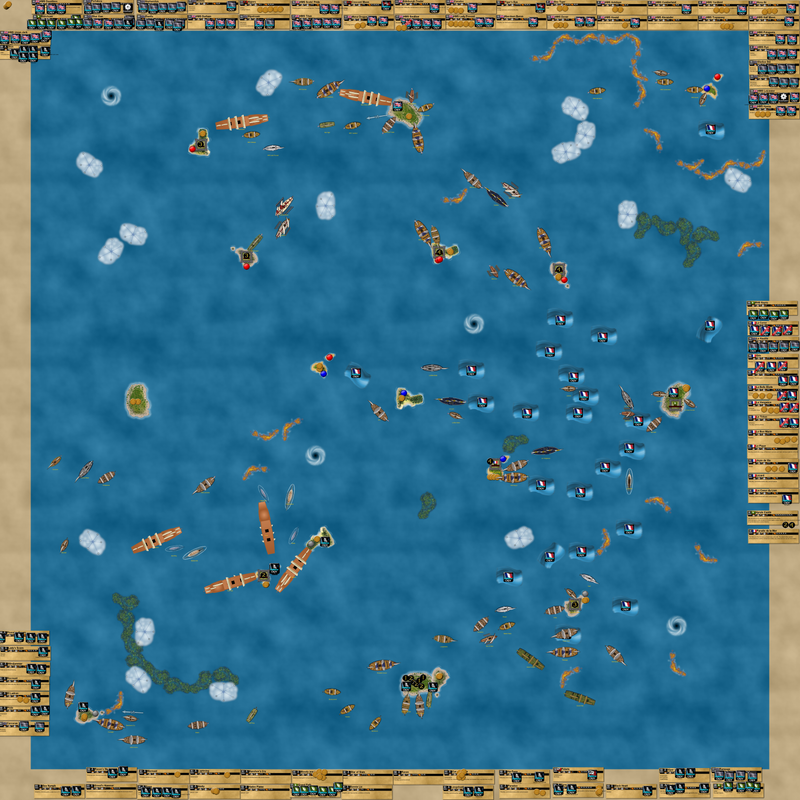
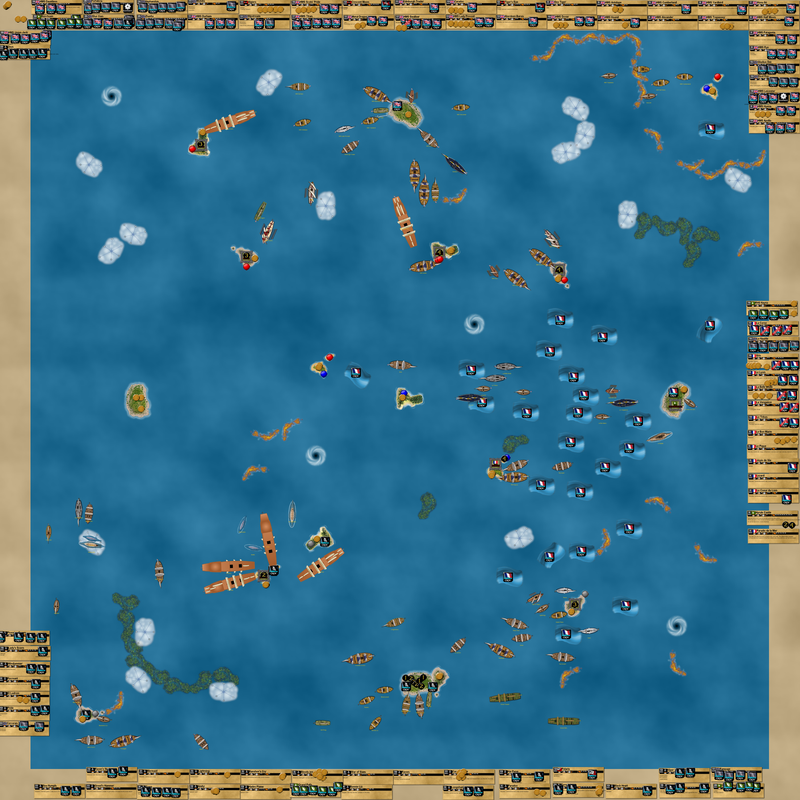
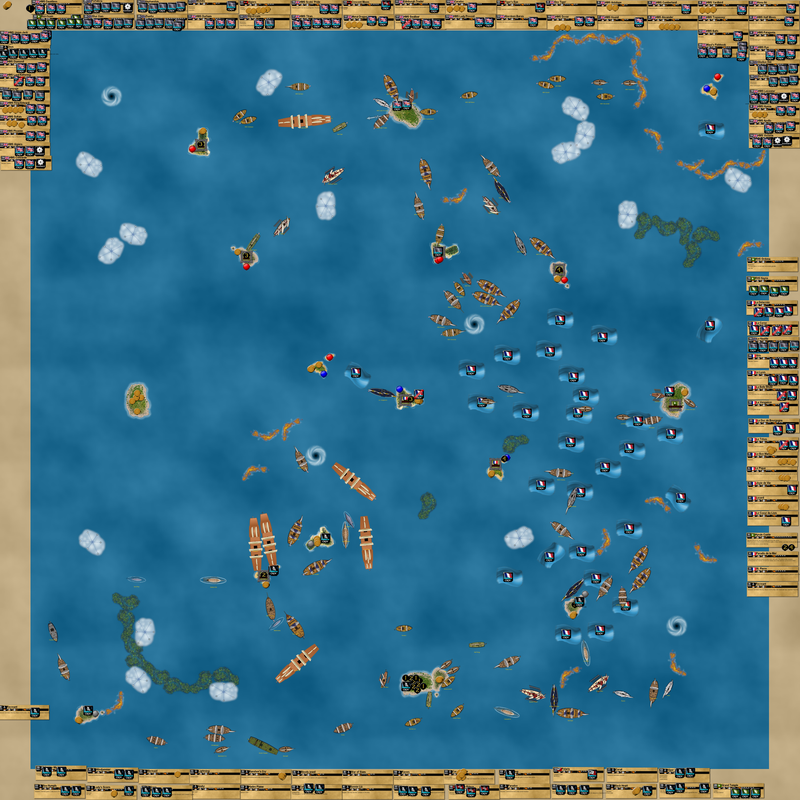
The grand ocean:
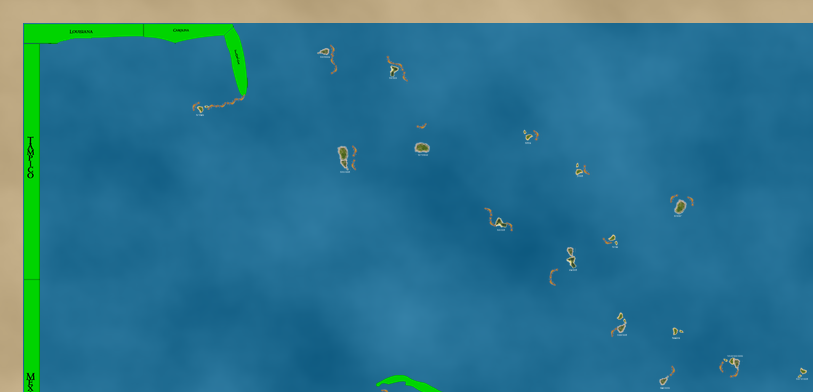
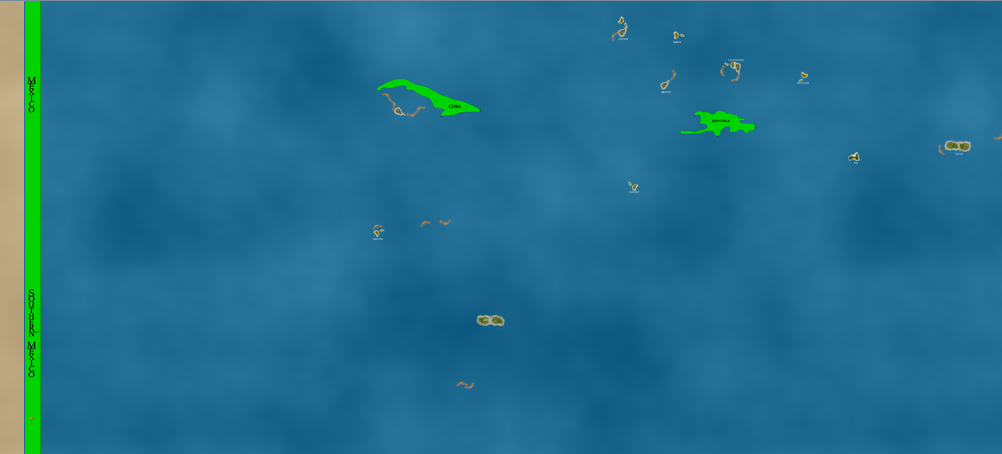
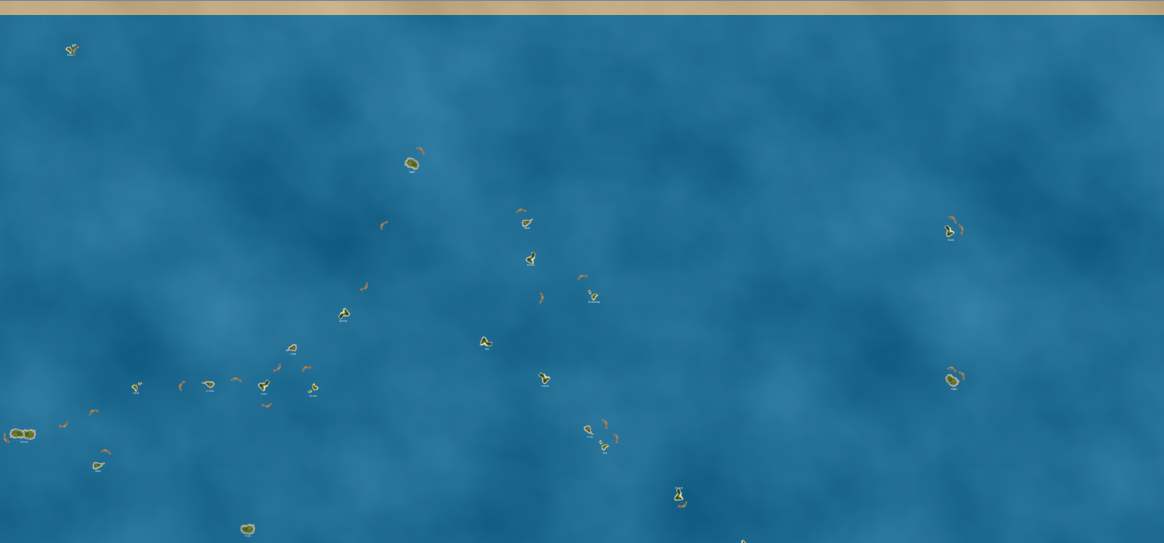
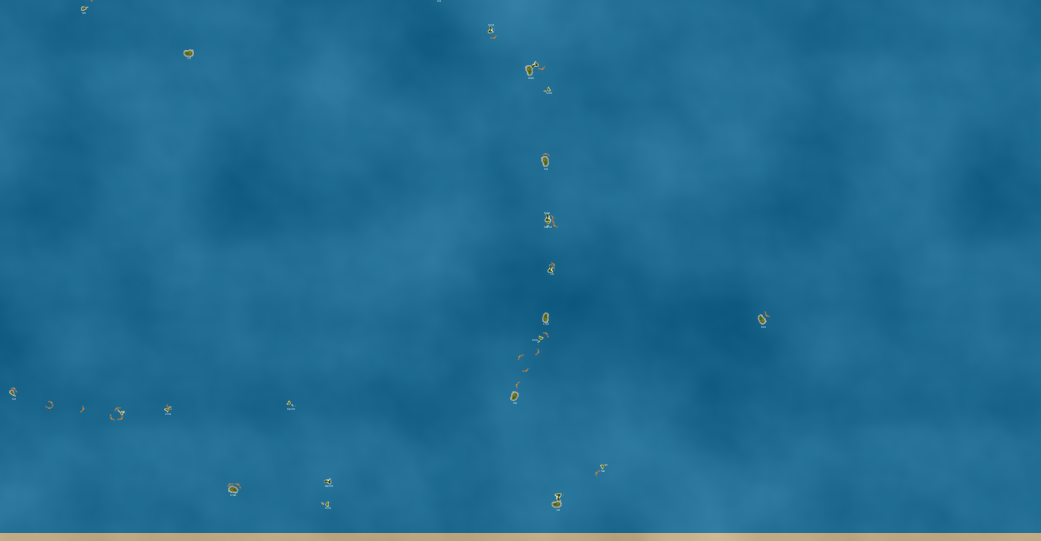
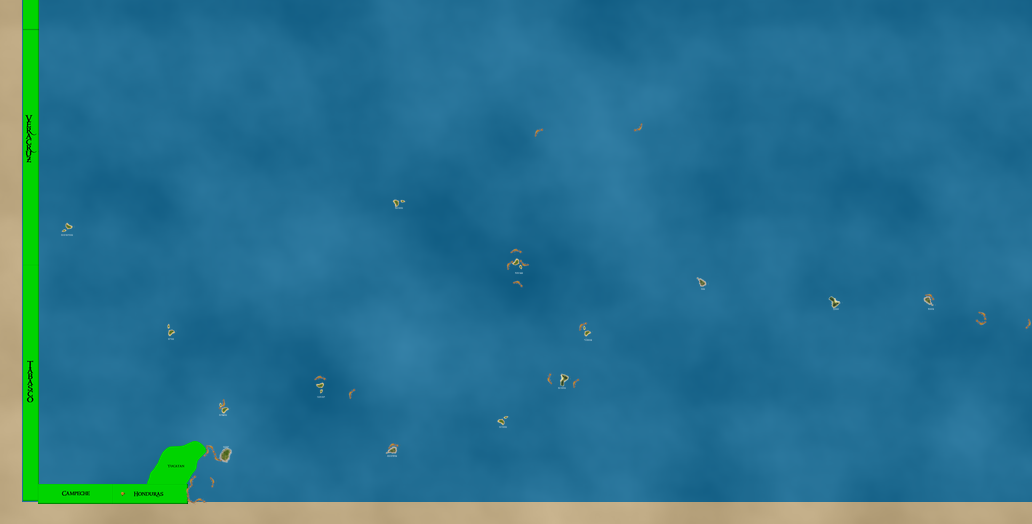
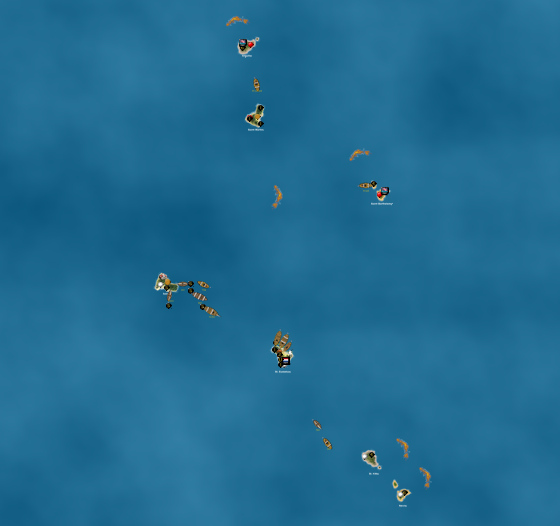
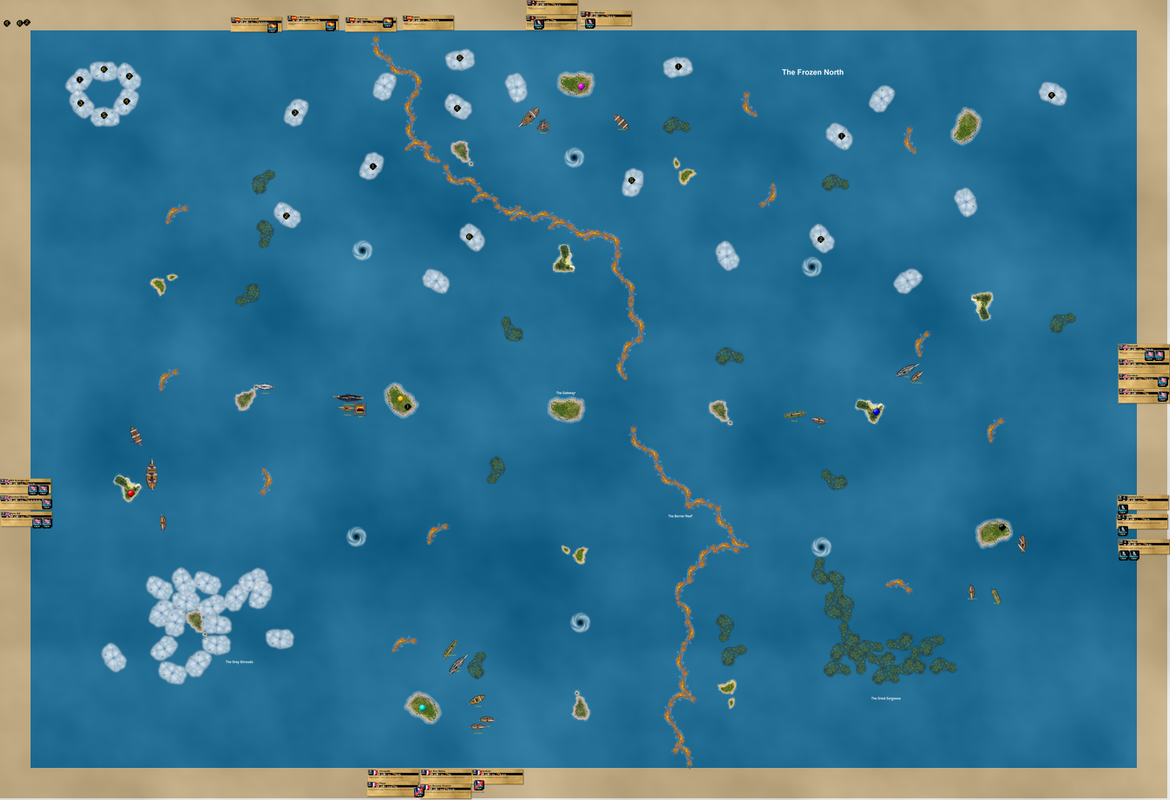
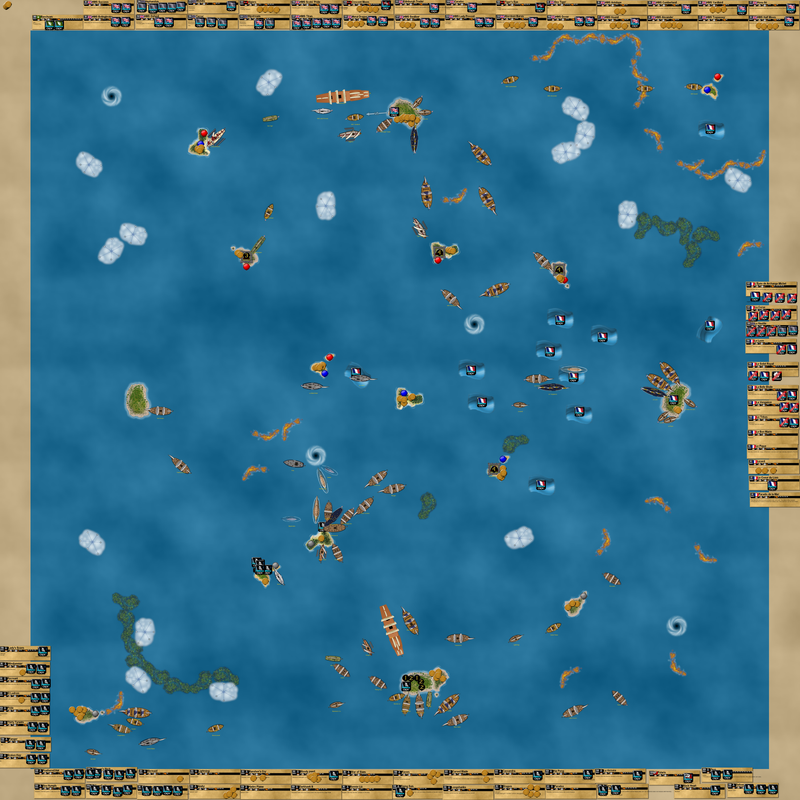
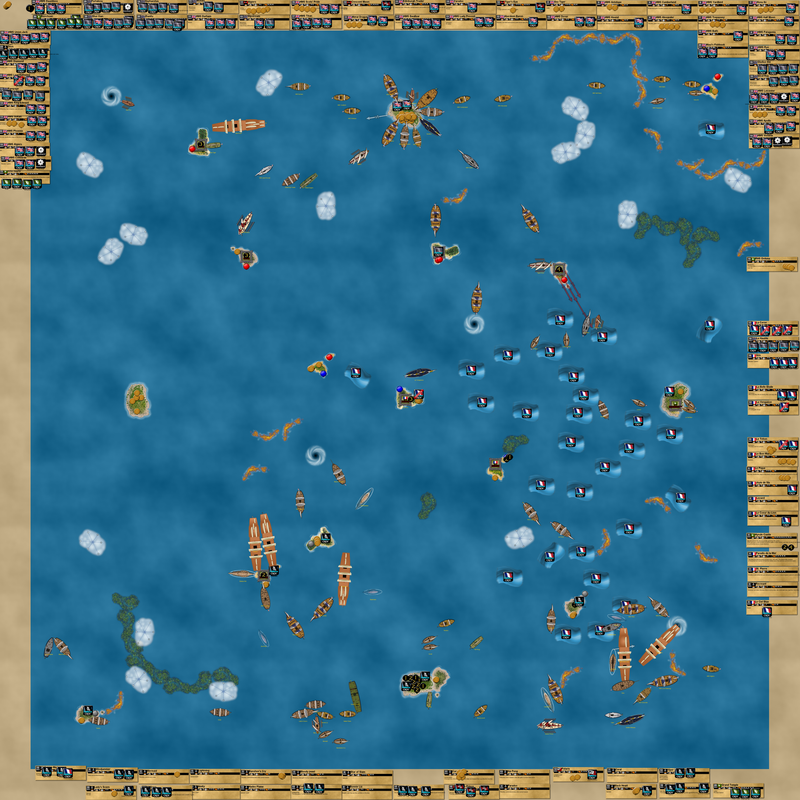
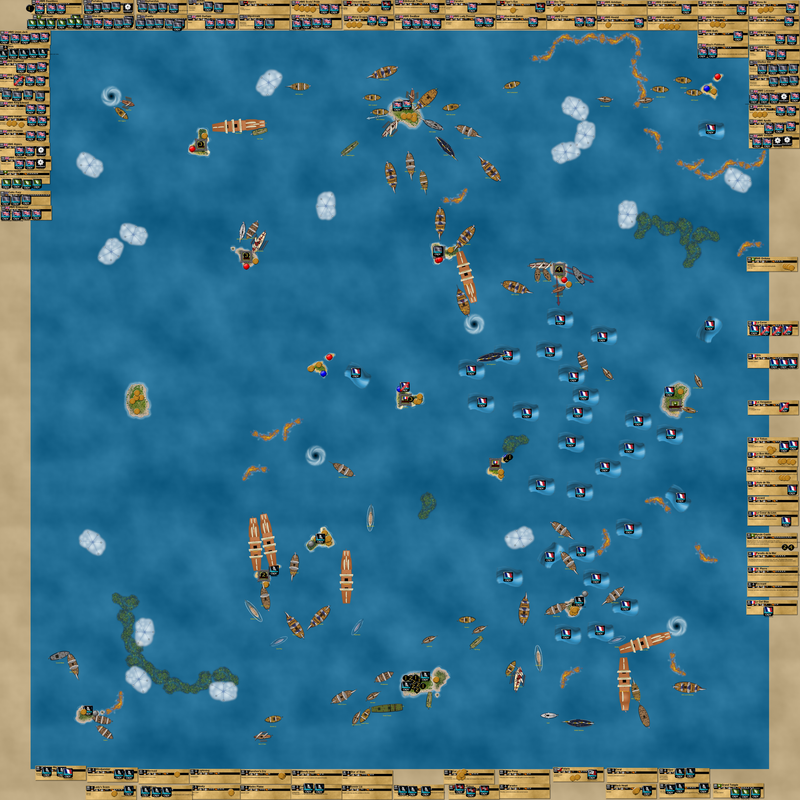
VASSAL Campaign Game 4

I have put nearly ALL of the game’s unique treasures into the stack, shuffled it up, and distributed multiple UT’s to each island! O_O This means it could be very interesting and chaotic from the start, with tons of UT’s being found early on. There are approximately 150 coins in play to start the game. The regular wild islands have 3 UT’s apiece, while the Archipelago islands in the middle have 4-5 apiece. Between the UT’s and the sailing in format, it should provide a unique and exciting start to the game.

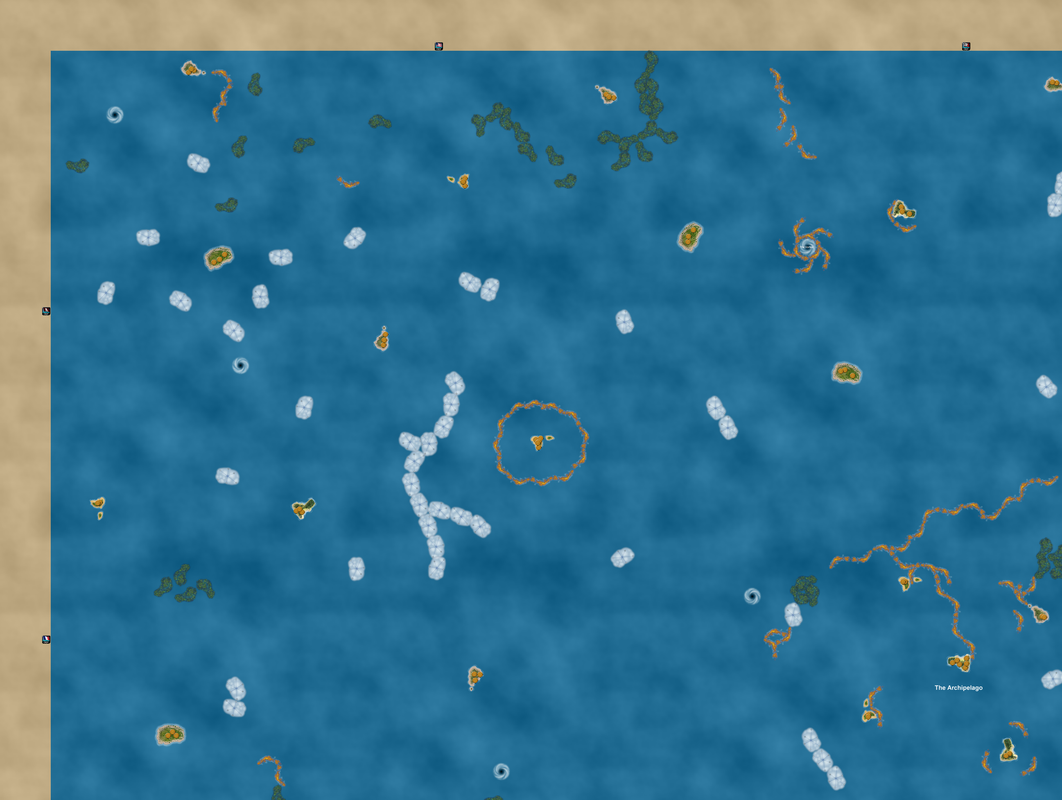
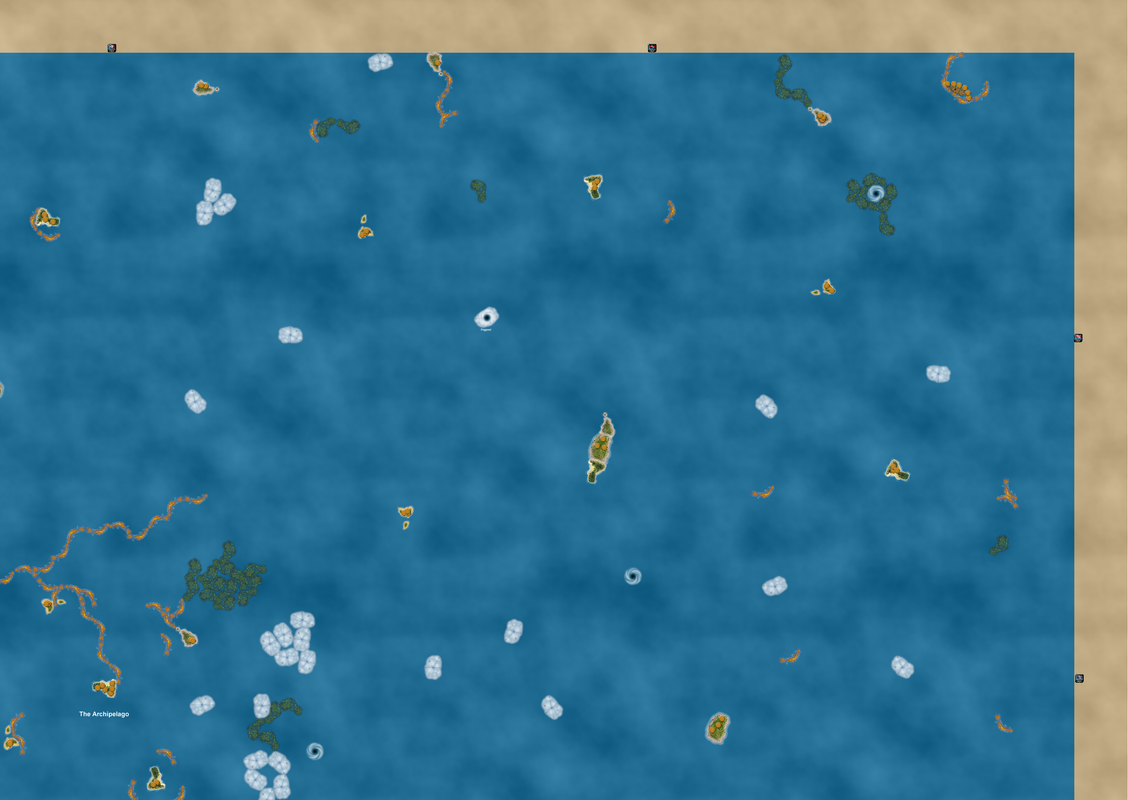
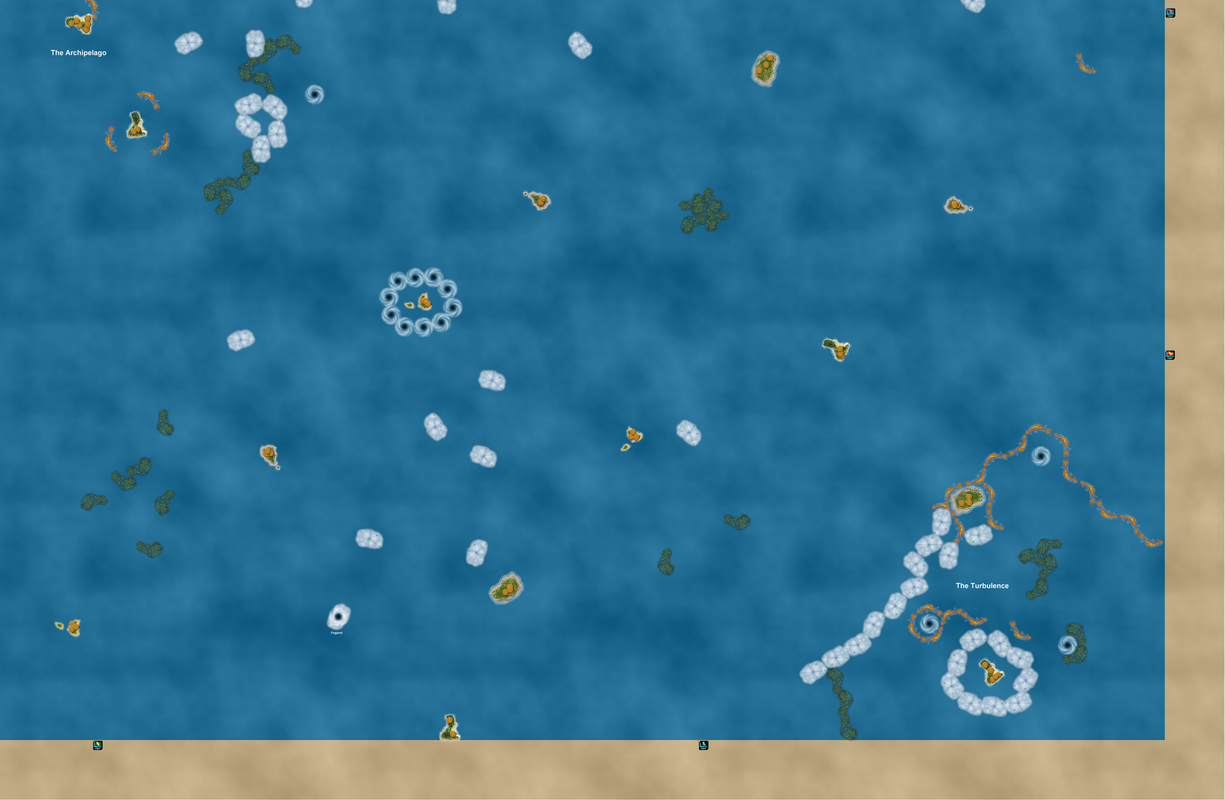
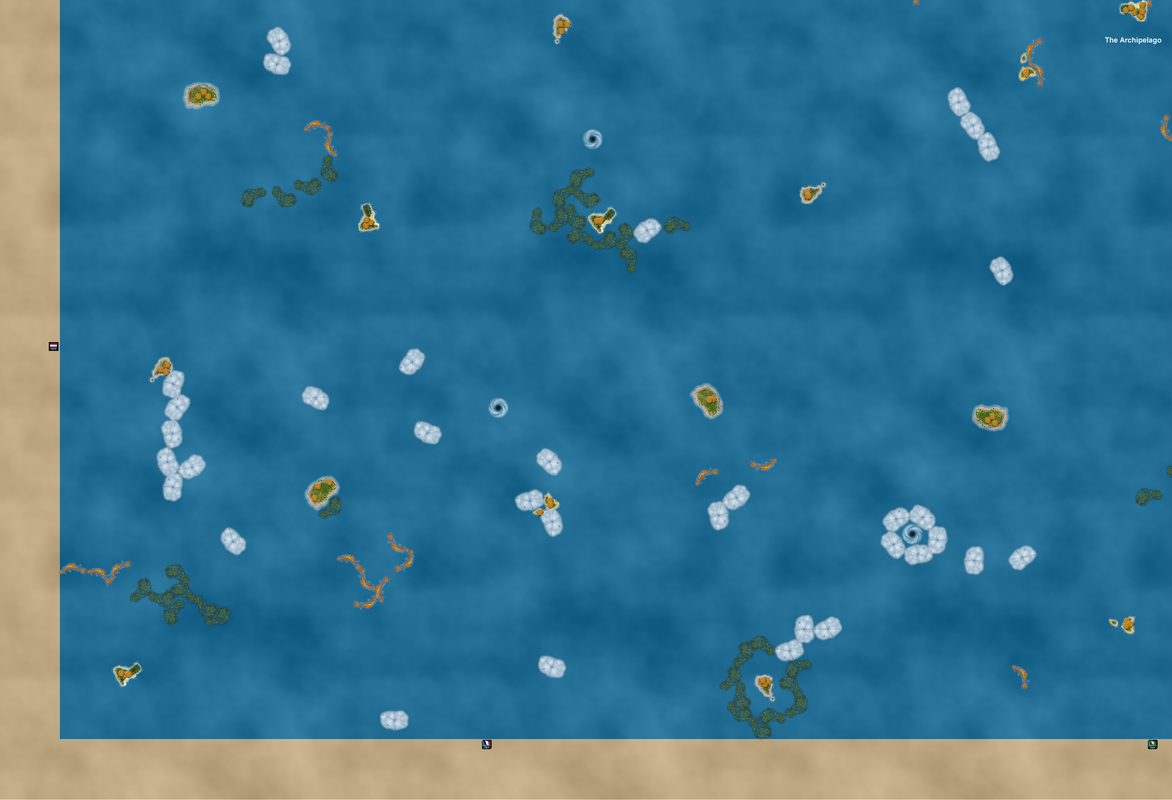
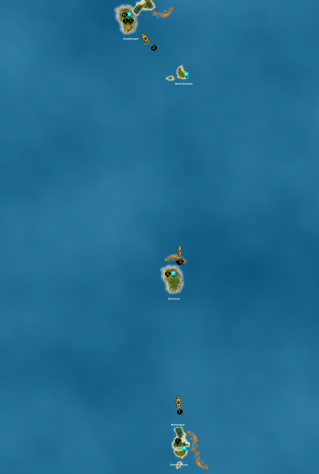
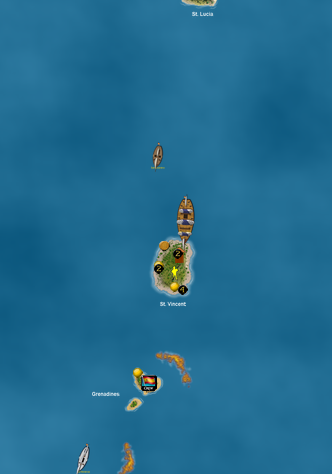
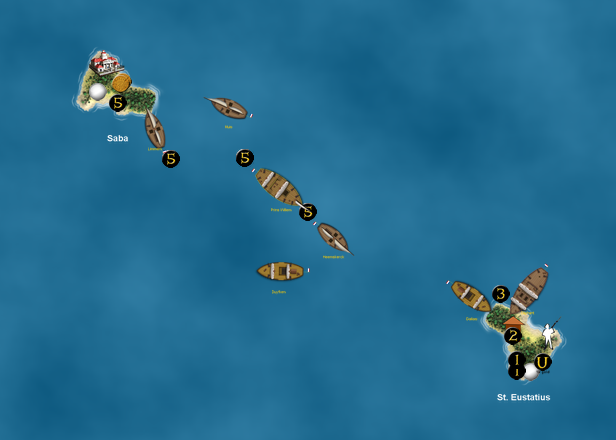
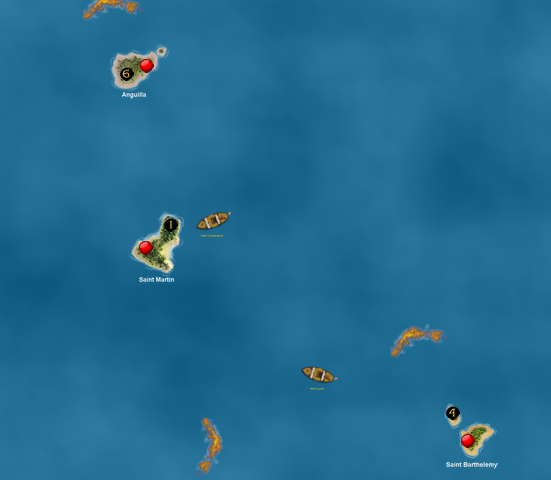
Around the map starting in the northwest. The Archipelago in the center of play will be used as a center point of reference for the pictures. The 5 islands of the Archipelago cannot be home islands.

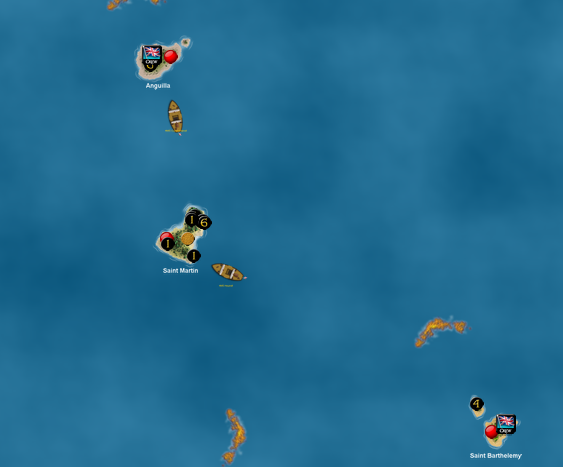
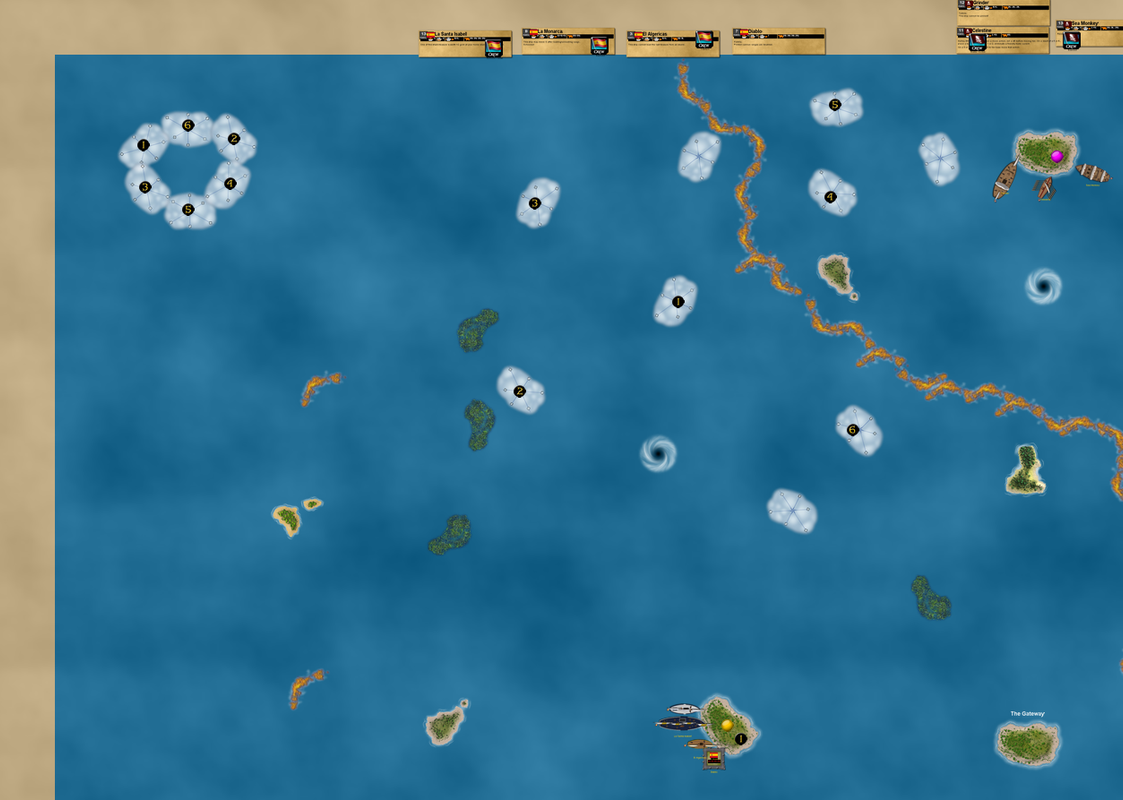
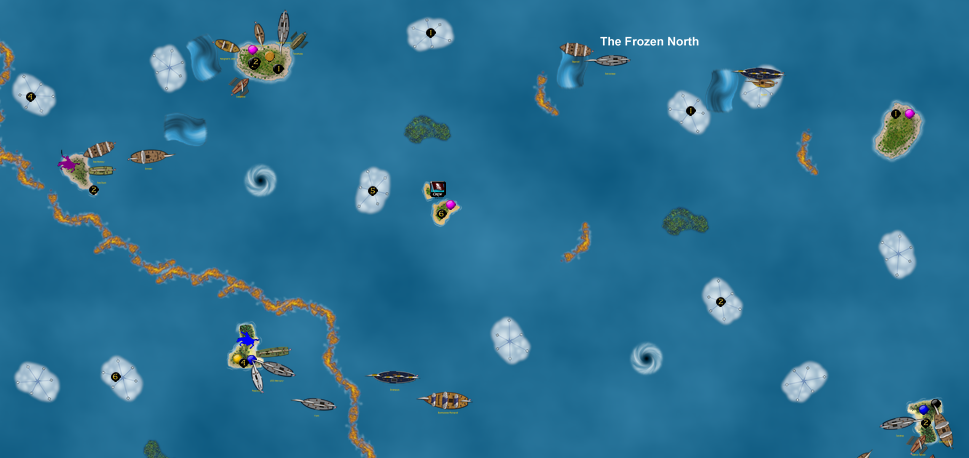
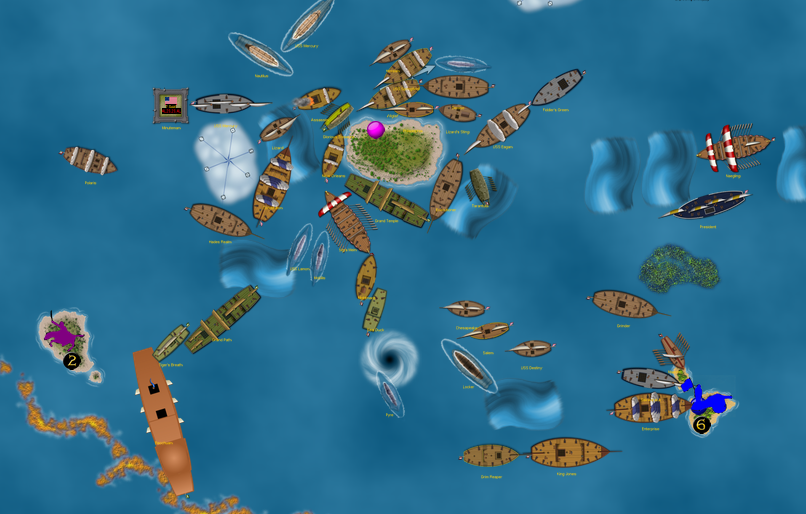
In the northwest, we see the Cursed and Hyrule on the west side (French to represent the Hyrule Conglomerate for now). On the north side are the Americans and Vikings. As a result, you could argue that it’s a somewhat weak area as far as factions are concerned, especially compared to the powerhouse of the southeast. In the middle of this quadrant is a lagoon, inside which there is an island with gold rather than resources. Unlike my Economy Edition game, the lagoon is surrounded by reefs that function normally. The lagoon island cannot be chosen as a home island, and is a gold island.

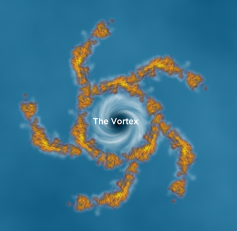
Here is “The Vortex”, a whirlpool that mysteriously appeared in the middle of a coral reef formation and has changed the orientation of the reefs themselves to match the spin of the whirlpool.

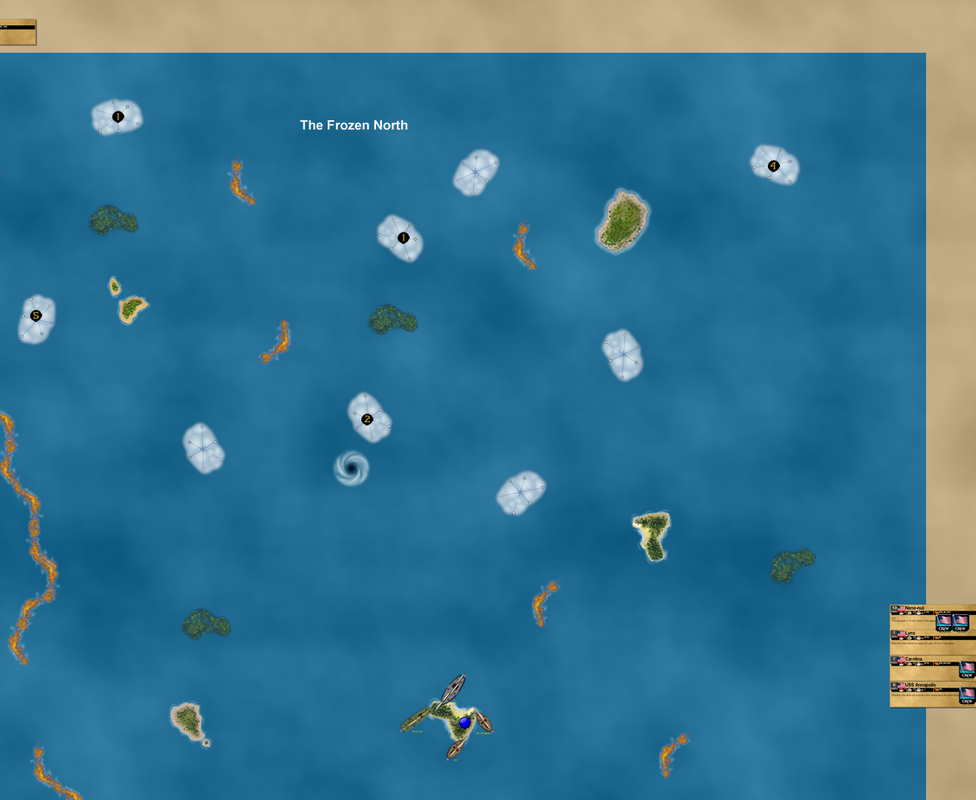
In the northeast, we see the Vikings again as the middle northern starting faction. A fitting location for the Norse raiders! East of them are the Barbary Corsairs, meaning that two (very) minor factions are starting on the north side of the map. On the east side we can see the English, and south of them the Mercenaries. This area features a bit less terrain, but some interesting things as well. There is a large island, as well as an island in the north that is connected to another island piece (considered one island for play purposes) via round earth! (we’ll see the other half in the SE picture)

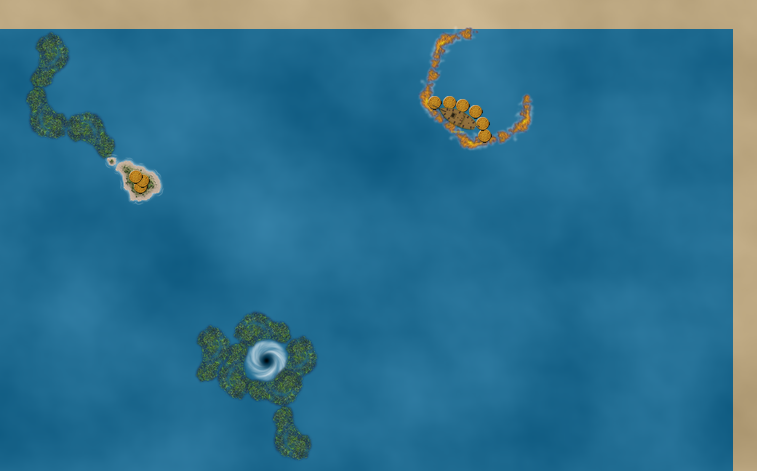
You may have seen this oddity near the large island – a “fogpool”! This whirlpool is shrouded in a fog bank. Any ships that come out of the whirlpool are immediately lost inside, and anything trying to enter the whirlpool has to be given a separate move action once inside the fog.

The northeast corner has a whirlpool surrounded by sargasso seas, while a shipwreck is present on some reefs that connect to another feature via round earth… a dangerous area indeed.

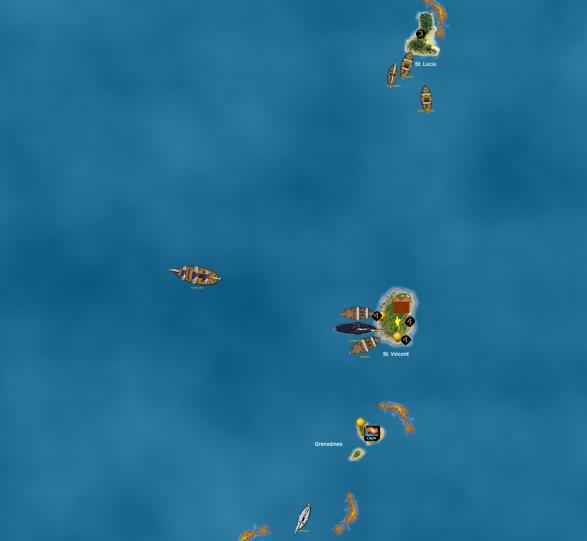
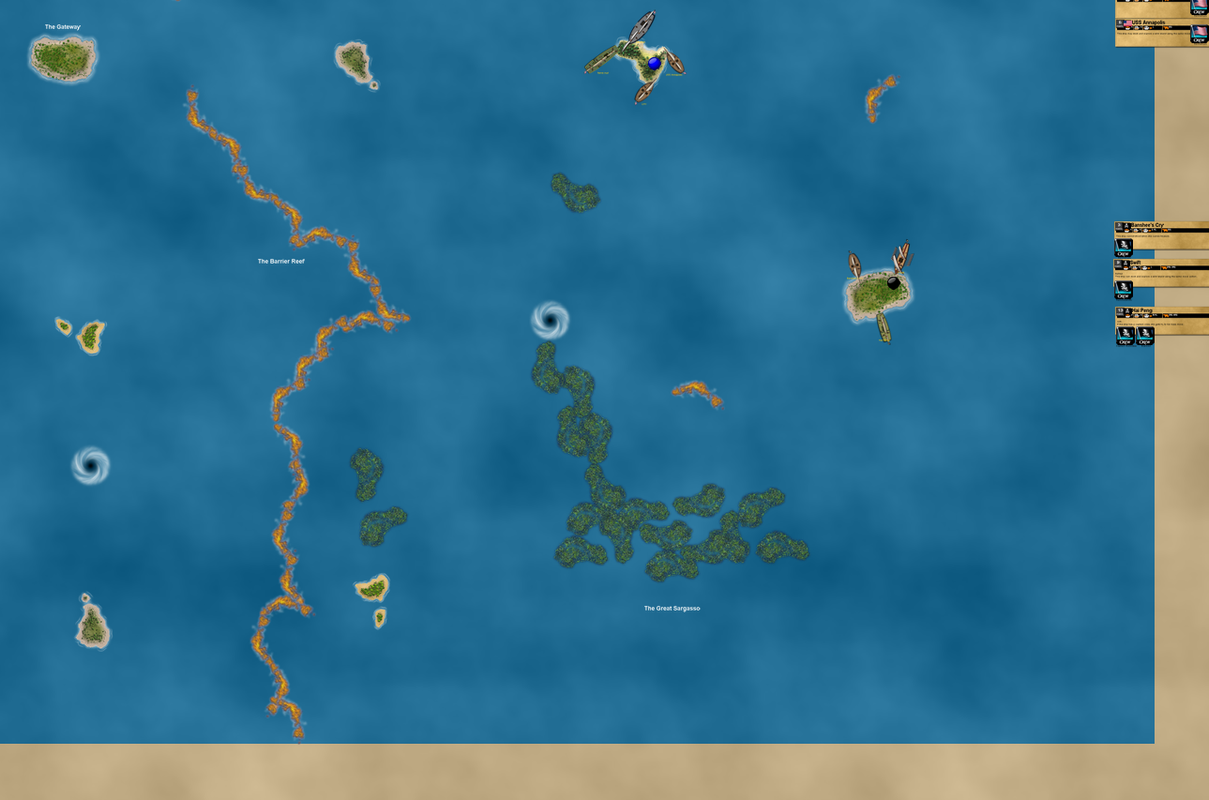
The southeast, with the Mercenaries and Spanish on the east side, and the Pirates and Jade Rebellion on the south side. This area has some distinct features, including an island surrounded by whirlpools and the other half of the island in the north.

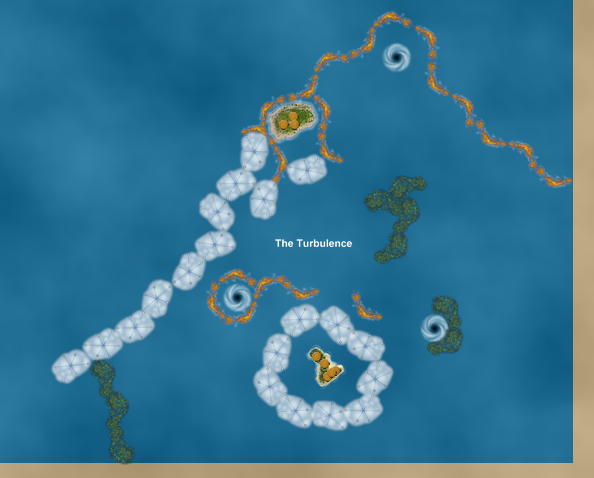
The southeast corner is dominated by “the Turbulence”, an area of uncertainty, chaos, and danger. No less than 3 whirlpools are concentrated here, but all of them are surrounded by terrain. Walled off from the southeast, using round earth from the other corners may be the best way to access this area. However, both wild islands are hard to get to, and the one surrounded by fog cannot be chosen as a home island (it is another gold island).

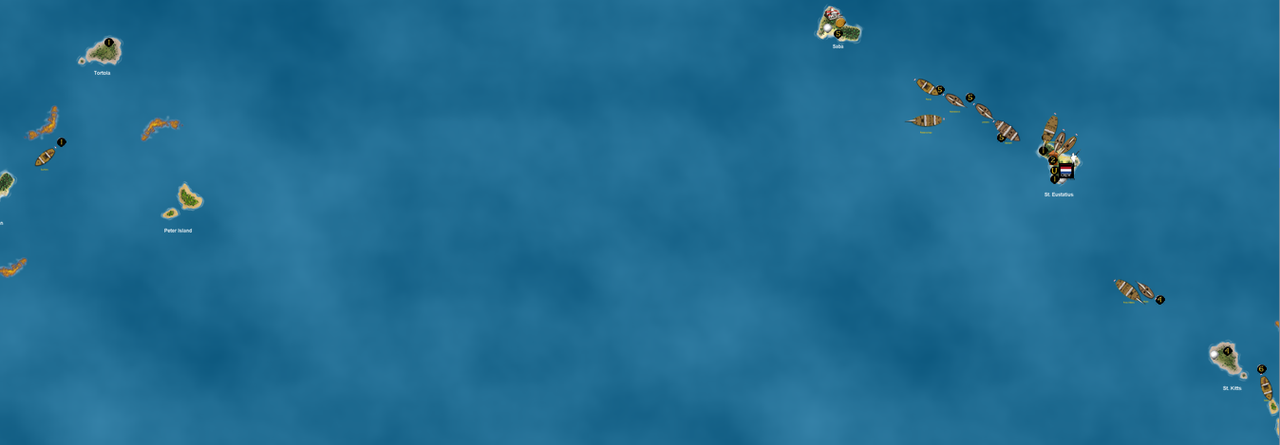
Finally we come to the southwest, where the Jade Rebellion and French will sail in from the south, and the Dutch from the west (Hyrule just out of sight north of the Dutch marker). This area features a lot of terrain, but slightly higher island density than the other areas.

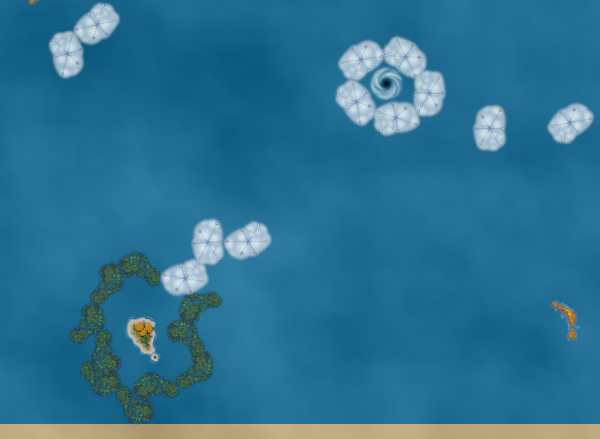
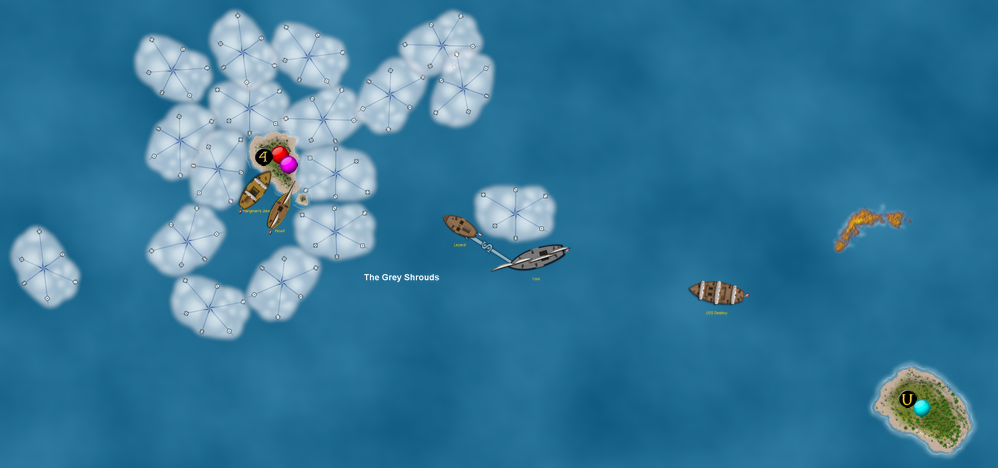
The sargasso sea formation in the northwest continues via round earth to this area, culminating in an island surrounded by sargassos except for a potential foggy entrance. Just northeast of that, a whirlpool surrounded by multiple fog banks is the alternate of the new fogpool.

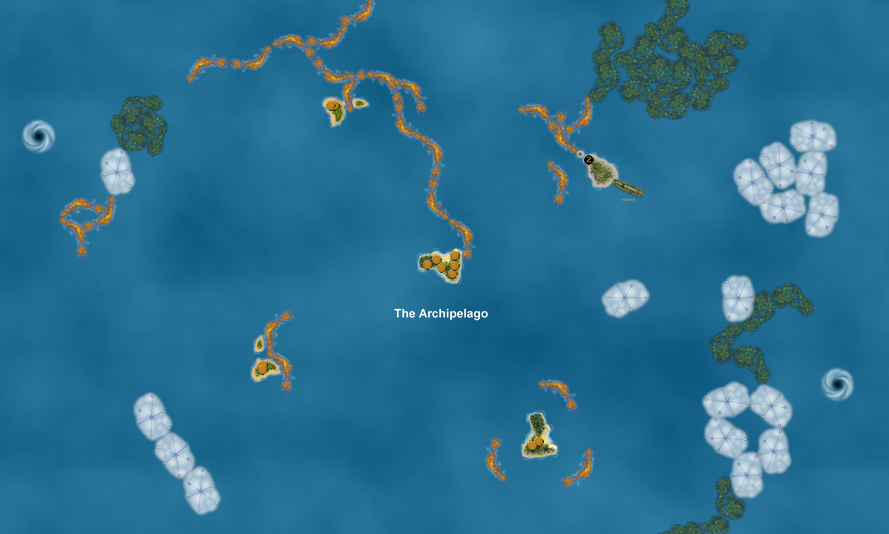
In the center of the map is the Archipelago, a chain of 5 wild islands that is hard to access from any angle. The waters are treacherous but plentiful, and it represents the “tropical paradise” of this game. There are various “squeeze” spots where there is a break in the terrain – I purposely did that to increase the chances of it becoming a bottleneck that can be strategically controlled for limited access. Also, despite the two whirlpools in the area, both are blocked somewhat by the large amount of terrain. The center island of the Archipelago will be the most valuable in the game, and could eventually contain both gold and resources.

BATTLE REPORT WARNING: With postimages recently changing their url’s and other image hosting sites not satisfactory, it is very likely that this game will see a variety of reporting styles. Youtube videos may be more common than regular text-and-picture reports. At any moment all of the pictures in this thread may disappear.

With that, we are about ready to begin! Time to GET HYPED with my CG4 trailer video!!

4/23/2018

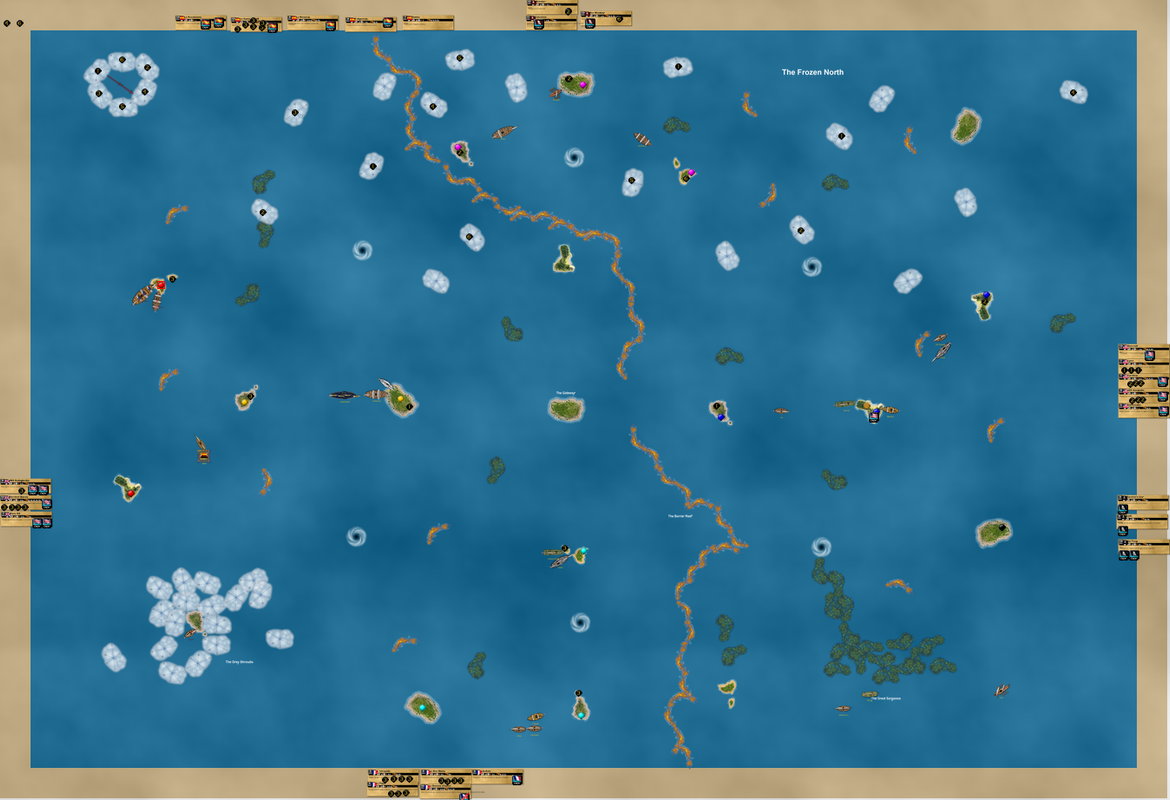
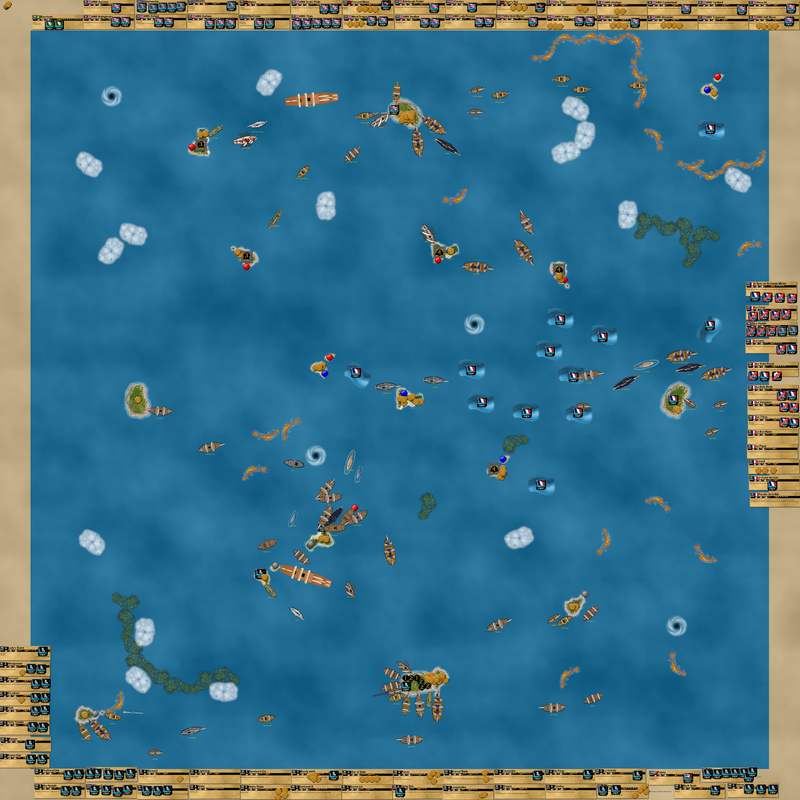
Play has started! As I said in the first post, picture reports will be less of a priority since the image hosting sites are prone to disasters. I’ll try my best to make any recordings informative and good, and do some video reporting as well.

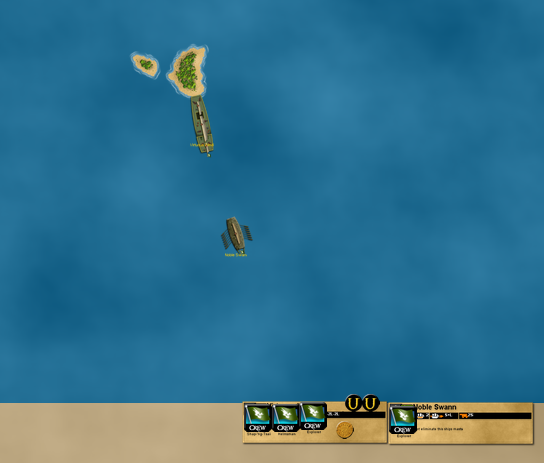
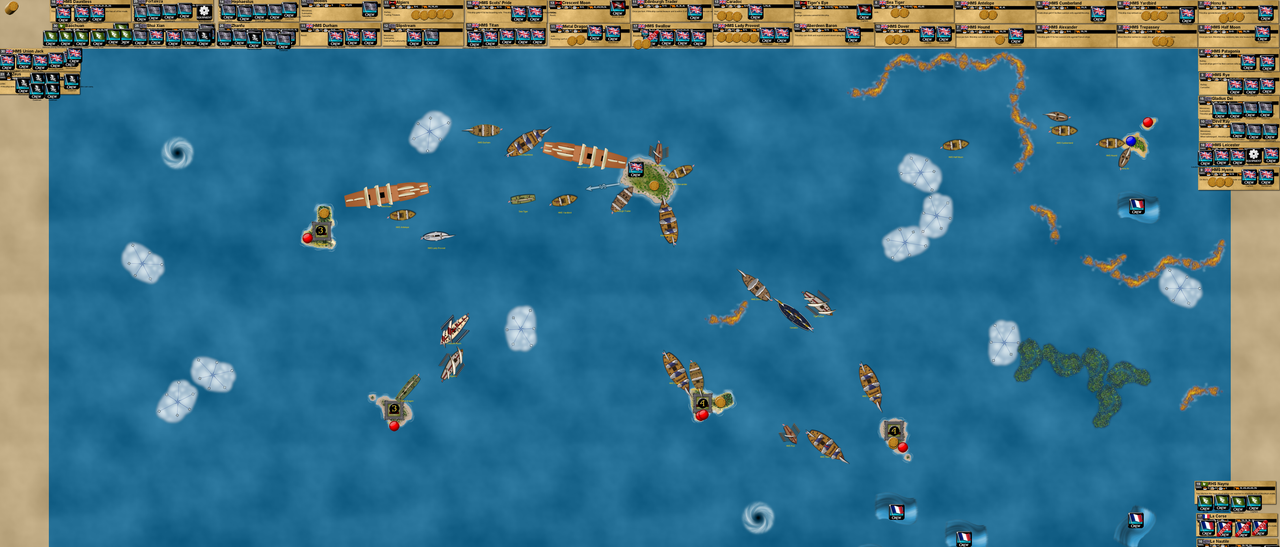
The Jade Rebellion is the first to a wild island! The Virtuous Wind explores and the Jades have the first home island of the game! They also got the Forged Papers and Sword UT’s.

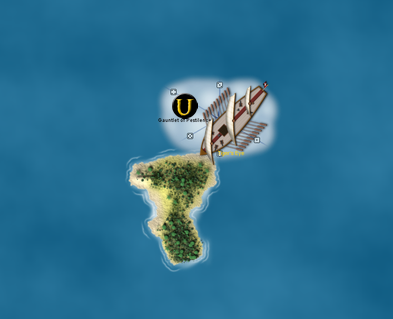
The Barbary Corsairs got hit with some “instant karma” when they found two negative UT’s (Missionary and Gauntlet of Pestilence) after not starting the game with the full 30 points (only 13 in fact). Here the Tiger’s Eye is in a fog bank created by the Gauntlet, which is a custom UT from Rizz the Bloody. This island will be the Corsairs’ home island, which will be interesting with that nasty fog bank right next to it.

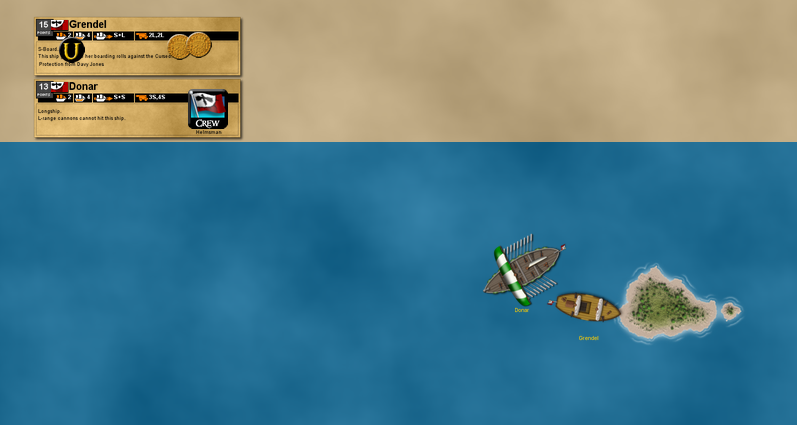
The Vikings have fittingly settled on a home island in the far north near where they entered the ocean, with the Grendel finding Protection from Davy Jones.

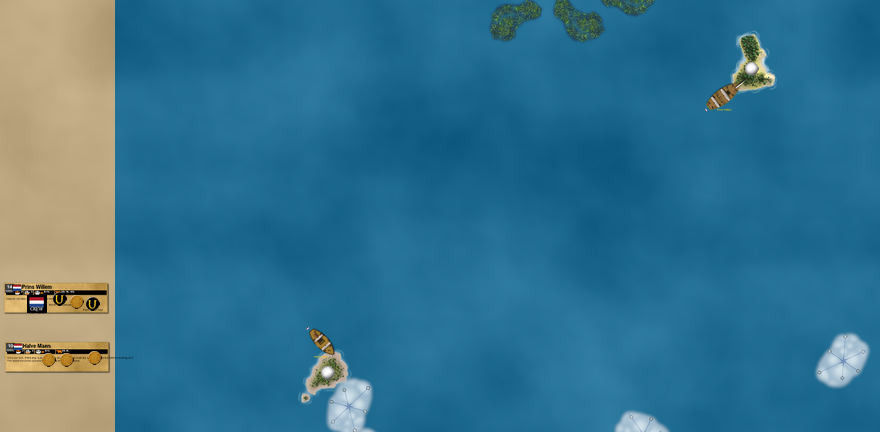
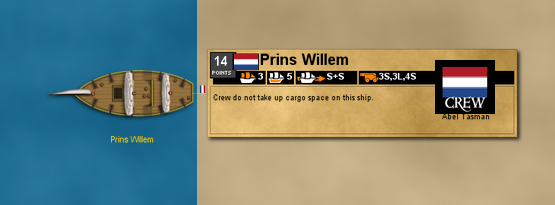
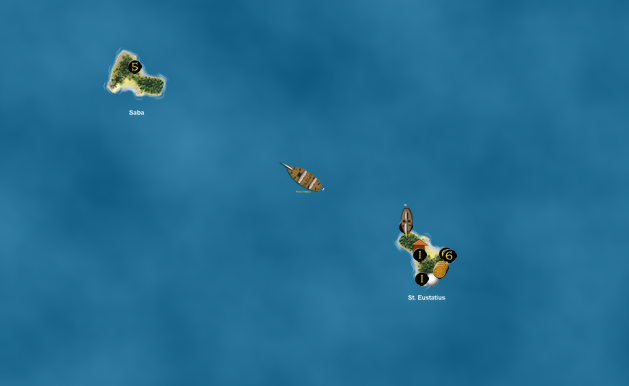
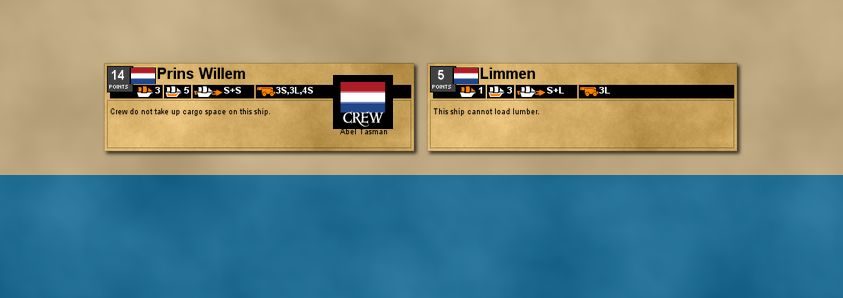
The Dutch are off and running! With a hot start similar to their effort in the Caribbean game, they have already explored two islands. Led by Abel Tasman, they have a home island near the fog at the bottom of the picture, and some UT’s on the Prins Willem to the northeast.

Various factions are still without a home island, but it was a solid start to this epic adventure!

5/4/2018
5/16/2018
6/17/2018
The game has continued, with the Virtuous Wind being the first ship (and the Jade Rebellion the first faction) to explore the Archipelago! The VW is now really loaded, with various UT’s along with newly found textiles aboard. The Vikings explored their first wild island, finding lumber in the far north.

VASSAL Tournament #2

VASSAL Tournament #2

9/30/2016

Welcome to the second VASSAL tournament! The winner of the tournament will be declared the best fleet of all time!!

Just like Tournament #1, each matchup consists of 2 fleets facing each other in 1v1 competition in a 3-game series. The fleet that wins the series advances to the next round. To save time, if a fleet wins the first 2 games of a series, the third game of the series will likely not be played. If you’d like to join the tournament, just let us know.

These games are being played under most of the “standard” game rules (8 coins per player worth 15 gold, 6 islands, etc). However, there will be a few house rules:
-Xerecs and I are changing the turn order after the first game of each series. The fleet that went second in the first game will go first in the second game. This is to ensure maximum fairness so one die roll doesn’t effectively decide a series. (though Game 3’s will still feature regular rolls)
-We will play until there is a clear winner. This will often be the “more than half the starting gold” rule, but there may be exceptions.

The seeding is based primarily on each fleet’s winning percentage. Of the 16 fleets participating in T2, 6 were determined before T1 based on their past performance – these are the best of the best. Then, the top 4 fleets from T1 were added. Finally, over the past few days Xerecs and I have selected 3 fleets each for the final 6 fleets of the tournament. The seeding wasn’t strictly based on winning percentage – exceptions were made based on our judgement and who was going to play each fleet in the first round.

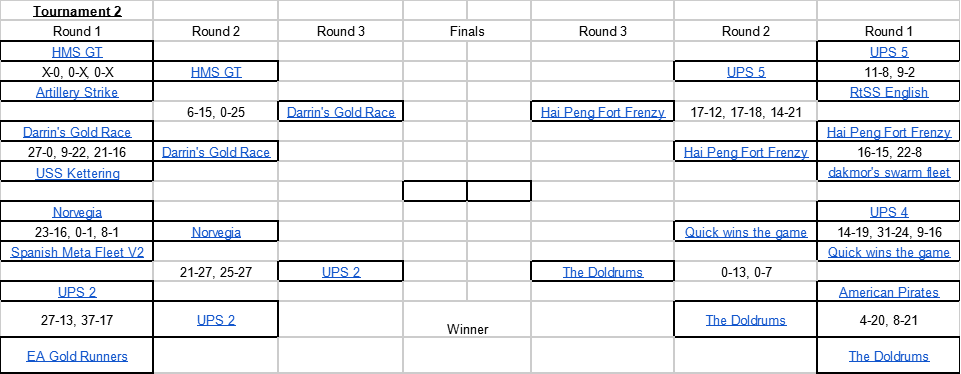
We based our bracket on this, with the exception that in each matchup, the higher seeded fleet is on top. The picture below shows the bracket, but to clarify, here are all of the matchups and fleets. This order simply goes down the left “division” or column, and then it goes down from the right. However, we may not play the games in this order. Also, some of these fleets may be edited slightly by the time we play them.

Round 1 matchups:

HMS GT (#1 seed)
vs.
Artillery Strike (#16 seed)

Darrin’s Gold Race fleet (#8 seed)
vs.
USS Kettering – Deadly Weapon (#9 seed)

Norvegia (#4 seed)
vs.
Spanish Meta V2 (#13 seed)

UPS 2 (#5 seed)
vs.
Extra Action Gold Runners (#12 seed)

(right side of bracket)

UPS 5 (#2 seed)
vs.
RtSS English (#15 seed)

Hai Peng Fort Frenzy! (#7 seed)
vs.
dakmor’s swarm fleet (#10 seed)

UPS 4 (#3 seed)
vs.
Quick wins the game (#14 seed)

American Pirates (#6 seed)
vs.
The Doldrums (#11 seed)

VASSAL Tournament #2

If I had to bet money on the winner of the tournament, I would pick UPS 2. Xerecs said he would pick either HMS GT or UPS 5. Our “sleeper” picks were generally the Doldrums and “Quick wins the game” fleets.

The first matchup was underway! HMS GT vs. Artillery Strike, in a series that would likely be played in a deathmatch style.

Basically, I forgot about Hidden Cove. The overpowered event allowed the Neptuno to strike first, where she scored a whopping 5/5 hits on the Grand Temple. The London was overmatched for the remainder of the battle, and Artillery Strike pulled off a major upset!

The second game underway:

After a somewhat lengthy maneuvering process the GT finally got in range of the Neptuno and sank her outright!

Diablo managed to go 4/4 against the GT, but the Spanish fleet was effectively doomed. HMS GT won the game to even the series 1-1!

For the final game, the home islands were close together. The Neptuno didn’t have a lot of room on her first turn, and luckily I got an SAT to dismast her. From there the game was predictable, with the English firepower too much to overcome.

HMS GT wins the series 2-1 and advances to the second round! This series was unique in that it was essentially a deathmatch, since neither fleet loaded any gold in any of the games. This would soon change however, as Xerecs and I got started on the next matchup. The first game is in progress!

10/16/2016

Two more series have been played! We decided to go in seed order – the second matchup would feature the #2 seed, and so on.

UPS 5 (#2 seed) (commanded by xerecs)
vs.
RtSS English (#15 seed) (commanded by a7xfanben)

This was my first time playing my RtSS fleet challenge entry, and my first time using the English native canoes. Of course, my fleet was in for a rude awakening, facing a UPS variant.

The canoes were designed to deny the Zeus from an island, but the Zeus sacced to explore first. The canoes scattered, while the Halcyon ducked into fog in anticipation of battle.

The Halcyon attacked but only scored one hit! This left the RtSS fleet in grave danger.

The Zeus sacs to sink the Halcyon! The Elthelfleda returns home with gold as canoes load gold.

The Elthelfleda gets home before the Zeus can strike, but things aren’t looking good for the English.

The Zeus then went after the canoes, eliminating one and being pestered by another. The Zeus had lost some masts when the Elthelfleda redocked at her home island, firing at the Zeus in the process.

The Zeus eliminated the gold-laden canoes but this left the Elthelfleda to sail east for more gold. The Zeus docked home, but was still a huge threat.

The Zeus sacced to cut off the Elthelfleda before she could return home!

The Elthelfleda was captured and UPS 5 won the game 11-8!

The second game featured different home islands. I made the mistake of putting the canoes near the Zeus again, but it didn’t seem to matter much.

Similar to the last game, but the Halcyon stays docked.

The Halcyon comes out and hits 2/3, trying to buy time for the gold runners.

The Zeus simply crushes the opposition. The Halcyon lies derelict while the Elthelfleda is close to being dismasted.

Now it was a chase for the canoes! I decided to spread them out, simply hoping that the Zeus would only be able to catch 2. The English were just trying to avoid being shut out at this point.

A canoe did manage to slip by, but UPS 5 still won the game easily, 9-2. UPS 5 advances to the second round!

The next matchup!

UPS 4 (#3 seed) (commanded by xerecs)
vs.
Quick wins the game (#14 seed) (commanded by a7xfanben)

It’s important to note that the “Quick” fleet had the Coeur swapped out for Hidden Cove. The Coeur’s explorer was moved to the Courageux, while Cissey was moved to the Vengeance.

The sea was set for Game 1!

It quickly (no pun intended heh) became apparent that this series would be considerably more interesting than the last two. The first was a mismatch with HMS GT emerging victorious, with the second matchup also ending in a predictable fashion. Here, both fleets possessed gold bonus abilities (3 for UPS 4, and 1 for Quick), and both fleets were generally focused on gold, though each also had a purpose-built gunship. Here, the French gold runners have abandoned their explorers in favor of more gold, while Captain Jack Sparrow (CJS) gets busy aboard the Coral up north.

I knew I needed to force the action with the Vengeance, or else the Pirates would get a huge lead with all of their gold bonuses. The Coral would be the primary target in all games of the series, and here the Vengeance dismasted her with a well-placed L-range shot! At the French home island, the Pique is about to be given an explore action to give her gold to the Courageux, who will redock to get Aristide’s bonus on both hauls.

Battle erupts in the northwest, where the Longshanks and Vengeance duel. The Vengeance has a durability and cancelling advantage, but her gunners seemed tired to start this tournament. The Sea Crane has no UPS strategy to work with, so she sails out to get gold on her own.

After missing another shot, the Vengeance abandons the LS to go after the Sea Crane, hoping to cripple the ship before she docks home gold. The Courageux and Pique continue to tag team, getting the gold bonus on a single coin.

The Sea Crane did manage to get home in time, but the Vengeance was in cancelling range! Lenoir cancelled Genny Gallows, denying the Pirates an additional 2 gold. Battle then continued, with the Vengeance eventually winning out with just one mast remaining. The gold was counted up, and the Quick fleet had won a 19-14 upset! It helped that they had found most of the silver coins coveted by the Pirates.

For the second game the HI’s would once again be at opposite ends of the playing area.

The Coral does her thing, and the Vengeance comes after her.

The Pirates can get gold extremely quickly, but the French have 6 coins on their runners. The Vengeance is not fast enough to catch the Coral…

Then things started getting interesting. The Pirates built Dead Man’s Point on the island, but the Vengeance rammed off the Coral’s single mast.

The fort took out a mast on the Vengeance and Barbinais along with it, but the Coral was dismasted after repairing.

The Coral sank, and the Vengeance and Longshanks went at it again!

The Vengeance couldn’t overcome the combined firepower of the fort and LS. The French cleaned out their two islands, but the Sea Crane established the Devil’s Maw on the center island. This effectively ended the game, and it was time to count!

The Pirates had won a 31-24 victory in one of the highest-scoring standard games you’ll ever see! 55 total gold was counted, meaning that 25 extra gold had been created with the gold bonuses! (almost another game’s worth of gold!)

A Game 3 finale was in order! The French got to go first, and I made sure that the Pirate HI was next to my own.

The French used Hidden Cove to spring the Vengeance to the center island. She then moved east, looking to attack the Coral once again.

Once again the Coral built Dead Man’s Point:

The Vengeance got lucky and hit 3/4 on the fort to severely limit its return firepower. The Coral was in major trouble, with the LS too far away to help.

Similar to the first game, the Coral ran for it and was dismasted by a long range shot! As you can see, both fleets have unloaded some gold and received some bonuses from it.

The LS went after the French gold runners for the first time, but the Courageux fought back instead of running! The Vengeance went after the Sea Crane, and it looked like the Quick fleet could pull off a major upset if they could just dismast the remaining Pirate ships.

The battle in the center rages, with the Pique getting in on the action:

The LS was sunk and the Vengeance dismasted the Sea Crane to end the game!

The French had 16 gold to the Pirates’ 9. Quick wins the game advances to the second round!

Here’s the updated bracket. After two predictable matchups, we have our first upset. (The X’s at the upper left mean that the fleet was eliminated without getting any gold, while the 0’s mean that that fleet won the game despite not getting any gold.)

10/16/2016

Norvegia (#4 seed) (commanded by a7xfanben)
vs.
Spanish Meta V2 (#13 seed) (commanded by xerecs)

The next matchup featured the classic Norvegia setup. We only had time for Game 1 so far.

The Neptune’s Hoard (NH) found Rum on the middle island, freezing the ship for a turn. In hindsight, I could have used the ship’s ability to trade away the UT, but in addition, Rum probably shouldn’t be in the fleet in the first place.

The San Cristobal (SC) caught the NH and blasted most of her masts off. Luckily for the Pirates, the final mast standing meant the NH could return home with a sac action. The Star of Siam docked home gold on the turn as well, giving Norvegia a bit of a windfall. The Banshee’s Cry (BC) is hiding from the SC while the Monarca runs gold.

At one point all the Pirate ships were docked at the home island, leading to the SC resorting to ramming.

The Monarca reached home with Buried Treasure (another UT I’m taking out of the Norvegia build for future games) and Spices, while the NH was able to damage the SC with a double action, including a ram of her own. The BC grabbed some coins but wasn’t able to get them back home.

In the end, Barbary Banner and the sheer volume of gold gave Norvegia the victory! The final score was 23-16. We look forward to Game 2!

10/19/2016

Norvegia (#4 seed) (commanded by a7xfanben)
vs.
Spanish Meta V2 (#13 seed) (commanded by xerecs)

The second game of the series was about to begin!

Total destruction! The San Cristobal gets an EA, which lets her dismast the NH and BC. The Star of Siam was in the fog, and came out to score a hit. However, the game was as good as over when the NH’s final mast fell.

The SC sinks the remainder of the fleet, and the Spanish Meta fleet wins Game 2 by a score of 1-0! (from eliminating the Hag of Tortuga aboard the BC when she sank)

For the third time in the first four matchups, we were going to a decisive Game 3!

The NH and Star of Siam reached islands on their first turn, and the BC headed to a third island. The Pirates wanted to split their fleet so the SC would have to chase down multiple targets.

Once again the SC got an EA, but she couldn’t reach the Neptune’s Hoard! The Star of Siam was sunk instead, allowing the NH to reach home with gold.

With the NH docked, the SC then went after the Banshee’s Cry. The BC was sunk, but this opened the door for the Pirates to strike. I nearly went for the northernmost wild island, but I then remembered that from past experience, sinking the only gold runner an opponent has gives you a very good shot at winning the game. The NH used a sac action to reach the Monarca and dismasted her!

The SC finally missed the EA roll (about time haha), and missed the NH with both shots. This allowed the NH another sac action, which was used to sink the Monarca and miraculously dismast the SC as well!

Norvegia won the game 8-1. Norvegia advances to the second round! This was a fun series, and the Spanish Meta fleet is definitely a tough customer. The biggest differences were the guaranteed sac actions of the Norvegia fleet against the EA roll for the SC, which sometimes doesn’t work, as well as having 3 gold runners compared to 1.

The next matchup!

UPS 2 (#5 seed) (commanded by a7xfanben)
vs.
Extra Action Gold Runners (#12 seed) (commanded by xerecs)

I really love my EA gold runners fleet, but I love UPS 2 as well. Also, as I said previously, if I had to pick a fleet to win the tournament, it would be UPS 2, although it’s very close and there is very tough competition. I was disappointed to see that these fleets have already faced each other, with UPS 2 prevailing 2 games to 1, but that was bound to happen in this tournament anyway, and will likely happen again.

The EA fleet got off to a great start, with the Joya and Star of Siam (SoS) receiving EA’s on the first turn. The Joya grabbed gold from the center island, while the SoS headed west.

Then it was time for UPS 2. The strategy darrin outlined in his fleet was followed, and by the end of the turn UPS 2 had a bunch of gold sitting on their home island, two islands explored, Paradis de la Mer built on the island the SoS was sailing towards, and turtles swimming towards their home island.

The second turn saw the Joya dock home gold with the help of Skrew Engine, while the Hai Peng built another fort.

The SoS eliminated some turtles, while the Joya made for the northeastern island. The Hai Peng wasn’t quite fast enough to beat the Joya to the island from across the sea, so instead took a shot against the Algeciras (which missed) and then returned to Dead Man’s Point to transfer another coin home.

The Joya used Homing Beacon to get home extremely quickly, and with most of the gold unloaded and the rest in forts, the game was called. UPS 2 had won handily, 27-13. This was the first time using UPS 2 in a while, and it didn’t disappoint!

10/20/2016

UPS 2 (#5 seed) (commanded by a7xfanben)
vs.
Extra Action Gold Runners (#12 seed) (commanded by xerecs)

UPS 2 went first in the second game of the series, building a fort on the second island but finding useless UT’s and low gold values.

The Joya got an EA and found turtles, and it was clear that this game would be tougher for UPS 2 to win.

Only then did UPS 2 play Hidden Cove, and CJS transported some coins home and Dead Man’s Point was erected on the island.

That caused the SoS to change course, while the Joya got another EA to dock home some gold. The turtles were on their way, and they had a short trip home.

Here I made a mistake, thinking the Hai Peng could dismast the Algeciras with a shoot and ram. Both shots missed, and the Hai Peng was pinned. After dumping some crew, the Intrepide sailed from home, as it was a bit of an emergency for the usually-calm UPS 2 fleet. The Intrepide was ready to sail to the Paradis fort if needed, taking the gold to the much safer location of the home island.

The Algeciras scored a hit on the pinned Hai Peng, but it was ignored with a Cross of Coronado. The SoS then missed twice in a row, and UPS 2 had another chance.

The Hai Peng finally managed to dismast the Algeciras and escape a bad situation, scooting off to the southwest island to trade home some coins. My thinking here was that, knowing the gold values on the wild island, I could create a bigger gold advantage by tossing them home than eliminating turtles. It’s not likely the Hai Peng could get all of the turtles, but each coin transferred via CJS would get +2’d by Maurice Aristide. In addition, eliminating the turtles could have meant facing more shots from the SoS.

UPS 2 was content to transfer home coins and get the bonus on each one, while the EA runners got busy attacking Dead Man’s Point. The fort took a hit from the SoS, while the Joya waited for an EA to get in range since she had no captain. The fort’s gunners didn’t expect any contest with UPS 2 going, and they were asleep at their posts and forgot to fire.

The Star of Siam’s guns woke them up, and they connected to dismast the SoS! This took Gallows out of the action, and the EA runners were essentially down to one ship. The turtles reached home safely after the Hai Peng eliminated one of them, while the Intrepide and Coeur sailed north now that the HP didn’t have any gold to transfer.

The battle at the fort intensified! The Joya eliminated its final cannon, but that happened as the entire UPS 2 fleet sailed up to the Joya. The Joya was rammed by the HP and Coeur, while the Intrepide loaded the final available coin from the fort.

The Joya steals the coin! The SoS heads for the center island, where the Trees UT is located.

The HP stole the coin back, and the Joya was sunk.

The SoS used Homing Beacon to return home and repair, while the Intrepide took the coin from the HP. Aristide worked his magic once more, and the game ended. Once the gold was counted, it was obvious that the gold in the forts would not have given the EA fleet the win if they had gotten it.

The final score was:
UPS 2: 37 gold
EA gold runners: 17 gold

UPS 2 advances to Round 2! This came as no surprise, especially given that UPS 2 had already won a series against the EA fleet. My EA gold runner fleet is now 9-13, but 4 of those losses have come against UPS 2, one of the best fleets of all time.

With that, we also have our first Round 2 matchup: Norvegia vs. UPS 2!

12/1/2016

Xerecs and I were able to continue the tournament! We played three games; the third one was possibly the longest (by number of turns) 40 point game I’ve been involved in. It was incredibly desperate and wacky – keep reading to see what happened!

American Pirates (#6 seed) (commanded by Xerecs)
vs.
The Doldrums (#11 seed) (commanded by a7xfanben)

Becalmed would soon prove to be a massive nuisance to the AP’s, giving the Doldrums fleet a head start. The Eagle waited for the Roanoke in the fog, while the Banshee’s Cry and Amity both docked at the same island. The Longshanks is already headed back with gold due to Hidden Cove.

The Eagle managed to dismast the Roanoke and come to the BC’s aid when the Amity rammed the BC! With their gunship out of action and no gold on their ships or home island, it would be a tough road back for the AP’s in this game.

The Eagle has sunk the Roanoke, while the Longshanks rams the Amity.

The Eagle finishes off the Amity while the Bloody Jewel returns home with gold. The LS rescues the BC. The AP’s manage some gold as the Bandido returns home, but it’s only to avoid a shutout at this point. The Doldrums win 20-4!

The AP’s went first in the second game, but the Doldrums still managed to hit the Roanoke and Amity with Becalmed on their first turn. The Eagle stayed home, anticipating the Roanoke returning to her HI, while the Doldrum gold runners were wary of the dangerous American 5 master.

The Roanoke instead headed west, prompting the Eagle to sail out. Suddenly 4 ships were near the center island! The Bloody Jewel unloads gold, while the Amity grabs some for the AP’s.

Shots fired! The Eagle wasn’t able to hit anything with her first action, but by saccing she got lucky and took out 3 masts on the Roanoke! The Longshanks rammed the Bandido derelict, and combat was in full swing.

Of course, in a game this small, it didn’t last long. The Eagle used another double action to dismast the Roanoke, while the LS towed the Bandido.

This led to a strange situation where the Eagle purposely didn’t shoot at the Amity, since dismasting her would end the game. The Doldrums weren’t 100% sure they had more gold than the AP’s, so the Eagle sailed by while the Amity took some ineffective shots at the captured Roanoke. The BC engaged the Amity but failed her ram and was then dismasted.

The game ended when the Eagle docked home the Roanoke; the gold and captured Commodore Perry gave the Doldrums a 21-8 victory! The Doldrums advances to Round 2! Becalmed was certainly a factor in the two games, but good dice luck and appropriate maneuvering by the Eagle also won the day. (The Eagle would have to receive the MVS “Most Valuable Ship” award for this series)

The next matchup:
Hai Peng Fort Frenzy! (#7 seed) (commanded by a7xfanben)
vs.
dakmor’s swarm fleet (#10 seed) (commanded by Xerecs)

(This was the crazy one!)

The home islands were relatively close together. I was very excited to return to my HPFF fleet, which is a variant on the UPS strategy. Of the 16 ships the two fleets had on the ocean, none had more than 2 masts. Throw in only a single captain ability (Captain Jack Sparrow), and it looked like the series wouldn’t feature much combat. What looked like it could be a quick game turned into a long affair….

This is the situation before the swarm fleet even took a turn. The Hai Peng has followed the HPFF strategy, building Paradis de la Mer on the center wild island. The UT Maps of Alexandria was found, giving both fleets the location of each UT and standard coin. The HP (Hai Peng) loaded the traded oarsman and a coin, while the Banshee’s Cry headed for the southwestern island. Finally the swarm fleet could take its turn!

Here, the swarm fleet has set out, but the Hai Peng is at it again. The Devil’s Maw was built on the westernmost island, and the HP loaded another coin and the Holy Water UT.

The HP then headed south to build Dead Man’s Point, the third fort on four wild islands! Soon afterward, things started to “devolve into chaos”, as I like to say. A few swarm ships got too close to Paradis de la Mer, who shot a couple masts off. The Banshee’s Cry went there to grab any extra coins not used for the fort’s construction. The swarm fleet mostly divided itself in two: a contingent of ships headed west to attack the Devil’s Maw, while another group headed south towards the HPFF home island. There, the Hai Peng had just docked home the coins she had picked up on her journey to most of the wild islands. However, she was soon under attack! The swarm fleet can utilize rams quite effectively, and this strategy began to pay off as the HP lost a mast. CJS was surprised to be in so much trouble at his own HI! It’s worth noting that the northern wild island was effectively irrelevant at this point, having been emptied by the swarm fleet.

The swarm fleet took their turn, and the momentum began to shift! The sheer number of swarmers overwhelmed the Hai Peng and dismasted her via ramming! Then, in an expert display of seamanship, Xerecs used the swarm fleet to capture and chain-tow the Hai Peng away from the HPFF home island and out of harm’s way!!!! Shocked Chain-towing in a regular game, using about 6 total ships! (I sort of introduced chain-towing as a tactic back in my first 500 point game; it’s normally only viable in very large games so to see it here was epic.) At this point I commented that I was willing to lose despite my love for the HPFF fleet, simply because of Xerecs’ fantastic move and the honorable way of losing such a unique game. However, it was becoming evident that there was a lot of game left to play! The swarmers took up position in the far west against the Devil’s Maw, and began their bombardment! This was another unique feature of this game – a prolonged assault against a fort by multiple ships, something you’d be more likely to see in real life than in a game of Pirates.

With the Hai Peng captured, Lord Mycron aboard the Patagonia can now give the extra action to the Banshee’s Cry. The BC zips home with an extra coin from Paradis, giving the HPFF fleet 11 gold on their home island. The Lezard sails out, the HPFF fleet desperate now that the HP is gone. The Devil’s Maw puts up a good fight against the uncaptained swarmers, dismasting two ships even as three more prepare to fire.

The two battles continue to rage. The swarmers now concentrate some ships against the remaining HPFF ships. The Lezard and Patagonia are both dismasted by rams! The Devil’s Maw has knocked the western swarm squadron down to 2 masts, meaning that the fort has won the battle! Another rarity, as forts are often destroyed before they can even fire a shot when a fast gunship sails in and mauls them immediately. Between the lack of captains in the swarm fleet and the small size of the ships, the fort was in a uniquely good position. The Banshee’s Cry tries to get gold, while the Hai Peng is towed home by the swarmers. At this point, the only way for the swarm fleet to win is to get some of the gold from the forts. However, they will be hard-pressed to destroy all 3 with their lack of firepower.

Both fleets continue to have some successes: the Devil’s Maw finishes off the swarmers in the west, and the BC uses Skrew Engine to duck into a fog bank with a coin. However, the swarm fleet sinks the Lezard and captures the Patagonia! This gives the swarmers access to Lord Mycron.

Some turns later, and the Hai Peng has been repaired! She sets out for the swarm fleet, and is by far their best hope for them to destroy the forts, between her speed and CJS’s captain ability. Her first shots miss the Devil’s Maw, but Mycron can give the ship another action. At this point the Pirate fort is down to 3 cannons and faces a more powerful squadron in this second battle, with more swarm ships arriving soon. A ship stands guard at the HPFF HI, where the BC needs a 2 or 3 coming out of the fog to dock home her coin.

With 4 ships the swarm fleet manages to destroy the Devil’s Maw in the second assault! The Hai Peng is given the Patagonia’s action to load the 5 coin, which is extremely important. With two forts left, the swarmers will need some luck if they want to destroy both, especially against Paradis’ overpowered ability. The Banshee’s Cry has docked home a 3 for HPFF, and since she’s the only ship remaining in the fleet, she has become essentially invincible! If the swarm fleet dismasts the BC, the game immediately ends and the remaining gold in the two forts counts for the HPFF fleet, which would give them the win. Knowing this, the BC immediately rams the nearest swarm ship in the hopes of capturing and repairing it, but the hapless Venture sinks instantly!

The Banshee’s Cry manages to capture El Raton and even the Patagonia! However, the Patagonia is quickly sunk after being recaptured, giving the swarm fleet an extra 1 gold from Bratley’s Ransom ability, which could certainly matter in this hotly contested game. In the south, Dead Man’s Point has already fallen! Some of the fort’s gunners fell asleep at their posts after the battle of the Devil’s Maw took so long, and the fort is quickly defeated. The Hai Peng tries to load the gold used to build the fort… and we suddenly realize that I had accidentally cheated! The BC’s entire trip to Dead Man’s Point earlier in the game was all for nought: I thought there were two 3’s in the fort, but in reality the 3 used to build the fort was the only standard coin on the island. Thus the coin couldn’t be removed from the fort, and we corrected the mistake by transferring the coin from my HI to the Hai Peng. I knew something was amiss when I counted 38 total gold in play (30 + 5 from Barbary Banner, + a mysterious 3 that I mistook for an extra coin when it wasn’t).

Something else happened in this segment of turns that completely turned the game on its head. When the BC went to Dead Man’s Point to grab the “extra” 3 coin, she did pick up the Jailhouse Dog UT (so I guess the trip wasn’t completely worthless!). I completely forgot about the UT until one of the swarm ships won a boarding party against the BC. Having to look at the BC’s deckplate for the first time in a while, I suddenly saw the UT! I then consulted the Pirate Code and found this:

The Pirate Code wrote:
Jailhouse Dog
-This ability may be used at any time during the game.


Ecstatic, I then happened to (luckily!) read further:

The Pirate Code wrote:
-This ability may be used to remove a unique treasure that is worth gold after it has been unloaded to a home island, provided that unloading that treasure did not trigger an endgame condition. If any endgame condition has been reached, Jailhouse Dog can no longer be used.


Shocked

I used Jailhouse Dog to eliminate the Barbary Banner sitting on the swarm HI and cost them 5 gold!

The BC lost one of her two oarsmen instead of having the UT stolen, and now it was once again a regular 30-gold game instead of the one-time “38”! At this point I knew exactly what I had to do: with 11 gold on my HI, just hold Paradis (with a 5 coin inside) and I would win the game. Jailhouse Dog meant the swarm fleet would have to get the gold from Paradis after all, rather than just the Devil’s Maw and Dead Man’s Point. Despite being on the winning side of the UT in this game, Jailhouse Dog is still one of my least favorite UT’s because it can be OP and game-breaking. It’s one of the ultimate “party poopers” of Pirates CSG.

With 2 of the 3 forts destroyed, it looked like the game would finally end soon. There was a brief scuffle near Paradis, which resulted in two derelict swarm ships. The Hai Peng hurried home with the gold from Dead Man’s Point (the real 3 that the BC never should have loaded heh), while the gunners at Paradis prepared for a final clash.

The BC captured the Intrepide and towed her to Paradis to repair, while the fort sank the other swarm ship. The Hai Peng sailed out, knowing that only one of the two HPFF ships (now including the Intrepide) could be dismasted (unless docked at the fort and therefore able to repair).

In between the above picture and this one, the Hai Peng rammed the Banshee’s Cry at such an angle that the guns of Paradis couldn’t hit the HP. However, the Intrepide rammed the HP and forced her to retreat. The HP went home to repair one final time! At this point I had been playing the game and typing in the chat with one hand for a while due to eating. This led to many bizarre and amusing things in the VASSAL chat, and further contributed to this long and wacky game.

The Hai Peng sailed out and dismasted the Intrepide, leaving the BC as the only HPFF ship once again. The Hai Peng tried to attack Paradis, but once the first die was rolled for Paradis’ effect, it was obvious that it was impossible for the HP to get enough hits. The fort’s guns boomed once more, and the Hai Peng was derelict! This seemed to end the game, but the swarm fleet still had the Jolly Mon at their home island! The Jolly Mon vs. Paradis de la Mer matchup didn’t happen for obvious reasons: the Jolly Mon would need an absolutely unprecedented string of luck to win, and even then a single successful ram from the BC would end the game as well.

Hai Peng Fort Frenzy wins the game 16-15!! 11 gold was on their HI, with 5 in the intact fort. The swarm fleet had 14 gold and 1 extra from sinking Bratley. How fitting that one of the longest and most desperate 40 point games ever ends with a 1-gold margin of victory! This is a game we’ll remember for a long time, and continues the trend of the HPFF fleet having very long and interesting games: its first series (against the AP fleet ironically) was also quite memorable. After all that, we still have at least one more game left to play in the series!

12/10/2016

2 more games!

Hai Peng Fort Frenzy! (#7 seed) (commanded by a7xfanben)
vs.
dakmor’s swarm fleet (#10 seed) (commanded by xerecs)

The second game of the series got started, with the swarm fleet going first. For the second game in a row the Hai Peng built Paradis de la Mer on the center island.

The HP was headed to the southeast (building Dead Man’s Point), where she found the Maps of Alexandria. By that point she had also loaded Holy Water and Jailhouse Dog. Paradis dismasted the swarm’s Banshee’s Cry, while the HPFF BC docked in the northeast.

The BC used Skrew Engine to dock home a few coins, including the Barbary Banner. This time HPFF had found both the dog and the banner, giving them a decided advantage. It was already likely that HPFF would win, but they also had luck on their side. Xerecs’ cannons were ineffective, and DMP crushed all comers in the southeast.

Here, the swarm fleet has some gold home, but they’re running out of ships. At this point the swarm fleet had to do the near-impossible: steal the Jailhouse Dog from the HP, use it to eliminate Barbary Banner, and then somehow destroy Paradis de la Mer to get the fort’s 5 coin. HPFF had 16 gold when counting Paradis’ gold but not counting the banner or the 3 in Dead Man’s Point. The Banshee’s Cry and Lezard were dismasted via rams but quickly repaired.

The Hai Peng got involved in the skirmish at the HPFF home island, where she was actually dismasted by rams and forced to hand over the Jailhouse Dog! Xerecs immediately played it to eliminate the Barbary Banner, but after the BC and Lezard got revenge by dismasting two swarm ships, the swarm fleet almost certainly wouldn’t be able to destroy Paradis. Realizing that the Hai Peng could move S+L+S when derelict (oarsman + both bonuses intact from having a captain and helmsman aboard), I decided to take off, knowing I could repair at either fort but knowing that the HP would be captured if she stayed at home.

An overly lengthy endgame process saw the Algeciras capture the Patagonia, so Mycron gave the swarm’s Coeur some extra actions. The Carrion Crow took the BC and Lezard out, leaving HPFF with just the HP. That would prove to be enough however, as the HP repaired at DMP, then dismasted the Carrion Crow. With only 2 masts left in the swarm fleet, we decided to call the game. HPFF had a 14-8 advantage even without the forts, which made the final score 22-8. Hai Peng Fort Frenzy advances to Round 2!

The final matchup of the first round!
Darrin’s Gold Race fleet (#8 seed) (commanded by a7xfanben)
vs.
USS Kettering – Deadly Weapon (#9 seed) (commanded by xerecs)

This was a bit of an odd matchup – a UPS variant against a fleet designed for deathmatch play. The Kettering fleet used the same nasty UT’s as the HMS Grand Temple fleet to maximize the competitive nature of the tournament.

Darrin’s fleet rolled to go first, and I followed his strategy to a T. The fleet had 12 gold on its HI by the end of the first turn.

CJS traded another coin home on the next turn, which was the final coin on the center island (Missionary was traded away on the first turn and the BC loaded a Monkey’s Paw). This gave the gold race fleet 17 gold, technically enough to win. However, knowing that the BC had only traded away 8 total gold, there was 22 more gold out on the islands. To be fair we kept playing in the off chance that the Kettering fleet could come back, since the gold race fleet didn’t have a true majority of all the gold now in play (9 extra on their HI from the bonuses).

The Rover turned around and rammed the Kettering! However, no damage was done. Then, in a bizarre twist, the Rover won the boarding party 7-6! A 2 point ship had just won a boarding party against one of the most feared ships in the game, and there was nothing the canceller ability could do about it! To continue the oddities, the Kettering then missed 4 shots in a row (partly due to Brent Rice having been eliminated in the boarding) before the Minuteman finally put an end to the mighty Rover. That whole sequence guaranteed the Banshee’s Cry another explore action at a different island, and it was over. CJS traded home a 7, which became a whopping 10 after the gold bonuses. Darrin’s gold race wins the first game of the series 27-0, the greatest margin of victory so far in the tournament and a higher margin of victory than any game from Tournament #1.

12/28/2016

Darrin’s Gold Race fleet (#8 seed) (commanded by a7xfanben)
vs.
USS Kettering – Deadly Weapon (#9 seed) (commanded by xerecs)

Game 2 (Darrin’s fleet won the first game)

This time the Kettering fleet went first, and the BC was unlucky enough to find 2 negative UT’s at the center island, loading Maps of Hades.

The Rover was dismasted, and it was clear that the BC would have to do some sailing (rather than just “Hidden Cove’ing” to the island and redocking) in order to win the game. The BC needed more regular coins at the center island rather than UT’s. Negative UT’s may be the most reliable way to slow down these UPS fleets, since treasure traders like Gilbert can only toss away one at a time. Even then, there’s a chance you’ll get another bad one in the exchange!

The Maps of Hades allowed the Kettering to easily sink the BC, while the Sea Crane and Bonnie Liz sailed out to look for gold instead. The strategy of the gold race fleet was massively compromised, and the serious firepower advantage of the Kettering fleet looked like a tough obstacle to overcome.

Here the Sea Crane is being towed by the Kettering for her gold and gold bonus ability. The Bonnie Liz has gotten the Rover back in action, and they look to ram and steal before it’s too late.

The Bonnie Liz actually managed to steal a 7 from the Sea Crane, but it was promptly retaken by the Algeciras, who gave it to the Sea Crane to get the +1 bonus. The Rover was smashed again, while the Bonnie Liz tried to commit suicide on a reef in order to force the game’s end, simply hoping for enough gold to win. However, it would have been too late anyway, for the Kettering fleet won the game 22-9!

We have begun the third and final game of this series, and hope to complete it in the near future. After that, the competition heats up in Round 2!

1/20/2017

Darrin’s Gold Race fleet (#8 seed) (commanded by a7xfanben)
vs.
USS Kettering – Deadly Weapon (#9 seed) (commanded by xerecs)

The final game of the series was underway!

The Banshee’s Cry had to make a run for a second island, while the Rover tried to hold off the Kettering and the Sea Crane left her HI.

Disaster for the gold race fleet: the BC is sunk, the Sea Crane captured, and the Rover dismasted. The Bonnie Liz is their only hope now.

The Kettering encountered a Missionary, but managed to get some gold home, leaving the Minuteman flotilla near the middle of the map. The Bonnie Liz was off to the southwestern island, where she found Wolves.

With Wolves making some of the gold unavailable, the game was soon decided. Darrin’s gold race had won a close 21-16 victory and advances to the second round of the tournament!

After the entire first round, here is the updated bracket. As before, the first number in each pair of scores belongs to the upper fleet, whether they won the game or not. Many fleets were quite impressive, winning both games of their series, while others prevailed against tough competition. The biggest upset was Quick wins the game (#14 seed) beating UPS 4, the #3 seed. After exactly 20 games in Round 1, there are 8 fleets remaining!

The first matchup of Round 2!

HMS GT (#1 seed) (commanded by Xerecs)
vs.
Darrin’s Gold Race fleet (#8 seed) (commanded by a7xfanben)

The home islands were the same as they were for the third game of the previous matchup, and with HMS GT following a similar style as the USS Kettering fleet, it would prove to be a similar game.

Once again, the Rover is dismasted as the BC runs off to a second island.

I didn’t take many pictures, but the Bonnie Liz ended up as the last ship in the gold race fleet once again. This time, the Bonnie Liz managed to do a suicide run onto a reef to force the game’s end, knowing that her fleet likely had more gold than the HMS GT fleet. This was correct, as darrin’s fleet won 15-6.

There are no pictures from the second game of the matchup, because there doesn’t need to be. The gold race fleet rolled to go first (after going second in the first game), and the Banshee’s Cry managed to find only standard coins on the island she was Hidden Cove’d to! This meant she could simply trade 4 coins home in 2 turns and get the +3 bonuses on all of them. There was no need to scramble and no need for a second island. With 13 regular gold on the HI, there was only 17 gold available for the GT fleet. However, with 12 gold in bonuses in addition to the 13 standard, there was absolutely no way for the GT fleet to win.

Darrin’s gold race wins 25-0 and advances to Round 3, the semifinals! The #1 seed is out of the tournament in an upset! It wasn’t hugely surprising, since the gold race fleet is a UPS variant and the HMS GT fleet is built for combat. The perfect scenario combined with going first let the gold race fleet attain an easy second victory.

2/3/2017

Xerecs and I have played a whopping 5 games in VASSAL Tournament #2! (and nearly finished a 6th)

UPS 5 (#2 seed) (commanded by xerecs)
vs.
Hai Peng Fort Frenzy! (#7 seed) (commanded by a7xfanben)

Both fleets quickly got to work, with HPFF building Paradis de la Mer in the center and the Devil’s Maw in the north, and UPS 5 building their Devil’s Maw in the west. UPS 5 found better coin values.

Here, HPFF has gone to the southeastern island, but the Zeus has destroyed their Devil’s Maw!

With the remaining gold contained within the two forts, there wasn’t much HPFF could do with their lack of firepower. The Lezard blocked the Zeus temporarily while the Hai Peng sped off in an attempt to destroy the Devil’s Maw to get at the gold inside. The Banshee’s Cry looked to take out the Hag of Tortuga.

The BC succeeded, but was dismasted for the effort. The 1 extra gold would not be enough to make the difference for HPFF, whose Hai Peng managed some damage against the Devil’s Maw before being destroyed. UPS 5 had won the first game of the series 17-12!

One turn into Game 2. HPFF’s home island is in the southeast, with UPS 5 in the west. The HP made it to the northern island, finding Pirate Globe, Jailhouse Dog, and two of the three 5 coins. Indeed, the luck had reversed from the previous game in terms of gold. To make things even better for HPFF, the Barbary Banner was revealed to be in the east, where the BC was headed.

A few turns later and HPFF is able to get what they need home. The HP avoided building Paradis on the northern island because it would put the valuable gold back in play, where the Zeus could potentially get it. After a loss in the first game, a change in strategy was just what the HPFF fleet needed, and here it panned out nicely (normally it’s better to just build the forts, but with a Zeus moving L+S+L+S the gold is not safe for long at all heh). UPS 5 almost managed a late-game salvage operation: I had kept the Jailhouse Dog aboard the Hai Peng in case it was needed, but suddenly it became a huge liability since the Zeus could steal it and use it to eliminate the Barbary Banner, which would cost HPFF the game! Thinking quickly I did something unorthodox and eliminated one of my own positive UT’s, Holy Water. This was simply to eliminate the dog from play to deny UPS 5 from using it. Indeed, the game turned out closer than I expected, but HPFF won 18-17 to even the series at a game apiece.

Game 3!

The Hai Peng sprinted to the northern island, once again finding the Pirate Globe, and this time the Barbary Banner as well. The Zeus went to the center island before turning to the northeastern island, where the Jailhouse Dog was. I then had to think about the best course of action for my fleet – I originally was going to run home with the Barbary Banner and the other coin the HP was carrying. However, seeing that the Zeus would soon come into possession of the Jailhouse Dog, and knowing that the UT could eliminate the Banner even after I docked at my HI, I decided to do something more risky but also more wise. The Hai Peng took off for the same northeastern island the Zeus was headed to, which could have been a suicide move. The HP docked on the side opposite the Zeus to maximize how far the junk would have to travel to get in range, and picked up the Jailhouse Dog, immediately playing it to eliminate the now-useless Maps of Alexandria UT on the western island. The Hai Peng picked up the Banner, and traded a 5 from the island for an oarsman on the Banshee’s Cry. The BC, originally headed for the western island, now turned around and docked home the new 5 coin, giving HPFF two of the three 5’s. To finish the turn, one of the 5’s was transferred back to the northeast to build Paradis de la Mer, both in an attempt to deter the Zeus from attacking the Hai Peng/Barbary Banner, and to protect the final coin on the island. Not trying to brag but it was one of my best turns of the tournament and a fine example of how strategic this “beer and pretzels” game can be, and why it’s always best to think things through. In the end I had essentially swapped 5’s while protecting my end of the gold in play, since it was likely the Banner would be sunk or stolen, but that the 5 would remain in play for at least some time inside Paradis. Had I ran home, I would have lost the Banner immediately and not gotten the 5 in the northeast.

The Zeus decided against attacking Paradis and a double-action Hai Peng, turning to the western island instead. The HP used an action to trade home the 2 from the northeastern island, then used her second action to move towards home, careful to stay out of the Zeus’ range.

The Coeur came out to meet the Hai Peng, but was unsuccessful with a ram and board. The HP sought shelter within a fog bank, while the Zeus unloaded her gold and combined it with the gold on the western island inside the Devil’s Maw fort. Seeing the endgame conflict materialize, the Banshee’s Cry headed to Paradis.

And there you have it – HPFF isn’t willing (or capable, likely) to go after the Devil’s Maw (and has no reason to), so the Zeus heads east to destroy Paradis. The 5 coin inside will determine the winner of the game – HPFF was up 21-14 at this point in gold, which could be determined by the revealed gold and the lack of extra gold in play outside of the Barbary Banner. It looked like the Coeur was sailing out to join the Zeus, but the HP sank her quickly. HPFF’s strategy was to stop the Zeus from destroying Paradis and loading the 5 coin in a single turn. As long as that didn’t happen, the HP could scoot to the island after Paradis fell, and then simply trade the 5 home (the Lezard still had 2 oarsmen aboard) for the instant win. The advantage laid with HPFF, but the situation was tense and competitive.

The BC maneuvered to block the Zeus at her bow, which in hindsight was a mistake because the Zeus could stay in place and shoot at the BC without coming into the range of the fort’s guns. The Zeus did just that, but managed to go an abysmal 0 for 4! This gave the BC another chance, which she used to dock at the island on the side where Paradis was closest to the water (with her stern sticking out as far as possible). This new blocking method was designed to force the Zeus to go to the far side of the island and shoot at Paradis from longer range, reducing the number of effective guns. The Hai Peng observed everything, ready to pounce on the Zeus with a double action (4 shots) or grab the 5 if the Zeus got lucky against the fort.

Incredibly, Xerecs rolled a 6 for Paradis’ ability, meaning the Zeus had to hit the fort 6 times that turn just to damage the fort at all! After this was not accomplished, Paradis knocked down 3 masts on the junk. The Banshee’s Cry has departed the island, hoping to get revenge when the Zeus becomes weaker.

After another exchange of cannon fire, the Zeus is left with just 4 masts while Paradis still has 4 cannons. The BC saw her opportunity for a miraculous ram and board, but both failed!

The OP ability of Paradis was too much for the (similarly OP) Zeus to overcome, with the Hai Peng fittingly dealing the final damage to the 10 master. After a great game and hard-fought victory (final score 21-14), Hai Peng Fort Frenzy had knocked off the #2 seed to advance to Round 3, the semifinals!

This was a really memorable series, and showcased how HPFF is one of the best fleets out there. The fleet also seems to be involved in a LOT of very long games, from its first (and also extremely memorable) series against the American Pirate fleet, to that crazy game against the swarm fleet, and now to this hotly contested series against the fleet that won T1. Wacky enough, when considering the total gold scores from each of the three games, HPFF beat UPS 5 by a score of just 51-48!

Fittingly enough, as great as that series turned out, the next series was a complete dud! lol.

Quick wins the game (#14 seed) (commanded by a7xfanben)
vs.
The Doldrums (#11 seed) (commanded by xerecs)

As the winner of the Round 1 series involving these fleets, I picked which one I controlled. Between my general disliking of events and my very positive experience using the Quick fleet to knock out UPS 4 in Round 1, I went with Quick wins the game despite its lower seed.

Game 1 setup: Quick in the north, Doldrums in the south.

Quick went first, with the Courageux being Hidden Cove’d to the center island to explore. The Pique headed east, while the Vengeance prepared to protect either gold runner while also trying to make sure that no two ships would be in range of Becalmed at the same time. Alas, it didn’t work, with the Pique and Vengeance getting hit with the event. I had forgotten that the Doldrums fleet also had Hidden Cove, and suddenly the Eagle was at the center island and attacking my fleet! The Courageux and Vengeance lost a mast apiece, but Becalmed was an even bigger problem. The Vengeance connected on my turn, but was unable to move and get canceller Lenoir in range, while the Courageux’s ram and board failed miserably.

The Eagle takes over, blasting the Quick fleet to smithereens! Suddenly the Pique was the only ship they could move (Vengeance sunk and Courageux derelict), and the game was effectively over.

The Eagle sank the Courageux with 6 gold aboard, but the Pique escaped into a fog bank, later grabbing gold from the western island. During all of the combat shenanigans the Pirate gold runners were busy establishing an advantage, and the French were out of the running. The Longshanks intercepted the Pique on her trip home and rammed her derelict to end the game. The Doldrums had won 13-0!

The second game went similarly great for the Doldrums, and similarly horrible for Quick. The Vengeance stayed in port, so the Eagle couldn’t shoot at her if the same Hidden Cove strategy was used. However, this allowed Becalmed to hit two ships on the first turn once again, and it looked like the Vengeance should have moved northwest. This time the Pique was Hidden Cove’d to the center island, the French changing their strategies after the embarrassing loss in Game 1.

Becalmed was played to hit the Vengeance and Courageux. Hidden Cove was then played to put the Eagle at the center island once again, where she wreaked havoc. The Pique was sunk, while the Courageux was dismasted soon afterwards. This left the French to seek Vengeance (ha ha… or not). The Vengeance got caught up in a skirmish with the Longshanks, which further proved how much momentum the Doldrums fleet had, for Xerecs even rolled much better at the guns during the engagement. The battle was ended by the Eagle, with the French eliminated for the second game in a row!

The Doldrums won 7-0 in dominating fashion, and are a force to be reckoned with as they move on to the semifinals to face HPFF!

Only one more series in Round 2, after which there are only 3 matchups before we crown the best fleet of all time!

2/5/2017

The final matchup of Round 2!

Norvegia (#4 seed) (commanded by xerecs)
vs.
UPS 2 (#5 seed) (commanded by a7xfanben)

UPS 2 got busy with a couple forts, while Norvegia went to the northern and southeastern islands.

Eventually the only gold left was in the two forts, which would determine the winner of the game. The Neptune’s Hoard attacked Dead Man’s Point, knocking out three cannons before she was dismasted and captured by the fort and the Hai Peng. (we counted our gold early to determine if it was close enough to keep playing for the fort gold, and indeed it was, with Norvegia up 21-18 with 9 gold in the forts)

The Star of Siam and Banshee’s Cry didn’t have enough firepower to destroy Dead Man’s Point, and both ships were dismasted to end the game! UPS 2 won the game 27-21.

Norvegia went first in the second game, using sac actions to reach two wild islands. The Hai Peng settled for the northwestern island, finding good gold values there (4,3,2,2). UPS 2 didn’t build a fort, planning to send home the islands’ final two coins on the following turn.

After much excellent treasure running by both fleets, it looked like it was going to be a close finish. Norvegia found all of their UT’s (Spices, Barbary Banner, and Buried Treasure), while the Hai Peng was busy trading home coins from the northeastern and center islands. The last coin on the NE island was a 1, and CJS knew there was no point in getting that coin when he could try for a potentially better (and definitely not worse) coin with the final treasure of the center island. (UPS 2 had to pick one coin and not the other because the HP’s helmsman had been sacced recently so the HP could explore the NE island right after docking, and because the Neptune’s Hoard could catch the HP with her speed on Norvegia’s turn.) The decision paid off when the coin was a 2, which CJS traded home.

The Hai Peng was dismasted by the Neptune’s Hoard, while the Banshee’s Cry docked home the final 1 coin for Norvegia.

In the end, UPS 2 had won a very close 27-25 victory! This reveals how important it was that the HP switched islands at the end, for if CJS had traded home the 1, the game would likely have ended tied at 26! For me it was one of the best treasure running games I’ve ever seen, with a whopping 22 extra gold in play by the end of it (12 from Maurice Aristide’s +2 bonuses, and more from the UT’s). Another weird stat is that Norvegia totaled 46 gold between the two games and still lost both! It seems that UPS 2 is always involved in very high-scoring affairs; they just happen to score more than their opponents.

UPS 2 advances to the semifinals!

Here is the updated bracket, with just 3 matchups left! At this point, we may play more than 2 or 3 games per series, if there’s any doubt about which fleet is superior, similar to what we did in the last few series of T1.

Round 2 saw some VERY interesting series, with both the #1 and #2 seeds being knocked out. I’m not overly surprised at the left side of the bracket, as I had UPS 2 as the potential winner before the tournament started, and the gold race fleet not far behind. However, the right side of the bracket is a little more surprising, with HPFF knocking off UPS 5 in a close series. The Doldrums fleet has been the most dominant of the tournament, outscoring its opponents 61-12 (!), going 4-0, and often finishing games rather quickly. I hope Becalmed doesn’t effectively ruin the tournament… either way, these semifinal matchups look very competitive and intriguing. It’s also worth noting that the Doldrums fleet is the only fleet remaining that has a functional gunship… not overly surprising, but in the past I’ve seen different HMS GT fleets absolutely steamroll great gold fleets (which just speaks to how amazing Darrin’s gold race fleet really is).

Stay tuned to find out which fleet becomes the greatest ever!

2/10/2017

A grand mistake has been made… an embarrassing error that threatens the integrity of the tournament….

EVENTGATE.

The first of two semifinal matchups began, with Hai Peng Fort Frenzy (HPFF) facing the Doldrums fleet. As usual, the Doldrums fleet was cruising along, indeed on their path to an easy 17-2 victory for a nearly unprecedented 5-0 record. Early in the game the Hai Peng returned home to avoid being hit by Becalmed and then the Eagle, who would be Hidden Cove’d to the center island and then given a sac action to move and shoot twice. The Banshee’s Cry then moved into a fog bank, which prompted Xerecs to wonder if the fog would make the BC immune to Becalmed. I figured as much since I thought that lines of sight/ability/etc were blocked by fog. The game continued, and here you can see the Eagle in the southwest after sinking the HP, essentially ending the game in favor of the Doldrums.

To confirm my thoughts about Becalmed I went to the Pirate Code, and funny enough I went to the section on Becalmed instead of the section on fog banks (where the answer to the question actually is). It was then and there that I saw it:

-Only one “beginning of turn” event token may be revealed during your turn.

O_O

Neither of us knew about this ruling, and it changed EVERYTHING. I immediately looked back at the battle reports concerning the Doldrums fleet, and sure enough, the fleet had used both Becalmed and Hidden Cove on their first turn in possibly every game.

Suddenly the Doldrums’ 5-0 record was in doubt. Not only that, but their position in the tournament. One more win would put them into the final round, where a series victory would give them the title of “best fleet of all time”. It became very apparent that controversy and scandal would win the night, but with T2 being a somewhat serious affair (we have to get it right), we were determined to fix what we could.

I have decided not to go back and edit any previous reports, since it could be confusing and disrupts the story of the tournament. A new picture of the updated bracket follows at the end of this report.

After a discussion, Xerecs and I narrowly decided to replay both series that the Doldrums fleet was involved in. This would be the most fair, and the Doldrums fleet would need to prove itself using the better rules. After all, it felt like Becalmed had gotten them to the semifinals almost by itself, and it was the only fleet in the tournament using the event. (the latter of which was very lucky – since no other fleet in the tournament uses both Becalmed and Hidden Cove, there wouldn’t be any other matchups to replay)

With that, we were suddenly back in Round 1!

American Pirates (#6 seed) (commanded by a7xfanben)
vs.
The Doldrums (#11 seed) (commanded by xerecs)

We used the same home islands as in Game 1 of the original series. The Amity used Hidden Cove to load up from the center island.

The Doldrums used their own Hidden Cove to dismast the Amity with the Eagle and take two masts off the Roanoke.

However, on the next turn the Roanoke sank the Eagle! It became clear that playing Becalmed and Hidden Cove on the first turn hadbeen giving the Doldrums fleet quite an unfair advantage.

The Roanoke sank the Bloody Jewel, while the Amity and Bandido eventually returned with gold for the AP’s.

The Roanoke was then set upon by the Longshanks (LS) and BC of the Doldrums fleet, until she was dismasted and captured! The Amity repaired two of her three masts before setting out for the final coin on the southwestern island. The Bandido followed her into a fog bank, while the remaining Doldrums fleet looked to intercept. The BC was rammed out of the game, while the Roanoke repaired. Eventually the Bandido rammed the final mast off the LS and captured her, towing the ship to block the Roanoke from attacking the Amity. The Amity returned the coin home and the American Pirates had dealt the Doldrums fleet their first loss! The final score was 17-15 after finding out that Raft had no effect on the Hag of Tortuga; she became 1 gold for the AP’s when the Eagle sank.

The setup for Game 2:

This time the “Hidden Cove chess game” resulted in the Roanoke besting the Eagle once again.

Now the Roanoke can effectively terrorize the Doldrums gold runners, while the Amity and Bandido both dock in the west.

The BC was dismasted and captured, while the Amity and Bandido returned home with gold.

The Bloody Jewel ducked into fog with gold aboard, while the LS was targeted by the Roanoke. The AP fleet has formed a temporary chain of ships to block the Bloody Jewel if she comes out of the fog.

Some late-game antics made the game closer than it looks. (capturing the BC was a mistake) However, in the end the AP fleet won 9-8!

The American Pirates move on to Round 2! The Doldrums fleet has been retroactively eliminated! In stunning fashion, the Doldrums fleet falls as far as you could possibly imagine, from 5-0 and one win away from the finals to 0-2 and out of the tournament. 0_0

Now we had a brand-new Round 2 matchup, and HPFF would have to wait to see who their new opponent in the semifinals would be.

Quick wins the game (#14 seed) (commanded by xerecs)
vs.
American Pirates (#6 seed) (commanded by a7xfanben)

Quick rolled to go first, and both fleets used Hidden Cove on their first turns, with the Roanoke dismasting but unable to sink the Courageux.

The Roanoke captured the Courageux, which later turned out to be a mistake.

The Amity and Bandido hide in the fog, while the Vengeance blockades the AP home island. The Roanoke uses the opportunity to drop the Courageux and sink the Pique.

Here I made another mistake (one of many this session) and pulled the gold runners out of the fog too early. The Vengeance turned around and dismasted both of them in one action! Now the AP’s would have to win with just the Roanoke.

The Vengeance sank the Amity and Bandido, eliminating 11 gold from the game. This left 19 in play, of which the Roanoke deposited 4 from the center island soon afterwards. She then headed northwest for 4 more, while the Vengeance recaptured the Courageux. In a nice move the Vengeance towed the Courageux to dock her at the center island, loading up gold.

With no helmsman, the Vengeance could only tow the Courageux at S speed, allowing the Roanoke to get in range of the Courageux while being out of Lenoir’s cancelling range. The Courageux was sunk, and the Roanoke won a brief battle of the gunships to end the game. The AP’s win 8-4!

Here is the updated bracket, with Eventgate over. The AP’s went from being eliminated to being one win away from a trip to the semifinals (if they get there, they would face HPFF, which would be an extremely highly anticipated rematch for the ages). At the opposite end of the spectrum, the Doldrums fleet proved to be a lot of hype for nothing. This also gives the Quick fleet new life, though now they have to win 2 in a row to advance.

2/12/2017

Quick wins the game (#14 seed) (commanded by xerecs)
vs.
American Pirates (#6 seed) (commanded by a7xfanben)

After losing the first game of the series, Quick went first once again.

The AP’s were very aggressive with Hidden Cove, using it to catapult the Roanoke towards the French gold runners.

This turned out to be a mistake, for the Courageux was never in range, and the Vengeance arrived to cancel Captain Blackheart and eventually sink the Roanoke.

The Vengeance headed south to cut off the Bandido and Amity on their second gold run. Seeing no chance of getting the gold home, the Pirates turned to attack! An impressive ram and board from the Amity (two 6’s in a row) hurt the Vengeance a little, but things were still looking dire for the AP’s.

After the Bandido was sunk, the Amity put up a rather miraculous fight against the Vengeance, though it was more due to the Amity carrying the final AP mast (Quick needed to make sure they had more gold before triggering an endgame condition) than the excellent exploits of the Amity and her crew. The AP’s built a Devil’s Maw in the west after capturing the Vengeance and her two coins from the same island. However, the Courageux was going to the northern island once more, and gold bonuses were already stacking up on the Quick HI.

The Vengeance brought home de Cissey for a ransom payment, and the Courageux avoided the Amity to dock home the final coin. Due to the gold bonuses from Maurice Aristide, the Quick fleet had won a nice 24-20 victory!

It was one of the better games of the tournament thus far, and sets up a Game 3 showdown to see who moves on to the semifinals to face Hai Peng Fort Frenzy!

5/26/2017

With xerecs not responding to my emails and showing zero interest in T2, and myself eager to resume/finish the tournament, I have decided to forge onward by myself. (If anyone else would like to join, just let me know, keeping in mind that the games are competitive and mistakes pretty much have to be replayed to have optimal results)

The tournament left off in the middle of the final game of the second round! The rubber game (#3) between these two great fleets:
Quick wins the game (#14 seed)
vs.
American Pirates (#6 seed)

These were the home islands, from play back in February:

The fleets made mirrored movements to the north, with neither playing their Hidden Coves.

The northern islands were explored:

This is where the game left off. After my question was answered by Woelf in the Rules thread, it was clear how to continue the game.

As expected, the AP’s used Hidden Cove to get the Roanoke out of Lenoir’s cancelling range. With careful maneuvering and a sac action, the Roanoke was able to knock down the Vengeance’s final two masts and capture her!

The Courageux explores the Pique for her 1 coin, eager to unload it to get Aristide’s +2 bonus. They plan to do the same at the northeastern island, which would give them 20 gold total (which they are aware of because they’ve explored two islands and found both 1’s, and know the treasure distribution based on the previous games). However, the AP’s would have 21 if they unload all of their gold (16 between the Amity and Bandido) as well as Cissey, who would provide 5 via the Ransom keyword. Thus, the French must make some kind of daring attempt to limit how much the AP’s bring back.

The Pique was going to capture or sink the Amity, but Captain Blackheart on the Roanoke had other plans. At this point I forgot about the “new” oarsman keyword ruling, where you can’t tow a ship if it has an oarsman. The Amity was towed a little bit by the Roanoke, but she could have just hidden in a fog bank or made it on her own anyway. The Roanoke could have dismasted the Pique instead of the Courageux to avoid forcing the end of the game and the treasure count, at which point a similar situation would have unfolded at the end of the game. In addition, the Roanoke would then have time to load the Amity’s oarsman for sacrificial purposes and also to tow the Amity. Here are the pictures from the rest of the game, which the AP’s won 21-17. It’s extremely likely they would have won anyway, but I’m playing another game for maximum fairness.


In the other game, the same home islands were picked with Quick going first. The Roanoke used Hidden Cove to go to the center island and attack the Vengeance, hitting 2/3 times. The Vengeance fought back and cancelled Blackheart, but eventually lost the fight. The Amity beat the Pique to the northern island and the AP’s won in a shutout.

With that, the American Pirates move on to Round 3 of the tournament, the semifinals! There they will face Hai Peng Fort Frenzy, in an epic rematch! But first, the other matchup will be played: Darrin’s Gold Race fleet vs. UPS 2!

5/27/2017

Xerecs has rejoined the tournament and Round 3 (the semifinals) has begun! From here on out, a fleet will need at least two more victories than its opponent in order to advance. We will play as many games as necessary to determine which fleet is better in each matchup.

Darrin’s Gold Race fleet (#8 seed) (commanded by Xerecs)
vs.
UPS 2 (#5 seed) (commanded by a7xfanben)

This matchup pitted two fleets that use Captain Jack Sparrow against each other. Each has Hidden Cove and CJS on a very fast flagship (Banshee’s Cry and Hai Peng). The games didn’t disappoint! Xerecs also got a crash course on the gold race fleet, which I consider to be the most confusing fleet ever made.

The first game was marred by a UT problem. The gold race fleet has Periscope listed (Sunken Treasure was already taken out based on past problems with including it), but the Hai Peng (HP) found it. The Hai Peng used a double action (saccing with Jimmy Legs) to activate the UT and cancel Jonah aboard the Banshee’s Cry (BC), shutting down the crew and therefore forcing the removal of both Captain Jack Sparrow and Don Pedro Gilbert, two extremely essential crew for the gold race fleet! They were tossed overboard, and meanwhile the Hai Peng’s CJS was busy ordering the gunners to open fire, leaving the BC derelict.

From here it looked like UPS 2 would have an easy ride to victory. The HP teleported two coins home from the northern island, getting bonuses on both. The gold race fleet was forced to sail out their remaining ships, with the Banshee’s Cry useless and later scuttled.

The HP gets gold from the center island, while the gold race fleet salvages what they can.

After clearing out the western island, the HP headed east to intercept the final coins sailing home in the opposing fleet. However, she lost a skirmish and was captured! Here the Bonnie Liz transfers individual coins to the Sea Crane, who redocks to get a +3 bonus on each coin. This was the gold race’s best chance at victory, and it could work as long as the rest of UPS 2 (Intrepide and Coeur du Lion) couldn’t interfere.

The final coins were unloaded, and UPS 2 had won a 35-26 victory! This broke the previous tournament record (for T1 and T2) of total gold collected in a single game, at 61 gold! (previous high was 55)

The second game started, with the gold race HI in the southeast and the UPS 2 HI in the northeast. The BC has built Dead Man’s Point in the center, dumping her French Letter of Marque equipment to make room for more sacrifices.

The fleets accumulate more and more gold via the UPS strategy.

Things started to get interesting. UPS 2 ran out of sac crew for the Hai Peng, who shadowed the BC and managed to dismast her (sending that CJS to the northern wild island via Jonah). The Intrepide and Coeur are sailing to the northern wild island.

The HP tries to steal the BC’s coin, but manages to lose the boarding party! The Sea Crane stays docked to protect her valuable gold bonus crew. This makes Genny Gallows (aboard the Sea Crane) a “stay-at-home mom”. (I wonder what Sean thinks of that? Wink) The Bonnie Liz sails to the fort and grabs the gold there. The Rover stalks the Intrepide and Coeur up north.

The Hai Peng sets up a sort of blockade of the gold race HI, leading the Bonnie Liz to seek shelter in the fog and wait for a good die roll to come out. The Sea Crane waits for her. Captain Jack, even the opportunist, seizes the chance to grab Powder Pete (traded earlier in the game via the other CJS to the southwestern island), in order to sac him. The Rover rams the Coeur derelict to get at the Intrepide.

The Intrepide has a mast rammed off by the Rover, before returning the favor to end the threat. In the southeast, further disaster for the Hai Peng! She went after the Bonnie Liz, who came out of the fog eager to hand off coins to the Sea Crane. With a handful of terrible die rolls (typical for me of course), the HP is eventually captured as you can see in the next photo…

… as all three 2 masters race to stop the Intrepide from accumulating more coins and bonuses. I finally managed to calculate that grabbing the final coin from the northern island and towing the Coeur home (she also had a coin aboard) would take 7 turns, compared to 8 turns if the Intrepide explored the Coeur, took that coin home, and then went back out for the other one. Exploring the Coeur and then going to the island (or vice versa) and taking them both home at once wasn’t a good option, since I had also calculated/estimated that I needed the +2 gold bonus from Aristide on both coins (which was proven correct in the final gold totals). Hopefully this gives some insight into how competitive these tournaments have been – not so much between myself and Xerecs, but more between the fleets themselves. There’s been plenty of math and deductions going on, with estimates and projections changing every turn based on the changing conditions of the game. The level of play is extremely high, evidenced by the very very high, very very close scores. Normally I wouldn’t do so much before one action, but this turn got a little extreme and I really wanted to know what was truly optimal. Of course, I didn’t factor in the other variable – the gold race fleet was already on its way, which meant the Intrepide had to get ANY coin home as fast as possible, with no time to get both. (pretty much guaranteed to lose both if that was pursued)

In the ensuing skirmish (not quite “chaos” between a few small ships heh), the Coeur was sunk and the Rover recaptured. The Intrepide got a coin home but it probably wouldn’t be enough. The gold race fleet was in full control, but didn’t want to end the game since they could still get the final coin on the northern island and +3 bonus it. (4 gold vs 1 from Cissey’s elimination; capturing Cissey would end the game with no chance to unload him) The Intrepide initially tried to suicide on a reef, but then began fighting Dead Man’s Point.

In a brilliant move, Xerecs used the captured Hai Peng to load up an oarsman and the CJS that was originally on the BC (so the HP had two Jack Sparrow’s on her during the same game – Multiple Jacks like in At World’s End!!). Then he used Jimmy Legs to sac the oarsman and redock, NOW using CJS’s ability to flip the coin to the Sea Crane way in the south, who unloaded it for 4 gold total. To end the play, the gold race fleet was now free to end the game, and that they did, with the fort blasting the Intrepide apart and getting 1 gold from Cissey’s elimination.

The final score was 34-28 in favor of the gold race fleet! The series was tied 1-1. This also rebroke the record set earlier in the day of most total gold in a standard game, with 62.

For the third game of the series, the gold race fleet rolled to go first, just as in the first game (and they went first in the second game too since they lost the first game). The home island locations happened to reverse, and we set sail!

Once again the BC built Dead Man’s Point on the center island, which forced the Hai Peng to go around the perimeter. The HP was Hidden Cove’d (copyright lordstu) to the southwestern island but skipped it entirely, sailing north to the western island.

The HP and BC got busy trading, with the HP continuing to circle the center island by moving to the northern island, much to Xerecs’ dismay. Paradis was built on that island, and the BC turned away.

The sickening speed of the Hai Peng was soon on full display. She sent another coin home before saccing to dismast the Rover, and then moved on to the southwestern island (finally returning to it) on the next turn. Honestly, sometimes there’s just not much you can do against a ship like the Hai Peng with the right crew setup.

Another example: the Hai Peng is running out of crew to sac, but catches the Sea Crane right before she gets home and dismasts her. This is when it was time to get wild, with strategies going out the window and the desperate endgame situations kicking in.

Here is when it happened. The Banshee’s Cry scored a hit. With CJS aboard and desperate times calling for desperate measures, the BC somehow dismasted the HP with a shot and ram! Importantly, the BC stole back the coin the HP had stolen from the Sea Crane. The Bonnie Liz came out to help the Sea Crane, while the Intrepide and Coeur looked on from afar in confusion and disbelief.

Then, another bizarre thing happened. While attacking the Coeur, the Banshee’s Cry couldn’t shoot due to carrying treasure, the same treasure that she stole partly as a result of her earlier hit.

The Coeur eventually sank, and the Intrepide once again tried to fight a fort. This time, she would survive at least in the interim, since the gold race fleet was trying to get the 4 gold from Paradis rather than settling for the 1 from eliminating Cissey.

The battles at the forts continued after a brief break, caused by yours truly messing up and pasting the entire eBay spreadsheet into the chat box lol, causing my VASSAL window to freeze and crash. (this can happen even if you don’t submit the message, so beware)

Paradis is massively overpowered and unsurprisingly put up a great fight against the gold race coalition of 4 ships, besting all 3 comers! To complicate matters further for the gold racers, the Intrepide had just finished taking out the guns of Dead Man’s Point, so it would only be a matter of time before she loaded the fort’s former gold and sailed it home for a reversal of fortune and momentum. The Bonnie Liz put a stop to all that by ramming the Intrepide to end the game!

As you can see from the gold, it was a very high-scoring game! UPS 2 wins 37-31! This game set yet another record (rebroken for the 3rd time in 3 games, all in one day) for the most total gold unloaded or scored in a standard (40 point) game, with 68! This means we had well over twice as much gold than when the game started!

Between that (averaging gold scores in the 30’s, like what??) and the overall effectiveness of the strategy, these are absolutely two of the best fleets of all time. It’s interesting that UPS 2 holds a 2-1 advantage despite the gold race fleet going first in all 3 games, but that was partly due to the Periscope situation in Game 1. The future holds more excitement, for at least one more game will be played between these two fleets. The winner of the series advances to the finals!

6/14/2017

Darrin’s Gold Race fleet (#8 seed) (commanded by Xerecs)
vs.
UPS 2 (#5 seed) (commanded by a7xfanben)

Game 4

My horrendous dice luck continued at a near-unprecedented rate, starting with losing the roll to go first. The gold race fleet uses Hidden Cove to send the Banshee’s Cry to the center island.

The Hai Peng was Cove’d to the western island, and she continued south from there, exploring two islands in the same turn.

UPS 2 built Paradis de la Mer, and the gold race fleet responded by building Dead Man’s Point in the northeast.

This is where things started to get interesting – with a scarcity of crew to trade with Captain Jack Sparrow, both fleets would need to scramble to secure victory. The Hai Peng lurks in wait for the Banshee’s Cry and/or Rover, who could be coming home with gold soon.

After a change of plans, the HP instead attacks the Sea Crane, nearly losing the battle due to my bad rolls in the process. The ship is captured, and the Intrepide comes out to tow her home. The Coeur grabs an oarsman in the northwest, while the gold race fleet gets bonuses the hard way with the Bonnie Liz.

Suddenly all ships of UPS 2 are headed home, as I realized the HP could simply tow the Sea Crane back at S+L+S speed. In addition, the 5-gold payout from the Hag’s Ransom keyword was greater than the potential 3 the HP could get at the southwestern island. Finally, it allowed the Intrepide to go back home and not risk being vulnerable to the gold race fleet while towing at S speed.

The HP repairs and speeds out to the southwest, where she trades home the final coin that she had found earlier. Then UPS 2 appears to sail straight for Dead Man’s Point.

Battle for the fort! My die rolls continue to defy belief, and Dead Man’s Point and the gold race fleet quickly gain the upper hand. Before the Rover was dismasted by a shot from the HP, a ram roll failed with a 1. You really can’t make this stuff up.

Eventually 3 of the fort’s 4 guns were silenced, but not before the HP was captured and most of UPS 2 dismasted. Xerecs didn’t have amazing die rolls this game, but naturally the Banshee’s Cry hit once again with a 6 to dismast the HP. (An outsider wouldn’t be crazy to think that the module is biased against me.) A final shot rang out, and the game was over!

The final scores:
1. Darrin’s gold race: 38 gold
2. UPS 2: 31 gold

With that, two more records are set! 38 gold is the new high score of any fleet in a single game, beating the 37 that UPS 2 collected in the previous game of this series. The 69 total gold breaks the previous record of 68, also set in the previous game.

The series is now technically tied at 2-2, but it’s more like 2-1 in favor of the gold race because of the Periscope dilemma that ruined the first game. However, UPS 2 still hasn’t gone first in any of the games. Between these factors and the close scores, it’s incredibly unclear which fleet is superior. Stay tuned for more!

7/28/2017

Darrin’s Gold Race fleet (#8 seed) (commanded by Xerecs)
vs.
UPS 2 (#5 seed) (commanded by a7xfanben)

Game 5

Xerecs and I were recording our Skype discussion for a video of the game.

With the series tied at 2 games apiece, we decided to let UPS 2 go first because the gold race fleet had gone first in all 4 previous games in the series. This led to the Hai Peng quickly establishing forts at the center and northern wild islands.

Turns and turns of furious treasure-trading and gold bonus applications went by. There wasn’t much the gold race fleet could do about the UPS 2 forts, and the game was truly a gold race. In the end, UPS 2 won the game with an insane score of 44-21! This is a new single-fleet high for gold in a standard game that we have played, breaking the previous record of 38 set by the gold race fleet in Game 4 of the series.

Game 6

Due to eating and an imminent time crunch, we didn’t do Skype or a video for the second game of the session. Since the gold race fleet had gone first in more games (3 to 1 even if you don’t count the first game which was marred by the Periscope incident), UPS 2 went first once again.

The home islands were swapped, with UPS 2 in the southeast and the gold race fleet in the west. Both fleets built Dead Man’s Point in the north!

Knowing I had to get moving in order to prevent the Rover from getting gold in the southwest, the Hai Peng used one turn to build Paradis de la Mer on the center island, and the next turn to build the Devil’s Maw on the southwestern island right before the Rover would have been able to explore. This meant that all wild islands had a fort on them!

The Dead Man’s Point is the easiest target for the gold race fleet, who must destroy at least one fort and get its gold to have a chance. The Intrepide sails out to meet the HP and get a double bonus from Spices after a treasure swap. I dismasted the Rover with the intention of capturing her, thinking she might be useful down the line if the game came down to a battle to the death at a fort.

DMP (the UPS 2 version heh) puts up a good resistance, blasting masts off all 3 remaining gold race ships. The Intrepide makes another trade, this time with the captured and repaired Rover. The Coeur is ready to assist the fort up north, while the Hai Peng finally repairs (she was hit by the Rover after I missed her 4 times in a row) and gets ready for maximum speed once more (she was only doing stuff at one action per turn for 2 or 3 turns in a row, which is nearly unheard of in this fleet).

The Intrepide got yet another bonus via Aristide, and the Coeur rammed the Bonnie Liz unsuccessfully. The firepower in the northwest eventually subdued the BL and Sea Crane, while the Hai Peng chased down the Banshee’s Cry and dismasted her to end the game!

In a second consecutive blowout, UPS 2 wins 40-20!

After a brief discussion, Xerecs and I decided that UPS 2 advances to the Finals of VASSAL Tournament #2!!

Our reasoning was that UPS 2 had a 4-2 lead in the series, though it was more like 3-2 because of the weird Game 1. However, UPS 2 won a game (out of three) despite going second. In the only games where UPS 2 went first, the gold race fleet lost both by a wide margin. As a result, it seems that the gold race fleet cannot beat UPS 2 when going second, while UPS 2 can beat the gold race fleet when going second. With that, we have a finalist. At the start of the tournament, I predicted that UPS 2 would win if I had to put money on just one fleet. Now they are in the finals, and have a serious shot at winning the title of the best fleet of all time.

The other semifinal matchup is next! Hai Peng Fort Frenzy versus the American Pirates! Get hyped! XD

8/4/2017

In one of the most highly anticipated series of all time, an epic rematch is taking place!! I knew this was a possibility from how the bracket was structured, but I can hardly believe it’s actually happening. Similar to darrin’s fleets facing off in the other semifinal matchup, my best two fleets I’ve submitted go head-to-head with huge stakes!

Hai Peng Fort Frenzy! (#7 seed) (commanded by a7xfanben)
vs.
American Pirates (#6 seed) (commanded by xerecs)

HPFF rolled to go first, and was placed at the center island.

The Hai Peng has explored the two western islands, building Paradis de la Mer on the southwestern one. She unloads Barbary Banner at home, while the Roanoke sinks the Banshee’s Cry.

The Amity explored the northeastern island and flipped Jailhouse Dog to eliminate the Barbary Banner. Knowing I’d need more gold, the HP scurried past the Roanoke to explore the northern island. However, the Roanoke’s boarding party kills Lord Mycron, which puts a severe dent in the HPFF game plan.

The Roanoke sped north to dismast the HP, who took off into the safety of a fog bank. The Patagonia and Lezard sailed out, now unable to serve the HP.

The Lezard was sunk, but the HP managed to get a lucky roll out of the fog bank and speedily row home to unload her coins from the northern island!

With a considerable ship and mast advantage, the AP’s capture the Patagonia, hoping to unload Bratley for the 5 gold Ransom payout. However, the Hai Peng is too fast for that! Although she missed when redocking at her home island, the HP managed to try again on her next turn. The second shot connected, sinking the Patagonia and denying the AP’s the ransom.

At this point, only the 5 coin in Paradis remained. The AP’s would give it up if they sunk the HP, and therefore the HP became essentially invincible for the endgame. The Roanoke and Amity headed over to the fort, but the Roanoke rolled a 5 for the ability and thus was only able to eliminate one cannon even after saccing for a double shoot.

Paradis was simply too much for the AP’s to overcome, and the game ended after the Roanoke was sunk and the Amity was dismasted. That gold in the fort was the difference, as HPFF won a 18-13 victory in the first game of this highly anticipated rematch!

It was a great game, with more to come soon. In fact, we’ve already started the second game, which you can see part of if you check out the video on my channel.

8/13/2017

In one of the most highly anticipated series of all time, an epic rematch is taking place!! I knew this was a possibility from how the bracket was structured, but I can hardly believe it’s actually happening. Similar to darrin’s fleets facing off in the other semifinal matchup, my best two fleets I’ve submitted go head-to-head with huge stakes!

Hai Peng Fort Frenzy! (#7 seed) (commanded by a7xfanben)
vs.
American Pirates (#6 seed) (commanded by xerecs)

For the second game of the series, the AP’s went first and HPFF’s HI was moved to the northwest.

The HP builds Paradis in the north, while Maps of Alexandria reveals the southwestern island to have both the Barbary Banner and the Jailhouse Dog, two important UT’s in this series that often cancel each other out. Knowing the Bandido would likely ram the Banshee’s Cry to dismast her, I had to try to explore the island anyway.

The HP was dismasted by the Roanoke, but since she can move S+L+S with a captain/helmsman/oarsman setup, she was able to return home some gold and repair there. The BC is indeed dismasted by a Bandido ram, but HPFF gets another fort built. The Roanoke has begun a fight with Paradis, but the OP fort shreds the gunship without taking any damage!

Both flagships repair (the Roanoke at a new fort built by the AP’s in the northeast), and both Pirate 1 masters are sunk in the south. The Amity and Lezard are unable to do their usual tasks (respectively to gather gold and flip oarsmen for coins), and so they prepare for the inevitability of war.

The AP’s destroyed Dead Man’s Point in the southwest, but immediately afterwards the Hai Peng showed her worth using her uber-fast speed and great crew complement to get both gold coins from the fort back home to safety. This led to an inevitable and lengthy conclusion, with the AP’s assaulting Paradis to no avail. However, in this picture you can see not only the mess, but also how close the AP’s got to destroying the fort. Paradis is down to one cannon, while the Lezard and HP only have one mast standing between them.

In the end, HPFF won its second game in a row, this one by a score of 19-11! With that, HPFF seems like the better fleet, but at least one more game will be played in the series. We’ll swap the Bandido out for the Banshee’s Cry with a helmsman and explorer, and possibly switch controllers at some point. Either way, the Finals of T2 are not far away!

9/2/2017

In one of the most highly anticipated series of all time, an epic rematch is taking place!! I knew this was a possibility from how the bracket was structured, but I can hardly believe it’s actually happening. Similar to darrin’s fleets facing off in the other semifinal matchup, my best two fleets I’ve submitted go head-to-head with huge stakes!

Hai Peng Fort Frenzy! (#7 seed) (commanded by a7xfanben)
vs.
American Pirates (#6 seed) (commanded by xerecs)

Here is a recording of the night’s action, which happened directly after the start of CG3! The Bandido was swapped out for the Banshee’s Cry with a helmsman and explorer. I didn’t really want to do that, but I wanted to see if the AP’s could pull out a win with a more optimized setup.

Here is the only picture from Game 3 of this series, showing how the Amity Hidden Cove’d to the center island and the Hai Peng used Mycron to reach the west. The Pirate Globe and Maps of Alexandria revealed the treasure distribution, with HPFF getting the better of it. They grabbed the 5 coins they needed to win (two 5’s and three 2’s), with the final score being 16-14.

With that, HPFF had a commanding (and indeed, decisive in normal circumstances) lead in the series, but I wanted to experiment. We switched fleets with myself in control of the AP’s and Xerecs getting HPFF. Once again the AP’s went first since they were behind in the series. The Roanoke was Coved out to the center island, where for the second game in a row, Pirate Globe and Maps of Alexandria were revealed at the same time! With two 5’s on the southeastern island, the AP’s got a better treasure distribution.

The Hai Peng couldn’t reach a far island on her first turn, and so settled for the northern one. The Roanoke blasted her with a double action but couldn’t sink her, which let her get away to the east. However, she was slowed, and by this point the Amity, BC, and Roanoke carried enough gold to win the game for the AP’s. In a rarity, HPFF got both the Dog and the Banner, raising their potential score. However, I knew how much gold was on the Roanoke, and the calculations for this series were far easier than in the other semifinal series (which had a TON of gold bonus variables). The partially repaired HP nearly managed a miracle against the Roanoke, hitting 3/4 and getting her ram roll, but lost the boarding party. The Roanoke docked home her 6 gold, giving the AP’s their first victory of the series by a narrow 18-17 margin!

Those two games were quick, but the third and final one of the night was FAR longer. It was one of the most desperate and drawn-out games I’ve ever been involved in.

Once again the Roanoke finds the revealing UT’s on the middle island after Coving. On HPFF’s first turn they get the Dog to knock out the Banner.

The HP has built Paradis in the southwest, while the Amity and BC clean up the center and northern islands for the AP’s. The Roanoke reaches the HP with a double action but only hits once in three tries!

The HP goes all the way around the map (but still very quickly of course) to reach home without being intercepted by any AP ships. She docks home her gold, which leaves only a couple coins left in play. Between the 30 gold in play and the UT’s that reveal everything, I knew how much gold was on my HI and how much was left. I came to the unfortunate realization that I (as the AP’s now) would be playing for a tie in an attempt to continue the series with a rematch. That is, until xerecs made the good point that if I could eliminate Bratley on the Patagonia, the Ransom payout could potentially give the AP’s a 16-15 win. However, that trade route (not road haha!) was fraught with waterfalls (instead of pitfalls), since a ton of things had to break right for that conclusion to even be plausible.

With the game in her hands (or so we thought…), the Roanoke begins bombarding Paradis with a 2 in her hold and a 5 in Paradis. I had 8 gold at this point, so I needed both coins to tie. I was afraid that HPFF would simply trigger the Ransom keyword of Perry, making it even more of an uphill (stormy?) battle. I did have absolutely incredible good luck in this game, which is somewhat rare for me (although it’s mostly just shoot actions that give me problems). The roll for Paradis was a 1, which let the Roanoke hit 4/5 to take the fort down to just one cannon. In this picture, the HP has arrived to damage the Roanoke, with the fort contributing as well. The Amity and Lezard flock to the scene, while the AP’s BC rams the Patagonia, killing Mycron.

A fair bit of wackiness later, and the Roanoke is derelict and the fort is abandoned. The HP, Patagonia, HPFF BC, and Lezard are all dismasted. This was where things really degenerated into madness, but unbeknownst to us, it was just beginning….

So much happened in the “endgame” (I call it that since we were fighting over the last few coins left, but it took longer than the other parts of the game) that I cannot remember all of it. HPFF managed to capture the Roanoke and began repairing her at the fort, but the Amity put a stop to that and eventually the Roanoke sank. The Amity became a major factor in the game, providing All-Star service to the AP’s. However, the pesky rams from the HP and Lezard took her down to 1 mast. In the southeast, the “Battle of the Banshees” took place, with the HPFF Banshee’s Cry eventually prevailing, but not before the AP BC successfully boarded the Patagonia again to eliminate Bratley and give the AP’s 1 extra gold! However, now that the AP’s were down to just one ship, the Amity, they couldn’t afford to lose her. With HPFF having a gold advantage, the Amity needed to keep her final mast standing at all costs. As a result, although her priority was to get the 5 coin from Paradis (abandoned but still standing), she was forced to ram and dismast any potential threats in the area. This included the Lezard and Hai Peng, both of which had oarsmen before the Amity eventually eliminated them to render them harmless. Whew! This is just about as desperate as this game gets!

But of course! More ramming and boarding! LOL. The Amity needed to take care of the dual BC threat (both healthy and in the HPFF fleet) before moving back to the fort (I believe she had missed a handful of times with her remaining 5S gun in the attempt to destroy it). Both BC’s were dismasted, but another shenanigan was continued from earlier, though I haven’t mentioned it yet: the Roanoke’s old 2 coin was making its rounds through both fleets, and it was probably on at least 4 of the ships by the time the game ended. The Amity was trying to protect the 2 coin and recover it and re-recover it so that HPFF couldn’t get it home somehow. This all in addition to the whole purpose of getting the 5 from Paradis!

With the BC’s still in play (at least one of them rowing around), the Amity returned to the fort but I believe she missed again. She then dealt with one of the BC’s and towed her to retrieve the coin and end the threat. However, by this point the most unlikely of ships had entered the fray: HMS Patagonia! With Mycron and Bratley killed in combat, only Robinson remained to crew the ship all the way to the southwest at S speed. With the Amity busy ending threats to stay in the game, the Patagonia managed to get in range. Her 2L cannon boomed for the first time in ages, and the Amity’s last mast fell overboard! Finally there was a victor! The final score was 20-9 in favor of HPFF, since the AP’s got Bratley but HPFF retained the fort gold. (and the 2 was still afloat on the Amity when the game ended)

With that, an incredible game ends the series. By the end of the game, only the Patagonia had a mast standing, with 3 derelicts and one abandoned fort among the living. 3 ships were sunk, and most of the crew were gone. In fact, we probably came close to setting a record for most crew eliminated in a standard game.

With that, Hai Peng Fort Frenzy wins the series 4-1! Hai Peng Fort Frenzy advances to the Finals of VASSAL Tournament #2!

Here is the updated bracket. Only 2 fleets remain!! Which will claim the title of The Best Fleet of All Time?

12/29/2017

The Finals

After a long hiatus since early September, T2 has been revived for its grand finale! The Final Round has begun!

UPS 2 (#5 seed) (commanded by xerecs)
vs.
Hai Peng Fort Frenzy! (#7 seed) (commanded by a7xfanben)

There are videos of Game 1, in addition to Games 2 and 3.

UPS 2 rolled to go first in Game 1, establishing a gold lead and finding the Maps of Alexandria to reveal all treasures on all islands.

After much trading of gold and crew, and the building of a fort, my calculations revealed that I could not win with HPFF in this game. This was due to how early everything was flipped due to Maps of Alexandria – even with gold bonuses piling up for UPS 2, I was able to figure out the situation in terms of gold scores, both real and potential. The best I could hope for was to lose 22-21, since UPS 2 had the Barbary Banner and Jailhouse Dog (which had been played to deny my Hai Peng from getting Holy Water), in addition to a trio of +2 bonuses. The semi-worst case scenario in a long endgame would see HPFF lose 23-20 instead. Therefore, we called it, with UPS 2 technically winning the first game 22-5.

HPFF automatically went first in Game 2, trading home the Banner and building Paradis de la Mer on the lucrative northern island.

My Hai Peng went all the way to the southwestern island to trade home another coin…

… but was eventually sunk by the UPS 2 Hai Peng. XD

With only Paradis’ 5 left in play, we counted gold to see if it was relevant. With UPS 2 winning 14-11 NOT counting the fort’s gold, it was clear we had to play the endgame out. Things quickly devolved into a ramming fest, with the Banshee’s Cry playing the role of hero. She was able to sail out, ram off a mast from a UPS 2 ship, get rammed in return, row home at S+S with the help of Mycron, and then repair and sail out to ram again on the next turn (with the help of Mycron).

UPS 2 needed to destroy the fort to eliminate or claim the gold there, but they couldn’t get there. The ramming and boarding antics favored HPFF, who got consistently better rolls. The Coeur was captured and the HP dismasted, at which point we called it. HPFF wins the second game 16-14.

With the series tied at one apiece, we had to play at least 2 more games. The home islands changed again, with UPS 2 rolling to go first as in Game 1.

However, Game 3 was the most lopsided of the series so far. UPS 2 went first and got all the good coins, with HPFF having to settle for a bad haul up north. This forced me to fight early, which ended as poorly as one would expect. In one of the most lopsided games of the entire tournament, UPS 2 won 34-6!

With that, UPS 2 has a 2-1 lead over HPFF! At least one more game will be played, and we’d like to see UPS 2 win while going second to have a more decisive and conclusive result. Either way, the greatest fleet ever will be crowned very soon!

12/30/2017

The Finals

With UPS 2 up in the series 2-1, the Finals of Tournament #2 have concluded!

UPS 2 (#5 seed) (commanded by xerecs)
vs.
Hai Peng Fort Frenzy! (#7 seed) (commanded by a7xfanben)

There are videos of Games 4-6, in addition to Games 7-8.

HPFF went first with its back against the wall. The HP reached the center and northern islands on the first turn, with one of the UT’s revealing where everything was.

I don’t have more pictures from this game, since it ended in a tie! 19-19 was the final score, which meant we had to play on.

The home islands were essentially rotated anticlockwise for the second game, with HPFF going first again and hitting two islands.

Both fleets used their Hai Pengs to build Paradis de la Mer, showing how similar and evenly matched these two are:

The UPS 2 Hai Peng was sunk, and with the support ships unable to blast Paradis, the game was over! HPFF won this game 21-11, evening the series at 2.

The HI’s were reversed for the start of Game 6:

UPS 2 rolled to go first and got busy exploring and trading. Honestly this final round was a bit of a blur, and both fleets are complex, confusing, extremely similar, and entirely based on maximizing profit. As a result, there’s not a ton to report on. XD

UPS 2 went to the center island for more gold bonus trading opportunities, while HPFF built a fort on the northern island:

With the fort’s gold becoming irrelevant, UPS 2 had a 19-9 victory!

With HPFF down in the series 3-2, they went first once again.

I made a mistake by not trying to build a fort on the western island. This resulted in a throwaway win for UPS 2 (final score 29-18 ), but due to the unknown, we played another game to see if UPS 2 could conclusively win even while going second without mistakes made by either commander.

Game 8!

We kept the same home islands as last time, and ironically the treasure distribution also turned out very similar, with HPFF getting solid values along with the Banner, Jailhouse Dog, and Holy Water. (Jailhouse Dog was played to eliminate the Holy Water to prevent UPS 2 from stealing the Dog to eliminate the Banner)

This time HPFF did build a fort on the western island, with Dead Man’s Point providing a second fort.

Both Hai Pengs were busy trading gold home, but the advantage of UPS 2 lies in its gold bonuses….

The UPS 2 HP was dismasted by DMP, after which we counted gold to see if the forts were worth fighting over. They were not!

With a dramatically close finish, UPS 2 defeats HPFF 22-21 and wins the series 5-2!!!!

UPS 2 IS OFFICIALLY THE BEST FLEET OF ALL TIME!!!!!!!!!!!!!!

It’s finally over! After starting this tournament in October 2016, it fittingly ends right as 2017 ends as well. The tournament featured 16 different fleets, and it took 53 total games to have a decisive winner.

Congratulations to darrin for making such a brilliant fleet. 3 of the 4 semifinal fleets used the Hai Peng/Captain Jack Sparrow strategy, but UPS 2 emerged victorious in large part due to saccing efficiency and gold bonus galore. It truly is an incredible fleet, and is now the fleet to beat in competitive play.

Congratulations to myself and Xerecs too, for playing such incredible tournaments out (T1 included). They have been quite fun, with a ton of games being very close or quite exciting. We’ve learned a lot about playing standard games optimally, and could certainly be considered experts in regards to the UPS strategy and competitive play in general. However, things got a little bogged down over the course of SO many standard 40 point games, and we’re ready to take a break from the endless “Hidden Cove’ing/saccing/treasure trading with CJS/extra action to HP”/etc etc. XD Also, congratulations to a7xfanben for correctly guessing the winner of the tournament right from the start! O_O

a7xfanben wrote:
If I had to bet money on the winner of the tournament, I would pick UPS 2.

This was partly because of my prior experience with UPS 2 in a small number of physical games, in which it dominated to the extent that it was my winner pick (though I had a feeling the Gold Race fleet or UPS 4 would give it a serious run for its money (literally), and the Gold Race fleet did not disappoint in this tournament). It feels good to have a good handle on the various fleets, and it’s too bad that nobody bet against me. XD 

From here we do have one final thing left to do with this game file: the 16 fleet game to conclude the festivities. O_O This will be played soon, after which we turn our attention to other projects of a larger nature. Until then, thanks for reading these reports, and look out for that wacky 16 fleet game sometime soon.

Here is the final, completed bracket!

1/1/2018

The first Piratical activity of 2018!

The 16 fleet game has begun! As far as I know, this sets a new record for total fleets used in a single game!

If you watch the video you’ll get the gist of it, but here’s how we started things.

Xerecs rolled higher than me to go first in the player turn order. From there, we decided to do a draft in reverse turn order! This meant that I had the first pick in the draft, followed by Xerecs for a fleet, and so on until all the fleets were picked. This was a fun way of doing it rather than haggling over which fleets we each controlled. We ended up with mostly the fleets we wanted to play, which is great. I had some conflicts of interest and decided to choose fleets that were NOT my own, passing over HPFF to select UPS 2 (a fleet I like about as much as HPFF though) and taking the swarm fleet instead of RtSS English since I’ve barely controlled the swarm fleet at all since T1 began. However, I did go with classic favorites American Pirates and HMS GT, while Xerecs went with some of the more combat-heavy options, locking up both Spanish 5 masters along with the Doldrums and Kettering.

Then, for fleet turn order, we simply went in reverse draft order. (might be getting confusing XD) That meant the last fleet picked would go first in the game, so RtSS English (controlled by Xerecs) would go first, followed by the swarm fleet (controlled by me). In this way you can see the order here: (go side to side before up and down; this is the reverse draft order with the AP’s and then Norvegia going in the second round of the draft)

Since this game is purely for fun and the tournament is over, it would not nearly be worth the considerable time involved to recreate all 16 fleets in a bigger ocean to have a “standard” setup with 2 wild islands per fleet. Also, less wild islands and less distance between islands can often make for a more fun, fast-paced, and combative game. We were barely able to fit 32 total islands in, with 16 home and 16 wild. This meant there would be 8 coins per island, double the normal amount. The home islands were chosen in draft order/reverse turn order, with UPS 2 picking their HI first.

It is important to note we would use round earth rules, just as in the big T1 game. To not ruin the fun of having all the coins revealed early, a custom ruling for Maps of Alexandria and Pirate Globe is being used: when those are found, the fleet can choose to look (privately) at all the coins on ONE other island, instead of revealing every coin in play to all the fleets.

Reminiscent of my 12 fleet game and the 8 fleet game to conclude T1, here is the grand setup with all the fleets ready to set sail!

Entering play, my American Pirates fleet had not only the most pressure on them in a way (having an incredible pedigree in these giant multiplayer games, coming in 2nd in the 12 fleet game and winning the 8 fleet game), but also a good home island location despite choosing third. Most fleets tried to stay away from the Zeus and Grand Temple during HI selection, but in general these things turn into a crapshoot due to how many fleets pick after you (or before, as picking last has narrow options) and due to the randomness of the treasure distribution.

We were off! The first turn saw a lot of developments, with 16 fleets trying to maximize their potential to win the same game. It truly is incredible, with most of the best (submitted) fleets ever matching up against each other in a big game like this. Whoever wins will certainly have bragging rights forever, but could an underdog pull away with an upset due to the sheer amount of luck and chaos involved?

UPS 4 ran into some trouble early when the Kettering and Minuteman flotilla round earthed to sink the Longshanks. A bunch of Hidden Coves were played, with ships trying to get gold as fast as possible.

As far as combat goes, the Artillery Strike fleet made the biggest first impact. The Neptuno Coved out to the island where the English canoes were docked, and used extra range and cannon bonuses to hit 3/4 and dismast the Kettering! The Diablo flotilla shot 1/2 to eliminate one of those English canoes. The AP’s were one of the last fleets to go, and after much pondering, I had the Roanoke cove out near the Neptuno, capturing the Kettering instead of exploring and/or trying to hit the Neptuno (keep in mind with all these nasty fleets, UT’s like Missionary are out there). With a good home island location, the Amity and Bandido were able to take coins from the same island this turn, with the Amity discovering Holy Water. (this is in the deep south to the left)

Some other happenings around the map: at the lower right, the Zeus traded home a 5 to build Paradis, making that corner of the board a certified UPS 5 stronghold, with the most OP 10 master and the most OP fort in the same area. To the right of the Zeus, the Gold Race fleet didn’t have many options for Hidden Cove, having to choose between the Zeus and the San Cristobal (round earth at top center). The BC docked at the eastern edge of the SE island, but the Elthelfleda is approaching via round earth. However, the Gold Race quickly showed why it’s the 3rd or 4th best fleet of all time (would be interesting to match it up against the AP’s, though I think the Gold Race would win), saccing to trade home two coins which both got +3 bonuses. O_O

EA Gold Runners does not have a favorable HI position, but the Joya got an EA to reach and explore a wild island, grabbing a bunch of coins along with some Spices. At the upper right, the Doldrums coved the Bloody Jewel to deny that wild island from HPFF, whose Hai Peng has gone to the west via round earth. In the upper right quadrant you can also see the Neptune’s Hoard hit the Pique, but only with the help of the Monkey’s Paw UT. The Quick wins the game fleet did not have a good first turn, with a tough HI position and the Pique likely doomed after finding a bad island and the Norvegia cheese attack. XD (they partly picked that HI since Lenoir’s cancelling can help them deal with the nearby Zeus)

The Swarm fleet is heading towards at least 3 wild islands, and may somehow be the first to explore 2 of them. However, they have been denied of that island in the center/northwest by a wacky first turn from UPS 2, the last fleet to go each round and the winners of the actual tournament. UPS 2 continues to dominate headlines, winning the tournament in grand fashion, getting picked first (albeit predictably) in the draft, and now finishing the first round of turns with a BANG. The HP was coved out to that island where you see a bunch of Pirate crew chips. The HP redocked to explore but also shoot at the nearby HMS London of the HMS GT fleet, incredibly shooting 2/2 to take the London down to 2 masts! I was originally going to trade home the best coin and then drop some crew to sac and get home with more (so the London couldn’t return fire next turn), but one of my least favorite UT’s in the game ruined all that: Natives. Ironically one of the UT’s placed by the HMS GT fleet, this freezes the Hai Peng for FIVE turns, since that’s how many crew were on the ship when the island was explored. O_O In all likelihood this could doom UPS 2’s chances of winning, but they could at least finish the explore action even if they couldn’t sac afterwards. The island was good otherwise, with CJS trading home a 7. Paradis was built! This may keep the London at bay while simultaneously keeping the swarm fleet from taking any of the island’s remaining gold. The Hai Peng was simply emptied out, since the crew and gold will be safer inside the fort. Also, I didn’t want crew on the HP since if she is somehow still alive after 5 turns of sitting there, she could redock and take the remaining gold without triggering the Natives again. I wanted to send the Coeur out to the island, but figured she’d be safer at home with the London still lurking. Overall a wild turn for UPS 2, from the brink of glory (flipping a 7, building Paradis, and saccing to get most of the island’s gold back home) to disaster (Natives keeping the rest of the gold there and likely dooming the Hai Peng for the rest of the game).

Whew! What a first turn! The sheer amount of fleets and things to do each turn mean this game will take quite a while to complete over the course of several VASSAL sessions. We hope to continue the video footage, and we’re looking forward to what will likely become one of the best games we’ve ever been involved in!!

1/12/2018

The 16 fleet game has continued with a partial turn.

After finding Natives, the swarm fleet loaded the remaining gold from this wild island onto 3 different ships. However, the Algeciras and Armada teamed up to sink their escort, the Carrion Crow. At the left, the Lezard has rammed a mast off the Hai Peng of UPS 2.

In the deep south, the Minuteman flotilla missed all of her shots on the Roanoke and Neptuno. The Artillery Strike fleet did not reengage with the American Pirates or RtSS English, instead opting to regroup in preparation for a potential round-earth assault from the HMS Grand Temple. However, after considering all the options (with an EA available from Calico Cat), the GT decided to stay close to home and go after the lucrative island where UPS 2 was stuck at (HP sitting around for 5 turns due to the Natives there). HMS London got things started, dismasting the HP and Lezard while staying out of range of Paradis. However, after the GT used a whirlpool and extra action to get in range of the fort, the roll came up a 6! One miss meant that the mighty GT couldn’t even damage the fort, and that’s exactly what happened. It may look silly now, but this was the best route Lord Thomas Gunn saw after considering the various options. Attacking the canoes and Artillery Strike in the deep south may not have led to any gold, and it’s quite possible that the cannons of that Spanish fleet would cripple the GT next turn. Whirlpooling to the center would mean the GT would be stuck in a crossfire between Armada and the San Cristobal, with towing home multiple swarm ships for gold not a likely possibility. With the Joya del Sol in a fog bank, there were almost no gold targets within reach of the GT from that whirlpool at the center right. In the southeast, attacking UPS 5 likely would have been a disaster (Zeus + Paradis at the same island O_O). Overall the HMS GT fleet made the choice they saw as the most profitable in the long term, as they will still try to win the game despite being more of a 1v1 deathmatch fleet. If they can indeed destroy Paradis and UPS 2 in the process, that wild island has at least a 7 along with all the gold the HP has seen but not loaded.

In the north, the San Cristobal has sunk the Banshee’s Cry of Norvegia and dismasted the Pique of the swarm fleet. In the far east, the Quick fleet finds more misfortune. They found TWO packs of Wolves on that island, and although some Turtles would have aided them since they aren’t loaded onto the ship, the swarm fleet played Jailhouse Dog immediately to knock out the turtles. So, we have the dog from PotC eating a bunch of turtles while a ton of wolves look on. O_O Quite the spectacle. XD

All that, and there are still 6 fleets left to go in Turn 2!

1/26/2018

The 16 fleet game has continued!

About a full round was played, with various activities happening around the sea.

With only some of these fleets taking turns during this live session, here’s the busy situation around the swarm HI. Paradis has shot two masts off HMS Grand Temple, while the swarm fleet gets gold home from the south but struggles against Spaniards in the north.

In the south, the AP’s got some gold home to build Thompson’s Island, with the Roanoke damaging the Minuteman flotilla (of the Kettering fleet) and Neptuno. The captured Kettering was docked at the northern end of the island when the Roanoke docked in an effort to protect the Bandido, who was also coming home like the Amity.

Alas, it was of no use, as the Artillery Strike fleet has a fantastic turn! The Roanoke was sunk by the power of both flotillas and the Neptuno, with the Diablo going 4/4. The Neptuno then turned her cannons to the other ships in the AP fleet, sinking the Kettering and dismasting the Bandido! Once looking strong to finish high in the standings in yet another big multiplayer game, the AP’s are now teetering on the edge of disaster. At the left, the Artillery Strike fleet accomplishes a rarity, with 2 gold both from eliminating Ransom crew in the same game (in this case two versions of Commodore Matthew Perry from the Roanoke and Kettering).

1/30/2018

We played a session last night. This and other reports are naturally a bit biased towards the fleets I control, even more so for this game due to how many things are happening each turn and how many things are forgotten about.

With some ships sunk or out of action and many fleets just getting home some gold, we finished the rest of Turn 3 and all of Turn 4.

I’ll go west to east to make things easier to look at. HPFF has built Paradis de la Mer in the far west, just to the left of where HMS GT has taken out all flags on the Paradis of UPS 2. With the London capturing the Hai Peng of UPS 2, the remaining ships in that fleet have fled north in search of alternate treasure options. In the upper center, about half of the swarm fleet has gotten into a crossfire mess between part of the Kettering fleet and the San Cristobal of the Spanish Meta fleet. 4 ships are derelict, but the swarm fleet still has 5 ships with masts up. EA gold runners is having a fantastic time of it, with the Joya consistently getting her EA’s most turns. She has dropped off a full spicy load at the HI, and has sailed back out to nab some gold from under the Coral of UPS 4 in the south. The Rover of the Gold Race fleet has dismasted the Star of Siam, but the SoS is limping home on oar power with a coin left. Speaking of the Gold Race, their Banshee’s Cry was sunk by the Elthelfleda of RtSS English, who you can see at the lower right in the vicinity of the Zeus. In the northeast, the Neptune’s Hoard ran into a cancelling problem, but was lucky to lose only two masts to the Vengeance of the Quick fleet. The Vengeance will try to tow the Pique home while the Courageux looks for gold in the west after round earthing (probably). The Doldrums fleet has amassed quite a stash, and I think they still have Becalmed left to use.

Later in the action, with a few more developments. In the far northwest, the Algeciras of EA gold runners looks to intercept the English canoes. In the far southwest, her fleetmate the Joya del Sol looks to grab gold from the island the canoes loaded up at! The swarm Algeciras has joined the fight against the Armada flotilla terrorizing the middle northern part of the map, but the San Cristobal has left that same area to round earth to the south and dismast both ships remaining in the UPS 4 fleet. UPS 4 had a great start and have enough gold on their HI to maintain a respectable finish in the standings, but as of now it looks like they might be the first fleet eliminated. Speaking of riches, the swarm fleet is piling up some gold. They only gained control of 1 of the 3 wild islands they were targeting from the start of the game, but they have made a good profit nonetheless, wiping the island clean with 3 different ships. The American Pirates managed to get the Bandido home, but Artillery Strike still lurks in the deep southwest where their fort is located. The bonus ships of the Gold Race fleet (Sea Crane and Bonnie Liz) have begun heading north, fearing the San Cristobal’s arrival in the south.

The faster pace of play has been nice as we approach one month since we started this game. With so many fleets, there is a massive, unprecedented level of uncertainty. It’s not QUITE anyone’s game, but at least half a dozen fleets are easily in the running for the win and possibly 10 or more still have a shot. O_O It’s a fun free-for-all that will likely see extremely close gold scores similar to the 8 fleet game, and we are looking forward to the eventual conclusion!

2/2/2018

Last night we played all of Turn 5 and part of Turn 6!

Most fleets have quick turns at this stage of the game, so we were able to cycle through a lot of minor developments. At the far left, the Halcyon and Elthelfleda of RtSS English are heading home, while the Courageux of the Quick fleet has round earthed in search of treasure, which has so far eluded Maurice Aristide. One of the more exciting developments of the night was when the Hai Peng of HPFF rolled a 6 to activate Maps of Hades , which not only denied that fleet from using Mycron on the HP, but also the player “to their right” would be the American Pirates!! This was an ultimate irony, as HPFF and American Pirates have one of the longest fleet-to-fleet rivalries of all time, first matching up in a classic 3-game series back in January 2015 before having an epic rematch in the semifinals of T2. It’s safe to say that the AP’s hate HPFF, and the Hai Peng in general by extension. In a “double whammy” move, they sent the HP south to shoot at the Hai Peng of UPS 2, which has been captured by the HMS GT fleet! Both shots missed, but the HP of HPFF got stuck in the sargasso sea! Speaking of the GT fleet, they have destroyed Paradis on that wild island, which is now “open for business” again. XD However everyone now knows of the Natives there that doomed the UPS 2 fleet, which basically requires the GT fleet to drop off crew (for the London at least) in order to explore the island and take coins. With most other wild islands wiped clean, that island and other fort islands (such as the Paradis of HPFF just to the west) may become hotspots of activity with most of the gold concentrated there. To the right, the swarm fleet has had at least two ships sunk and one dismasted by the Armada flotilla, which is the only functioning game piece left in the Kettering fleet. Further to the right we have some brutal gunship vs. gold runner engagements. The Zeus hit 2/6 to damage the Joya del Sol after whirling to that region with Grease Barrels, while the San Cristobal continued her reign of terror in the south, dismasting both 2 masters of the Gold Race fleet.

A short bit later and HMS GT has sunk the HP of HPFF (!), along with the Algeciras of the EA Gold Runners (the latter of which took out an English canoe earlier in the night). The AP’s are back in business to some extent, with the Bandido repaired and most of the big threats of the area (Kettering, Neptuno, etc) finally gone. South of the GT, the swarm Intrepide and Quick Courageux are looking for gold, but most of it is defended by gunships or forts. In the northwest, UPS 2 had a hope at that previously unexplored wild island, but the Neptuno may put an end to their dream of a comeback. In the center, the Joya and others have been frozen by Becalmed, which was finally played by the Doldrums fleet! The Zeus predictably won a firefight against the Joya, which is now derelict. However, the Star of Siam used an EA to row home with a coin. The EA runners have had incredible luck this game, but now they have no masts standing. The San Cristobal has left the south a desolate wasteland, with 4 derelicts trying to scuttle themselves (UPS 4 and Gold Race essentially out of it). The Norvegians and Spanish Meta are still doing well health-wise, but the Doldrums fleet is really piling up the gold.

2/5/2018

sixth session has been played.

The Monarca of the Spanish Meta fleet was dismasted but then rescued by the San Cristobal, who put an end to the Norvegia fleet, making them the first fleet technically eliminated. UPS 4 quickly followed them with scuttles, and by the end of the night UPS 2 was also out of it! Of the 13 fleets remaining, a handful have quite a bit of gold. In the center, the Joya del Sol was sunk but her crew escaped with gold via a Raft to the wild island the swarm fleet was smashed at. However, it wasn’t all bad for the swarm fleet, for they had a Pique Miracle! (patent pending XD) The Pique still had her helmsman and oarsman, and finally started rowing after the effect of the Natives wore off and I remembered the generic crew aboard. After this picture she got home with 6 additional gold for the already-wealthy swarm fleet, with 4 coming from Buried Treasure.

After a bizarre situation where they had 4 ships and no gold (strange since they started with 2 ships and most fleets have gold but less ships than they started with XD), the HMS GT fleet is rising up! The repaired Lezard is loading gold from the wild island where UPS 2’s Paradis fort was destroyed, with the London and Hai Peng (captured from UPS 2) possibly looking to join her. However, HMS Grand Temple has been quite busy, destroying not one Paradis de la Mer, but TWO in a single game! After towing home the HP and repairing, she got an EA to finish off the Paradis southwest of their HI. Of course, she got solid help from the London and enemy Halcyon (basically another London haha) along with a lucky 1 roll on the second Paradis’ fort ability (though she rolled a 6 on her first attempt at the UPS 2 Paradis). However, with the arrival of the mighty Zeus from UPS 5, things may quickly unravel for the HMS GT fleet. That’s right, it’s a showdown between the Zeus and the Grand Temple! However, the Zeus sacced out of the whirlpool to hit an impressive 5/7, likely dooming the GT in the near future. That said, with both of those Paradis’ gone almost at the same time, it opens up a bunch of newly available gold in the northwest, which is why I zoomed in here to see all the action. In the far north, the swarm fleet’s Intrepide is trying to take gold from the island where the remaining two UPS 2 ships have been dismasted by the Neptuno of Artillery Strike. At the bottom right, the Pique Miracle is complete as the ship docks home and then repairs. However, trouble for the swarm fleet is brewing. The Coeur has loaded the coins from the Joya’s Raft adventure, but the Star of Siam (the Joya’s fleetmate in EA Gold Runners) has whirled to the area in an attempt to steal it back! Complicating matters is the Bandido of the American Pirate fleet, which is doing alright but won’t get enough gold to win. There was a mistake where the Neptuno had a false reroll, which may have messed up some of the stuff earlier in the game. However, the fleets affected (Artillery Strike, AP’s, USS Kettering, and now UPS 2) were not really in the running anyway so it is not likely to affect the top standings results at all (hopefully; maybe someday I’ll go back and look at the videos to find out haha).

At the far right, it’s another Pique Miracle!! (TM) After being dismasted early in the game by Norvegia, the Pique of the Quick fleet sat at a wild island for a while (somehow not being sunk or captured by Norvegia, Spanish Meta, Doldrums, or anyone else) until the Vengeance finally showed up to tow her home. The return trip was uninterrupted, and another Pique has somehow made it home with gold! Speaking of the Quick fleet, their Courageux had a mast rammed off by the Intrepide of the swarm fleet and can be seen lurking in the far west after retreating into and back out of the fog. In the south, the Diablo flotilla has destroyed Thompson’s Island, but the Amity will just get the gold home for the AP’s anyway. The Bandido ended up ramming the Jolly Mon of the swarm fleet, netting the AP’s an extra gold from the Ransom keyword.

With three fleets (Norvegia, UPS 4, and UPS 2) out of the active running and with much of the ocean deserted, the game is winding down. There is still considerable treasure to be hauled home, but it requires extreme bravery due to the forts protecting it and the various monster gunships (Zeus, San Cristobal, and until this turn the Grand Temple) still sailing around. We should be able to finish the game with another session or two, and then we’ll have an epic coin count to determine the winner and finale of this T2 story!

2/10/2018

Another session was played. The entire game is just desperate and kind of wacky at this point, so it’s tough to remember all of the insignificant details. In the far west, the Zeus has shown up to crash the HMS GT fleet party. The wounded GT and HP have tried to block her, allowing the London and captured Lezard to get coins from the island where UPS 2 essentially met their doom in two ways (Natives plus Paradis destruction by the GT). In the center, the swarm denies the Star of Siam and is about to capture the Bandido. The Doldrums continues to rack up the gold, while the Quick fleet tries to round earth to the far west.

With very few coins readily available on islands, the northwest becomes a hotspot of activity. The Pique and Courageux are quickly (pun intended) trying to go back to the east with 3 coins between them. In the far west the Vengeance is dueling the Longshanks of the Doldrums fleet to protect the gold runners. In the northwest both islands have been mostly wiped clean, with the Zeus dismasting the HP and the London having dropped off her captain and helmsman to load 3 coins. The Neptuno dismasted the swarm Intrepide, who wants to be rescued by one of their sloops. However, the Star of Siam has appeared through the whirlpool, annoyed at having lost the boarding party to the Coeur recently. In the far southeast, the San Cristobal rolled poorly for Paradis (a 5 roll), but hit a whopping 9 for 9 in a double action to make the fort go from healthy to abandoned!!

In the NW, the London got home by whirling a slight bit to the far north so the Zeus wouldn’t be able to get her. She brought home some nice gold for HMS GT, who has risen to late-game prominence a bit after a somewhat slow start. The SoS has stolen the Intrepide’s final coin, but the Lezard has rammed a mast off. The Pique captured the GT. In the SW, the Amity used Skrew Engine to ram the final mast off the Neptuno, getting ready to capture the ship for some revenge at the Artillery Strike fleet being very detrimental to the AP’s early in the game. In the SE the San Cristobal and Monarca have loaded up a lot of coins from the spoils of UPS 5’s Paradis fort, now destroyed by the Spanish Meta fleet. The Quick fleet had a good turn, with the Courageux capturing the Longshanks and the Pique darting into the fog to protect her gold.

But the Quick fleet couldn’t sustain their brief success. Although the Pique got a lucky fog roll to dock home her coin safely, the Rover (the final ship remaining from the Gold Race fleet) rammed the final mast off the Courageux, the ship with two coins aboard. The Vengeance captured the Patagonia for Mycron’s ability but is nearly dismasted with the powerful Eagle nearby. In the SE, revenge for UPS 5! The Zeus flies through the whirlpool and knocks down 4 of Cristobal’s 5 masts. She boards the Monarca and hoards all the gold! The NW becomes a desperate ramming and boarding situation, with the SoS somehow holding onto her coin (vaguely similar to a situation in the NW in the 8 fleet game at the end of T1 I believe). The swarm fleet was going to become a juggernaut with the repaired HMS GT, but the Pique lost her mast on the whirlpool trip and they’re stuck! XD

The London picks up her captain and helmsman, sailing out to wreak havoc. The English are tired of running gold! The London goes 3/3 against various canoes as the Star of Siam improbably escapes home via the whirlpool with her coin. The Bandido and Jolly Mon of the swarm fleet (Bandido captured) face off against the Lezard of HMS GT (captured from the swarm fleet!) for the final coin of the western Natives island. So many ships have swapped sides in this game that is has gotten rather confusing. Another example of that is in the northeast, where the AP’s try to make things interesting. The Amity would take a while to drag the captured Neptuno back home and repair her, so the AP’s are giving the Neptuno to Spanish Meta (ironically an all-Spanish fleet) in the hopes of creating a short-term alliance to help bring down the Doldrums, who I suspect have the most gold. The Doldrums fleet even has a shot at the Courageux, who has both coins still aboard and is likely the largest amount of gold left in play that is realistically available (Zeus with 7 masts left is just about unbeatable at this point haha). Speaking of the Courageux, she has been captured by the Rover of the Gold Race fleet!

In a reversal from the previous handful of turns, the west empties out as eyes turn towards the Doldrums vs. Quick showdown of sorts in the far east. Neither of those fleets may win the fight however, as the Eagle sinks the Vengeance and the Rover takes the captured Courageux into the fog. Various single ships are on their way to the area, including the Amity, Coeur (of the swarm fleet), and Elthelfleda. The AP’s plan backfired, as the Spanish Meta fleet rammed the Amity. The Zeus got her gold home and the London looks to explore to take the last coin from the former UPS 5 island.

Fleets that have been eliminated or essentially eliminated now include UPS 4, Artillery Strike, USS Kettering, Norvegia, HPFF, and UPS 2.

The game is obviously winding down and we will hopefully finish it in the eighth and final session!

2/11/2018

The eighth and final session of this game has been played!  😀

The two coins on Le Courageux became some of the final in play. Various ships are here fighting over them, with Le Pique of the Quick fleet briefly recapturing the ship that was originally theirs (after the Rover was dismasted.

At the upper left, the Lezard (now of HMS GT) whirlpools to the northwest to avoid the Jolly Mon of the swarm fleet. HMS London of the same fleet has one of the other final coins, so the Monarca and Star of Siam have entered the area, anticipating the return of the London through a whirlpool. In the far east, the Eagle has gotten one of the Courageux’s coins and ducks into a fog bank near her HI for safety.

Yet AGAIN there is chaos in the far northwest! The London returns, but is ambushed by one of her own former allies in a way! The Zeus of UPS 5 loaded aboard the HMS GT’s Calico Cat, and her extra action allowed the Zeus to go through the whirlpool to steal the London’s coin! However, it made the Zeus a magnet for fire, and being pinned to the London meant it would be difficult for the Zeus to get the coin home, even with 7 (at the time of the ram) masts remaining. The Neptuno, London, and Star of Siam all pounded away at the 10 master, with the Jolly Mon and Lezard anxiously waiting to ram and try to steal the coin.

The Lezard of HMS GT DID steal the coin away from the Zeus, but the Zeus sank the London to unpin herself shortly afterwards. Then she smashed the Lezard and took the coin back, sinking the Jolly Mon and eliminating the swarm fleet in the process. XD The San Cristobal won the final battle in the far east, taking the Courageux’s other coin all the way home (the Eagle of the Doldrums fleet did unload the other one). With that there was only one coin left!! The San Cristobal got an extra action to go through the SE whirlpool and dismast the Zeus, stealing the coin!! The Zeus would indeed NOT get the coin home, as it instead went to the Spanish Meta fleet, who had an incredible and dominant endgame.

In an epic COIN COUNT, Dakmor’s Swarm Fleet has WON the 16 fleet game!!!!!!!

Here are the final gold scores after a VERY long game (23 turns, but over a dozen hours).

The final standings for this epic game:

1. dakmor’s Swarm fleet: 34 gold
2. The Doldrums: 33 gold
3. Darrin’s Gold Race: 29 gold
4. EA Gold Runners: 26 gold
5. Spanish Meta Fleet V2: 24 gold
6. HMS Grand Temple: 22 gold
7. American Pirates: 16 gold
8. UPS 4: 16 gold (AP’s had a ship active at the end)
9. UPS 5: 13 gold
10. RtSS English: 12 gold
11. Quick wins the game: 9 gold
12. Norvegia: 6 gold
13. Artillery Strike: 4 gold
14. (tie) UPS 2 and Hai Peng Fort Frenzy: 2 gold
16. USS Kettering: 0 gold

Truly incredible with a 1-gold margin of victory for the swarm fleet! For the past few sessions I suspected that the Doldrums fleet had the most gold, but the swarm did very well. They had the Barbary Banner, which I think was included in a “motherlode” of about 14 gold brought home by the Intrepide. The swarm fleet ekes out a win, proving that it’s a great fleet to use in multiplayer games (which was already established from games I played a WHILE ago, but still, winning a 16 fleet game is a big deal after all! XD).

Finishing on the “podium” was Darrin’s Gold Race fleet, which placed the highest of the “super fleets” from the actual tournament. That fleet further proves itself, especially when you consider that they were down to just the Rover for the entire endgame. (so they got that 29 gold very early and quickly in the game)

The EA Gold Runners fleet did admirably, coming in 4th after winning the 12 fleet game I played awhile back. The AP’s (winner of the 8 fleet game and 2nd place in the 12 fleet game) didn’t do as well as I had hoped (I wanted them to win among my fleets), but still had a respectable finish in the top half of fleets.

The Spanish Meta had an amazing endgame, becoming a juggernaut as less and less ships were sailing around. The San Cristobal came to dominate, with the Monarca as her sidekick. Eventually they even took control of the Neptuno of the Artillery Strike fleet, giving them a perfect all-Spanish addition to an already great Spanish fleet. It was a bit too late to win the game but a very strong showing from them.

Speaking of good endgames, HMS GT came out of nowhere to finish 6th! After struggling against the Paradis built by UPS 2, they finally got some gold home (London had 3 coins worth about 13 in one load I think) and even managed to double their fleet size to 4 ships with the HP and Lezard.

From there it was mostly disappointments, but only so many fleets can do extremely well with so many participants. The Zeus of UPS 5 had a powerful endgame but they finished with just 13 gold. Fleets like Norvegia, UPS 2 and HPFF underperformed, but that was partly due to going late in the turn order. In fact, the top two fleets of this game were in the first 3 fleets to go in the turn order. In that case the AP’s and Gold Race fleets outperformed their starting positions a bit, but so much happened on the early turns that getting behind meant doom.

As far as player stats go, I got 60 more gold with my fleets than Xerecs did with his (154-94), along with one of my fleets actually winning the game, but he had many more ships active at the end of the game, including a nearly healthy Spanish Meta fleet and a Zeus that wrecked my hopes of HMS GT upsetting more fleets in the standings.

Overall it was a very fun game! This officially concludes the Tournament #2 festivities for good, and likely it says goodbye to “official” tournament play for a long time, at least between Xerecs and I. We hope you enjoyed the journey, which started in fall 2016. O_O From here we plan other adventures, including a grand one that will hopefully start sometime this year… plans to be revealed at a later date….

The Caribbean Game

The Caribbean Game

Two of the greatest admirals in history, Admiral A7XfanBen and Xerecs, The Lord Sentinel, have begun their grandest adventure yet! After playing many campaign games over the years, including three together on the VASSAL module (CG1/2/3), we have decided to embark on something completely unprecedented, something no one has ever done. Something that is truly on a historic scale. A “game to end all games”, if you will. Ironically enough, this game may actually never end! Ever since the World game had to be put on hold, Xerecs and I have been planning this game as the replacement. However, we wanted to finish T2 first. Now that that’s over, we have been able to concentrate on this lately and are finally ready to start!

I couldn’t find the post, but for a few years now I’ve had vague thoughts of creating a complex, all-encompassing “Game of Life” based around Pirates CSG that would be my masterpiece. A game not just about naval warfare, but land warfare, politics, governments, trade, economies, revolutions, civilizations, home fronts, and more. Now that the World game has been put on indefinite “permanent” hiatus due to various technical issues, this game is the continuation of that idea. I mentioned it to Xerecs in one of our MANY emails about CG1, and the idea took off. I originally thought this “Game of Life” idea would come to fruition in many, many years from now (many decades actually). However, the VASSAL module (thanks again B.J. Olejnik!) has dramatically sped things up, and now my “masterpiece” of a game can see the light of day already! Xerecs and I spent parts of April and May 2016 developing the ruleset; what you see here represents hundreds of emails and only a chunk of the google doc we are using to collaborate. Ironing out the details has been a very fun and exciting process. We have recently edited the World ruleset to adapt it to the Caribbean game, though most of it has remained exactly the same.

Before I go any further, I’d like to point something out:
-There will be opportunities for you to play in this game as well. These will be known as “cameo” (or guest) appearances, and more information is at the bottom of this post.

The Caribbean game is just that, a game based on a map of the Caribbean. This is mostly possible through the VASSAL module, since creating an ocean large enough for such a map would require immense amounts of space and time (obviously not to scale, but even so it would have to be a HUGE ocean). With so many real life elements involved, the game is very loosely based on historical concepts, but NOT historical events (there will be no reenactments or reconstructions of history). These concepts form the backbone of many of the rules, and they also explain the need for a ban list for the game. However, it is still a game, so plenty of concepts will be cut out or underrepresented – to save time and effort, and also to focus on Pirates CSG, which is still the game’s core.

With the game file being saved at the end of every play session, this game has no timetable. Xerecs and I are both in our early 20’s, and you can see from our previous campaign game experience that we LOVE Pirates. As a result, this could sort of be “that game” – a game that goes on and on with no end in sight. A “forever-long game”, it could turn into just that. As of now we’re hoping to play for many years, though that could turn into multiple decades. Many things will get in our way, and we may have to put the game aside for months or even years at a time. However, we’ll always be able to return to it and resume playing once more. This also furthers the historical aspects of the game, since playing the game for many decades could represent decades or centuries of history, with the Age of Sail occurring in the general time period of 1500-1850. To put it simply, this thing has a chance to be BIG. Not just in terms of points in play, but in terms of impact and popularity as well. With enough complexity in the ruleset and enough time to play, it could turn into one of the most epic games in the history of gaming (tabletop/boardgaming/videogames/etc).

Without further ado, here is our ruleset. It is not a finished product and we will likely have to edit it once the game begins. Feel free to peruse at your leisure!


Tentative ruleset

Rulesets used: Economy EditionCentury of the EmpiresRISKPirates of the Cursed Seas CampaignThe Pirates of Catan (Quick Reference Guide)

A HUGE thanks to cannonfury, sariouriel, captain_vendari, and woelf for creating those! Many parts of this ruleset directly borrows from the others.


Errata

Duplicates rule – There cannot be duplicate ships in play until a faction has purchased every single standard ship (including flavor duplicates (such as all three versions of the 5 master HMS Apollo, for example, but not including customs)) available to them. Once a faction has every ship in its fleet in play, that faction can launch duplicates. Only one duplicate ship is allowed; if a faction has two of every ship in play, they can begin a third set of duplicates. However, once a ship is sunk, it MUST be replaced before duplicates can be launched again. (This is also known as the “complete the fleet” rule)

-Named crew must be unique, but once a named crew is eliminated or removed from the game, a DIFFERENT version of that crew can then be purchased as long as they aren’t in play at the same time. This can be done ad infinitum; crew may be called “Thomas Gunn III”, for example.

-After a ship rolls for the resource type and loads resources, the ship will load face-up gold coins that correspond to the numbered resource (for example, a ship with lumber on board would have 1’s). When the ship unloads the resources at the home island, the 1’s (in this case) are swapped out for the value of the resource (IF they are being converted to gold). If the value of lumber was 4, when the ship docks at her HT (home territory), the 1’s come off the ship and face-down gold 4’s appear on the HT, which can then be used to purchase ships and crew.

-Players will NOT be required to pay one gold each turn for every ship not docked at their HI. Why? We want this game to be huge, so anything that slows the game down is getting cut out. I like this concept, since you have to pay the crew and supply them with food and rations, but for this game we can’t afford to be paying gold every turn when there are already going to be a ton of ships being launched all the time. Also, when this game reaches astronomical point totals, it would be extremely annoying to count how many ships each fleet had on their turns.

-Game time is measured in rounds. A round begins with the start of the first player’s turn and ends with the finish of the last player’s turn.

-Unique treasures may be used, but note that due to the nature of some rule changes, they may no longer function as intended.

-If 10 masters can be edited into the VASSAL module, no duplicate 10 masters will be allowed at any point during the game. In order to build a 10 master, you must capture a 10 master from another faction in order to get the hull and ship plans (the Jade Rebellion will be the only faction capable of launching a 10 master from the start).
-The Jade Rebellion is the only faction that can have duplicate 10 masters (still following the duplicates rule, and only the Baochuan) (Zheng He first version is linked, then have other crew for future linked admirals)

-Return to Savage Shores game pieces may be used.

-Custom game pieces may be used, as long as they aren’t too overpowered.
-Non-historical factions (Hylia/Gallia/etc) are not available

Ban list:
-All Events
-Whirlpools
-Navigators/trade currents
-Cargo masters
-Sea creatures
-Abilities that move enemy ships
-Strange/unfair UT’s (Bad Maps, Blood Money, Cursed Natives, Elizabeth’s Piece of Eight, Eye of Insanity, Gem of Hades/Red Skull, Homing Beacon/Jack’s Compass, Lost, Kharmic Idol/Pirata Codex, Maps of Alexandria/Pirate Globe, Maps of Hades, Necklace of the Sky, Neptune’s Figurehead/Resurrection Codex, Neptune’s Trident, Odin’s Revenge, Odin’s Revenge, Poseidon’s Breath, Runes of Destruction/Magic/Odin/Serpent, The Cursed, Voodoo Doll, Jailhouse Dog)
-Certain named crew (Calypso, Captain Davy Jones/Wraith (SS version), Cursed Captain Jack)
-Other completely impossible abilities (fog hoppers, Captain Jack Sparrow (UPS), Davy Jones (DJC), “Spyer” abilities (look at face down stuff on an enemy ship), Eternal, trading treasure, “other ships do not block this ship’s line of fire”, Turbine

Modified abilities:
-Pandora’s Box: Cannot be used to pull in any of the banned UT’s
-Periscope: Works within L, but not anywhere

-Ransom: In addition to the stated rules for Ransom, factions may now bring the Ransom crew back to a territory, port, or fort controlled by the crew’s faction. If the faction can pay, they must pay 100 gold (with gold from that area!); the gold is transferred via a “UT” worth 100 gold to the ship, and the Ransom crew can now be used again by the original faction.

-Ghost Ship: Cannot move through solid obstacles (islands, ships, and icebergs), but can move through fog, sargassos, and reefs
-“Ramming cannot eliminate this ship’s masts”: Changed to “This ship gets +1 to her boarding rolls” (both abilities should cost 2 points, and both refer to the ramming/boarding aspect of the game)
-“You own any derelict this ship explores; both ships become docked at your home island.”: Changed to “This ship gets +1 to her cannon rolls against any ship.”
-”Give this ship a move action but do not move her. Instead, roll a d6. On a result of 5 or 6, move an enemy ship L in any direction.”: Changed to “Captain. Reroll.”
-“Whenever any crew is eliminated, roll a d6; on a result of 6, assign the crew to this ship. Its nationality changes to match the nationality of this ship and it becomes linked to this crew.”: Changed to regular “Possession” ability (“If an enemy ship is within S of this ship, you can use this ship’s action for the turn to try to possess a target crew on that ship. Roll a d6; on a result of 6, the target is immediately assigned to this ship. Its nationality changes to match the nationality of this ship.”)
-“If this ship (sea monster) ends her turn in a fog bank, on her next turn she may use her move action to move out of any other fog bank in play.”: Changed to “This ship ignores terrain, except icebergs, when she is given a move action (islands are not terrain).”
-”Once per turn, this ship may look at any one face-down treasure on any ship or island.” (and variations of): Changed to “Once per turn, if this ship is touching another ship, reveal all treasure aboard the other ship. This ship can take as much unique treasure from the other ship as she can carry- even those that otherwise can’t be removed.”
-Eternal: Changed to “This ship cannot sink, but she can be scuttled.”
-”After looking at treasure on a wild island, you may trade any one treasure from that island for a random treasure on any other wild island. This ship must load the traded treasure.”: Changed to “Once per turn, if this ship carries treasure and is within S of an enemy ship, you may randomly trade one treasure with that ship.”
-“Other ships do not block this ship’s line of fire”: Changed to “You may double the range of this ship’s cannons each turn, but you must roll a 6 to hit.”
-“If a sea monster begins its move within L of this ship, it gets +L to its base move.”: Changed to “This ships gets +L to its base move. This ship cannot be assigned a helmsman.”

-Calypso: Once per turn, give any ship in your fleet +L to it’s base move that action.
-Cursed Captain Jack: Parley. Canceller.
-Captain Jack Sparrow: Captain. Parley.
-Davy Jones (DJC): Changed to OE Davy Jones (All-Powerful)
-All-Powerful: A roll of 6 is effectively a 5 – you may give any ship in your fleet an extra action.

-Any abilities that refer to boarding bonuses against sea monsters are applied to ships instead.

Temporary ban list:
These items will only be allowed after a certain amount of time has passed or a specific milestone is reached.

-”Instead of giving this ship an action this turn, you can give another ship in your fleet two actions.” (Available after the first 100 rounds have passed)

-Native canoes/chieftains (Available after a faction has discovered the New World territories in the far west of the map)
-A faction cannot have more than 4 sets of native canoes (20 total) in play at the same time (this is to reduce lag)
-Native canoes may only be launched at military ports. The first set of native canoes that a faction “receives” will be a custom ruling, likely involving bribing the local natives and/or impressing them with a display or riches or firepower.

-Flotillas (TBD; likely not available for multiple years)
-Hoists (TBD; likely not available for multiple years)
-Submarines (TBD; likely not available for MANY years)


Starting conditions

-There will be 4 factions starting the game, and the order of play will go as follows:

Xerecs:
English
Spanish

A7XfanBen:
Dutch
French

-Fleets start out at 20 points. Each faction also gets one infantry unit to start the game. Factions must keep at least one infantry unit in their home territory at all times. All of the other territories will be “empty” (they will contain unknown resources and gold) at the start of the game. Despite the rules for shipyards, any ship type is allowed for the first starting fleet.

-A custom VASSAL ocean called the “Caribbean Map” will be the setting. This ocean will be the largest ocean ever used for a game of Pirates CSG, and will feature a ton of real-world locations, with many of them based on history (especially 1500-1850).

-Factions will not start the game with a home island. Instead they will be sailing into the region from the far east, as the Caribbean has only recently been discovered. We are vaguely pretending that the year is approximately 1500, but this is not particularly important or relevant to gameplay. All four factions will start at the eastern edge of the map according to their historical locations in Europe. From north to south: English, Dutch, French, and Spanish.

-Once a faction establishes a home island, that island can produce only one resource per turn. Once a faction has upgraded all of their structures to Level 2, the island can produce 2 of that resource per turn.

-Other factions will not be present at the start of the game. The Mercenaries will be available for hire as privateers, as detailed below.


Resources

Resources are the main source of gold production in the game, but must first be converted for a variable price at the home island into treasure coins, which can then be used to purchase ships, crew, equipment, etc.

Resources count as cargo, and abilities that affect treasure coins also affect resources (i.e. each of these coins is worth +1 gold… turns to each of these resources is worth +1 of whichever resource is in question).

The value of a resource is determined by a die roll. At the beginning of the first player’s turn, a d6 and two d6 are rolled. The d6 roll determines the values of all resources (refer to the quick reference for exact values) while the pair of d6 rolls determines the number of turns this value will hold.

Lumber: (1) Fundamental for ship and settlement building, lumber is the basic building block of any naval civilization.
Textiles: (2) Needed for sails and clothing, textiles are a key part of the trading industry.
Metals: (3) Stronger than wood, metals allow for the construction of sturdier ships and deadlier weapons—as well as providing the means for paying for them.
Food: (4) From fish to spices, food is an essential part of every nation’s economy.
Medicine: (5) Derived from various sources, medicines are essential for having a healthy military.
Luxuries: (6) The rare items crews find on their journeys through the world’s seas—from the beautiful to the wild to the truly cryptic.

Die Roll…….1……2…….3…….4…….5…….6
Lumber…….1……6…….5…….4…….3…….2
Textiles…….2……1…….6…….5…….4…….3
Metals………3……2…….1…….6…….5…….4
Food………..4……3…….2…….1…….6…….5
Medicine…..5……4…….3…….2…….1…….6
Luxuries……6……5…….4…….3…….2…….1

Specific resource abilities
When 20 or more of these resources are at your home territory OR port, they give you special bonuses. Resource bonuses do not stack. Only one of these abilities can be used at a time. In order to change abilities, the resource in question must be decreased below 20 to select a new one. If these abilities combine with other abilities (such as those from political parties), nothing can ever cost 0 gold. 1 gold is the minimum cost for any purchase.

Lumber: (1) Ships cost 1 less gold than their point cost (point costs don’t change for all other purposes). Shipyard upgrades cost 5 less gold.
(Ships and shipyards both require vast amounts of lumber)
Textiles: (2) Ships cost 1 less gold than their point cost. Gain 1 loyalty per turn.
(Sails are used for the ships, and a great clothing industry keeps the populace happy, especially during winter time)
Metals: (3) Fortress upgrades cost 5 less gold. Army units cost 1 less gold.
(The fortress houses many guns and an armory, and that armory produces guns and swords for the soldiers, hence the lower cost of army units)
Food: (4) Army units cost 1 less gold. Gain 1 loyalty per turn.
(The faction does not have to supply the army with as much rations, and a healthy food market keeps the populace happy)
Medicine: (5) Gain 1 loyalty per turn. If a civil war occurs, the populace is decreased by 25%, rather than 50%.
(A healthy populace, and one that can bear disasters better than the average populace)
Luxuries: (6) Ransom payments can be for 50 gold instead of 100. Named crew cost 1 less gold.
(Thematically luxuries could be swapped for gold (you don’t have to fork over the luxuries during the ransom exchange), and giving named crew different jewelry and valuables could entice them to join your cause)

In regards to that “OR port”, it basically means that if you stockpile 20 or more of a specific resource at a military port, the bonus kicks in IF POSSIBLE. If a military port resource bonus ability says “gain loyalty”, nothing happens because the populace is way back in the HT. However, a military port could benefit greatly from the lumber resource bonus, since ships can be launched at MP’s and each MP will have its own shipyard, upgraded just like the shipyard(s) at a HT.

Theoretically each resource type should account for 16.67% of the territories and islands in the game.
These resource bonuses will not be applied until we are 20 turns into the game.

-If 10% or less of the islands produce the same resource, that resource is worth 1 more gold than usual.
-If 5% or less of the islands produce the same resource, that resource is worth 2 more gold than usual.
-If 50% or more of the islands produce the same resource, that resource is worth 3 less gold than usual (to a minimum of 1).
-If 33% or more of the islands produce the same resource, that resource is worth 2 less gold than usual (to a minimum of 1).
-If 25% or more of the islands produce the same resource, that resource is worth 1 less gold than usual (to a minimum of 1).

-An island’s resource will be represented by one of the tiny dice, which will be turned upright to the corresponding number. (In the VASSAL module, we will use face-up coins.)

-Nations can “make change” with their gold or resources.

-Factions are allowed to purchase resources from other factions. (and really anything else agreed upon for that matter)

-Certain islands or territories may have predetermined resource types on them, based on history.

-Some locations will also contain regular gold, especially locations that were/are historically rich with gold. To minimize potential lag within the module, most of the gold will not be present at the start of the game, but added when ships or troops discover it.

-If a wild island is very close to a faction’s home island (about 6S but especially less than that, with one or two move actions required to get there), that island will almost never produce resources due to the potential for abuse.

-Random timer idea (for resources changing, weather, etc.): At various points throughout the game, all players may agree to use a random timer for that session. When the timer goes off, roll for resource values as normal. Those values hold until the end of the session, or until the timer goes off again.

-Players may agree to change the resource system. Instead of simply rolling a d6 for values and two d6 for duration, other options may be added for more randomness.
Example: A round of turns begins with the d6 roll. A 1 is rolled (on a 2-6 the resources stay the same, until a 1 is rolled). Since a 1 was rolled, roll again. If the second roll is a 2-6 (anything other than a 1), the resources only change value for that turn. On the next turn, they revert back to whatever they were on the previous round, or a different system is once again agreed upon by all players (such as starting over with regular EE rolls, or using the system described in this example). However, if the second roll is a 1, the current EE rolls are disregarded, and new rolls are made (both for values and duration).
Changing the rules for how resources change could really make things interesting.

-Alternative economy rules may also be used.


Upgrades

Home Islands/Territories
Factions must build structures in order to establish their presence in the game. After a faction settles on a home island or territory, they must pay 10 gold in order to purchase any Level 1 structure (except for Cities). These structures may be upgraded, and factions can construct multiple shipyards and fortresses on their home territory (up to 4 of each, subject to change). These structures must be within L of the coast. Upgrades to home islands and upgrades to wild islands happen at the end of a faction’s turn during the launch/spending phase.

Shipyard:
Level 1: 1 masted ships, 2 durability points, 20 gold to upgrade
Level 2: 1-2 masted ships, 4 durability points, 20 gold to upgrade
Level 3: 1-3 masted ships, 6 durability points, 30 gold to upgrade
Level 4: 1-4 masted ships, 8 durability points, 40 gold to upgrade
Level 5: All ships, 10 durability points

The price of a ship is its point cost. When you purchase a ship, place only its hull at the shipyard. During each of your turns, that ship may be given build actions (only) to place masts until it’s been fully constructed. Shipyards can only build a number of ships equal to their level (ex: a Level 3 shipyard can build up to 3 ships simultaneously). Ships under construction can be shot at, but not rammed or boarded. If the port or shipyard where a ship is being constructed is destroyed, construction immediately halts and the ship may be given actions as though construction were complete.

-Each additional HT shipyard costs 50 gold
-Factions can have up to 4 shipyards (subject to change)
-Crew cannot board a ship until it has been fully launched.

Tavern:
Level 1: Generic crew and equipment, 2 durability points, 20 gold to upgrade
Level 2: All crew (named crew, generic crew, and equipment), 6 durability points

Fortress:
Level 1: 4x4L cannons, 4 durability points, 20 gold to upgrade
Level 2: 4x3L cannons, 6 durability points, 20 gold to upgrade
Level 3: 6x3L cannons, 10 durability points

City:
-Each faction will have a “city” similar to their other structures. The faction’s city represents its populace. Factions start at level 0, and each upgrade costs 50 gold.

Level 1: Add 3 to populace at the beginning of each turn.
Level 2: Add 5 to populace at the beginning of each turn.
Level 3: Add 10 to populace at the beginning of each turn.
Level 4: Add 15 to populace at the beginning of each turn.
Level 5: Add 20 to populace at the beginning of each turn.

City Hall:
See rules for “Government” underneath Updated/New Mechanics; City Halls cannot be upgraded.

-There are now game pieces in the VASSAL module that can be used to represent these structures; however, some of them may not be used in the interests of minimizing lag. In addition, they were designed with the World game in mind, so the structures will not fit properly on single island pieces. It is likely that simple face up coins will be used instead.

Islands
An island upgrade is bought at the home island; a token representing that upgrade and 10 gold used to pay for it can be loaded onto any ship(s); the token fills one cargo space. That ship must return to the previously explored island and may unload the token and 10 gold as a free action. The island is immediately upgraded, but it cannot function normally until the following turn (similar to forts). If a ship is sunk on transit, the token is lost and another must be purchased.

-Settlement: Automatically created after an explore action. Abilities that remove explore actions can eliminate settlements. Settlements simply mark that this island has been explored by the player; enemy settlements may exist on the same island.

-Fort: A settlement may be upgraded to a fort. However, a faction must physically sail the gold to the island where the fort will be built in order to construct it. A fort generates no resources. Generic crew may be hired at this island. Resources can be unloaded at a fort, but they cannot be converted.

-Colony: A settlement may be upgraded to a colony by paying 10 gold. Abilities that remove explore actions do not eliminate colonies. Having a colony on an island gives control of that island to a player; other players may no longer take resources from that island. Colonies can be razed by enemy ships, they have no natural defenses and after three hits are considered destroyed. A colony may also be captured through a boarding action. Once destroyed, the island becomes unexplored in regards to all players, and its resource value may be reset.

-Port: A colony may be upgraded to a port. Players have a choice between either a trading or a military port; an island can only accommodate one. When upgrading to a port, that faction must bring the upgrade token to the colony in addition to 10 of the gold they used to purchase the upgrade. The 10 gold is removed from play when the token is unloaded at the island as a free action.

1) Trading Port (30 gold): Allows a player to trade any one resource for one other resource, of any type. An opposing player’s ship may also dock at your trading port to trade commodities, but they must pay one resource to the owner in addition to the resource(s) being traded. Ships with the Parley keyword do not have to pay this fee. A trading port can be blockaded by any ship. A trading port has 5 durability points; a sixth hit will eliminate it. Trading ports may be given repair actions – if so, no resources can be exchanged that turn. A trading port may use one lumber to repair itself, in which case resources can be exchanged that turn.

2) Military Port (100 gold): Allows a player to repair ships docked at this island as if it were a home island. Crew and ships may be purchased at a military port using gold from the port. A military port can hold resources and gold. A military port generates no resources. A military port cannot be blockaded, and acts as an eight flag fort with 3L cannons. In terms of purchasing ships and crew, a military port starts with a level 1 shipyard and tavern. The shipyard can be upgraded the same as home territory shipyards, but the tavern cannot (no named crew hired at military ports).

-In addition to the gold cost of island upgrades, when a colony upgrade is purchased, the populace decreases by 2 (to represent people leaving the HT). When a port upgrade is purchased, the populace decreases by 5.

-An island can only have one upgrade on it at a time.

-Upgrades must happen sequentially – factions cannot upgrade from a settlement to a port in one turn. This applies to HT upgrades as well – factions must upgrade their structures one level at a time. An upgrade of any kind takes a turn to institute.


RISK

-Territory/island can be used interchangeably at this point.1. In the map of the Caribbean, we have placed 11 non-island territories that form the coast of the New World continent. In addition to the group of territories, there will also be MANY islands. These islands (not territories, so therefore essentially irrelevant to the Risk part of the game) function as wild islands, but they can have units from Risk placed on them. Due to space constraints, some locations will be absent or underrepresented.

2. All of the non-HT territories that are bordered by only water will start the game as wild islands, unless chosen as a home territory by a faction. These territories follow the normal rules for wild islands. All of the territories except for the home territories in the game will start as “wild”. This means that resources and gold can be acquired over land by armies.

3. Each faction has a home island or home territory. Home locations can be conquered, but a faction is not automatically eliminated if their home is taken over by an opponent.

4. When invading an enemy territory across water or reinforcing a friendly territory across water, the army units must be transported by ships. There are no lines from RISK that connect territories over water – armies cannot invade across water unless they are transported in ships. That being said, ships have no limits on where they can transport army units.

5. Invasions follow the standard rules for Risk, and combat due to an invasion happens as soon as the units disembark from the ships. In order to land the troops on the territory, an explore action is needed, unless the territory is friendly and/or has been invaded before (home territories do not require an explore action to land troops there if it is the landing player’s home territory).

6. Risk units cost 3 gold each (or 3 points). This may be adjusted during the game if needed. For the purposes of abilities and effects, army units are considered ‘crew’ when on board a ship, even though they have no abilities. However, they do not count against the ship’s point cost. When a ship loads army units, they take up one cargo space per unit. They can be loaded and unloaded like normal crew with the following exception: An explore action is required in order to load or unload army units. For flavor purposes, one unit represents 100 troops.

7. Ships can fire on army units on land (following the regular procedure for a shoot action) if the units are within S of the ocean. The number of hits needed on the same turn to eliminate a unit is the same as the number of units the piece represents (infantry=1 unit, 1 hit needed to eliminate, cavalry=5 units, 5 hits to eliminate, artillery=10 units, 10 hits in one turn to eliminate). This is a way to incentivize saving up for artillery, which became more important in land warfare as the years went on. Infantry and cavalry units cannot fire back; however, if a ship misses an individual unit three times in a row in a particular shoot action, she loses a mast. Artillery units (representing 10 army units) can function as a 2L cannon for coastal defence. If an artillery unit is given a shoot action to shoot at a ship, it cannot be given a move action that turn. Ships cannot shoot over an island to hit a territory beyond, no matter what range her guns are.

8. In addition to the regular rules for forts, the rules for forts regarding land attacks are as follows: Army units can attack forts from land, in this way they must have already invaded the territory. A fort’s flags represent its defenses multiplied by 4 (a 4 flag fort functions as 16 army units). The rules for combat work the same, with the exception that due to the fortifications, the defender can roll up to three dice. The fort can contain army units of that particular faction, as a means of protecting them. The fort serves as the last line of defence if placed on a territory bordered by land. (These rules also apply to trading ports and military ports, with 6 and 9 durability points respectively.)

9. There are three custom forts that I have designed for the game – forts that were key strategic points in real-life campaigns. These forts are stationary. They cannot be placed on any territory/island and rebuilt on other territories/islands later in the game. Other than that, they function as regular forts. Once the ocean is created, their stats and abilities may need adjusting. In addition, more stationary historical forts may be created.

Gibraltar (Gibraltar, located on the southern tip of Spain)
72 gold (6 times the original cost of 12 gold), 10 guns: 3S, 2L, 2L, 2L, 2L, 2L, 2L, 2L, 2L, 3S. Ability: When this fort hits an enemy ship, you choose which mast is eliminated. Once per turn you may double the range of ONE of this fort’s cannons.

Diamond Rock (off the southern coast of Martinique)
24 gold, 2 guns: 2L, 2L
Ability: Extended Range.

El Morro (Havana, Cuba)
48 gold, 8 guns: 3S, 2S, 2L, 3L, 3L, 2L, 2S, 3S. Ability: This fort’s L-range guns cannot be eliminated.

10. Unlike the regular rules for Risk, territories can be abandoned. However, a faction cannot abandon their home territory under any circumstances. They can move most of their units and/or ships and gold to another territory to avoid being annihilated, but they cannot abandon their home territory.

11. When moving army units, each individual unit can only move from one territory to another once per turn. If units are part of a successful invasion, they cannot immediately move onto the next territory and invade it as well. Units can only move into one territory at a time (once per turn) even if the territories they are moving through are abandoned. When fortifying their position, a player can only move from one territory to an adjacent territory.

When army units move to acquire gold or resources, each unit has one cargo space (ex: three army units moving together can carry up to three lumber). When carrying resources/gold, army units cannot attack, but they can defend as normal.

12. There are no reinforcements from the number of territories or continents a player controls. Since players are supposed to pay for their armies, there will be no free reinforcements – players cannot bypass the cost of army units.

13. No cards from Risk are being used. There will be no reinforcements.

14. Each faction gets 10 free army units for home territory defense ONLY. These units cannot be removed from the HT, and are not represented on the map because they are part of the populace. They can only be used if another faction invades their HT.

15. Army units cannot move into a territory and explore it in the same turn. They must be given an explore action.

16. Similar to the RISK rules for army unit movement, crew and politicians can move across land. A move action can be used to move through one adjacent territory at a time. Equipment can be carried by army units; one piece of equipment takes up one cargo space.

17. Mercenary army units can be hired at military ports for twice the usual cost of army units. (faction bonuses/minuses at the HT do not apply – Mercenary army units always cost 6 gold per unit)


Action modifications

-Explore Actions: An explore action at a wild island takes an action, as usual. When a wild island is explored for the first time, the player that performed the action rolls a d6—match the result to the number of the corresponding resource. That island now produces that resource for all players, and you may load tokens of that resource onto the ship up to its cargo limit; each token fills one cargo space. Abilities that remove exploration markers may reset the resource of an island.

-Repair Actions: Repair actions occur normally, with the exception that a ship carrying both lumber and textiles may repair a mast at a wild island, per the shipwright rules; these resources are used in the process. Also, a shipwright stationed at a fort or military port may use the fort’s action for the turn to repair one cannon per turn.

-Combat Actions: Combat actions occur normally, although boarding actions have received updates and new actions, blockading and razing, have been created.


Updated/New Mechanics

-Boarding: after a successful boarding action, the winning ship may, in addition to taking gold or killing crew, take resources of any type up to their maximum cargo space. A settlement can be considered to have 2 masts in a boarding roll, and is captured by the winning ship. If a ship loses a boarding roll against a settlement, the attacking ship must remove a mast and move S away.

-Blockading: A trading port can be blockaded by a ship. If a ship docks at a trading port and declares hostilities, that port is considered to be blockaded; all trading ceases and the player loses all bonuses, including the production of commodities. The blockading player gains the resource bonuses, and can choose to take resources up to their cargo limit or remove them from the game.
-Military ports and HT’s can be blockaded, which results in the blockaded faction losing any resource bonus abilities they had until the blockade ends.

-Razing: A trading port can be razed with a boarding action; it is considered to be a 4 mast ship. If the boarding ship wins, the trading port is removed from the game, and the boarding ship receives all the resources available, up to that ship’s cargo limit. If the trading port wins, the opposing player takes that ship, but all crew on board are removed from the game. (Military ports cannot be razed)

-Raiding: A ship with the home-island raiding ability can dock at an enemy home island and take as many resources as she can carry, in addition to any gold. If able, she must leave on her next turn.

-Privateering: Once a trading port has been established, Mercenaries may be hired by the major nations as privateers. The ship or crew is bought for gold worth its build cost at the trading port, with gold in the trading port paying for the cost. The ship comes into play immediately at that island; it is considered a member of your nation for all purposes except that once it docks at a friendly home island or trading port, it is removed from play, along with any crew of the same nationality aboard. It may be hired again once it has been removed from play for the same cost. If a Mercenary ship sinks, that player cannot rehire that ship until a different player has hired the ship and it sinks as well.

Taxes and Loyalty
-Factions can levy a tax on their populace. Each faction’s populace is based on their city and how many political parties exist in their city hall. For flavor purposes, each number or “unit” of the populace represents 10,000 civilians (ie. a faction with a populace of 1,000 represents a country of 10 million people).
-The number of the tax rate is the amount of gold (up to 6) that faction receives at its home territory at the beginning of each turn.
-The tax rate can only move up or down by 1 gold at a time.
-When a faction declares a new tax rate, that tax rate must remain constant for 5 turns.
-A faction’s loyalty (of their armed forces and populace) can rise and drop. This is based on the tax rate and other factors. When taxes are raised or lowered, the corresponding drop or increase in loyalty occurs over the course of 5 turns. Loyalty cannot drop below 0 or rise above 100.
-Factions can only tax their populace if it is greater than 200.
-If the populace falls to 0, there cannot be taxes, and army units and crew cannot be hired.

-If a faction’s loyalty is between 60-79, that faction can add 1 to their populace per turn.
-If a faction’s loyalty is 80-99, that faction can hire crew for 1 less gold.
-If a faction’s loyalty is 100, that faction can add 2 to their populace each turn. Army units cost 1 less gold.
These effects do not stack, and occur at the beginning of the faction’s turn.

The chart below illustrates how loyalty changes with the tax rate. If the tax rate is at 6 for 10 consecutive turns, desertion will occur. 5 units desert per turn starting on the 11th turn of the 6 gold tax rate. If they go into the negative they have to pay for the units until they have a zero balance, after which they can once again purchase army units.

If a faction’s loyalty drops to 0, roll a d6. On a 1-2, there is a civil war. On a 3-4, there is a revolution. On a 5-6, there is a government overthrow.

Civil war
-The faction crumbles into a civil war between the opposing parties involved. The faction’s populace is cut in half. Divide the faction’s home territory into two areas. Each half gets half of the army units present in the home territory. On the faction’s next turn, the civil war begins. The two sides square off in battle, following the regular RISK combat rules. Battles continue until one side is victorious, ending the civil war. While the civil war is being fought, any ships within L of the home territory fire upon formerly friendly vessels.

Revolution
-The current political party and its supporters in the populace face a revolution by the opposing party. If there are over 50 army units in the HT, the rebellion is quelled and nothing happens. If not, the current political party is eliminated along with their leader. The faction must now function without a government (see below) for 2 turns, after which time another election can be held.

Government overthrow
-Eliminate the entire political party currently in control of the faction. Replace that party with a new party and leader, following the rules for elections (hold one election between the two parties next in line). The tax rate is decreased to 0 and cannot be raised for 10 turns. The loyalty is increased to 100 and can decrease from there.

If the eliminated party is the last party in the city hall, the faction must now function without a government until a new one is hired or planted. In that case, there cannot be taxes, but the faction also cannot buy army units or ships at their home territory.

Government
Each faction will have a city hall, where their government resides. There is no limit to how many different political parties a faction has in its city hall. However, each political party introduced after the initial number results in a loss of 5 loyalty. In addition, each political party introduced after the initial parties adds 20 to the populace.

Each political party will have a leader. This leader will be represented by a crew, and will function similar to regular crew. The politicians will have specific abilities pertaining to their strengths and weaknesses. Most politicians will have abilities that can ONLY be used while in the faction’s HT, but some will have abilities that function while at sea. Land abilities cannot be used while at sea, and sea abilities cannot be used while on land.

To introduce a political party, a faction must hire that party’s leader for a gold cost. Every politician that can serve in government must be paid 5 gold when “hired” in addition to the regular cost of the “crew” (the cost of their actual abilities). This brings that political party into play; they and their leader are placed in the city hall. Once in the city hall, they can begin participating in political elections.

Elections
Once every five turns, a faction can have their city hall host an election. Select two political parties and roll a d6 for both of them. The party with the higher result either advances in the governmental system (similar to a tournament bracket) or becomes the leader of the faction (if it was a final election). If a new party comes to power, their abilities and the abilities of their leader come into play and replace the abilities of the old party. Political parties and leaders can only use their abilities when they are in power. If a final election is held when the loyalty is 80 or higher, the party in power gets +2 to its die roll in the election. There can also be elections within parties, to determine which candidate of a party becomes the leader of that party. If a faction has 4 or more parties in their city hall, elections can happen every 3 turns. If a faction has 8 or more parties in their city hall, elections can happen every 2 turns.

Political parties and their abilities:
-These will be the abilities of each political party, which only activate when the party is in power. Political leaders will have their own individual abilities.

Land party: Favors land warfare and expansion.
-Army units have a base cost of 2 (instead of 3). Ships’ point costs are doubled.

Sea party: Favors naval warfare and expansion.
-Army units have a base cost of 5. Captains and helmsmen only cost 1 gold each.

Home territory party: Favors building up the HT through upgrades and a strong home army, as well as a large populace.
-All home territory upgrades cost 10 less gold than usual.

Exploratory party: Favors exploring every corner of the world, at any cost.
-Army units have a base cost of 4. Three explorers can be hired for just 1 gold. Helmsmen cost 1 gold.

Imperial party: Favors aggressive colonial expansion, and declares war on other factions often.
-The cost of island upgrades are cut in half. Every 5 turns, declare war on a faction.

Colonial party: Favors having as many colonies as possible, and having strong upgrades on them such as ports and high-level shipyards.
-The cost of island upgrades are cut in half. Decrease the populace by 2 each turn.

People’s party: Favors increasing the populace, having very low or no taxes, and preserving the safety of the home territory.
-City upgrades cost 25 gold (instead of 50). The tax rate cannot exceed 2 gold. Island upgrades cost twice their normal amount.

Religious party: Favors going to war with specific factions whose religion conflicts with their own.
-Assign a number to each faction. Use a random number generator to choose a faction. Declare war on that faction. Pursue peace treaties and armistices with all other wars.

Upgrade party: Favors upgrading all structures, including those on colonies, before building up the army and navy.
-Halve the cost of all upgrades. Double the costs of ships and army units.

Trade party: Favors resources over gold, and pursues profitable commercial relationships with other factions.
-Halve the value of all gold unloaded at the home territory. Halve the cost of trading ports. Pursue commercial alliances with the factions you can profit most from.

Gold party: Favors gold above all else, including resources and actually spending that gold.
-Double the value of all gold unloaded at the home territory. Halve the value of all resources unloaded at the home territory. Cannot spend more than 20 gold per turn.

Power party: Favors an absolute monarchy/dictatorial state. Works to eliminate other political parties from contention. Potentially high taxes but a very clear sense of purpose. (centralized decision making)
-Hire political assassins to eliminate other parties from the city hall. When this political party comes into power, roll a d6. On a 1-3, loyalty drops by 20 immediately. On a 4-6, loyalty does not drop when taxes are increased. Cannot issue bonds.

Resource party: Favors collecting a specific resource, depending on the leader’s preference.
-Roll a d6. The result is the resource type that now doubles in value for this faction only.

Region Party: Favors having absolute control of a specific area
Abilities: Roll a d6. This number is the particular region the party is trying to control (refer to chart). Generally the lower the number, the more difficult it will be to control the region. There will be benefits for establishing and maintaining control of a region when the Region Party is in power.
-The cost of military ports are halved in the specific region. Any ships and army units not in the specific area get -1 to their cannon and combat rolls (only).
-We are still figuring out the specifics of this political party.

There will likely be other parties as well.

-Once every 10 turns, a faction can plant a political party and leader inside the city hall of another faction. This can be used to help that faction, or to hurt them. The leaders of these planted parties can have secret abilities known only to the player who planted them. The player must reveal the secret ability when they intend to use it. This is a way to simulate assassinations, though other possibilities exist as well. (Example of a secret ability: Select a political leader in this city hall. Roll a d6. On a 4-6, eliminate that leader from the game.)

-Sometimes there will be a frontrunner in the political race. That party will get to double its election rolls, but will disappoint the populace and therefore have subpar abilities. On the other hand, a party may have its rolls halved for elections, but might have very worthwhile abilities.

There will be a trade-off between loyalty, populace level, taxes, and long-term agendas. More political parties mean less loyalty, but a higher populace could give a faction the ability to tax. Introducing more political parties also increases how many elections there can be, but that can lead to high turnover in terms of government, which can hinder a faction’s overall progress.

Bonds
Factions can issue bonds to receive money from their populace.
-Bonds are an immediate influx of gold.
-A faction can receive a maximum bond value of 10% of their total populace (ex: a faction with a populace of 1,000 cannot receive a bond worth more than 100 gold)
-Factions must repay the value of the bond plus interest. Interest is paid at the end of the period.
-The minimum period of a bond is 10 turns. There is no maximum period.
-The interest rate is tied to the period. A 10 turn bond has a 10% interest rate. 10 turns after issuing the bond, a faction must pay 110 gold back to the populace by eliminating the gold from their home territory (following the 100 gold example).
-Factions are not required to issue maximum value bonds; they can receive gold equal to less than 10% of their populace value, but never more than 10%.
-Only one series of bonds may be issued at a time. More bonds cannot be issued until the current ones are paid off.
-If bonds are not paid back, loyalty drops by the amount that isn’t repaid.
Example: A faction has a populace of 1,186. The maximum amount they can get for their bonds is 119 gold. However, they don’t think they can pay back 131 gold in 10 turns, so they opt to receive 80 gold, with a 15 turn period. In 15 turns, they pay 92 gold back to their populace. If they can only pay most of the bond payment (70 gold), loyalty drops by 22.

Rumors and Missions
Named crew (only) may try to acquire rumors or missions, which may help them or their nation. Rumors are usually more esoteric or selfish in nature, while missions are more obvious and “patriotic”.

-Rumors may only be obtained while docked at another faction’s settlement or trading port (not colonies).
-Missions may only be obtained while docked at the fort or military port of the ship’s faction.

To acquire a rumor or mission, roll two d6. Add the results, and compare it to the point cost of the most expensive named crew on the ship. If the sum of the dice is lower than the point cost, that named crew has been successful. Place a Unique Treasure representing the rumor or mission on the ship’s deckplate. Rumors and missions are kept face down, but they do not take up cargo space. Rumors may be stolen as regular “treasure”, but missions cannot be stolen by any means. If a ship with a mission is captured or sunk, the mission is eliminated. If the named crew is eliminated, the rumor is eliminated as well. (Rumors are tied to their named crew; missions are tied to the crew and the ship.)

-There will be a neutral merchant ship that sails around once in awhile. This ship will be a 4 masted ship with L speed and 8 cargo spaces. All 8 cargo spaces will be filled up with one resource type. Ships can engage this merchant ship to trade goods on a 1:1 basis. The merchant ship cannot shoot or be shot at. Once all of the original resources are gone, the merchant ship leaves the game, but may reappear again.


Victory Conditions

-There are no victory conditions. This game is not expected to end.


House Rules

-Factions must meet at sea or on land in order to exchange information, or send messengers. The players of the game cannot simply speak to one another or send messages through the module chat.
-NO TELEPORTATION! (of any kind)

-All ships must be hit twice in the same turn to eliminate one of their masts. This ability also applies to ships such as El Acorazado, whose ability now reads “four hits are required to eliminate one of this ship’s masts” (not necessarily the same shoot action). In some of the larger battles, this may become difficult to keep track of, in which case we will use the “same shoot action” rather than the “per turn” ruling. In VASSAL, we are tentatively planning to use pennant flag markers to denote that a ship has been hit before the second hit eliminates a mast.

-Ships cannot do damage by ramming.

-When a ship wins a boarding party, the winner decides whether they will take gold/resources or eliminate crew. The winner chooses which gold/resources to take, but the loser chooses which crew is eliminated.

-Ships can be shot at while docked at their home islands.

-Marines are now a generic crew. They cost 5 points, and simply have the Marine keyword. Named marines cost the same as usual, but they get two shots per shoot action instead of one. Since generic marines are generic crew, they are subject to the no-stacking rule. However, named marines work the same as normal – they can stack. If multiple generic marines are present on the same island or territory, they can all be given shoot actions.

-Forts now cost 6 times their normal gold cost, with the exception of Paradis de la Mer, which costs 30 gold.

-When an enemy ship comes within range of a fort’s guns, that fort may fire ONE cannon.

-Forts can now be set on fire.
The rules for flaming forts will work like this: instead of the fort rolling for each fire every turn, it rolls one die regardless of how many fire masts it has and regardless of whether the fort is given an action during the turn. The roll follows the regular rules for fire masts. The fort will be automatically destroyed if the fire consumes all 8 areas (not how many guns the fort has). A shipwright can only put out one fire per turn, but no flag is raised in the fire’s place until another repair action is given.

-Incentivize captures – possibly an answer to the problem of sinking ships (ships sink more in Pirates CSG games than they did in real life combat). When a ship is captured, that faction can “rechristen” the ship as one of that nation’s ships instead once the captured ship is fully repaired, and pays the difference in gold cost. Ships exchanged in this manner MUST be of the same ship type. Factions do not get any kind of gold or resource bonus if the captured ship is worth more than the ship they are converting it to. If brought back to a shipyard that is not an adequate level (for example, bringing a captured 4 master back to a level 3 shipyard), the faction must upgrade the shipyard in order to rechristen the ship. (The normal rules for capturing ships still apply, and therefore it may be more advantageous to not use this rule and simply keep the captured ship and change it’s nationality flag.)

Very simple example: the Pirates capture the Couer de Lion from the French, tow her back to their home territory (or a military port where they can legally launch ships from), repair her, and “exchange” her (simply editing the stats) for the Banshee’s Cry by paying 1 gold for the cost differential.

-Factions can send ships back to their home countries in Europe for reinforcements. This is done by sailing at least one ship off the eastern edge of the map; it is removed from play. The ship(s) must roll for effect on one of Xerecs’ storm terrain on their way to Europe. The faction may get free reinforcements while out of play after arriving in Europe. If one ship reaches Europe, they can get up to 100 points of ships and crew. If two or more ships reach Europe, they can get up to 200 points of ships and crew. It takes 100 turns to reach Europe, and a number of turns equal to the largest new ship’s mast count to launch the reinforcements. It will then take another 100 turns to return to the eastern edge of the Caribbean in the same spot as the faction started the game in. Each of the starting factions can only do this once per game.

-Factions can transport lumber for use as fire beacons. This is a means of communicating over great distances. One lumber resource is needed for each beacon. To make an effective chain of fire beacons, it would have to be a consecutive line through territories (one lumber needed per territory, and the territories need to share a boundary line). As a free action, army units from ANY faction can burn a beacon if they are in that territory. This will set off all other beacons that can be lit in the chain, at the rate of 2 beacons per turn. Any faction can also take the lumber resource as normal. On islands, fire beacons are lit at the rate of 3 beacons per turn, and can be used at a range of up to 2 of the Long Range Rulers (basically 8L).

Storm terrain will occasionally be used.
Storms
If any part of a ship touches a storm, place that game piece inside the storm; they are lost. Roll a d6. If the result is lower than the number of masts, segments, or flags on the game piece, eliminate one mast, segment or flag from that game piece. For game pieces with one mast remaining, treat a roll of 1 as a roll of 0. Ships exit storms by giving them a move action for their turn, and rolling a d6. Place the ship on her stern facing outward on the number rolled. (Moving out requires the full action, unlike fog banks.)

-It is possible there will be seasons (which mimic real life) where more storms are present than usual. Hurricanes may be introduced.

-Equipment
Dueling Pistols
Type: Equipment
Point Cost: 5
Reveal this event when within S of an enemy ship. The two ships involved cannot shoot at each other this round (including next round if needed). Specify a named crew on the opposing ship, and one on this ship. Roll a d6 for each crew and add the results to the crew’s point costs. The crew that rolled lowest is eliminated from the game. Eliminate Dueling Pistols from the game.

Trick Duel
Type: Equipment
Point Cost: 10
Reveal this event when within S of an enemy ship. Specify a named crew on the opposing ship; that crew is now assigned to this ship, but doesn’t take up cargo space, doesn’t count against the point limit of this ship, and cannot use its abilities. The opposing ship now gets a free shoot action, after which this ship can move L away. Eliminate Trick Duel from the game.

(Thematically: The captain or crew in question rows over to the other ship with a few members of his crew. These less important crew are quickly dispatched, and the key figure is taken hostage.)

Currently unknown house rules:
These are house rules that are either currently unknown, or are known only to the players playing the game. As a result, some of them will be left deliberately ambiguous.

-The chart for resource values and types may change.
-There will be custom UT’s with special rules.

Quests

Nations can engage in quests. These are purposely ambiguous and subject to change. The nations do not know of the specific quests at the outset of the game. Only through certain means can they come to fruition. There may be various types of rewards for completing quests. This is a game mechanic we have not figured out yet.


Useful abbreviations and wordings

-Faction/nation/fleet/etc all mean the same thing.

MP=Military Port
TP=Trading Port
HI=home island
HT=Home Territory
WI=wild island
CG=campaign game (the C can also stand for cumulative, but that’s generally a more basic campaign game with a less complicated ruleset, such as CG1 and CG2)

Certain abilities will also be simplified:
EA=Extra Action
SAT=Same Action Twice
SAC=Sacrifice action
Canceller=“Once per turn, one crew or ship within S of this ship cannot use its ability this turn.”
HI raider=home island raider (effectively a “home territory raider” for this game)
In the Battle Reports for this game, I may use abbreviations that can be found here on the third sheet labeled “Information/keywords/abbreviations”.


Cameo/Guest appearances

As mentioned earlier, you can join this game! However, before doing so, we ask that you get comfortable with the Pirates module (helpful page here), and get to know this ruleset pretty well. We realize that these are large barriers to entry, and we’re not expecting frequent or consistent guests, especially considering all of life’s numerous time obligations. As evidenced by CG2 (a VASSAL campaign game with three players), playing a campaign game with more than two players remotely is not easy. We still encourage anyone who is interested to participate. Guest appearances would likely consist of one or both of us relinquishing control of at least one of our factions for a specified period of time; this could be as short as one turn, to as long as a month or more. It all depends on your availability, aptitude, and passion/interest level. One of our favorite things to think about in terms of these “cameos” is how it simulates changing leadership, which is obviously one of the keys to history. Just let us know and we’ll fit you in!

Thanks for reading, and welcome to the Caribbean!
The Caribbean Game


3/10/2018 – The first turns of infinity….

Welcome to the Caribbean! Very Happy

We know our map looks rather silly, but that is the cost of entry to even play this game. If the territories weren’t so small and low in quantity, we would have technical issues similar to the World game. As with just about everything else concerning this game, gameplay trumps everything, including the map and region itself. However, I am quite satisfied with the map now that it’s done.

I used primarily the following resources when creating the map:
Google map of Caribbean
Herman Moll’s 1732 historical map of the Caribbean (used for some original names)
Map of reefs in the Caribbean

The map features a ton of real world locations. It is a custom VASSAL ocean 20 ocean tiles wide by 10 ocean tiles high, with double borders on all sides to provide more space for deckplates.

I created 13 different territories, with 11 of them making up the landmass of the New World continent. Cuba and Hispaniola are the only island territories, though some bigger islands like Jamaica and Puerto Rico have two island pieces put together to form the larger island.

There are a whopping 75 islands. These are all islands from the real world, and I took detailed looks at them in Google maps to determine which of the 4 main island pieces I should use for each. As a result, each island is as closely represented in both shape, size, and orientation (rotated correctly) as I could get them. The scale is necessarily off by quite a bit, but we are happy with the final product. There are also some oddities with the map, as I took some leeway and added Bermuda in the far north. In addition, Antigua, Barbuda, and Barbados are farther east than they should be to expand the horizon a bit. There are a grand total of 86 land locations between the 75 islands and the 11 non-island territories.

Finally I added the reefs. There are not nearly as many as there should be, but once again that is to keep the file size small at the start to minimize overall lag. There are still many dozens of reefs, and all of them were added by looking at maps first. None of the reefs were placed randomly, and I did my best to put them in orientations most similar to real life. Even the few reefs you see a bit southeast of Jamaica are actual cays or banks in the actual Caribbean Sea.

In short, the map is about as accurate as can be had given the limitations of the VASSAL module and the gameplay itself. It took many hours to make, and is one of my all-time greatest map creations up there with the World map and Command the Oceans.

Now, for a tour of the Caribbean!

This is the northwest corner, where the coast of America starts with Florida and continues with Carolina, Louisiana, and Tampico. To the right you can see the Lucayan Archipelago, including the Bahamas. That region has 16 islands.

Continuing south, you can see Mexico and Southern Mexico as territories in the far west. This picture shows most of the Greater Antilles, comprised of 8 islands.

Moving to the northeast, we come upon the vast expanse of the sea and the Lesser Antilles.

In the southeast corner is the main island chain running north-to-south that includes some of the most important islands in the history of the West Indies. With factions sailing in from the east, it will also be possibly one of the busiest regions in the early part of the game. The Lesser Antilles as a whole comprise the largest region by map size and land locations, with 39 islands in the region.

Finally we come to the southwest, the region I’m calling the “South/Central American islands”. There are 11 islands in this region (Aruba and others are pictured to the east, but I looked it up and they are considered part of the Lesser Antilles). In addition, the southern hemisphere territories include Veracruz, Tabasco, Campeche, Honduras, and Yucatan. I really wanted to make the Florida/Yucatan channel closer, but it’s just not feasible with the constraints we have. I was pleasantly surprised with how many islands I found in the southern part of the Caribbean and Gulf of Mexico, so hopefully there won’t be a lot of “dead zones” in the long-term.

THE RACE TO COLONIZE THE CARIBBEAN IS ON!!!!

Recently discovered by a single European ship now repairing back in Europe, the Caribbean is open to exploration!! It could be considered to be the “year 1500” and the major powers of Europe are sending vessels across the Atlantic to seize new territory! However, they don’t know what’s out there, and may be shocked at the sheer size and scale of the venture….

In the order of play, here come the factions!! Very Happy As detailed in the ruleset, we started with 20 point faction-pure fleets with no 0LR +5 crew.

The English, controlled by Xerecs, The Lord Sentinel. They have chosen two capacious ships to send west, with HMS Hound and HMS Cumberland on the scene. Both carry a helmsman, explorer, and oarsman.

The Spanish, controlled by Xerecs, The Lord Sentinel. La Monarca has an explorer, while the Morning Star carries a helmsman.

The Dutch, controlled by Admiral A7XfanBen. The historic Prins Willem has arrived with a legendary explorer at the helm: Abel Tasman!

Prins Willem
Faction Affiliation: Dutch
Rarity: C
Type: Ship
Point Value: 14
Number of Masts: 3
Cargo Space: 5
Base Move: S+S
Cannons: 3S,3L,4S
Ability: Crew do not take up cargo space on this ship.

Abel Tasman

Dutch
Crew
6 points
Ability: SAT (Born Leader). Helmsman. Explorer.

The French, controlled by Admiral A7XfanBen. The French also have a historical “all star” in their starting fleet they’ve sent to the Caribbean: Robert de la Salle aboard La Belle! They are also sailing in with the Terron (another historical custom) and the Jeux.

La Belle
Faction Affiliation: French
Rarity: C
Type: Ship
Point Value: 7
Number of Masts: 2
Cargo Space: 3
Base Move: S+S+S
Cannons: 4S,5S
Ability: This ship cannot be pinned.
Link: Robert de la Salle

Terron
Faction Affiliation: French
Rarity: C
Type: Ship
Point Value: 5
Number of Masts: 2
Cargo Space: 2
Base Move: S+S
Cannons: 4S,5S
Ability: Ship treasure trading. (Once per turn, if this ship carries treasure and is within S of an enemy ship, you may randomly trade one treasure with that ship.)

Robert de la Salle

French
Crew
3 points
Ability: Helmsman. Explorer.
Link: La Belle

With that, a final look at the undisturbed region before the game begins! The factions are starting on the far east side now that they have arrived from Europe. They are placed approximately equal distances apart from one another and only have vague inklings of the other factions in play and where they might be. They have been placed north-to-south according to their latitudes over in Europe. North to south: English, Dutch, French, Spanish.

If you want to really study the map and check out the locations, click on the picture below, then click to zoom in on postimages.cc. Then right-click it in the new tab and hit “open image in new tab”, and zoom in again. Then you can see the full picture in all its glory, at 9800×5000 pixels. O_O (may take a little time to load)

This is a combined report, so I have integrated part of Xerecs’ writings into this first battle report for the game. Some of the events may be slightly out of order, but we took a lot of turns and things were happening quickly as the session went on. However, this is the last time we will do this, as it gets far too confusing! XD After this report we will do separate reports; I’ll be covering as much as possible, but we’ll also be doing reports for our specific fleets.

We also streamed live to youtube, which we hope to do frequently with the live sessions for this game. You can hear our excitement and banter in the video, where we recorded all of the first session.

Xerecs wrote:
The English are the first to go in this ‘endless’ game, and their two ships the Hound and Cumberland set sail from the far eastern reaches of the sea. The crew of the Hound eagerly look forward to their adventures and exploits in the name of the crown, while the crew of the Cumberland look ahead to the potentially long voyage with mild apprehension. Sailors can go mad if they’re cooped up on a ship for too long after all…..
Far to the south, the Spanish began their own voyage with excitement, unknowingly reflecting the sentiment of the Hound. The Monarca and Morning Star will both be able to keep pace with one another, which will come in handy should either ship’s captain suggest changes to their course.


The French sail along, with three ships moving at different speeds resulting in being quite spread out over time. Robert de la Salle forges ahead in his ship La Belle, eager to find land and plant the French tricolor!

The English make the first landfall in Barbuda! They would explore to find textiles.

The English sail south and soon come upon Antigua, finding metal! This means the English have explored the two islands in the most northeastern part of the region, but they didn’t like either as a home island due to the reefs nearby.


Quote:
The English made land ahead of the Spanish, but the journey was not an easy one. With a far superior speed, the Hound has left behind the Cumberland, and found two islands; first Barbuda in the north, and after finding textiles there and finding it not suitable as a Home Island, turned south. The Hound found Antigua soon afterward where Metals were discovered. Since then the Hound has turned back west, while the much slower Cumberland has finally made land at Barbuda. After resting at the island and taking one of the textile tokens, the Cumberland has once again resumed her sail westward, in what the crew believes to be the footsteps on the Hound.


Zooming ahead a bit, but the Dutch were the second faction to sight land! With the help of Abel Tasman’s SAT, they were able to explore 4 islands in short order, going northwest and “island hopping” from Montserrat to St. Kitts and Nevis, then up to St. Eustatius. Along the way they find 4 different types of resources – metals, luxuries, food, and lumber!

The French find land at last! La Belle approaches Martinique, ironically a French island in the historical Caribbean. Diamond Rock is not a separate island for play purposes – it’s labeled because that’s where the custom Diamond Rock fort can be built.

As the turns go on, the French fleet gets even more separated, with the Jeux and Terron lagging behind La Salle’s flagship.

The Dutch declare that St. Eustatius will be their home island!! With that, they are the first faction to settle on a home island. Wanting to cash in some resources, it was finally time for the first resource rolls! (on Turn 29!) A 6 for values meant that medicine (resource #5) was the most valuable resource, but the values would only hold for 4 turns, not long enough to even affect the other factions!

Cashing in some resources held in the cargo hold of the Prins Willem, the Dutch build the first structure of the game! Spending 10 gold to establish a Level 1 shipyard, they will be able to start construction on one 1 masted ship next turn. As detailed in the ruleset, upgrades of any kind must happen sequentially, and shipyards can only build as many ships as their level indicates. They also scale to the size of the ships, so at max capacity a Level 3 shipyard can build up to three 3 masted ships simultaneously.


Quote:
Some time later, with their stores nearly depleted the Spanish finally find land, the island of Grenada. They will explore it by their next turn, which will give their weary crews a much needed respite.
The Spanish have found Medicine on Grenada, of which the Monarca takes one, and the Morning Star takes two. Neither crew is satisfied with the island in regards to a Home Island, given the reef off of the north shore which would make launching difficult. As such both ships turn sharply northward, and decide to follow the reef, in hopes that they have stumbled upon an island chain.
Their hopes and hunches were in the end correct! A few turns later and the Spanish have discovered Grenadines, on which Luxuries were found. After exploring, the Monarca maneuvered around the reefs to move northwest, her smaller size allowing her to fit between the reefs without serious risk. Meanwhile, the Morning Star being larger kept sailing in a northward direction, under guidance from the crew of the Monarca before the two ships became separated by the island. Both ships have spotted St. Vincent, and both crews think that it could make a fine Home Island for them.


After finding lumber on Martinique, Robert de la Salle decides to brave more open ocean, taking La Belle north! The crews of the Jeux and Terron are certainly getting worried, but La Salle specifically instructed them to sail due west until they make landfall, excepting any hostile relations of course.

It was already time for the first actual resource change! (Turn 33) The 1 for values means that every resource is worth its number value (luxuries are the #6 resource and now worth 6 gold apiece), and the duration was for 10 turns, long enough for factions to actually take advantage of the values!

This certainly benefits the Spanish, who have found luxuries on the Grenadines:

A few turns later and the Dutch are in business! They found medicine (currently worth 5 gold apiece) on Saba, and the Prins Willem has brought some home for a small windfall of 25 gold! With the gold the Dutch purchase the first Tavern, which at Level 1 can be used to hire generic crew and purchase equipment. They also have nearly finished constructing the first new ship of the game, the Limmen! All of my customs and their stats can be found here.

A cheap resource runner with a negative ability to keep the cost down, the Limmen is officially the first ship launched in the Caribbean game. The Dutch fleet begins to expand and their focus is solely on trade and infrastructure.


Quote:
A turn later and the Spanish have explored St. Vincent, finding food in the process. Both crews scout the island and the surrounding terrain as thoroughly as they can, finding little terrain that would impede the launching of ships and the conducting of trade. Could it be their Home Island in these waters?
The Answer is a definitive YES! Both the Morning Star (MS) and La Monarca unload their medicine tokens, which are now worth their face value of 5 gold apiece! They begin to formulate plans to upgrade the island, likely with a shipyard which will turn it into their HI for the foreseeable future.
The English have not been inactive, they’ve simply been sailing for a longer time, and have not discovered an island chain as the other factions have. However, that could change as the Hound finds Saint Barthelemy. While it appears to be on the smaller side, from what the crew can see there are no dangerous reefs around the island which would impede launching and expanding.


Zoomed out quite a bit, and you can see that the Dutch and English aren’t that far apart from each other. The Dutch have planted their flag in a nice 5-island chain running to the northwest, with Montserrat out of the frame to the south. Now that the Limmen has been built and sailed out, the Dutch begin construction on another 1 master.

The French situation a bit to the south, where they have made a lot of progress! Robert de la Salle scouted and explored Dominica, finding medicine. Noting the reef on the northern side of the island, he didn’t think it would make for a great home island. However, he sailed north and quickly discovered both Marie-Galante and Guadeloupe! In addition, the Jeux has finally gotten to Martinique, relieved to see evidence of La Salle’s scouting efforts. She loads lumber, slowing her down, and heads north. The Terron brings up the rear.

The Spanish situation. They have explored St. Vincent and the Grenadines, while the Morning Star finds St. Lucia!


Quote:
An exciting few turns for the Spanish! They successfully upgraded St. Vincent to transform it into their HI! You can see their newly built shipyard on the western side of the island (represented by a yellow token and a 1 coin, to denote it’s level). At this stage, the shipyard can only build one ship at a time, up to one mast ships. With several valuable resources just to their south, the Spanish seem to be in good shape for the immediate future, with enough gold already brought back to launch and begin building the San Leandro!
The shipyard and Monarca:

Notice that for the first time the MS and Monarca are splitting up.The San Leandro being built:
A turn later and the San Leandro is built and ready to sail! She turns sharply northward to follow the Morning Star’s last known heading, hoping to meet up with her at another island. Meanwhile the crew of the Monarca get busy hauling gold around, with another load brought in from Grenadines giving them 43 gold. The Spanish spend a good chunk of it on upgradeing their shipyard, and building a Tavern, from which they can hire crew, spending 20 and 10 gold respectively).

The Tavern is the structure on the north side of the island, with a 1 coin to denote it’s level.


Taking advantage of the valuable medicine on Saba, the Dutch spend more gold! Cashing in the medicine, they launch the Muis and Heemskerck (1 masted cargo ships here), upgrade their shipyard to Level 2 (next turn it can begin construction on up to 2 ships with up to 2 masts each), and purchase the first island upgrade of the game! The Prins Willem loads the upgrade and the 10 gold used to pay for it. As detailed in the ruleset from the first post, each faction gets a free army unit for their home island, but we may remove them since it is easy to select them and the home islands will be overcrowded even without them. Since the structures tab of the module was mostly for home territories of the World game, we are not likely to use those to represent structures unfortunately, with the exception of taverns since they are small. We generally plan to represent structures and their levels with a neat horizontal line of face up coins (number denoting level) on or just above/to the side of the HI. A lot of things are still up in the air, since the “home island settlement” house rules combine with the upgrade system to make for some confusion as compared to simply starting the game with a home island.

Ironically, Sint Eustatius was part of the Netherlands Antilles for a long time, so it’s perfect as the Dutch home island!

The French decide to settle on Guadeloupe! Robert de la Salle has finished scouting the island, and is satisfied enough to make it the French home island! Luxuries are found on the island, while La Belle has already unloaded her lumber from Martinique. Since Marie Galante is only a single move action away from Guadeloupe, we will be making a house rule that the islands are considered too close to be separate if one of them was a home island. The same goes for the Spanish, where the Grenadines will run out of luxuries at the end of the current resource duration. That island is even closer to St. Vincent than Marie Galante is to Guadeloupe, and of course “St. Vincent and the Grenadines” is how those islands are often grouped in real life anyway. This is all to prevent gamey situations where factions abuse islands right next to their home islands for maximum profit.


Quote:
As the first session came to a close, the Spanish found themselves doing reasonably well. They had established a Home Island, have the top 4 most valuable resources close at hand, and have begun to expand their fleet.
The English have not done as well as the Spanish, but are making strides to catch up. After exploring Saint Barthelemy, the Hound moved north west and has discovered Saint Martin, which from first scouts and explores seems like a suitable island to make into a Home Island, as there are no reefs close to it, and it is a sizable island. The Cumberland is slowly making her way toward the small cluster of islands the Hound has stumbled into, once both ships meet and catch up, they will decide on a location from which to grow…….


With their Level 2 shipyard, the Dutch have begun construction on the Galias (a 2 master with 4 cargo spaces and S+L speed) and now have 5 total ships in play.

With that, the first session of gameplay is complete! We are exactly 40 turns into the game! There are only 2 turns left until the next change. The Dutch and Spanish are off to the fastest starts, but the French and English have been doing well of late now that they’ve made landfall. There is so much more to come that it would boggle the mind, so stay tuned!!

3/15/2018 – To govern a province….

We have played the second live session!

Note: Some of these pictures may be out of order slightly in the sequence of events. The turns are still going by quite quickly, and when it’s not my turn I’m constantly taking pictures and updating the spreadsheet we’re using for turn counter, upgrade stats, etc. My historical customs can be found here.

The Prins Willem carries the first wild island upgrade of the game towards Saba!

The Dutch have the first colony of the game! Saba is now a colony of the Netherlands, and the Dutch are off to a strong start with valuable medicine and a good fleet to haul it with.

To the southeast, the Terron finally reaches land! She loads lumber from Martinique and heads north after seeing an arrow on the beach left there (by de la Salle of course). The Jeux reloads her resources and also heads north, where La Belle has taken aboard some textiles from Marie Galante.

Soon after we started play, the resources changed. A 6 for value and 8 for duration meant that the Dutch would be even richer than they already were! (medicine worth 6 gold apiece) This also marked the end of resource production on Marie Galante and the Grenadines, the “partner” islands of the French and Spanish HI’s respectively.

The Spanish operation at St. Vincent:

Sailing due west in his appropriately linked ship Duyfken, the famous Willem Janszoon has been hired by the Dutch to explore west of St. Eustatius! The Dutch have also begun construction on the slow but capacious Oliphant.

The Cumberland sights St. Martin:

Having launched the San Francisco and Algeciras (SCS version), the Spanish go north to get resources from St. Lucia.

THE FRENCH CREW HAVE HOPE!! Frenchmen aboard the Jeux sight La Belle for the first time in a while, rousing a cheer from the deck. Robert de la Salle smiles and signals that he is going south to pursue the valuable medicine on Dominica.

The English decide to make St. Martin their home island!! The island currently produces lumber, with food and luxuries nearby.

In a somewhat momentous event, the Dutch build the first City in the Caribbean!! Spending a whopping 50 gold to get a Level 1 city that will increase their populace by 3 each turn, the Dutch are in business. When a faction purchases their first city, they also get a free City Hall as well – this means the Dutch are the first faction to get one, and next turn they can potentially start hiring politicians or doing governmental things. Yet another ship is being constructed at their shipyard, while Willem Janszoon ventures west in the Duyfken.

The English split up, happy to finally have a home island:

With their shipyard at Level 3, the Dutch begin construction on the Ridderschap, which will be helmed by none other than Philips van Almonde.

At some point during the session another resource change was needed! This time the value roll was 2, with a 7 for duration. This was great for the Dutch and English, whose home islands produce lumber. For now, we have a rule that home islands produce exactly one resource token per turn. If a faction gets all their structures to Level 2, the home island can produce 2 of that resource per turn.

The French are finally launching some ships! With a Level 1 shipyard they built Le Pique, and here they’ve upgraded the shipyard to Level 2 and have begun constructing the Favori and Bon Marin. The resources unloaded by the Jeux were of maximum values (5 and 6 gold apiece), which gave the French their Level 1 tavern as well. At the bottom, La Belle is already about to lap the Terron, whose crew is just happy to see La Salle again and hear of the great home island of Guadeloupe being set up.

LAND HO!!!! In a huge discovery, Willem Janszoon discovers a trio of islands west of St. Eustatius! The Dutch sent Janszoon due west to find whatever he came upon without changing his course, and here it’s paying off. Peter Island, Tortola, and St. John have all been sighted, and Willem Janszoon looks forward to exploring them soon.

IT HAS HAPPENED!!!! THE COMPLEXITIES BEGIN!! XD

With much excitement, the Dutch elect Olivier van Noort to be their first political leader!! He will head the newborn Exploratory Party!

Olivier van Noort

Dutch crew
4 points
Ability: Helmsman. This ship gets +1 to her die rolls against the Spanish.

Van Noort is proud to be the leader of the new Dutch Government, and carries with him a wealth of maritime experience. Neither of his abilities are land or politician-based, but that’s for a good reason – the Dutch wanted a true seaman and explorer to head their new and untested political system. Abel Tasman had a huge influence on the decision to choose van Noort, and was even considered as a candidate himself. However, Tasman would prefer to be at sea, while van Noort claims he is just fine directing operations from the Dutch home island of St. Eustatius.

In case you haven’t seen it yet, here are the details of the Exploratory Party:

Exploratory party: Favors exploring every corner of the world, at any cost.
-Army units have a base cost of 4. Three explorers can be hired for just 1 gold. Helmsmen cost 1 gold.

This is exactly in line with the Dutch strategy so far. Abel Tasman and Willem Janszoon are proven capable explorers, and van Noort completely subscribes to their mindset and aspirations. With so much unexplored territory to be gained for the Dutch Republic, it’s in the best interests of all parties involved to have a unified government that seeks to explore the region in its entirety. Van Noort is completely on board with the plan to colonize the Caribbean and plant the Dutch flag wherever possible!

To that end, the Dutch went on another mini spending spree immediately after selecting van Noort. The Snelle Ongedierte is the ship of Adriaen Block, yet another capable Dutch explorer who will map territory for the Netherlands. He is determined to find as many islands as he can, as fast as he can. To the point where there is even talk of a friendly rivalry between Janszoon (who has long since departed on his voyage of course), Block, Abel Tasman (still running medicine with the Prins Willem), and any other Dutch explorers that van Noort sees fit to hire. The fast and expensive Onzichtbaar is also now under construction, joining the Snelle and Ridderschap. Overall it is becoming a glorious time for the Dutch, whose fleet will soon number these 11 ships, and now contains 4 of their prominent exploring minds.

But unbeknownst to them, the Dutch aren’t the only faction in the Caribbean! The Spanish have been doing very well for themselves, becoming the first faction to get their shipyard to Level 4 and beginning construction on three new ships!

St. Vincent is crowded indeed, though a less fortunate resource change and the drying up of luxuries on the Grenadines may slow them in the short term.

Now for a couple zoomed-out shots. The Dutch and English are actually located remarkably close to each other, with St. Martin only a handful of move actions north of St. Eustatius. At the bottom, you can see that the Dutch have sent two of their ships southeast to St. Kitts and Nevis.

The French and Spanish aren’t as close to each other, but St. Vincent and Guadeloupe lie in the same island chain of the Lesser Antilles.

This was an exciting session that saw the first city built and various important developments. The Dutch are getting revenge in a way, since they should have appeared in Pirates CSG long before the Vikings and arguably other factions as well. What a grand opening to a well-deserved faction! We are 52 turns in and looking forward to more!

3/20/2018 – A meeting, a mission, and a governor

Video of third session

If you don’t recognize names or you want information on the Dutch or other historical customs, you can find my custom sets here:
Pirates of the Age of Sail
and Pirates of the Epic Seas

The warm waters of the Caribbean beckon to those looking to make a fortune establishing their trade…

The English continue to get both food and luxuries from the two wild islands near St. Martin.

Many Spaniards are busy at work in the shipyard of St. Vincent, where three impressive ships are under construction. The Morning Star has been sent west, presumably to explore and mark new territory for Spain! Smaller ships make trips to the north and south for resources.

Here come the Dutch! At the far left, Willem Janszoon moves on from Tortola after finding lumber there. At the right, three Dutch ships have gone southeast of St. Eustatius to get resources from St. Kitts and Nevis. These sort of zoomed-out pictures will become more common as factions begin to stretch the prior limits of their explored waters.

Southeast of the Dutch, the French are constructing two ships and making long trips to Dominica for medicine.

At the left, Philips van Almonde pilots the Ridderschap west. Dutch leader and Exploratory Party leader Olivier van Noort has sent Almonde west to meet up with Janszoon. Van Noort is worried that Janszoon could use support or an escort for the arduous journey ahead. However, with Janszoon’s excellent skills, the Duyfken is still faster than the swift Ridderschap! At the right, the newly launched Vis heads due north as the Dutch upgrade their shipyard to Level 4! At this point the Dutch are the early points leader (unbeknownst to them and the other factions), bringing in resources often, cashing them in, and launching new ships at a fast pace.

As the French save up for something, the Favori leaves port. Heading north, her crew have disobeyed La Salle’s orders to sail south to Dominica until a stronger presence can be established in the unknown waters north of the French home island of Guadeloupe. At the bottom, you may have noticed that the Terron is finally leaving the French home island – it took her a while (over 50 turns!), but she has finally reached and docked at the French HI!

The English spend 40 gold to upgrade their shipyard to Level 2 and buy a Tavern!

The French reveal what they’ve been saving for! The second city of the game!! This gives them a city hall, so they can begin government operations next turn. Northwest of Guadeloupe, the crew of Le Favori come upon Montserrat, which is the first island in the Caribbean to be discovered by two factions!

Turn 58 marked the need for new resource rolls! A 1 for values meant that all resources are worth their face value (luxuries best at 6, lumber crashing to 1), the same values as the second resource change from turns 33-42. The duration was for 9 turns, so factions will be able to take some advantage of this time period.

With the very speedy Vis sailing due north, the Dutch discover the English! This is the first contact of the game between any factions! The Dutch came in peace, for the Vis was just one of many exploratory ships christened by Olivier van Noort. Here is how the conversation went:
<a7xfanben> – (captain of Vis, in Dutch XD): Ahoy!!
<Xerecs> – (captain of Honud): Eh?
<Xerecs> – (captain of hound): SPEAK ENGLISH!!!
<Xerecs> – (captain of hound): Who’re you, and where’d you come from?
<a7xfanben> – Dutch captain: wij komen uit Nederland.
<Xerecs> – (CoH): You’re a Neanderthal?
<a7xfanben> – D: wanneer ben je hier aangekomen?
<Xerecs> – CoH: Eh?
<a7xfanben> – D: wat zei je?
<a7xfanben> – D: we kijken ernaar uit om met u te handelen.
<Xerecs> – CoH: Can’t understand a word you’re saying

~~~~~
<a7xfanben> – welp I guess the actual Dutch won’t help! XD
<a7xfanben> – might have to get Tasman up here… XD
<a7xfanben> – Dutch may spend
<a7xfanben> – going to French
<a7xfanben> – a peaceful but confusing first encounter! Smile
<Xerecs> – English can’t understand a word they said.

As you can see from Google translate or your own knowledge of Dutch, it was a conversation lacking in hostility, but also understanding. XD We’ll see if they can communicate better in the future. Still, a big moment in the game, for neither faction knew of any other nations present in the Caribbean region….

The Dutch continue their spending, with multiple ships constantly being built at their shipyard. The Reijger is one of their new additions, and has been sent due east….

The English break off from the visiting Vis to make some major strides! They build a city and launch their first ship, the Lord Kenyon!

Happy and amused, the crew of the Vis continue speeding due north, noting Anguilla’s English presence as they go. To the southwest, the Onzichtbaar is heading northwest….

The Morning Star is now quite aways from St. Vincent, venturing off into the unknown by herself:

Willem Janszoon is overjoyed! After finding lumber on Tortola, he explored the nearby island of St. John and found metals! Continuing a bit further west (and out of this picture), he discovered a new island! St. Thomas was explored, and much food was found. Truly an “all-star” explorer, Janszoon has now found 4 new islands for the Dutch and explored all of them! (using S-exploring to mark Peter Island) With these very important discoveries and the Duyfken’s hold full of various resources, Janszoon decided to turn for home to inform his comrades. On the way back, you can see he ran into Philips van Almonde! Almonde was just relieved to see Janszoon alive, let alone in high spirits. The Ridderschap is meant to be the Duyfken’s escort, but Janszoon may not be able to contain his excitement and could sail ahead at a faster pace!

With that and the following pictures, it is time to reveal the Dutch plan!! Olivier van Noort is overseeing the construction of 8 ships that will sail directly in the 8 main directions of the compass rose!

After many turns of building and spending, the “exploratory squadron” is complete! Here you can see the final 3 ships departing from St. Eustatius: the Reijger heads due east, the Concordia (with Joseph van Ghent aboard!) heads southeast, and the Braek heads northeast.

With the Concordia still in the picture, the Halve Maen can be seen heading due south.

All alone heading southwest, the Snelle Ongedierte has blazing speed and Adriaen Block at the helm.

The Onzichtbaar heads northwest:

The Vis north:

Clearly the Dutch have big ambitions to explore not only their surrounding area, but possibly the entire region! They have sent ships in all direction as a “probe” of sorts to find out what is out there. In addition, if it’s worth harvesting, colonizing, attacking, or exploring.

In a big move, the English hired Governor Lynch to be their leader and the head of the Sea Party!!

Sea party: Favors naval warfare and expansion.
-Army units have a base cost of 5. Captains and helmsmen only cost 1 gold each.

With that, here are the stats so far from our spreadsheet.
The Dutch are off to the fastest start, with a Level 4 shipyard and both their Tavern and City at Level 2. This means their city is adding 5 to the populace every turn, which the Dutch have a big lead in so far. Van Noort is happy with his progress as leader of the Exploratory Party, and has completed the 8-ship squadron that will explore the region for the Dutch. The French are lagging a bit but have some good things going for them, specifically (currently) valuable medicine on Dominica.

The Spanish are off to a good start, but the English made much bigger news than them in this session, purchasing a bunch of stuff and surprising people by being the second faction to have a government. In addition to the Lord Kenyon, the English have launched the Prince of Chichester.

The turn and resource change log. With two value rolls dominating the first five changes, we have already begun talking about instituting the random change rule. It was used to solid effect in Command the Oceans and can be found in the first post. (I will note when it is introduced; we are tentatively thinking around Turn 75)

We have completed Turn 61, with a few developments.

Philips van Almonde docks at Peter Island and finds lumber, now the most common resource in the game and the most plentiful that the Dutch have found. Willem Janszoon passes him in the Duyfken, who is on her way home. At the far left you can see the island of St. Thomas.

The Dutch launch the Mercurius with today’s historical custom of the day, Steven van der Hagen! The Meermin is nearly ready for action and will be transporting resources to St. Eustatius from nearby islands.

Robert de la Salle gets home at the same time as the Favori, whose crew disobeyed his orders to sail south! However, la Salle is more intrigued than angry after hearing about the discovery of Montserrat and the wealth of metals found there. In fact, la Salle is now excited by the prospect of having another island near Guadeloupe.

The French hire two politicians! Philippe Hurault de Cheverny of the Home Territory Party and Louis de Revol of the Resource Party have been hired for a cost of 10 gold, as neither have any special abilities yet. Next turn will be France’s first election, and indeed the first election of the game!! Emptying the coffers, the French also launched the Courageux with crew, as la Salle is interested in heading a small squadron up to Montserrat in the near future.

6/25/2018 – An election?

That’s absurd. Wouldn’t you say? But no!! It is happening! Very Happy

Summary of the 4th live session

4th live session

VASSAL Campaign Game 3

VASSAL Campaign Game 3

Played from September 2017 – March 2018

8/23/2017

With a whopping SIX people interested in playing a virtual campaign game, the opportunity for another adventure has presented itself!

Unlike the first two campaign games on VASSAL, this one will utilize a special ruleset:

Economy Edition

In addition, a few simple house rules:
-No Events
-No 0LR +5 crew
-0LR reroller crew will cost 3 points so they’re not free
-When a ship wins a boarding party, the winner decides whether they will take gold/resources or eliminate crew. The winner chooses which gold/resources to take, but the loser chooses which crew is eliminated.
-Whirlpools take effect on a roll of 1-3 instead of 4-6 (since you almost never want to roll low in this game)
-Return to Savage Shores is available
-Custom game pieces are allowed, but they may be modified or banned in-game (through a vote) if they are overpowered (OP).
-Other house rules may be instituted during the game if players are in favor of them.

This game has two abbreviated names:
VEE: VASSAL Economy Edition
CG3: Campaign Game 3

2019 Edit: You can use the Master Spreadsheet to see the game pieces now that Miniature Trading doesn’t work.

Here are the players with their associated factions, in the order that turns will be taken.

Pirateaj14, Spanish
La Santa Isabel + Dominic Freda
La Monarca + explorer
El Algeciras + captain
Diablo

Xerecs, Cursed
Grinder
Sea Monkey + explorer
Celestine + Master Scribe

Wifey, Pirates
Hai Peng + Captain Barbossa, explorer
Swift + Hammersmith
Banshee’s Cry + helmsman

Vixenishcoder66, French
L’Intrepide
Le Pique
Le Bon Marin
La Bonne Chance + crew
Libellule + crew

A7XfanBen, Americans
Nene-nui + helmsman, explorer
Lynx
Carolina + helmsman
Annapolis + helmsman

Repkosai, English
HMS Bolingbroke + captain, helmsman
Aberdeen Baron + helmsman
Honu Iki + captain, helmsman

The home islands were chosen in reverse turn order, with the English choosing first and the Spanish choosing last.

Here is the ocean, created by xerecs! A great barrier reef divides the sea mostly in half, with the Gateway island in the center where the reefs part. There is a Frozen North, as well as a Great Sargasso and Gray Shrouds in the south.
VASSAL Campaign Game 3

The northwest, where the storms are currently clustered into a hurricane. The storms are from xerecs’ EE game:

STORM
Type: Terrain
Every storm has two sets of numbers on it, one in the middle, and 1-6 on the edge. Once per every players turn, roll a d6. If the number matches the middle number of any storm in play, roll another d6, the storm moves L from that number in a straight line. Storms may move over islands and other terrain.
If any part of a game piece, even submerged pieces, touches a storm place the game piece inside the storm, it is now lost. Roll a d6 and subtract the result from the number of masts, segments, or flags remaining on the game piece. Ships may be sunk by storms, and forts may be eliminated by storms as well.
To escape the Storm, give the piece a move action, and roll a d6. Place the game piece facing away from the storm on the resulting number, the game piece may continue moving from there.
If a storm moves over or into another storm they join, if either of them is rolled, move both as one.

The other fog banks with numbers on them (not grouped together) are icebergs. The Spanish and Cursed home islands (HI’s) are visible.

The northeast, showing the American HI.

The southeast, showing the American and Pirate HI’s, the Barrier Reef, and the Great Sargasso.

The southwest, showing the home ports of England, France, and Spain. Indeed, by coincidence the major imperial factions are grouped in the west half, while the “others” (Pirates, Americans, Cursed) are on the eastern side of the big reef. An island is hidden in the Gray Shrouds, which may part or roll at various times.

Stay tuned, for adventure awaits!

9/3/2017

The third Pirates CSG campaign game on the VASSAL module has BEGUN! VEE (VASSAL Economy Edition) is now in progress!

Video of the first session. “Alive” by Phil Lober is one of the best fantasy/adventure/epic songs that encompasses the grand and epic nature of this kind of game, and provides a perfect thematic start. This was live streamed to youtube but may be quite a rarity because coordinating the logistics of 6 different people across 3 different time zones is rather difficult for the purposes of playing live. However, we wanted to do a “grand opening”, and here it is!

The first resource rolls were made! A 4 was rolled for value, with a 9 for duration. This gave us some time to acquire resources and cash them in if desired, with metals and textiles being the most valuable. We are keeping track of the resource rolls with face up coins in the upper left corner.

The first turn of the game! As with the other Economy Edition games, face up coins represent resources, while face down coins represent gold. Launchings happen at the end of each player’s turn, and the icebergs and storm terrain is moved at the beginning of each round of turns. We confirmed flat earth due to how the map was constructed.

This shows a chunk of the east, where the first launching has occurred! The Spanish found extremely valuable metals on the island west of their home island, and have cashed in 3 of them for 18 gold! pirateaj14’s Spanish launched La Resolucion, giving the Spanish two capable gunships very early in the game. You can see repkosai’s English heading for an island north of their HI, while to the east the Gateway island is unexplored.

Incredibly, all four explored islands in the west are metals islands!! All of those metals are currently worth 6 gold apiece, so the English, French, and Spanish are hurrying to cash them in before the next resource rolls are made. wifey’s Pirates are making their way around the Great Sargasso to a southern island. In the east, my Americans made the second launching of the game with the Rattlesnake. They have found good resources as well, with their two islands producing textiles and lumber. In the Frozen North, the Cursed have found textiles of their own in addition to luxuries. In the south, the French took great advantage of the explorer-reroll rule, turning an island from fish (currently worth 1) to metals! (currently worth 6)

It was a successful start to this grand endeavor, and we hope to continue soon with individual turns and hopefully live play as well. Stay tuned!

9/9/2017

Another live session has been played! I forgot to take pictures for most of the session, partly because it was recorded.

Partway through the session, the first resource change happened! With great anticipation from a laggy die roll, a 6 was rolled for value, and another 6 for duration! For the next 6 turns, spices and fish would be the most valuable resources.

The Americans launched their native canoes, with the chieftain residing on the James Madison. The Spanish and Americans have established military ports on the islands west of their home islands.

The first shots have been fired! The French sailed the Bonne Chance towards the Gateway, but the Spanish were not having any of it! With a quick turnaround, the Resolucion sailed south and took a mast off the French junk! No declarations of war have been made, but the Resolucion also provided the first sinking of the game on the next turn, sending the Bonne Chance to the depths!

The Spanish found textiles on the Gateway island. From their new military port, the Spanish launched La Tartessos, who began sailing towards the English. The Aberdeen Baron and Bolingbroke were taking a roundabout way back to their HI, using whirlpools to go in a circle of sorts. This may have been to avoid the Algeciras and Diablo, and indeed the Spanish are off to a very strong start. At the bottom left, the Honu Iki prepares to re-enter the Gray Shrouds in hopes of finding the island again.

The Frozen North, where the Cursed reside. The resource change didn’t do them any favors, as they currently have access to the lowest-value resources. Although, the Hangman’s Joke discovered lumber after fog hopping to the far northeast! You can see the trading port southwest of their HI, but the Sea Monkey has taken a hit from an iceberg.

Likely in response to Spanish aggression, the French launch two 5 masters: the Soleil Royal and Monaque! They join an impressive fleet of French resource runners, who are collecting still-valuable metals from two different islands. At the far right, the Swift has loaded spices from the Pirates’ wild island, and the Hai Peng and Banshee’s Cry are approaching home farther north.

It was an interesting night, which saw the first shots fired, the first ship sunk, and the first resource change.

10/27/2017

Since Xerecs’ last report, some stuff has happened!

Retaliating for the sinking of the Bonne Chance and possibly aiding the English at the same time, the French strike the Spanish hard!! The Acorazado was sunk (!), with the Joya del Sol and Monarca dismasted. The San Cristobal has sailed in to dismast L’Ange, but the Spanish are in major trouble.

Up in the north, the Cursed are using their fog hoppers to great effect, gathering valuable lumber from the northeasternmost island. At the bottom left, my Americans have established the second trading port of the game, which is right near the first one built by the Cursed. At the bottom right, the Pirates’ Darkhawk II loads textiles from an island in the far east.

The entire ocean, showing the decent-size French-Spanish action in the middle.

11/8/2017

A few major developments have happened! After the latest report, the Americans spent a whopping 221 gold in one turn to launch the Zhanfu, Baochuan, Nautilus, Mobilis, Concordia and New Orleans, all replete with crew setups!

The French have nearly finished off the Spanish, capturing the Joya del Sol, San Cristobal, and Santa Isabel in addition to eliminating most of their native canoes. The Spanish settlement on the Gateway island was destroyed as well.

After spending big at their trading and military ports in recent turns, the Americans finally show their might! Seeing the potential for huge French competition in the near future (a military port about to be established on the Gateway island with a resource change coming soon to possibly skyrocket the value of French metals), Montana Mays decided to launch a preemptive strike!

With careful execution, the American gunships are sent into battle! The Julius Caesar and York knocked masts off the Belle Etoile, who was docked at the Gateway island with both a settlement and military port upgrade. Then it was the Zhanfu’s turn! Huang Bai sacced an oarsman, and the 10 master from Return to Savage Shores surged southwards. Her second action brought her within range of the Soleil Royal. Ibrahan Ozat launched an S-boarding party, which let Captain Nemo capture Capitaine Arathiel! Then, in a rare display of accurate shooting from yours truly, the Zhanfu went 5/5 on the cannons she had in range, dismasting the Soleil Royal! The Atlanta was given the Tombstone’s action via GWL (RtSS version of George Washington LeBeaux, the American version of Lord Mycron), and the Belle Etoile was sunk with her island upgrades aboard! O_O

The whole ocean, with the sudden American strike in the center. The Spanish, Pirates, and English have about 8 usable ships between them, leaving the Cursed, French and Americans as the dominant factions as of now. The hurricane in the northwest has not affected play yet, but it has been moving southeast somewhat consistently….

12/2/2017

After two more turns, the Americans have emerged as the dominant faction in the game.

One turn ago, the French tried to escape and salvage what gunships they could. However, Montana Mays and Captain Nemo weren’t having any of it. The Zhanfu took out the final mast on Le Bonaparte, leaving her and the captured San Cristobal dead in the water. The Superbe was dismasted and the Soleil Royal captured. The Julius Caesar and Atlanta chased down the Monaque, hitting her with exploding shot and stinkpot shot.

After 8 turns, a new resource change was needed! A 2 was rolled, crashing the textiles market but increasing the value of everything else by 1 (lumber is the most valuable). The values will hold for the next 5 turns.

This past turn, the Monaque shot 2/2 (with Deleflote’s action) against the Zhanfu, but the Americans completed their victory just afterwards. The Americans have captured most of the ships, though the Monaque will have to be scuttled. The Mobilis cancelled the Nautilus’ Submarine keyword, allowing the ship to tow the Joya del Sol out of the way so the Peacock could dock and explore the Gateway island. However, more textiles were found, a resource readily available to the Americans. Thus, the Americans built Thompson’s Island at the end of their turn! This will give them a place to repair, quite convenient given the plethora of valuable derelicts now in their possession.

The Americans have declared war on the French! The Zhanfu also sunk the Mont Blanc flotilla this turn, and the captured Bonaparte will eventually be scuttled since I hate that ship. The American victory is complete, and gives them total control over the center area. The Pirates and French still won’t have valuable resources readily available to them during this change, but the final English ship (Aberdeen Baron) may finally be able to dock home on their turn! Curiously, the Spanish have not returned to their HI or tried to gather resources with El Algeciras, as they appear hell-bent on eliminating the English. The Cursed just launched their icebreaker (Urd), and have pretty easy access to islands that produce the two most valuable resources.

1/15/2018

The action has continued! In this picture you can see that the Americans have captured Davy Jones!! This was their ultimate objective when they suddenly sent the Grampus and Bonhomme Richard north into Cursed territory, seizing the opportunity to take out a huge threat (and the reason the Joya del Sol sank after being captured by the Americans, which is why the Americans took action in the first place). The Urd was dismasted by the Grampus, with AA’s and GWL (American Mycron) helping out immensely. You can see that the Americans have launched more ships from their trading port, with two turtle ships crossing the reef barrier and four new ships at the port.

However, an even bigger development has been taking place in the mostly deserted western half of the sea…

THE SPANISH HAVE BEEN ELIMINATED!!!!

The Zhanfu had been dispatched to the west a number of turns ago, with the mission of eliminating the final Spanish presence in the game. After they were decimated in the French attack near the Gateway, the Spanish eventually had only two game pieces afloat – El Algeciras and the Diablo flotilla. With the Spanish for some reason seemingly still hell-bent on eliminating the English instead of returning home to secure the HI and start gathering resources again, it was time for the Americans to end things. The slightly weakened Zhanfu (8 masts remaining) dismasted the Algeciras and knocked out the flotilla’s flag with her first broadside, and this turn she has sunk both to knock pirateaj14 from the game! They still have their military port, but that is now easy picking for whoever wants that island as their own. There is a tiny loophole in the EE rules where the Spanish could get back into the game, but it would require a failed razing of that port by an enemy ship (at which point the Spanish would capture the ship). The possibility of Cursed or Pirate help potentially bringing the Spanish back into the fold is an ugly one (due to the Spanish often taking the longest to complete their turn despite the lack of time it takes to give a single move action), so it’s possible the Americans will have the Zhanfu sac next turn and try to eliminate the port herself.

At the left, the Aberdeen Baron repairs, as the English are still in it!

Action in the north! The first American reinforcements are on the scene of the “Battle for Davy Jones”, which the Americans have won so far. The Divine Dragon began towing the Grampus, knocking a mast off the Hades’ Realm. The Noble Swan arrived as well, but missed her shot. The DD was later given an AA to shoot and ram the Hades’ Realm, taking out two more masts along with a crew (successful shot plus devastating ability). However, the Cursed are on the move with their gunships, with the Grim Reaper and Fallen Angel leading the charge. Those subs at the top of the picture have cancellers (Papa Doc and Madame Maria, a custom by Xerecs), which is part of the reason the newly launched Naegling and Polaris have turned around lol. However, the Glorious Treasure and Slipstream have ventured across the great Barrier Reef. With the captured Slipknot (the ship that carries All-Powerful Davy Jones) failing her scuttle roll again, the Bonhomme Richard was given an extra action by GWL to tow the Slipknot into the fog bank at the lower right, where DJ will be “safe” until his ship can “sink” and warp home via Eternal. Some slightly complicated business, but the Americans have accomplished their objective (it seems, unless the Cursed can extricate their captured leader) and now have control of Davy Jones.

At the bottom, the Mercury (windcatcher) is the first of a few American gunships slowly bringing up support from the home waters to the south. At the left, though, is something else entirely. Wanting to make a STATEMENT, the Americans spent most of their income from this turn on the Fortaleza, their third 10 master of the game! This was a perfect and ironic “gift” the Americans gave to themselves after eliminating the Spanish from the game.

With most of the ocean somewhat deserted, the only remaining conflict is in the north now. Of course, the French, Pirates, and English are all biding their time until the next resource change, which is now less than 2 rounds away. The American force in the south is nearing the French fleet, even as the influence of America reaches far into the west and north. Further conflict between the Americans and Cursed looks inevitable.

1/20/2018

After another turn, the Americans continue to make aggressive moves. The force in the south has reached the primary French resource island, with the combined firepower of three ships destroying the French settlement there! This makes the island go back to unexplored for all players and resets the island’s resource. In hindsight the Americans probably should have captured the settlement instead, but oops on my part for that.

In the north, the Cursed appeared to begin retreating, but the Americans are considering their hired turtle ships from the Jades as disposable, so they pressed the attack. The Noble Swan knocked a mast off the Grinder and eventually sank the Urd with an AA, while the Divine Dragon beat up on the Grim Reaper a bit. The Americans have slowly been trying to mass a small force near the reef barrier, with the Glorious Treasure, Mercury windcatcher, Minuteman flotilla, and now Naegling in that area. The recently launched Kettering looks to join them soon. The Slipknot finally got her scuttle roll and will join the American HI soon, while her captor (the Bonhomme Richard) sails to the military port for repairs.

The resources are about to change! Knowing this, the Americans used an AA to get the James Madison home (along with other ships of course) when she otherwise wouldn’t have, cashing in some extra lumber in the anticipation that lumber may not be valuable again for a while. This paid off immediately, as the Americans used all but one of their 84 gold to launch 4 new ships from their military port.

A few developments in the west too: the Zhanfu destroyed the Spanish military port to officially eliminate them from the game for good, while the Aberdeen Baron finished repairing so the English are ready to sail once more.

1/23/2018

What is going on?!

This game isn’t as big as my EE game, CG1, or CTO, but I’m hyped about it right now and feel like it’s a solid time to do a little overview.

Finding valuable resources early, the Spanish got off to the quickest start. They soon launched some of Spain’s finest ships and got into small-scale conflicts with their neighbors, the English and French. This ultimately led to their demise, with both factions fighting back.

Eventually the resources changed and the Americans were able to put forth some good warships and start to optimize their resource system. There was essentially a domino effect. First the Spanish largely took out the English, who still only have one ship in play. Then the French got revenge for the sinking of the Bonne Chance and took the Spanish down to one ship remaining. Then the Americans struck suddenly at the Gateway island, sinking or capturing the entire French battle squadron that had crushed the Spanish.

Just recently the Americans have finished off the Spanish, while the Pirates and English slip under the radar and try to recover from difficult starts. The Cursed have been rising of late, and the capture of Davy Jones by the powerful Americans has escalated into very tense relations between those two factions.

~~~~~

Onto the actual developments! Of which there are only a couple now haha, but more soon. A VERY important resource change just took place, with a value roll of 3 for 8 turns!! This is incredibly fortunate for the factions already in power positions, as the Americans and Cursed have the valuable resources (textiles and lumber) readily available to them. Dark times continue for the French and English, who likely wanted nothing more than to cash in their metals and go on a spending spree.

As of the current turn, the Cursed have launched some of their best custom ships, and now have 4 cancellers in play to counter the 4 the Americans have launched over the past few turns. Papa Doc from RtSS is the only standard one, with Madame Maria, the Demise, and the Rampage (a Merc 5 master launched from the trading port) joining the Cursed ranks.

However, the Americans spent last night plotting and strategizing, planning out their launches for a while in what looks to be a borderline-unprecedented 8 turn spending spree as high volumes of textiles and lumber are cashed in for new ships. The American leaders will have to juggle difficult operations on two fronts, though they will now have the spending power to potentially make aggressive moves at both locales. In the south, they face the fact that it is extremely difficult to eliminate a faction entrenched at their home island. In the north, powerful customs and a “blanket” of cancelling surrounding Cursed operations will require serious efforts to contain or overwhelm.

1/27/2018

After a few more faction turns, there has been some big spending. In the far south, the French decided to cash out their immense hoard of metals, spending nearly all of it (almost 100 metals) despite the resource being only worth 1 gold. However, it makes sense because the Americans look to be bearing down on them and have declared war. Waiting 8 turns for the metals to jump in value would be risky as well. The French have launched some new gunships and put some fighting crew on existing vessels.

With the Americans once again possessing the two most valuable resources (textiles and lumber), it was launch time at the home island! Cashing out their stash of 41 textiles for 246 gold and adding to it with some lumber, the Americans spent 292 gold on their turn, completely emptying the coffers. They launched from all three of their available locations: the Grand Temple and Crescent Moon came into play at the trading port, where the Fortaleza and Grand Path also lurk. 6 warships were launched from the military port, and 3 ships were launched from the home island.

In addition, the Slipknot was repaired at her new home after finally being scuttled. The Noble Swan burned to the waterline after being hit with exploding shot, while the Slipstream zoomed back across the reefs after seeing the newly launched Rampage (which has the canceller ability) at the Cursed trading port. The Americans already have about a dozen ships stationed near their own trading port, with more on the way from the south.

It will be interesting to see if the Americans can fight on two fronts at once, with a full squadron of 10 ships still stationed in the south near the French HI. In other news, you may have noticed that the Zeus is loose!! At the lower right you can see her newly launched at the Pirate HI. This is the fourth 10 master in play, with all of them spread out right now in different locations. At the far left, the Aberdeen Baron has finally sailed out after repairing for quite some time!

1/30/2018

Perhaps an unnecessary report, but certainly some interesting developments to report on. The Cursed appear to be in fully defensive mode, with most of their new launches staying docked at their home island and the Rampage and others retreating a bit from their positions a turn ago. In the far south, the French are off! Their entire fleet has departed the HI, heading in a northwesterly direction.

Seeing a chance to really maximize their profits, the Americans are devoting even more cargo capacity to their textile-laden island northeast of their HI. The Providence and Bellevue are being used as hybrid escorts in an attempt to protect the canoes from possible fog hopping attacks by the Cursed. With textiles as the most valuable resource for another 6 turns (after this picture was taken), the Lynx and Carolina have switched islands from the lumber island to the textiles island to assist in the efforts. Finally, you can glimpse four ships heading to the island as well. This is a random mishmash including the recently repaired Strongarm hoist, the newly launched Silver Dollar (Xerecs custom), the fully repaired Slipknot with Davy Jones aboard, and the (finally repaired) Santa Isabel, another grand prize the Americans have brought home from their war spoils. Throw in the Darkhawk II of the Pirate fleet, and the textiles island will see a huge harvest over the coming turns. There was a tiny bit of combat on this turn as well, with the Fortaleza getting an EA from Count Gustov. My custom equipment Bow Chasers was revealed, with the ship using both actions to shoot across the reef and hit 1/4 to dismast the Fallen Angel. The Americans ended their turn by launching 4 new ships from their trading port: the Assassin (one of my oldest customs), the Sigra Mein (a custom Viking 3 masted longship, with S+S+S speed but costing 20 points for just 2 cargo spaces), the Majestic, and the Wiglaf, the latter of which has a cannon bonus against the Cursed.

2/7/2018

A Turn for the Ages

Normally I don’t title these but this deserves special mention. Check out the video of my combat turn here.

First, the situation at the end of the Americans’ last turn: “tightening the noose”. In the north, and the south. The Fortaleza paid the price for using Bow Chasers to dismast the Fallen Angel, with the Cursed dragging her across a reef with an L-mover. This left the 10 master essentially doomed with just 2 masts remaining (3 taken out via the Death’s Anchor flotilla, and 5 more from the reef roll), since she couldn’t move off the reef without being wrecked automatically (highest roll of 6 for the reef would result in 4 masts eliminated and a shipwreck in this case). Knowing this, the Americans simply shot again, with the Fallen Angel sinking. The Death’s Anchor sank the Fortaleza, which the Americans knew was inevitable. However, all the while they have been tightening the noose around the Cursed home island. Not wanting to risk the Grand Temple and Grand Path across the reefs that wrecked the Fortaleza, the Americans sent them west towards a convenient whirlpool. Around 10 ships clustered near the American trading port, waiting for the command to surge northwards. The Kettering guarded the Naegling, who was on a strange mission to explore the Cursed luxuries island as part of an American goal. Further south lies some of America’s newest ships, among them 3 cancellers and 3 five masted capital ships (with the President, Montezuma, Eagan, and cheerleading Denver to back them up, an impressive force indeed).

However, the real immediate strength lay in the deep south, where the task force assigned to the French fleet was gathered around the whirlpool, having anticipated an attack on the Cursed for weeks now. In that squadron were three more cancellers, and the mammoth Baochuan. In an important development, the Flying Fish arrived through the southern whirlpool carrying island upgrades, turning a former French metals island into an American military port! This was the final piece of the puzzle for the American strategy, as they could now launch in the deep south to keep the French at bay (or now to blockade them since they are leaving the area). This would free up their megaships (cancellers and best gunships) to enter the whirlpool and emerge in the Frozen North where the Cursed were concentrated!

THE AMERICANS DECLARE WAR ON THE CURSED!!!!
USS Kettering starts the war! She sailed over and cancelled the Interloper to the surface, sinking the expensive submarine with a barrage of cannon fire augmented by her captain Jonas Richman’s hatred of the Cursed.

The American force in the north may not look strong enough to take on the Cursed, but with a LOT of help from their friends…. 😀

Chaos erupts! The Wiglaf and Sigra Mein brave the Barrier Reef to dismast and capture the Grim Reaper. In a calculated strike, the Americans send forth their cancellers to counter the 4 Cursed cancellers in the area. Christian Fiore (aboard the Nautilus) and Madame Maria (aboard the Locker) cancel each other out. The Mobilis and Papa Doc (aboard the Pyre) cancel each other out. The Constitution gets her SAT with a reroll from Jonathan Haraden, and America’s most famous sailing warship is back in action! The Americans had a little trick up their sleeve: the previous turn they had launched the Majestic, a 14 point 1 masted galley that has the cheerleading ability (friendly ships within S get +1 to their cannon rolls). As a Barbary Corsair ship she was fair game to launch at the trading port, and with only one mast, she wouldn’t take reef damage when crossing. The Majestic was sent over before the Constitution’s second action of the turn, and although she didn’t play a HUGE role in the battle so far, it’s a cool way to use 19 points on something (with helmsman/shipwright/oarsman aboard for maximum support, as I am wont to do XD) that nobody would ever use in most regular games.

And now things descend into the chaos only seen in huge games. O_O This is where the action is! The Constitution sank the Death’s Anchor flotilla before shooting at the Rampage, with DNT and the Rampage cancelling each other out. Next came the mighty Baochuan! However, she wasn’t so mighty this turn, as she couldn’t quite reach the Cursed trading port (I had wanted to raze it on this turn), but sacced to eventually sink the dangerous Rampage. From there the Americans had a bit of luck, but they were certainly due for it. Since getting two more AA crew (any ship in your fleet gets two actions on a 6) 3 turns ago, the Americans got just ONE AA over those three turns (the one came on this turn). Since I have paired every AA crew with the reroll ability, in this case that represents 1/29 total rolls being a 6. O_O (normal odds would be 5/30, so 1 is extreme) However, the Americans made up for it with their SAT and EA rolls this turn. The Grand Temple got her SAT to blast away. The Kettering received the AA so she could blast away at the Demise. The Grand Path received an extra action from GWL (American Mycron) to do the same thing as the Grand Temple. The cannon smoke hasn’t even cleared, but the Cursed lost the Demise and Flying Dutchman in the carnage.

With less emphasis on the action itself, here is the whole situation. The Americans are now at war with the French and the Cursed. The Concordia, Mercury, and Lamon also showed up through the whirlpool from the south. At the lower right, the Americans show that the Cursed must act fast and have a miraculous comeback, for the speedy Sea Wind is carrying settlement and military port upgrades to the luxuries island the Naegling explored! All is revealed in this battle report on the American side, as they plan to build an MP there to launch right near the Cursed and eventually wipe them out. Various ships have surged across the reef barrier and up from the south in an all-out CHARGE!!! O_O

The deep south is suddenly nearly devoid of American activity, though 4 gunships are sailing to blockade the French HI.

In their final action of the turn, the Americans pull a shocker! Having established a secret alliance with the Pirates early in the game, the Americans didn’t put any island upgrades on the textiles island northeast of their HI so they could share the island with the Pirates. Nice right? However, the Americans suspect the Pirates might be in cahoots with at least one of the other factions, including the French or Cursed that the Americans are at war with! This is because the recently launched Zeus has pointed her bow towards the American resource system with a crew complement ready to strike! (sac with captain/helmsman and world hater) An attempt to contact the Pirate admiral was in vain, but it didn’t help that the Americans were trigger-happy tonight! XD Wanting to get a preemptive strike in the case of a betrayal, the Americans strike first and break their alliance with the Pirates!! The captured Superbe sacs an oarsman to rake the Zeus’ bow, but lands just two hits. However, the attack was a statement, since any Pirate aggression will result in earning the wrath of the mighty Americans. The Americans have not declared war, and are even still open to the possibility of working with the Pirates.

Here is the full ocean, with the Americans becoming dominant to the point of a full Empire. They have declared war on the Cursed and crushed many of their best ships with a single, massive, devastating attack, and have sent dozens of ships sailing straight for the Cursed HI in what could become the longest and bloodiest conflict of this game. To show off their might, the Americans launched the Shui Xian from their trading port just a turn after the Fortaleza sank! XD Sink one of their 10 masters, and they’ll just launch another. They also launched the Tiger’s Breath as an impromptu medical barge, with various Jade ships losing crew from the whirlpool and likely losing more in the War on the Cursed. In the deep south the Americans have begun activity at their new military port, where the USS Thomas Jefferson (one of my favorite American ships) and Brandywine have been launched.

So all in all, you could say “the Americans hit the nuclear option”. XD Declaring war on the second-largest faction, launching a new 10 master, potentially wrecking their only alliance, and going ballistic on the game in an attempt to dominate this ocean. All of this (except the attack on the Pirates) has been in the works for weeks, but only now was it the perfect time to strike. It has now been about 5 hours since I downloaded the new file and started my turn, which took over 3 hours. Thanks for reading, and thank you to those who are playing this huge game! 😀

2/8/2018

Here are the latest ship and point counts for this game. I didn’t post this first one back then since I didn’t want it to be as obvious how much of a points lead I had, in an attempt to prevent a coalition against the Americans. XD (though anyone could total things up at any time of course)

12/2/2017 point count
Spanish: 2 ships, 13 points
Cursed: 16 ships, 241 points
Pirates: 4 ships, 62 points
French: 12 ships, 163 points
Americans: 43 ships, 893 points
English: 1 ship, 14 points
Total: 78 ships, 1,386 points

2/8/2018 point count
Cursed: 23 ships, 407 points
Pirates: 5 ships, 100 points
French: 14 ships, 221 points
Americans: 72 ships, 1,565 points
English: 1 ship, 14 points
Total: 115 ships, 2,307 points

The game has ballooned by almost 1,000 points in the past month! The Spanish were eliminated, but most other factions gained at least some stuff. The Americans have had fortunate resource changes, adding 29 ships and 672 points to their fleet! O_O

Points per ship:
Cursed: 17.7 points/ship
Pirates: 20
French: 15.8
Americans: 21.7
English: 14

The Americans have many heavily crewed gunships, along with three 10 masters. What’s more impressive is the percentages:

Americans:
Ships in play: 62.6% (72/115)
Points in play: 67.8% (1565/2307)

That means the Americans have more than twice as many points in play as all the other factions COMBINED! O_O
American points in play: 1,565
All other points in play: 742

The Americans are approaching the status of the largest single fleet ever seen on VASSAL, within sight of the Spanish CG1 record of 1,631 points in play. That fleet did have a ridiculous 111 ships in play at that point count, so that record probably won’t be broken in this game. The Americans are also approaching the record for the largest American fleet I have controlled, which was 96 ships at 1,660 points from Command the Oceans.

2/12/2018

The Americans are here! With another fantastic turn they tighten their hold on what I would now say is officially the “endgame” assuming the Americans can keep their point lead and win their wars.

Here is the combat situation in the far north, where the action is still hot. The King Jones was dismasted by a trio of ships (including Glorious Treasure and Assassin), with DNT of the Constitution cancelling the ship’s oarsman so the Grand Temple could capture her. At the far left, the Baochuan and Minuteman flotilla teamed up to sink the Sea Monkey, but not before the Baochuan won a boarding party to take three textiles. The Americans are disappointed they haven’t razed the trading port yet, but at this point they can do that at their leisure, having gained control of the area. After the 2 submerged cancelling submarines on each side cancelled each other out, the Lizard sailed over the Pyre to cancel the Eternal keyword on Admiral of the Skelds, allowing the Grand Path to shoot twice via the only American AA this turn to sink the Hell Hound! Just to the right of that, the Ghost Walker got within cancelling and cannon range of the Locker, bringing the sub to surface by cancelling the Submarine keyword. One hit from the GW and a pair of hits from the Sigra Mein eliminated all three of the Locker’s segments. With the now-dominant cancelling advantage the Americans enjoy (4-2 in that area with DNT and the late-arriving Hessian making SIX on the overall battlefield), they hope to capture at least one of the Cursed submarines that has a canceller on it, since cancelling the Submarine keyword allows it to be towed. One thing that didn’t go well at all for the Americans this turn was submerged ramming, as their subs generally failed to damage the Nightmare and Hell Hound. The Concordia shot 3/5 to leave just one mast standing on the Hades’ Realm. The Cursed have now been pushed back against their own home island as a result of the 2 turn offensive (so far). However, from previous reports you might expect to see more American gunships flooding the area in this picture. Their attention has been drawn elsewhere!

The French have arrived in the northeast! Sending almost their entire remaining fleet through the whirlpool near their home island, they have come to the eastern half of the sea presumably to wage war on the Americans. The Americans have already called 3 capital ships away from the squadron heading north, with the Enterprise, Colossus (out of frame to upper left), Essex, Denver, and Hannah breaking off to head southeast. The Bonhomme Richard was almost finished repairing (4 masts up) when she too was called to active duty, rushing to intercept the oncoming French (the captured San Cristobal is behind her at the far left). At the upper right, the Bellevue only managed to take out one mast on the Sea Hag, and the Americans don’t have any other captained ships in the area with which to take on the Ouroboros fort. However, the timing wasn’t too terrible for the Americans, since their larger cargo ships (Carolina, Silver Dollar, Strongarm, Slipknot, Santa Isabel) all got loaded up with textiles just before the fort was built last turn. They are now running home along with the canoes, though some might be intercepted by the French before they can get there. However, the Americans probably have enough points in play and resources coming in to win the game as-is, so the triple threat of Zeus/Cursed fort/French attack may not hinder them as much as you would think.

At the lower right, the Kentucky was clutch on this turn, hitting the Zeus 2/2 on her first action and using an AA (not from Preble himself, who is aboard) to hit 3/4 on her second action! This takes the Zeus down to 3 masts, and the Kentucky also towed the now-derelict (courtesy of the Zeus) Superbe with her second action. A canoe and the Argo have positioned off the bow of the Zeus to hinder her mobility a bit, and the powerful Kettering has begun repairing at the home island.

For the first time in a while, the Americans launched only from their HI, buying swift gunships they will use to combat the French threat. They launched four of their fastest and most effective 4 masters, including 3 schooners: the Franklin, Intrepid, Hudson, and Saratoga. The Americans are hoping those 4 can get out and defend the resource system quickly, since the likely imminent French attack puts the cargo ships in danger. Those 4 will combine with the 5 ships coming in from the northwest, along with the two 5 masters from the west, and likely more gunship launches next turn. It’s an emergency situation for the Americans, but one that I think they are reasonably prepared to deal with. I have been meaning to launch more hybrids to use as escorts to the textiles island, but the Providence and Bellevue are the only ones around so far. Most of the money has gone towards the War on the Cursed, and understandably so given their powerful customs in play (some formerly) and at one point their 4 cancellers. The Kentucky had been sailing slowly off the south shore of my HI, so she was in decent position to hit the Zeus.

With that, the French appear to be giving up on trying to win, which will likely hasten the end of the game. The American-Pirate alliance is clearly gone for good. As the American admiral I have some inkling that the remaining factions have made a coalition alliance against the Americans, but as evidenced by the latest point count, the Americans have more than twice as many points in play as all of the other factions combined. O_O

In the far west, the lone English ship (Aberdeen Baron) has turned east, though it’s unsure if she is heading towards the anti-American war effort, or simply another wild island in search of resources seeing that the hurricane has overrun the island the English visited a long time ago. In the far south, the Americans were planning to establish a blockade of the French home island, but now that looks generally unnecessary. The York and Destiny are headed there anyway, but the better American gunships in the area (USS Thomas Jefferson, Atlanta, and Julius Caesar) are headed towards the whirlpool to go fight the French or possibly the Cursed. Speaking of whirlpools, that is another area where the Americans could hit the French soon. They almost sent the Lizard through the whirlpool to cancel Lenoir aboard La Gaule (the Americans have been using their 3 cargo spies lately to look at face down French crew), allowing the Grand Temple to zoom through with an AA to smash the French 5 masters. However, I didn’t want to give up a canceller in the complicated Cursed situation, and that would also likely mean sacrificing the Grand Temple when a significant defense of the American resource system is being put together rather effectively on the fly. Between their ships in the far north and the USS Thomas Jefferson in the south (EA available via Commodore Stern), the Americans have flexibility for a many-pronged attack to combat the French invasion.

In the middle, The Zhanfu finally reaches Thompson’s Island to repair, joining the Slipstream. The Shui Xian may not even see combat in this game, but the newest 10 master in play is lumbering south in an attempt to join the effort against the French and/or Pirates. In the northeast, the Americans have gotten some measure of (largely unnecessary XD) revenge against the Cursed fort, as they’ve built their own fort on the Cursed resource island! It is a new game piece designed as part of my new fantasy (non-historical) custom set:

Eagle’s Roost
American Fort
Cost: 4 gold
Guns: 3L,3L,3L,3L
You may double the range of this fort’s cannons each turn, but you must roll a 6 to hit.

2/17/2018

With another devastating turn of brutal combat, the Americans have mostly recovered from their home island “crisis” and have scored a coup in the far north against the Cursed.

The Baochuan was L-moved by the Cursed onto a reef, where she was wrecked regardless of the die roll! This was the second time the Baochuan has become a shipwreck while in the pay of the Americans, the other example being the famous situation in Xerecs’ 2015 CoE game. The Americans are disappointed, but it was arguably inevitable with the Baochuan’s extreme length and difficulty positioning. The Baochuan kind of failed in this game (couldn’t raze the trading port, didn’t last long in combat, and couldn’t take advantage of the Treasure Ship keyword to be a hybrid like in CG2), but the Americans have such a massive lead in the game that it hardly matters. They’ve now lost the Fortaleza and Baochuan, but still have the Zhanfu and Shui Xian. At the far left, the Polaris has destroyed her third iceberg (I believe), making the passage of the Mercury easier.

Near the whirlpool, the Americans scored a “coup” this turn! With enough cancellers in the area, I was hoping to capture at least one of the Cursed cancellers, as Papa Doc and Madame Maria were still aboard the Pyre and Locker. With those cancelling out the Lizard and Ghost Walker, it was time for some finagling. The Sigra Mein got into position and got her temporary Fear ability, gaining the keyword for this turn. Then, I improbably rolled a 5 to scare the Locker, shutting down all crew and ship abilities!! No Submarine keyword meant the sub could be towed immediately, and the Philadelphia did the honors. DNT (on the Constitution) cancelled the Pyre to the surface, where she was dismasted by the Sigra Mein. The New Orleans then started towing her! The Americans have now captured both Cursed cancellers!

The Mobilis was able to repair after surfacing, also putting out a dangerous fire. She cancelled the Atlantis to the surface, who was sunk by the Grand Path and Assassin. The Hades’ Realm was captured, with the Divine Dragon recaptured. The Mercury (submarine now) rammed a mast off the Tarantula, and the Glorious Treasure used her ability to take out a mast and crew from the Executioner, whose EA ability provided by Igor McWarren is being cancelled by Christian Fiore of the Nautilus. This represents the beginning of the assault on the Cursed HI, which will likely take many turns and be a brutal affair for both sides. At the far right, the Naegling and President (latter with Bow Chasers as you can see) teamed up to dismast the Skwaluck (not the actual spelling XD) before she can reach the HI. The Americans don’t want any more resources coming in, since every potential Cursed launch represents more and more firepower needed at the HI. If you’ve read the BR’s for CG1, you know how incredibly difficult it is to eliminate a faction AT their HI. Knowing this the Americans also launched a few ships from their new military port to the southeast: the Paul Revere and USS Morning Star.

Now, for a historic situation. Now that they have both Cursed cancellers in their possession (Papa Doc pun intended), the Americans control a whopping NINE cancellers as of now. O_O I believe this is the most ever seen in a single fleet in a game of Pirates CSG. The Kettering is back at the HI, but in this picture you can see EIGHT cancellers all in the same general area. I have marked them with the range “rosettes”, though of course only the S-range applies to the cancellation. The Nautilus (with Christian Fiore) and Ghost Walker are the farthest to the top, with the Constitution (DNT) on the left. Around the whirlpool is an incredible CANCELLING CLUSTER of 5, with the Mobilis/Lizard/Hessian/Papa Doc/Madame Maria ready to shut down anything and everything that gets close. Even with all my CG experience I have never seen anything like this. The amount of cancelling available to the Americans right here is astounding. Keep in mind that the Americans have the most officially released cancellers of any faction, with 5. This means that to get to this level of 9, you’d have to do a combination of capturing enemy cancellers, using other faction’s cancellers (like the Mobilis and Fiore), and/or using custom cancellers that aren’t Wizkids official. As a big fan of cancellers this is a wacky but cool moment in this game. Between this coup and the drowning of Lenoir (see below), the Americans also now control most of the cancellers left in play, for a 9-1 (Demise still Cursed) advantage over all 4 other factions.

Chaos reigns in the east! The American home island is under attack, but they are now well-equipped to defend it. The Carolina and a few canoes were sunk by the French and the big Pirate ship Zeus, but the Americans have responded with force of their own. 4 ships have teamed up to dismast the Zeus, but the Americans are purposely waiting on the capture part. I’ve learned a bunch about 10 masters on VASSAL, and I know how dramatic and extreme their length can be. If I captured the Zeus this turn, the resultant “towing flip” would likely put her in range of the Cursed fort and/or some oncoming French ships. By waiting, the Americans theoretically increase their chance of actually getting the 10 master home to repair, which would once again give them three 10’s in play along with the Zhanfu and Shui Xian. Unfortunately the Bellevue (upper right) is likely doomed, as she couldn’t hit the Sea Hag much and is now pinned in place with one mast standing. The Americans are rushing to get some L-range cannons out there (Ouroboros can’t be shot at by ships within S), including the newly built Blackwatch and Stephens.

Against the French the Americans were actually able to do better than I expected, partly due to 2 AA’s this turn (as compared to 1 or 0 on the previous 3 turns). The new launches did their job exactly as intended, with the Franklin, Intrepid, Saratoga, and Hudson zooming out from home to block and blast the French ships. The Franklin was devastating, starting a fire on the Gaule after Lenoir cancelled the Providence’s captain. The Intrepid and Saratoga did well, but the Franklin really shined when given an AA, finishing her turn 8/8 to sink the Gaule and dismast the Neptune. The Hudson and Lynx were ineffective against the Possession, but the Saratoga helped out and the ship still lost 2 masts. More to the west, the Enterprise got an EA to team up with the Bonhomme Richard and Denver to sink the Lyon and severely damage the Triton and Libellule. The Colossus and Essex are reaching the battlefield, and two surprise (to me) entrants came in at the end. The Atlanta and Julius Caesar were originally part of the squadron assigned to blockade the French HI, but seeing as how that’s unnecessary, they have arrived via the whirlpool to join the fight against France! The Atlanta got an AA, which I knew probably should have gone to the Intrepid or Saratoga. However, I wanted to take a chance and use some equipment instead of the easier option, plus I clearly love extra action-based whirlpool strikes as evidenced by CG2 and this game. The Atlanta did well, and didn’t roll a 1 with exploding shot at least. XD Her stinkpot shot hit, shutting down the crew of Le Descharges next turn. Two hits on the Courageux took out a mast due to the defensive ability. Overall the attack on the French went even better than I had anticipated, but having good extra action/AA rolls and tons of ships coming in at multiple angles helps a lot. XD

Here is the whole situation, though the closeups probably show at least 90% of the points in play. The Aberdeen Baron is all alone in the far west, looking for metals as the hurricane moves off to the northwest. The French ship Lezard seems to be hiding among the Grey Shrouds, giving out actions via Deleflote. The Destiny and York are off to take care of her, though they won’t be able to do much if she flees into the dense fog.

THE AMERICANS HAVE DECLARED WAR ON THE PIRATES!!!!
Though, it was pretty lame. XD USS Thomas Jefferson was given the Tombstone’s action via GWL, but only hit the Hai Peng once, with stinkpot shot. In addition, the Americans have way more points in play than the Pirates, so it’s not like the war declaration was a big deal either way now that their alliance has completely fallen apart.

2/26/2018

I was listening to this impressive series while taking my latest turn.

The Cursed used the Executioner to sink the Ghost Walker, taking out one of the many American cancellers. At the far left, the Celestine was sunk by the Polaris. The Cursed home island is under siege, with the Sea Duck captured and L-mover Mimi cancelled by the Hessian. The Americans have captured a bunch of Cursed ships over the course of the battle, but they won’t be able to finish them off yet. That’s why you see a bunch of smaller ships launched from the military port at the bottom right – to eliminate the Cursed from their HI will be difficult, so the Americans have launched “ram ships” that will serve no other purpose since ships cannot be shot at while docked at their home islands. The Americans were not as aggressive this turn, since their cancellers are still getting into position and Ocean’s Edge is just north of the Cursed HI. If the submarines go too far north during their submerged ram attempts, it will leave them vulnerable to being moved off the map by the L-mover crew. One of them is now cancelled, but the Cursed have enough stuff left to hold out for a while, partly due to what they have (2 L-movers, 1 canceller, two sources of Eternal, some oarsmen, etc) and also because of how close their HI is to the dangerous edge of the map.

Much more decisive and quick is the situation at the American home island. The French have nearly been eliminated!! American firepower closed in on the remaining French squadron from all angles, dismasting all French ships in the area. The French managed to sink USS Atlanta, but now I believe they are out of move actions. The Americans are capturing as many French ships as possible to increase their fleet’s point total, with the Neptune and Triton being saved from scuttling. At the right, the Zeus is finally captured by the Americans, while the eternal ships Kettering and Concordia repair. Soon the Hudson, Blackwatch and Julius Caesar will bombard the Cursed Ouroboros fort to get the American resource system back to normal. The Americans have still had healthy launches of late, due to how many ships managed to load textiles from that island right before the fort was built, and their undisturbed lumber trade route to the west.

The clincher! The York received an AA to dismast the Lezard, eliminating her potential to escape into the fog and dismasting the final French ship in play. I included the Grey Shrouds in the picture because those Cursed fog hoppers could be problematic for the Americans to eliminate the Cursed, as the Cursed also have a fog bank conveniently right next to their HI. At the lower right, the French do have one metal resource token left, so if it increases in value when the next resource change occurs (2 turns from now), they could theoretically put another ship in play. However, the Americans have emerged victorious in their war against France!

The entire ocean, with American victory looking inevitable at this point. They have crushed the opposition and the 4 remaining fleets have considerably smaller areas that deckplates occupy. In fact, the Americans now need about half of all border space available for their burgeoning fleet. Outside of the two HI/battle “hub” areas, the sea is mostly empty at this point.

2/28/2018

Another round of turns has been completed. Here you can see the intense blockade/assault of the Cursed home island. At the upper corners, the Sea Rat and Maman Brigitte have been sunk. With a lot of ramming, the Americans have captured both Cursed L-moving crew, with the Tarantula and Fiddler’s Green towed. This was a priority for the Americans, since now the Cursed cannot move American ships off the map with the L-movers. The Executioner and Nightmare lost some masts to ramming as well.

It’s a bit of a convoluted mess to the southeast, but the Americans have captured the Grinder by using the Mobilis to cancel the Turbine keyword, and now their newly launched ram ships are sailing towards the Cursed HI. The Cursed now have 7 ships left in play – the Executioner, Nightmare, Demise, and Lizard’s Sting at their HI, the Sea Hag, and the Howl and Hangman’s Joke in the Grey Shrouds hoping to come home and unload fish. That is why you see the Americans doing a new tactic to the left – the “fog blockade”. XD The Americans are trying to block off most or all exit points at that fog bank in order to force the fog hoppers to go somewhere else and eventually be intercepted by the vast American war fleet. If the fog hoppers can pop out right there, they can dock home on the same turn, which would not only allow the Cursed to launch more stuff, but it would also place additional ships that cannot be shot at at the Cursed HI, requiring even more American rams to take them out. The American situations against the French and Cursed show the contrast simultaneously – the Americans disposed of a similar-sized French fleet in just a few turns, but eliminating the Cursed while they are docked at their HI will take much longer.

The situation in the east. The Americans have captured the remaining French ships in play, eliminating their fleet from the game! The sole possession the French have is one metal token, so if that spikes in value (resource change is about to occur), they might be able to launch a small ship to stay alive. At the upper right, the Hudson and Blackwatch teamed up to destroy the Ouroboros fort built by the Cursed. The Julius Caesar shot off the Sea Hag’s final mast, so that ship is also now derelict. Next turn the Santa Isabel will re-explore the island and American trade will resume at the island once more. North of the American HI is just towing logistics as French ships are captured and towed home. To the southeast, the Americans show they mean business against the Pirates, with the Colossus, Essex, and Denver whirling into the area from just above the American HI, not wanting to go all the way around. The repaired Kettering is headed south along with the newly launched Wasp, the first of more “ram ships” designated for use against the Pirates. Three more were launched this turn: the Dolphin (custom by Cadet-Captain Mike), Fly and Hornet.

In fact, those three Pirate ships in the above picture are what they have left. In the deep southeast, the Brandywine was given an AA to catch and dismast the Banshee’s Cry. Between the resources and gold on their HI and the resources coming in, the Pirates may be able to mount a significant defense of their home island in the coming turns. However, it will still depend somewhat on the resource change roll. In the southwest, the York captures the Lezard as the USS Thomas Jefferson arrives via whirlpool to assist the Zhanfu in chasing down the Aberdeen Baron, the only English ship. As the end approaches, the American fleet is a mammoth size many times larger than all the other factions left in play. Only the 12 deckplates you see in the far west borders are not part of the American fleet now.

3/1/2018

With the help of 3 AA’s and GWL’s action, the Americans managed to capture all four Cursed ships that were stationed at their home island. From the dense cluster you can tell that I needed a lot of ships to ram the Cursed ships derelict, and indeed five 1’s were rolled between the Lizard’s Sting and Demise! The Glorious Treasure’s ability proved useful, and a clutch 6 ram from USS Mercury (submarine, the windcatcher is actually just to the west haha) dismasted the Demise. With Fiore cancelling the Demise’s cancelling, and the Hessian cancelling the Cursed oarsman, the Wiglaf moved in to tow the Cursed gunship. It was a fitting end to the Cursed HI, as the Wiglaf has +1 to cannon rolls against the Cursed and her flavor text is very anti-Cursed. With the Executioner, Nightmare, Demise, Lizard’s Sting and Sea Hag all captured, the Cursed have only their two fog hoppers left. However, the close blockade around the Cursed home island could mean they won’t be able to get their now-valuable fish home. That’s right, the resources changed and finally lumber and textiles weren’t valuable. Spices are now the most valuable resource, which is what the Pirates have a bunch of!

However, the Pirates are about to experience a home island attack similar in intensity and nature as the Cursed. At the bottom right, the Hai Peng, Swift, and Darkhawk II are the three Pirate ships in play, but they can launch a bunch more. Already about half a dozen American ships are closing in on the Pirate HI, and a whopping 10 ships have emerged from the whirlpool near the Great Sargasso. Many other ships are on their way or about to be, including many of the ships that recently defeated France along with the captured French vessels. At the upper right, things get back to normal. With the Sea Hag captured and the fort destroyed, the Americans can run resources to and from that island once more. The Santa Isabel explored it to find luxuries, currently the least valuable resource; however it doesn’t really matter at this point. In addition, the Americans are still getting some lumber from their western island and cashed in some now-valuable fish and spices to get 36 gold, which they used to launch the Celtic Fury from their trading port. Because why not? XD

This was not the final event on the American turn, but check out the English finally coming into contact with another faction again! After being isolated since the Spanish had to back off, the Zhanfu has sacced to chase down and intercept the Aberdeen Baron. Ibrahan Ozat led an S-Boarding party and captured the English helmsman, with the ship’s foremost cannons also shooting off a mast. At this point it’s unlikely the Aberdeen Baron will get home to unload her metals, but the Americans have the powerful USS Thomas Jefferson now stationed off the English HI in case things get wacky.

3/5/2018

With only a handful of turns left I would think (and hope! XD), the Americans converge on the Pirate home island! The Pirates did cash in their spices and launched a bunch of well-equipped gunships. Here the Americans have used the captured L-mover Screaming Mimi to move the Revenant away from the Pirate HI, allowing the Hudson and Kettering to sink her. The Revenant carried Dirk Chivers, a new historical crew from my custom set that I was pleasantly surprised to see so early after I created him. The Hai Peng was dismasted, and the Pirates have 5 healthy ships at their home island now (none of my rams worked).

Zoomed out a bit, and you can see the extent of the American operation in its “swan song” days. The Blackwatch got an EA to come south and sink the Darkhawk II. The Americans may already have enough points near the Pirates to eliminate them, but they’ve sent some additional ships through the whirlpool at the left, and more ships are coming down from the north after repairing at the American HI.

The French are alive again! Cashing in their final resource token, it was just enough to launch the Marianne. The York and Destiny are headed there to dispatch her, while the English do what is also likely to be their final launch in the west. HMS Oxford has a captain and Sir Christopher Myngs aboard, but the Zhanfu has sank the Aberdeen Baron and is ready for more, with USS Thomas Jefferson for support. In the center, the Shui Xian and Celtic Fury are headed to separate whirlpools. In the far north, the Americans now have a close blockade of the Cursed home island and their fog bank.

With that, potentially a “final” point count. It exceeded my expectations, and may require another just before the game ends.

3/5/2018
Americans: 119 ships, 2,263 points

O_O The Americans have nearly reached the size of the biggest fleet of all time! That was the Pirate fleet from Command the Oceans in 2017, with 131 ships for 2,347 total points. So, if the Americans can capture enough ships and crew (along with minor launches) in these final turns, they may just claim the title of “biggest fleet ever”. 😀  I will admit it’s somewhat flawed due to how lopsided things are now, and many of the American ships are captures, derelict, or repairing. That Pirate fleet didn’t even make it to the final battle of CTO, and they certainly didn’t win the game. However, that’s part of the reason I want to keep track of the American point total – if it goes up enough, they could become the largest fleet ever AND the largest fleet to ever win a game.

3/9/2018

Given an Admiral’s Action from Commodore Preble himself, the York catches the Marianne and dismasts her, officially eliminating the French from the game!!!!

In the far west, the USS Thomas Jefferson gets the Tombstone’s action via GWL (American Mycron), hitting 3/5 to set HMS Oxford (the final English ship) ablaze. Then the Zhanfu’s commander (Huang Bai) sacced Capitaine Arathiel (a “prize of war” taken from the French much earlier in the game) to get in range of the Oxford, sinking her with a few accurate shots! This means that the English have been eliminated from the game!!!!

Whew! My Americans were on a roll, and I eyed what was very nearly an incredible THIRD faction elimination in one turn! However, it didn’t quite work out since the Akua Lapu and Empress are still docked. The Pirates did manage to sink the Essex on their turn, but the Americans hit back by capturing the Black Pearl, Hai Peng, and Swift. They also dismasted the Harbinger, so the AL and Empress are the only two usable Pirate ships left. The devastating flood of American ships has hit the Pirate home island hard, and their elimination is likely only a turn or two away.

The entire ocean, with now only 3 factions left in play: the Americans as the clear dominant force in CG3, the Cursed hanging onto two fog hoppers and a trading port, and the Pirates being besieged at their home island with a few usable ships left.

Keeping in mind the all-time fleet record of 131 ships at 2,347 points set by the Pirates of Command the Oceans, I’m trying to keep track of the American fleet totals on a per-turn basis. The Essex was sunk, but her ~23 points total was easily made up by the capture of the Hai Peng for the same point total. Between the other two Pirate captures and 48 gold spent on launching (the United States and Grand Storm), the Americans actually gained 90 total points from last turn! (they also lost an oarsman, but I don’t think any other crew were eliminated)

3/9/2018: 123 ships, 2,353 points

O_O

By point total, this American fleet now claims the title of largest fleet ever!! 😀  Of course, they’re only ahead of those Pirates by 6 points right now, though they should be able to launch next turn as well. They’re also behind the Pirates in ship count, and many of the American ships are in bad shape, especially the various captured vessels. Still though, it’s an amazing record to break, and I’m happy to have broken the record with a fleet that will actually win the game the record is set in. XD

3/11/2018

After about 8 rams, the Americans capture the final 3 Pirate ships and the Pirates are eliminated from the game!!!!

The Cursed split up as the final faction in play, with the Hangman’s Joke making a final stand and shooting 2/2 against the USS Thomas Jefferson.

The Americans clamp down on the incursion and the Zhanfu sinks the Hangman’s Joke!

Video of the final turn!

Only the Howl remained. She fog hopped to the northeast and started heading home when the Enterprise caught her. In a fitting end, one of the best American ships in the game sank the Howl! The Cursed have been eliminated!!!!

ADMIRAL A7XFANBEN’S AMERICANS HAVE WON VASSAL CAMPAIGN GAME 3!!!!!!!!!!!!!!!!!!!

Having won all 3 VASSAL campaign games (CG1 and CG2 in 2016), I have asserted extreme dominance over the CG world, and could now be called “The Tom Brady of campaign games”. O_O XD (at 3-0 with 3 wins and no losses in my first 3 non-solo campaign games, like Tom Brady going 3-0 in his first 3 Super Bowl appearances) More on that later, I hope. XD

In their final turns, the Americans captured 4 ships, the final 3 Pirate ships and the Marianne, the final French ship. This increased the size of their fleet of course…

Truly the final point count from this game:
3/11/2018: 127 ships, 2,414 points

This means they have extended their record from the last battle report as the largest fleet of all time by point count. As CG3 is now officially over, the Pirates of Command the Oceans hold onto the ship count record (for now…) at 131 total ships. However, the Americans of CG3 are the first fleet to break the 2,400 point mark, which is an insane number.

I’ll leave the rest of the analysis in the now-traditional reflection post, which you can find below.

Reflection post

Looking back on VASSAL Campaign Game 3, I would say it was largely successful. The biggest reason is that we set a new (by far) record for players in a virtual campaign game, with 6! The previous high was 3 for CG2, so to double that and not have any long-term issues with people dropping out or quitting was quite awesome. The game lasted almost exactly 6 months, with play going from 9/2/2017 until 3/11/2018.

The high number of players was certainly a new experience for me, having controlled 3 of the 6 fleets in CG1, and then controlling 1 of the 3 fleets in CG2. However, I eventually came to dominate both of those games points-wise, so the bulk of playing time in the long run was done by me. CG3 was totally different since I theoretically only controlled about 17% (1/6) of the points in play to begin the game, and a reasonably slow start by the Americans meant I was mostly relegated to seeing how things developed.

I will start this with an analysis of my own game that I played; all the other players are free of course to post their thoughts on the game, their strategies throughout, what their plans were, and what they thought of the experience overall. (also feel free to reveal any alliances/etc, with the game over there’s not much to hide haha!)

Americans
As play began, I did NOT plan to dominate this much and to eliminate all the other factions. XD Knowing that there were 4 new players in the CG, and hoping the game would have parity for quite a while, I was planning to sort of “take it easy” and be a somewhat passive or friendly faction.

Everything changed when the Spanish started being aggressive though. That got my competitive spirit rekindled, and it was game on from there. XD  Within a few turns or weeks I went from hoping I could be passive to being completely optimized and getting ready to dominate in the long-term. This happened because the Spanish showed they meant business VERY early, sinking a French gunship and nearly eliminating the English completely before any of the rest of us could do anything. This did a handful of things for me – it worried me on one hand, since the Spanish were a faction that I saw as a potential territorial rival, since they commanded a strong position on the map (center of the western hemisphere) and I was directly opposite them across the Gateway. In addition, it happened quite a bit faster than I (or possibly anyone else) had anticipated. I didn’t want to see another faction eliminated so early, but unlike CG1 and some of CG2, I was not in a position to be “world policeman” (like the British Empire during Pax Britannica 1815-1914) and interfere to guarantee the survival of a faction. The English were at risk of a VERY early elimination, but I had played with the English commander (repkosai) quite a bit on VASSAL in 2017, and I knew he was pretty stoked to be playing in CG3. Therefore, I didn’t want to see him go so early without hardly getting a chance to play, so I was somewhat opposed to the early Spanish lead. Some talks were had about a coalition to save the English, but in the end the French were the ones to take the fight to the Spanish since they had similarly valuable resources and the means necessary to get a battle fleet in play.

Very early in the game I pursued an alliance with the Pirates. This was partly since wifey was relatively new to pretty much everything going on – VASSAL, her first campaign game, and even Pirates CSG to a degree (and the EE ruleset of course). In addition, I recognized that their somewhat poor home island position could mean that my Americans would have a much better time getting gold from resources than the Pirates. So I wanted to take the Pirates “under my wing” if you will and have a friendly neighbor. And also, to hopefully prevent a pincer movement on all sides in the case of an alliance against me. XD This secret alliance solidified my position in the game, and made me feel decent about my chances going forward. Other alliances never really came to fruition, as the English didn’t respond to my tentative offer of help and the French and Cursed always seemed like factions I would have to fight to win the game. The Spanish actually reached out to me with an alliance offer, which I accepted. However, they then proceeded to establish a settlement on the Gateway island, which was near the American military port. I had doubts about the alliance, and couldn’t take it seriously when the Spanish were putting island upgrades near me on islands I also wanted.

As the French closed in and started wiping out the Spanish with their impressive battle fleet, I knew I had a chance to strike. The problem was how long it would take to get at the French (and what was left of the Spanish) effectively. With extreme haste, I rushed to get a trading port on the west side of the Barrier Reef, as the island was nearly untouched by the Cursed and Spanish. Some of the fastest American ships (Peacock, Sea Wind, Mercury windcatcher) were instrumental in this development, which I now see as one of the keys to my eventual victory. I escorted those ships with a few gunships, but not ones I wanted to risk in battle if I could help it (since they had tribal chieftains aboard). I also wanted a trading port because the players had voted that Mercenaries would function as regular privateers, with no bidding system as I had proposed. I was fine with that, but it was fun to get a little “payback” for the decision, as I eventually came to dominate privateer launches. XD We had also decided that the Mercenary 10 masters with faction biases were free to be launched by anyone that could do so, but I decided not to take overt advantage of that, generally only launching those 10 masters once the faction in question had been eliminated or effectively eliminated. The trading port also came in handy for launching AA crew, of which the Americans eventually had 5 including 3 privateers. Various AA’s were very useful down the line and provided support in key moments.

I didn’t put a trading port on the island northeast of the American HI because I was purposely sharing that with the Pirates, to keep the alliance strong and give them more of a chance if they had another island they could go to. The Cursed were actually the first to build a trading port, but they hardly ever used it for launching. This left the door wide open for me to take full advantage of the one built north of the Gateway, which became a launch hotspot and the bane of both the French and the Cursed.

In early November, I seized my opportunity and started the beginning of the American empire. After some saving, I spent over 200 gold to get some very effective ships, namely the Zhanfu, Baochuan (both 10 masters I felt comfortable launching at the time), Nautilus, and Mobilis. This dramatically increased my potential to hit the French before they could make it back home, as their fleet was somewhat far from home and exposed in the middle of the map while collecting Spanish prizes and being slowed by the towing process. It also gave me two cancellers, which is of course one of my favorite things to have in these giant games. Knowing the Americans have the most cancellers of any faction in the game (5 total), I decided to attempt a “canceller monopoly” that would form a potential “super squadron” surpassing even the super squadrons put together by the English and Spanish of CG1. Due to logistics and opportunities, this squadron never quite came together the way I wanted it to, but towards the end of the game it was mostly unified. Anyway, the Mobilis and Christian Fiore gave me a leg up in the cancelling game, locking up both Merc cancellers after the vote to not implement the bidding system for Mercenaries (and denying them from the Cursed, who had a trading port before the Americans).

I felt my window of opportunity closing fast, so I immediately hit the French as hard as I could. The French were about to establish a military port at the Gateway island (the ship with the upgrades was literally docked at the island and just needed another turn to explore and unload them!), and a resource change was imminent, making me worried that French metals would skyrocket in value and start a chain reaction that could see the elimination of the Americans. The attack went fantastic overall, and the rest is history. XD

After declaring war on the French and capturing many of the ships from the battle, I turned my attention to the Cursed, who were now the biggest long-term threat to the Americans (excepting if metals went to 6 gold apiece, which would have gotten the French back into things in a big way). Once again, the opportune moment came and I couldn’t pass it up. Though, the Cursed started it by using one of the American 10 masters to sink a captured prize (through Davy Jones), which I was looking forward to having in my fleet. XD I saw Davy Jones in a unique spot – somewhat isolated, nearly unprotected, and with his own ship open to attack! Knowing the downside if I failed (losing two gunships and their associated tribal chieftains, but only eliminating chieftains directly and rolling badly for them would really affect me negatively, since you only need one chieftain to actually give the canoes actions), and having checked the tribal chieftain rules to see that sinking them wouldn’t be too bad after all, I decided to take the plunge! The Grampus and Bonhomme Richard used AA’s to sail north and dismast the Slipknot, and after a couple tense turns, the former Cursed admiral was mine! (along with his ship, which was a nice resource gatherer towards the end of the game) This was another “masterstroke” of my game, mostly predicated on previous CG experience. From CG1 and CG2, I’ve learned that taking action and launching preemptive strikes can lead to great results in the long term, even though being hostile is always risky. In addition, I had learned from CG2 that having an All-Powerful crew in an enemy fleet rolling 6’s to sink your own ships (with your own ships) is one of the most annoying things in Pirates CSG. XD So I was determined to get quick revenge and not let it happen again. The skirmish was the start of the greater American-Cursed conflict, which mostly defined the last third of the game.

I was going to blockade the French home island and keep them there as best I could, but they fled the area before I could launch much from the military port the Americans set up in the south. Although there was a brief and somewhat minor “crisis” at the American home island when the French converged from the north and the Pirates sailed the Zeus up from the south (I just assumed they were breaking the alliance due to my points lead), I was actually relieved that the French would not have to be eliminated at their HI, which is extremely difficult and becomes a huge drain on resources the more ships there are to ram-dismast. Instead they were defeated on the open ocean, allowing for a quick elimination and some easy towing back to the American HI. Then I was able to focus on the remaining Cursed and Pirate ships.

Once the French left and I had a military port near their HI, I felt comfortable sending the elite southern squadron through the whirlpool to emerge in the north to combat the Cursed. It was quite the complicated mess for a number of turns, but eventually the Cursed HI was blockaded and their ships captured. That “turn for the ages” was the most complicated of the game, and reminds me of my whirlpool strikes from CG2. (whirlpool attacks are kind of my thing in these games now I guess XD)

If there was a “turning point”, I would say it was the Second Battle of the Gateway Island where the Americans defeated the French. This completed the domino effect, and led to the Americans dominating for the rest of the game. It really was a strangely perfect domino effect in a way – the Spanish nearly eliminated the English, the French nearly eliminated the Spanish, and the Americans nearly eliminated the French. The Americans were eventually responsible for the elimination of all the other factions.

So there you go. A detailed look into the mind of the winning Admiral. XD As the “Tom Brady” of campaign games, I’m happy with the way I played.

Of course, anyone could spin it another way. I benefited massively from the strange run of resource changes, which saw American islands (with textiles and lumber) valuable for months on end, whereas French metals stayed very low for just as long. In addition, I came in with a HUGE experience advantage over 4 of the other 5 players (Xerecs being the exception), and indeed this was the first campaign game (I think) for all 4 of those players. However, you could paint it the opposite way and point out that the Americans are almost objectively the second-worst faction of the Big 6, meaning I was at a somewhat severe disadvantage from the start. In addition, the resource changes benefited the western factions for a while at the start, but none of them were able to build up enough of an advantage that would resist the eventual riches of America (sounds familiar… XD). Finally, I am impressed with how quickly the Americans were able to end the game, since 6 months for a virtual CG with 6 players feels pretty short. Once the French were defeated at the Gateway and the Americans continued to get fortuitous resource changes, the steamrolling was just about inevitable and impossible to stop. (Cursed mounted a great defense of their HI but the numbers advantage was too great) I also made some mistakes of my own, though they were generally gameplay gaffes and not strategic blunders. For example, I tried to launch the Mercenary Divine Dragon with Christian Fiore before establishing a trading port (forgot about the EE ruling for that especially after not using it for CG1/2). Ironically I did launch both of those game pieces properly later on. XD I also had the Kettering cancel two abilities in one turn against the Cursed, so she lost her ability to cancel for the turn after. Oops!

Since I won the game and I have a wealth of knowledge when it comes to these kinds of games (and I greatly enjoy these reflection posts), I can give a brief analysis of the other factions and some “pointers”. 🙂  Kinda hesitant to do this since I’m revealing the “grand strategy” that has proven to be essential to winning these things, but I suppose it’s easy to understand and maybe not as helpful as I think it will be. XD

In the order of play:

Spanish
The Spanish were the dominant force early on, getting very valuable resources consistently from wild islands. They were the first to do a lot of things, such as launch, build a port, shoot, etc. However, it fizzled out quickly. I think they were a bit too aggressive, which made the factions on their west side of the map hostile to them. In addition, they didn’t really optimize their resource system before going after other fleets. They never had a lot of ships getting resources for gold, so things fell apart quickly. They attacked the French when they didn’t need to and couldn’t handle the later counterattack. Their gunships couldn’t handle the French fleet out for revenge, and their “alliance” with the Americans never panned out, especially when they claimed the Gateway island for themselves despite the Americans just to the east. They also seemed hell-bent on eliminating the English, keeping the Algeciras and flotilla stationed off the English HI when they may have been able to survive by running home or trying to get resources (not sure why the Spanish were so onto the English like that). In the end it was too much too soon, but partly as a result of not optimizing their income and launch strategy.

Cursed
The Cursed did well as a somewhat passive or isolationist faction. Their fog hoppers were used to great effect to get resources not readily available on nearby wild islands. The Cursed made themselves difficult to reach and attack early, helping out the English with L movers and positioning themselves in the Frozen North near the icebergs. However, they saved resources and gold too much, never fully optimizing their resource system. This was their Achilles’ heel, as other factions were usually ahead of them in point counts. With more ships running resources, the Cursed could have built up a more impressive hoard they could use for defense. One could also argue the Cursed were slightly too passive, and didn’t appear to align with any factions against the powerful Americans. When they did anger the Americans, it was too early (or too late) for them to get into that giant conflict. However, the Cursed still played a solid game and finish in second place, VERY good considering the factional limitations.

Pirates
The Pirates’ biggest problem was a disadvantageous home island location. In the far southeast, they didn’t have easy access to a single island, as the Americans were closer to an island in the northeast and the main Pirate wild island was far to the southwest around the Great Sargasso and possibly as close to the French HI as it was to the Pirate HI. This resulted in the Pirates getting WAY behind right from the start. In reality, they didn’t have much of a chance. They did accept a smart alliance with the Americans, so their powerful neighbors were on great terms with them for nearly the entire game. By the time the Americans sensed betrayal, the points lead the Americans had was overwhelming. Outside of that the Pirates didn’t really do anything wrong that I noticed.

French
I would contend that the French actually played the second-best game, though that can’t always be reflected in the final standings/elimination order. I don’t feel like they truly made any big mistakes that doomed them. I suppose you could make the case that they shouldn’t have used the explorer’s reroll at their second wild island during the first session of play, but it did help them early on. In addition, seeing the battle reports for CG1 and CG2 may have helped them anticipate a strike by yours truly, given the situation near the Gateway. The French were one of the early leaders due to valuable metals, and they sent an appropriately large squadron north to retaliate for the Spanish sinking of the Bonne Chance. As the Americans and French had no real contact prior to my attack (diplomatic or physical), there wasn’t a lot to suggest that they’d be crushed almost immediately after their big victory at the Gateway. However, with that decisive battle ending in favor of the Americans, it was very difficult to recover after that. Just as the resource “changes” (aka American and Cursed resources retaining high value) favored the eastern factions, the French were left with little means to launch things with. When one of the final resource changes kept metals at 1 gold apiece, the French decided to just spend what they had (99 metals I believe) and avoid a blockade scenario. If they had gotten lucky and metals had jumped to 6 (basically a windfall of 600 gold!), the French would have done better and possibly altered the final result of the game. (though since the Americans had over 1,000 points in play at that point, it still would likely have taken a coalition to unseat them as the eventual victor) All in all, it was a well-played game by the French, and like I said, in my opinion arguably the second-best game of the six factions.

English
The English went last and got to pick their home island first, which can be both a blessing and a curse. It allowed them to get a good location, but they had no idea where the other factions would settle. In the end they were close to the most aggressive faction of the early game, the Spanish. They were left at the mercy of Spanish firepower, though their questionable detour through a whirlpool route to get home may have doomed them just as much. Unfortunately the English spent many of the game’s most exciting turns simply repairing the Aberdeen Baron, the only English ship in play for most of the final half of the game. It was a disappointing outing for a faction that usually does quite well in these grand adventures, but like the Pirates they had lots of trouble early on and couldn’t make a comeback.

~~~~~

Random stuff from my google doc I use for all VASSAL CG’s (strategy/launch plans/etc)
-I wanted to eliminate the French within the 8 turns when that resource change happened, to prevent their metals from potentially skyrocketing
-At some point (in January or February) the main part of the strategy said “End the game as soon as possible!” XD (in bold) Mostly since it was borderline over, but also so we could potentially start another CG since the other players would get sick of the American dominance and inevitable outcome (trying to rush things so everyone could get a chance again in the next CG)
-Keep cancellers together and protect them (canceller squadron sails against Cursed, non-canceller ships blockade French HI) – this didn’t work that much, but it didn’t need to since the French left their HI and I couldn’t get all the cancellers together until the battle against the Cursed was already going well.
-Try to eliminate Cursed trading port?
-Peacock – where to put next military port? (after Flying Fish puts one near French HI)
(neither of those were particularly relevant as the endgame accelerated, the Celtic Fury did raze the Cursed TP on one of the final turns though)

These were from a while ago:
-Establish an alliance with wifey and possibly repkosai
-Deterrence with a fleet in being
-Escorts around fog banks

I accomplished the alliance with the Pirates, didn’t really need a “fleet in being” since I started playing offense earlier than I wanted/expected to, and started to get some escorts around fog banks to protect against fog hoppers. However, the Cursed didn’t use them for offense much and Davy Jones was captured before his 6’s could wreak havoc on the American resource system.

I also recorded a lot of various launch plans, which I followed some of the time. The game actually ended with a bunch of notes still in that section, so if the game had continued I had another ~400 points of launches planned out. XD I did manage to launch all 4 Merc 10 masters, and I think I put all the American 5 masters in play overall.

The super squadron never united as one due to how things panned out, but this was the fearsome main part of it that I wanted to assemble in the same small area:
Long term: Super squadron w/ Constitution + DNT, cancellers, Eternal, oarsmen
Kettering + Ralph David, Ghost Walker, Hessian, Lizard, Mercury, Lamon (+ Fiore and Mobilis in hindsight)

Here’s a random part of the doc where I recorded what I was satisfied with/had done right. XD

Accomplished:
-Alliance with wifey
-Kill Davy Jones and other similar threats before they can be used to cripple gunships (in hindsight, capturing worked even better!)
-MP on one of Cursed wild islands

Alliances: Spanish, Pirates (neither really worked out, but they didn’t need to)

~~~~~

The final standings:
1. Americans
2. Cursed
3. Pirates
4. French
5. English
6. Spanish

Major Battles:
-First Battle of the Gateway Island: French decisively defeat the Spanish
-Second Battle of the Gateway Island: Americans decisively defeat the French (immediately after first battle)
-Battle of the American home island: Americans decisively defeat the French and Pirates
-Battle of the Cursed home island: Americans decisively defeat the Cursed

Minor Battles:
-Skirmishes won by Spanish against English and French
-Battle for Davy Jones: American victory over Cursed
-Battle of the Pirate home island: Americans eliminate the Pirates
(there were some other minor skirmishes)

Official new records:
Largest recorded single-fleet point total: Americans at 2,414 points
Most cancellers ever seen in a fleet? (likely): 9 (Americans)
Most players ever seen in a campaign game? (impossible to know for sure): 6
Most players ever seen in a virtual/VASSAL campaign game: 6

Thank you all for playing! Also, thanks to xerecs and repkosai for helping with the battle reports.

Here is a picture of the Miniature Trading forum from soon after the game ended featuring reflections by some of the other players:

Reflections on CG3

VASSAL Campaign Game 2

VASSAL Campaign Game 2

Played from February-December of 2016

2/16/2016

With much anticipation and planning, the second VASSAL campaign game has begun! This one goes in a separate thread so they don’t get confused, with the first one having battle reports in the regular BR thread.

The game is being played by four different players, listed in the order of play below. As with the first campaign game (Campaign Game 1 or CG1), the starting fleets were 30 points. Each wild island had 7 coins which would replenish when at least 4 islands were empty. Flat earth rules are being used.

2019 Edit: You can use the Master Spreadsheet to see the game pieces now that Miniature Trading doesn’t work.

French (El Cazador)
La Vengeance +
Le Triton +

Pirates (Xerecs)
Darkhawk II + helmsman, explorer
Bloody Jewel + explorer
Banshee’s Cry
Mermaid
Lightning

English (A7XfanBen)
HMS Yardbird + helmsman
HMS Half Moon + helmsman
Honu Iki + helmsman

Americans (ownage98)
Blackwatch + Commodore Edward Preble
Rattlesnake + captain

Oddly enough, the HI setup coincidentally resembled the real world, with the English in the north, the Americans in the west, and the French in the east. The Pirates took the southern HI.
VASSAL Campaign Game 2

3/12/2016

Progress has been made! Ownage decided to drop out of the game, leaving El Cazador, Xerecs, and myself to continue.

The action saw each faction launch a handful of extra treasure runners, expanding the fleets and leading to the first gold replenishment.

3/13/2016

Another handful of turns passed, with even more gold runners being introduced. Among them were the Aberdeen Baron, Tiger’s Eye, Hai Peng, and Le Lyon.

Here, the Lyon has gone through a whirlpool to emerge in the northwest, while the Pirates take advantage of the broken abilities of the Rising Sun and Captain Jack Sparrow.

4/16/2016

After a month of inactivity, CG2 has continued! Still no shots fired, but this picture gives a glimpse of all the launchings.

A quick ship count, in the order of gameplay:

French: 9 ships
Pirates: 24 ships
English: 19 ships

Total: 52 ships

6/22/2016

This game has continued.

The first official point count, in the order of play:
French: 11 ships, ~169 points*
Pirates: 34 ships, 442 points
English: 28 ships, 413 points

Total: 73 ships, 1,024 points

With over 1,000 total points in play, we have already reached huge game status!

(*El Cazador has kept many of his crew face down, so I simply assumed an average of 3 points each for those)

It’s worth noting that Emperor Blackheart made the Corse fire upon Le Soleil Royal, but other than that there hasn’t been any combat action.

6/30/2016

We have begun using the new version of the Pirates module to play CG2.

Exciting things are finally happening!

My English launched the Baochuan with Admiral Zheng He and Katsura-chan!

The Zeus is loose! Xerecs’ Pirates respond with a 10 master of their own!

However, the English have attacked! They’re not going to be nice like they were in CG1! Whirlpool sub squadron ATTACK!

The Terror came through a whirlpool first, using El Cazador’s custom Nobunaga marine crew to shoot a mast off the Pride, a Pirate schooner. Then the Slipstream followed suit, using Major Peter Sharpe to blast off another mast. To complete the attack, HMS Oxford sailed through the whirlpool and was given an AA (Admiral’s Action – the crew you must roll a 6 with) to knock three masts off the nearby Darkhawk II and steal a coin!

9/26/2016

CG2 has finally continued!

The English press their attack! (southwest of the center) The Pirates managed a nice counterstrike, dismasting the Oxford! However, more submarines were on the way! The Terror and Slipstream were followed through the whirlpool by the Mobilis and Hephaestus, as well as HMS Bolingbroke! The Bolingbroke splintered masts on the Darkhawk II and the Thirty Tyrants, while the Terror surfaced to shoot at the Windjammer! The Pride has been dismasted, but the Pirates have the Broken Key and Ranger nearby to help recover from the raid.

After another turn, the English and Pirates have unloaded quite a lot of gold, while the French appear to be heading east, despite the flat earth rules.

Up close in the action! The Bolingbroke was dismasted, and is due to be scuttled. The Terror was sunk! The other English-controlled subs were ineffective, but they had a final ship join them: HMS Success. She was given an AA (admiral’s action) after coming through the whirlpool, inflicting minor damage on the Ranger. This burst of combat has spiced up the game, and we hope to continue soon!

In terms of launches, El Cazador launched a custom 5 master, while I launched HMS Durham with Lord Cutler Beckett, giving the English 4 total AA (admiral action) crew.

10/4/2016

Two more turns have been played. HMS Success and HMS Oxford were captured by the Pirates, who launched the Prussian Crown, presumably to deal with the Mercenary subs hired by the English. Those three subs were ineffectively ramming the various Pirate gunships in the area, while Major Peter Sharpe missed sinking the Oxford (to deny the Pirates from using her).

The French nearly sailed off Ocean’s Edge, but had second thoughts and eventually turned their ships around. Introducing El Cazador’s custom Hyrule faction to the game, the French launched the RHS Nayru and built Hyrule Castle on their home island!

At the end of my turn, the English launched the Shui Xian and hired crew for the Baochuan!

10/8/2016

More turns have been played with very interesting developments.

The English did something I believe to be unprecedented. After launching the Shui Xian, they proceeded to launch the Zhanfu on their next turn! The Zhanfu is one of the 10 masters from Return to Savage Shores. Then, after using an AA (admiral’s action) to dock home the Scots’ Pride for enough gold, they purchased the Fortaleza (also from RtSS) as well!! Three 10 masters in three turns! However, by the end of it they were flat-out broke and will remain poor for the time being. They also didn’t have enough gold to put much crew on the Fortaleza – the gold from the Scots’ Pride was needed just to launch the final 10, let alone have a good crew complement aboard. However, the crews of the Shui Xian and Zhanfu are more impressive, hosting the likes of Lawrence, Huang Bai, Captain Nemo, and others. This flurry of launches give the English 4 10 masters in play, which may be a campaign game record.

The English had also cleaned up in the south against the Pirates. After a dismal turn of bad rolls, they had two good turns in a row to sink not only the captured Oxford and Success, but also the Pirate ships Thirty Tyrants and Darkhawk II! Most recently, the Deliverance showed up to contest the now-surfaced Hephaestus, but the Deliverance was sunk by the Mercenary sub after the Hephaestus went 6/6 with an AA! So in total, the English raid through the whirlpool almost had 3 distinct stages: initial success with the element of surprise, followed by the Terror being sunk and the Oxford and Success captured, and now with the remaining submarines (Hephaestus, Mobilis, and Slipstream) doing a great job of salvaging the operation and hurting the Pirates by permanently taking some of their better ships out of the game. It also mirrors CG1 a little bit, where the English got some hired help to combat the Cursed. However, the English are doing a much better job this time around, making sure their minor faction helpers have enough crew to be effective in their missions.

The French seem to be changing their ways a little bit. Understandably shy in combat so far with a (somewhat) smaller battle fleet, they attacked the Pirates! The Recreant had actually shot first, but the French got the better of the engagement, capturing the Pirate 3 master with Le Lyon. The Soleil Royal then ventured into Pirate waters to dismast the Dragon! This was a rare instance of hurting a fleet’s gold system, and that’s one of the best ways to bring down a faction in a campaign game (though it’s often difficult).

If it looks like the Pirates had a rough day, that would be correct. However, they were well prepared for whatever came next. The 20 point Flying Dutchman sailed towards the submarines with canceller Tia Dalma aboard, with the sub-hunting Prussian Crown and Corcoran nearby. The Zeus and other Pirate gunships still loomed large, and in the far south you can see the Victoire departing the Pirate home island.

The next phase of the game promises much excitement!

10/9/2016

A single turn has been played since the last report, but it was a notable one. The Flying Dutchman opened fire on the Hephaestus and did minor damage.

As the English, I knew what my strategy was. First the three submarines got through the whirlpool to safety, back in the north. Then, it was time to ATTACK! The 10 masters were sent into battle!

Emerging from the whirlpool, both ships sacced for extra actions. The Shui Xian was first, hitting 5/9 overall (I think) against the Corcoran and Prussian Crown. The Zhanfu was next, and Huang Bai positioned her to ram and board the Flying Dutchman, with Lawrence aboard the Shui Xian cancelling the FD’s Ghost Ship keyword. The Zhanfu was a bit less effective, taking out three masts on the Flying Dutchman. At the end of the attack I rolled 4 consecutive 1’s, two on shots, one on a reroll, and one on the ram roll. However, the Zhanfu won the boarding party! This allowed Captain Nemo to capture Captain Barbossa! I wanted to make sure I could ram in order to have enough crew to sac on the next turn, since the Zhanfu was running with one less extra crew than the Shui Xian, and I wanted to avoid saccing the shipwright or primary oarsman.

Xerecs’ counterattack will no doubt be devastating, but the Fortaleza may also be sent through the same whirlpool!

Three other things: the Shui Xian is using Woodes Rogers, a rare instance of him being useful. At the end of Xerecs’ turn, he launched the Grand Path and Fool’s Hope at his home island. Also, El Cazador’s Soleil Royal managed to light the Cassandra aflame with some exploding shot, continuing the assault on Pirate gold runners!

xerecs wrote:
From my turn right after this:

Cassandra immediately turned for home, but the fire spread, however the Lighting has come out to meet her, possibly to tow her home. La Victoire used a SAC to bring the Royal down to one mast, and then the Feathered Hat got in on the action, sinking the Royal, and damaging another french ship in the process.

The FD got her SAT and went 2/4 against the Zhanfu, while Lawrence and Tia Dalma cancelled each other out. The Sea nymph used a double action provided by Jean Laffite to fire 8 time on the SX, but only hit with half her shots. The PC and Corcoran split off, trying to get to safety to repair. The Zeus used a SAC to get her first five cannons in range of the SX, but only hit once in five tries.

The Grand Path and Fool’s Hope have deployed from the Pirate HI, ready to assist Pirate efforts on any front.


el_cazador wrote:
From my turn right after this:

With the sudden disappearance of Le Soleil Royal, the French decided to stay put and hit harder. Down went La Victoire to the holy sword of St. Michael and the booming guns of the Nayru. Vive la France!

I also launched a custom 1 masted French galley.

And good to see the Cassandra burning. She sinks immediately at the start of Xerecs’ next turn. 🙂

Xerecs: note the crew on those ships. I have 2 cancelers in the area (in case you try to attack). 😛

10/9/2016

More exciting developments have unfolded!

Xerecs’ counterattack knocked out more than half of the Shui Xian’s masts, and the Zhanfu took damage as well.

As the English, my main objective had failed (if you can guess what is was heh). However, I eventually came to the conclusion that I needed to get my 10 masters out of a bad situation instead of losing them, or worse, having the Pirates capture them. The English were close to giving the Mercenaries the go ahead, but it would have been suicidal, and the main objective would likely have failed anyway.

Of course, there was damage to be done on the way out!! The Mobilis and Tia Dalma cancelled each other out, right before all three submarines high-tailed it outta there! Then it was time for the 10 masters. The Zhanfu was already on top of the whirlpool, so her first action was used to further damage the Flying Dutchman. The Zhanfu then used a sacrifice action to go through the whirlpool and emerge in the northwest where she had come from, near a friendly English fort where she and the Shui Xian could repair. The submarines had gone to a different fort, partly because the other fort would be quite crowded, and also to provide 2 targets via different whirlpools in the event of an immediate Pirate counterattack.

Here you can see the aftermath of a major skirmish. Certainly not a full-scale battle, but an important part of early-game combat. The Shui Xian and Zhanfu are looking to repair in the northwest, where the Fortaleza and Baochuan (two more 10 masters!) provide insurance in the case of a Pirate attack through the whirlpool. The battlefield looks strangely empty without the Merc 10’s and the submarines – the Zeus is nearly intact, while the FD has been sunk. The Prussian Crown repairs at the Devil’s Maw.

The Pirates and French continue to fight in the southeast while the 10 masters repair.

From north to south: the Baochuan has begun running treasure, picking up an entire island’s worth of gold on her first trip. A bunch of English gold runners are crowded around their home island, and with some of the gold coming in I launched a few more ships. In the center, the French continue to get gold from their main 3 wild islands. In the south, total carnage between the French and Pirates! Xerecs recently launched the Rampage, a custom Merc 5 master with built-in cancelling.

It’s a small picture, but a closeup of the carnage! One 5 master on each side lies derelict. The Nayru (a custom Hylian 5 master similar to El Acorazado) and Nautilus, both equipped with cancellers, hold the key to France’s hopes in the battle. Their main opponents are the Grand Path and Feathered Hat, though El Ladron still has all her masts.

10/11/2016

Here are the latest ship and point counts as of October 11th!

French: 14 ships, ~232 points
Pirates: 33 ships, 515 points
English: 35 ships, ~670 points
Total: 82 ships, 1417 points

Since the last point count (June), the French have made some strides in their fleet, and lately they’ve made some waves by attacking the Pirates. The Pirates have about the same number of ships they had in June, but they have more crew since their point total is higher. The English, however, have climbed into the lead in both ship and point count! Their quartet of 10 masters (3 of them just about fully crewed) explains their point differential compared to the Pirates while having just 2 more ships.

Here both of the derelict 5 masters in the southeast have sunk; the Nayru flees the area while the Nautilus has submerged to reach safety underwater.

10/18/2016

After the English had failed to achieve their objective with a raid on the Pirates through the whirlpool, they finally had their 10 masters and submarines repaired! The turns of waiting and organizing another raid were over, and it was time for another strike!

ATTACK!! The Fortaleza is given an AA to sail through the whirlpool and unleash her firepower! A custom equipment of mine was revealed to be aboard:

Bow Chasers
Faction Affiliation: Neutral
Type: Equipment
Point Value: 5
This ship gains two additional cannons that can only shoot from the foremost mast of the ship. The cannons follow the range of the foremost mast of the ship, but they have 4 rank and the Extended Range keyword. The cannons can only fire in a straight line directly forward of the ship’s bow. Other pieces of equipment cannot be used with Bow Chasers.

The Fortaleza’s gunports opened up, and the upgraded Devil’s Maw fort was in range! The new bow cannons missed, but her regular cannons hit, damaging the Pirate investment. Lord Thomas Gunn is the new admiral of the fleet, and from HMS Dauntless he gave the Fortaleza +1 to her cannon rolls this turn. However, in my opinion the Bow Chasers should stay at a fixed rank that cannot be modified, similar to how they cannot be used with other pieces of equipment.

The Fortaleza then fired on the Rising Sun at point-blank range, dismasting the ship. However, the English were just getting started…

Ducie Chads gave HMS Leicester the SAT, and she came through the whirlpool! The Zeus was in trouble! The Leicester revealed some Bow Chasers of her own and scored 3 hits to take out 6 masts on the Zeus! Then it got even worse for the Pirates – the Zhanfu is back!

With a successful shoot and boarding party, the Zhanfu took the Zeus down to one mast and captured sac captain Havana Black with Captain Nemo! Then it was the Shui Xian’s turn. A 3rd 10 master came through the whirlpool, and just like the Zhanfu the SX sacced for an extra action. The SX missed the fort despite Woodes Rogers’ rare bonus ability, but the Zeus was dismasted!

This shows the entire ocean. The subs also came through the whirlpool, including the two new ones. The English were not going to fail in their objective again! The first raid was 2 10 masters and 3 subs, but this raid has 3 10 masters and 5 subs, with the Leicester backing them up to boot! Lawrence and Tia Dalma have teamed up to freeze the Zeus, cancelling her helmsman and oarsman abilities. On their turn, the Pirates built Dead Man’s Point and hired some crew, while the French have been forced to retreat from the southeast area where the Pirates have the new fort.

10/21/2016

The English onslaught was so abrupt and powerful that there wasn’t much the Pirates could do about it in the short term. The Pirates backed off, save for the Ranger, who missed two consecutive Broadside Attacks against the Fortaleza. The Fortaleza responded by sinking the Ranger and the Rising Sun. However, the Pirates managed to get two valuable ships out of harm’s way: check out the Hai Peng and Prussian Crown sailing away from the battle.

As you can see, the Zhanfu captured the Zeus! The Shui Xian and Fortaleza teamed up to destroy the upgraded Devil’s Maw fort, technically costing the Pirates 55 gold!

With that, my first objective was complete! This is from my strategy document, and thus I can’t show my other strategies which are still in progress. Destroy the fort upgrade with the 10 master squadron, sinking 10’s with the subs if captured. Mission accomplished! The fort was no more, and the English hardly lost any masts (2 on the Shui Xian), let alone any ships. My thinking was that if the Pirates had a launch point near a whirlpool, they could launch ships with which to get revenge on the English by using similar tactics, since it was the English who started this conflict. That being said, keep in mind that the English still haven’t declared war on the Pirates. In fact, there hasn’t been a declaration of war in this game!

The capture of the Zeus gives the English a whopping SIX 10 masted ships! The fifth was actually HMS Union Jack, a custom 10 master from Pirates of the Kraken Sea. The battle squadron in the south is somewhat exposed, but it has enough firepower to defend itself. I suppose it feels exposed since I am the one controlling it, and each ship had a special purpose until now, since the situation is more stable at this point. The 10’s have good crew complements aboard, while the Leicester and submarines provide good support in the case of an emergency.

It seems to be a good time to do a general overview of each fleet’s situation.

Here are the English in the north. From left to right: the Baochuan is being used as a gold ship, since she can empty an entire island each trip! HMS Durham (with valuable Lord Cutler Beckett aboard) is her guard ship. I love how campaign games get so big that you can simply assign a ship to guard another ship, like a personal bodyguard. The Dauntless is heading home, hoping to pick up some additional crew. That’s what the Union Jack has just done, and she has some very good crew indeed. Her current setup gives +2 to her cannon rolls via Admiral James Norrington and Griffin. Many other ships are running gold. It looks less necessary now that the English have the largest fleet, but early in the game I made it a point to have “treasure runners with teeth”. The English gold system is not a vulnerable one, because many of the gold runners have more than 2 masts, and a handful of them carry a captain in addition to a helmsman, providing more flexibility in the case of raids or attacks. The English have plenty of natural hybrids, and among their current ranks running gold are the likes of HMS Dover, Hyena, Metal Dragon, Swallow, Scots’ Pride, and the Tiger’s Eye. At the lower right, HMS Titan guards Ramsgate, in the case of an attack by the French or by a fleet through the nearby whirlpool. HMS Rye guards the Titan, giving the English two cancellers in one spot (Bratley is aboard the Titan). At the upper right, smaller English gold runners have handled the reefs rather well. There isn’t much point in sailing the larger ships to that hazardous island, and so the 1 and 2 masters do the job. It’s also the furthest island the English are currently harvesting, but with 6 ships running gold it’s reasonably efficient.

The center area, showing the entirety of the French fleet. They have fallen on hard times of late, as their raid on the Pirates didn’t go as well as planned. They were thwarted in trying to get another island in their possession, losing two capital ships in the process. However, the Nayru and Nautilus have survived intact, and they and their cancellers provide France with some good weapons and defense. France simply needs to optimize her gold system and avoid a war with either of the other two factions (aka not making them angry lol), and she could begin to make major strides in this game.

The Pirates in the south. As you can see, their territory has been encroached upon by the English, who have essentially cut off two of their valuable islands. The English didn’t foresee their attack going so well and being able to cut off some of the Pirates’ resources, but the Pirates are still a strong faction, as evidenced by their many capital ships and powerful named crew. The English were particularly annoyed by the Pirate usage of “OP” game pieces, such as the UPS gold strategy. The capture of the Zeus and elimination of things like the Rising Sun (UPS) and Flying Dutchman (Eternal) may serve to level the playing field going forward, which is exactly what the English were after. However, factors such as Emperor Blackheart threaten to throw things out of balance once more, and if the Pirate shenanigans continue, it may inevitably lead to war….

The entire ocean. Notice how the English attack has dramatically reshaped the south – the northwestern part of the southern hemisphere is all of a sudden nearly devoid of Pirate activity. The Shui Xian quickly built Fort Royal on the island where the Devil’s Maw stood, giving the SX and Zeus a place to repair. The Zeus moves S+S towards the fort on oar power, an ominous sign. Why so ominous? The ghostly crew of the Devil’s Maw lay there, along with plenty of sacrificial oarsmen. It may be only a matter of time before the English loose Calico Cat on her former fleetmates….

Finally, the topics of UT placement and forts repairing via shipwrights have come up. No consensus has been reached, but it’s likely that some of the “light” UT’s will make an appearance at some point.

10/23/2016

Another day, another turn. The French are running gold almost exclusively due west to due east, as you can see from the orientation of their ships. The Nautilus has surfaced to repair near the French home island.

In a devastating turn of events, Emperor Blackheart rolled a 6 to use the Leicester! The gunship nearly dismasted the Zhanfu, and now only one of the four 10 masters in the area has all of her masts. It was a blow to the English cause, but it only served to make them extremely angry.

In the meantime, another gold replenishment was done.

10/24/2016

Exciting developments in the southwest! The Gladius Dei and Devil Ray came out of the fog to ram the Corcoran, hoping to dismast the sub hunter and therefore eliminate her as a threat to themselves. The Dei was completely ineffective, but the Devil Ray got an EA from Count Gustov and succeeded with both rams!

With an AA, the Leicester used her Bow Chasers to smash masts off the Foresight!! The English are gunning for Emperor Blackheart, and for good reason. While the English have built up their battle fleet with sheer firepower and a possible numbers advantage, EBH threatens to throw everything off course with a single lucky die roll. Lord Thomas Gunn doesn’t see that as fair, and thus has ordered EBH’s execution. HMS Apollo and HMS Union Jack have arrived through the whirlpool, the latter having been given an EA from Mycron to do so. The Zhanfu and Zeus (double Z! lol) repair, while the Shui Xian and Fortaleza are too far away to reach the Foresight.

The Pirates have sent most of their gunships west. However, the English may give them more trouble, as two more Pirate hunting gunships have been launched – HMS Victoria and HMS Diamond. The English will have justice!

11/29/2016

CG2 has continued once more! Xerecs and I took our turns to complete the round and I did a gold replenishment at the end.

The Pirates went on the run after being attacked by the English. Emperor Blackheart tried to get away aboard the Foresight, but the Leicester was given an AA to sail over the Sargasso Sea (rolling a 3 to not get stuck) and fire! With Ducie Chads’ help, her powerful guns sank the Foresight, and EMPEROR BLACKHEART IS DEAD! This fulfills another one of my objectives as the English. Mission accomplished! EBH didn’t roll many 6’s before his demise (unlike Davy Jones in CG1), but one was all it took for the English to snap. The crippled Zhanfu is still repairing, and will be for quite some time. A weapon as powerful as EBH needed to be eliminated, and now the English and French (who also wanted EBH dead) can sail the seas without having to worry about having their capital ships too close together.

However, the situation may actually get much more interesting. The Leicester needed some support down in the deep south of the ocean, and the 10 masters were willing to assist. The Shui Xian used a sac action to sink the Prussian Crown, another ship on the English hit list. Now that the PC and Corcoran have been taken out of action, the English get closer and closer to being able to run unrestricted submarine warfare against the Pirates if they need to. Speaking of which, the Gladius Dei and Devil Ray managed to dismast the Cursed Blade with a series of rams; the Cursed Blade and Windjammer are visible at the extreme left of the picture.

The Fortaleza was next on the scene with an AA, but missed both her shots against the Longshanks. HMS Union Jack, England’s latest 10 master, also arrived with an SAT from Commander Spencer Portland. However, the Pirates have considerable force amassed at their home island, most notably with the Rampage (a custom Merc 5 master with built-in cancelling) and two Jade privateer 6 masted junks.

12/4/2016

Exciting developments unfold!

Another round of turns took place today. The Pirates went after HMS Leicester, seeking revenge for the death of Emperor Blackheart. The Longshanks and Grand Temple (the latter with help from Tsai’s SAT) dismasted the English gunship and captured Henry Ducie Chads with Dragon Eyes, at which point Woodes Rogers (aboard the nearby Shui Xian) hailed the Pirates:

Woodes Rogers: I would like to point out that we are not after the elimination of the Pirates. We have objectives that need to be met, but open war is not our primary goal with you scum.
* L Tool moved by Xerecs*
<a7xfanben> – WR: In other words, perhaps we can work out some terms?
<Xerecs> – Genny Gallows: You killed the Emporer.
<a7xfanben> – I think this is the first convo of this type lol, similar to CG1 heh
<Xerecs> – GG: But we can listen,
<a7xfanben> – WR: As needed. He ruins everything for everyone but yourselves.
<Xerecs> – One Extended shot from Ningpo on that ten
*** <Xerecs> rolls Red D6 -> [2] ***
<Xerecs> – miss
<Xerecs> – GG: We have quarrel with the French
<a7xfanben> – WR to himself: Even as they continue to fire…
<a7xfanben> – XD
<Xerecs> – GG: Blasted Frogs
<Xerecs> – GG: T’was one shot
<Xerecs> – GG: and it missed
<a7xfanben> – WR: You are still more powerful than the French. If certain things don’t happen soon, that may change.
<Xerecs> – GG: You can take the Leicester back,
<Xerecs> – GG: But the Polaris and Sigurd are important to us.
<a7xfanben> – WR: We are not interested in a talentless Viking….
<Xerecs> – GG: I would not call him talentless…..
<Xerecs> – GG: I quite fancy him
<a7xfanben> – Lawrence: Blackheart is not the only nuisance in your fleet
<Xerecs> – GG: To what other nuisance to you refer?
<Xerecs> – GG: Captain Sparrow?
<a7xfanben> – WR: A certain junk, let’s call her “Hai Peng”?
<a7xfanben> – WR: Him as well.
<Xerecs> – GG: Is oyur issue with the ship or with er captain?
<a7xfanben> – WR: Both are unnatural…
<a7xfanben> – WR: I would hardly expect the Pirates to be surprised that His Majesty’s Navy wants Sparrow dead.
<Xerecs> – GG: Killing Sparrow would result in a cursed version of imself.
<Xerecs> – GG: Neither are in our best intrests
<a7xfanben> – WR: We’re not asking you to kill one of your own.
<a7xfanben> – WR: Simply keep him in a jail cell where he belongs.
<a7xfanben> – WR: If not, Beckett will not simply keep him in a jail cell…
<Xerecs> – GG: But he brings us such nice shiny things……
<Xerecs> – GG: I’ve heard he is going to the Dead Man’s Point…….
<a7xfanben> – WR: With unnatural powers that will lead you to your own doom.
<Xerecs> – GG: I can arrange for im to be……Detained
<a7xfanben> – WR: Good. We hope for hostilties to cease.
<Xerecs> – GG: Mind you, I cannot stophim from using his ‘unnatural’ powers one last time once he arrives.
<Xerecs> – GG: But after that it sould be simple to keep him there
<Xerecs> – GG: Your giant ships off our coast make us quite Nervous Woodes
<a7xfanben> – WR: Unless he escapes… or should I say when you LET him escape in his usual fashion? Wink
<Xerecs> – GG: Only a Pirate could keep him permanently in place.
<a7xfanben> – WR: How could we make demands without a show of force?
<Xerecs> – GG: For only a Pirate can truly know the mind of another Pirate
<Xerecs> – GG: Impressive display Woodes, you took one of ours to make it so.
<a7xfanben> – WR: Gives us Ducie Chads in the meantime; his hatred of Pirates will make him kill himself before you can get him back to the ransom market.
<Xerecs> – GG: Alas i truly do not know how to give im back, he’s fallen to the Dragon Eyes, a truly mysterious fellow.

Here’s the situation after the Pirate turn. 6 Pirate gunships have their bows pointed to the west; the Rampage has turned around and away from the battle.

At this point negotiations broke down. Almost all the English ships in the southern hemisphere have Pirate-hating crews aboard. In addition, the large crews of the powerful 10 masters had grown restless. The Leicester had taken care of the main objective – eliminating Emperor Blackheart. The English and Mercenary crews were itching for some action, and the Grand Temple’s dismasting of the Leicester (and subsequent capture of Chads by Dragon Eyes) put them over the top. The Fortaleza surged forward and it was on! With an AA the Fortaleza shot about 9/20, taking the Grand Temple and Grand Path down to 3 masts each. The Shui Xian was given a sac action to move and shoot twice as well. Her first broadside sank the Longshanks, while her second broadside dismasted the Grand Temple and Raven’s Neck and sank the Greed’s Hammer. Then at long last it was time for the English 10 master: HMS Union Jack! The Union Jack had a triple cannon bonus against Pirate ships: +1 from Governor Lynch, +1 from Griffin, and +1 from Admiral James Norrington! This also meant that she had a +2 cannon bonus against ships of any faction, but against Pirates, 2’s hit on all of her cannons! Commander Portland’s SAT roll failed, but Mycron gave the ship an extra action to bail him out. The Raven’s Neck and Ningpo were sunk in short order. Then the Union Jack had to maneuver so that some guns were in range of the Grand Path, but so that the UJ wasn’t in range of the Rampage’s built-in cancelling ability. This was accomplished, and the Grand Path was sunk! With 2 L-range guns in range of the Rampage, the UJ rolled a pair of 6’s to damage the dangerous vessel. Finally, all 4 aft cannons on the UJ scored hits on the Ladron, making the Ladron the final Pirate ship to sink on the turn, one of six I believe. The English ended their turn by advancing even more Pirate-hating ships: HMS Apollo, HMS Victoria, and HMS Diamond are on their way. In addition, you can see the Mercenary subs advancing, without the Prussian Crown and Corcoran to oppose them.

The ocean. In a single turn the 3 English-controlled 10 masters in the deep south fired off around 50 shots to absolutely devastate the Pirate resistance. The English are still not interested in war, as they have made their demands to the Pirates clear:
<a7xfanben> – 1. Don’t use Captain Jack Sparrow for the rest of the game.
<a7xfanben> – 2. Scuttle the Hai Peng.
<a7xfanben> – The English will be taking the Rampage as a prize of war; resistance will mean the end of the Grand Temple, Polaris, Dragon Eyes, Tsai, and Andersen.
<a7xfanben> – If the two demands are not met, the English will have no choice but to use force. In that case anything that gets in the way will be eliminated.
<a7xfanben> – TIME TO CAPITULATE!!!!!!!

12/5/2016

A few turns later, and the Pirates have agreed to the English demands. The English captured the Rampage, and a house rule allowed the Fortaleza to load Ducie Chads (previously captured by Dragon Eyes) after the Shui Xian eliminated the Grand Temple’s oarsman. In the deep south you can see the 10 masters turning north, while the Mermaid has taken the Grand Temple under tow. The Leicester is about to get Chads back, after which he hopes to provide an SAT so the ship can move 4S on oar power. The Leicester will repair at Fort Royal, where the Zhanfu and Zeus have half of their masts up. The Victoria and Apollo have docked there as well, having lost masts to the whirlpool. Those two were originally headed south in case the 10 masters needed backup, but the battle has concluded already, the English objectives having been met.

In the southwest, the Devil Ray received an EA from Count Gustov, but missed all 4 of her shots in an attempt to sink the Corcoran. The Slipstream (with Major Peter Sharpe aboard) is coming over to assist the Devil Ray if needed, while the Gladius Dei prepares to ram any Pirates attempting a rescue.

The Pirates’ plans seem to have shifted back to their beef with the French. Gunships have been launched on both sides. Among the new Pirate ships are the Harbinger, Coleoptera, and Nubian Prince. The French have hired more Hylians in their quest, with RHS Ordona joining the ranks. The Duc de Bourgogne and the Delacroix have set sail as well. It looks as though another battle could happen in almost the same location as the previous one.

The English have launched more ships as well. One turn saw them purchase 3 new gold runners, among them 2 armed merchantmen. The latest turn saw them launch another trio, this time all gunships. It remains to be seen what they intend to do in the near future, but they certainly have plans.

12/9/2016

Here we have another round of turns completed. The French certainly appear to be renewing their conflict with the Pirates: check out their squadron in the east heading south towards the Pirate fort. That group of ships includes the Nautilus (with canceller Christian Fiore aboard) and RHS Nayru, a Hylian ship similar to El Acorazado (also with a canceller aboard). Other ships are sailing with them, such as the defensive powerhouse La Corse.

The Pirates appear a bit worried about the French, which is quite understandable, especially considering that the Pirates don’t have any cancellers at this point, Tia Dalma having been killed in combat earlier in the game and the Rampage being recently captured by the English. The Pirates are grouping up south of the fort however, and have some great firepower of their own: the Sea Nymph, Viper, Harbinger, Coleoptera, Akua Lapu, Golden Medusa and others look to be ready for battle. It will be interesting to see how that situation unfolds. It looks like the Pirates could be trying to draw the French into the southeast corner, putting them further from the French forts and home island, while also keeping the Pirates’ main treasure lane open to that island. However, if the French can interrupt Pirate trade, the Pirates will have to fight farther north in order to end the threat. With the Pirates and English having fought numerous times (without either faction declaring war however) and their conflict at an end, the Pirates can go to their southwestern island more easily now. That’s important since the Pirates really only have 2 islands readily available to them right now.

And what about the English? As their controller, I have various plans which I won’t divulge here. I can give a few past strategies though (specific objectives in this case):
Sink the Hai Peng
Deals with the Pirates (?)
-The HP wasn’t sunk, but probably won’t need to be. Captain Jack Sparrow was unloaded at Dead Man’s Point, where he won’t be used anymore. Without him the Hai Peng is considerably less valuable (and less OP!) to the Pirates. A deal was made, as I explained earlier, and the Rampage was taken. It’s been some months since this much peace existed between the Pirates and England.

The English launched a ship at the end of their turn: the Maui’s Fishhook. I didn’t want to launch a hoist this early in the game, but she is absolutely the perfect “medical barge”. I believe that term was coined by cannonfury in his review of the Frontier. The MF has loaded up with 6 crew, two of which she’ll keep: William Dampier (SAT) and a helmsman. The other 4 are oarsmen here, and they are to be delivered to ships that need them. The MF will be a busy ship helping out with crew logistics. Between the sac captains on the Shui Xian and Zhanfu, the somewhat under-crewed submarines hastily launched to get the sub squadron, and crew lost in combat, there are plenty of opportunities to use the MF. Her unexpected appearance and sudden strategy of using her combines with an objective the English have. This situation is one of my favorite things about campaign games – strategies that aren’t viable in regular games become fun side diversions in CG’s, and the flexibility and grand strategy involved just make it a much more rewarding experience.

12/12/2016

The French begin their assault! Dead Man’s Point is quickly destroyed, and the Pirates have gathered their gunships near some reefs at a point south of where the fort stood.

Shortly after this picture, the Maui’s Fishhook was able to complete her crew logistics mission to perfection, using an extra action to give an oarsman to the Mobilis (who also received a shipwright from the Hephaestus before being a given a move action of her own) and 3 oarsmen to the Shui Xian.

Attack! The French do tremendous damage, sinking multiple ships and getting the advantage of the first shot. The Pirate counterattack saw the Gris and Delacroix take considerable damage, with Barstow capturing Robert Surcouf.

At this point the English decided to intervene! The English were after the Nayru’s Captain Darbus and the Nautilus’ Christian Fiore, which could allow the English to complete their canceller squadron. HMS Rye and Scott Bratley cancelled Darbus and the Nayru’s ship ability (same ability as El Acorazado), which allowed the Titan and HMS Union Jack to dismast the Nayru. Five support ships followed those three English ships through the whirlpool.

The French then surrounded the Nayru with all of their ships in the area, trying to prevent her from being captured. A 5 roll meant she would be scuttled at the beginning of the next French turn. The Union Jack and Rye lost masts, the Nautilus surfacing to shoot at the UJ. Many months ago the French had told the English that if the English attacked them, the French would retaliate with everything they had. The English had forgotten about that, and the French stuck to their plan. Indeed, France’s attention now appeared to be solely fixed on England, as the French/Pirate battle was essentially over already. At this point, the French had declared war on both the Pirates and the English.

The English showed their classic gunnery on their turn, blasting their way to the Nayru and capturing her with Commander Temple, who was aboard HMS Swallow. The English had accomplished half of their objective (with one canceller captured), but with the unintended consequence of France declaring war on England. It was truly total war, as the French suddenly sent their gold-laden treasure runners north to invade English home waters.

French gold runners attacking Ramsgate and the ship docked there, the Tiger’s Eye. At the bottom you can see more French ships on the way, while to the left the damaged Victoria has returned through a whirlpool.

In the southeast, Christian Fiore committed suicide by ramming the Nautilus into the Union Jack and dying in the boarding party, so the English couldn’t capture him. Between Fiore being gone and the difficulty of capturing the Nautilus, the English decided to sink the Nautilus. The Gris was captured while HMS Phoenix missed a bunch of extra-long-range shots. The Pirates were enjoying their time off from fighting, looking to re-explore the island that Dead Man’s Point was on, towing the Cursed Blade in the southwest, and getting the Grand Temple home to repair. All four French ships at Ramsgate have been dismasted. At the end of their turn the English launched HMS Endeavour and the Celtic Fury, giving them seven total 10 masters. The English hadn’t planned on launching the Celtic Fury (her ability allows French crew aboard), but seeing that the French were deploying a total war strategy and seeing that the French likely wouldn’t have the funds to launch her, the English broke their own record for most 10 masters in a single game. Shortly after this picture the Vengeance dismasted the Victoria.

And that was that. Unfortunately this means that the game is effectively over. The French will attack the English, who have no choice but to fire back and eventually eliminate them. The Pirate fleet is still weakened by the English raids earlier in the game, and further weakened by the French attack. Letting the Pirates build up their fleet would take a while, and the English would have a ton of gold saved up even if they backed off for a long time. Even if the Pirates came back, the English would have an advantage between their 7 10 masters and 6 cancellers, not to mention all the English capital ships in reserve. (The game has not ended, but the English have all but won.)

Out of curiosity, I did a point count of the English fleet to see how big it is. The fleet totaled 54 ships for 1,177 total points, which is one of the biggest fleets of all time and surprisingly it could be the largest English fleet I’ve ever commanded. Although, with the 10 masters, the fleet has a lower percentage of English game pieces than in past English fleets I’ve had.

Here are my strategies as the English.

CG2 Strategy (keep all players in the game and let them build)
Assemble canceller squadron, keep it intact
Capture the Nautilus/Nayru if possible (Lenoir?)
Use MF for crew logistics (Mobilis: oarsman, Rye: oarsman, Fortaleza: oarsman, Slipstream: shipwright+oarsman, Zhanfu: oarsman, Zeus has an extra oarsman)

Beyond that, I was hoping to break up fights between the Pirates and French and keep the fun of this campaign game going for as long as possible.

Launch: 
Customs (my crew, other English customs) (Custom sets)
More gold ships
Gunships with chieftains (establish canoe fleets at forts)
Ships with Bow Chasers
Double boarding ability
Monjuer, Crown Jewel
Fort upgrade in south? Fire squadron?

Potential ships for chieftains:
Dreadnought
Bombardier

VASSAL Campaign Game 1

VASSAL Campaign Game 1

Played from February-May of 2016

The first-ever VASSAL campaign game is about to get underway!! Two of the greatest admirals in history, A7XfanBen and Xerecs, meet in an epic clash on the high seas!

After a number of smaller adventures, both admirals have agreed to take part in the ultimate challenge – a giant cumulative game where gold is spent along the way to build bigger and better fleets. The game has no time limit, and it will go until only one fleet remains or until both admirals agree to stop the game, at which point the fleet with the most combined points afloat and gold on their home island will be declared the winner.

The game is being played with a unique style – each admiral gets to control 3 different fleets, with all of the major factions being present (the minor factions can be hired as privateers). However, each admiral MUST control these fleets independently – they can still form alliances with their own fleets, but each fleet is a separate entity.

2019 Edit: You can use the Master Spreadsheet to see the game pieces now that Miniature Trading doesn’t work.

Without further ado, here are the starting fleets in the order of gameplay, under a 30 point limit:

Xerecs

French:
La Geographe
Enfant Terrible + Capitaine Baudouin Deleflote

Pirates:
Neptune’s Hoard + explorer
Swift + helmsman
Banshee’s Cry + explorer
Mermaid

Americans:
USS James Madison + Tribal Chieftain
Wasp + explorer
Native Canoes

A7XfanBen

Spanish:
El Alquimista + Tribal Chieftain
La Saragoza + helmsman
Native Canoes

Cursed:
Divine Dragon + Davy Jones, helmsman

English:
HMS Dover
HMS Hound
Sea Tiger
HMS Trepassey

Here is the grand ocean!
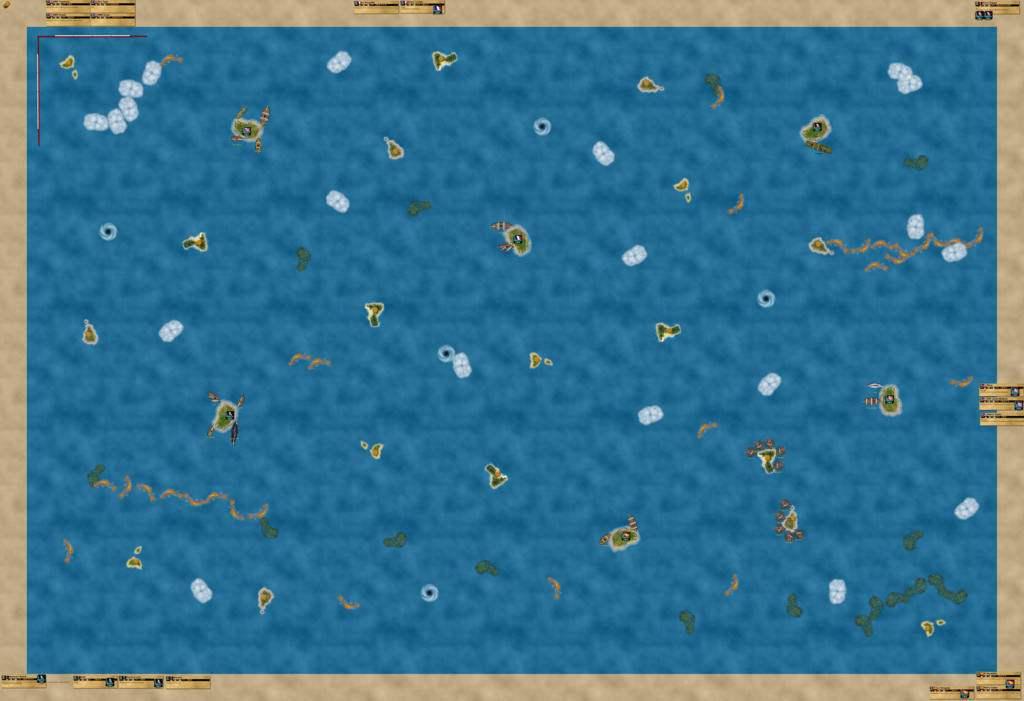
Here’s the northwest corner, where the English have settled. I purposely made the corner islands harder to get to, since the fleet nearby could otherwise take extra advantage of them. The French have generally the most central fleet location, though they’re not really in the actual middle. Here you can see them to the far right.
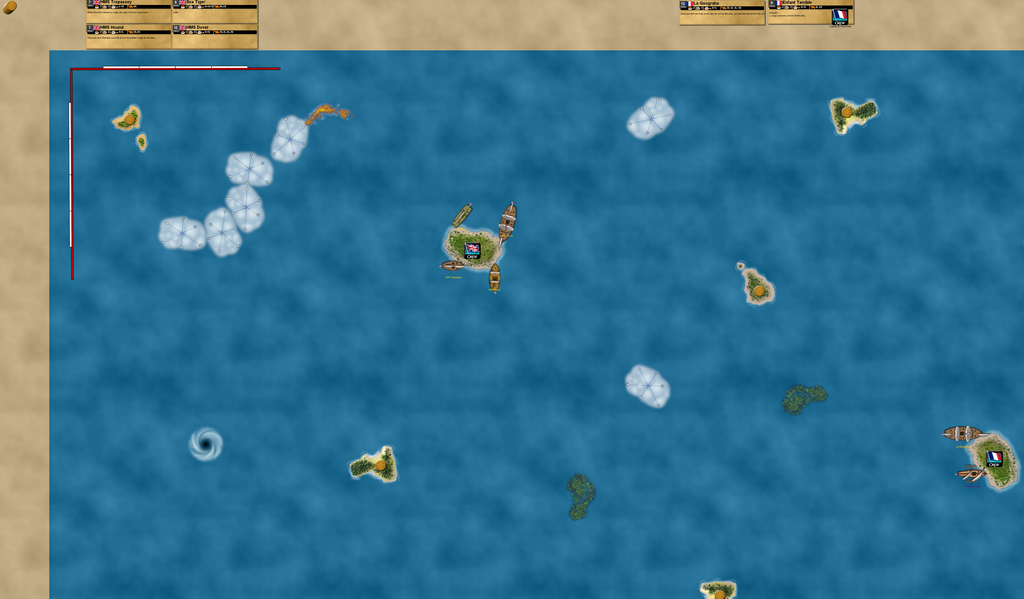
This is the northeast corner, where the Cursed lie. There’s some overlap with the pictures, as you can now see the French at the far left. To the right lies a barrier reef and some fog dangerously close to the shallows.

The southeast corner, with the Americans on the right and the Spanish on the left. I placed those wild islands close together on purpose, so the setup didn’t look too artificial with the same distance between all neighboring islands. How fitting that 10 canoes are already docked at those islands!

Finally, the southwest corner, where the Pirates are waiting to sail out. You can also see the French in the upper right corner, while the English HI is almost due north of the Pirates’ HI.
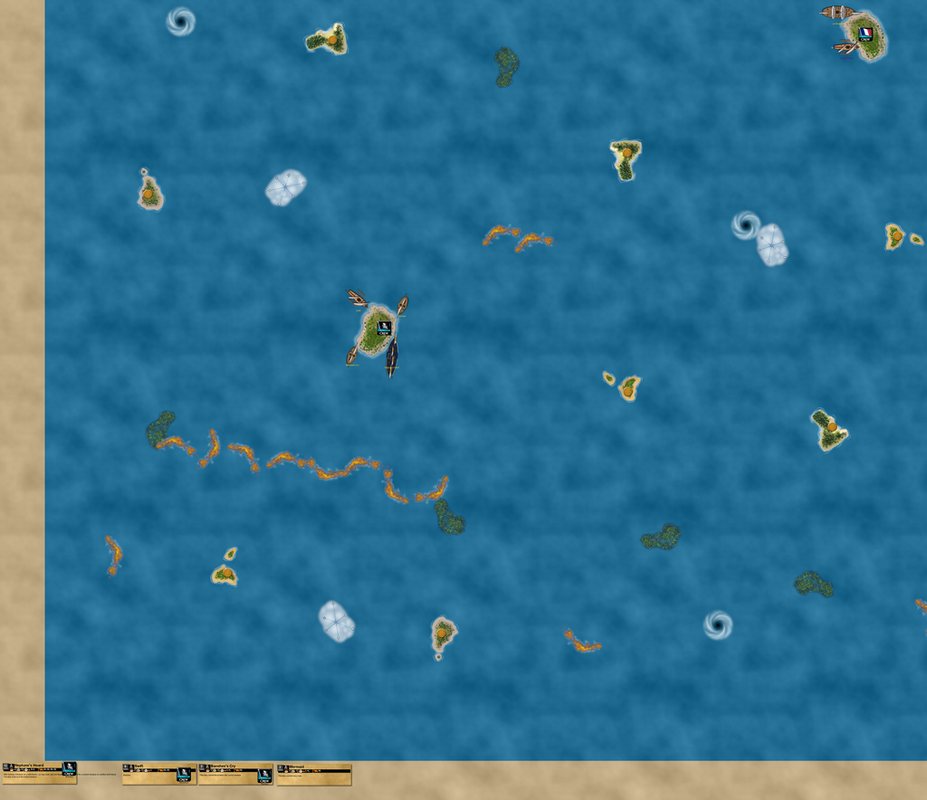
Right now there are 18 wild islands in addition to the 6 home islands (HI’s). Each wild island starts with 7 coins on it. All wild islands will refill to their maximum of 7 coins when at least 4 of the wild islands are completely empty. UT’s will probably make appearances eventually. Flat earth rules are being used.

The current house rules state that when a ship wins a boarding party, the winner chooses which coins to take, and that turtle ships are immune to ram damage. Other house rules will be instituted if needed.

The game will start tomorrow! The other campaign game will start sometime early next week, but I’m planning to create a separate thread for that one to avoid confusion and because this one starts first.

2/13/2016

The first VASSAL campaign game has gotten underway!

The Geographe took the first action of the game, and all of the fleets raced for the gold!

In the southeast, both the American and Spanish native canoes have explored their islands, while in the northeast, Davy Jones on the Divine Dragon is powering the Cursed to a fast start.
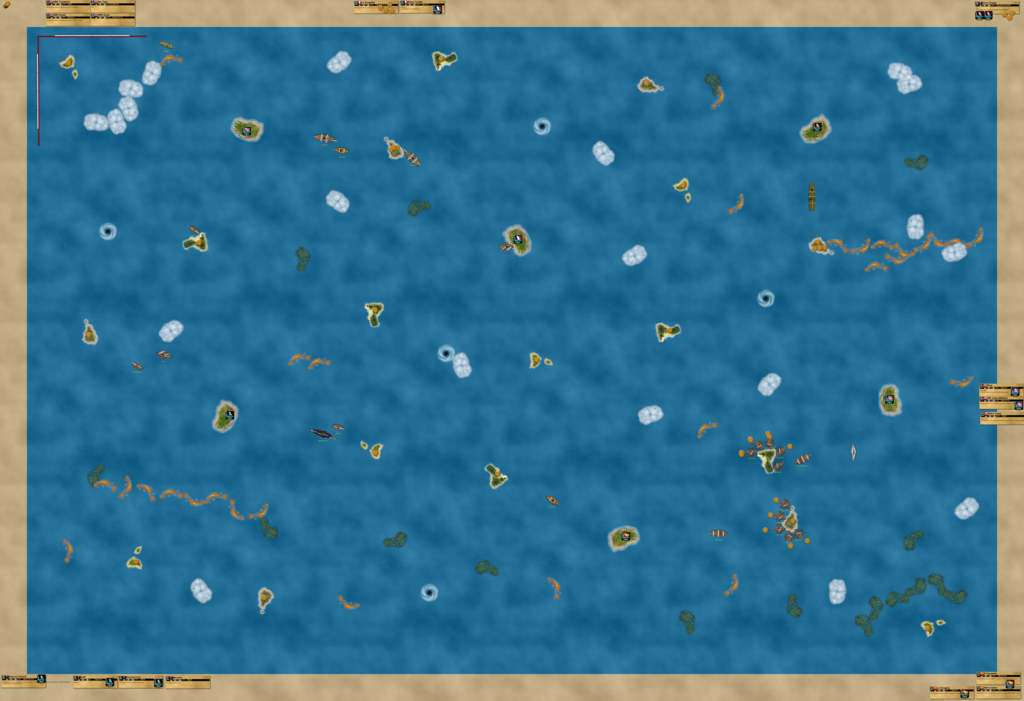
Of all the factions, the Cursed make the first launchings of the game! The Loa’s Justice and Nightmare join the ranks, both crewed with helmsmen.

The Americans and French have some gold, while the Pirates, Spanish, and English are all about to unload some.
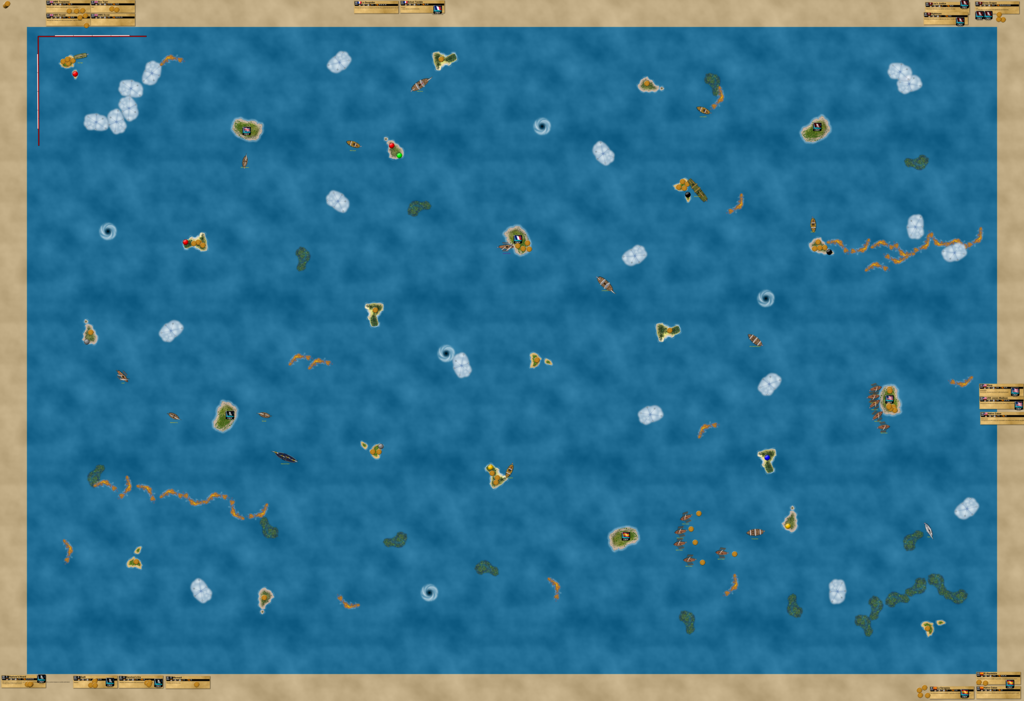
Here you can see some of the islands that have been explored. In the order of play, here are the explored marker colors: French (green), Pirates (gray), Americans (blue), Spanish (yellow), Cursed (black), English (red).
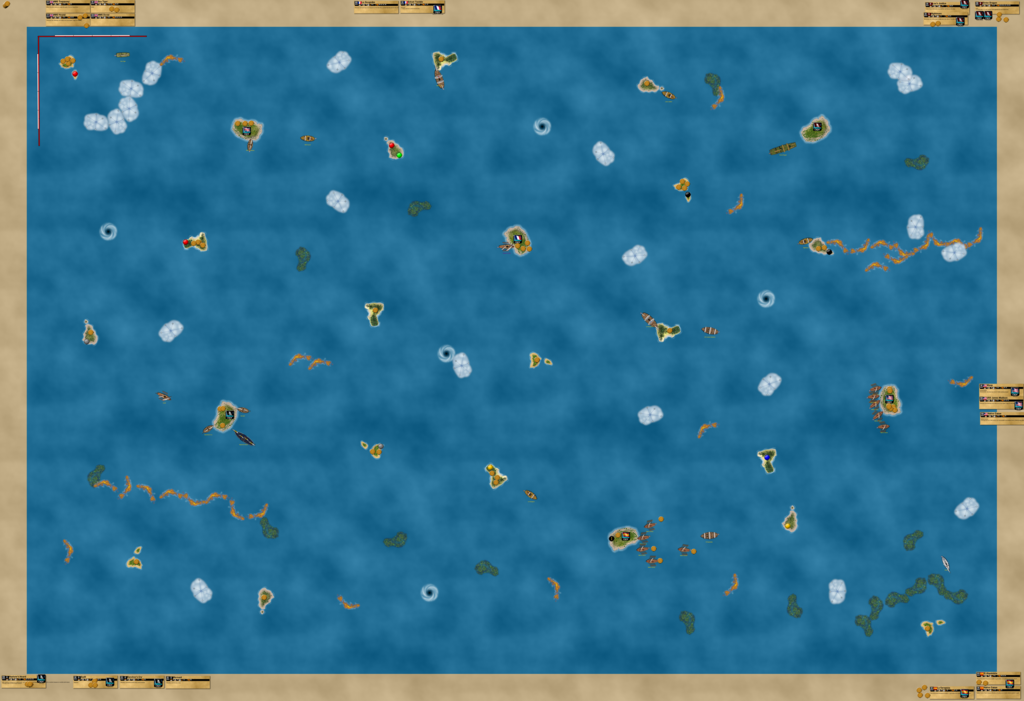
The English spent some gold and bought HMS Lady Provost and a helmsman and explorer for her.

A flurry of launchings soon followed!

Pirates:
Bloody Jewel + Jean Laffite
Dragon + Captain Elizabeth Swann
Rover + navigator

Spanish:
La Santa Isabel + Capitan Alarico Castro, helmsman, oarsman
San Pedro

Cursed: Sea Monkey + helmsman, oarsman

English: HMS Alexander

The Sea Tiger is returning with gold from the remote northwestern island, while the Wasp looks to do the same in the far southeast.

2/13/2016

The game has continued!

The Spanish have built El Castillo del Infanta on the island in the southern middle area! Just like in xerecs’ Economy Edition game, forts can be rebuilt as many times as a player wants.

Notice the Spanish flocking to their island to the east.

Responding to the Spanish, the Americans quickly build Thompson’s Island, but the Spanish counter with Fortaleza Dorada just to the south! Xerecs has been using navigators, which are now a part of all three of his fleets. The Spanish launched the first true gunship of the game with La Tartessos + captain, helmsman, and fire shot.

The Cursed and English got busy spending as well:

Cursed:
Executioner + El Fantasma, captain, helmsman, oarsman

English:
Edinburgh Trader + helmsman
HMS Durham + captain

The Pirates navigated some reefs in the southwest to reach a corner island with the help of some trade currents.

Davy Jones on the Divine Dragon finally rolled a 6, and seeing that the Americans were the biggest threat to the Cursed, forced the Wasp off the map! Xerecs had forgotten about her way over in the southeast corner, and now she’s been moved off the flat earth and removed from the game.

Here’s an overview of the situation in the southeast:

The Swift had the honor of being the first ship to lose a mast, while crossing over a reef! However, the Pirates did launch the Cassandra with a helmsman.
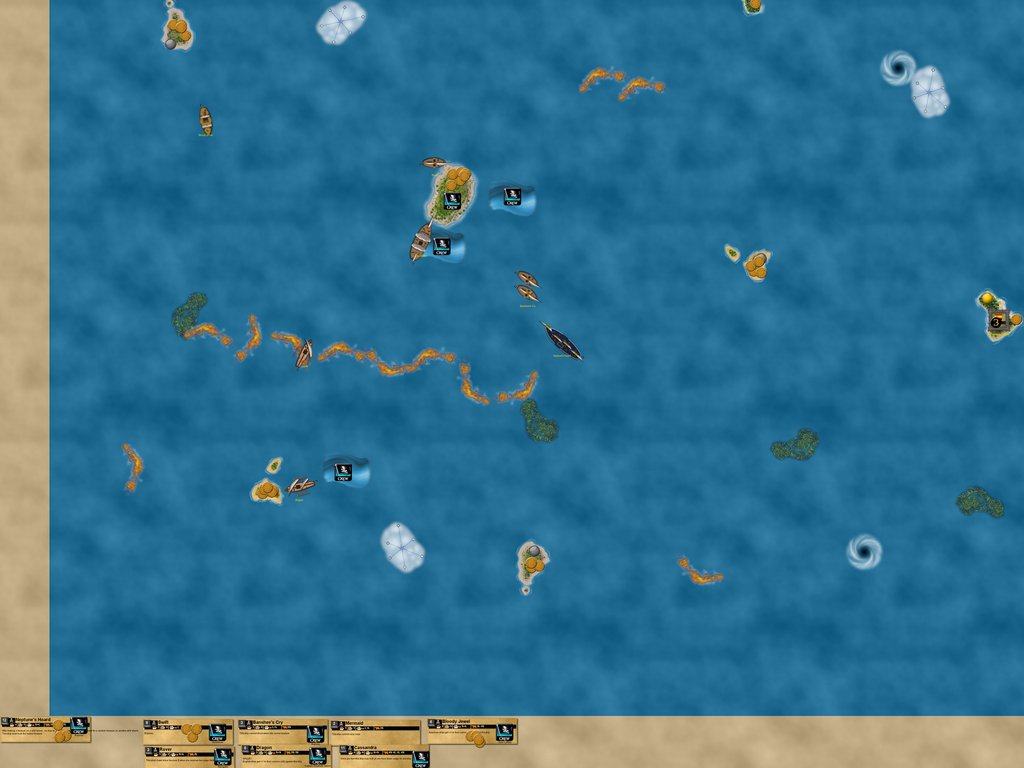
The Cursed have been doing surprisingly well for themselves; their newest additions are the Maman Brigitte and Fallen Angel. The Executioner seems to be headed straight for that whirlpool; I wonder why?

Admiral A7Xfanben’s favorite faction is the English, so it should come as no surprise that they are launching ships all the time. In addition to building Ramsgate south of their HI, they’ve purchased numerous ships:
Aberdeen Baron + helmsman
HMS Cheshire
HMS Antelope
HMS Oxford + captain

The fleets have rapidly expanded, with no less than 39 ships already in play! The close of the first day’s action saw the French nervously eyeing the expanding English fleet. An interesting part of the game so far has been the differing philosophies of the admirals. Xerecs saves gold more often, belying the potential strength of his fleets, while a7xfanben knows the value of getting lots of gold runners out on the sea as fast as possible to increase the gold flow.

Another interesting aspect is even just writing the battle reports; I have to watch what I say because I don’t want to tip off xerecs or make any odd mistakes!

2/17/2016

Here’s the game after another turn. The main developments are that the Pirates launched the Black Heart with Cursed Captain Jack, and the Executioner has gone through a whirlpool to arrive in the west.
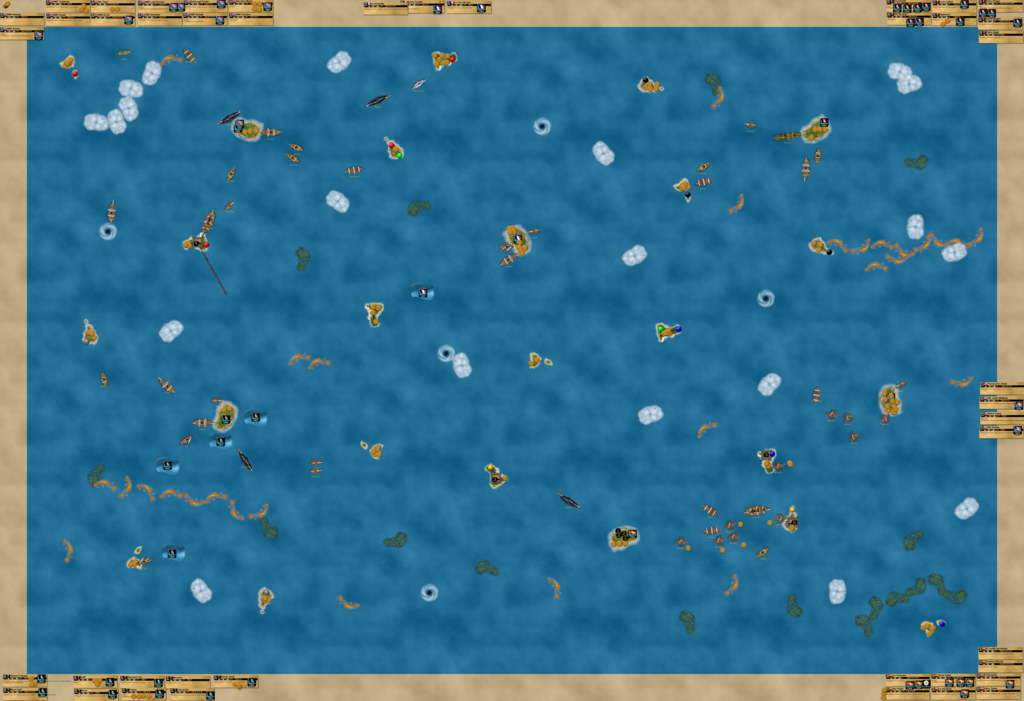
2/20/2016

A TON of progress has been made on Campaign Game 1!

The French finally spent some more gold:
La Possession + helmsman
Royal Louis + helmsman
Le Courageux
Le Bon Marin

The Spanish purchased another gunship with La Habana + captain and helmsman.

The Cursed launched the Fiddler’s Green with “Screaming” Mimi and a helmsman.

The Spanish have instigated the first combat of the game! The Tartessos had been lurking off Thompson’s Island, and she finally got the perfect positioning and fired a full broadside at the American fort! Only one hit landed, but it sent a clear message. However, the Spanish assured the Americans that they were NOT declaring war.

On the Cursed turn, Davy Jones rolled a 6! All eyes turned to his wrath, as he could now move any ship in the game however he wanted.

Suddenly HMS Oxford surged forward and fired a broadside into the Aberdeen Baron, taking her down to 2 masts! Davy Jones was wreaking havoc in the English home waters!

Then, the Executioner, who had sailed through a whirlpool the last time the game was played, sailed up and dismasted the Aberdeen Baron!

This shows the first real “battle” of the game, though it was a strange one. The English used the Antelope (who went 2/2!) and Oxford to sink the Executioner, but Fantasma’s Eternal sent her back to the Cursed HI!

The Spanish launched two ships: Concepcion (with a helmsman) to further their gold system and the Colector del Dia (with a captain and helmsman) to further their eastern expansion. The Colector del Dia is a 3 masted junk from RtSS very similar to the Cazador del Pirata.

The English began towing the Aberdeen Baron with the Hound and launched HMS Galway.

The next turn was a rare one, with no launchings by any fleet. Thompson’s Island was fighting hard against the Tartessos, hitting 2/3 before the Spaniard knocked the fort down to 2 guns. The Executioner used Fantasma’s SAT to repair two masts in short order.
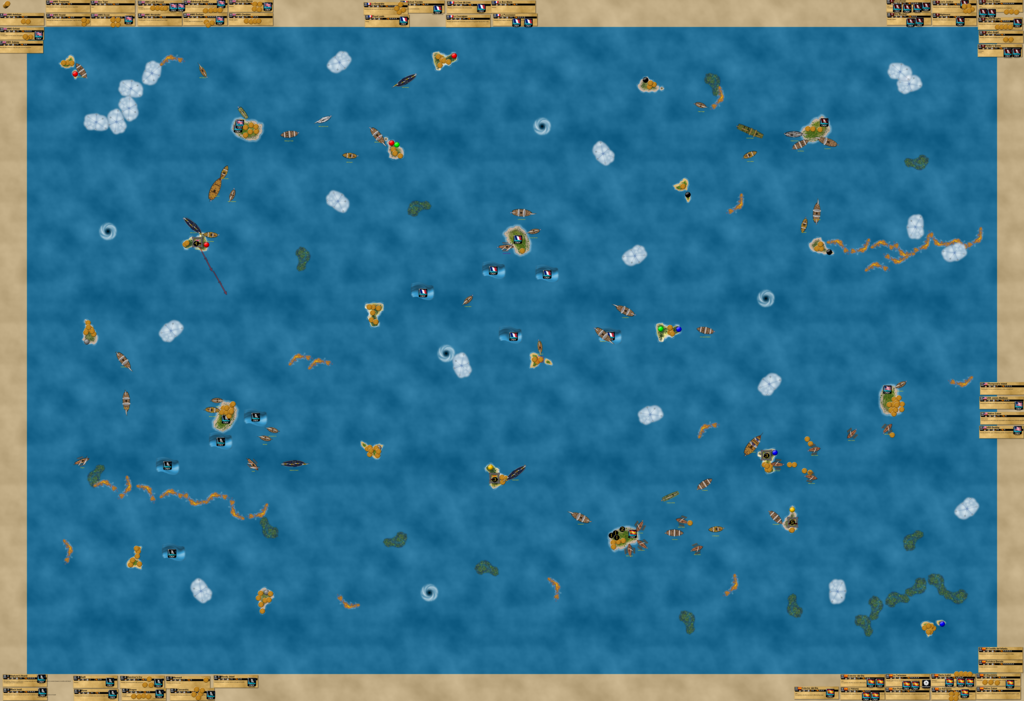
With the English in the west and the Cursed in the east, the French have been getting the majority of their gold from the center area south of their HI, where you can see a bunch of trade currents. Each fleet has their own area right now, but fleets are quickly expanding. As more and more ships come into play, treasure replenishments happen more and more often.

Despite the Tartessos losing two more masts to Thompson’s Island, the Spanish finally silenced the fort’s cannons!

In a huge move, Davy Jones rolled another 6 and forced the Oxford to sink the Aberdeen Baron!! She went down with plenty of gold aboard right near her home island, and one of England’s best gold runners is gone for the rest of the game. The Aberdeen Baron also is the first ship to officially sink, though the Wasp was eliminated via round earth and the Executioner was “sunk” before Eternal kicked in.

On the following turn, the Americans made some interesting purchases:
Jarvis + chieftain, helmsman (+ another set of native canoes)
Gator + GWL (RtSS version, the American version of Lord Mycron)

The Spanish immediately responded, launching another set of canoes at the island that Thompson’s Island was recently destroyed on (the Spanish weren’t declaring war but rather claiming the island), as well as El Garante with a chieftain, captain, helmsman, firepot specialist, oarsman, and fire shot.

The English got busy spending as well:
HMS Apollo + Lord Cutler Beckett, captain, helmsman, oarsman
HMS Patagonia + RobinsonLord Mycron

The Apollo took over for the Dover as the official English flagship. The English saw the two Pirate fleet admirals and decided to use their own as well.

The new American canoes loaded gold from the island in the far southeast, while the new Spanish canoes loaded gold from the island Thompson’s Island was on. The Spanish ended their turn by building their third and final fort, El Puerto Blanco, on the island! This ended their short-term objective of controlling those two nearby islands. Also, forts can be rebuilt as many times as a faction wants if they are destroyed. An agreement has been reached where up to 2 of the same fort can be present at the same time, but flotillas follow the same rules for ships in that they can only be purchased once and can’t be brought back if sunk.

The Tartessos repaired at the southern Fortaleza Dorada, while something interesting was brewing up north. The USS James Madison “shot” at the French ship Royal Louis, who parleyed a coin to the American HI. Xerecs (the controller of both fleets) then announced that the French and Americans were agreeing to some kind of alliance, as both factions felt pressure from the fleets around them. Taking it even further, the French then went so far as to make it clear that they considered the English and Cursed to be “enemies”, which puzzled and frustrated Beckett and Davy Jones respectively, as no fleet has done anything hostile against the French so far. The French might want to be a little more careful with their choice of words in the future, given the short fuse the Cursed have in addition to their dangerous named crew.

Speaking of dangerous named crew, the Cursed recruited Tabitha McWarren to crew the Lizard’s Sting. a7xfanben doesn’t dislike trade currents and navigators nearly as much as cargo masters, and so the Cursed also got the Celestine with Master Scribe.

The English then bought 5 new ships, including one named crew: Commodore Rhys Gryffin Owen (CRGO), the other English fleet admiral. The English also received the first home island expansion! As the game gets bigger and bigger I’ll probably do more and more pictures of the deckplates since it’s faster than typing everything in.

The whole situation:
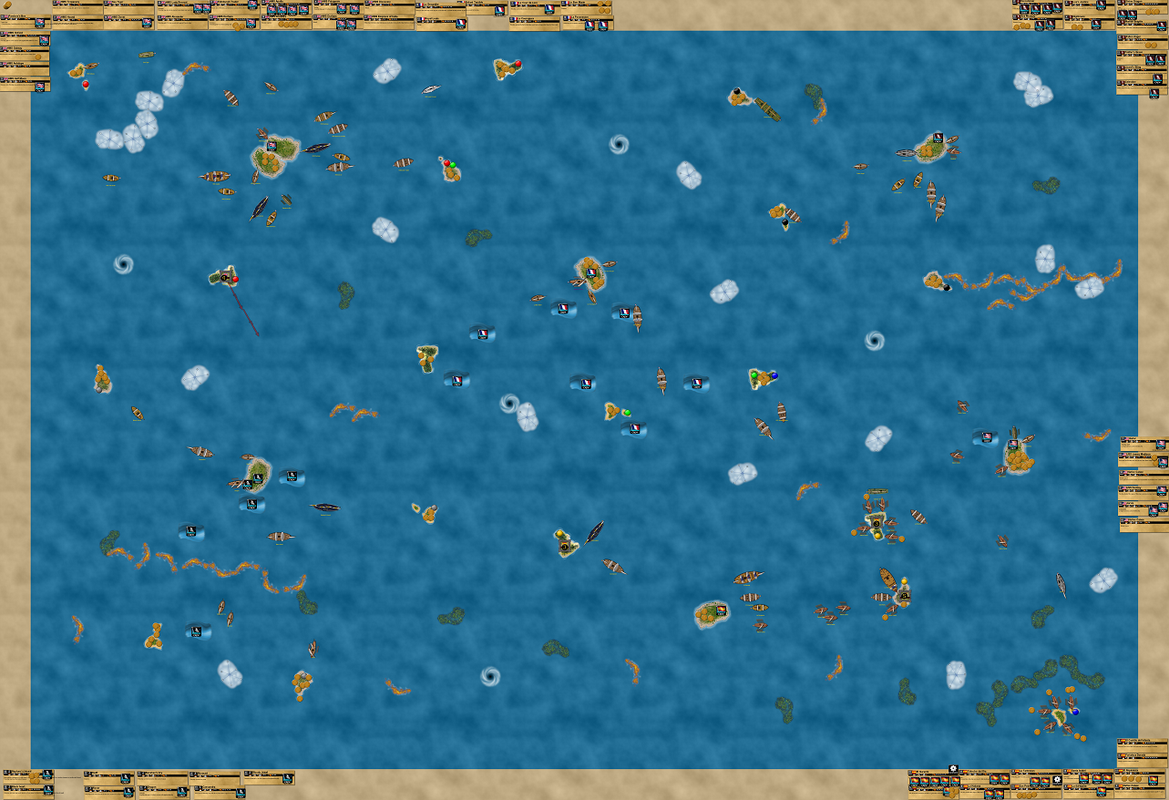
The gold running pace intensified, and treasure replenishments were happening every turn or two. The Pirates had been saving for a while, and suddenly spent 91 gold on three new ships, including the first use of privateers!
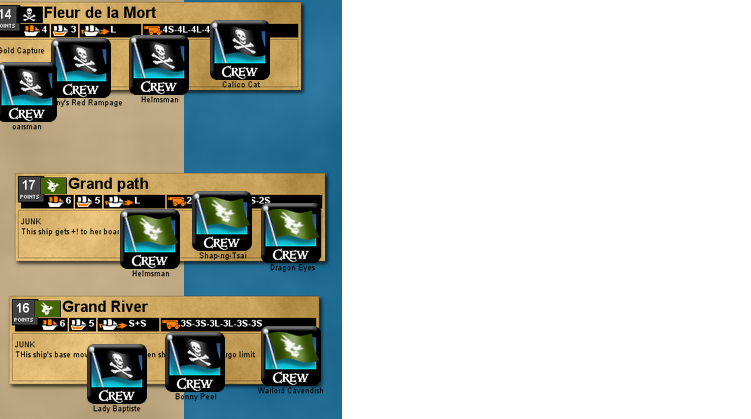
All three ships were ready to capture crew and turn them into gold, while the Grand River is actually a custom of mine (Xerecs is the Pirate controller).

Grand River
Collector’s Number: 124
Faction Affiliation: Jade Rebellion
Rarity: SR
Type: Ship
Point Value: 16
Cargo Space: 5
Base Move: S+S
Cannons: 3S,3S,3L,3L,3S, 3S
Number of Masts: 6

Junk. This ship’s base move becomes S when she reaches her cargo limit.

The Spanish then cashed in some gold of their own to get the Isabela, another set of native canoes (their third), and the Afortunado with a navigator. This left the English as the only fleet not to utilize trade currents.

During the actual turn (which happened before the launchings), some interesting stuff went down (literally). The Cursed, annoyed with the English but also the Americans (remember them moving the Wasp off the flat earth as the first ship eliminated), moved a native canoe off the map and sunk another with the Executioner!

The Americans’ woes continued. The Spanish decided they needed to make a statement. Despite the destruction of Thompson’s Island and the building of El Puerto Blanco on the same island, the Americans didn’t seem to be getting the message, with the James Madison sailing into now-Spanish waters. The Colector del Dia shot 3/3 to dismast the JM, though she managed to lose the boarding party 5-4 after rolling a 1. The Spanish still have not declared war on the Americans, but the message is clear: the waters around Spanish forts belong to Spain, and nobody else.

Ominously, the Cursed got the first submarine of the game with the Locker and Edward Low.

The English launched two more treasure runners, HMS Goodfellow (from RtSS) and HMS Lord Kenyon.

At the end of their next turn the Americans finally spent a bunch of gold to get both of their hoists (Frontier and Strongarm, the latter from RtSS), as well as a custom by Xerecs.

USS Mississippi
Faction Affiliation: America
Type: Ship
Point Value: 15
Cargo Space: 6
Base Move: S+S
Cannons:
Number of Masts: 4

Steamboat. (+L to base move, no helmsman allowed) One of this ship’s treasures is worth +2 gold when unloaded at your home island.

The Frontier and Mississippi carried the American Eternal crew, while the Strongarm carried a cargo master.

For this game, hoists are represented by 4 masted square rigged ships with no jib sail, where an S range tool can be proxied as the hoist arm.

The Spanish followed by capturing the James Madison with the Habana! This was the game’s first capture.

In a brutal display, the Cursed continued to be hostile to the English, using McWarren and Mimi to move the Sea Tiger and Discovery off the map and eliminate them from the game.

The day’s action was almost at an end! The French got things started by launching three of the finest ships: the Libellule (with Maurice Aristide), Belle Etoile, and Favori. The Pirates built Dead Man’s Point on an island south of their HI.

The Spanish went overboard and bought two more sets of native canoes, bringing their overall total to 5 sets (25 canoes) and breaking my Economy Edition record of most sets of canoes in a single game by one fleet!

The Spanish have already dealt with some moderate traffic jams, but things are about to get a LOT more interesting!

With great drama the Cursed rolled successfully for both Tabitha and Mimi, and threw the Jarvis off the map and out of the game! This took out their last chieftain, and the Americans had to eliminate 3 more canoes! The Cursed were proving to be a major annoyance to the English and Americans, but they’re far enough away that going to war against the Cursed would take a major effort. The Cursed are taking huge advantage of the flat earth rules and Davy Jones’ 6’s. The English have learned not to sail their ships too close to the edge on their trips to and from that northwestern island, which is why the Jarvis got flung next.

Speaking of the English, they launched a set of their native canoes from RtSS!

Here is the overall situation, with the Pirates, English, and Spanish having the biggest treasure fleets. You can see a lot of French trade currents, with the Pirates and Americans (Xerecs’ other fleets) laying some down as well. The Spanish and Cursed have gotten started with their navigators.
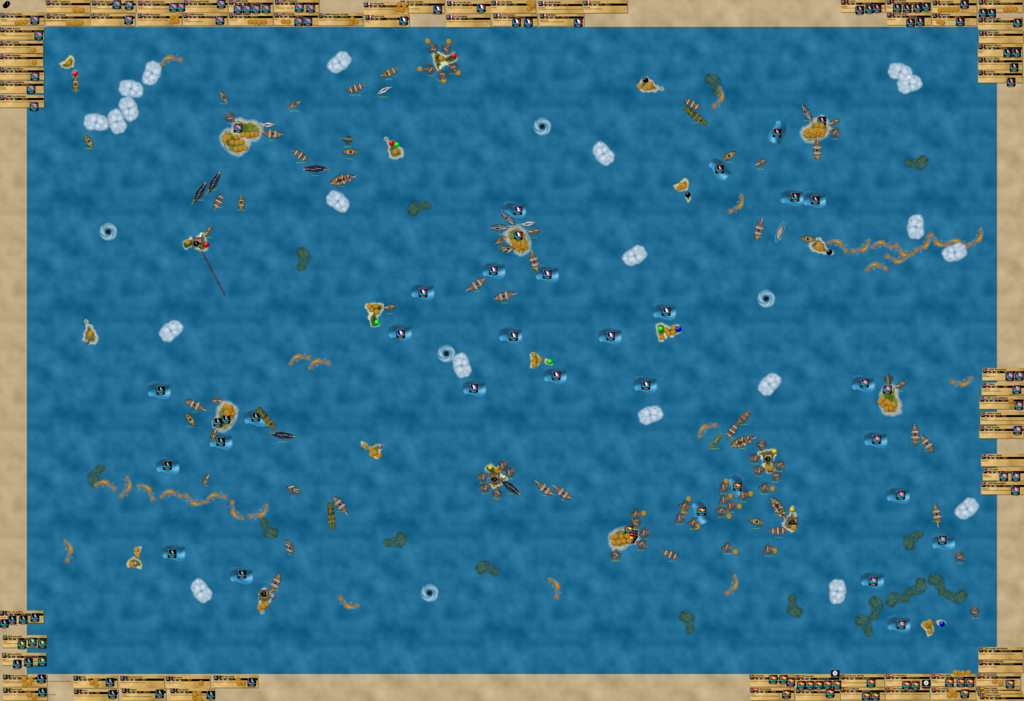
With all that was accomplished on this great day of Pirating, I thought it would be a great time for the first ship and point counts! For the ship count, each set of native canoes is counted as one ship, while forts are not counted. Forts were not included in the point counts either.

In the order of gameplay:

French: 10 ships, 120 points
Pirates: 12 ships, 180 points
Americans: 7 ships, 91 points
Spanish: 16 ships, 208 points
Cursed: 11 ships, 186 points
English: 21 ships, 266 points

Total: 77 ships, 1,051 points

That means that after just a few days of playing, this game has already reached the status of being a “huge” game! (at least 1,000 total points) Who knows how big it could get? 😀

2/22/2016

More turns have been played!

The Spanish had to pay for their mistake of launching two additional sets of canoes without having their associated chieftains on ships. The Spanish immediately purchased the Morning Star and San Jose, and a turn later paid a penalty of 6 gold. However, once that was figured out they had a new-record 5 sets of native canoes for 25 total in play! As impressive as it sounds it’s rather obnoxious to move them all each turn!

The Cursed continued to have great luck with Mimi and Tabby, throwing the Grand River onto a reef, where she lost 5 out of her 6 masts! This marked the 3rd fleet that the Cursed had annoyed with their antics. Nobody has declared war on them, partly because they’re in their northeast corner and haven’t been a huge detriment.
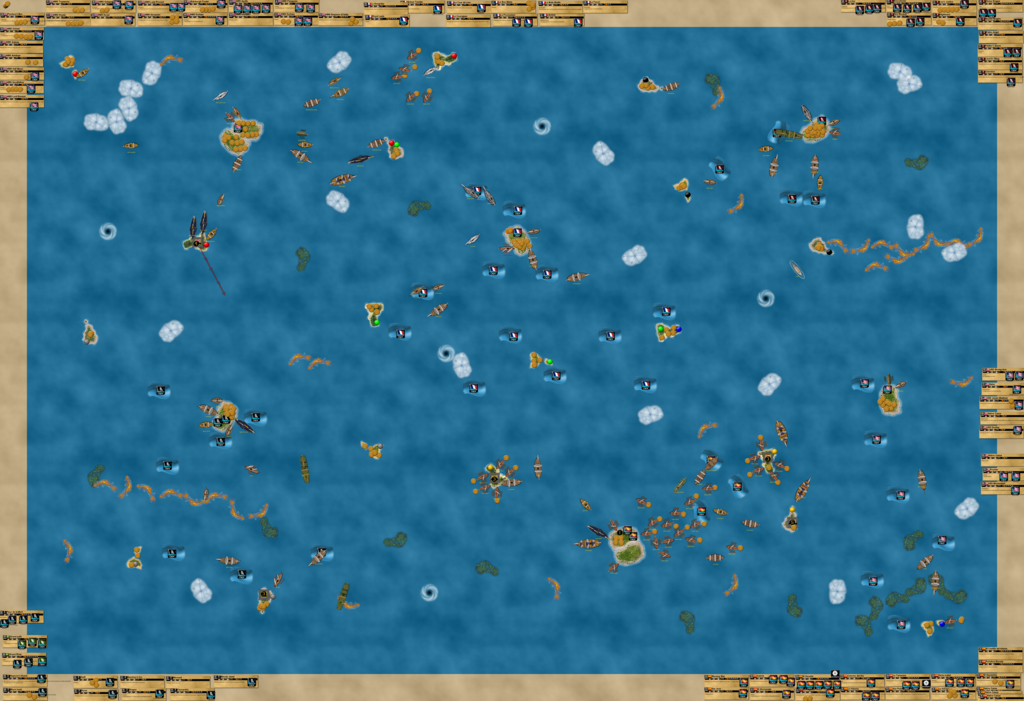
Soon afterwards, the French launched La Charlemange with Capitaine Arathiel (with oarsmen) and La Richelieu with Jean Desailly, captain, and oarsman. This gave the French their second major gunship along with the Possession, as well as one of those annoying crew with the same ability as the Cursed Mimi and Tabby.

The Americans launched the Louisiana with a captain and other crew.

Mimi and Tabby were successful in their rolls yet again! The Grand Path was chucked onto a reef but didn’t lose any masts. The American turtle ship Gator was yanked backwards away from the American HI. Davy Jones gave the submerged Locker (with Edward Low aboard) an extra action and rammed the mast off the Gator, and on the next turn she would have had a chance to possess GWL, the American Mycron! Alas, it was not to be, as the Gator rowed home with the help of a trade current and unloaded GWL. Still, it was a narrow escape for such an important crew, and another example of the gimmicky but powerful Cursed named crew.

Check out the Gator and Locker on the far right near the American HI. Also note the considerable gold piles on the Spanish, Cursed, and English HI’s.

Over the past two days of action, Cursed Captain Jack has rolled 6’s twice. This has greatly annoyed the fleets, as it severely hampers their efforts and essentially just makes the game more boring, as no abilities of any kind can be used. Much grumbling follows his antics….

The fleets continued to run gold, and the Spanish and English were eager to spend. The Spanish had already received a HI expansion and now proceeded to buy El Príncipe de Asturias and the Buscador, both with chieftains for two additional sets of native canoes! This brought them to a grand total of 7 sets of canoes for 35 canoes in play!

With little outward fanfare but much internal excitement, the English launched HMS Dreadnought! She was a long-term investment, and a great example of a naval deterrent. Her crew was picked from the best English sailors of old.

Carbon Charlie

George Anson
Collector’s Number: 044
Faction Affiliation: England
Rarity: R
Type: Crew
Point Value: 11

Captain. Canceller. This ship’s crew cannot be eliminated unless she sinks.

Job Hartop
Faction Affiliation: England
Type: Crew
Point Value: 7

Eternal. This ship gets +1 to her cannon rolls against any non-English ship. If this crew would be eliminated OR removed from the game, place it on your home island instead.

(And a helmsman and oarsman!)

The Cursed were the next fleet to make a major launching, and they bought a fog-hopping squadron! This consisted of the Sea Hag, Hangman’s Joke, Needle, Howl, and Alligator, all with captains and helmsmen.

Then the English spent some more gold. To celebrate the 10th anniversary of SCS, the English launched the Virtuous Wind, Sea Wind, Tiger’s Breath, and Sea Crane. They also got HMS Interceptor.
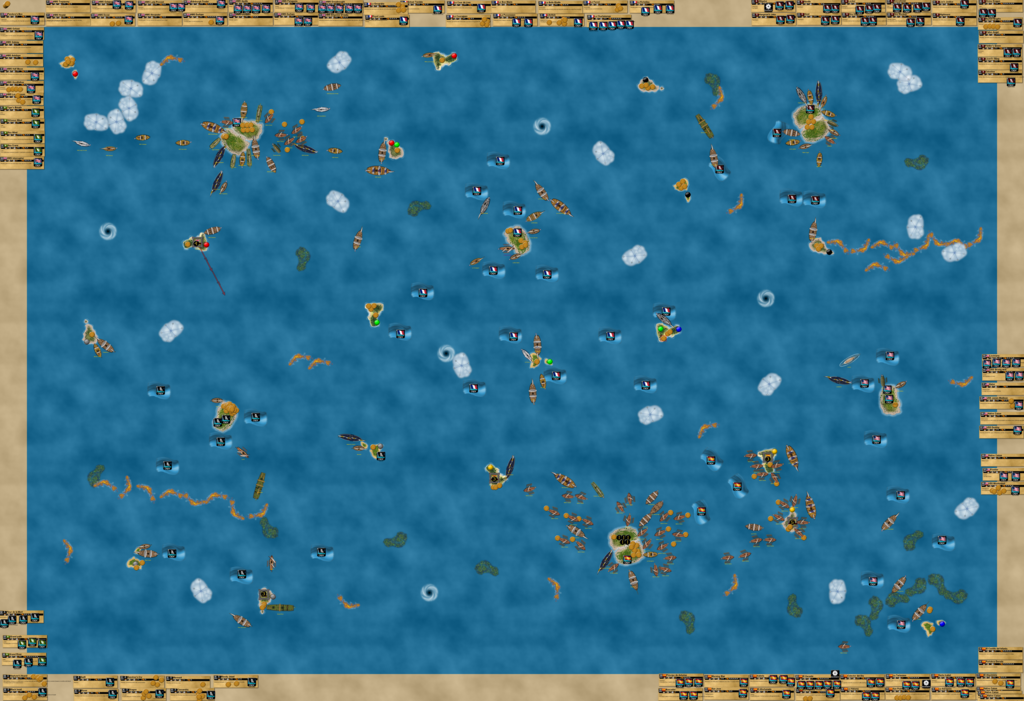
At the far right, notice the Locker lurking near the Gator and Destiny. Just south of the French home island, the Isabela and San Jose have docked at a wild island. The Dreadnought begins making cannons from 1 coins. The Cursed have made their displeasure with Cursed Captain Jack obvious, using Mimi or Tabby to hinder the Black Heart’s movement.
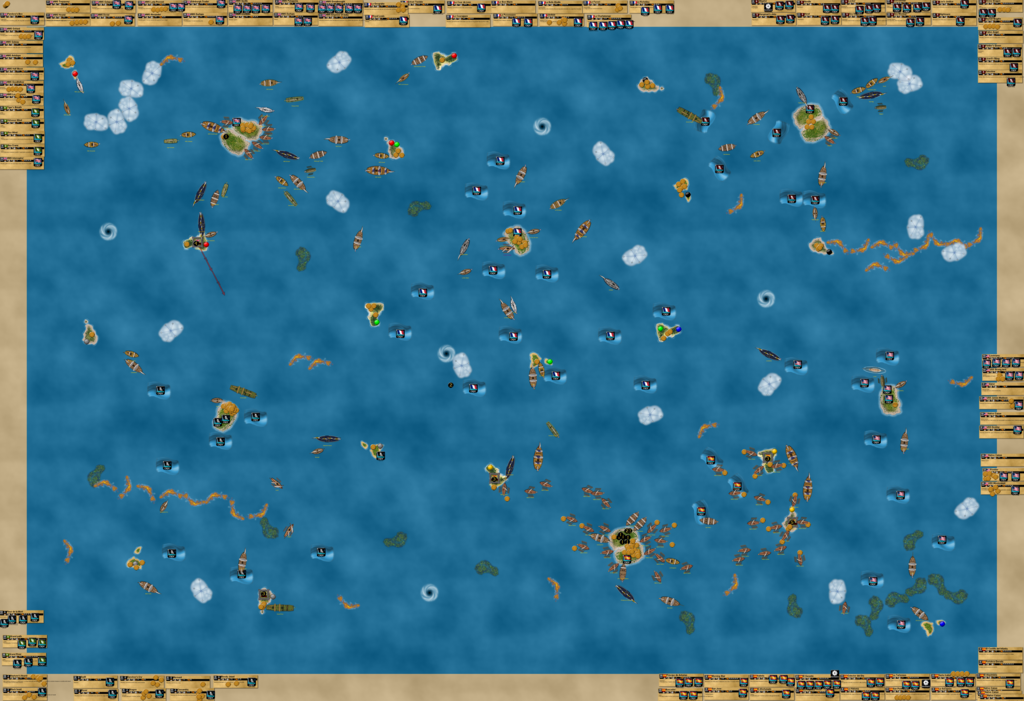
The last few turns of play were quite interesting. The French used Jean Desailly in combination with Deleflote to move both the Divine Dragon and the Locker! The French appeared to be helping their American allies. The Dragon wound up on a reef, losing almost all of her masts just like the Grand River. The Locker was moved away from the American home island temporarily. The Americans launched the Carolina with Commodore David Porter (captain + Broadsides Attack). Speaking of the Grand River, she was almost done repairing in the southwest at Dead Man’s Point.

The Spanish joined in on the SCS anniversary festivities, launching some turtle ships (Glorious Treasure, Noble Swan, Proud Tortoise). They also launched some other ships, among them the Espada de Dios (with Bianco’s Haulers, just like my latest fleet challenge entry), Bahama, Santa Lucia, and Villalobos. This and their giant native canoe traffic jam required them to get their 3rd and 4th home island expansions.

The Cursed purchased the Tenfold, one of El Cazador’s most famous custom ships! Her linked crew, Zedekiah, is Hostile: Cursed, so she’s only crewed with a helmsman for now.

Tenfold
Type: 3-mast hoist
Nation: Mercenary
Points: 22
Masts: 3
Cargo: 5
Move: S+S
Cannons: 4L,3S,3S
Link: Zedekiah
Mercenary, Hostile: Caesar, Hoist, Turbine. Two hits from the same shoot action are required to eliminate one of this ship’s masts. This ship ignores the first hit she takes each turn if she has all of her masts.

This was the first Mercenary ship in the game, but not nearly the first hoist. Speaking of hoists, the English finished their turn by launching the Maui’s Fishhook.

As the day’s action came to a close, the English and Spanish suddenly saw new French forts on the wild islands they were (respectively) sailing towards and docked at. This puzzled both nations, as neither had done anything hostile to the French whatsoever. As a matter of fact, the French remain the only faction not to be bothered by anyone, and they’re one of only two factions (along with the Spanish) not to be bothered at all by the Cursed. The English and Spanish are somewhat perturbed by this development, though it’s far from an act of open hostility.

The game has seen a lot of progress thus far. No factions have declared won on one another. There haven’t been many skirmishes. The Spanish established dominance over the pair of islands east of their HI, unseating the Americans in the process. The Spanish are feeling a bit chaotic and disorganized, and their admiral is a bit unsatisfied with their gold system. The Cursed managed to anger the English by sinking the Aberdeen Baron through Davy Jones commanding the Oxford, but the English got some revenge by sinking the Executioner (who came back via Eternal). The English have mostly gotten over the emotional loss of having the Sea Tiger and Discovery moved off the round earth. The Cursed have also caused a lot of tension with the Americans, moving numerous canoes and more importantly, the Wasp and Jarvis, off the ocean. With the still-recent Franco-American alliance, the Cursed appear to have a new enemy they didn’t intend to have, though the French haven’t actually engaged any fleets yet. The Cursed have also been at odds with the Pirates from afar (Cursed in the NE, Pirates in the SW). However, Cursed Captain Jack has caused rising tension in more than just one fleet.

The fleets are still feeling each other out and are mostly content to build up their navies, and it remains to be seen what long-term strategies they might have in mind.

2/23/2016

I’ve played my latest turn with the Spanish, Cursed, and English.

The Spanish had a mass departure of ships from their HI, and at the end of their turn they launched La Joya del Sol with Dominic Freda, just about completing their “gold factory” system of +1 and +2 gold bonus abilities.

The Cursed took their turn, with the Divine Dragon repairing and the Master Scribe placing another trade current. The submerged Locker was within S of the Carolina, and Edward Low tried to take possession of David Porter! With much drama a 5 was rolled, almost enough to succeed!

The Cursed made their intentions clear: the fog hopping squadron is coming to kill Cursed Captain Jack.

The English launched HMS Bath and the Growler with helmsmen.

HMS Growler
Type: 3-mast square rigged
Nation: England
Points: 10
Masts: 3
Cargo: 4
Move: L
Cannons: 3S,3S,3S
Link: None
Schooner. This ship gets +L to her base move if she starts her move action within S of an island.

2/27/2016

With much anticipation, play has resumed!

The Cursed had taken the Pirates by surprise with the fog hopping squadron! The Black Heart docked at the southwestern island and unloaded Cursed Captain Jack, to much shock in the Cursed fleet. Blackheart, the Pirate admiral, didn’t realize that enemy ships could pick up crew from islands, even if their abilities couldn’t be used. The Sea Hag used an extra action from Davy Jones to dock at the island and load up Cursed Captain Jack! With him on the island, he couldn’t use his Parley ability, but he also couldn’t be killed in a boarding party against the Black Heart. The Cursed couldn’t kill him immediately, so they settled for the next-best thing: torture, Cursed-style.

This whole saga ironically parallels the Pirates of the Caribbean movies in multiple ways. The Cursed are extremely annoyed with Jack, similar to Barbossa and company in Curse of the Black Pearl. They manage to essentially capture him, and in this case Jack has been taken to the brig, much like how he was a captive during the BP’s battle with the Interceptor. However, now it’s Davy Jones who’s after him, similar to the events of Dead Man’s Chest. Another parallel would soon emerge…

Here you can see the Sea Hag docked. The Alligator and Needle have stayed in the area to make sure the Sea Hag can get home safely, while the Hangman’s Joke and Howl have gone back into the fog, trusting the trio of Cursed ships to finish the mission successfully. At the right, the Fleur de la Mort and Grand River are a turn or two away from interfering, which would prove key.

On the Pirates’ next turn, there was a long series of exchanges between the admirals of the two fleets. The Black Heart’s crew loaded the guns and ran them out, but Davy Jones warned the Pirates not to shoot, and reiterated that the Cursed had not declared war on the Pirates. Blackheart (the Pirate admiral) didn’t want to listen, but consulted with Elizabeth Swann. Blackheart asked the Cursed if they would return Cursed Captain Jack to the Pirates in return for holding their fire, at which point the muttering started… part of the crew, part of the ship… part of the crew, part of the ship… part of the crew, part of the ship….

Swann told Blackheart there was no reasoning with the Cursed. There was clearly no getting Jack back. part of the crew, part of the ship

And with that, the Black Heart opened fire! She hit twice, but the deed was done (or not done… undone!).

The Pirates were not happy with the Cursed. They pulled a surprise of their own, launching three sets of their RtSS native canoes at the three wild islands the Cursed had been going to!

Tribal Chieftain & Native Canoes
RtSS-019
Pirate
Points: 11
Masts: X (Canoes)
Cargo: 1
Move: S+S
Cannons: 4S
Native Canoe. This ship can dock at an enemy home island and load one treasure. If able, she must leave on your next turn.

The Pirates apparently intended to rob gold from the Cursed by appearing on their doorstep! The ships housing the chieftains were no small threat either: HarbingerFool’s Hope, and the Black Pearl!

On the Cursed’s turn, the Alligator sacrificed herself to the cause of destroying Jack. She used her smokepot shot to create a smokebank that the Sea Hag and Needle ducked into. This left her vulnerable, and she was quickly sunk by the Fleur de la Mort and Grand River. The rare sinking further angered the Cursed, but it was necessary to complete the mission of killing Jack.

Here’s a closeup of the Cursed HI situation. At the bottom, the Executioner has gotten busy eliminating Pirate canoes, while the Divine Dragon finishes repairing at the home island. The hired Tenfold is immune to the canoes with her immense defenses, while reinforcements arrive in the northeast with the Hangman’s Joke and Howl returning from the short expedition.

The next turn saw a few intimidating launches.

French:
Le Superbe + Capitaine Arazure, oarsmen x5
L’Hercule + captain, helmsman, firepot specialist

Cursed:
Loki’s Revenge + Wraith, Keith Atkinson (one of Xerecs’ custom crew with the 3 point reroll ability), captain, helmsman, oarsman

The Spanish also purchased the first fort upgrade! Xerecs and I have agreed to fort upgrades, where a faction can pay 50 gold to upgrade their fort, which means that ships and crew can be launched there. The cost is so high because we want to mitigate the rich-get-richer/poor-get-poorer nature of campaign games, and because we want it to be risky, since the fort is still relatively fragile. Getting a fort upgrade can be a big deal. The Spanish chose Fortaleza Dorada, the southern island of the pair east of their HI. I don’t recall if I said it yet, but factions can also build up to two of the same fort, which the French have already done with Paradis de la Mer.

In the northeast, the Sea Hag and Needle return home from the expedition, with Jack aboard the Sea Hag. In the southwest, Mimi has moved the Harbinger onto a reef, but the new Pirate flagship wasn’t damaged.
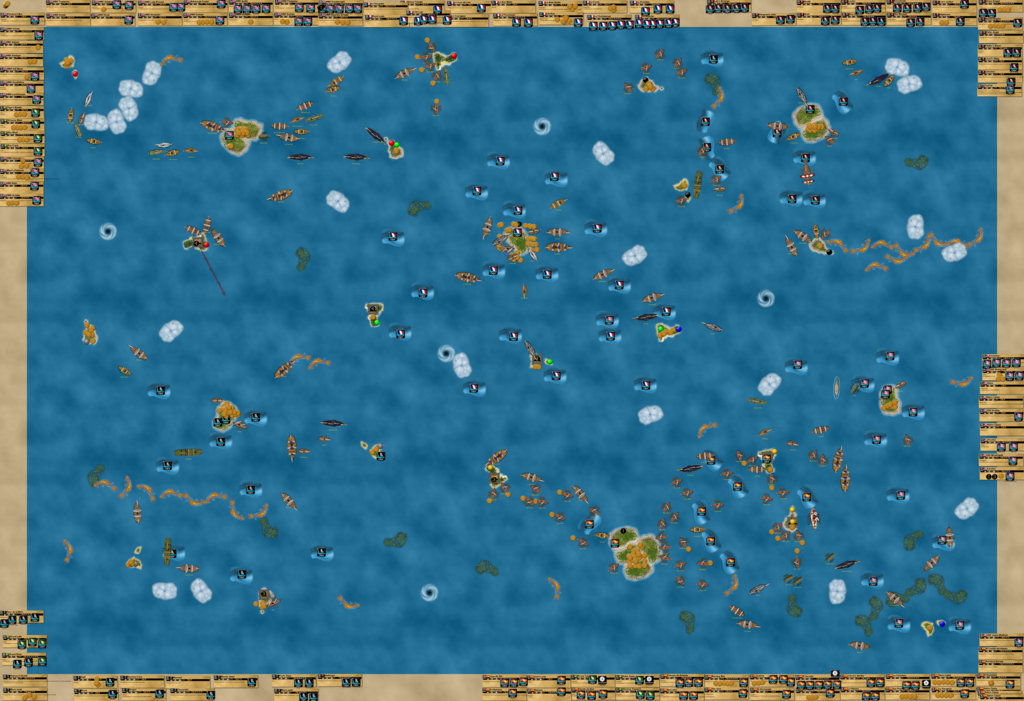
In the southeast, the Buscador uses her hoist to take gold from that island, the first time the Spanish have done so! The Spanish also have a group of ships nearing the American HI; however all appears well between the factions as they haven’t had any issues for quite some time now.

The English are finally satisfied with their gold system and appear to have begun saving gold.

Another closeup of the northeast. The Sea Hag has docked home to repair and unload Cursed Captain Jack, who can now be tortured on the Cursed HI. The Nightmare lost a mast to a canoe, but they’ve been mostly neutralized by the Executioner, Divine Dragon, and Loki’s Revenge. Only the northernmost set remains, and that’s been knocked down to 4 canoes after Mimi moved one off the map.
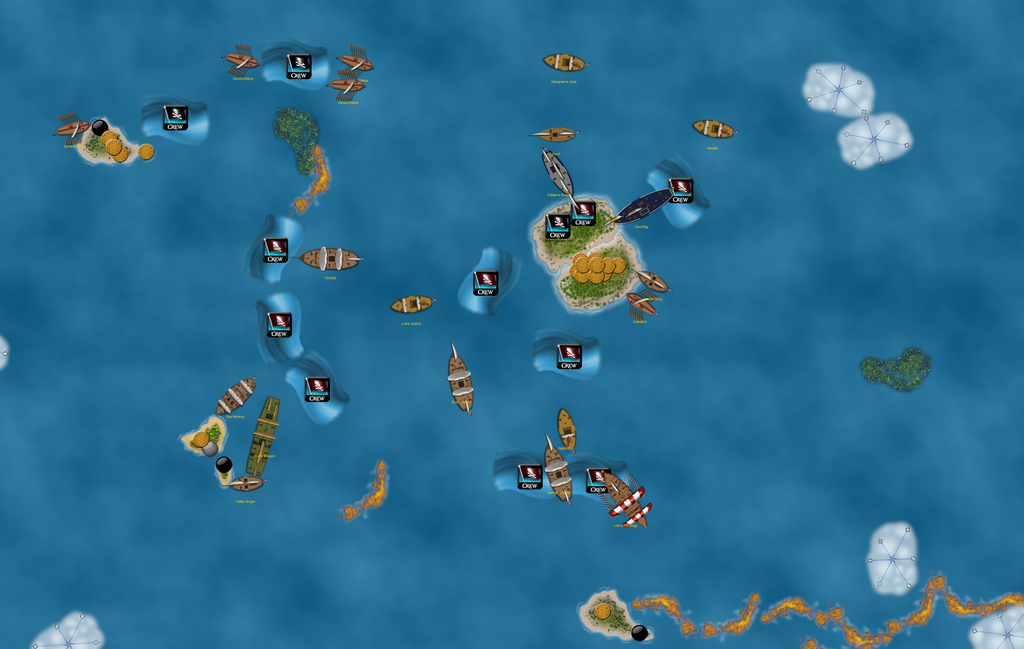
A treasure replenishment was done after that turn.

Another ship count!
French: 14 ships
Pirates: 15 ships
Americans: 8 ships
Spanish: 31 ships
Cursed: 17 ships
English: 29 ships

Total: 114 ships!

2/28/2016

After another turn, there are some launchings to report on.

The Americans launched the Ghost Walker.

The Spanish spent every penny in their possession (177 gold!) and launched a fire squadron!

La Ebro + captain, helmsman, exploding shot
(This ship was launched at Fortaleza Dorada with the new fort upgrade while the rest were launched at the Spanish HI.)

San Cristobal + Almirante Devante Del Nero, El Bombero, captain, helmsman, fire shot
La Cazadora + captain, helmsman, fire shot
La Sirviente + captain, helmsman, fire shot
La Voz de Dios + captain, helmsman, exploding shot, fire shot
El Argonauta + captain, helmsman, exploding shot, fire shot
La Resolucion + captain, helmsman, firepot specialist, fire shot
Soberano del Mar + Roberto Santana, navigator
El Picador

El Bombero
Nation: Spain
Points: 3
Link: None
Firepot Specialist. This ship gets +1 to her d6 rolls when attempting to extinguish a fire mast.

The Cursed got busy as well:
Dire Miralis
Nation: Cursed
Points: 14
Masts: 2
Cargo: 8
Move: S
Cannons: 2L,2S
Link: None
Longship. Secret Hold.

Lamprey
Nation: Cursed
Points: 8
Masts: 2
Cargo: 3
Move: S+L
Cannons: 5S,5S
Link: None
Longship.

Ghast’s Bell (a custom from selvaxri)
Point cost: 12 (For now)
Masts 1
Cannons 4S
Cargo 3
Movement L
Ghost Ship.
If this ship ends her turn in a fog bank, on her next turn she may use her move action to move out of any other fog bank in play.
This ship may take a shoot action after moving out from a fog bank.

The Dire Miralis had a captain and helmsman aboard, while the Ghast’s Bell had a captain, helmsman, and smokepot shot, to replace the sunken Alligator.

3/1/2016

The game is absolutely exploding!!

THE SPANISH DEMAND PAYMENT!

After gathering a squadron of warships near the American home island, the Spanish have finally revealed its purpose! A tribute demand! The Americans had little choice but to capitulate, as the Spanish have a much larger fleet and the Americans were powerless to resist. However, the Americans were able to tensely negotiate that the tribute payment would happen on the American turn, rather than the Spanish turn.

The Spanish appear to be the fleet to beat! At the right you can see their canoes going home after receiving the tribute from the Americans. The fire squadron has sailed out.

The French launched La Corse with Amiral Stephan Dupuy, who became their first in command.

The Pirates were the next fleet to launch, with the Flying Dutchman and the Carnage.

Carnage
Link: One-Handed John
Pirate
Rarity: CLE
20 pts
Masts: 4
Cannon: 3S-2L-2L-3S
Cargo: 4
Movement: S+S
Hidden Gold (This ship has 2 extra cargo Spaces that may only be taken by TREASURE. This ship is considered to have the Limit keyword ). If this ship has a captain crew, she gets +1 to her cannon and boarding rolls, and is considered Eternal.

The Spanish weren’t done just yet! They purchased a second fort upgrade for 50 gold and used it to launch four new gunships at El Castillo del Infanta, northwest of their HI! These gunships included two new ones from Pirates of the Great Sea (Estrella de la Manana and Hurucan), as well as the Granada and Reconquistador.

The Cursed were showing their truly evil side. They docked the Loki’s Revenge at their HI, unloaded Wraith and Keith Atkinson, loading up their prisoner Cursed Captain Jack, who had been tortured repeatedly. The Cursed were ready to complete their mission. With no fanfare whatsoever they executed Jack to give the Loki’s Revenge an extra action, which she simply used to redock at the HI. The Cursed made a final insult to his legacy by not even using him as well as they could have. Cursed Captain Jack is gone, and Davy Jones is happy.

However, that’s not all the Cursed were doing. They proceeded to launch one of the nastiest combinations from the brand-new Pirates of the Great Sea set:

Farore’s Cataclysm
Link: Vaati
Cursed
Rarity: R
19 points
Masts: 4
Cannon: 2S,3L,3L,2S
Cargo: 4
Movement: S+S
Ganonite. During your shoot actions, each time this ship hits an enemy ship, you may move that enemy ship S in a direction you choose.

The linked crew has already undergone some revisions:

Vaati
Link: Farore’s Cataclysm
Cursed
12 points
Ganonite. Helmsman. Once per turn instead of giving this ship an action, roll a die. On a 1-2, move any ship S. On a 3-4, move any ship L. On a 5, move any ship S and place a Fog Bank within S of that ship (it remains until your next turn). On a 6, move an enemy ship L and eliminate a mast or a crew from that ship. Enemy Turbines may be moved S by their controller after being hit by these effects, but this is not considered an action.

Dark Knights (Crusher Corps)
Cursed
7 points
Reroll. When this ship hits an enemy ship, you may eliminate one cargo from that ship.

The Knights were brought aboard specifically to reroll Vaati’s powerful ability, which was the perfect complement to the L-movers Mimi and Tabby. This gave the Cursed a crazy arsenal of weapons that seems to expand with each passing day.

This shows the developments; notice the Spanish forming a short line of battle with the first ships of their fire squadron.
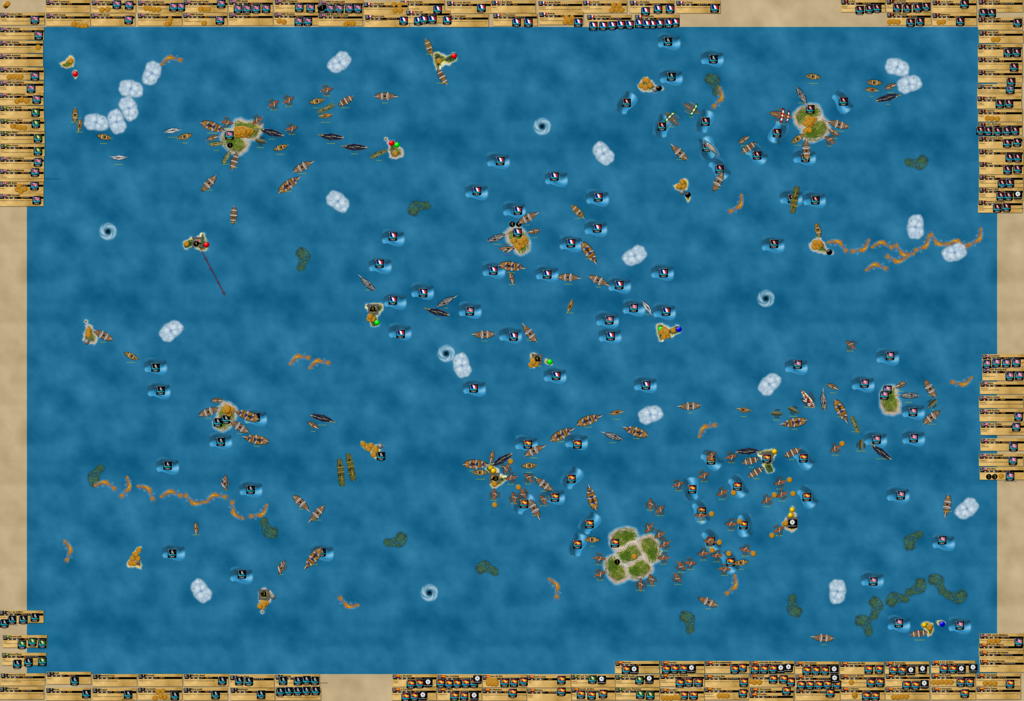
The Pirates launched the Deliverance with Captain Nemo!

The Spanish then noticed something suspicious. They were aware of the French-American alliance, but what they saw puzzled them. The Spanish Admiral hailed Amiral Stephen Dupuy and asked him what was going on. The French were honest and told the Spanish that Le Favori was taking gold to the Americans. Apparently the Americans were going to use the gold to finance an operation against the Cursed, as the Cursed had dogged the Americans in the early game and seriously hampered the potential growth of the US fleet. The Spanish admiral aboard El Garante told the French that as soon as the gold was in American hands, the Spanish would seize it as another tribute payment. The French replied that this would not be happening, and Le Superbe and L’Hercule were sailing close behind the Favori to provide support. The Spanish seemed adamant that the gold would belong to them.

Spain was extremely confident in her young navy, with a more veteran squadron to the east and the newer ships gradually coming up from their HI in the south. Some of the eastern squadron was sent west to meet up with the fire squadron, and in the following picture you can see the crossing of their lines. To top it all off, the Spanish even launched more gunships, with El San SalvadorLa Cordoba, and El Montenez being berthed at El Castillo del Infanta.

The Cursed launched as well. They continued their demonic rise, purchasing two horrible new gunships, one custom (the Phantom) from El Cazador and one from Xerecs (Hell Hound).

Ganon’s Phantom
Cursed
Rarity: U
17 points
Masts: 4
Cannon: 2L,3S,3S,3S
Cargo: 2
Movement: S+L
Ganonite. Schooner. Fog Hopper.

Hell Hound
Cursed
16 points
Masts: 4
Cargo: 4
Cannon: 2S-3L-3L-2S
Movement: S+S
If this ship wins a boarding party she may eliminate all of the other ships crew.

Both ships had captains and helmsmen, but the Hell Hound carried a new horror, also courtesy of Xerecs:

Admiral of the Skelds
Cursed
6pts.
Link: Skelds
Ability: Eternal, as part of a move action this ship may initiate a boarding party from S away without having to ram, the boarded ship may not use any boarding bonuses.

flavor-This foul creature appeared with the hordes of Skelds, and is the only one who can command them.

Skelds
Cursed
5pts.
Link: Admiral of the Skelds
Ability: This ship gets +1 to her boarding rolls for every crew on her.

flavor- A new breed of foulness, the Skelds are decaying sailors animated by dark fire, with a craving for destruction.

This was part of the Cursed strategy, which was unsurprisingly a gimmick. The Hell Hound would go out and murder entire crews on enemy ships, after which Wraith (on the Loki’s Revenge) would try to reanimate them with the help of Keith Atkinson. It was a brutal and evil plan, concocted by none other than Davy Jones himself.

In the meantime, the Executioner and Locker headed west…

The Louisiana and Carolina, the only captained American ships on the seas, had been heading west through French waters for quite some time now. This wasn’t altogether surprising, given the French-American alliance. However, the English were surprised when they continued even further west, as the Carolina reached English waters. Lord Cutler Beckett, aboard the English flagship HMS Apollo, hailed Commodore David Porter on the Carolina. Porter responded that he sought an audience with the Lords, Beckett and Mycron. The English were curious as to what had brought the Americans so far west! It was especially interesting given their precarious situation back home with the greedy Spanish. Almost immediately, Mycron said that the English were at peace, and desired to remain so. However, Porter responded that the problem laid not with Spain, but with the Cursed.

This got Mycron’s attention. The Cursed had messed with the English quite a bit, almost since the very beginning. Davy Jones had used his power to turn the English on themselves, and with the help of the Executioner’s arrival, sink the Aberdeen Baron, one of England’s finest merchant ships. They had also used Mimi and Tabby to move the Sea Tiger and Discovery (two of England’s fastest ships) off the map and into oblivion. Recently, they had moved English gold runners into fog banks, delaying their progress. Porter said that the Americans had already formed an alliance with the French, with the primary purpose of stopping the Cursed madness. He asked Mycron and Beckett if they would be willing to participate. The English responded with a yes, but that their participation would be on their terms; they would send what ships they could, when they wanted to send them. Still, it was a huge moment in the game, as the ice had been broken between factions. Porter announced that the Americans had a gift for the English, which he would bring to Ramsgate. As the conversation ended, it was clear that the First Coalition had been formed!

Things were in motion, but there was more than one aggressive nation on the seas…

THE SPANISH DEMAND PAYMENT! To much eye-rolling in the French and American fleets, the Spanish abruptly demanded another tribute! Another lengthy discussion followed, with the French being the voice of reason. Dupuy assured the Spanish that they would receive their tribute payment, but that it would come from the wild island northwest of the American HI (where the Frontier was sailing), not from the Favori’s cargo hold. The Strongarm used her hoist to load the Favori’s gold, and the French had officially provided monetary assistance to the Americans. However, the Spanish weren’t quite satisfied. Once again they warned the French and Americans that the gold would be paid as tribute to the Spanish. The Spanish also claimed that the gold was now in Spanish waters. Dupuy retorted that the area was marked by American trade currents, to which the Spanish replied that they didn’t matter because Spain had the dominant naval force in the area.

The tension was obviously escalating. The Spanish had a point, but they had also sent a good amount of their eastern squadron west to join the fire squadron. They now only had 3 captained ships stationed off the American HI: the Tartessos, Principe de Asturias, and Glorious Treasure. However, they had also blatantly sailed three HI raiders (Espada de Dios, Bahama, and Santa Lucia) near the American HI for some time now, making it obvious that they would get gold whether the Americans cooperated or not. To the west, the still-growing Spanish battle fleet was impressive, with a line of ships stretching almost from El Castillo in the west to El Puerto Blanco in the east.

The Spanish, probably taking in an average of at least 25 gold per turn, launched yet another gunship at the Castillo, the Santa Catalina.

The Cursed continued to make purchases, buying another ship for their fog hopping squadron. However, this time that ship was a submarine:

Interloper
Type: 3-segment submarine
Nation: Cursed
Points: 20
Masts: 3
Cargo: 3
Move: S+S
Cannons: 2S,2L,2S
Ganonite, Submarine, Ghost Ship, Fog Hopper.

This underwater demon carried very interesting new named crew:

Agnahim
Cursed
10 points
Ganonite, Captain, Eternal. When this ship sinks an enemy ship (or causes it to scuttle by fire masts), place all of its treasure on your home island.

Dark Knights (Sniper Corps)
Cursed
8 points
Marine. This crew’s gun has the Extended Range keyword.

The English finally spent some of their saved gold! On the previous turn, Davy Jones had forced the Durham to fire upon the Sea Wind, dismasting her! Seeing the Executioner and Locker approach from the east, the English decided it was time to take action. They launched HMS WestminsterHMS Granville, and HMS Ajax, all with captains and helmsmen. In addition, the Apollo weighed anchor and sailed east. After 10 turns, Carbon Charlie’s job was temporarily complete, having given HMS Dreadnought a whopping 10 extra cannons, so she now carried 15!

Notice the new launchings, as well as the Spanish battle fleet north of their HI. The Strongarm has loaded gold from the Favori at the right.
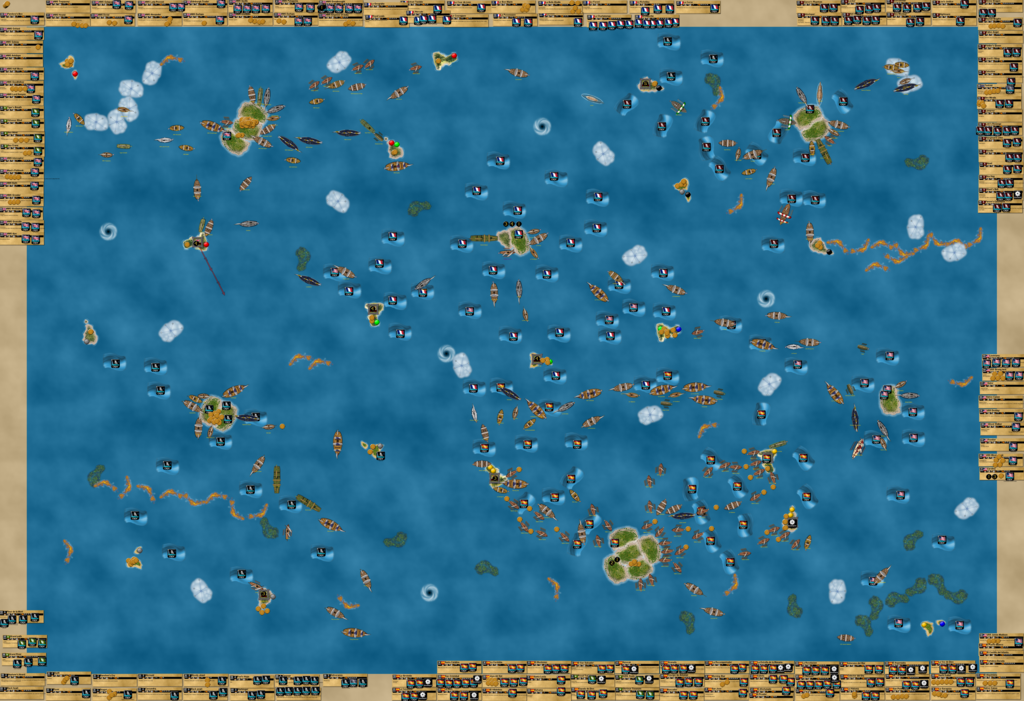
With the new First Coalition between the Americans, French, and English, the French continued to prepare themselves for the Cursed! They commissioned RHS Farore, introducing Hyrule to the game! To keep it somewhat more historical and because Hyrule isn’t an official faction, each fleet can only have 3-4 Hylian ships in their navy at any one time. The Farore is a 6 masted junk similar to the Grand Temple, and she was joined by the new Le Gaule, a 5 master.

The Pirates continued running gold, and seemed to be the only faction not really at odds with anyone.

The Americans took their turn, and then all eyes turned towards the Spanish.

THE SPANISH DEMAND PAYMENT!

With yet another tribute demand, there was only so much the Americans could offer and promise. They reiterated that the Spanish would be getting all the gold from the island NW of the American HI, but the Spanish weren’t satisfied. Knowing of the French-American alliance, the Spanish felt they were being deceived. The Spanish admiral said once again that the Americans would fork over the gold the French had given to them. Once again the French said it wouldn’t happen.

Tense negotiations continued, and the Spanish grew angrier and angrier. France and America were getting in the way of Spain’s ultimate goal.

The Spanish admiral aboard El Garante considered his options, but in the end he knew what to do. He had waited long enough for this moment, ever since the French had built a fort on a wild island the Spanish explored.

To the west, the Granada suddenly surged forward! Her guns were run out! With a defiant battle cry heard by the thousands, she opened fire on Paradis de la Mer!!

VIVA EL IMPERIO ESPANOL!

THE SPANISH DECLARE WAR ON THE FRENCH!!!!!

With a huge roar the Spanish fleet sailed north! The fort’s defenses were tough, but Spain had an overwhelming numbers majority in the area. The Granada and LE San Cristobal weakened the fort, and the Sirviente and Estrella teamed up to destroy it! The San Cristobal used the same action twice to continue sailing northwest, where she fired upon the Bon Marin, sinking her easily! Her final shots set the Libellule aflame, and the fire squadron was in full sail! They finished their turn by launching 4 new ships at the Castillo, and finally their imperial desires were made clear!

The Battle of Paradis de la Mer has begun! The Franco-Spanish war has commenced, and it’s the first declaration of war in this game.

Here is the entire ocean again, with chaos erupting in the center. The English got both of their Admirals’ actions, and used them in conjunction with Lord Mycron to give double actions to all three of their new gunships, whose crews are eager to protect English trade from the Cursed. The Executioner and English are both out for revenge, in a way, since the English couldn’t sink the Executioner for good but Fantasma is angry his ship was defeated in the first place.

What on earth could happen next? Only time will tell, though another report will be coming soon with a ship and point count.

3/3/2016

After another epic ship and point count, here is the game size:

French: 16 ships, 294 points
Pirates: 18 ships, 355 points
Americans: 9 ships, 133 points
Spanish: 51 ships, 752 points
Cursed: 24 ships, 484 points
English: 32 ships, 489 points

Total: 150 ships, 2,507 points

This game is already close to becoming the biggest game of all-time (Economy Edition at 2,846 points), and we’ve nearly just started! Also, Economy Edition had a max of 181 ships in play, which when multiplied by the average points/ship (2,846/163=17.46) gives an approximate size of 3,160 total points. As a result, I wouldn’t feel confident claiming a game as the biggest in history until it reaches around 3,400 total points. The massive totals made me want to do a bit of analysis.

First off, the Spanish have almost 30% of the overall points in play, while the Americans have just over 5%. Even if you take out all 7 sets of native canoes, the Spanish would still have a dozen more ships than the English, the next-largest fleet. In addition, the Spanish now become the second-largest recorded fleet that I’ve ever played in a game, being surpassed only by the giant Pirate fleet of Economy Edition, which had 778 points in play at the end of turn 33 of that game. However, Spain’s 51 ships surpasses that fleet’s total of 45, though the Pirate fleet would grow MUCH larger soon afterwards, with 62 ships after turn 38. Then the Pirates continued launching even more, until their fleet was almost unmanageably big, with an astronomical, mammoth size of 104 ships after turn 43. I’m putting this in perspective because although the Spanish fleet is huge, one mustn’t forget past epics (and if you multiply those 104 ships by the average points/ship number based on turn 33 (2,846/163=17.46), the Pirate fleet could have theoretically reached over 1,800 points!!).

Here are the numbers on points per ship, rounded to the nearest whole number:

French: 18 points/ship
Pirates: 20 points/ship
Americans: 15 points/ship
Spanish: 15 points/ship
Cursed: 20 points/ship
English: 15 points/ship

It comes as no surprise that the Cursed have the highest average points per ship (before rounding), though I’m a little surprised by how high the French number is and how low the Spanish number is (partly due to the canoes). The Pirate number is so high because it feels like the only gunships they’ve bought have been 5 and 6 masters with tons of crew on them. The French were the most peaceful nation, but with the first war of the game directly involving them, the Pirates become the current “most-passive” faction if you will.

Also, after the recent weekend of action, I felt the urge to reveal my strategies for the three fleets under my control. Little did I know how much they would change over the course of these eventful days! Now they are different, so I’m not really disclosing any information that could be useful to Xerecs, whose past strategies I’d love to see if they were recorded.

Strategies of 2/26
Spanish: Try to cut off American access to the island in the southeast. Demand payment from the Americans, and threaten with display of force.
(Mission mostly accomplished; cutting off American access to that island was quickly changed based on other things that I won’t reveal.)

Cursed: Kill Cursed Captain Jack. Be extremely aggressive and likely lash out against the Americans and/or the French. Continue the gold system, but buy for war.
(Again, mostly accomplished, but the Cursed still aren’t aware of the First Coalition against them (consisting of the Americans, French, and English).)

English: Be cautious and controlled. Continue launching gold ships until the system is massive and the fleet can begin saving gold. Do not engage enemy fleets unless they become hostile. Give the Dreadnought at least 10 extra cannons.
(Mission accomplished, though the Cursed have forced their hand.)

3/9/2016

The action has continued!

The French are the first fleet to go each turn, and their counterattack crippled the San Cristobal, Granada, and Hurucan. However, the fire on the Libellule spread and she was doomed.

The Americans used GWL to give an extra action to the Strongarm, who docked home the French gold gift, denying it from the Spanish! True to their word, they launched the Enterprise with Jonas Richman and other crew, with the likely intent of going after the Cursed.

Disaster for the Spanish! Both the San Cristobal’s and Sirviente’s fire shot equipment blows up! The Montenez and Reconquistador are ineffective, though the Charlemagne is doomed by the flames.
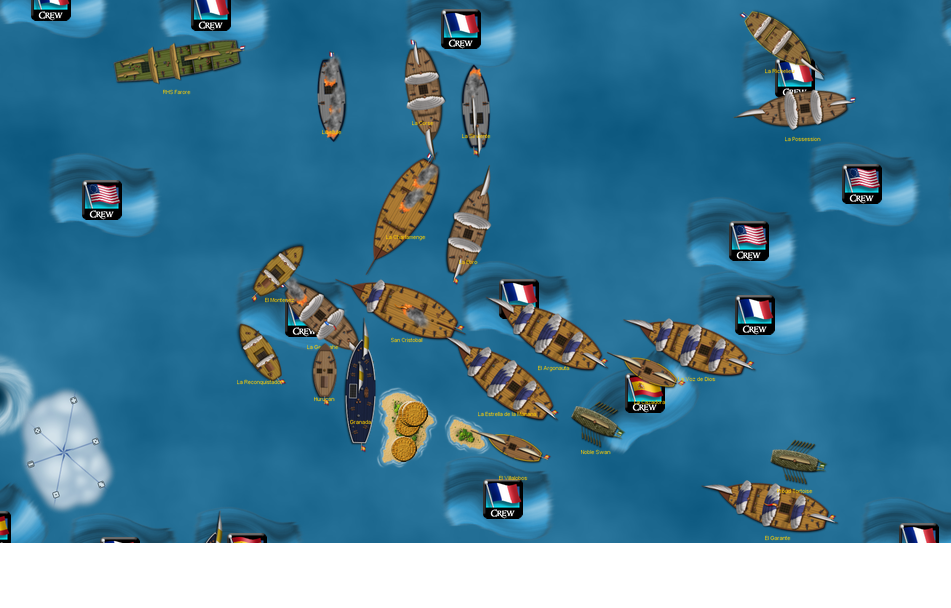
However, another fight has broken out in the northwest! The Executioner reached English trade and started disrupting it! A canoe was eliminated, but the Executioner was just a distraction! Suddenly, the Ghast’s Bell popped out of a nearby fog bank! Using her unique ability, she shot a smokebank out right next to some English ships! Then the hordes came forth! The Sea Hag, Ganon’s Phantom, and Needle all appeared through the new fog bank! This was disturbing to the English, since they had spent the game peacefully running treasure. Now the Cursed were at their home island!

However, the fog hoppers hopped out too close to the English. On their turn, the English were able to dismast 3 of the 4 ships and cripple the Needle! The threat was a dangerous one, but the English had the gunships and crews available to put it down before it did any serious damage. In addition, the Granville and Westminster teamed up to hit the Executioner twice.

Here’s the whole ocean:

As the battle in the center raged, the Spanish gunners weren’t as accurate as their French counterparts. Numerous ships had their fire shot backfire, causing chaos. The San Cristobal, Sirviente, and Hurucan were all sunk in short order. The Spanish, with their great gold system, were eager to replace their losses, hiring the Tasmanian DevilForwardRevolution, and El Algeciras towing Diablo.

A broad shot of the entire French/Spanish situation. At the left Spanish gunships are unable to touch the western Paradis. The battle rages in the middle, but more Spanish ships are on the way. To the right, the Superbe, Hercule, and Tartessos are three major ships yet to enter the battle.
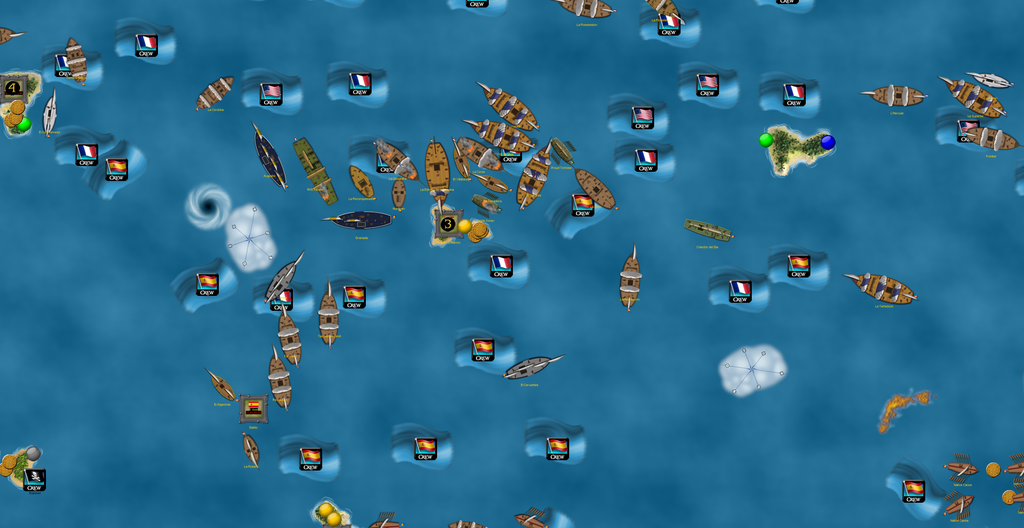
The Farore gets involved, but fires are burning on her decks and throughout other French ships.
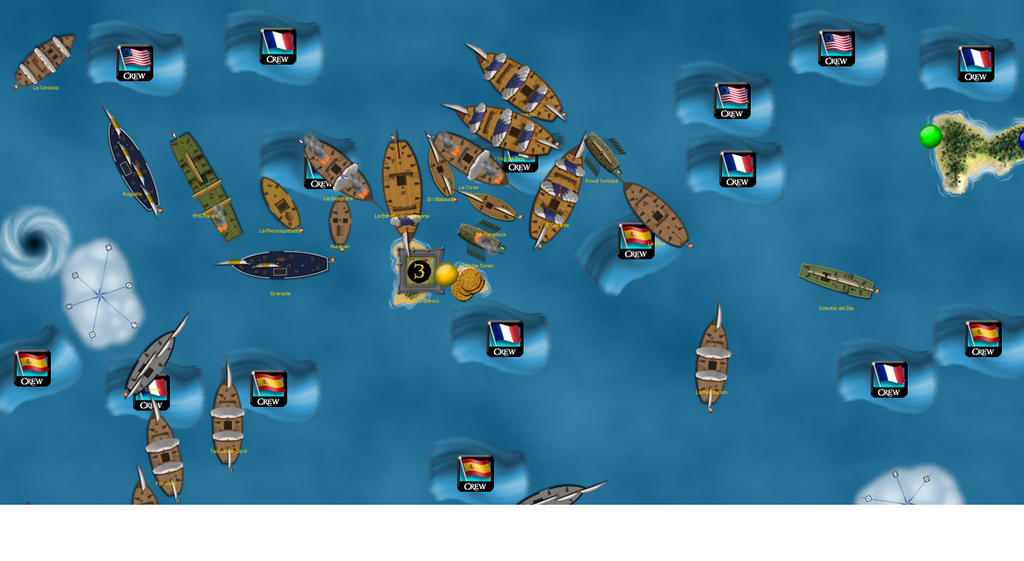
The Pirates continued their trend of launching 6 masted junks, hiring the Grand Temple and Katsura-chanKian Ng, helmsman, oarsman.

This picture only shows a few developments; the Spanish have launched a super-sniper and a medical barge:
El Neptuno + captain, helmsman, exploding shot, fire shot, chain shot
La Manila + captain, helmsman, shipwrights x3, oarsmen x2

In addition, the English captured the fog hoppers the Cursed had sent to attack them.

The French soon lost the Charlemagne, but replaced her with Le Bonaparte and El Cazador’s custom French native canoes, which have S+L speed and 3L guns, in addition to the Captain keyword built-in. The canoes were launched at the western Paradis.

This picture shows the chaotic melee. The Spanish have built their second El Puerto Blanco on the island that used to have Paradis de la Mer, as the Spanish try to establish themselves in French waters. The Noble Swan has already docked there to repair a mast she lost to her own fire shot. Using an extra action from Deleflote, Le Gaule has hit the Spanish hard, but on the Spanish turn she came under extremely heavy fire. The Augusta, a ship purchased to expand the new Spanish Empire, was fortunate to have a captain aboard. Roberto Santana (aboard the Soberano del Mar docked at her HI) gave the Augusta +1 to her cannon rolls, and most of them hit! The Villalobos did more damage, while the Cazadora finished off La Corse. Slightly north of the Corse, the Possession has the upper hand against the Argonauta, but El Garante, the Spanish flagship, has sailed up on her starboard quarter. Astern of the Garante, the Proud Tortoise and Colector del Dia have taken out 3 of L’Hercule’s masts and set her alight. However, one mast standing meant that she could fire all of her cannons next turn. To the east of her, the Cursed have joined the fray on the outskirts! The Hell Hound used an extra action from Davy Jones to surprise the Superbe, crippling her and eliminating all of her crew! This was rather exciting, as it was the first instance of crew being eliminated specifically for the purpose of feeding Wraith (aboard the nearby Loki’s Revenge). Both Wraith and Captain Davy Jones (in the Pirate fleet aboard the Black Heart) were able to possess a French oarsman.

The Pirates built the Devil’s Maw on the wild island east of their home island, while the Americans launched the Algiers.

The English continued to bring back their Cursed prizes, and the Executioner was captured!

On the following turn, the French managed to sink the Argonauta! However, their new canoes were relatively ineffective. Much to the dismay of the Spanish, the Hercule and Possession dismasted El Garante! This was a morale blow for the Spanish, seeing their flagship in such dire circumstances. In the end, however, it spurred them on with an even greater hatred of the French than they already felt. The Spanish quickly launched the Trinity at the end of their turn, stationing her at the Castillo west of their HI.

The Cursed purchased some cheap firepower in the form of the Baba Yaga, Last Hope, Whydah, and Mourning Star.

The French were being absolutely worn out, with the Spanish enjoying a significant numerical advantage. The Spanish had a great turn, knocking out 4 of the 5 French canoes, dismasting the Possession and Superbe, and crippling both Le Bonaparte (through a team effort involving the Santa Catalina, Canela, Cordoba, and Tasmanian Devil) and La Richelieu. The Hercule was sunk by the Augusta, which was quickly turning into a Spanish hero ship. To the southeast, the Cervantes has removed the American and French explored markers from that wild island and put a Spanish one there instead, further signalling the expansion of the Spanish Empire. Four Spanish gunships repair at the new Puerto Blanco, and it appears the flagship, El Garante, is safe for now.

This isn’t all of the action either; stay tuned for more!

3/12/2016

The Spanish flagship, El Garante, was soon dismasted by the Possession. This was a blow to Spanish morale, but it also served to make the Spanish hate the French even more, spurring them on. The English have towed most of their Cursed prizes back home to repair.
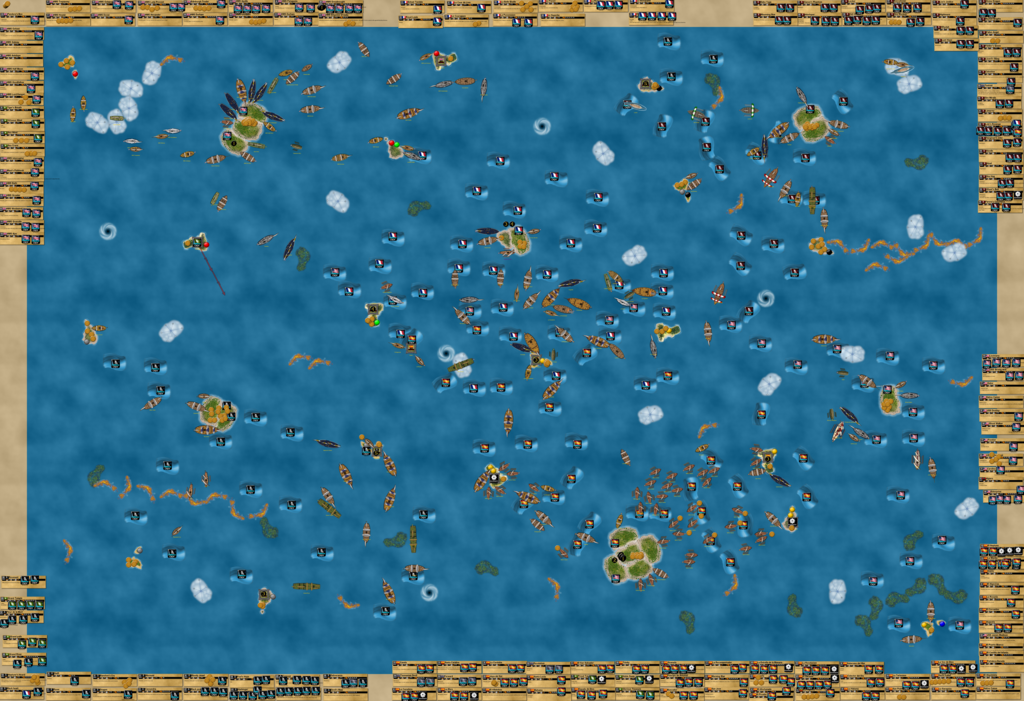
The Spanish continued to press their attack, sinking the Superbe and Richelieu. The Villalobos rammed the Enfant Terrible, dismasting her and eliminating Deleflote, one of the most important French crew! The French launched the eternal Tepant, but they had already lost the battle. To make matters worse, the western Paradis de la Mer was destroyed by a combination of Spanish ships and the Diablo flotilla. The Rosario quickly used Alejandro Malaspina to plant the Spanish flag upon the island. In a morale victory, the Noble Swan started towing El Garante, and it appeared that the Spanish had saved their flagship! Another handful of Spanish ships dismasted the Favori, one of the only remaining French gold runners.
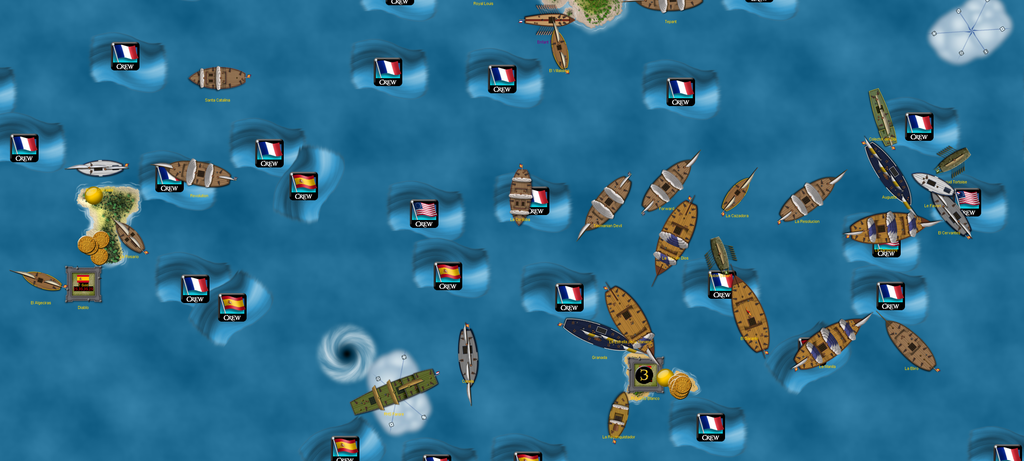
In a huge move, the Cursed Hell Hound used the help of a trade current to catch the Enterprise, board from S, and eliminate all of the American ship’s crew! The new Cursed gunships have set a southerly course. In another big move, the remainder of the Cursed’s fog hoppers have hopped out of a fog bank near the Pirate HI! The Interloper is looking to use Agnahim’s new ability to aid the Cursed gold effort, while hurting their old enemy the Pirates (though actually one of their newer enemies haha).
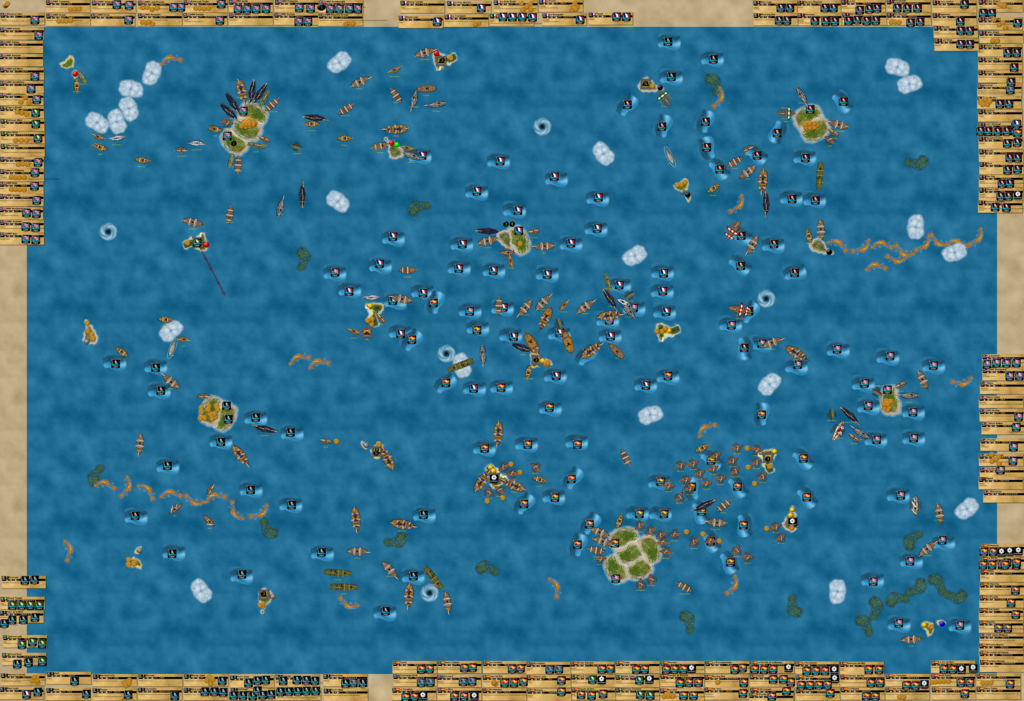
Seeing an intimidating Pirate fleet assemble off the western side of their HI, the Spanish realized that they were stretched too thin. They decided to have a considerably better Home Fleet for home island defense. They started this new plan by launching 5 ships at the end of their turn. One of them was my custom Nautilus (basically faster with better cannons for more points) with canceller Christian Fiore, a captain, helmsman, shipwright, and oarsman. They also got La Academia and stationed her at the Castillo northwest of their HI, where she couldn’t be shot at as long as she stayed docked at the fort. This gave the Spanish some extra defense for their vulnerable gold runners, in addition to the fort itself and the Trinity. They also launched a few other ships at their HI: the 2 masted El Toro, and the treasure-seekers Ventura and Halcon. Knowing UT’s had just been put into the mix for the first time, the Spanish were eager to launch the ships with such a valuable spying ability, which they would use to look for enemy ships with UT’s. These launchings beefed up the Spanish Home Fleet, but they knew they would need more. Fortunately for them, they had done well to put the gold system in place early on so they could afford to launch multiple ships each turn.

The Cursed launched the Pyre with Papa Doc, who would look to join the Locker and Edward Low in the quest to possess crew. The Jikininki also made an appearance, with the Cursed looking to use her to feed eliminated crew to Wraith. They also built the Dark Knights’ Tower, a custom fort from El Cazador.

The English launched HMS King Edward and the Metal Dragon.

This picture simply shows the new stuff.
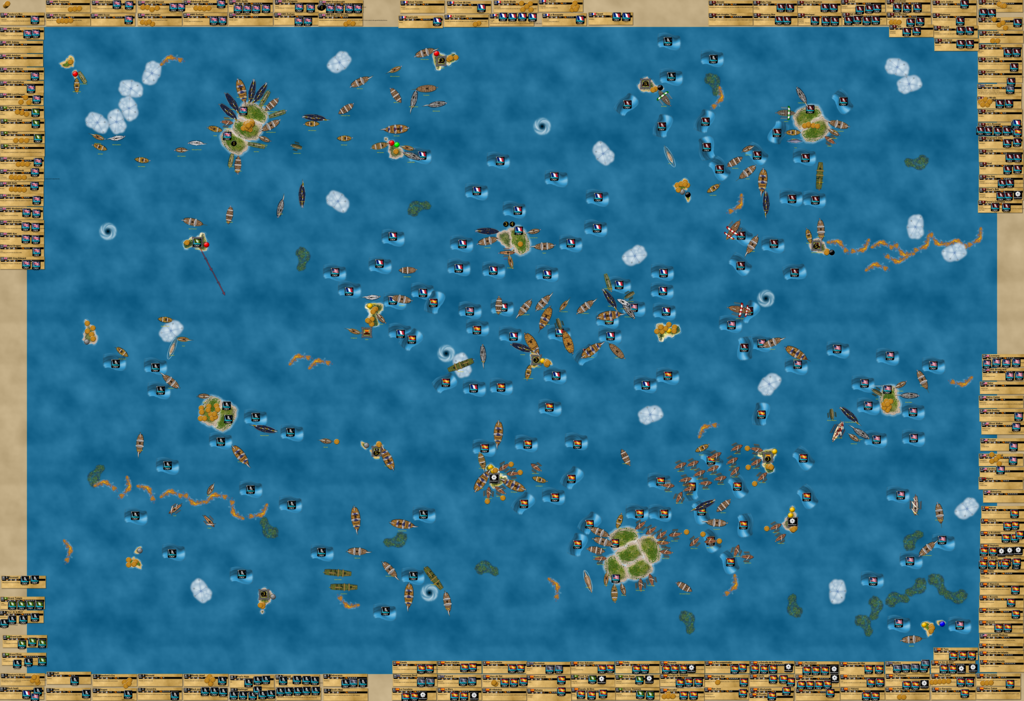
The French weren’t nearly done yet! The Bonaparte was busy repairing, while the Farore made it out of the fog but couldn’t quite make it home. This actually meant she was completely doomed, since the strong Spanish presence in the area threatened to take out any ship not docked at the French HI. However, there were signs of hope for France. The Tepant ventured out and damaged the Forward and Cazadora. Two French gold runners were almost home with treasure. However, the Spanish had captured Le Favori, and some of their biggest ships were repairing at the nearby El Puerto Blanco just to the south.
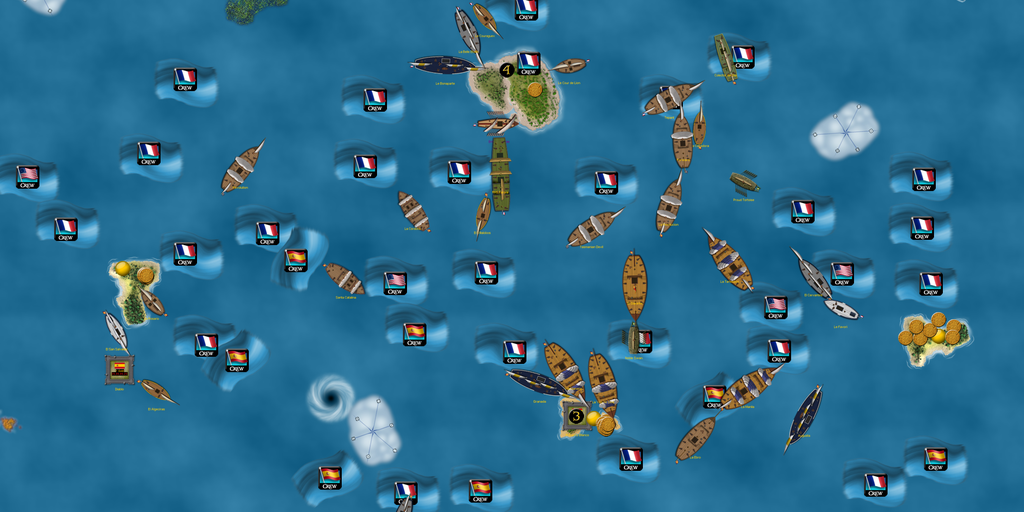
This shows the whole ocean from the same point in time. At the left, the Interloper has sunk the Bloody Jewel (and Jean Laffite), giving the Cursed all of her gold! However, they were about to pay for it dearly, especially after the captains of the squadron forgot to move their ships back into the fog and to safety! Two devastating new customs have been launched: the Pirate ship Smoke’s Hand (one of my customs which lets you use certain keywords of your choice) and La Muerta (a custom of El Cazador similar to HMS Endeavour).

The Enterprise was pulled away from her HI by Vaati! This allowed the Hell Hound to sink her! The Americans were really struggling, as they had launched the Enterprise for the express purpose of getting revenge on the Cursed. However, in an ironic twist, the Enterprise had been quickly sunk by the Cursed without doing any damage in return! In the meantime, the Spanish had taken another tribute payment.
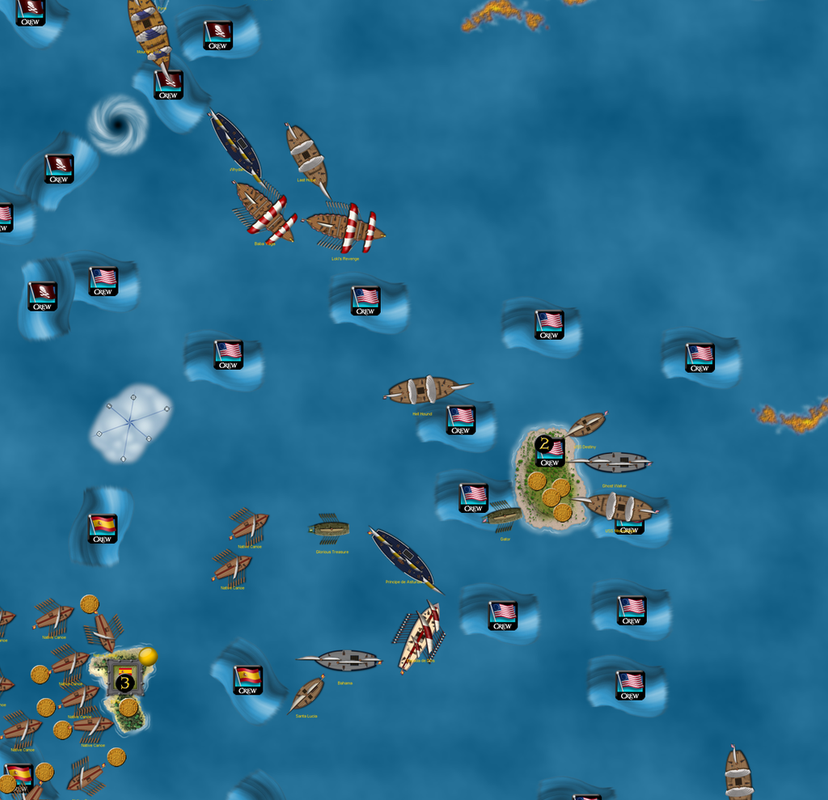
The Spanish continued to build up their relatively new Home Fleet. Most of their energies had gone north to win the Battle of the Two Paradises, but now that the main battle was over, some ships were able to return to traditionally Spanish waters. Four gunships sailed off the northwest coast of the Castillo, while the submerged Nautilus and La Muerta stood guard closer to home. The Spanish Empire was in full swing.

Up north, the situation was a bit of a mess, but the Spanish had more than enough ships in the area to have things mostly in their control. Some ships were still in the early stages of towing derelicts and repairing from the battle, while north of El Puerto Blanco, healthier ships continued the fight against the French. At the left, the Revolution and Cordoba frantically try to establish a close blockade, while the north and east sides of the French HI see cannonballs flying everywhere. The Colector desperately tries to cripple the Courageux before she can dock home with gold, but the Frenchman’s defensive ability thwarts her plan. In the east, the Tepant is surrounded by Spanish gunships. This would seems to spell the end for her, but Lenoir cancelled the Resolucion’s captain, giving the Spanish only 4 shots on the Tepant. 3 of them hit, including the Proud Tortoise’s fire shot. However, the Tepant’s one mast meant she could return home on her turn to repair. At the upper left, note the escaping Royal Louis and the American ships Louisiana and Carolina, who are making the long journey home after their trip to see the English. That trip to form the First Coalition against the Cursed has mostly been for nought, as the English would have defended their gold runners from the Cursed fog hoppers regardless of any coalition agreement. The Americans, French, and English are allied against the Cursed, but the Spanish onslaught and tribute demands (as well as the Cursed themselves, who have had no contact with the Spanish whatsoever, whether friendly or not) have led to almost nothing being done against the Cursed. In short, the Cursed hate everybody, while the powerful Spanish seek only to expand their empire and conquer the entire sea. Those two factions have really made things difficult for the French, Americans, and to a lesser degree the English.

Another report coming soon!

3/12/2016

After another handful of turns, a few interesting events have unfolded.

The French had some of their ships flee north of their home island! However, the Spanish were relentless! They pressed their advantage, dismasting the Royal Louis and Courageux! The Lyon and Bonaparte also took damage, but quickly returned home to repair. Despite the nearby French HI, the Spanish are still winning the War on France. The American ship Louisiana hit the Revolution with chainshot, so the Spanish decided to punish the Americans (still not declaring war on them of course, as they are essentially a vassal (pun intended) or tributary state to the Spanish) by dismasting the schooner with the Revolution and Villalobos, who was still plaguing the French. At the upper left, note how close the battle has come to English waters. The first UT’s have been discovered! The English had a horrible run of UT’s, finding Wolves on their southern and eastern wild islands. They also found Rats and Monkey’s Paw. They hired Lt. Nigel Hardwicke and Major Peter Sharpe to hunt the Wolves. Hardwicke was successful at Ramsgate, but in this picture you can see that Sharpe has missed his first shot aboard the Galapagos. This delayed the treasure replenishment for an extra turn or two, since the English have the most efficient gold system in the game and by FAR the most gold saved up. At the upper right, it looked like the Royal Louis was headed northeast towards Cursed waters in search of gold (she was originally headed towards that island at the left before the Wolves were found on it). The French are really in trouble, since the Spanish have total control of their southern front; they’re running out of places to run.

In the southwest, the Pirates turned their gunships west and/or towards their home island. Whether or not they were planning to attack the Spanish gold system, the new Home Fleet seems to have provided some deterrence. In other news, the fog hopping squadron was nearly lost! The Cursed are discovering how ineffective fog hoppers generally are, losing the Hangman’s Joke to Pirate gunships. As stated earlier, the Cursed forgot to move the three ships for a turn, which cost them the Joke and some masts. The Howl was nearly sunk, saved only by Vaati and her fog hopping ability. The Interloper was sunk, but Agnahim’s Eternal keyword brought her back to the Cursed HI, where she is now fully repaired. This means that the Cursed have only 2 fog hoppers left, with the rest either sunk or captured by the English.

Speaking of the English, Lord Cutler Beckett and Commodore David Porter had another meeting, which could possibly be their last. Both men agreed that it would be best to send the captured fog hoppers back against the Cursed, to give them some of their own medicine. It was up to the English how they want to do this; they talked about having them pop out near the Cursed HI, or assisting the Americans at their HI. Either way, the English aren’t worried about losing the prizes, since they’re not English ships and the English crews aren’t comfortable on the strange ships in the first place.

On their turn, the Spanish announced that they had made a decision. The Americans were essentially like a colony to them, with tribute payments hindering the growth of the tiny American fleet. However, the Spanish could not afford to fight the approaching Cursed. Interestingly, the Spanish are the only fleet the Cursed have had no contact with, and therefore the only enemy they haven’t made. Neither faction is interested in fighting the other right now, though that could change. In addition, the Spanish had just received yet another tribute payment, which actually filled up the cargo holds of both the Principe de Asturias and Espada de Dios, the two principal Spanish enforcers still in the area. Wanting to get the gold home, the Spanish decided to pull out their eastern squadron, not wanting to fight/defend on three fronts at once. The Cursed know they’ve made too many enemies, but the chaos in the center and the general complacency of the English and Pirates have let the Cursed run free to do whatever they want. It appears they want to eliminate the Americans… the Cursed are coming! The combination of Mimi/Tabby/Vaati yanked the Ghost Walker away from her HI repeatedly, and the Hell Hound capitalized, killing GWL (American Mycron) and eventually sinking the Ghost Walker! The Cursed took it even further, using the Last Hope to ram the Destiny at her HI and eliminate the single American navigator. Other Cursed gunships head south.

Here you can see all of the aforementioned developments, with the Spanish leaving and the Cursed overrunning the area. I’m not a huge fan of trade currents, so I put Celestine’s Charts into the mix! The Americans were the first to find it, and it really cleaned up their area, knocking out all of their trade currents! This made the American situation even more deplorable, with no American trade currents, only one ship docked at their HI, and Cursed gunships sailing freely around the waters.

With the War on France mostly under control, the Spanish are for the first time seeing a relatively major influx of ships coming home. This is a welcoming sight to them, as they save gold and plan for the future. The French and Americans have become desperate, but both factions have plenty of fight left in them. The Pirates continue to amass an impressive fleet, while the Cursed have invaded American waters and seem to have no enemies intent on destroying them. The English have been saving for what seems like ages, and are still the most peaceful faction. The next few turns will no doubt see very interesting developments!
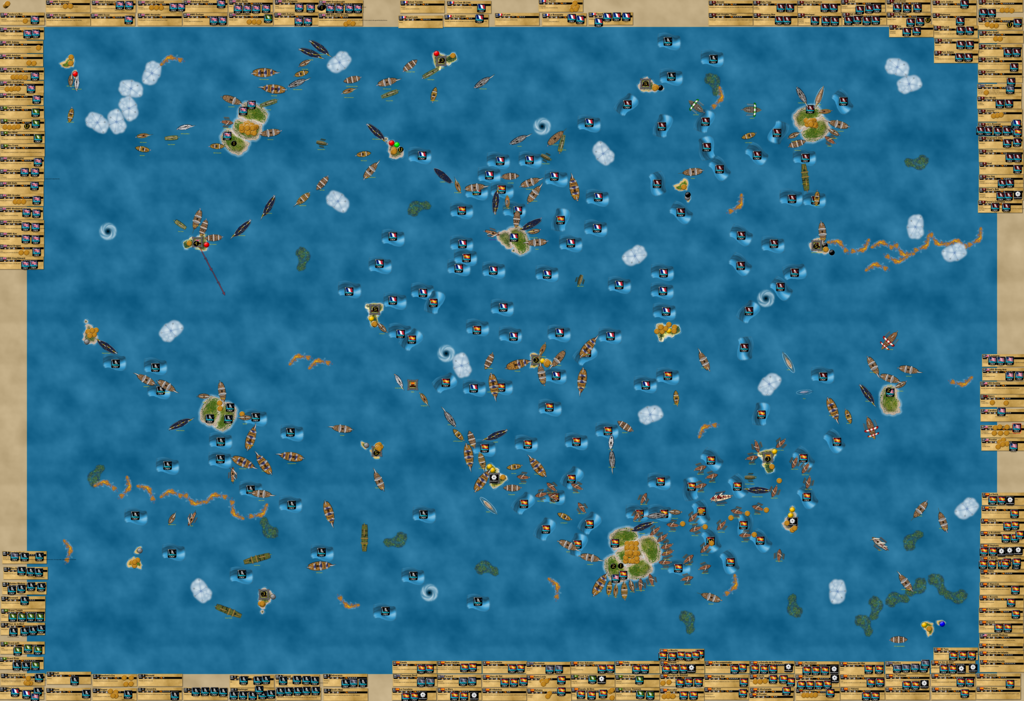
3/15/2016

Here, the French have been soundly beaten north of their HI. The Royal Louis was captured, and some Spanish ships have turned for home. Some more UT’s have been found, and the English have fully repaired their fog hopper prizes and can use them as a squadron against the hated Cursed. The Spanish found Celestine’s Charts, eliminating all of their trade currents! However, they responded with a long-term plan coming to fruition: The Spanish Inquisition!

Inquisition squadron (174 gold)
El Cristal del Obispo + The Inquisitor, Castro (SAT), captain, helmsman (28 )
La Catedral del Mar + de Silva (BA), captain, helmsman (23)
Santos Romanos + captain, helmsman (16)
El Rafael + captain, helmsman, musketeer, shipwright, fire shot (24)
El Rosal + Duque Alfonzo de Castilla, oarsman (22)
Armada (9)
El Extremadura + Guillen, helmsman, oarsman (23)
El Tirador + captain, helmsman, grape shot (14)
Martillo de Dios + captain, helmsman, shipwright (15)

This picture shows the Cursed and English turns. The Cursed have continued to send their battle squadron south, further and further into American waters. The Poor Adams has stolen the only coin on the American home island. After it was placed on a different wild island, the Cursed also found Celestine’s Charts! Not only does the UT level the playing field, but it also makes the ocean look much better and less convoluted.

This gives an idea of the giant size of the Spanish fleet, with not all of their ships shown here. (Ship and point count coming in the next few days!) Even with 5 home island expansions, there is almost no space to dock at the home island, especially with the launch of the Inquisition.
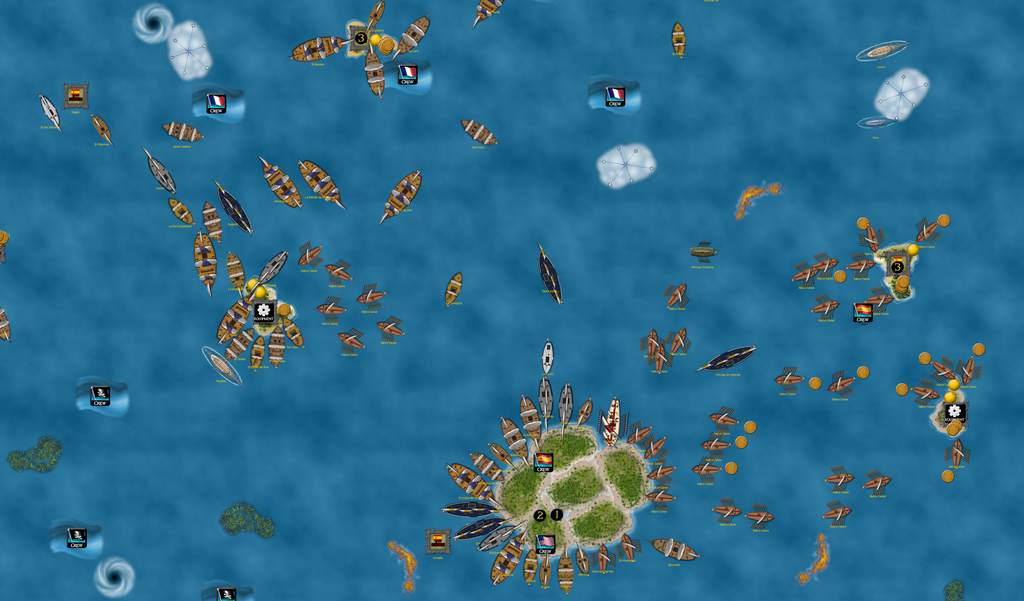
The French continue to fight, but the odds are against them. The Tepant and Enfant sail out, but both are quickly dismasted. Most Spanish ships not running gold are generally headed west. However, the real excitement here lays to the southeast! The English loosed the captured fog hoppers on their former owners, helping the Americans as promised! Mycron gave the Ganon’s Phantom an extra action, but she only hit once on the Baba Yaga. In addition, Vaati pulled the Destiny away from her HI, and the Last Hope sunk her! This left no American presence at their own home island.

MUCH more to come!

3/16/2016

The French sailed the Tepant and Enfant Terrible back home to repair, while the Lyon sailed out in search of gold. She wouldn’t find any however, because the Colector del Dia quickly shot off two of her masts. It was obvious that despite the considerably diminished Spanish presence in the area, Spain was not willing to let France go easily.

The Cursed caught up to their captured fog hoppers, and the Baba Yaga blasted them to pieces while the Jikininki rammed the Algiers.

The Spanish had been amassing their home fleet and heading west for a while now, and finally they continued their imperial conquest!

THE SPANISH DECLARE WAR ON THE PIRATES!!

Similar to the Battle of the Two Paradises, the Spanish got things started by attacking the nearby Pirate fort. As a result, this battle will probably be known as the Battle of the Devil’s Maw. The San Salvador was the first ship in action, quickly followed by other Spanish gunships. However, most Spanish ships couldn’t reach the battle area right away, but the Spanish had already decided that it was the best time to strike. Xerecs would later reveal that the Pirates had been planning to attack the Spanish (which prompted the Home Fleet’s construction), but different things got in the way.

The Carnage and Fleur de la Mort were quickly dismasted, but both fleets had a lot of ships on the way. This has all the makings to be one of the all-time great battles!

Here you can see the battle’s start at the Devil’s Maw, with tons of Spanish ships trying to flood the battle area from the east.

Here you can see how crowded the battle area in the southwest is going to get. The English have docked home their flagship, HMS Apollo, in order to give her extra cannons just like they did with the Dreadnought.
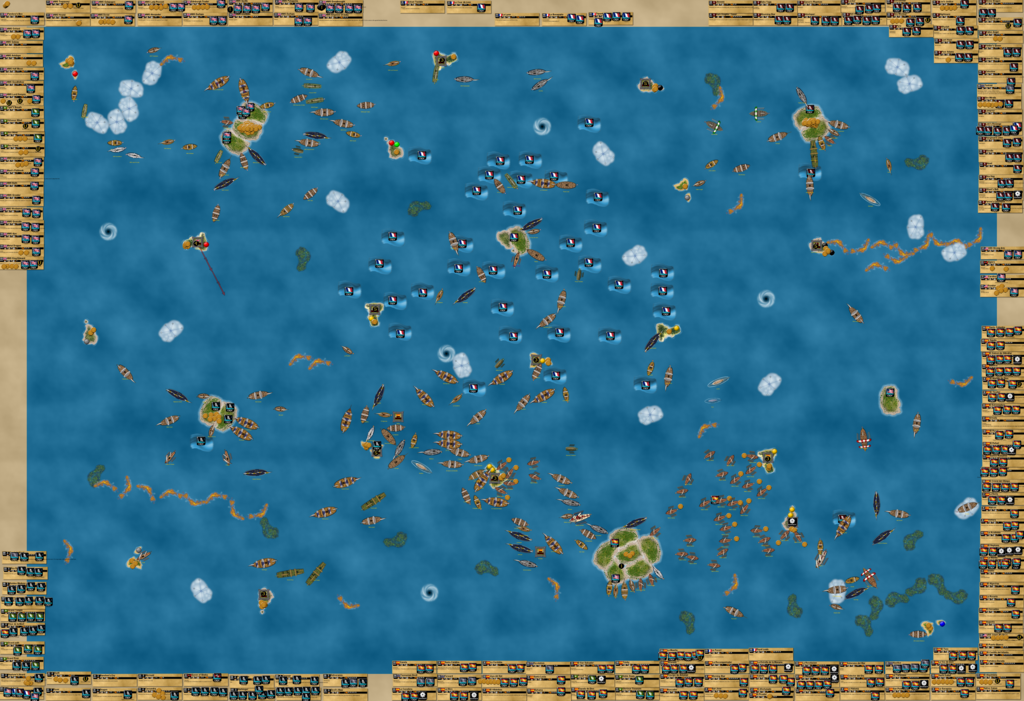
The French continue to fight, taking a mast off the Colector and Tartessos. Spain is sending a lot of the veteran ships of the French war and the blockade southwest towards their new enemy.

The Spanish/Pirate war is just beginning! Here, both factions have taken another turn. The Pirates sunk the Habana, while also doing major damage to the Canela, San Salvador, Neptuno, Augusta, and Reconquistador. The Grand Path, Smoke’s Hand, and Black Pearl used double actions to get right in the thick of it. The Spanish counterattack was successful, eliminating all of the Devil’s Maw’s cannons. Christian Fiore (on the submerged Nautilus) cancelled the Carnage’s ability (which provides her with Eternal when a captain is aboard), allowing the Spanish to sink her. The Augusta missed against the Fool’s Hope, but the Neptuno helped her out with an improbable 2/2 with both exploding and fire shot, setting the big ship ablaze!

In the far north, the Carolina has been joined by HMS Granville and HMS Westminster to finally take action against the Cursed as part of the First Coalition. The captured Executioner is on her way to join them, and she would make very fast progress in the next few turns due to Fantasma’s SAT.

The Spanish have sunk Le Lyon, knocking the French fleet down to just 4 ships. The Americans only have 3 ships left after the Mourning Star sunk the Algiers. The Mississippi and Frontier are hiding in fog banks from the Cursed, who were finishing off the captured fog goons sent there by the English. The Ganon’s Phantom sank, and the Cursed had sailed almost to the southeastern-most part of the sea in their assault on the Americans! The Cursed have sent the Locker and Pyre west, where some of the faster and more durable Spanish gold runners have gone north to explore formerly French islands. Ominously, the Interloper and Howl have moved into a fog bank near the Cursed HI, as the remains of the fog squadron are ready to hunt again. The Spanish rolled successfully to scuttle the Royal Louis; although they wanted more ships, she was holding the Tartessos back from more important matters. The Spanish continued to clear out of “French” waters while the Apollo and Carbon Charlie looked to eliminate bad UT’s the English have found to give the Apollo extra cannons (turning a negative into a positive).

The second war of the game continues! The Spanish have sunk the Smoke’s Hand and dismasted the Fool’s Hope. The Grand Path and Black Pearl were both burning fiercely. The Canela and Reconquistador were towed a bit out of harm’s way; the Spanish know that to achieve the size of the Spanish Empire they foresee, they will have to save as many ships as possible to keep up their huge fleet.
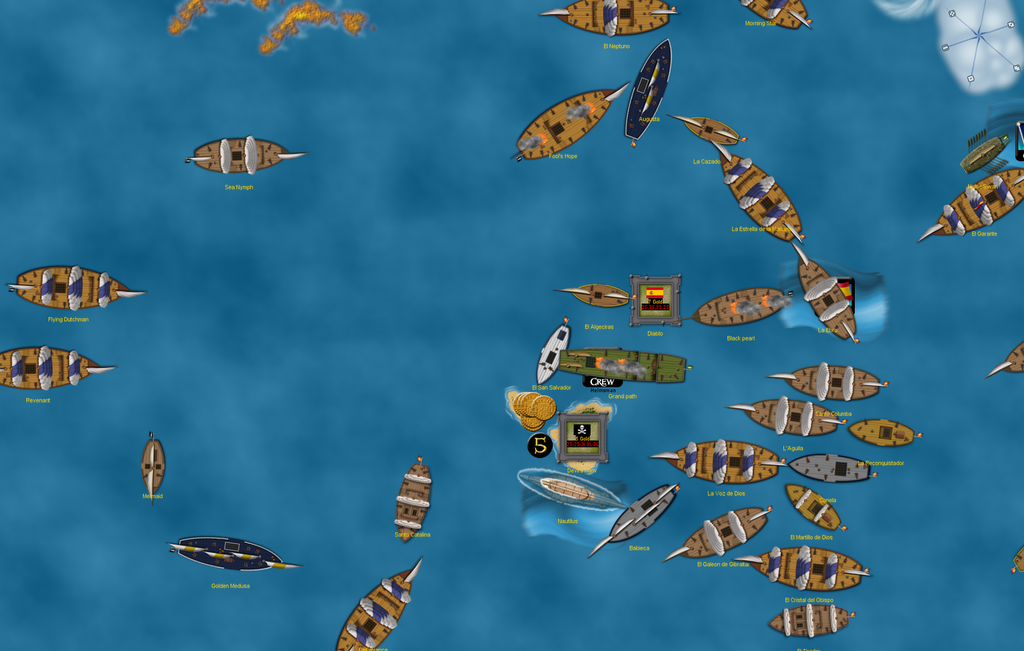
Xerecs and I are actually playing another turn as I post this; another post coming soon!

3/19/2016

The Pirates began to retreat! Most of the remaining Pirate gunships headed west, back towards their home island. The Spanish, however, pressed their attack, sinking the Fool’s Hope and setting fire to the Golden Medusa. Tia Dalma was cancelled by Christian Fiore on the submerged Nautilus. Through the gun smoke of battle, the Spanish didn’t realize that they were still shooting at the Flying Dutchman, and she returned to the home island via Eternal. Spanish derelicts are towed to clear room for the advancing gunships. However, the Cursed would soon throw a wrench into their plans…

The Cursed have attacked! In a potentially very bad decision, the Cursed sailed the Mourning Star up to Fortaleza Dorada and opened fire! THE SPANISH DECLARE WAR ON THE CURSED! (Even though the Cursed initiated the conflict, they didn’t declare war; it was supposed to be just a raid.) The Spanish are now at war with the French, Pirates, and Cursed! The Cursed also revealed their intentions with the Interloper and Howl, their two remaining fog hoppers. Both hopped out near the Santa Isabel and Saragoza, with the intention of striking the Spanish gold system, the heart of their empire!
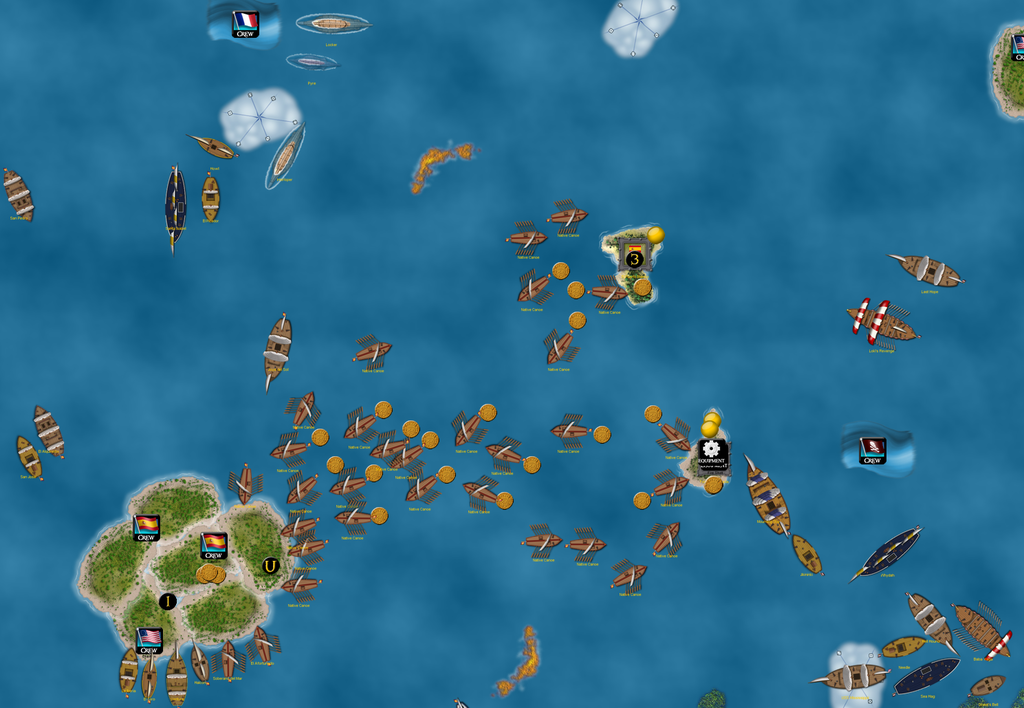
In addition, the Cursed used Mimi to yank the Carolina toward the Gerudo Fortress, where two of the schooner’s masts were shot off.

North of the French home island, the Bonaparte and Tartessos were locked in battle. Each ship was hurting, and the Tasmanian Devil missed twice on the Bonaparte, keeping the annoying ship alive. Between the Cursed attack on their now-undefended eastern front and the defiance of the French fleet, the Spanish realized that they had sent too many ships to attack the formidable Pirates. Especially with the Pirates losing the Battle of the Devil’s Maw and appearing to be in retreat, the Spanish have sent some ships back east and a few to the north.

The Revenant did some damage to the Galeon de Gibraltar, but was quickly dismasted by the horde of Spanish gunships.
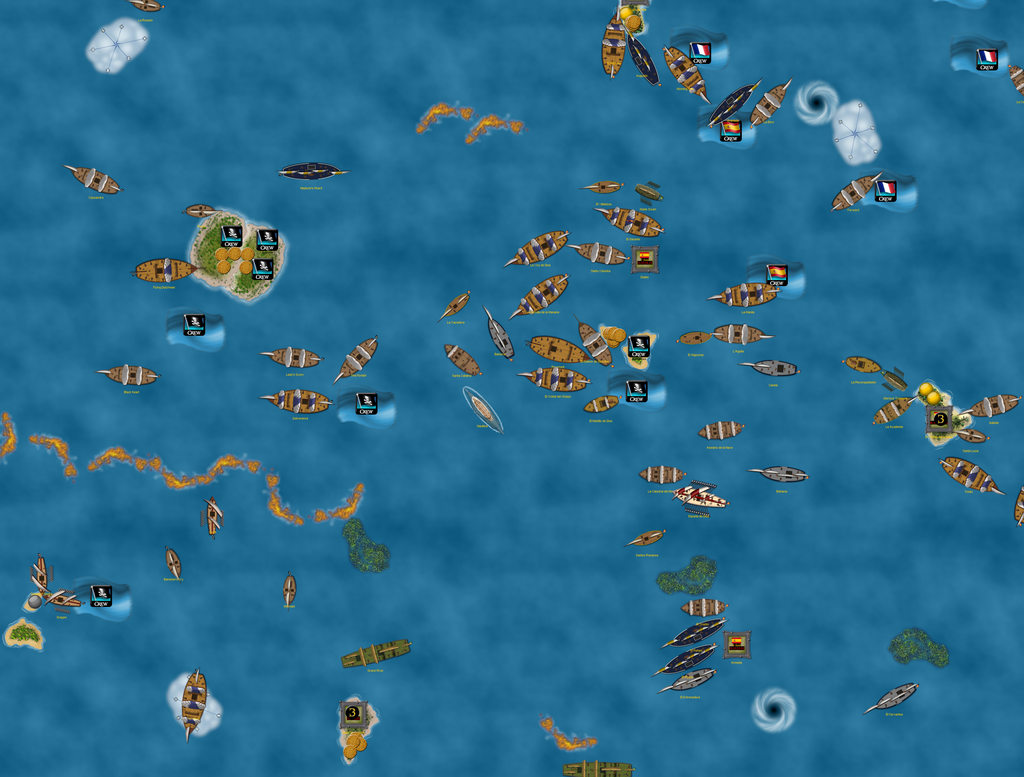
The Spanish hired some Jade Rebellion privateers to help their eastern defenses, with the East Wind and Black Lotus joining the fight. However, the Cursed sunk the recently launched Santa Ana (SCS version), while the Interloper sunk the Picador, giving the Cursed two valuable coins via Agnahim’s ability! The Cursed recaptured a few of their fog hoppers, while the Whydah looked to join the Mourning Star in bombarding Fortaleza Dorada. In addition, the English had some plans up their sleeve regarding the First Coalition, though they didn’t tell Commodore David Porter exactly what they were.

At this point, I was able to do another epic point and ship count! As usual, here are the numbers in the order of play:

Ship and point counts at the beginning of play on 3/18/2016:

French: 4 ships, 54 points
Pirates: 17 ships, 351 points
Americans: 3 ships, 50 points
Spanish: 76 ships, 1,212 points
Cursed: 27 ships, 517 points
English: 37 ships, 595 points
Total: 2,779 points
(164 ships!)

WOW! At the beginning of another day’s action we were literally 68 points away from breaking the all-time record of 2,846 total points, held by my Economy Edition game from summer 2015. How incredible! However, as I said in an earlier post, that EE game likely peaked at around 3,200 or 3,300 total points a handful of turns after the final point count. Still, the game is at a massive size. However, it’s also obvious that the fleets are radically different in size. The Pirates have the highest points per ship number, at 21 (rounded).

Here is each fleet’s point total as a percentage of all points in play, rounded to the nearest whole number:
French: 2%
Pirates: 13%
Americans: 2%
Spanish: 44%
Cursed: 19%
English: 21%

Spanish Empire indeed! The Spanish have a higher percentage share of the points in play than any other two fleets combined, not to mention having almost half (76/164=46%) of the total ships afloat. At 76 ships, they’ve cemented their place as the second-largest fleet I’ve ever managed, behind only the massive Pirate fleet from Economy Edition. Imagine a twelve hundred point fleet! The French and Americans are hanging on by a thread, while the middle three fleets continue to have some success in general. In addition, it’s worth noting that my turns take so much more time than Xerecs’ because I literally control about 84% of the points in play! As of this point count I have to move 140 ships each turn.

The Bonaparte returned home once again to repair, while the Enfant Terrible set out. The Tasmanian Devil shielded the Tartessos and Colector from the French as no less than seven Spanish gunships sailed north to contain the French and bring Spanish dominance back to the area. While fighting on three different fronts, the Spanish would have to manage each fleet appropriately. They had learned from their mistake of sending too many ships to attack the Pirates, and they were determined not to make the same mistake again.

The Pirates launched the Mobilis with a helmsman, and Calypso aboard the Black Heart created two new whirlpools! The Pirates still appeared to be running from the Spanish, though one of their strategies would soon be revealed. Here, the Spanish have captured the Revenant (who lost all of her crew to the Inquisitor), and they intend to use her as a guard ship. Other Spanish ships continue to advance west through Pirate waters. In this picture alone over 15 Spanish ships have captains, with a few HI raiders and flotillas among the others.

At the end of their turn at Fortaleza Dorada in the east, the Spanish launched their best gunship: El Acorazado! They were going to wait longer to launch her, but the sudden Cursed attack on their undefended eastern front forced them to take desperate measures. They crewed her with my favorite crew setup for her: Luis Zuan (MI version), Nemesio Diaz, Joaquin Vega, Duque Marcus Vaccaro, helmsman, oarsman. If the Cristal del Obispo can make it over to the Acorazado, they’ll swap the oarsman for Castro, making the setup complete. However, in the meantime, the Acorazado serves as an extremely intimidating presence; her power and history as arguably the best gunship in the entire game sent all of the nearby Cursed ships sailing in the other direction immediately. In a huge game like this one, her presence diminishes simply because of the sheer size of the game, but the Acorazado still commands the utmost respect from every ship on the sea. The Acorazado becomes THE Spanish flagship of their entire fleet, with the Garante moving to second-in-command. In addition to the Acorazado, the Spanish also launched the Corazon Dorado with a captain, helmsman, and exploding shot.

Two other interesting developments in this picture: the Black Lotus had set the Loki’s Revenge aflame with fire shot, making the ship a floating time bomb. However, Keith Atkinson’s reroll (a custom Cursed crew from Xerecs) saved the ship by putting out the fire! The Loki’s Revenge then sacced one of her possessed oarsmen to move 4S while dismasted! She moved towards Cursed waters and a friendly fort. Also, notice the Cursed fog hoppers going right back into the fog: La Muerta approaches. Similar to the legendary HMS Endeavour, La Muerta is the most dangerous Spanish ship afloat, capable of eliminating two masts with every hit. She’s also crewed extremely well and carries Metal Hull. The Santa Isabel was soon going to leave the Spanish home island with the Martyr’s Amulet aboard, which decreases Cursed cannon rolls against the ship carrying it. If the Muerta can get both the Amulet and Metal Hull aboard, she will be completely immune to Cursed cannon fire!!

The English have launched HMS Swallow with plenty of good crew aboard; she was launched to become the next ship Carbon Charlie added cannons to. However, this time the negative UT’s Xerecs added to the mix sort of backfired, since Charlie can eliminate UT’s for cannons. This led to a strange situation where Charlie was making cannons out of odd materials rather than precious metals, including wood, Rats, and a Monkey’s Paw!

The French continued to repair and regroup, but it’s not as if things are looking up for them. In addition to the veteran Spanish gunships returning from Pirate waters and the northern Puerto Blanco, the newly repaired Neptuno and Granada returned as well! The Granada’s crew has a special venom reserved for the French; she was the ship that fired the first shots of the war at the original Paradis. Definitely not a good sign for France.

After seeming timid against the Spanish, the Pirates have revealed their plan! Calypso made two more whirlpools, but to the surprise of the Spanish, one of them appeared next to the eastern Puerto Blanco, just north of the recent Cursed attack on Fortaleza Dorada! Not only that, but the Grand River and Harbinger both moved through the whirlpool and got extra actions to smash the Spanish in their own waters! The Grand River eliminated two canoes (including one carrying Elizabeth’s Piece of Eight), while the Harbinger bombarded El Puerto Blanco and destroyed the fort’s gun armament. The Spanish are much more concerned with the southern Fortaleza Dorada, since it was given a fort upgrade relatively early in the game and thus they have 50 gold invested in it. Speaking of Fortaleza Dorada, the Mourning Star’s second broadside knocked that fort down to one cannon before the Acorazado showed up and scared all of the Cursed ships away. And speaking of the Acorazado, she connected twice on the Harbinger as the Battle of El Puerto Blanco began! The Corazon also landed a couple hits, including a devastating exploding shot. The Spanish weren’t nearly done in the area; the Black Lotus captured the Mourning Star while the East Wind sank the Jikininki. At the end of their turn, the Spanish spent almost all of their remaining gold out of necessity and bought three ships. The first two were El Alma and El Paso, two ships the Spanish had planned to launch with the Acorazado (with Nemesio Diaz) to form a very small sort of “canceller squadron”. Last but not least, they launched the first Viking ship of the game. The Naegling comes into play with Shayna Deux and Sigurd Andersen in addition to a helmsman. The Naegling is the most accurate and devastating Viking longship, and Andersen gives the Spanish a fleet admiral crew, something they’ve been jealous to have between all of the similar crew in the Pirate and English fleets. Also notice the Frontier finally venturing out of the fog.
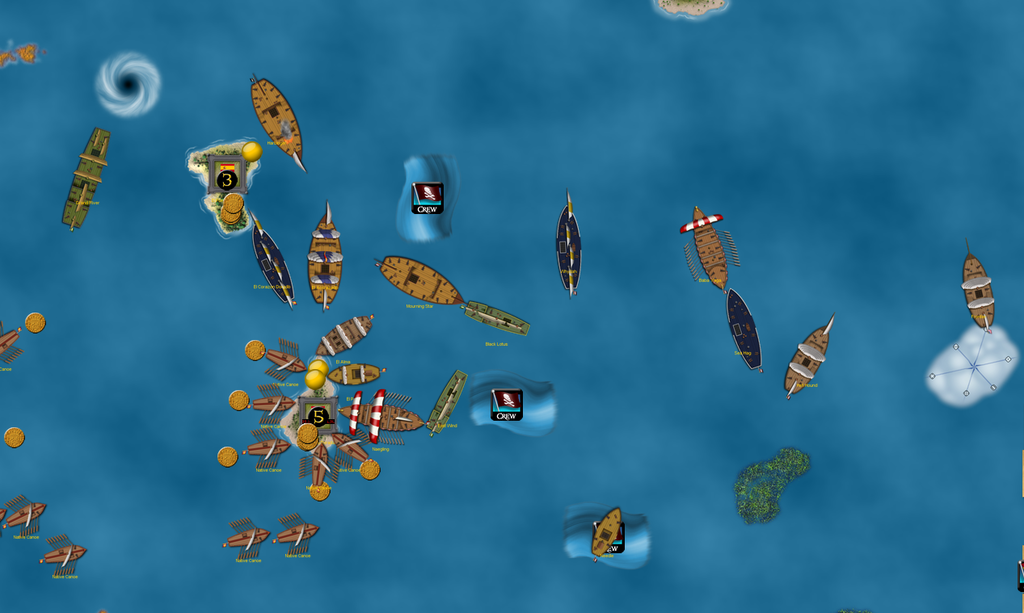
The Howl and Interloper returned home, giving the nervous Saragoza a chance to do the same. The Muerta and other Spanish gunships are making their way east to combat not only the Pirate threat but also the fleeing Cursed. Spain’s extremely ambitious imperial goals forces them to fight on three fronts at once, which they’re still getting used to. However, they’ve grown as a nation and continue to get better at managing their Empire.

The Spanish built a new Castillo del Infanta just west of their first one, on the island where the Devil’s Maw had been destroyed. The new fort was built for three purposes, all of which flowed into one another: expand the Empire, provide a base of operations from which to attack the Pirates, and serve as a repair station for damaged ships. Four Spanish gunships are already docked at the busy new fort, with their crews eager to repair. The captured Revenant has also been towed there, while the Canela has deposited a shipwright inside. Xerecs and I have agreed to have shipwrights give forts repair actions while stationed there. At this point, the Battle of the Devil’s Maw had ended in a conclusive Spanish victory, though the Pirates kept their numbers up by not turning the battle into a major fleet action.

El Garante (and her guard ship the Noble Swan) turned east away from the Pirate war. The Cristal del Obispo, lead ship of the Inquisition, took over as flagship of the western fleet. The dynamics of world power were shifting, and the threat of Calypso was troublesome, even for an Empire as great as the current Spanish one.

As much as the Pirates and Spanish were sharing the spotlight, the English were executing on plans of their own! Their plans came together faster than expected, and the English were happy to finally strike directly at the heart of the Cursed! That’s right, it’s time for the Cursed to pay for what they’ve done! With France and America badly hurting at the hands of the Spanish and Cursed, England had no choice but to lead the so-far-inactive First Coalition into battle!

It began in the north. The English wanted to give the Cursed a taste of their own medicine, similar to using their own fog hoppers against them. The captured Executioner received an SAT from El Fantasma, and she sped into Cursed waters, sinking the Dire Miralis and damaging the Lamprey! The Westminster and Granville (the ships that teamed up to capture the Executioner) sailed up to Gerudo Fortress and poured in some broadsides, taking out more than half the fort’s armament.

The next segment occurred in the southeastern reaches of Cursed waters. The Oxford and Durham, with recently hired oarsmen aboard to help with whirlpool troubles, sped through a whirlpool near the English home island. They emerged from the northeastern whirlpool, near the other Cursed fort! The Durham got an AA (Admiral’s Action) from Beckett and she proceeded to STUN the Cursed by sinking the Loki’s Revenge!! The LR had a ton of possessed crew from Wraith aboard, not to mention being one of the most dangerous gunships in the game, capable of ripping off 12 shots at 2L in a single turn! This was a big blow to Cursed morale; just a few turns previously they had been in control of the entire far eastern chunk of the sea. Then they attacked the Spanish, and once scared away by the Acorazado and company, turned for home. However, they didn’t expect an English sneak attack! If this proves anything, it’s that you shouldn’t attack the Spanish Empire. They WILL declare war and get payback. If the Cursed hadn’t attacked and gotten the Loki’s Revenge in trouble, she wouldn’t be sailing home so fast and in danger from the English.

To finish the English three-pronged assault, the Dreadnought revealed the secret weapon, found by the Lord Kenyon: Necklace of the Sky! Suddenly the Dreadnought was transported all the way across the northern ocean into Cursed waters, where she docked at the middle Cursed gold island! This stunned the Cursed as well, as they were the ones expected to use teleportation tactics. The Dreadnought carries with her one of the most formidable combination of crew and cannon in the history of naval warfare, as the Cursed are about to find out…
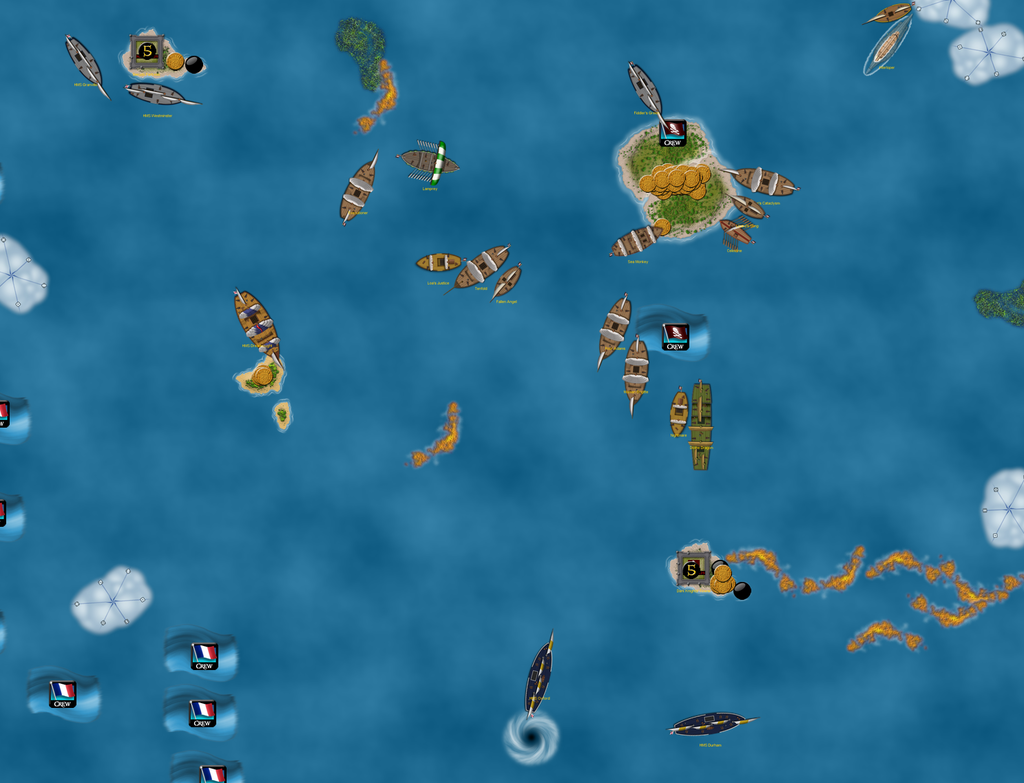
Since this picture, Xerecs has played another turn. The Grand River sailed right back into Calypso’s whirlpool near the eastern Puerto Blanco, and used the SAT to sink the Cervantes! This was actually a relief for the Spanish, for they were afraid she would go on a suicide run and take out a bunch of canoes and hurt the Spanish gold system directly. The Frontier is making a break for the American home island, but the Hell Hound is hot on her tail. The Harbinger couldn’t make it back into the whirlpool, but at least her fire didn’t spread.

What more is going to happen here?!

(Here are some of the recent strategies for my fleets)
Strategies of 3/6
Spanish: Demand payment from the Americans, and threaten with display of force. Drive the French back towards their HI and establish dominance over their waters. (Save for the Inquisition) Demand payment from the French. Establish a HI defense fleet.
Mission accomplished, though the French have no gold to make tribute payments with.

Cursed: Be extremely aggressive and lash out against the Americans and/or the French. Consider attacking the English through various means. Let the Hell Hound kill to feed Wraith. Save for fort upgrades, and then use them to launch attacks against nearby ships. Continue the gold system, but buy for war.
Partially successful, though they attacked the Spanish instead of the French. The English appeared too powerful after the failed fog hopper expedition, and Wraith is gone. They aren’t saving for fort upgrades, but for something else entirely…

English: Be cautious and controlled. Save gold. Do not engage enemy fleets unless they become hostile. Use Carbon Charlie to give gunships extra cannons.
Simple but effective. Bad UT’s have delayed them a bit, but between turning a negative into a positive by giving those UT’s to Charlie and also leading the First Coalition, things are looking good for England right now.

3/19/2016

A few more developments after another turn: the Cazadora used Sigurd Andersen’s Admiral Action to dismast the Queen of Sheba; the Spanish gold spyers had seen some nice coins aboard the galley.

The English smashed the Cursed! Both forts were destroyed, including the eastern one that had been upgraded! The Cursed know they need to launch in order to repel the English attack. In addition, the Poor Adams was crippled by the Durham, while the Oxford stole Metal Hull from the Maman Brigitte. The Executioner sent the Lamprey to the bottom.
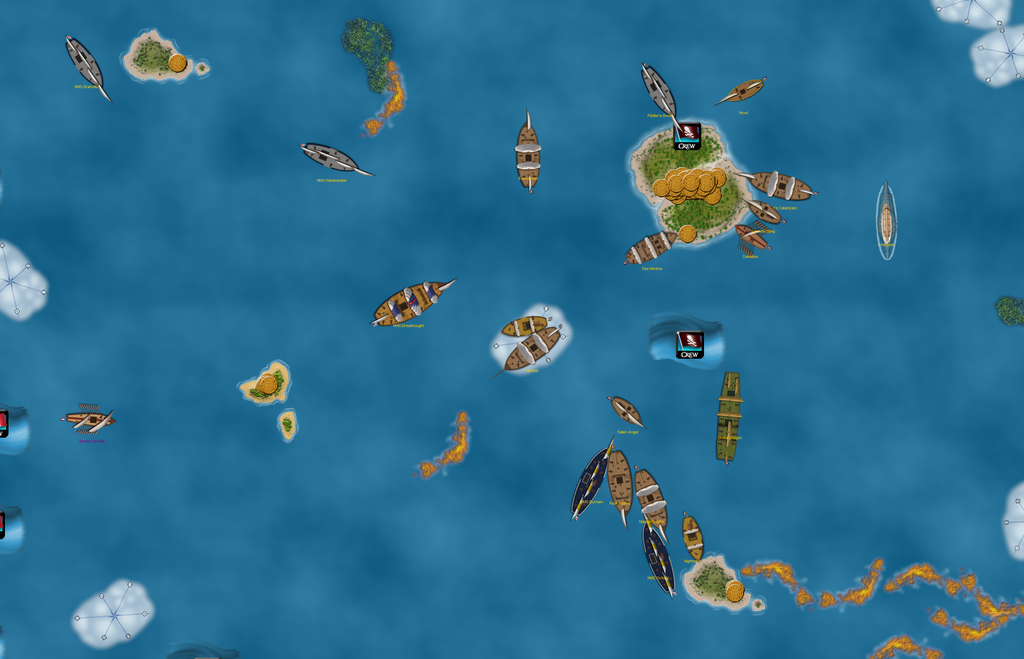
3/21/2016

Before play started, the Cursed spent every penny in their possession (261 gold) and launched the majority of their planned FEAR squadron!

Dragmirius + Sargasso Calhoun (SAT), The Organist (reroll), Dark Knights (Marine/+1 boarding), captain, helmsman, firepot specialist, oarsman (49)
Monkey’s Paw + Dark Knights (Reroll/Kian Ng), captain, helmsman (29)
Flying Dutchman + Sammy the Skull, helmsman, firepot specialist, shipwright, oarsman (30)
Sautez le Requin + captain, helmsman (21)
Demise + Ghirahim, helmsman, firepot specialist, oarsman (32)
Nayru’s Ire + Veran, Pipe Organ, helmsman (37)
Boneyard + Devereaux, captain, helmsman, oarsman (23)
Verdani + captain, helmsman (21)
Twinrova (10)
Dread Isle (4 gold)
+ captain and helmsman on the HI

The Cursed needed better home defense, and this was the way to do it!

The French still fought the Spanish around their home island. The Tepant took three masts off the Revolution, while the Enfant Terrible had almost reached a wild island in the east; it has been a long while since a French ship carried gold.

The Spanish were growing more and more weary of the French resistance, and decided to become even more serious in their efforts. The Proud Tortoise moved off the Bonaparte’s stern and hit with fire shot, while the Ebro’s captain was cancelled by Lenoir aboard the Tepant. However, the Tasmanian Devil maneuvered to get 3 guns in range of the Tepant, and 2 connected. Then, the Neptuno got involved in the action! Using her sniping ability to great effect against the Bonaparte (the perfect ship to snipe at), 1 of her 2 shots landed, with the exploding shot taking out the old French chieftain and spreading fires throughout the Bonaparte’s decks! To finish the aggressive assault, the Cordoba rammed the Coeur du Lion derelict and eliminated her navigator, allowing the Granada to capture her and leave no ships docked at the French HI!
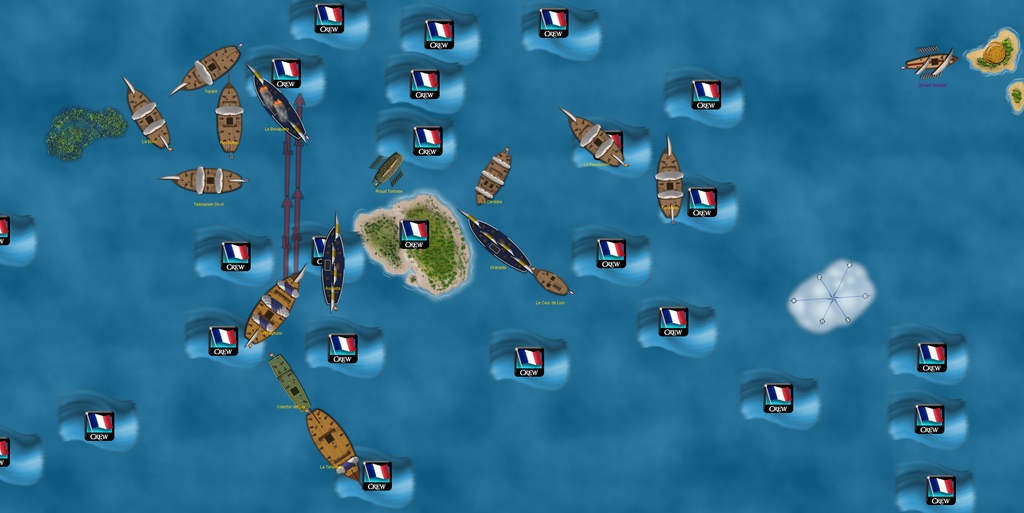
In the southwest, the Spanish/Pirate war continued to have small and slow developments; the Pirates appear to be stalling for time. Each side had a relatively major victory however: the Flying Dutchman dismasted the Estrella de la Manana (one of Spain’s most accurate gunships), but the Cazadora sunk the Queen of Sheba, who went down with admiral crew Kheir and 16 gold aboard. The Spanish also used teamwork to dismast the Flying Dutchman. The Espada de Dios has now taken 2 of the Pirates’ 3 remaining gold coins, though the Cassandra is almost home with more. Spanish ships continued to repair at the new Castillo, while the Garante and Noble Swan turned back to the west after hearing of the successes against the French and Cursed in the north and east respectively. All is well in the Spanish Empire.

In the far north, the Carolina received an abandoned shipwright from the Edinburgh Trader, allowing her to repair without having to sail back to the American HI. The English continue to collaborate with the Americans as part of the First Coalition, though it’s essentially a two-nation agreement right now due to the Spanish pushing France to the brink of elimination. The Frontier and Mississippi have ventured out of the fog, and after a rather unsuccessful attack by the Hell Hound, the Frontier is almost home!

Between the vastly improved Spanish fleet in the east and the English attack back home, all Cursed forces are being withdrawn from the southeast. The Hell Hound and Last Hope have the best chance of making it back; El Corazon Dorada set the Whydah alight before she sped off with the help of a trade current. The southeastern expedition was mostly a failure for the Cursed, and could even be deemed a fiasco. They sailed south with the intent of eliminating the Americans, which they couldn’t do. As a result, they took out their anger on the (seemingly) vulnerable Spanish, who showed their colossal power in this game by quickly re-asserting dominance in the far east, sinking the Baba Yaga and recently capturing the Mourning Star and Sea Hag. That same counterattack was what also led to the English sinking the Loki’s Revenge, Davy Jones’ second-in-command.

At the end of their turn the Spanish launched 4 new ships. La Monarca was launched at Fortaleza Dorada to give them yet another gold runner, while three 4 masters were launched at the Castillo to the west. With the newly launched Santa Ana (CC version), Matthias Vospero, and Salte el Tiburon in play, Spain has now used every single 4 and 5 masted ship at their disposal except for the OE Resolucion, which can’t be launched until the SM version is sunk.

In addition to the above developments, note how quickly the Spanish Empire can react to threats. Just a few turns ago, the eastern Puerto Blanco and Fortaleza Dorada were in serious trouble from the Pirates and Cursed. Now, the area is swarming with Spanish power: probably the two best ships of all 150+ ships afloat, El Acorazado and La Muerta, have been joined by another 5 master, El Cristal del Obispo. The Alma and Paso bump the canceller count to 3, while support sails around them in the form of the Corazon, Principe, Naegling, East Wind, and Black Lotus.
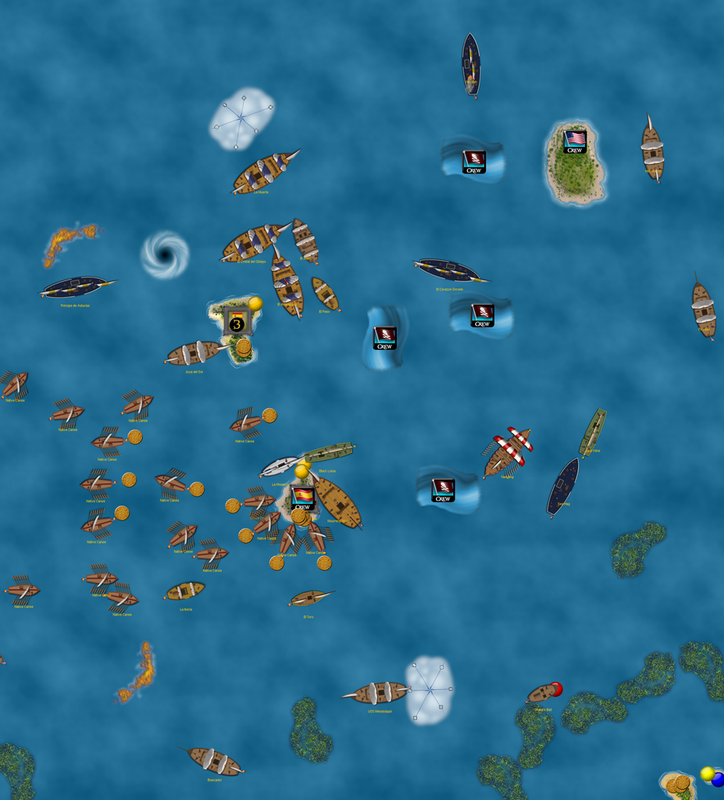
Unfortunately for the English, the Cursed Fear squadron got right to work. The Dragmirius got the SAT from Sargasso Calhoun, sinking HMS Durham and greatly angering the English. The other English ships were lucky to escape, with the Oxford being given an Admiral’s Action (AA) to take the whirlpool back home. The Dreadnought’s Eye of Insanity was used to copy Davy Jones’ All-Powerful, allowing the lumbering battleship to move 4S and accompany the Granville and Westminster back to the west. The Cursed dismasted the Executioner and plan to recapture their first true gunship of this game.

Here’s the entire ocean. If you haven’t noticed it already, check out the deckplate disparity around the edges. The Pirate fleet is at the lower left, but it very quickly turns to Spanish… and more Spanish… and more Spanish, all the way up to the three remaining American deckplates at the far right. South of their HI, the Spanish have needed to go 4 deep with deckplates, running into the ocean itself! The English and Cursed fleets are quite large; the eight new gunships of the Fear squadron are obvious from all the crew chips just to the upper left of the Cursed HI.
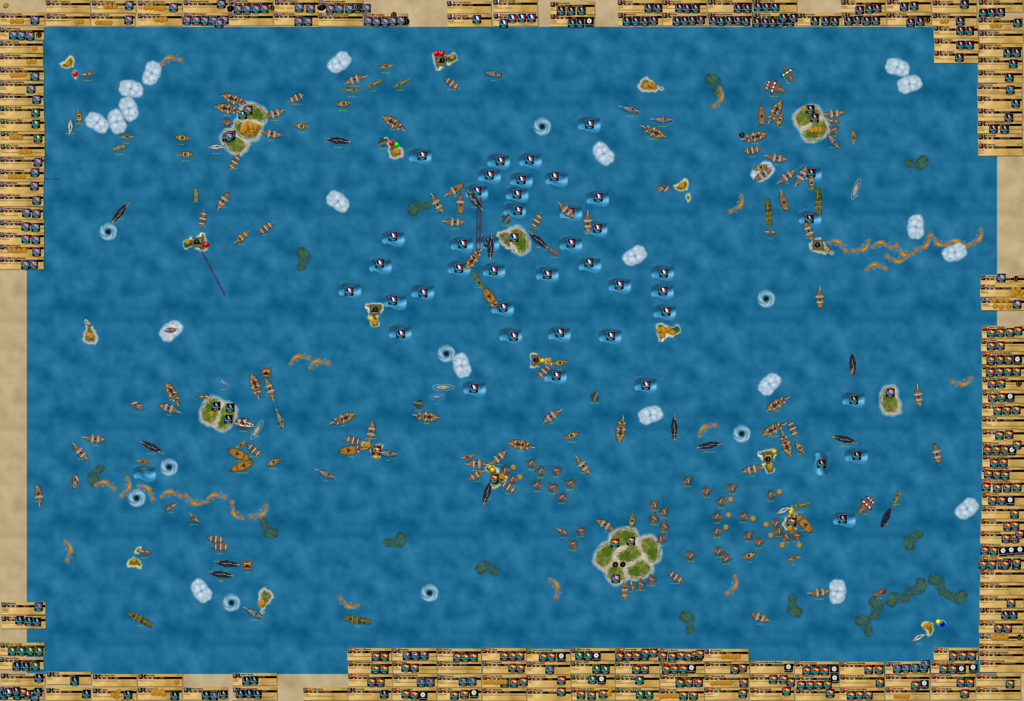
Soon after play for the weekend ended, an urgent letter from Lord Mycron arrived upon the deck of the Carolina, where it would be read by Commodore David Porter.

“Dear Commodore David Porter,

Our worst fears have been realized… the Cursed have suddenly launched a considerable battle fleet and all hope has abandoned our small eastern squadron… we hope to strengthen our alliance soon, but the Cursed are far stronger than we anticipated… we lost one of our finest ships, the Durham, to these fiends. This angers us immensely, and we’ve already called upon the Barbary Corsairs, Vikings, and our old friends in the Jade Rebellion to help us. They’ll be arriving shortly to reinforce our position, but we hoped that our American allies could help in some way as well… if a main force is sent due east along the northern coast of this troubled ocean we think the possibility of an American force coming up from the south could either provide a distraction or vice versa with your force hitting their trade.

Rampant rumours have reached us regarding a Cursed attack on the Spanish Fortaleza Dorada… we’ve been told the Spanish are even more angry at the Cursed than they are at the Pirates, who they’re also at war with… we know you’ve had trouble with Spain, but if they can be reasoned with, I can’t imagine the Cursed being able to repel a 3 pronged attack, especially when they’re all cooped up in that demonic corner of theirs…

Good day to you; we hope your ships are luckier than ours!

Lord Mycron”

Porter would respond quickly:

“Dear Lord Mycron

It troubles me to hear this, as it is one of my worst fears as well. Indeed, the Cursed fiends have attacked the Spanish Fortaleza, and they are beside themselves in a rage, however I fear their lust for gold my inhibit our ability to call forth a battle fleet. Nonetheless I shall try to reason with them, and I shall contact what remains of our allies the French. I suspect the Cursed would be hard pressed indeed to repel a three pronged, or even four pronged attack, however it may take time to raise the necessary funds to launch such an attack, however we will try to reason with the Spanish admiralty and see what can be done.

Good day to you,

Commodore David Porter.”

“Dear Porter,

Just since my last letter was sent out, from our spies we’ve heard that the new Spanish admiral is Luis Zuan, as he is the commander of El Acorazado, the new Spanish flagship. We may have more spies than your fleet possesses simply because of the size of our respective fleets. In addition, we’ve heard that Zuan is more reasonable than the former Spanish admiral (who may be on the Garante; perhaps your past experience with the Spanish gives you such knowledge). However, ever since we heard wrongly that the Spanish had given you Americans gold, we realize we must be cautious with such findings. That said, our hope is that Zuan is at least willing to listen, unlike the first Spanish admiral that gave you such trouble. If any ills befall you on accord of our devious spies where Zuan turns out to be just as harsh as the last admiral, we are truly sorry.

Lord Mycron”

“Dear Lord Mycron,

Thank you for understanding. Once my ship has been repaired, I will set a course toward American waters. I am hoping the Spanish, and Zuan, are willing to listen as well.

Commodore David Porter.”

3/23/2016

The latest point count revealed that the game has exceeded 3,000 total points!!

French: 3 ships, 50 points
Pirates: 15 ships, 285 points
Americans: 3 ships, 48 points
Spanish: 88 ships, 1,423 points
Cursed: 28 ships, 622 points
English: 37 ships, 603 points
Total: 174 ships, 3,031 points

3/28/2016

CG1 has continued! Despite only one more turn being played, major developments unfolded!

The French continued to fight back, but they are extremely close to being eliminated by the Spanish! The Tepant was dismasted by the Ebro and Tasmanian Devil. However, the Bonaparte was docked at her home island. The Spanish had sent reinforcements for just this purpose. The Neptuno and Augusta rammed the Bonaparte derelict and killed her captain. Then, in a very fitting end for the obnoxious ship, she was captured by none other than the Granada, the Spanish ship that started this long war!

France holds on for dear life, with 2 ships remaining:
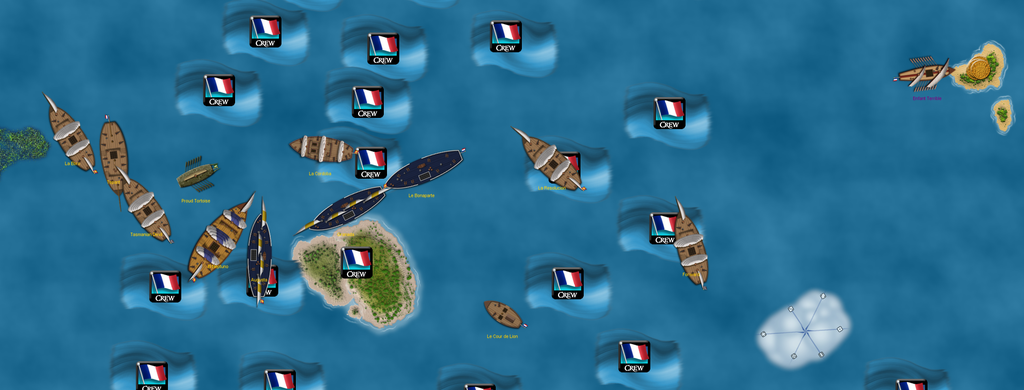
The Spanish see the Pirates as cowards, as they’ve done almost nothing but run away. Spain punished them, sinking the Flying Dutchman (Fiore on the submerged Nautilus cancelled Eternal), dismasting the Mermaid and Banshee’s Cry, and setting fire to the Lady’s Scorn. To add insult to injury, the Espada de Dios and Bahama stole the only 2 coins on the Pirate home island.

Things were also happening in the east. The Americans managed to get the Frontier home while the Cursed were still running away! They used her gold to buy the USS Morning Star. The Corazon Dorado has sunk the Whydah, but Davy Jones gave the Hell Hound an extra action, so she’s safe for now. The Last Hope has made it to the fort, but the Spanish appear to be serious about their declaration of war – note their small but extremely impressive line of battle. Those three 5 masters are La Muerta, El Cristal del Obispo, and El Acorazado, three of the most powerful ships on the sea! The Spanish are looking to have other ships join them as they sail north. The Spanish launched two ships at the end of their turn: the Cazador del Pirata and Magdalena.

In a morale blow to the Pirates, the Cursed moved the Black Heart off the map! She was eliminated with Calypso, Captain Davy Jones, and tons of possessed crew aboard. The Cursed were tired of their crew being used by another nation, and they were wary of Calypso’s power to easily strike the Cursed gold system. In addition, they were already at war with the First Coalition and Spain – the last thing they can afford is a powerful Pirate fleet to make it 4 on 1!

The Cursed spent all of their 21 gold to launch the Spilled Salt with a captain, helmsman, and firepot specialist. From now on they’re planning to launch the remainder of their planned Fear squadron in chunks. They also recaptured the Executioner, which I believe is the only ship to change hands twice in this game so far.

The English took their turn, getting gold and starting to give the Shetland extra cannons. All seemed well in the northwest as the English appeared content to remain the richest nation.

Suddenly, the English stunned the Cursed by turning their ships around and attacking! After seeing the numbers disadvantage, the Westminster, Granville, and Dreadnought had turned to flee, but now they turned around once more, this time to face the Cursed head on! Both admiral crew had rolled 6’s, which meant that all 3 ships could move and shoot twice, as the Dreadnought used the Eye of Insanity to copy Davy Jones’ All-Powerful.

The Westminster was the first ship in action, blasting a mast off the Monkey’s Paw and another off the Sautez le Requin. The Sautez also lost her helmsman. The Granville shot two masts off the Sea Monkey and rammed another off the Tenfold, damaging Cursed trade. Then it was the Dreadnought’s turn.

As I may have mentioned a while back, the Dreadnought had been given no less than 10 extra cannons from Carbon Charlie’s ability, over the course of 10 turns. She also had two of my custom crew aboard, which when combined with her oarsman and ship ability, makes her one of those “Eternal god ships”. Just to make it even more over-the-top, Peter Sharpe added a Marine crew to the onslaught. The Dreadnought totaled 16 cannons, with all of them shooting at rank-2. However, her speed was still slow, so her first action simply sunk the already damaged Sea Monkey. However, her second action put her in position to rake both the Monkey’s Paw and Nayru’s Ire by the bows. The cancellers cancelled each other out, and the Dreadnought unleashed a full broadside! The immense firepower sank the Nayru’s Ire outright and nearly dismasted the Monkey’s Paw!

The English had dealt the Cursed a major blow. In addition, they’ve become the default leader of the First Coalition. The English won’t run from a fight!

However, the English weren’t even done! Mycron gave an extra action to the Swallow, who appears to be heading east towards Cursed waters. She carries 5 extra cannons from Charlie for 10 total, in addition to the Power Cannons UT. Between the UT, her speed (S+L+S with a helmsman), and Blake’s SAT, she has the greatest overall striking range of any ship in the game right now.

As they had talked about with Commodore David Porter, the English then spent a bunch of gold (209 to be exact) to hire minor faction help in the war against the Cursed! The new ships were launched at Fort Brompton, the closest English island to Cursed waters.

Nubian Prince + captain (18 )
Ivory Star + captain (15)
Meshud + captain (14)
Tiger’s Eye + Murat Rais, captain (19)
Muninn + Count Gustov, captain, helmsman (29)
Huginn + captain, helmsman (20)
Hrunting + captain, helmsman (22)
Grand Dynasty + captain, helmsman (20)
Terror + captain, helmsman (21)
Hephaestus + captain, helmsman (19)
Divine Dragon + captain, helmsman (12)

In addition, the English launched HMS King George III at their home island and also built Fort Royal on the other wild island they control. (Both of those pieces are customs of El Cazador.) This brought total English expenditures of this turn to 232 gold.

England was showing her might, but not nearly her full might. As of 2 weeks ago, they had accumulated more gold than any other fleet that I’ve ever controlled in Pirates. For those of you that remember, that means they had more than the 549 gold that the Pirates used in last summer’s Economy Edition to launch the HI raiding squadron! Though they just spent over 200 of it, they probably have even more than anyone realizes…
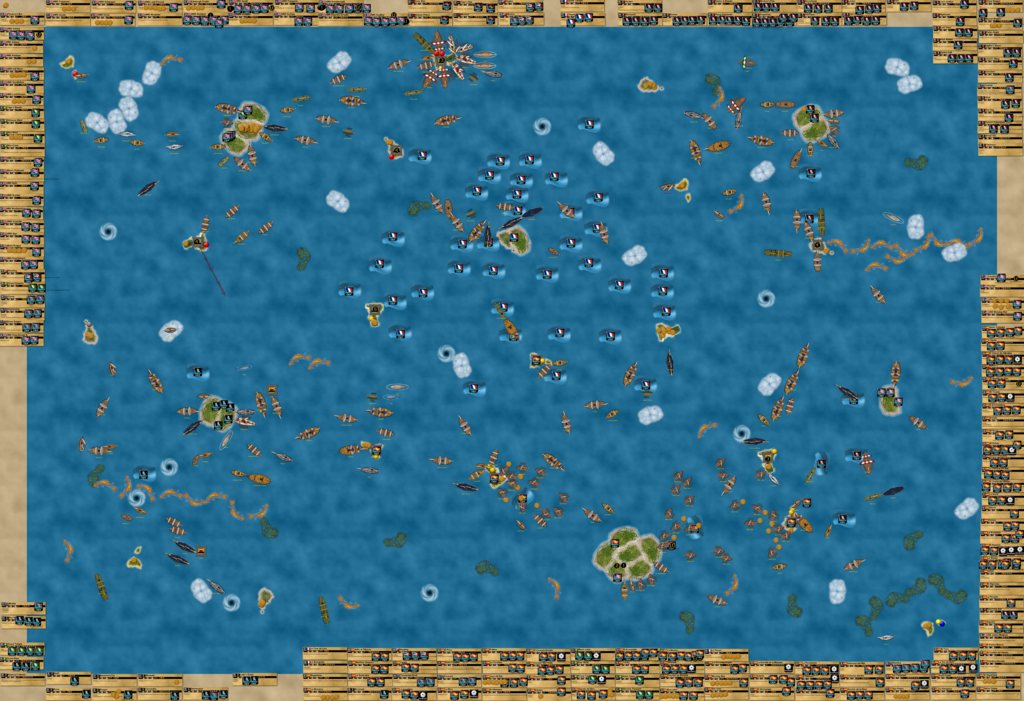
4/15/2016

Play finally resumed, and the French have been eliminated!!

The French fought gallantly at the Battle of the Two Paradises, but eventually fell to the superior Spanish fleet, being driven back to their home island. The French continued to dog the Spanish with quick and effective raids, fighting to the last ship. The Spanish suffered a setback and almost lost control of the area when they sent too many gunships southwest to wage war against the Pirates. However, Spain quickly realized their mistake and sent reinforcements to take out the French once and for all. The Bonaparte and Tepant made the war last much longer than Spain expected, but both ships have finally been captured, with the Enfant Terrible being sunk. Spain has won the War on France!

Here’s the now-desolate center area, deprived of French trade currents via Celestine’s Charts. The French HI converts to a regular wild island.

Spain was also continuing her aggressive westward expansion. Spanish gunships have reached the western reaches of the sea, where the Pirate Grand Temple ran into trouble. Looking to the east, notice Spain’s impressive supply chain of fresh ships ready for action.

However, the biggest excitement of the day concerned the mounting tension in the northeast. England was leading the “First Coalition” (now essentially devoid of the French and Americans) into battle from the west, while an extremely impressive Spanish squadron sailed up from the south. The Westminster was affected by Fear to the point where she could only fire in place, but further damaged the Sautez le Requin. The Granville failed to ram another mast off the Tenfold, but the Dreadnought easily sunk the Sea Monkey and Fallen Angel. In the meantime, the Cursed were gathering their best ships to the south at their fort, ready to take on the Spanish. However, La Muerta had both Metal Hull and the Martyr’s Amulet aboard, making her almost immune to Cursed cannon fire! The Acorazado required 3 hits just to eliminate her first mast, and the Spanish had 3 cancellers in the area to the Cursed 1. Things were not looking good at all for the Cursed.

The Spanish continue to press their attack! The Pirate Grand Temple effectively used reverse captain to derelict three Spanish ships in two turns, but has finally been dismasted by the Spanish force. Three Spanish gunships have sailed around the north side of the Pirate HI while others go to the south, creating a pincer movement in the next few turns. The Babieca used a trade current to dismast and burn the Swift, but the galley was able to dock home her gold on the next turn with help from admiral crew Swann. The Asesino and Villalobos have taken damage, but the Lady’s Scorn suffered worse. Pirate waters continue to be overrun by the Spanish fleet.

The Spanish finally launched the rare version of the San Cristobal after the LE version was sunk in the Battle of the Two Paradises. They also launched the San Estaban, the luckiest ship of my Economy Edition game. However, the Americans made strides as well, launching the Chesapeake and Lynx. However, Admiral Zuan has issued a chilling command from the Acorazado, seeing how weak the Cursed are: “wipe out the Americans before they become stronger.” Zuan said this after the Spanish soundly crushed the Cursed squadron south of the Cursed fort.

The Cursed had known to attack first, but the Dragmirius and Hell Hound could only respectively sink the Extremadura and dismast the Corazon Dorado, not nearly enough to win the battle. The Acorazado dismasted the Last Hope (who was later sunk by the Paso) while Diaz cancelled out the Demise’s cancelling ability. This gave the Muerta free reign, with no Cursed canceller to cancel her captain or ship ability. She sunk the Dragmirius and dismasted the Demise! The Boneyard was crippled by the Cristal del Obispo and Principe de Asturias. The Alma and Naegling teamed up to dismast the Hell Hound. The Cursed have lost the Battle of Dread Isle almost as soon as it began. It’s not over yet, for the Divine Dragon and Flying Dutchman are about to get into action, but the Cursed are finished.

In terms of the English, the Granville and Westminster were inevitably sunk, but the Dreadnought obliterated the Twinrova and Spilled Salt, while the English minor faction squadron continued sailing towards the Cursed.

4/16/2016

War continued in the southwest, with the Spanish advancing. The Deliverance was sunk, while the Lady’s Scorn and Swift were captured.
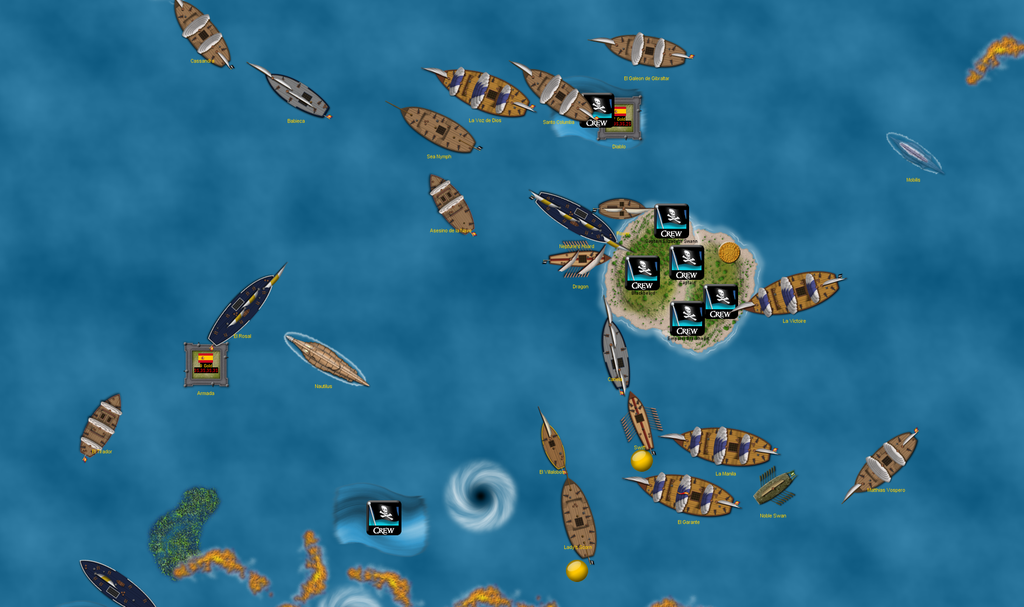
The Spanish continued to crush the Cursed, sinking their derelicts and nearly sinking both the Divine Dragon and Flying Dutchman. Between Nemesio Diaz, El Alma, and El Paso, the Cursed are being cancelled into oblivion. The Cursed could hardly muster anything in their counterattack, with two failed rams in addition to moving the Naegling onto a reef, where she took no damage.
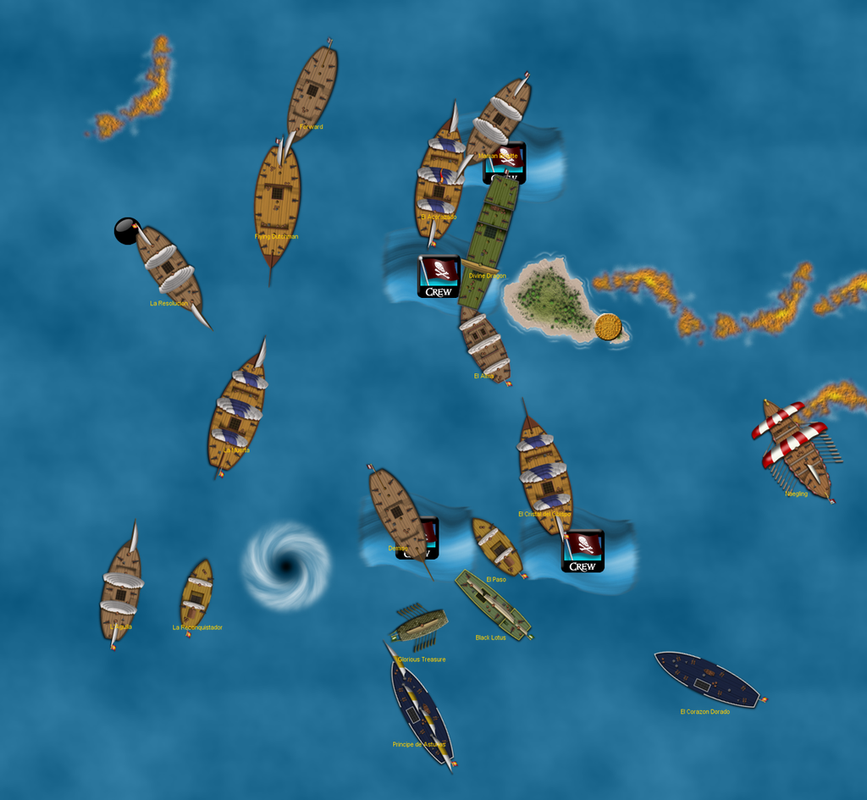
The Cursed had more success against the English than the Spanish, eliminating four masts from the Dreadnought by tossing her onto a reef! The Interloper and Howl teamed up for a final fog hopping ambush, taking masts off the Swallow and Muninn. Both the Interloper and Howl were sunk on the next turn, and the English furthered their cause by rolling a 6 with the Eye of Insanity (copying Davy Jones). The Tenfold (carrying 4 coins) couldn’t be sailed off the map, so instead the Executioner was used to bring the Tenfold down to one mast (ironically the English actually had control of the Executioner earlier in the game – El Fantasma must be really confused!). The Cursed aren’t quite finished, with some ships repairing at their home island in addition to the newly launched Specter.
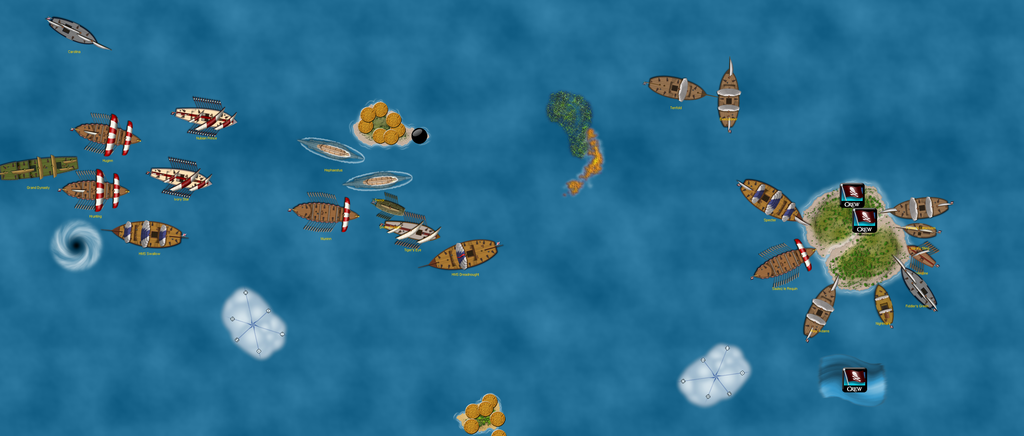
In addition to the Specter, the Spanish and English also launched new ships. The Spanish purchased 9 new support gunships, with some stationed in the east to aid in the elimination of the Americans, and some in the west to possibly help the war against the Pirates.

The English decided to count their gold for the first time in a month.

With a grand total of 864 gold, the English have by far the most gold saved up in any fleet I’ve ever controlled!

The inevitability is coming…

With no other options, England began preparing for war with Spain. The two great superpowers of the game have started eyeing each other across the ocean, with tension slowly mounting.

The English built another five master, this time the Dauntless. The Shetland had been given 5 extra cannons by Carbon Charlie, and was thus ready to sail out. Charlie boarded the Dauntless, England’s newest capital ship. If it hasn’t been obvious, England has avoided becoming an intimidating faction in this game. They haven’t looked like a threat, but their “nice” nature has given them the relative peace (with the exception of the Cursed) with which to save gold for almost the entire game, with only occasional launches dipping into their savings. However, with the inevitable war against Spain on the horizon, they will finally abandon their cautious strategy. Notice the lack of famous ships such as HMS Titan, Grand Temple, Endeavour, etc. The Dauntless and her fantastic crew (Admiral James Norrington and Admiral Morgan) signal the end of this phase of the game for the English.

The English decided to keep it simple and spend 64 of their 864 gold, using 32 on the Dauntless and 32 on two support gunships, the Success and Dunlap. Then, to avoid having to recount their gold, they consolidated their remaining treasure in a UT labeled “800 gold”.

The northwest corner of the sea, purely English.

Now for a glimpse at the past strategies of my fleets:

Strategies of ~4/10/2016:
Spanish: Eliminate the French. Continue to have a strong presence in Pirate waters. Keep the HI defenses strong and provide good defenses on the eastern front. Launch gunships where appropriate, with eliminating the Pirates as the intermediate-term goal.
Mission accomplished; the Pirates, Americans, and Cursed all face simultaneous elimination at the hands of the huge Spanish Empire.

Cursed: Launch part of the Fear squadron to combat the invading English. Once the threat is over, buy back more gold runners than were previously in use, and once the system is better than ever start buying gunships constantly.
The “threat” became much larger than anticipated, and the Cursed are doomed. The two most powerful fleets have crushed them in a non-allied two-pronged attack.

English: Be cautious and controlled. Save gold. Do not engage enemy fleets unless they become hostile. Use Carbon Charlie to give gunships extra cannons. Put forts on the other two nearby island, and likely purchase at least one fort upgrade. Give bad UT’s to Carbon Charlie for more cannons. Lead the First Coalition into battle against the Cursed, but be wary of losing important long-term assets.
Mission accomplished; the biggest questions are those regarding the future.

Another ship and point count (4/16/2016):
French: 0/0 (eliminated)
Pirates: 10 ships, 152 points
Americans: 6 ships, 82 points
Spanish: 98 ships, 1,566 points
Cursed: 16 ships, 365 points
English: 47 ships, 794 points
Total: 2,959 points

Wow! The game size is slightly smaller than the last point count, a testament to the bloodshed that has occurred since. By far the most interesting thing about this point count is the English number. They have about 800 points in play, in addition to 800 gold saved up. This means that if England launched a giant battle fleet, the Spanish and English would have fleets of almost exactly equal size!! How incredible!

England and Spain now face decisions; England is aware of Spain’s somewhat thin but extremely far-reaching and powerful empire. England has to decide whether to initiate the war and try to strike Spain while she is trying to eliminate 3 other factions (Pirates, Americans, and Cursed). Spain is not eager for war with England, as the Spanish have some idea of the vast gold reserves that could be spent in an instant to produce a giant battle fleet. The Spanish favor eliminating the other factions first, which would allow them to repair and regroup before the final climactic struggle to determine the ruler of the sea. England has considered a whirlpool squadron in an attempt to strike the Spanish gold system and hurt their morale, as well as a surprise attack on the Spanish forces that are now fighting the Cursed, since both factions will be near the Cursed HI very soon.

The other three factions can’t help but root for the English, between Spain’s oppression and the slight possibility that if England attacks soon, it may distract the Spanish and give the other factions a chance to recover. However, the Pirates, Americans, and Cursed won’t survive either way, for they would likely be eliminated in the epic crossfire when Spain and England meet in pitched battle!
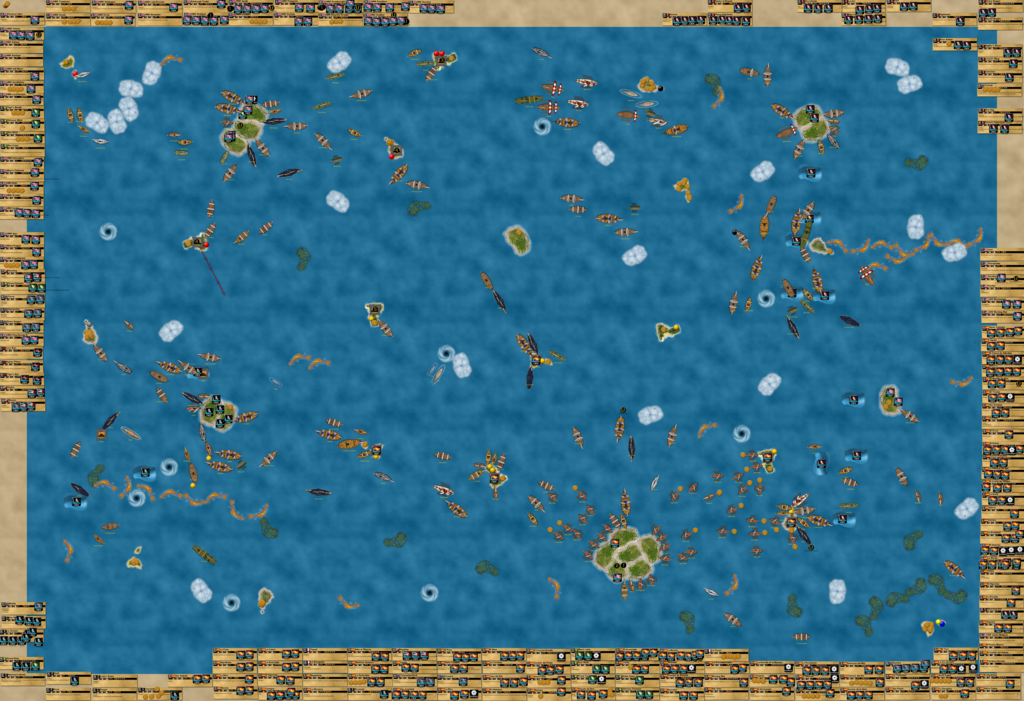
4/18/2016

The Spanish have almost finished eliminating the Pirates from the game! The Cassandra, Victoire, and Sea Nymph sank while the Dragon was captured.

The majority of the Spanish gold system, the fuel of their empire. The Spanish are beginning a major regrouping, with some of their gunships sailing closer to home to protect against a possible attack through the whirlpool (at the bottom left) by the English.

In the southeastern reaches of the sea, the Americans face elimination at the hands of the Spanish, much like the Pirates. However, the USS Morning Star has successfully used her ability to get Commodore Peregrine Stern aboard (from the Mississippi back home), giving the Americans a gunship in the area. Spain is ready for them, with 9 captained ships chasing the Americans.
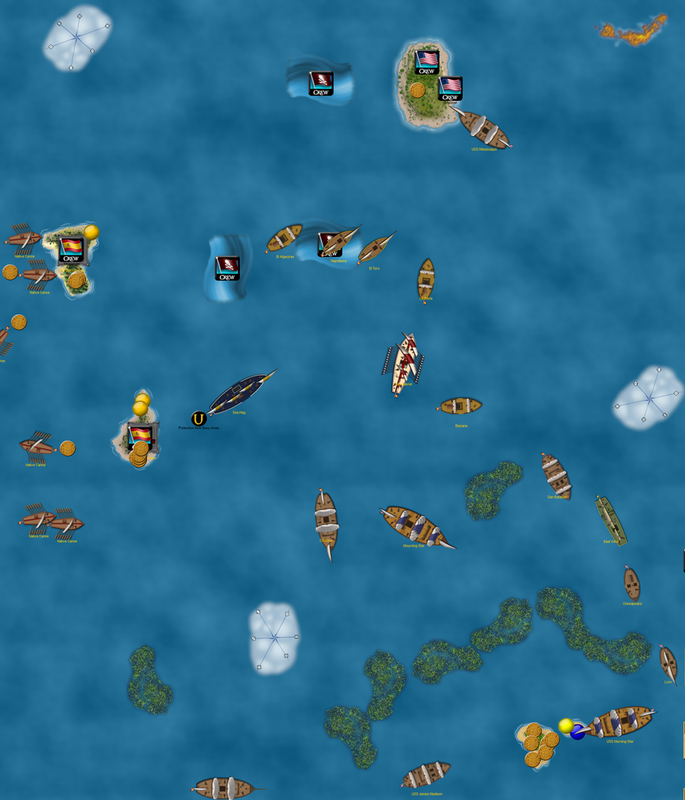
The mess in the northeast was the hottest action of the day. The Spanish had already sunk the Flying Dutchman and Divine Dragon, meaning that Davy Jones was gone. The Acorazado moved away from the Cursed HI to repair, giving the Muerta a chance to dismast the Poor Adams. The Paso and Alma teamed up to cancel the Demise’s canceller and Eternal abilities, sinking the Cursed ship at last. However, the Locker and Pyre pounced on the Cursed turn, emerging from a whirlpool to ram the Paso derelict. The Cursed also moved the Terror (Mercenary submarine of the English) onto a reef, but she took no damage. The Tasmanian Devil (hired by the Spanish) was not so lucky, losing two masts. The Tasmanian Devil signaled the arrival of the Spanish reinforcements, 5 ships sailing in from the west following the elimination of the French. They make the Spanish position in the northeast even stronger.

The Specter set the Tiger’s Eye aflame, and after a bad roll she will burn to the waterline. The Terror surfaced to bring the Specter down to 2 masts. Most of the minor faction squadron controlled by the English still hasn’t reached the Cursed home island, but the Divine Dragon (Mercenary turtle ship) and Hephaestus teamed up to dismast the Executioner, but not before the Cursed ship sank the Muninn.
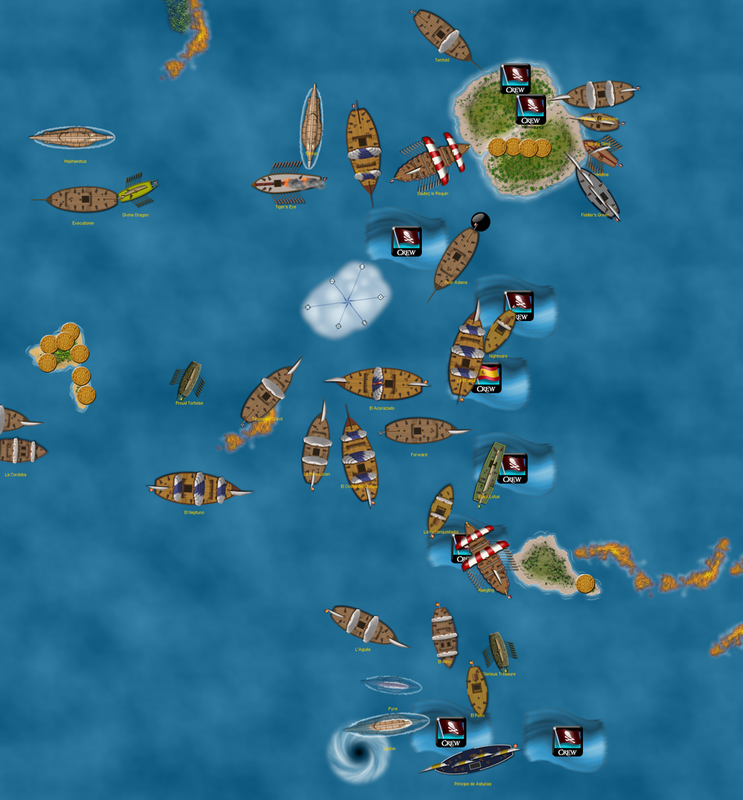
It has finally happened! The English spent 628 gold to purchase no less than 26 new ships, most of them very capable gunships! This broke the Pirates’ record (549 gold) from my Economy Edition game of the biggest single-turn launching in history! This made their home island extremely crowded, even with three additional home island expansions. They also launched a few ships from Fort Brompton to the east.
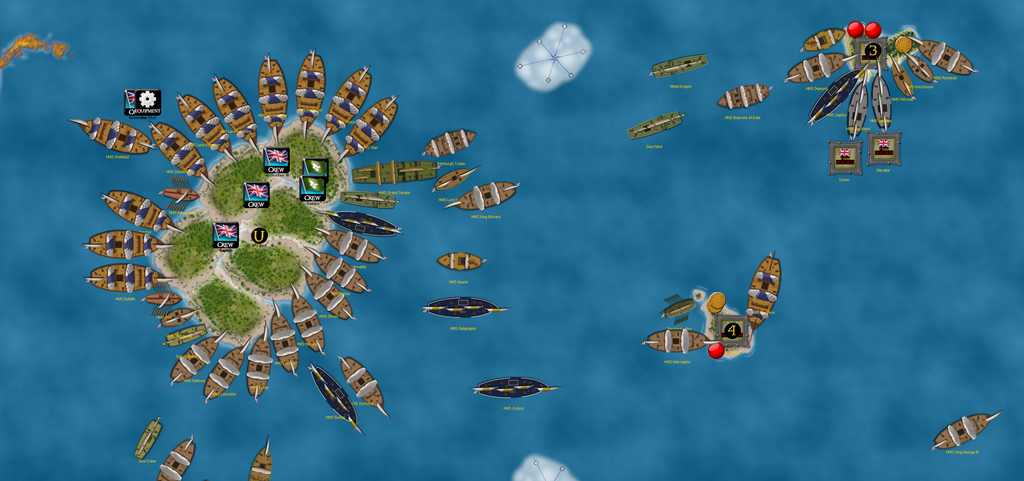
And with that, the most important point count yet was done!

4/17/2016 point/ship count
French: 0/0 (eliminated)
Pirates: 6 ships, 96 points
Americans: 5 ships, 75 points
Spanish: 101 ships, 1,631 points
Cursed: 13 ships, 292 points
English: 73 ships, 1,422 points
Total: 3,516 points

Since my Economy Edition game peaked at approximately 3,200 points, I can comfortably say that VASSAL Campaign Game 1 is officially the BIGGEST GAME IN THE HISTORY OF PIRATES CSG!!!!!

The Royal Navy sets sail!

The biggest game of all time, with the biggest war of all time as the inevitable finale… notice how crowded the corners are, with the Cursed, Pirates, and Americans all on the brink of elimination at the hands of the Spanish Empire.

4/23/2016

Before play started I took the time to launch some ships for the Spanish, Cursed, and English. The Cursed were only able to launch the Sea Duck, a desperate play which may be their last purchase.

The Spanish spent almost 100 gold to grab 6 new support gunships, while England spent almost 200 gold to buy a bunch of ships at their upgraded Ramsgate fort and a few at their home island.

The next picture shows a big overview of the entire southwest area. At the bottom left, the Pirates only control two ships, the submerged Mobilis and the fleeing Grand River. The captured Dragon and Rover will sink at the beginning of the next Spanish turn, having been scuttled. However, the English are coming. The main battle fleet of English ships is surging forward, and the Escudo del Mar fortress could be the first casualty of the inevitable war. The English squadron launched at Ramsgate has moved west towards the whirlpool, which the Spanish anticipated. At the bottom right is the whirlpool the English would likely emerge from, trying to blast their way into Spanish trade and hurt the Spanish badly at the outset of the war. The Spanish are reasonably prepared, but they’re worried that their imperial adventures have stretched their fleet too thin and weakened their empire to the point where the suddenly strong English could defeat them in a numbers game. The English have a lot of 4 and 5 masted ships ready to go, while the Spanish are starting to rely on their smaller ships when launching, since all of their larger ships are at sea or sunk.

In the southeast, the East Wind caught the USS Morning Star and knocked off her back masts. The Americans also face elimination, but their widespread fleet makes them a better candidate to survive longer than the Pirates and Cursed.

Speaking of the Cursed, they’ve finally set sail with the four ships they previously had permanently docked at their home island! These are the ships carrying the L-mover crew and Master Scribe. The Spanish cleaned up on their turn, sinking the Specter and capturing the Poor Adams (which has Eternal). The English weren’t effective at all, with the Terror unable to take out the last mast on the Tenfold. The English did recapture the Executioner, which means that she has changed hands 3 times this game! The Cursed launched her, the English captured her early on, then the Cursed recaptured her, and the English just re-recaptured her! It remains to be seen if the English intend to ignite a battle against the Spanish in the northeast. The Spanish aren’t exactly reeling, but they were shocked and troubled when they lost the Naegling. The Sea Duck dismasted the longship by herself, allowing the Sautez to sink her. The Naegling was a powerful asset, and carried Sigurd Andersen, Spain’s only admiral crew. England still has both admiral crew, Beckett and CRGO.

Here’s the whole ocean; note the mass of English gunships heading southeast, while the Americans are mostly trapped in the southeast corner. Right now the Spanish are concerned with the English advance; Spain doesn’t have enough ships to throw at England to delay them for long. Some ships are moving to intercept the huge battle fleet, with some coming from the battle around the Pirate HI. Six new gunships have been launched at the Castillo, and the newly launched Trinidad will join them. The Augusta and Granada have turned around near the former French HI, and the captured Bonaparte is fully repaired. Despite these forces, the Spanish are the least confident they’ve been the whole game. To make matters worse for them, England has launched 3 new gunships at their HI for 50 gold. More are undoubtedly on the way, but the English have finally run out of gold!
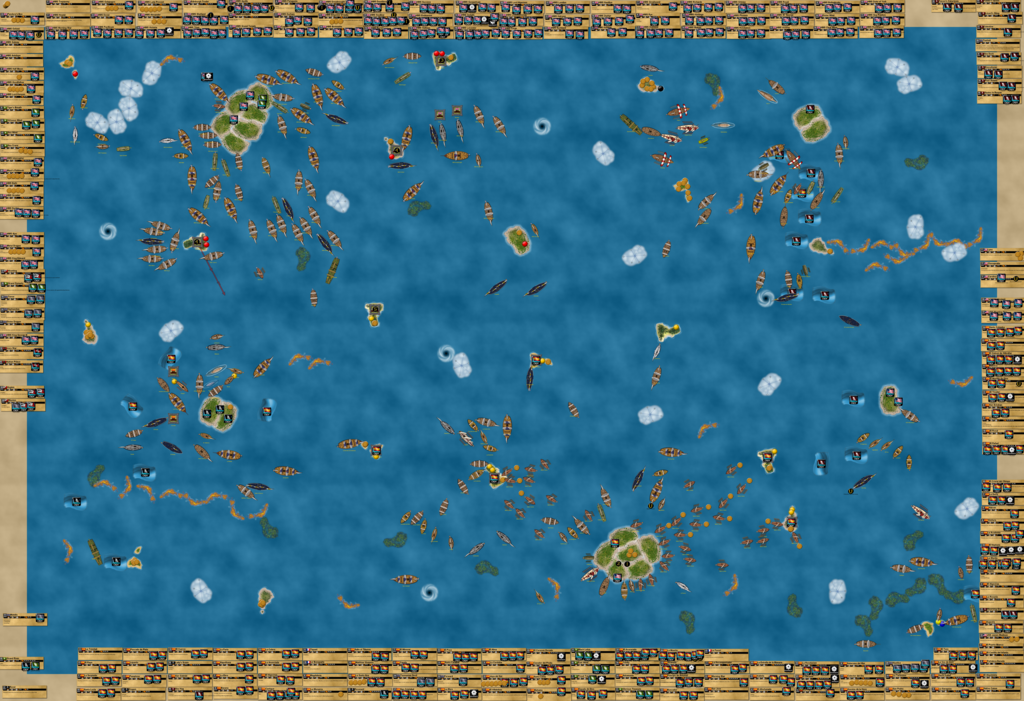
4/24/2016

It’s finally happened…

BUT NOT FROM THE ENGLISH! THE SPANISH DECLARE WAR ON THE ENGLISH!

In a stunning move, Spain, now the underdog, sent the San Cristobal through the whirlpool near their home island to emerge from the whirlpool the English appeared to be after. She used an extra action to move S+S+L+S and sink HMS Goodfellow, one of England’s best treasure ships! This sudden, unexpected attack on English trade left the English stunned and angry.

The Spanish also managed to crush the American fleet, sinking the Lynx and Chesapeake while dismasting the Morning Star and Mississippi. The Carolina is the last American ship left, a fitting end for the doomed faction.

Speaking of doomed, the Cursed are also about to be eliminated. The Sea Duck and Tenfold are their final ships, with the others either captured or derelict. The Pirates are faring a bit better, between the submerged cancelling sub Mobilis and the quick Grand River. The Spanish squadron in the southwest is heavily damaged from the Pirate war, yet faces an extremely intimidating English fleet bearing down upon them from the north. The Spanish have gathered their forces and will continue to launch in an effort to delay the English as long as possible.

In the first English hostility of the war, HMS Grand Temple almost destroyed the Escudo del Mar, the Spanish fort closest to English waters. The Ajax, Success, and Dunlap are immediately astern of the GT, but dozens more English gunships are sailing full speed at the Spanish. All-out war is about to ensue!!

In the southwest, the Pirates have almost been eliminated, but the Spanish are reeling and need to repair some of their ships before they take on the English. In the southeast, the Americans have been destroyed by the Spanish Empire, but the Carolina is still relatively safe in the far north after her (very) long expedition. The northeast has seen the Spanish mostly eliminate the Cursed, with the English unable to get into action effectively and unable to inflict much damage when they did (though, it’s the minor faction squadron, not a Royal Navy squadron!). In the far northwest, the San Cristobal is doomed against the Endeavour, but she did her part to ignite the War for CG1. 

4/26/2016

4/25/2016 ship count (this was done before my latest turn)
(Pirates: 2 ships; Americans: 1 ship; Cursed: 3 ships)
Spanish: 111 ships (new record! Previous record: Pirate fleet of 104 ships in my Economy Edition game)
English: 91 ships
Total: 208 ships (new record! Breaks the previous record of 198 ships set a few turns ago)

Also, the game may be at a new peak level of points, though I’m not planning on doing another point count (I may do one when the fleets are smaller). Based on the last point count from 4/17, the average number of points per ship was 17.76. Multiplying this by the 208 ships in play gives an estimated points total of 3,694!

And now, for the “final” past strategies of my fleets, which are now almost irrelevant:

Spanish: Eliminate the Cursed. Eliminate the Pirates. Eliminate the Americans. Prepare for war on England.

Cursed: Survive? LOL

English: Get Lord Thomas Gunn out there. Use Carbon Charlie to give gunships extra cannons. Eliminate the Cursed. Consider declaring war on Spain; possible attacks include the whirlpool southwest of the Spanish HI, or loosing the minor faction squadron and other ships in a surprise strike. Make the 5 masters the true capital ships and go to war!

Now, for the actual events of the latest turn:

The center and western areas are being overrun by English warships! Tension is at an all-time high! The next turn will see the War for CG1 erupt!
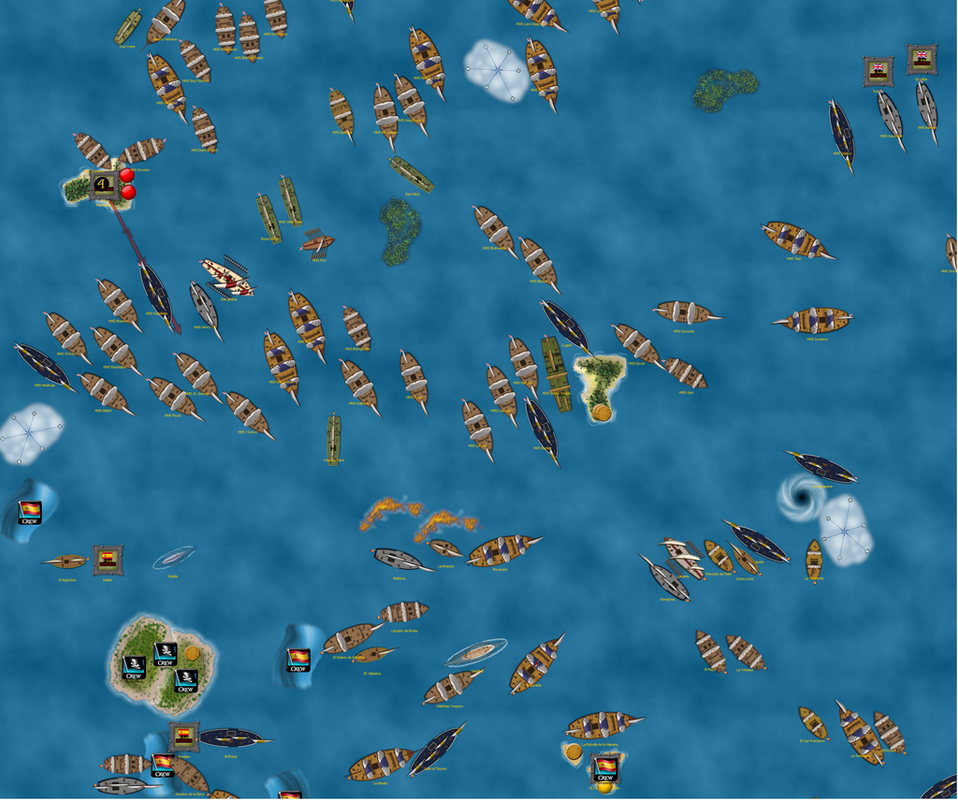
The San Cristobal, having recently sunk the Lady Provost, was able to sink the Tiger’s Breath. This hurt the English gold system further, but the Endeavour got revenge by sinking the SC. At the English home island, the Dauntless has been given a fifth and final extra cannon, and it’s possible that Carbon Charlie’s job is finally done, having created around 25 extra cannons for almost as many turns in a row!

The Cursed have been eliminated!

On the Spanish turn, the Spanish battle squadron in the northeast cleaned up, sinking all Cursed ships south of the Cursed HI. On the English turn, the Terror submerged and rammed the last mast off the Tenfold! With that, the Cursed become the second fleet eliminated from the game.

The northeast corner of the sea. I included the deckplate area to give an idea of just how dominant England has been lately – English deckplates have spilled into the ocean and almost completely over the areas formerly occupied by Cursed deckplates! The Tenfold lies derelict in the far north, but something interesting is occurring just to the south. Despite Spain’s declaration of war, neither the Spanish squadron nor the minor faction squadron (controlled by England of course) want to engage in battle just yet. The Spanish are looking to join their comrades in the south, while the English squadron is relatively slow and know the importance of the first strike. In a further irony, both sides are trying to scuttle a captured Cursed ship since they have Eternal, which means the ship would automatically return to their HI, saving a ship a lot of time rather than towing it to the nearest fort. (The once-again-English Executioner is Eternal via Fantasma while the Poor Adams has been captured by the Spanish.)

Speaking of captures, the Spanish have been capturing ships in the hopes of using them to bolster their fleet to take on the English. The USS Morning Star and Mississippi are the latest additions, and both carry some formidable crew that could make them good gunships if repaired in time to help the war effort.

In the meantime, a command has been issued by Admiral Luis Zuan (aboard the Acorazado, the Spanish flagship) to have all able Spanish gunships sail to intercept the English ships before they can reach the Spanish gold runners. Many ships are answering the call, and although the Spanish fleet is still significantly damaged and spread out, they do have a great empire to call on. The Spanish western squadron (which almost managed to eliminate the Pirates) is the closest major squadron available to help, though it’s also the squadron most in need of repairs. Around a dozen ships have been launched from the Puerto Blanco fort over the last 3 or so turns, and they’re headed towards the massive English battle fleet as well. Joining them are a few ships from the center, though the famous Granada has already been sunk by a devastating combo of SAT and Power Cannons utilized by HMS Swallow. The Granada sunk in just the second ship action of this war (the first being the San Cristobal’s whirlpool attack), but she served with distinction throughout the entire game for Spain. She was the ship that fired the first shots of any war during this game, the War on France. After surviving the Battle of the Two Paradises, she accompanied Spanish ships to Pirate waters before returning to the French home island to see them finally eliminated. The Granada fittingly captured the Bonaparte, a ship now serving the Spanish. It’s safe to say the Granada is an MVS (Most Valuable Ship) of CG1.

In terms of maneuvering, both the Spanish and English have been sizing up each other’s cancellers. Both fleets possess 4 total, and it’s well known how much of an asset they can be in battles of any size. 3 of Spain’s 4 cancellers are returning from fighting the Cursed, and the Acorazado and Paso need to repair. The submerged Nautilus carries Christian Fiore, who is returning to Spanish waters from the end of the Pirate war. The English have learned from a past campaign game victory, and appear to be throwing a huge bulk of gunships against the Spanish, while keeping their absolute best 3-5 ships in reserve, at least for the time being. That is a luxury the Spanish cannot afford, for they’ve needed to send every available ship into action to slow the inevitable English onslaught. From the picture it appears that England has the advantage, but Spain’s impressive battle fleet and their ability to launch ships each turn from the nearby fort (El Puerto Blanco) should make this an epic fight. Indeed, it will be the largest war in the history of this great game of Pirates CSG!

4/27/2016

The War for CG1 has erupted!!

The Spanish showed no fear, sailing straight towards the enemy and intending to create a huge traffic jam of ships in battle so that the English would have trouble reaching the Spanish gold runners further to the south. The Lepanto got things started, blasting three masts off HMS Grand Temple. She was quickly followed by other brave Spanish ships, eager to earn glory in the name of the Spanish Empire. The Pescados de Plata and Pamplona were a major help, and the Pamplona almost dismasted the powerful Leicester in one action! The captured Revenant served as a temporary shield and firepower magnet, while more valuable ships such as the Garante and Nautilus formed up behind. Just to the west, the Babieca set the Virtuous Wind ablaze, while the Rosario won a boarding party to kill her helmsman. El Algeciras teamed up with her Diablo flotilla to eliminate three masts, while the Augusta managed to sink the Ajax with help from Roberto Santana’s cannon bonus! The Spanish attack was effective, but they knew the counterattack would be devastating. Indeed, the battle very quickly turned into a chaotic, extremely close-quarters pell mell engagement.
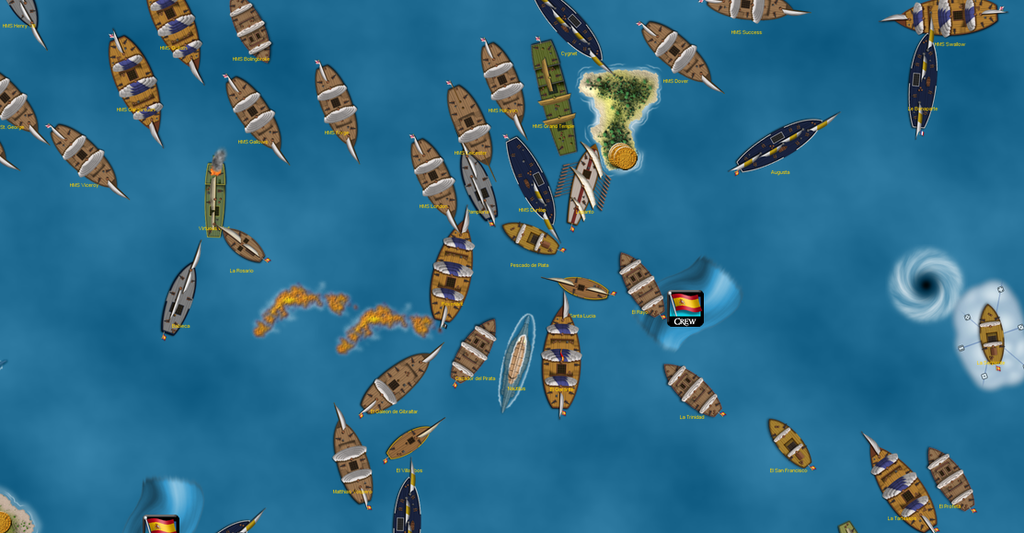
Here’s the wider view of the above picture, showing the far-flung Spanish Empire in full desperation mode. They’re frantically sailing to meet the English, but at the same time, their immense combat experience gained from building their empire in the first place gives them a well-earned confidence.
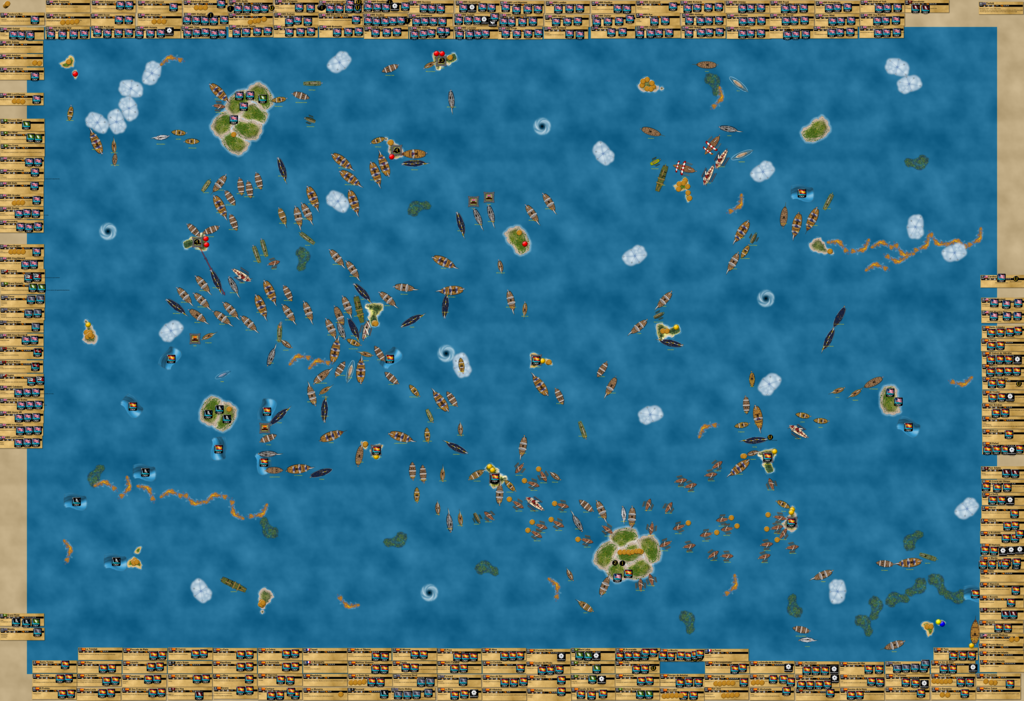
The last two pictures showed only the Spanish turn; these next two pictures show just the English turn. The counterattack was indeed effective, but not as effective as the English were expecting.

The Algeciras, Diablo, Babieca, Rosario, Revenant, Lepanto, Pamplona, Augusta and Bonaparte (among others I believe) were all either dismasted or sunk, but the derelict Lepanto and Revenant blocked English ships from getting through to more Spanish gunships, which meant the Spanish plan was succeeding on some level here in the early stages of the battle. The Spanish have sent most of their ships northwest to meet the English, but some English ships are even coming from directly north of the Spanish HI. The Kirkwall and King George III teamed up to damage the northern Puerto Blanco and nearly dismast the Trinity. With the Alquimista only another turn away, this is as close any faction has come to hurting Spanish trade since the Pirates’ whirlpool attack using Calypso.
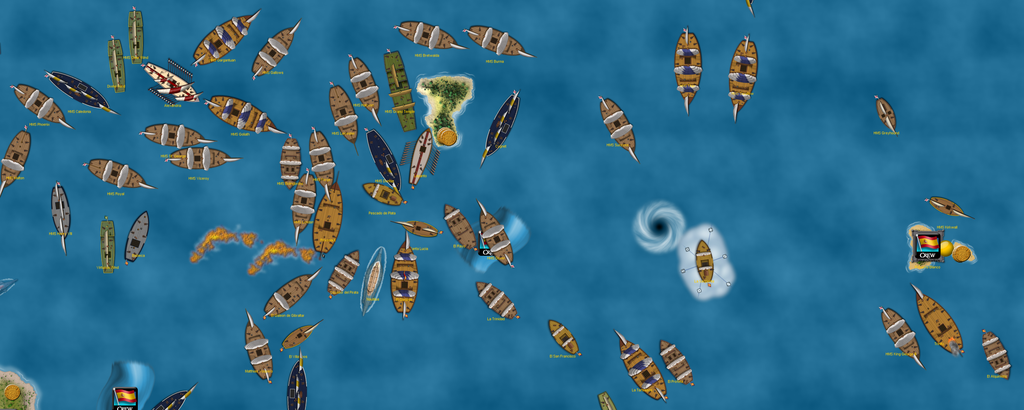
Though the main battle is obviously concentrated in the middle western area, other conflicts threaten to erupt to the east.
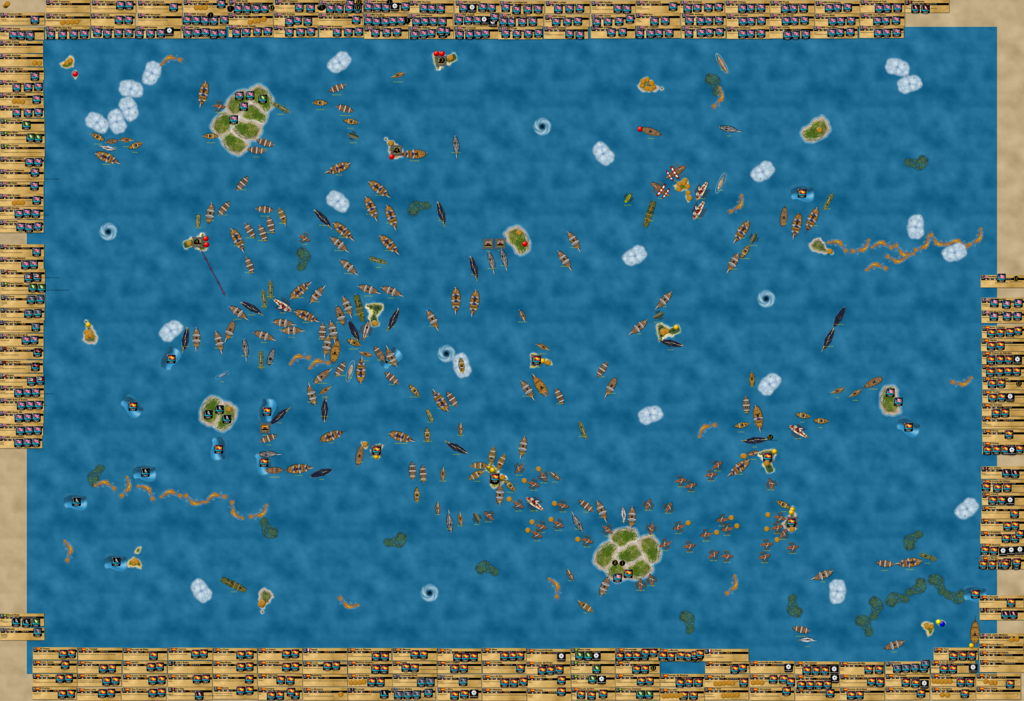
The last three pictures show a full round of the most recent Spanish and English turns.

Here’s the absolute hottest part of the fight. The Dunlap and Cygnet have fought through the hordes, but that will expose them to deadly Spanish fire on the next turn. The Dover has been sunk by a combination of 4 smaller Spanish ships, while the Bolingbroke has just dismasted the Cazador del Pirata after the latter sunk HMS London. The Nautilus and Garante will finally enter the fight, and their presence is helping Spanish morale. However, there seems to be no stopping this English flood of ships, though Spain has done a great job slowing it down thus far.

This shows the entire battle area. The English have adapted to their problems by establishing a sort of pincer movement: lots of English ships are sailing almost due east from the area north of the Pirate home island, while plenty of English ships from the north are almost upon the weaker area of the Spanish defences. This puts pressure on the Spanish while also taking attention away from the jam where the battle started, the only place where the Spanish almost have the advantage. Both sides have had some major combat successes, but ironically HMS Success hasn’t been able to hit much of anything with her cannons. At the bottom right, the Spanish pulled off a near-miracle: the Colector del Dia (now with a new captain to fight once again!) and Trinity went 4/4 to dismast the King George III, who was then captured and towed by the Alquimista (a gold runner) and La Cordoba. The Kirkwall has sunk the captured ship to deny the Spanish of using her, but the Trinity also docked at the northern Puerto Blanco to put out her fire mast before it was destroyed by the Greyhound, while some Spanish reinforcements are arriving from the northeast. The Tartessos is finally ready for action again, with Spain showing her might in the form of veteran gunships returning to duty. The Tartessos has been joined in the fog bank by El Profeta, just one of many seldom-heralded Spanish ships that the empire has to call on in this time of great need.

More Spanish ships are coming up from the south, and Spain continues to launch ships every turn from the western Puerto Blanco. The Leon, Corazon del Mar, Duque, and Mercenary submarines Fathom and Devil Ray are the latest launchings. The Estrella de la Manana, a veteran of both the French and Pirate wars, is sailing east to pick up some generic crew after she was almost sunk by the Flying Dutchman in the southwest.

A few interesting things have happened outside of the immense chaos in the center; the English won the scuttle battle by scuttling the Executioner before the Spanish could scuttle the Poor Adams! Far from the main battles lines, each nation’s most impressive ship repairs at their respective forts: El Acorazado and HMS Dreadnought. Each nation also has an extremely dangerous ship unlikely to see action for a while: La Muerta and HMS Endeavour. The greatest ships in action so far have been the Leicester and Grand Temple, with Spain mostly having smaller support gunships available so far. Speaking of the Leicester, she was saved from sinking by a somewhat unsurprising (by this point at least, if you’ve read some other BR’s of campaign games) chain-towing effort involving no less than 6 other English ships.

As the War for CG1 continues, only one nation can claim victory as the ruler of the ocean!

4/30/2016

The battle continued, with two more turns being played. The Spanish counterattack was somewhat successful, but their hope lied in the reinforcements coming from the south and east. Before play resumed Lord Thomas Gunn was able to recruit Commodore David Porter aboard the Carolina (the last remaining American ship and crew) to join the fight against Spain, based on Spain’s past transgressions.
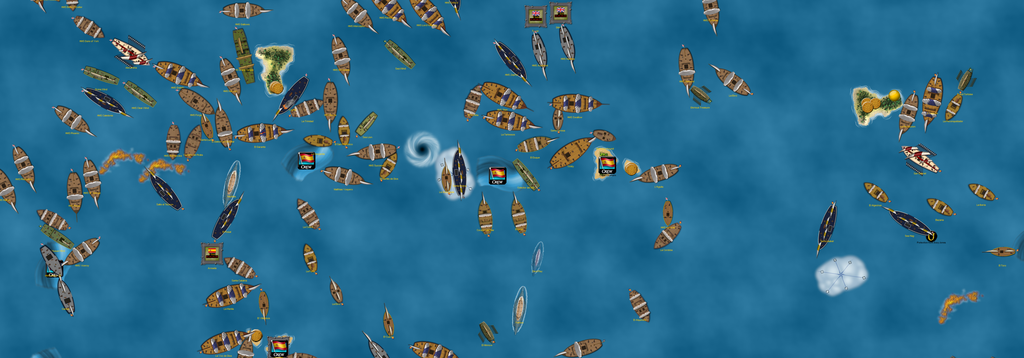
Here’s the whole ocean after the English took their turn. The valuable HMS Titan has temporarily fled northward to repair, as well as to meet up with the other English ships that have the canceller ability (Dreadnought, Endeavour, and Rye). They will be joined by the Gallows and Dauntless to form a sort of “super squadron”, relatively small but extremely powerful. The Spanish have their own makings of that in the east as the Paso and Acorazado finish repairing. In a stunning move, the Swallow used Mycron’s extra action to sink the Santa Isabel with 5 coins aboard! This angered the Spanish, but showed that the English were slowly getting closer and closer to putting a big-time hurt on the Spanish gold system.

After another Spanish turn, English ships such as the St. George, Clear Wind, Burma and Success lie derelict. However, this turn saw very poor shooting on both sides, especially the Spanish. However, they did manage to capture the Swallow, which they need to tow back to their home island. The Garante and others are fighting hard in the west, where a handful of English ships have been sunk, but the English still have a numbers advantage.

This is where the battle stands now, after another English turn. In the west, the Santa Catalina has been sunk, while the Voz de Dios and Manila have one mast left. After dismasting the St. George, the Armada flotilla has been sunk. The Santo Columba has finished repairing, giving the Spanish a capable gunship in the area for the next turn. However, the Villalobos and Asesino are just about out of time for repairs. The Ebro, Antamasia, and Colera are all in the area too, but the flood of English ships is starting to overwhelm the Spanish defences. The Galeon de Gibraltar and Santa Lucia are some of their latest losses, while the Rosal and Garante were very lucky not to have been sunk on the latest turn. Those two ships are the latest in a Spanish effort to block the invading English near where the battle originated. However, this led the English to send a lot of ships southwest around the reefs as well as ships sailing almost due east (and then south) in order to counter. The English have adapted reasonably well, as they seem to have the advantage in the western and center areas of the wide swath of battlefield. The Spanish have held up amazingly well in between those areas, holding off the English (and Grand Temple specifically) for many turns now. In addition, the Spanish have a reasonable advantage in the eastern reaches of the battle, which is more evident from the final picture.

Two and a half months into a giant campaign game. The Spanish and English continue to launch ships from their upgraded forts every single turn, which will keep the battle going for a while. However, Spain needs to focus more of her efforts to the west, because the Castillo (the main launching point right now) will fall once the English break free of the remaining Spanish ships. The Spanish now control almost all of the Mercenary submarines, while the English have launched almost all of their 3 masted ships. As expected, Spain has a repairing problem right now, as many ships repair at their two forts in the far east. Along with those ships, a handful of other gunships are joining part of the northeastern squadron after returning from the far east. Three gunships make their way around the south side of their HI. Between all of these forces, Spain still has a reasonable chance of victory, especially if they can capitalize on their launch point at the fort upgrade. For the existing ships, it’s mostly a question of whether they’ll get there in time or not (which depends on how effective the newer ships are at holding the lines of defence). I’m somewhat surprised by how the battle has gone so far, especially with Spain holding out extremely well where the action is still the hottest (near the Garante and Grand Temple). Spain has adopted a new strategy of leaving most derelict ships where they are, whether friend or foe. This forces England to tow some of their ships (though plenty have been sunk) and sink all Spanish derelicts, slowing their advance. However, the English gunships are really starting to break through to the west and north. It’s been reasonably complex thus far, especially with the maneuvering!

5/1/2016

After another Spanish turn, many more English ships lay derelict or at the bottom of the sea. HMS Richards was one of the latest sinkings, while the English approach from the west suffered heavy damage.

This next picture shows the next English and then Spanish turns. The English counterattack saw them sink the Rosal and Garante, slowly opening the gate for English ships to finally cross through past the area where the battle started. The English finally made the decision to try and scuttle some of their derelicts, simply to get them out of the way of their healthier ships. The Matthias Vospero and La Furia desperately try to re-close the gap at the upper left. To the far left, you can see the English struggling despite having a numbers advantage, but that numbers advantage is about to be almost negated by the new Spanish ships in the area. Three new Mercenary gunships, the (finally-ready-for-battle-once-again) Estrella de la Manana, Asgard, Sahara, and fully repaired Asesino are coming. This gives the Spanish a much-needed presence in the west. Once again, the momentum of each small area of the battle shifts. The English looked to have the advantage in the west and not so much near the Garante, but now it’s the opposite. The strong Spanish counterattack and the influx of new ships has solidified the Spanish western position, but now the English have broke free slightly to the northeast, allowing 4-6 gunships that are fresh to sail through. It’s very exciting! In addition, the Minnow is giving the English problems, while the Tasmanian Devil is fully repaired at the Castillo.

Towards the right-center, the Neptuno suffered a disastrous shoot action on the Lord Kettering, going 0/5 and setting herself alight with her own fire shot! Luckily for her the San Gabriel, Reconquistador, and Proud Tortoise bailed her out. Before that happened, the Gibraltar flotilla was destroyed by the Algeciras, while the Santa Ana dismasted the Nautilus (English schooner, not Spanish/Mercenary sub) after the Nautilus dismasted the Cordoba. The Grand Dynasty barely hit anything on the English turn, and was then pulverized by three small Spanish gunships. The Bazana has managed to dismast the Ivory Star by herself and ram a mast off the Nubian Prince. At the upper right, the Black Lotus surprised the minor faction squadron’s Vikings by turning to starboard and firing a full broadside! Two shots landed, setting the Hrunting on fire. The Sea Hag appears to be safe towing the Swallow home, while Spanish ships are almost done repairing at El Puerto Blanco (lower right).

And finally, the latest English turn. Inevitably, the Santo Columba, Villalobos, Matthias Vospero and Manila all sunk. Somehow the Ebro and Antamasia survived the English onslaught – though the English did have poor luck this turn. In addition, the aggressive English have put themselves in a position to be devastated in the western reaches of the battle on the next Spanish turn. The Cuervo and Corazon del Mar also sunk at the hands of the English, who are eagerly sailing south between that fog bank and the island the Spanish fort was on. Only a few subs and potentially the Tasmanian Devil and the newly launched Gallows stand in the way of England’s warships reaching Spain’s gold runners. The Pacificum received an extra action from Lord Mycron to sail further south and damage the Santa Ana. The English didn’t get either of their admiral crew this turn, but those two and Lord Mycron have definitely provided a somewhat significant advantage during the battle. England usually gets one of the admiral crew each turn because of the rerolls for them, which combined with Mycron allows them to get two extra actions to any gunships anywhere in the fleet.

The Lord Kettering, Nubian Prince, and Divine Dragon all did minimal damage to the Spanish, although the Hephaestus surfaced to cripple the Black Lotus. The hired Vikings didn’t do too well for the English, with the Hrunting’s fire spreading and the Huginn’s captain being cancelled by Nemesio Diaz aboard El Acorazado.
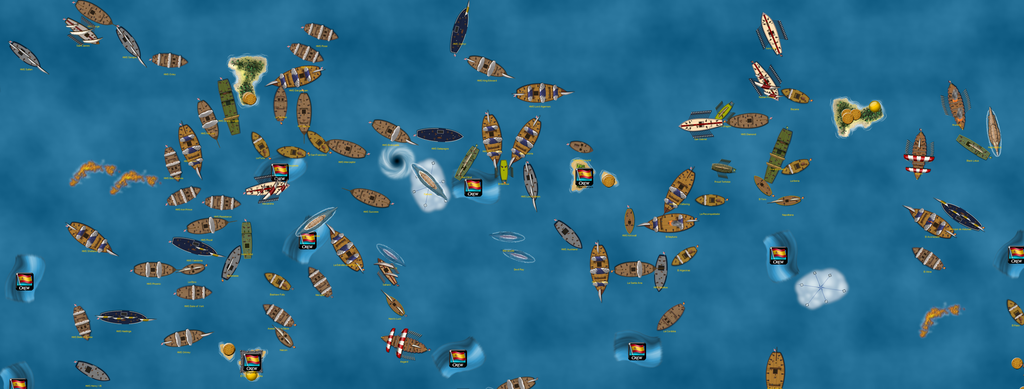
The entire ocean, which shows 79 ships in the Spanish fleet and 90 for the English. This means the numbers have shifted a bit, but the English have many derelicts among those 90 still afloat. Notice the relatively full English deckplate area compared to the once-grand Spanish area in the southeast, which now has many holes and chunks missing. The numbers haven’t gone down a significant amount, mostly because each faction launches at least one gunship per turn, and usually they can launch 2, 3, or 4. However, this will only last so long, because the current gold pile is running out. At less than 100 total coins, once the gold runs out, there will be no more replenishments! The end of the game is still a long way off, but it is approaching.

5/2/2016

Somehow I managed to play three turns today.

As expected, the Spanish hit the English hard in the westernmost part of the battle, with the Asesino de la Nave leading the charge. Slightly to the north, the Estrella de la Manana got back into action with a vengeance, dismasting one ship and setting fire to the Alexandria. She’s now participated in each of the major Spanish wars – against the French, Pirates and English. The submerged Mercenary submarines lied in wait for the English, while the Spanish launched three new Corsair privateer ships from the Castillo. The Tasmanian Devil and Neptuno engaged the Pacificum (middle of the picture), while the Santa Ana towed the Cordoba home. To the east, the Lord Kettering and Grand Dynasty were sunk, which boosted Spanish morale. The growing Spanish eastern squadron sank the Huginn and Hrunting, while the Hephaestus would soon meet a similar fate.
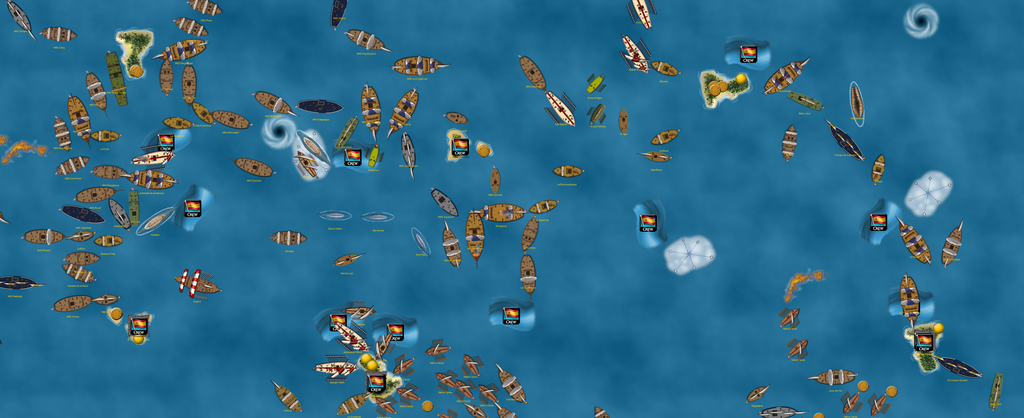
The following English turn saw them sink the Asesino and other Spaniards such as the Trinidad and Ebro. In addition, the English had a morale boost of their own, when the Pacificum managed to sail south towards the Spanish gold system (bottom right). Her attack on the Concepcion failed, but the point was made, similar to when the Swallow sank the Santa Isabel. However, the English were still struggling mightily in the west and northwest areas of the battle to fight through the horde of derelicts, belonging to both them and Spain. After the Minnow was sunk, HMS Morning Star surged through and used Professor Clive Defoe and Mycron’s extra action to sink both the Brave Selkirk and Barracuda! This took out two of Spain’s valuable submarines, and the Spanish were foolish to let them get so close to the Morning Star. The Victoria set the Tasmanian Devil aflame, while the Lord Lineton damaged the Neptuno. The Lord Algernon re-established an English presence in the eastern reaches of the battle, taking out La Reconquistador.
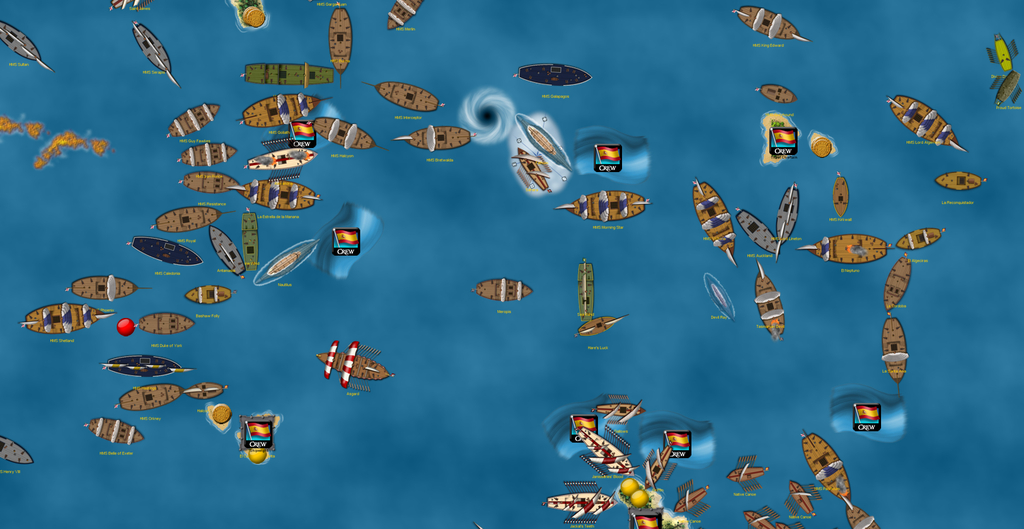
The rest of the ocean lies relatively dormant, save for the Spanish and English gold runners hurrying to fund their respective war efforts. It’s worth noting that England sent some of their larger gold runners (Interceptor, Metal Dragon, King Edward, Galapagos, and others) off to war, making the Spanish gold system seem more superior of late. However, with the gold replenishment pile running out, it may not matter, which could give England an advantage.

Another Spanish turn, and more devastation. The Estrella dismasted the Halcyon, while HMS Morning Star, Victoria, and Lord Algernon all took major damage. The Spanish have done surprisingly well using a lot of smaller but still effective gunships. The battle has turned into a stalemate, with both sides losing many ships and crew each turn. At the upper right, notice the powerful Spanish eastern squadron slowly assembling; El Acorazado cancelled the Terror to the surface and teamed with the Black Lotus to dismast the submarine. At the bottom, the Concepcion has dismasted the Pacificum to end that threat, while the Hrothgar and Slipstream are the latest Spanish launchings.

The English strike back, sinking the Antamasia, Bashaw Folly, Fathom, Reconquistador, and Toro. In addition, they rolled well for scuttling their own ships, which meant more ships would sink on the next turn. The Goliath slammed into the Estrella and set her on fire, pitting the two 5 masters against one another. At the top of the picture the English super squadron is assembling, with the intent to strike its Spanish counterpart. At the very top right, the Carolina has captured the Poor Adams (a ship the Spanish failed to scuttle), giving the Americans two ships overall.

The Spanish once again prove themselves! In a huge blow to the English attack, the Shetland and Goliath both sank! The Shetland carried 5 extra cannons from Carbon Charlie, while the Goliath was carrying shot equipment and was one of the main English ships in the northwest area of the battle. The Victoria and HMS Nautilus were sunk, while HMS Morning Star was knocked down to one mast. The Spanish continued to push the envelope, and miraculously they’ve taken control of the central/northern area of the battle! Things are also going better than expected in the west, and the east is predictably Spanish-dominated. The Lord Algernon is derelict, but the King Edward threatens to invade Spanish waters. However, the Spanish seem as prepared to take on any challenge as they have been since the battle began. The momentum naturally shifts each turn with the fast and furious broadsides, but the overall momentum shifted in Spain’s favor today. The experience many of their ships gained building the empire is serving them well against English crews with less experience. The Clear Wind and Silent Death are the latest launchings at the Castillo, while ships like the Castigue, Tepant, USS Morning Star (the latter two captured of course), and San Estaban look to finally enter the fray.

No less than 6 English derelicts were scuttled at the beginning of their turn, and that was followed by the English sinking numerous Spanish ships, which meant a large clearing-out in the western area of the battle. The Guy Fawkes finished off the Estrella, while the Belle of Exeter bombarded the western Castillo at the bottom left of the frame. The battle in the west is much more clear now, with 7 or 8 English gunships now free to sail towards the Spanish and not be bogged down by a dozen derelicts in the way. Spain only has about 4 privateer ships to match England’s strength in the western area, but more ships are on the way. The middle area has indeed been retaken by the Spanish, but HMS Gargantuan may cause some havoc before the Spanish can send some of those central ships to the west and northeast. At the upper right, the English made a wise decision not to send the King Edward south into more Spanish waters, instead turning around to dismast the Napolitana and temporarily save the Lord Algernon. Since the beginning of the battle, England has put a priority on hurting Spanish trade, but this has led to them being overly aggressive and not taking full advantage of their numerical superiority (which is dwindling or non-existent in the main areas of the battle).

This shows the entire ocean; once again notice the numerous holes appearing in the deckplate areas at the top and bottom of the frame. The Pirates are trying to get some gold with the Mobilis and Grand River, while the Carolina has let the Poor Adams repair with the abandoned shipwright given to her by the English.

There are around 65 Spanish ships afloat, compared to about 74 in the English fleet. This is without a doubt the biggest battle I’ve ever seen in a campaign game, and also one of the closest. At the middle left of the picture, 8-10 new English gunships (mostly 2 masters) are making their way to the battle from their launch point at Ramsgate. The Spanish have enjoyed their closer launch point at the Castillo del Infanta, which the English have not been able to reach, let alone destroy. Also, notice the massing of the two super squadrons, with the English near the former French HI and the Spanish assembling just to the southeast, where the Terror and Nubian Prince were recently sunk. With a giant (but diminishing in size) stalemate occupying the main battle fleets in the center of the ocean, it’s entirely possible that the battle between these powerful squadrons could decide the victor of the war, and by extension, CG1 itself! However, it’s also a possibility that the squadrons nearly cancel each other out (literally in some cases!) and the war of attrition leads to a very narrow victory for one of the two factions. Now that I think about it, it’s also possible that the gold runners of each faction would meet in a desperate struggle, with most actual gunships already sunk!
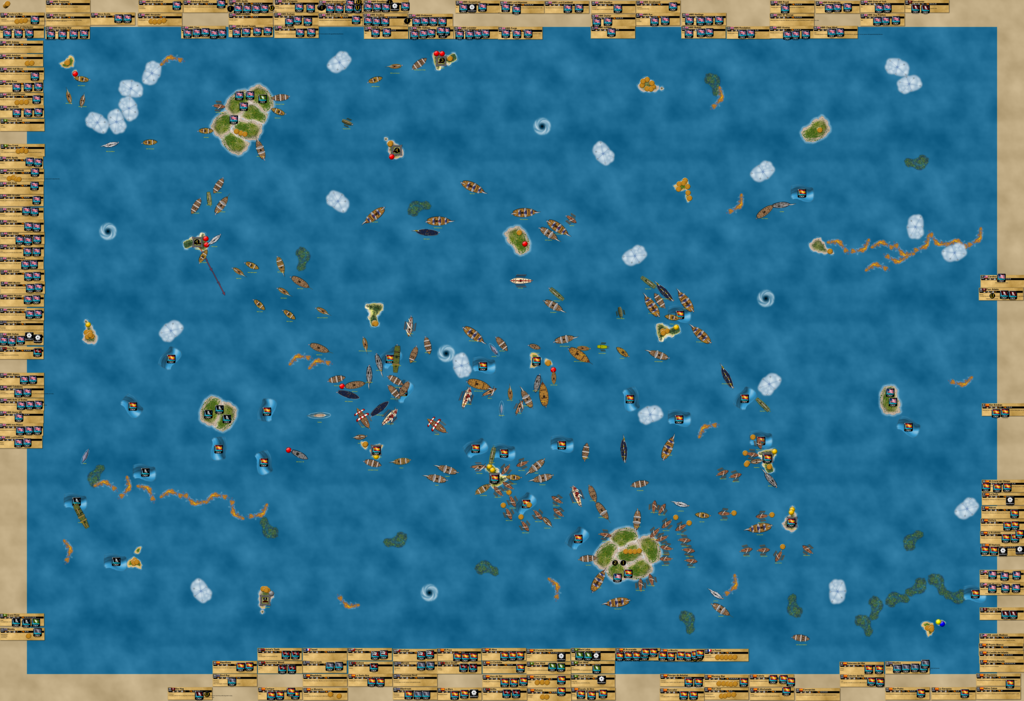
5/6/2016

With the game size diminishing as the end approaches, I was able to play 4 turns today! More will follow in the next few days as the pace of play increases due to faster turns.

This first picture shows the first full turn of the day in the battle area. The Spanish inflicted good damage, but England crushed both of her 3 masted longships and used the Gargantuan to devastate some of the smaller ships east of that fog bank in the middle. At this point in the battle, so many ships are being sunk or dismasted on every turn that it’s hard to keep track of. However, perhaps the most unique development on this turn concerned the “super squadrons”; Spain turned hers north in an attempt to lure the English squadron away from the Spanish home island and the battle they were continuing to very slowly lose, but the English were too smart for that. They still wanted to get to the Spanish gold system, which they knew would quickly end the war with an English victory. Turning their gunships south, England gave Spain no choice but to do the same, or risk losing everything while the Spanish squadron was unable to defend her home waters.

The next Spanish turn, where they barely have enough ships in the area to fight back. The dismasted Meropis and two 4 masted galleys have taken up the blocking duty in the now-infamous area northwest of the Castillo, but the Spanish are being exhausted by the war effort. On the bright side, they managed to finally dismast the Grand Temple, while the Nautilus rammed a mast off the Lord Cauldwell while submerged. They also took in 72 gold this turn, which was one of their highest totals in quite some time. They used it to launch 4 new gunships at the Castillo, while the super squadron turned around to take care of the King Edward and Executioner.

The next English turn saw the Prince of Chichester use her regular action to destroy the final armaments on the western Castillo, and then use an admiral’s action (AA) to dismast the Castigue. The English weren’t lucky this turn, but they were inching closer and closer to the Spanish home island.
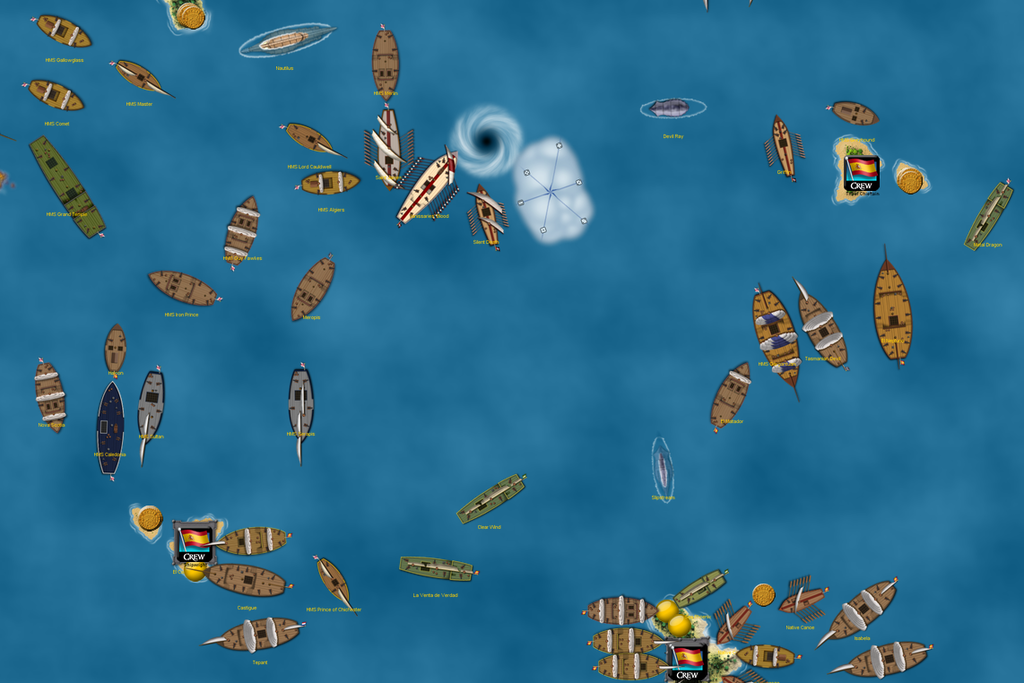
With all the empty swaths of sea and many deckplates noticeably missing from the English and Spanish fleets, it’s obvious that the end of the game isn’t far off. Some Spanish gold runners have transferred to the eastern side of their home island, partly due to fear of English invasion from the northwest and partly because the gold system to and from the Castillo island has been more than adequate. At the middle left, notice the steady supply of English support gunships sailing southeast from Ramsgate, which will continue to put pressure on the Spanish defenders.

A turn later, and the western Castillo has been destroyed! However, the Prince of Chichester was captured. The gaps are about to be plugged by the Spanish once again, but notice the wide open lanes available to the English, on either side of the fog bank the Nautilus has ducked into. The Nautilus is desperately trying to reach the Spanish super squadron to give them 4 cancellers in the area, which would match the 4 cancellers in the English super squadron. Also note how densely packed each super squadron is, in anticipation of the epic face-off. At the lower left, the Castigue sees a rarity: using a sac action to repair twice! (before the fort was destroyed)
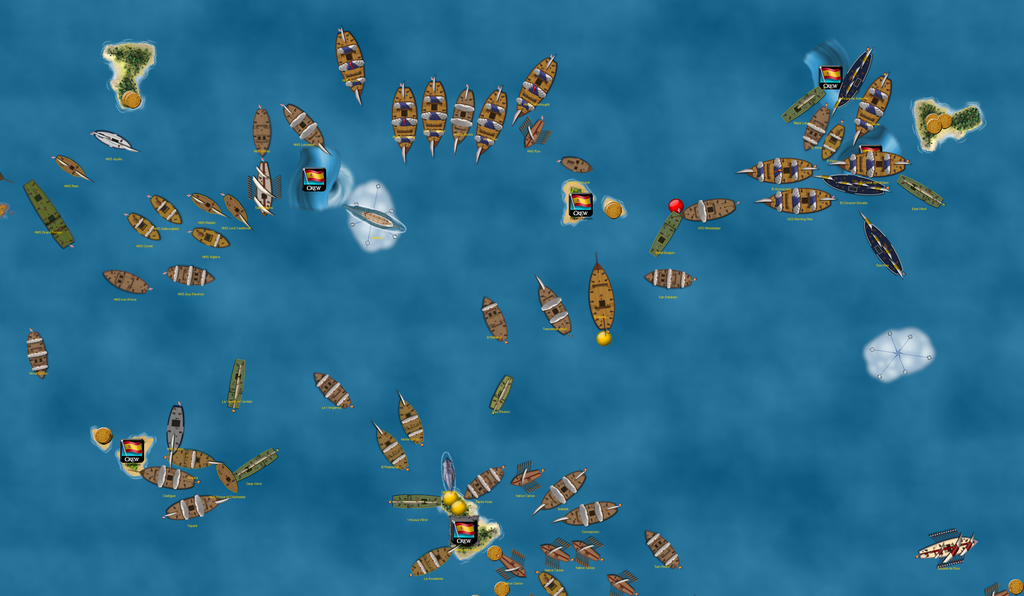
Xerecs was able to catch up on his turns, and the Americans (Carolina and captured Poor Adams) now sail with England against Spain! The Grand River gave the Pirates a coin, while the Mobilis will soon transfer another.

The next picture shows the following Spanish turn and part of the next English turn. The Spanish fought well once again, doing damage and creating annoying blocks for the English to deal with. With the average English gunship decreasing in size now that most of the bigger ships have been sunk, the battle in the western area is mostly even, though the English continue to gain ground very slowly. At the far left, the Castigue sailed out to battle the Nova Scotia, but her gunners failed her and the English have won that battle. In a scene usually only reserved for games this large, the English have two of their rowing ships towing two derelicts, while a fifth dismasted ship (the Iron Prince) follows (upper left areas).

The Nautilus managed to escape from the fog bank at the perfect location, joining up with the Spanish super squadron at last. At the top of the frame, the Matador used a suicide run to ram and dismast the Rye, one of the four English cancellers. This greatly angered the English, who decided to go all out and not hesitate any longer. The Spanish were still playing a bit smarter, with their experience in previous wars proving to be a key reason they’ve done so well against a mostly superior force. The Spanish had 3 of their lesser ships form a line to protect the Spanish super squadron, while the captured Swallow got an SAT to join the area as well. The Titan has started this important engagement, and she’s about to dismast all three of those ships with an extra action!
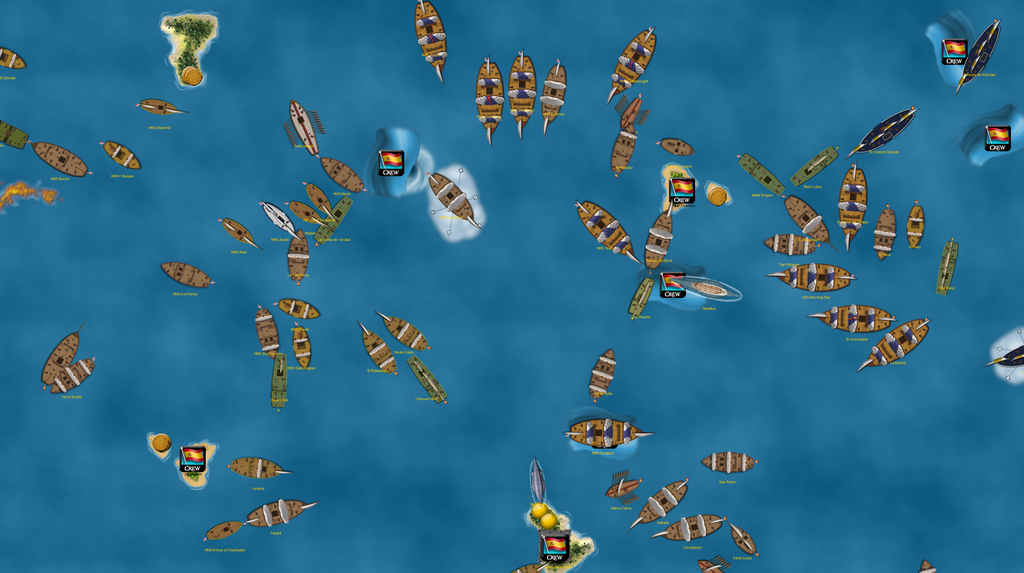
The Titan was followed by the rest of the English super squadron, who took part of the Spanish bait. The Spanish had the English where they wanted them, but the English were too smart to sink the line of defense, since it would open the English up to a more devastating Spanish attack on the next turn. Now, Spain will either linger behind her own derelicts or have to tow them out of the way to get a good line of fire. The repaired Leicester has gotten Myngs’ SAT almost every turn since leaving the English HI, allowing her to quickly return to action and join the English super squadron to reinforce it. The Spanish have reinforced their own squadron, with some support gunships joining the main force of the Acorazado, Muerta, Nautilus, Alma, Paso, Cristal del Obispo, and captured USS Morning Star. The additions make for a potentially even fight, especially considering that the Swallow now fights for Spain. She and the Dreadnought have extra cannons from Carbon Charlie, though the Dreadnought is far more dangerous. Both sides carry a ship with the Metal Hull UT (the Dreadnought and Muerta) as well, not to mention how similar the Endeavour and Muerta are. This combined with 4 cancellers and multiple extra action crew on each side make for a truly memorable and historic fight. Though I control both sides, the assembling of each super squadron and now their final battle has been a very natural progression. The arms race of cancellers and capital ships will finally explode, with the victor possibly having enough left in the tank to go on to win the game.
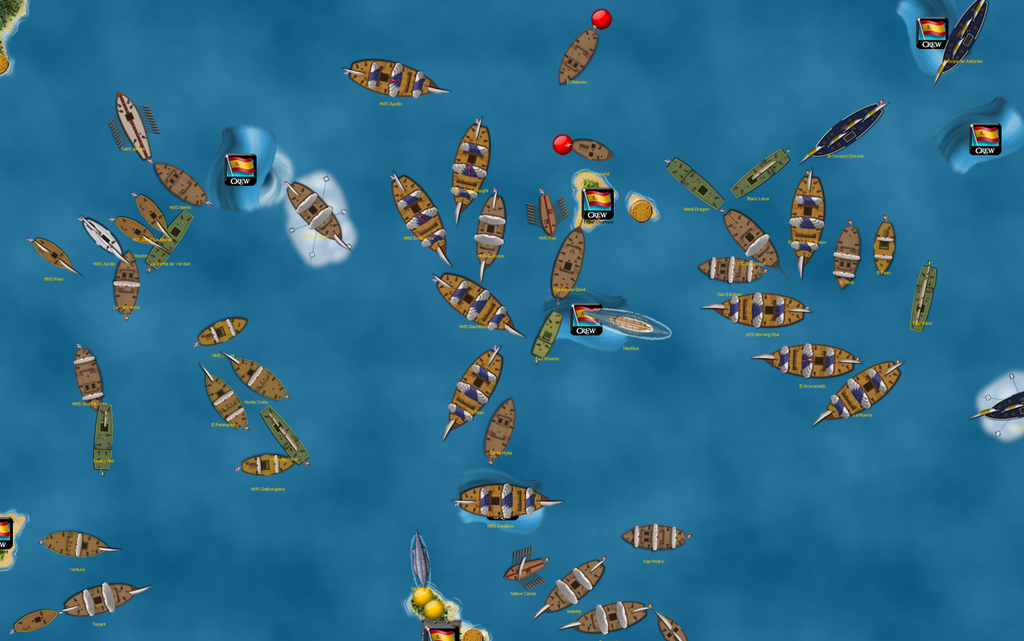
Spanish: 58 ships
English: 61 ships

The current state of CG1; note that in the upper left corner, there is no gold pile. With the latest replenishment, the gold has finally run out. There will be no more replenishments, which means that all the gold in the game is the only gold left. This may seem like trying to trigger an endgame, but between the relative stalemate with the War for CG1 and the final climax about to occur, it feels very natural for this to be the final replenishment. Spain and England have been on mostly equal terms for a long while now, so denying them both gold will reveal which nation is truly the ruler of the sea!

5/7/2016

Two turns have been played so far today, and more will be played very soon! The Spanish grouped a lot of ships behind their line and called upon gold runners to help block the English.

The English are fed up with the Spanish hiding behind their own derelicts, so the Titan sinks some of them! The Rye captured the Tasmanian Devil, while HMS Gallows managed to avoid Christian Fiore on the submerged Nautilus and dismast the San Pedro and captured USS Morning Star. Knowing the logjam would prevent them from entering the battle in the east so early on, the Dauntless and Leicester sailed west to help out the English ships in that area. The attack was devastating, and now only a few brand-new launches stand in England’s way of finally bombarding the Castillo del Infanta.

And with that, the chaos began to erupt! The extremely dense area just north of the Castillo became convoluted, with many ships engaging. The Cristal del Obispo sank the Gallows, while the Titan was swarmed. The Morning Star was towed out of harm’s way, with the Cristal taking her place to block the English from the Spanish cancellers. The Spanish were finally satisfied with their positioning.

The English strike back! The Titan and Dauntless teamed up to sink at least three Spanish ships, and the Dauntless managed to hit the Muerta (with some help from Carbon Charlie’s extra cannons) to eliminate her Metal Hull and damage one of Spain’s biggest assets! The Leicester and Diamond teamed up to sink the Grand Wind and Terror of Gibraltar, while at the top of the frame the Apollo has sunk the Black Lotus. In a huge move, the Dreadnought entered the fray! The Spanish immediately cancelled her canceller, captain, world hater and Marine abilities, but with an admiral’s action she was able to dismast the Cristal. The Spanish focused their attention too much on the Dreadnought, for they should have saved Fiore’s cancelling for the Dauntless. However, Spain will now have the opportunity to attack, which they’ll do with a vengeance.

Notice how the battle has very slowly shifted towards the Castillo, and by extension, the Spanish home island. The most recent turn saw Spain launch 2 new gunships, with England launching 5.

5/8/2016

A rather complex turn was played just now. Going into the turn, both the English and Spanish had 4 cancellers each, all in the same area. The Spanish were looking to establish a cancelling advantage in order to gain some momentum in the battle. The San Estaban only had one cannon in range of the Rye, but it hit! This sunk the Rye and decreased the English canceller count to 3. Then, the damaged Muerta dismasted the Dauntless by going 4/4 with her powerful ability. Diego Cesar Olano, aboard the submerged Slipstream, delivered a successful shot against the Dauntless, sinking the powerful Englishman. The Slipstream then went underneath the Endeavour and with the help of a trade current rammed the Endeavour, doing no damage. The submerged Nautilus rammed the Titan, also doing no damage. Fiore and Bratley cancelled each other out. Aboard the Dreadnought and Acorazado, Anson and Diaz cancelled each other out. The Paso and Lawrence (aboard the Endeavour) cancelled each other out. The Acorazado had towed the derelict Cristal out of the way, while the USS Morning Star rolled successfully to scuttle herself home with Gus Schultz’s Eternal. The Spanish were finally ready to put their biggest prize, HMS Swallow, into action. With no English canceller available to cancel the Swallow’s captain, she surged forward into the gap created by the sinking of the Dauntless. With the cannons the English themselves created via Carbon Charlie, the Swallow got one 6 in 5 tries to eliminate the Dreadnought’s Metal Hull UT, which meant that she could now be hit normally on non-6’s. The Swallow then landed a few more hits on the Dreadnought (bringing her down to 2 masts) before also landing a hit on the Titan. The Principe de Asturias now moved into the gap the Cristal used to occupy, hitting 2/4 to dismast the Dreadnought. Then, in a stunning move, the Alma (Spain’s fourth canceller) moved in unopposed on the Dreadnought’s larboard quarter and cancelled Job Hartop’s Eternal ability, and then sank the Dreadnought with a hit!! The English were not expecting the Dreadnought to be sunk so soon, and it was a huge blow to English morale while boosting the spirits of the Spanish. The Spanish had taken advantage of their new 4-3 upper hand in the cancelling game, which they leveraged to sink the Dreadnought and further their advantage to 4-2. Also, the Sea Hag has hopped out of a fog bank to unsuccessfully ram the Endeavour.

At the top right of the frame, the Americans have gotten too close to the Spanish, so the Corazon Dorado set the Poor Adams alight with exploding shot and scored an additional hit just for good measure. The East Wind moved into a position to intercept the Carolina, while also making sure the captured USS Morning Star wasn’t captured before she could be scuttled. At the lower left, the Tepant has hit 1/2 against the Nova Scotia. The newly launched Typhoon and Duncan got into action, with the Typhoon ramming a mast off the Leicester and the Duncan dismasting the Diamond. The Castillo del Infanta’s guns boomed, and the Diamond was sunk.

As expected, the English turn saw more craziness. They started with the Nova Scotia dismasting the Tepant and the Apollo (schooner) dismasting the Duncan. Then Lord Thomas Gunn (aboard the flagship HMS Endeavour) had some major decisions to make. The Titan got an extra action, which she used to sink HMS Swallow (!) and damage the Sea Hag. Then it was the Endeavour’s turn. With the Dreadnought gone, only two English cancellers remained in play, and Bratley (aboard the Titan) and Fiore had once again cancelled each other out. However, due to the Acorazado towing the Cristal on the previous Spanish turn, the Endeavour would be able to maneuver to hit the Paso and Alma while staying out of Diaz’s range. This is exactly what she did. As a result, the Spanish essentially had a 3-2 canceller advantage on this specific English turn since Diaz wasn’t able to help out. Knowing the Endeavour could sink almost anything in range even without moving (between her ability and an extra action from Lord Mycron), the Alma cancelled the Endeavour’s ability rather than Lord Gunn’s captain ability (after Lawrence and El Paso cancelled each other out, of course). This gave the Endeavour room to move (but not too far east, which would put her in range of Diaz on the Acorazado), but with less overall firepower. The English did give her an extra action via Mycron, and the Endeavour rammed the Paso. Her first shoot action sank the Alma! However, the ram failed, meaning that all three of her guns that were in range of the Paso had to hit in order to sink the Spanish canceller. Unsurprisingly, the great leader Lord Gunn rallied his crew, and with his help they sank the Paso!! This meant that each fleet now had two cancellers at their disposal, with all 4 of them being crew (Diaz and Fiore for the Spanish and Lawrence and Bratley for the English). In other news, the Leicester dismasted the Typhoon, while HMS Apollo sank the Corazon Dorado to the north and damaged the East Wind. The English are still trying to be careful with Lord Cutler Beckett aboard the Apollo, since losing him means the loss of an important admiral crew. As much as England would love to win this battle of capital ships and cancellers, the overall war effort is still more important than this phase of the battle, though they were tempted to have the Apollo come to the Endeavour’s immediate aid.

Though this turn saw the Spanish mostly victorious, England managed to correct a brief canceller deficit, while many English support gunships continue to arrive from Ramsgate. More are also on their way from the English home island, with former gold runners like the Growler, Lord Kenyon, and Empress of India having picked up captains to help the war effort now that the gold has run out. In addition, ships like the Zephyr, Forge, Grand Temple, and Burma will be ready for action once more rather soon. These ships, as well as a few others that haven’t reached the English forts, were salvaged by the English with their flood of ships that began the battle. It seems to be a smart move, as the Spanish had no way to sink the derelicts at the time, and now the war of attrition has lasted longer than the English anticipated. The Spanish home island is looking strangely empty, with a state of emergency forcing the gold runners to sail to more distant islands to get any gold. Some gold runners have sailed to join the Spanish battle fleet, but it’s unlikely they’ll make much of a difference.

5/8/2016

Two turns so far today, with hopefully at least two more coming soon!

With each pair of cancellers cancelling each other out, the Spanish had a great opportunity to damage the English. They did just that, dismasting the Titan and sinking the Endeavour!! The Endeavour had been the English flagship since they launched her, and she went down with Lord Thomas Gunn aboard (the English admiral). Obviously a huge blow to English morale, the elimination of these two ships from the battle essentially meant that the Spanish had won the battle of the capital ships! Spain’s maneuvering and support ships played important roles, but they were also helped by the fragility of HMS Rye, the first English canceller eliminated. La Muerta also managed to sink the Leicester with an extra action, while some native canoes moved to form a screen against the incoming English gunships from the northwest. The captured USS Morning Star successfully returned home via Eternal. The Poor Adams damaged the East Wind before the privateer engaged the Carolina, who had sunk the captured Metal Dragon. At the right of the frame, the Espada de Dios is the first Spanish ship to reach an island outside of their 4-island comfort zone, all of which are now empty. Native canoes assist her, while others are looking to sail farther north towards former Cursed waters in the northeast.

The English turn saw them try to rescue the Titan, as her oarsman ability had been cancelled (thus not allowing her to move away at 4S with an extra action and helmsman). The canoe screen was eliminated, and the Muerta and Typhoon were predictably sunk. As the Acorazado was still healthy and Spain appeared to be winning the battle for once, the loss of the Muerta didn’t affect Spanish morale. At the bottom of the picture, the Academia was finally damaged, while the English captured the Tepant and recaptured the Prince of Chichester. At the top, notice HMS Apollo fleeing the area, for she is no match for the Acorazado and Beckett knows the importance of his admiral ability.
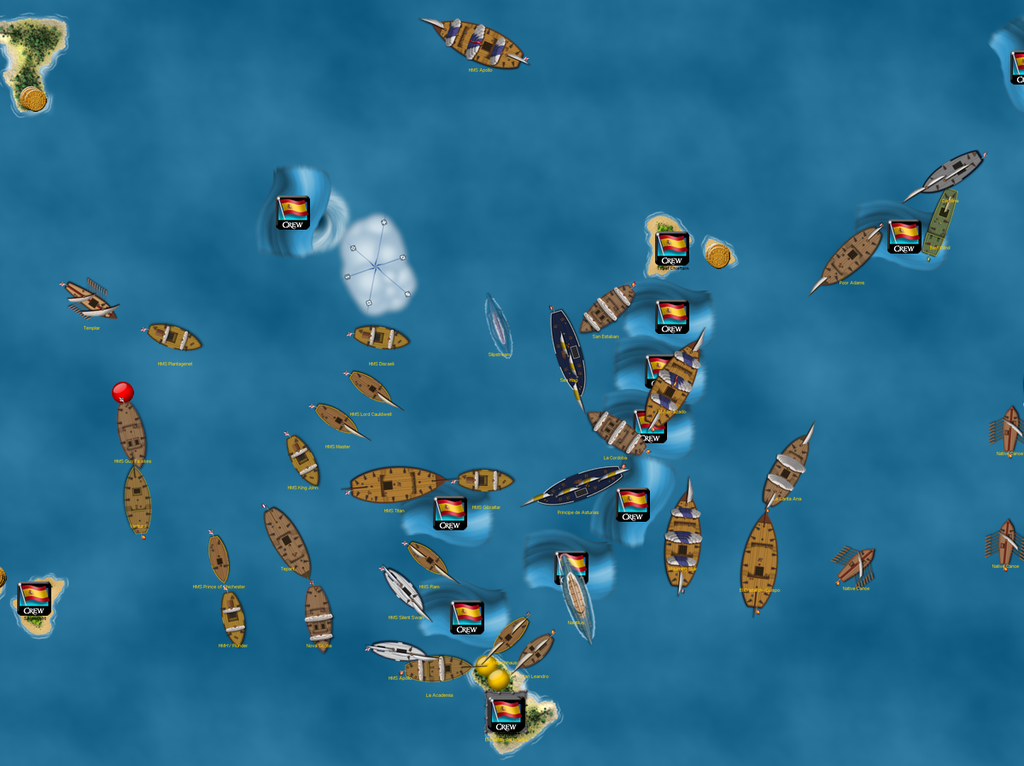
The next Spanish turn was similar to the last: a huge success and an absolute shock to the English! The Gibraltar and Titan were sunk, while no less than 5 other English gunships were dismasted! The Spanish navigators placed trade currents to the north, which the Slipstream and San Estaban quickly took advantage of. The Slipstream surfaced and teamed with the Estaban to dismast the Apollo, while Beckett thought he could escape in time! For the final clincher, the Acorazado got Castro’s SAT to move 5S and sink the Apollo, the last true English flagship!! This and the attack on the western front left the English in complete disarray. William Dampier, the new English admiral aboard the repairing Grand Temple, ordered a partial ceasefire for English gunships – the English gunships already upon the battle would continue to fight, but the ones still headed towards the battle would wait and regroup. The Spanish have won the “first” battle of the War for CG1, though they were losing for quite a while and it took them ages to get to this point of having a slight advantage. The English are now looking to regroup their new support gunships and have them join the older and larger gunships that are currently repairing. If England can combine these forces successfully, they will still have a formidable (and superior) battle fleet. However, Spain’s 2-0 canceller advantage and the sheer defenses of El Acorazado (essentially immune to anything smaller than 3 masts except for ramming) gives Spain two superweapons they’ll need to be careful with. At the upper right, the Poor Adams destroyed a canoe before being dismasted by the Santa Ana, who also hit the Carolina after the Carolina dismasted the East Wind. At this point, the privateer nations have been almost completely drained – the Scorpion and Pasha’s Delight are the best launchings Spain could muster near the end of this long game.

The dejected English managed some small offense on their turn, dismasting the Cordoba, Principe, and San Leandro. The Templar sank the derelict Ventura, but these English ships were doomed as a result of the recent order for fresh gunships to stop their approach to the battle area.

At the center left, notice the grouping of small English support gunships assembling between the wild island and reefs, the exact location where the battle began. They will wait for the larger ships to repair and join them, as England wants to mount one final assault with her entire battle fleet to crush the Spanish once and for all. The most important question might be what Spain can do in the meantime. At the top and right sides of the frame, the remaining gold runners for the two fleets race towards the northeast area, which is still rich with gold from past replenishments. A few gold runners head towards the southwest, where the Pirates are still lurking. How amusing it would be if the deserted areas of the sea now held the keys to victory!
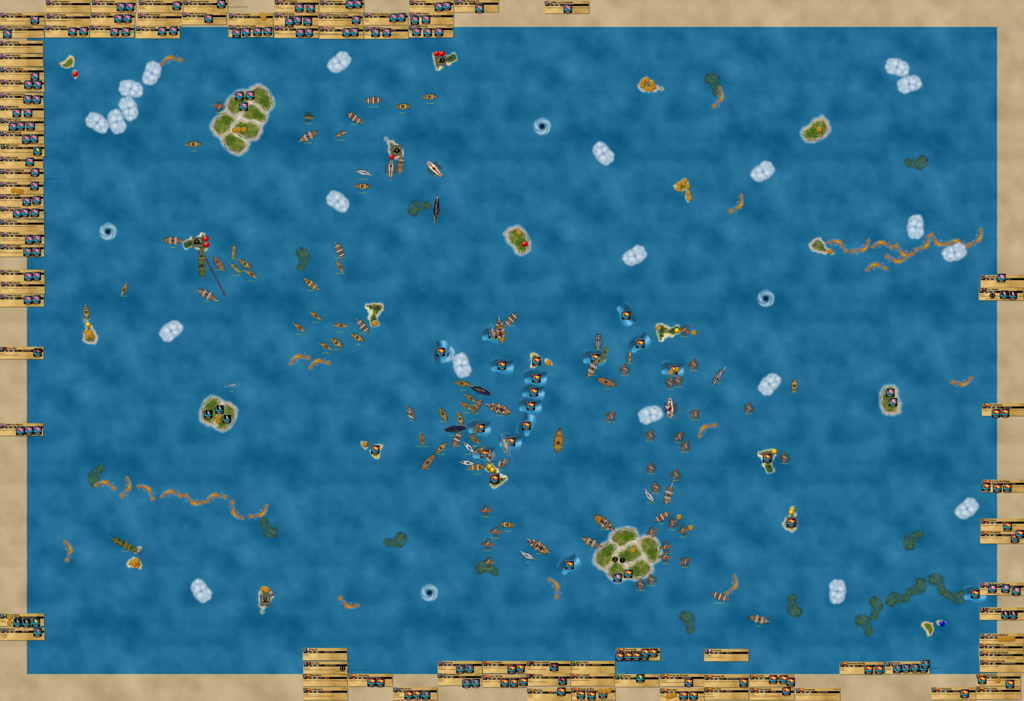
5/9/2016

4 more turns have been played, for a whopping 6 in just a day’s action. The game size is diminishing, which dramatically speeds up turns.

The Spanish continued to pound the remaining English ships. By far the most interesting development of their turn was a sort of collaboration between them and the English. The English didn’t have any cancellers left, while the Pirates still possessed the Mobilis, a submarine that has cancelling built in, therefore needing two cancellers to take out. The English agreed to hold off their newest battle squadron until the Acorazado and Nautilus (with Spain’s two cancellers aboard) were able to eliminate the Mobilis from the game.

The English barely managed any offense with their remaining gunships, while the Acorazado continued sailing southwest toward Pirate waters. At the top right, the Americans are about to be eliminated. Commodore David Porter died a hero, leading a losing boarding party to the Santa Ana. He instructed his crew not to give up the ship, and they scuttled the Carolina rather than seeing her captured by the enemy. And so goes one of the most noble ships of CG1, a journey which will be reflected upon in a post once the game ends.

The English have scuttled a few more ships, while in the northwest, her most formidable gunships finish repairing and prepare to go to war against Spain once more.
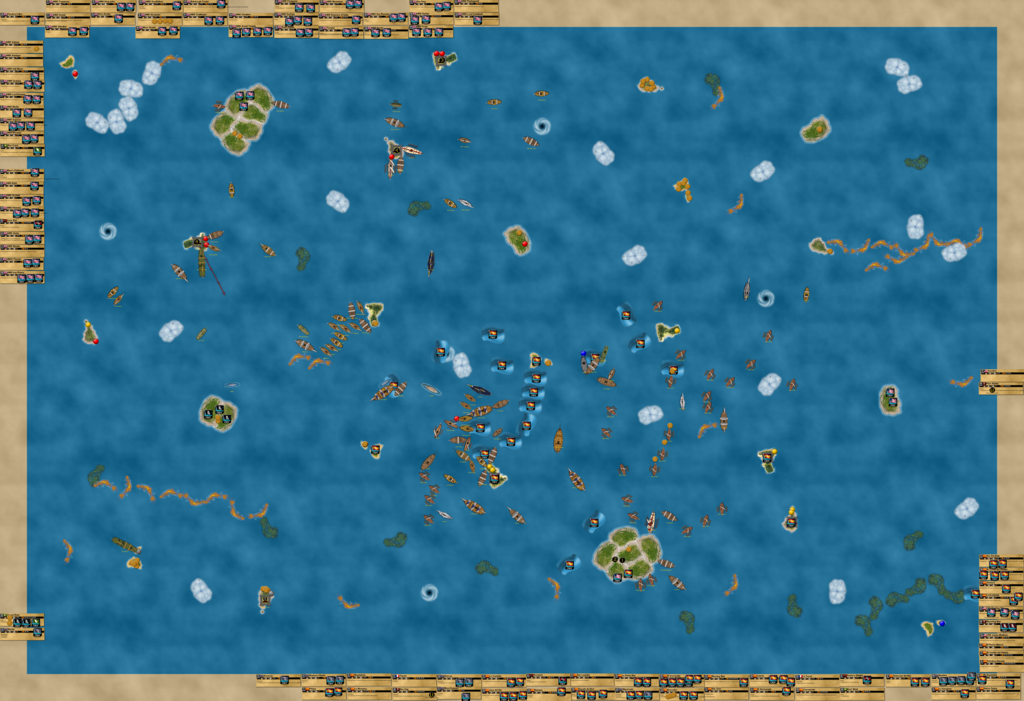
Sensing that the English would betray them and attack regardless, the Acorazado and Slipstream turned around and headed northeast! This ended the extremely brief and tense collaboration between the Spanish and English. The Spanish were thinking that as long as the English feared the Pirates’ long-term game, Spain should keep them alive if the Acorazado and Nautilus could also be kept around. The latter isn’t all that difficult, for the Acorazado and Nautilus are almost untouchable at this late stage of the game, with plenty of open ocean and very few capital ships. The Spanish split up the impromptu Acorazado squadron, with the San Estaban sailing south to sink the Templar and the Nautilus following her to dismast the Nova Scotia. The Spanish gold runners were nearing wild islands, while other Spanish ships began efforts to return some derelicts to action. These included the Tepant, Poor Adams, Cristal del Obispo, Munchhausen, and San Leandro. With the capturing of the Poor Adams, the Americans have been eliminated!
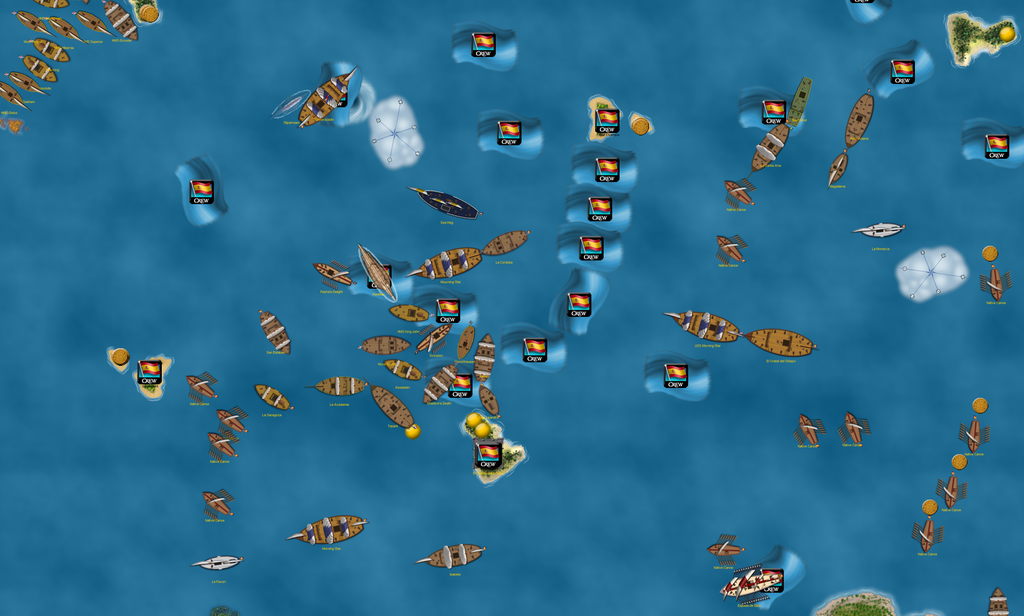
With the Spanish breaking their word regarding the sinking of the Mobilis, the English charged in a rage. The squadron of small support gunships sailed directly at the Spanish, who weren’t prepared for another fleet engagement just yet. The Growler received an extra action from Mycron to shoot at the closest Spaniards, but missed. In the northeast, the San Jose is the first ship to reach a former Cursed wild island, but more ships will soon join her. All three remaining home islands are as desolate as they’ve been in months.

The flagship of the Spanish fleet, El Acorazado, now appears to have a new mission: sinking English ships that don’t have support around them. The Acorazado and Slipstream sped north, with the Acorazado easily sinking the newly-repaired Zephyr with a double action. The Nautilus has abruptly left the scene of battle in the south to join them. The Pasha’s Delight sacrificed herself to delay the English onslaught, while the San Estaban went 3/3 to dismast the Growler. Notice the Sea Hag ducking into a fog bank near the middle of the picture. The Spanish have a secret plan to eliminate Lord Mycron – he sits aboard the Patagonia, a ship that has been docked for almost the entire game on the northwestern side of the English home island. Due to the circumstances where gold runners have sailed far from home in search of elusive treasure, the home islands have been left nearly vacant. The Sea Hag intends to pop out of the fog northwest of the English home island and catch the slow Patagonia, winning a boarding party to eliminate the powerful Lord Mycron (if Robinson died instead, Mycron would have to get tossed because of the ship’s point limit). However, Commodore Owen (aboard the 3 masted HMS Durham and the only remaining admiral crew left in the entire game after Beckett drowned in the sinking of the Apollo) is smart, and remembers how vulnerable Mycron could be to an attempt on his life. The Spanish ended their turn by launching two of my custom Mercenary ships and one from Cadet Captain Mike, the Pelayo.
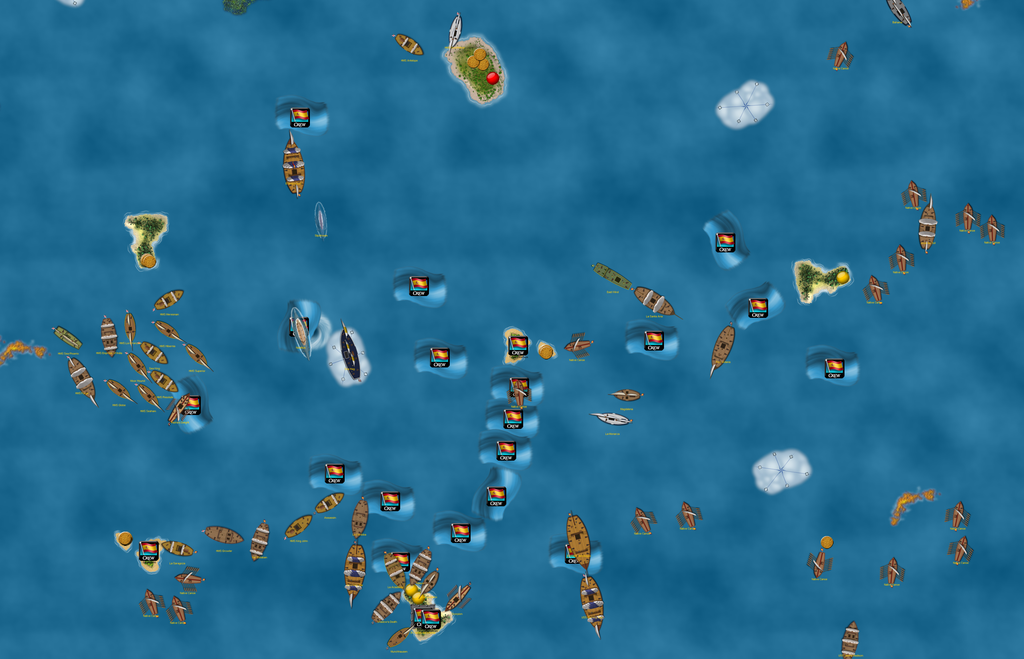
After the only true lull in the War for CG1 subsides, the second and much smaller battle is just beginning.
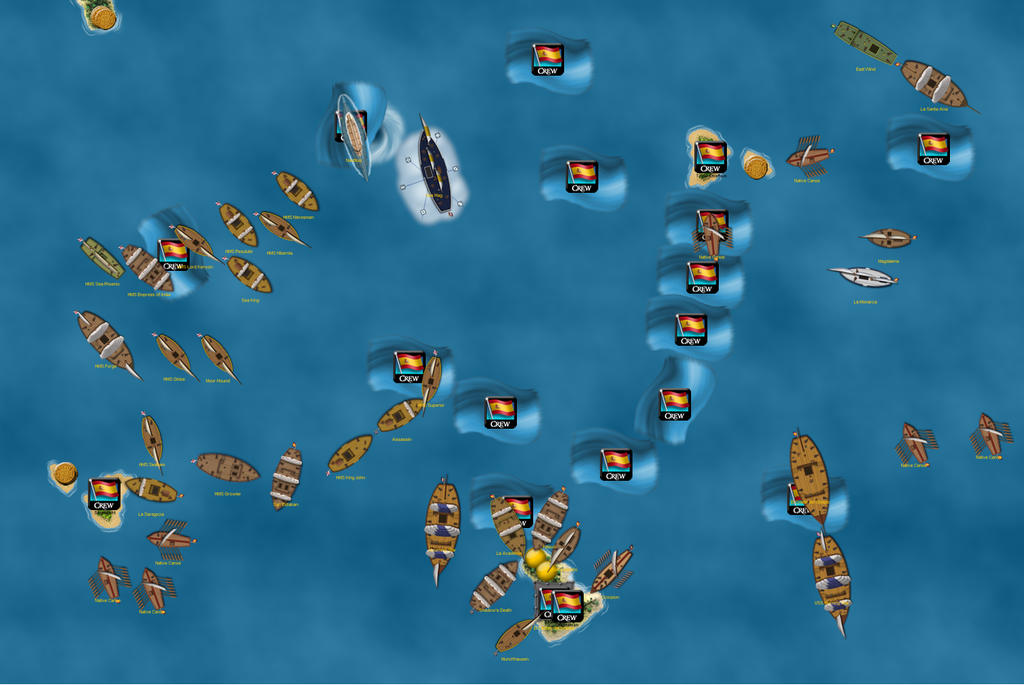
Conflicts between gold runners may break out in the northeast, while the Acorazado looks to prey upon weaker English ships.

5/10/2016

2 more turns have been played! The San Estaban attacked first, and another melee began! The English line abreast formation broke up, and chaos ensued once more. The Saragoza, one of Spain’s original ships from the start of the game, re-explored that island to allow the native canoes to load gold.

At the upper left, the Sea Hag has emerged from the fog for an assassination attempt on Lord Mycron! However, the Durham is there to save him. Once again, the Spanish have been hit with Celestine’s Charts, eliminating all of their trade currents. At the lower left, the Grand River has dismasted the Sea Crane, who sailed too close to the Pirates. I believe this is the first act of hostility between the English and Pirates. At the upper right, the Bahama and Edinburgh Trader have reached a contested island in the northeast, but the Bahama will explore first.

More fighting in the battle area, and once again the Spanish are more effective than the English, who once again couldn’t take advantage of their numerical superiority. The long-awaited Resolucion has finally been launched, and she sinks the Moor Hound.

The English score some hits on their turn, most importantly the Empress of India going 3/3 with an extra action from Mycron to nearly dismast the Resolucion.

This last picture shows a rarity: a new Pirate ship! The Grand River returned home enough gold for the Pirates to launch the DJC Harbinger, and Blackbeard finally had a ship! (Blackbeard was hired long ago but the Spanish obliterated most of the Pirate fleet before he could participate.) However, the Pirate fort built by the Grand River south of their home island is under siege by Le Favori, a former French and Spanish gold runner now looking to destroy the fort. She can’t be hit by L range guns, so she can bombard the fort at her leisure. At the upper right, the Trepassey and Joya del Sol are racing to the former Cursed home island, which now holds untouched gold. In the upper center, the Acorazado hunts. The Antelope is her latest prey, though the little ship isn’t carrying any gold. In fact, the Antelope decided to go down fighting rather than run, nearly winning a boarding party if not for Vaccaro’s reroll! The English are wary of the Battleship’s power, and have launched the Bilge to add to their gunships in the area. The Bilge is looking to team up with the Merlin, Saint James, and Ivory Star (what a random group of ships!) to form a sort of “anti-Acorazado squadron”, to give English gold runners in the far east a chance of making it home safely. Their task is complicated by the Slipstream and Nautilus, dangerous subs who act as the Acorazado’s bodyguards.

Ship count:
Pirates: 3 ships
Spanish: 39 ships
English: 37 ships

I have to admit, I’m really enjoying the final phase of this game. Deciding on a final replenishment was a great idea, because not only does it speed up the endgame, it also makes for exciting and unique gameplay. Both fleets are sending gold runners far outside their home waters, with ships sailing all over the map in a frantic race to claim the last coins in existence. The main battle in the War for CG1 rages in its usual south-central location, but the potential star of the show (El Acorazado) has left on a mission of her own. After the English have mostly finished repairing, it’s now Spain’s turn to repair some of her damaged gunships, among them the Cristal, Poor Adams, and Tepant. All the while the Pirates continue to make progress, quietly eager to slip under the radar into a finish better than 3rd place….

5/10/2016

Three turns have been played so far today, with more coming a bit later. Xerecs’ Pirates are two turns behind now, which is why they look dormant here.

At the top left, the Sea Hag has turned her attention away from Lord Mycron (now protected by the Durham) to the Goodfellow, a ship carrying 4 now-rare gold coins. In the far north, the Acorazado has been unsuccessfully rammed by both the Pandora’s Box and Maui’s Fishhook, and for that the fates of those two ships are sealed. Olano (a marine aboard the Slipstream slightly to the south) missed the Antelope, but her days (or turns!) were numbered as well. The Spanish were really struggling in the southern battle, where the Mourning Star has been dismasted. HMS Forge has eliminated a canoe and will soon eliminate the others carrying gold. An even greater threat, HMS Grand Temple, has finally arrived after being dismasted in the heat of the first battle.

After another English turn, the Pelayo and Shadow’s Death have sunk. At the right of the frame, Spain’s last hopes for winning the battle lie in the captured USS Morning Star, La Academia, and the Castillo del Infanta.

Developments in the north: the anti-Acorazado squadron is poised to strike, the Joya del Sol beats HMS Trepassey to the former Cursed HI, and the Goodfellow slips past the slow Sea Hag.

The Acorazado gets her SAT, and strikes first! The first action sank the Maui’s Fishhook, while the second crippled the small squadron. Luis Zuan actually spread out his firepower here, because with the Acorazado’s defenses, he only needed to knock each ship down to 2 masts or less to prevent any shots from damaging the flagship. The Nautilus and Slipstream helped out, and the English squadron was already doomed. At the bottom, the Edinburgh Trader is carrying gold to the English home island, while some Spanish canoes are looking for gold at the right.

At long last, English victory in the south! The Burma sank the Saragoza, while the Grand Temple sank other Spaniards and captured the USS Morning Star, hoping to gain her help by scuttling her with Eternal Gus Schultz aboard, much like the Spanish did earlier. The Forge used a double action to take out all of the Castillo’s guns, and now La Academia is the only thing preventing the English from getting to the Spanish home island! Unsurprisingly, England’s larger ships (GT, Forge, and Burma) tipped the battle in their favor, though both sides were very inaccurate in their gunnery today from sheer exhaustion.

Clockwise from the upper left: The Durham brings the Sea Hag down to one mast while the Goodfellow docks. The anti-Acorazado squadron surrounds the Spanish flagship, but all three rams (and boarding parties) fail and two captains are cancelled. The Trepassey sets off in hot pursuit of the Joya del Sol and her “stolen” loot, but it’s unlikely she can win a boarding party against the big galleon. A canoe grabs the last coin from the island, while another successfully blocks HMS Hound, who misses a shot. At this point both fleets have enough gold saved up to launch one or two support gunships.

Pirates: 3 ships
Spanish: 29 ships
English: 32 ships

5/11/2016

A few more turns have been played. At the top left, the Edinburgh Trader sustained damage from the Nautilus before escaping through a whirlpool. In the northeast, the Trepassey managed a heroic act, ramming a mast off the much larger Joya del Sol, and winning the boarding party 6-5 to steal a coin worth 7 gold! The Grand Temple moved east to eliminate some canoes and eventually dismast the Poor Adams. Near the Spanish home island in the south, the Tepant blocks native canoes from the Forge, while the Cristal del Obispo finishes repairing.

In the far north, the Acorazado, Slipstream, and Nautilus took care of the anti-Acorazado squadron, sinking every ship except for the Merlin (who sank on the following turn). The Forge got as close as any ship has gotten to the Spanish home island, taking a mast off the Monarca and ramming the Tepant derelict and causing further headaches for the Spanish. In the northwest, the English have a new plan. Seeing their squadron fail miserably against the Acorazado, England is planning to bunch all of her ships into one or two main fleets, to prevent the chaos that has occurred lately since the final replenishment. The English need to take out the Acorazado to win the game, and to do that they may have to use swarm ramming, though the Grand Temple and others could provide some adequate firepower. Neither fleet is looking very strong at this point, and both need to be careful not to lose their best ships until they confront each other directly.
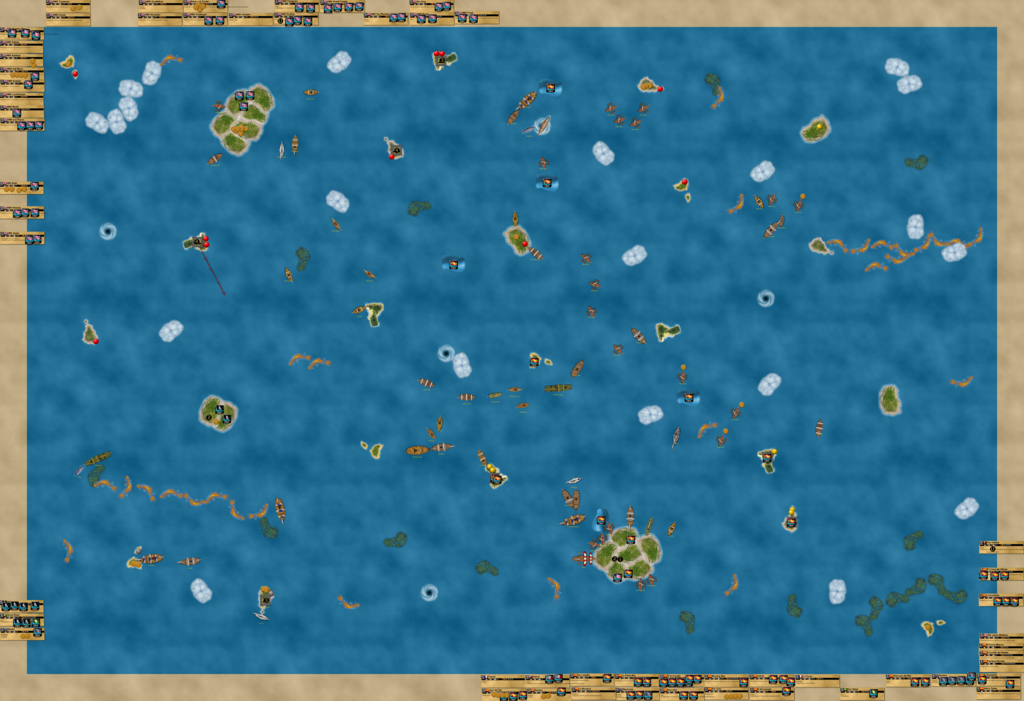
An interesting situation in the southwest. The Favori has abandoned her bombardment of Dead Man’s Point to assist the Morning Star and Isabela, who are in trouble from the Harbinger and Grand River. If the Pirates can capture the tribal chieftains, the Pirates could have some extra gold rather quickly. The 2 on the Pirate HI is from the Sea Crane’s helmsman – the Grand River was able to board, but not capture the junk before the English scuttled her.

The Spanish sank the Forge, with the Monarca taking the Tepant in tow. Both fleets have finally launched some ships (undoubtedly some of the last purchases of the game) – the Spanish with the Viking longship Kalmar and the English with the Ark Royal, Victor, and Lizard. Those English ships were launched at Ramsgate, and they look to rendezvous with the Durham and others to form a squadron. The other English squadron is what’s left over from the southern battle, though the Grand Temple (the English flagship) has gone north a bit to eliminate some Spanish canoes. About 60 ships remain afloat.

5/13/2016

CG1 has continued! It took 5 ships, but the English managed to capture the Academia. The Spanish battle fleet is assembling, but a recent plan has been revived. The Spanish and English will once again team up to eliminate the Mobilis and likely the Pirates in general. The English need the Mobilis eliminated in order to win the game. The Spanish are worried that the Acorazado and/or Nautilus would be sunk in a fleet action against the English, hence the opportunity to eliminate the Mobilis now before the final battle.

At the lower left, the Harbinger has engaged the Spanish. In the northern center of the sea, the Acorazado, Nautilus, and Slipstream are making full speed towards the Pirates.
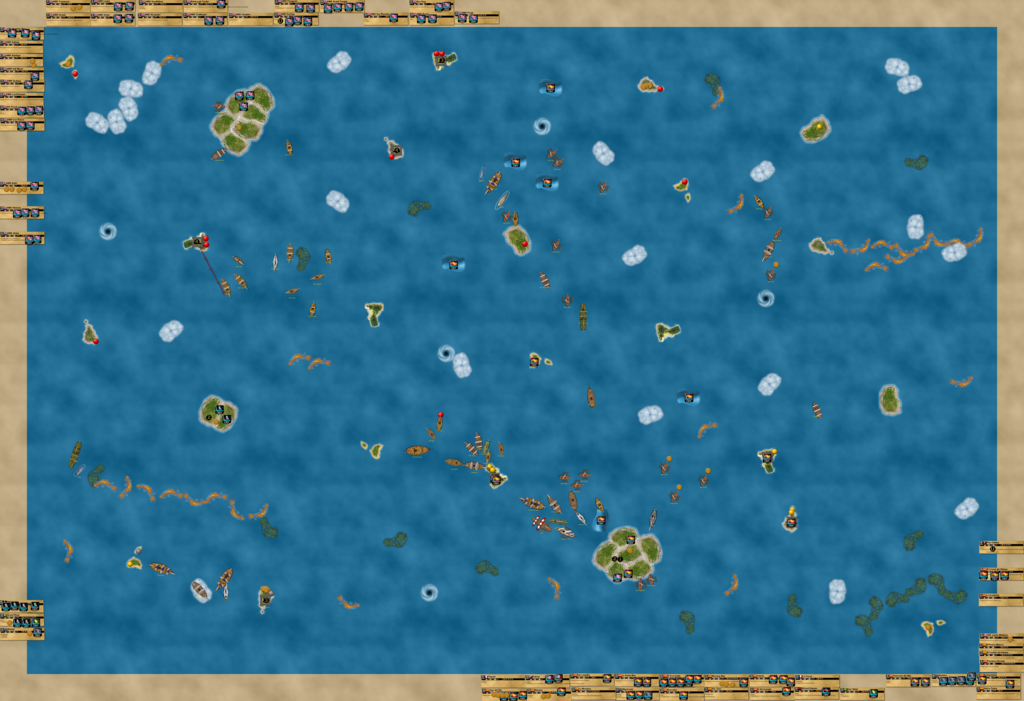
After another turn, the Harbinger dismasted the Favori before being rammed by the Isabela. The Isabela was trying to distract the Harbinger so the Morning Star would escape with her gold. In the center, it’s evident that the reinstatement of Spain and England’s agreement doesn’t provide a true armistice, as the Grand Temple and James Madison exchange shots. In the northeast, the Hound has let the Joya del Sol and captured Trepassey go after being frustrated by a canoe blocker.

After another turn, a few major developments. In the southwest, the Harbinger received an SAT from Le Requin and absolutely dominated. The Isabela was dismasted, while the Morning Star lost 3 masts. The Harbinger S-boarded both ships with the double action, capturing the tribal chieftains on both ships, which would be worth 18 gold if unloaded at the Pirate HI! However, that would be a difficult task, as the English and Spanish were both rushing to blockade the Pirate HI. The Spanish launched the Matuku at the end of their turn. The English sank the James Madison and scuttled the Poor Adams, while the Hound headed for the last available gold coins on an island to the north. (Dead Man’s Point also has some gold; the coins on the islands in the northwest and southeast corners are the Celestine’s Charts UT.) Xerecs and I are trying to finish the game by the end of this weekend!

5/13/2016

The chase for the Pirates continues in earnest!

Using extra actions from CGRO and Mycron, the English arrive first! The Mobilis cancels the Ark Royal’s captain, but the Victor slips in and goes 3/3 to take the Harbinger down to 2 masts. The Pirate home island has been blockaded by the English, while the Cristal del Obispo nearly destroyed the Dead Man’s Point fort to the south. Outside of the southwestern corner, the ocean is mostly deserted. The Hound and Joya del Sol bring back each fleet’s final treasure haul.

With the English seemingly cutting off the Acorazado and Nautilus from the rest of the Spanish fleet, Luis Zuan issues an ultimatum: back off, or the Mobilis will survive. The English immediately obey, knowing the Challenger would need a canceller to even touch the Mobilis. The Spanish finish off the Pirate fort. A big move happened when the English managed to sink the Harbinger! The Ark Royal rammed a mast off, and then Mycron gave the Victor a double shoot action to sink the ship with Blackbeard and 21 points of captured crew aboard! The Acorazado and Nautilus are preparing for the final attack on the Mobilis and Grand River.

After a quick consultation among the members of the Acorazado’s crew, the Spanish decided to attack! The Grand River had sunk the Ark Royal, though she returned to the English HI via Eternal. Castro gave the Acorazado the SAT, but first the Nautilus moved forward to cancel the Mobilis and hit the Grand River twice. The Acorazado surged ahead, cancelling the Mobilis to the surface and sinking her!! Then the Acorazado used her second action to go 5/5 and sink the Grand River and eliminate the Pirates from the game!! (This picture also shows the resumption of the war between Spain and England, with the Santa Ana and some canoes already sunk.)
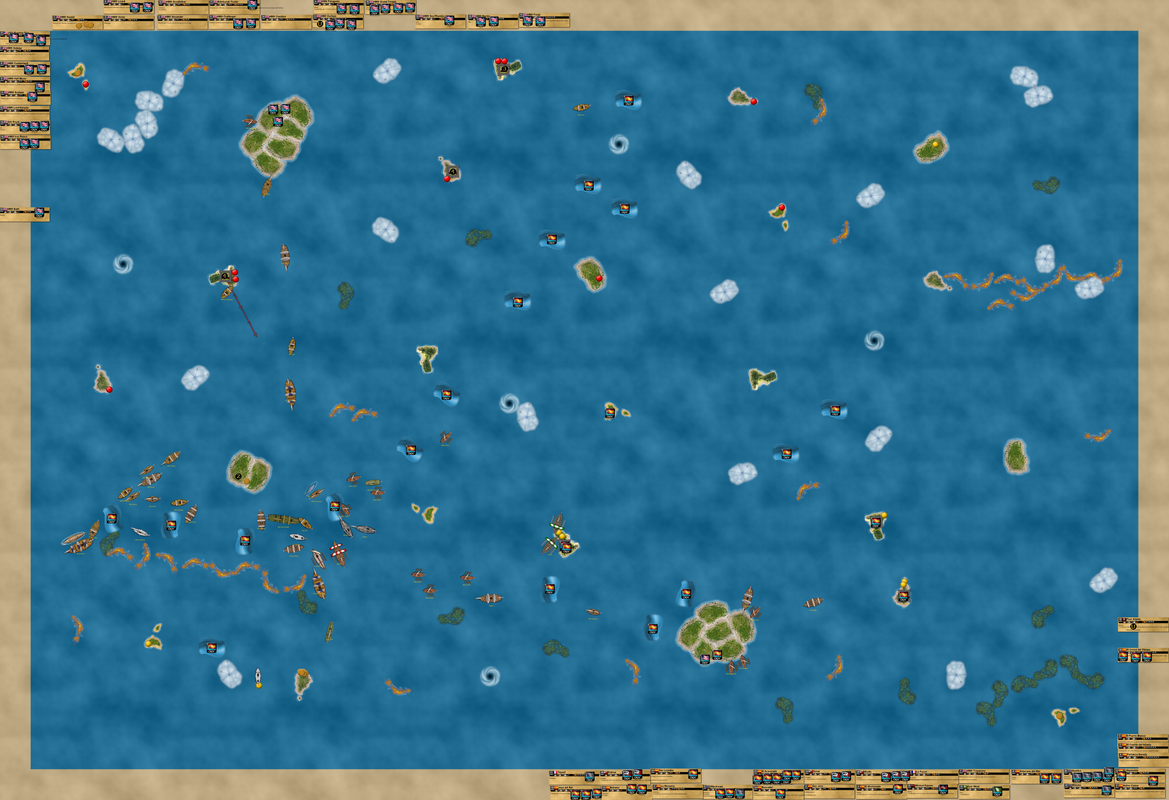
And with that, Xerecs is officially out of the game! I have technically “won” CG1, though two fleets remain for the final battle, which will take place in the next 24 hours. Thank you, Xerecs, for playing such a great game with me, and thank you for sticking it out with all three of your fleets even as they were slowly defeated. More to come in the reflection post!

May 14th will see the War for CG1 come to an end, with either Spain or England claiming victory in the biggest game in the history of Pirates CSG!!

5/14/2016

With the final battle imminent, the final day of play started in CG1!

With the Pirates eliminated, the War for CG1 resumed in earnest. The Spanish managed to sink the Grand Temple, a ship that could have been useful against El Acorazado. Her and the Nautilus are waiting for the English to come to them.
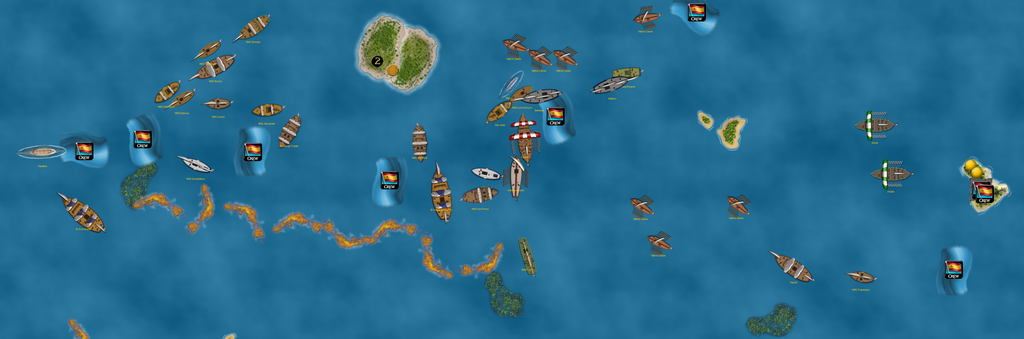
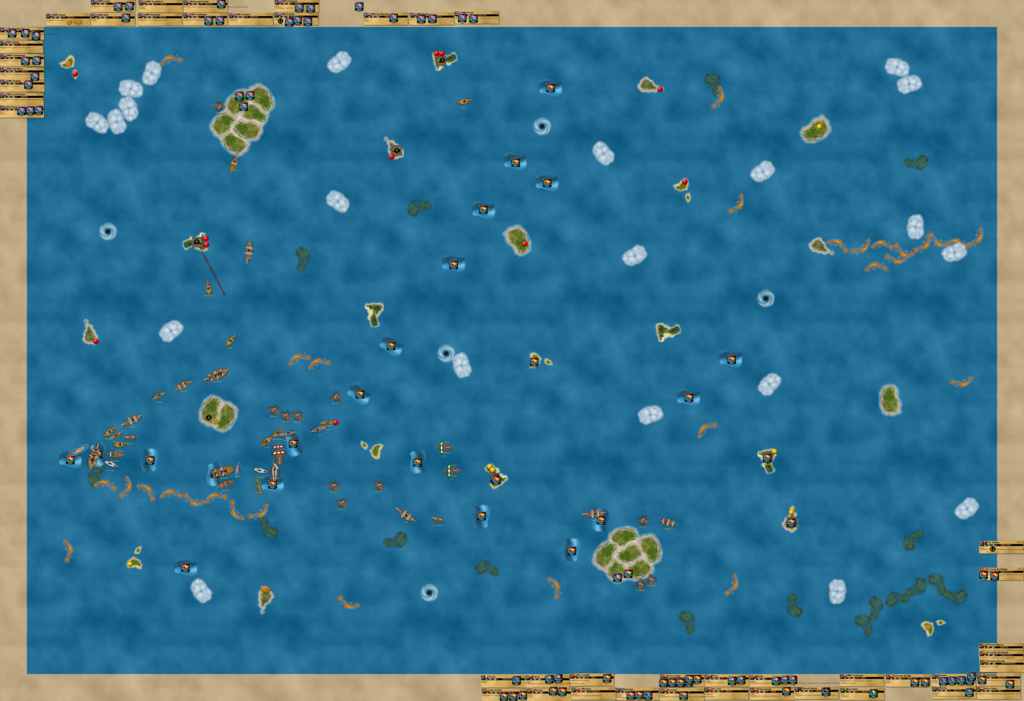
The Iron Prince, with Mycron helping, took the Cristal del Obispo down to 2 masts. However, she and the Cheshire were sunk and dismasted on the next turn. The Spanish had won the battle on the eastern side of the former Pirate HI, but the battle on the western side was just beginning, with the Acorazado dismasting the Goodfellow and damaging the Edinburgh Trader.

The English swarm the Acorazado by ramming her with 5 ships, but none of them roll a 6! At the top of the frame are 3 of England’s most important ships: the Challenger (can shoot at submerged ships within S of her), the Durham (carrying the only admiral crew and the default flagship now that the Grand Temple has sunk), and the captured USS Morning Star, their best remaining offensive weapon.

Here, the Acorazado and Nautilus fight off the horde, though they are essentially immune since the ships are pinned to the Acorazado and cannot eliminate masts by shooting them off since the Acorazado must be hit 3 times in one shoot action to eliminate her first mast. The rest of the Spanish battle fleet hurry west to help the Acorazado. Things are not looking good for the English.
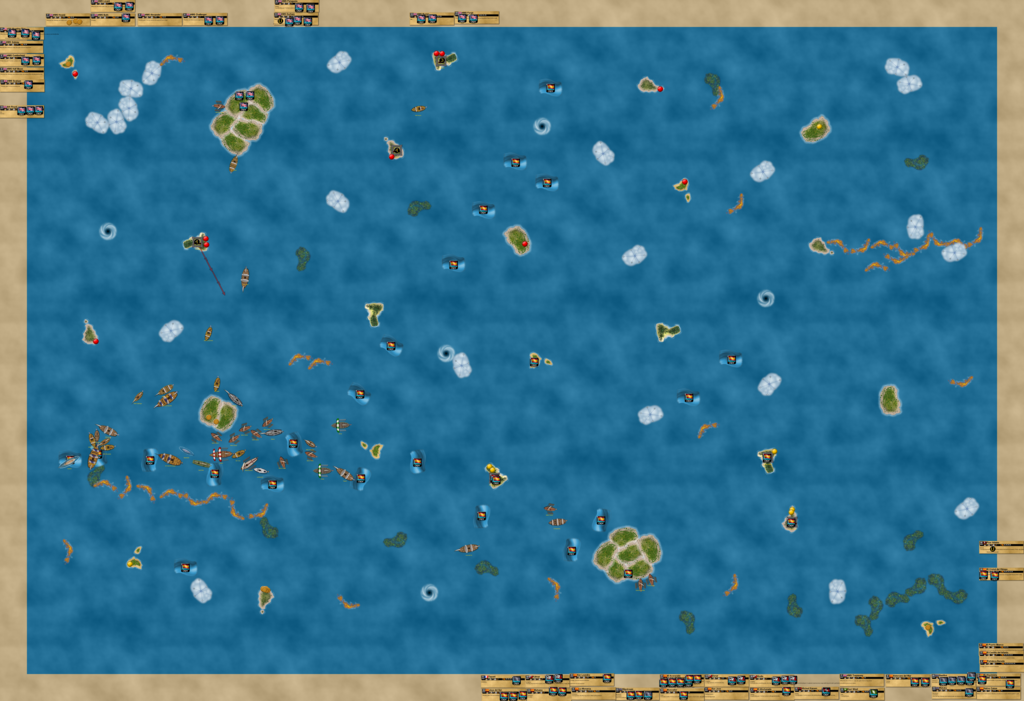
A partial turn later, and the Morning Star has sunk the Cristal del Obispo! Finally the Inquisitor is no more!
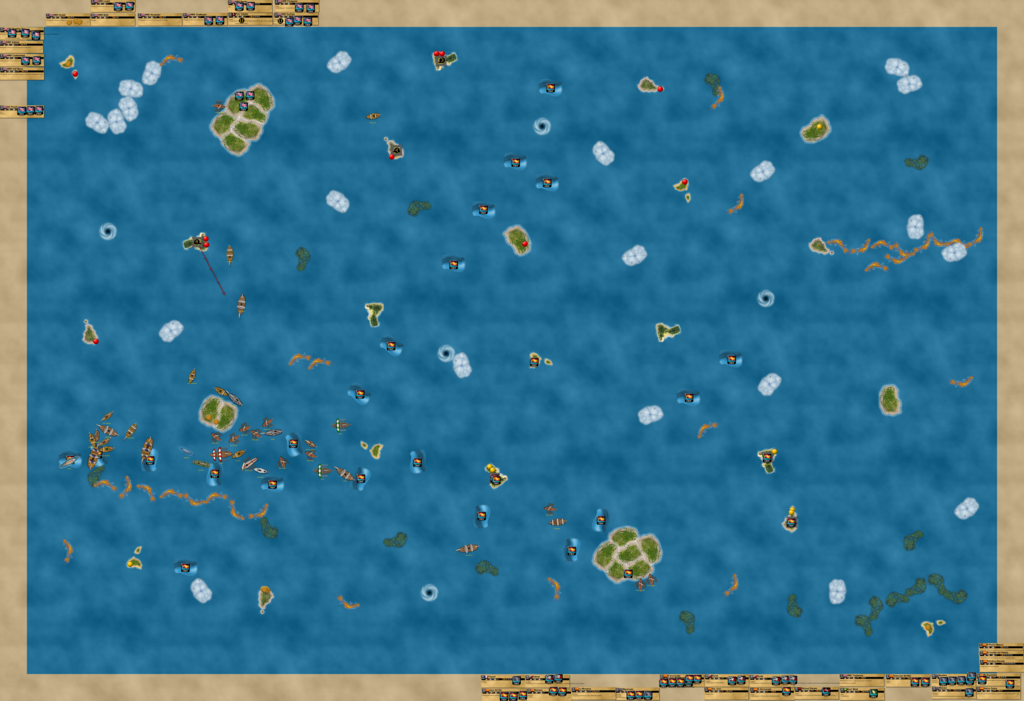
The Burma and Durham are cancelled by the Nautilus and Acorazado, while the Morning Star is nearly dismasted by the superior Spanish force. Up north a few more English ships are entering the fray, as the Spanish send ships to meet them.

The Spanish recapture the Morning Star, but HMS Burma and HMS Challenger manage to ram two masts off the Acorazado! This is the first time she’s taken damage in quite some time. The Acorazado did manage to sink the Durham, which meant that Mycron was the only crew left in the English fleet capable of giving them extra actions.

The whole map, showing how the battle has shifted to the north side of the former Pirate home island. The Hound is almost back to the English HI with 4 gold, while the Joya del Sol sails for gold (now that Dead Man’s Point is gone) in the deep south.
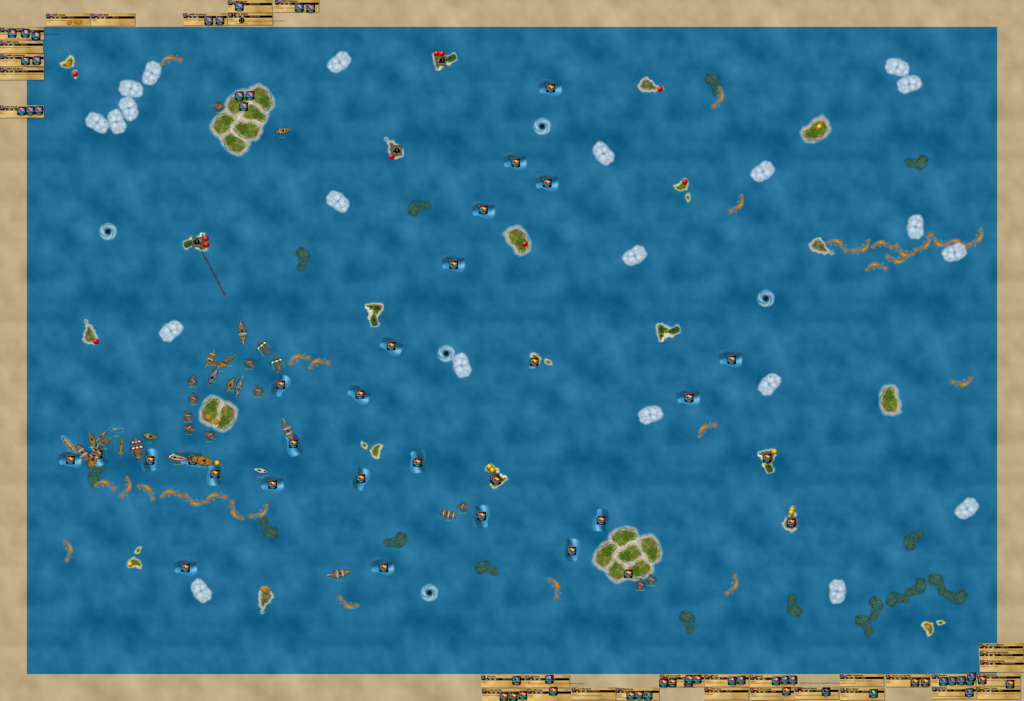
After another turn, the Spanish take complete control. The English are brought down to 4 ships, the same number that they started the game with. The Hound, Ark Royal, Patagonia, and Poor Adams are England’s last hope.
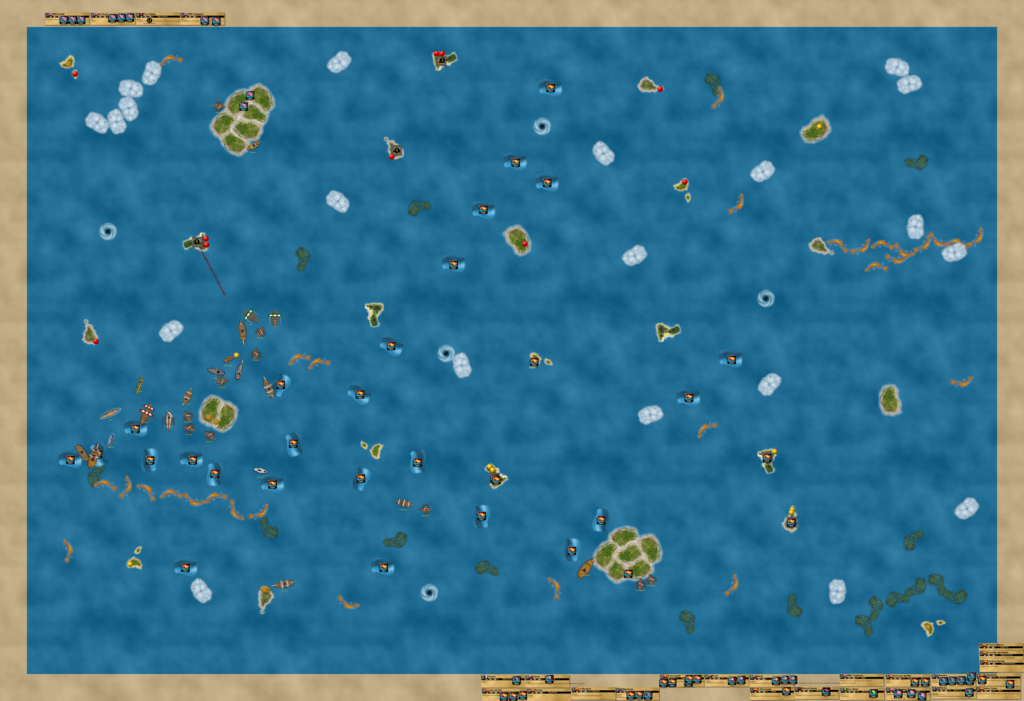
A few turns later, and the Spanish head north to finish off the English!

The main part of the final battle took place around the former Pirate HI, but the final shots will be fired in the northwest. The Spanish have captured the Ark Royal and bombarded Ramsgate. At the lower right, the Tepant and Poor Adams (both captured ships) are shooting at each other with their bow chasers, with neither ship possessing a captain. HMS Hound used her 4 gold to crew herself with a captain and oarsman, and a double action from Mycron let her dismast the Wodin. The English are fighting hard until the end, as evidenced by the damage on almost all Spanish ships left in play.

After the Nautilus dismasts the Hound, the English are essentially down to two ships, the Poor Adams and Patagonia.
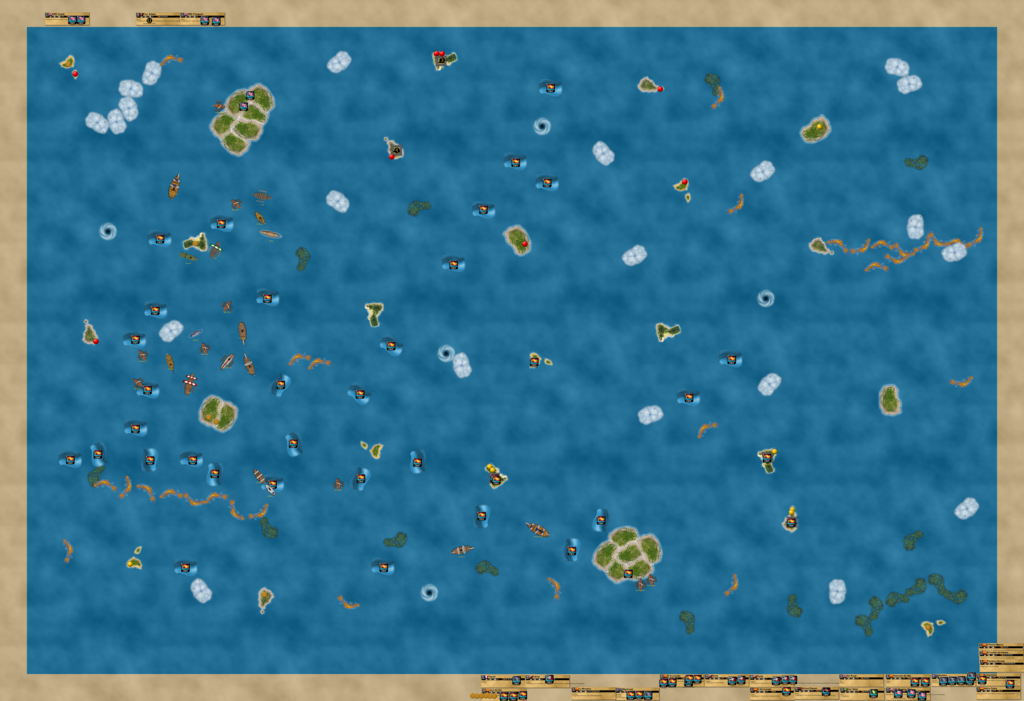
The Slipstream dismasted the Poor Adams, who was quickly captured by the Wicked Kareen! The Hound is sunk, while the Acorazado (the Spanish flagship) fittingly heads north to meet the Patagonia and Lord Mycron, the last English presence in the game!
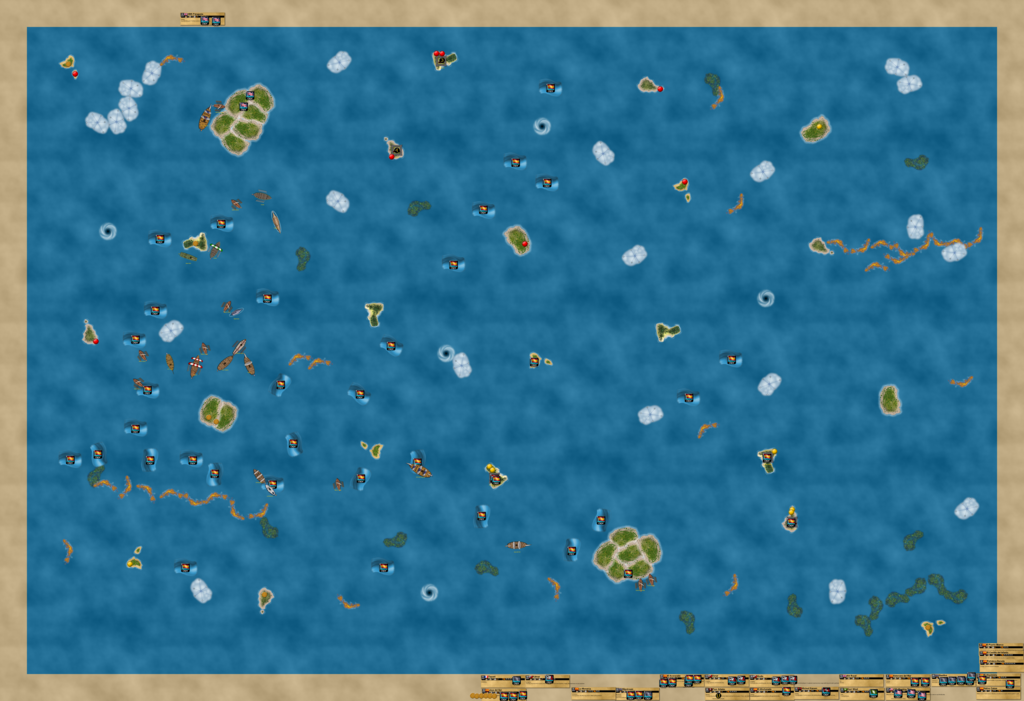
It started with 6 fleets, grew to a game with over 200 ships and over 3,500 total points in play, and now it all comes down to this.

The Patagonia put up a fight, but was ultimately no match for the legendary Acorazado!

The Spanish have won VASSAL Campaign Game 1!!!!
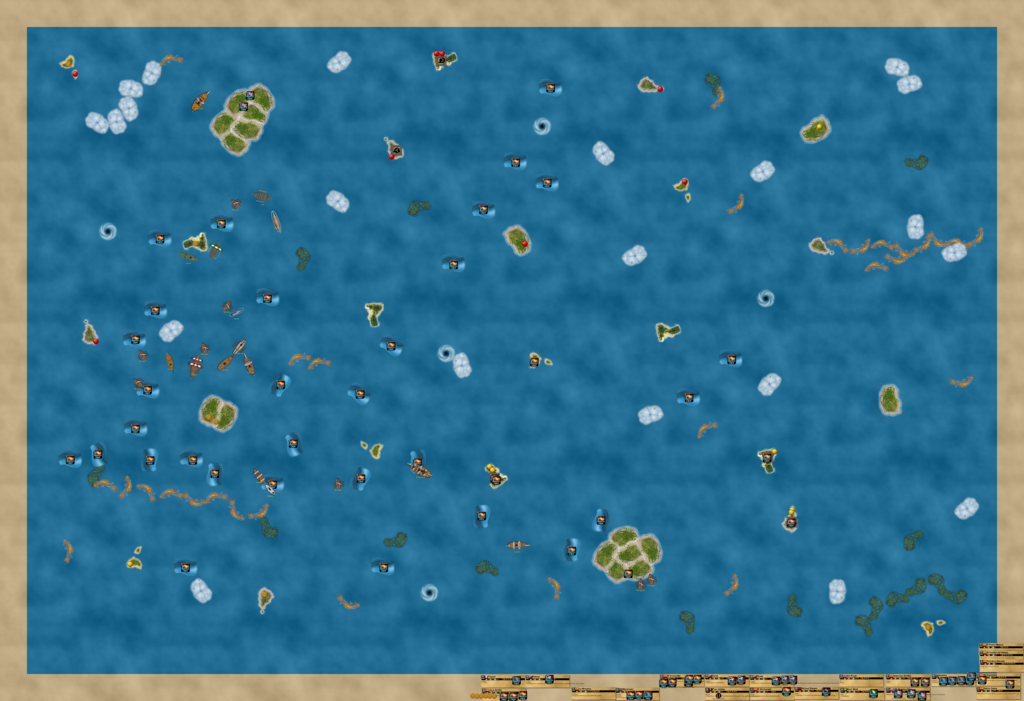
VASSAL Campaign Game 1

Upon hearing the news, immediately the cheer went up throughout the fleet: VIVA EL IMPERIO ESPANOL!

It’s finally over! After almost exactly 3 months of play (the first day of play was 2/12/2016), CG1 has finally come to a conclusive end! The Spanish Empire reigns supreme, for they not only rule the ocean, but I believe they also eliminated all 5 other factions. Tomorrow I will post a reflection upon the game, but for now, Spain is the ruler of the waves!

5/15/2016

Reflection post

Looking back on the first-ever VASSAL campaign game, Xerecs and I have a lot to be proud of. Not only did CG1 become the biggest game in the history of Pirates CSG, it was also the first time that such a long, intense, and epic game was played remotely. With Xerecs in California and myself in New York, we dealt with a 3 hour time zone differential, which we navigated quite well. Any problems were handled quickly and easily, and rules implemented after the game’s start were agreed upon to avoid any delays. Through many email exchanges, we were able to coordinate a ton of times where we both could meet, and play this great game. Once again, thank you, Xerecs, for playing this game with me. Also, thanks to B.J. for creating the Pirates module in the first place – without it, this obviously wouldn’t have happened. (Also thanks to El Cazador for his occasional watching, and always humorous comments.)

And with that, an analysis of the game. I may be the biggest fan of campaign games this game has ever seen, so it should come as no surprise that I also love the flashbacks, numbers, analysis, nostalgia, and more.

Spain played one of the absolute best games of all time, by any faction and in any setting. Not only did they manage to win the game in the long run, but they did so at extreme odds. The Spanish were imperialists right from the start. They literally declared war on ALL FIVE of the other factions, and wound up eliminating all of them (England technically struck the fatal blow against the Cursed, but the Spanish did most of the work). Showing no mercy, they went on a run that was only slowed by a historically large English battle fleet towards the end of the game. Even with that, Spain still came out on top. It’s almost hard to describe just how dominant the Spanish were in this game. In terms of combat and war, this game WAS Spain. In the end, they accomplished their ultimate goal of having a Spanish Empire that dominated the entire ocean.

The Spanish appeared aggressive from the very early stages of the game. Of my three fleets (the Spanish, Cursed and English), I decided that the Spanish would be my “imperial faction”. The Cursed would do typical Cursed things and annoy just about everyone, and I had some fun with that for a while. The English would sort of be the “nice faction” this time around, as evidenced by their strategy not to engage enemy fleets unless they became hostile. The Cursed were never a likely candidate to win the game, and so Spain took the early lead. They were the first to instigate combat, with the Tartessos firing upon the American fort Thompson’s Island. The Spanish easily established control of the two wild islands east of their home island, while simultaneously denying the Americans and hurting their potential gold system. It was a strong statement, and set them up well for the future. It’s safe to say that America never recovered.

In addition to making Spain my most aggressive faction, I wanted to establish a strong gold system that took advantage of their many ships with the +1 and +2 gold abilities. Getting all of those ships into the game was a priority, to the point where the Spanish even started the game with La Saragoza (a ship with the +1 gold bonus ability but also S speed) rather than something like La Monarca. I was determined to launch all of the bonus ships, which included launching many more sets of their native canoes than the one set that started the game. Less than two weeks into the game the Spanish had a record 7 sets of canoes for 35 canoes in total, though they wouldn’t launch any more after that.

One of the more impressive things the Spanish accomplished was eliminating the Cursed despite not being a part of the First Coalition. Originally intended to be a major alliance between America, France, and England, the coalition fell apart when Spain declared war on the French and continued to receive tribute payments from the Americans. Later in the game, the English took the lead for the coalition against the Cursed, but by that point Spain had already declared war on the Cursed after the Cursed made a mistake in attacking Fortaleza Dorada. The First Coalition was formed to eliminate the Cursed and contained half of the game’s fleets, but it was ultimately unsuccessful, though the Spanish eliminated the Cursed rather easily.

It’s worth noting that this was essentially the first huge game I’ve ever played where I wasn’t rooting for my favorite faction, the English. I anticipated rooting for them as the game went on, but the opposite happened. Managing and expanding the Spanish Empire became so fun that I was actually rooting for Spain! (However, there was no bias in the War for CG1 – I desperately played each fleet equally in order to have a true winner.) I also became attached to a lot of Spanish ships through the various battles and wars, which furthered my affection towards the faction.

Spain also made the Americans a “vassal” state, which was truly ironic and amusing given the game was being played on the VASSAL module. However, this eventually illustrated one of Spain’s only “failures” – they intended to essentially make the Americans their colony, but maintaining significant resources in the far east began to hold the Spanish back. They let the Americans go, which extended the Americans’ stay in the game. The Spanish were also one of the only nations to launch purpose-built squadrons, which included the Fire Squadron and Inquisition Squadron. Lastly, the Battle of the Two Paradises (the main battle of the Franco-Spanish war) was not decisive from the start. Between the effective French gunships in the area and the backfiring Spanish equipment (rolling 1’s with fire shot), France had a chance to win the battle early on, but the Spanish had a numerical superiority that was hard to overcome.

Notable ships that were either heroic or had a large impact on the game: Acorazado, Garante, Augusta, Muerta, and many others

A quick analysis of the other fleets, in the order of gameplay (the Spanish went fourth after the Americans):

French 
While setting up a huge network of trade currents, the French annoyed the English and Spanish by building two copies of Paradis de la Mer on wild islands the English and Spanish wanted to share. As the French hadn’t been bothered by any of the factions up to that point (not even the Cursed), it was a move that started their eventual demise. The French fought extremely well in the Franco-Spanish war and lasted a lot longer than the Spanish wanted them to. They came closest to handing the Spanish navy a defeat.
Notable ships: Le Bonaparte, Geographe, Favori

Pirates
The Pirates had a relatively standard gold strategy, though they made some waves by spending 91 gold in a single turn (probably the most in one turn up to that point in the game) to purchase 3 gunships, all with the gold capture ability. I (and the Cursed specifically) was extremely annoyed to see Cursed Captain Jack make an entrance. From then on, the Pirates hesitated to attack the Spanish on their western front, and never did so. The Spanish declared war and eventually wiped them out.
Notable ships: Grand River, Harbinger, Swift, Black Heart

Americans
To be honest, the Americans were basically stomped on and bullied by the Spanish since the very early part of the game. After losing Thompson’s Island and paying tribute to the Spanish, they had no shot at winning the game. However, they fought hard and lasted longer than expected, at first because the Spanish wanted to keep them alive and later because of their own skill and tenacity. The Carolina completed one of the longest journeys of any ship in any game. She departed from the American home island with the Louisiana, sailing almost the entire width of the ocean to arrive in English waters. There, she successfully recruited the English into the First Coalition, which partially led to the elimination of the Cursed. She joined the Americans in fighting the Cursed, nearly being sunk by a Cursed fort. With English help she repaired and then eventually captured the Poor Adams, and made a final stand against the Spanish by helping the English.
Notable ships: Carolina, Frontier, Mississippi, Louisiana, Morning Star

Cursed
The Cursed proved to be a major annoyance almost right from the beginning. They used Davy Jones to eliminate the Wasp from the game, and then turned their attention to the English, sinking the Aberdeen Baron and using their L-movers to force other English gold runners off the map (flat earth rules). Once the English got smart and didn’t sail their ships close enough to the edge for the Cursed to shove them off, the Cursed turned their attention back to the Americans, eliminating the Jarvis (and 3 canoes in the process). The Cursed then threw the Grand River onto a reef to eliminate 5 of her 6 masts, which greatly annoyed the Pirates. The Cursed launched the fog hopping squadron, which was moderately successful in carrying out different missions. It was gradually worn away, losing a ship or two per mission. They also launched a big Fear squadron, which fell to the combined might of Spain and England. The Cursed took great advantage of a lot of powerful gimmicks in this game, but didn’t come away with much to show for it. Their biggest mistake was attacking the Spanish, who proceeded to wipe them out.
Notable ships: Divine Dragon, Loki’s Revenge, Hell Hound

English
The English established a very strong gold system and a decent array of gunships to defend them with. The Dreadnought was launched early on, and Carbon Charlie eventually gave her a new-record 10 extra cannons to increase her firepower to 15 shots per turn. The English began saving gold way back on 2/27, and didn’t spend nearly any of it until launching their minor faction squadron on 3/28. The minor faction squadron sailed against the Cursed, but the Spanish got there first, so the squadron was generally ineffective. On 3/9, the English had 504 gold. On 4/16, they peaked at 864 total gold, which they spent to launch the biggest battle fleet ever, intending to eliminate the Spanish. They had a numbers advantage and the first strike, but somewhat poor cannon accuracy and the loss of their super squadron (with 4 cancellers) gave them a close second place finish.
Notable ships: Dreadnought, Apollo, Grand Temple, Endeavour, others

The most important overall crew in the game included Amiral Stephan Dupuy, Emperor Blackheart, Elizabeth Swann, Commodore David Porter, the mysterious “first” Spanish admiral (aboard El Garante), later succeeded by the slightly more reasonable Admiral Luis Zuan, Davy Jones, and the English Lords Beckett, Mycron, and Gunn.

Most important UT: Celestine’s Charts (lol)

Here are some interesting things I found while looking back at the reports.

First faction to launch: Cursed
First ship eliminated: Wasp
First ship to lose a mast: Swift
First ship sunk: Executioner
First ship permanently sunk: Aberdeen Baron
First HI expansion: English
First faction to hire a privateer: Pirates
First ship captured: USS James Madison (by La Habana)
First fort upgrade: Spanish
First declaration of war: Spanish (ALL declarations of war: Spanish)
First faction eliminated: France
Strongest alliance: America/England (though Xerecs knows more about the Franco-American alliance than I do)

Final Standings:

  1. Spanish
  2. English
  3. Pirates
  4. Americans
  5. Cursed
  6. French

Dates of elimination:
French: 4/15
Cursed: 4/26
Americans: 5/9
Pirates: 5/13
English: 5/14

Major Battles:
Battle of the Two Paradises: Spanish soundly defeat the French
Battle of the Devil’s Maw: Spanish defeat the Pirates, though the Pirates suffer light losses after retreating quickly
Battle of the Pirates’ home island: Spanish soundly defeat the Pirates
Battle of the Cursed home island: Spanish and English (not in an alliance) soundly defeat the Cursed
War for CG1: Spanish outlast and outplay the English to win the game

Minor Battles:
Battle of Thompson’s Island: Spanish victory
Battle of El Puerto Blanco (eastern): Strategic Spanish victory
Battle of the Cursed wild islands: Cursed victory
(Other minor battles took place as well; many had the Cursed as the aggressor.)

Official new records: (as of May 2016)
Total points: 3,516 (likely reached about 3,700 soon afterwards)  (since broken by Command the Oceans)
Total ships: 208 (since broken by Command the Oceans)
Largest single-turn launching: 628 gold (English battle fleet)
Largest recorded single-fleet point total: Spanish at 1,631 points (since broken by multiple fleets)
Largest fleet of any faction: Spanish at 111 ships (since broken by multiple fleets)

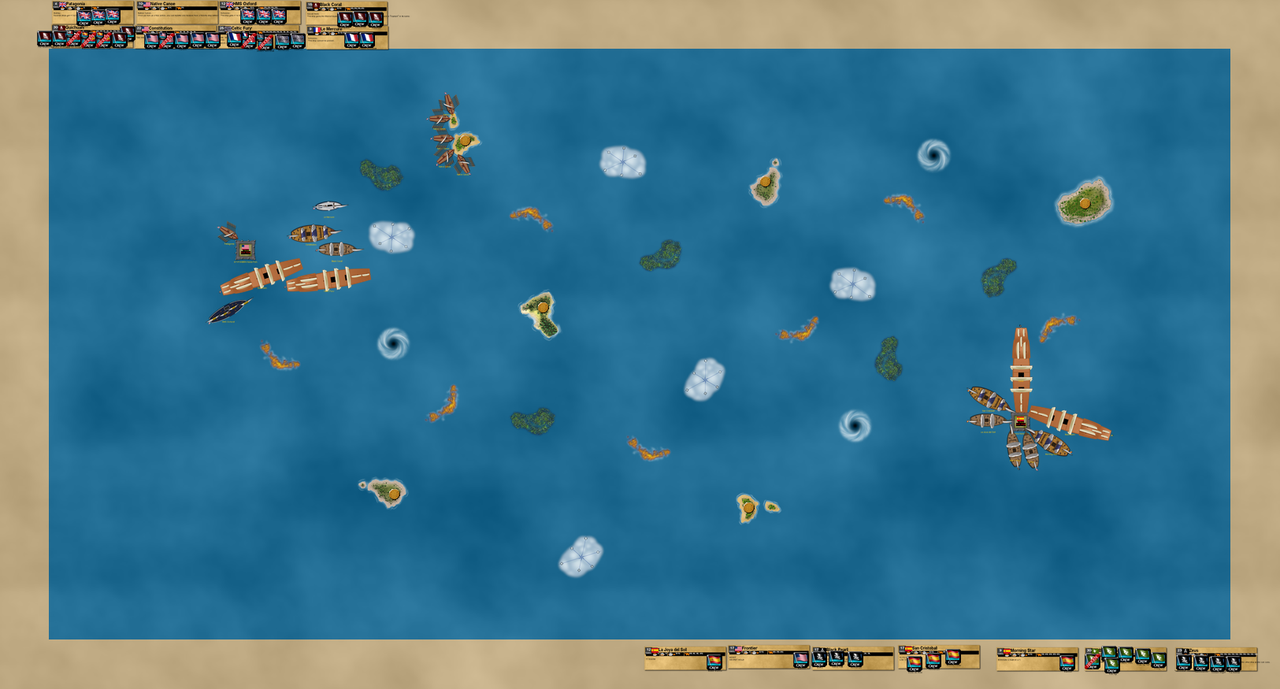
Savage Shores anniversary game

Xerecs and I played a 60 point game on the VASSAL module to celebrate the 10th anniversary of Savage Shores, which was released on November 5th 2008.  Check out this post for a reflection on the set.  I do hope to do a proper text and picture battle report for this incredible game at some point, but I don’t have time yet.  Check out Savage Shores on eBay!

Savage Shores 10th anniversary game

Savage Shores 10th anniversary game

After all the craziness, Xerecs’ mixed fleet prevailed over my English by a score of 18-7.

Editing the VASSAL module

Link to dropbox folder with all necessary files

Inkscape

GIMP

These are parts of emails exchanged between myself and B.J., the creator of the Pirates module.

a7xfanben wrote:
Do you know what your basic process was to start making a new ship model for the module? Assuming I can figure out how to edit it, that’s the main thing I would focus on, but I’m not sure where to start (though I’ll soon peruse the Designer’s Guide).


bj_o wrote:
I started off by tearing apart the old French-made module, and figuring out what I wanted to do differently. My version is a bit of a mess, but I did try to build things piece by piece, as in there’s different parts that plug together to make one ship. For example, each ship piece calls a prototype ship definition, which calls a ShipOps prototype, which also calls a ShipStats prototype. There’s a reason to the madness, and part of it was not duplicating and redefining certain actions many times over. I think there was another reason, but I honestly can’t remember it right now. A lot of it seemed to be necessary to get Vassal to play nice and the way I wanted.


a7xfanben wrote:
Do you know if the “observer” category is unlimited? I noticed that I could move things normally even as an observer, so I’d be intrigued to find out if the game could feature more than 4 or 5 players.


bj_o wrote:
I have no idea if there’s any “observer” limit. The main drawback that I know of would be that observers wouldn’t have access to a private window, so any coin flips or other formerly private actions would be public. Each of the private windows had to be coded separately, but more could be added fairly easily.


a7xfanben wrote:
When you created the artwork/files for the different ship types, did you download or take anything from the French version? There is a 10 mast junk on the French module, and I was able to get it in the correct format, but now I’m realizing it’s more complicated because I’ll need individual file pictures for each mast.


bj_o wrote:
I didn’t use anything from the French version. I didn’t want to reuse anyone else’s work without their permission, plus it didn’t work with the scale I picked anyway.


a7xfanben wrote:
Do you happen to have any old files that you didn’t end up using? I ask because I found your Photobucket picture with all of the different ship types, and I can see you had begun working on a squid, shark, and serpent. If you had any old files of artwork or anything like that I would try to put it to good use.


bj_o wrote:
I actually do have a svg file where I drew those out to scale with the existing ships. The shapes were drawn out in Inkscape, then imported that into GIMP to do the shading/texturing/etc. I usually scaled up to work in 4x scale in GIMP, then reduced back down afterward. (See attached files!) [files are on dropbox]


a7xfanben wrote:
I know you used GIMP to create the artwork – did you measure out the scale from real-life ships? Now that I’m actually trying to edit the module I’m even more impressed by how much effort was put into it.


bj_o wrote:
I didn’t use any real-life ships because these didn’t always match up to anything real. I used the assembled game ships as a guide and measured those, ending up with a 30px/cm scale, e.g. the cards are ~8.85 x 6.35 cm, so they are scaled to ~266 x 191 px for graphics (L = 252px, S = 174px).

For all the ships, I had been going with a semi-realistic style, and I pretty much hit a wall when I got to the creatures. After a while of trying to figure out a good way to depict them, I lost interest, and that’s where we are now.


a7xfanben wrote:
Just to clarify – when you say you drew out the shapes in Inkscape, you mean that you drew the parts out and saved each file separately and then uploaded each individual mast picture file along with the hull to complete the ship type? I can’t download Inkscape or GIMP right now but I’m wondering if I could figure out something with Paint.


bj_o wrote:
Not quite. The shapes were drawn in Inkscape, then imported into GIMP. GIMP also converts the Inkscape shapes into paths that I used to finish drawing all the components. For a ship, the hull was created on one layer, and each of the masts were on separate layers. Each layer was then exported to its own image file for Vassal to use.

One thing to understand is that for the “fire” to show up where the center of the masts were, all the mast images and the fire image all had to have the center of the image in the same place. That’s usually the center of the mast. For example, a square rigged mast shows the sails billowing out to the right, but there’s a lot of empty pixels to the left so that the mast is in the middle of the image. I also had to make sure the center of the ship (i.e. the rotation point in Vassal) was in the middle of the hull image.

I’m probably confusing the issue more here. I could probably explain it better visually, but I don’t have the time at the moment. You might be able to experiment with Paint, but it doesn’t support transparency.


bj_o wrote:
I sent you all the remaining artwork I had, so there wasn’t really anything else beyond the squid and shark that wasn’t used.

But if you have an image you can use (at the right scale), it’s easy to add it to the game. If you go into the editor, expand the item labeled “Ocean [Map Window]”, then expand “[Map Boards]”. Right click on [Map Boards], “Add Board”. Name it whatever, and select your image for the Board Image. You don’t have to tell it a size or anything. Save the module, and you’re done after that, but you’d have to make sure everyone has a copy of your modified module.

Now to start a new game with your map, you’d need to go into the “Build your own” option in the Ocean Layout and select your new map board.


a7xfanben wrote:
Out of curiosity, did you create the artwork for the stern flag and the deck/sail details in GIMP as well? (We’re adding a Dutch faction; creating a crew chip was easy but the stern flag will be a bit tougher.) I’m not a fan of doing artwork stuff on a computer, so I’m struggling to make a 10 master look very good lol.


bj_o wrote:
I did do it in GIMP, although a lot of it was drawn in Inkscape as shapes first, then imported into GIMP to add textures/shadows/etc.


I have edited the module again! Very Happy

This is version “2.1” finished on 3/2/2018 and released yesterday with the start of the Caribbean game. The module size is smaller, and it did take less time to boot up than with the previous module version.

An important aspect of this edit that I should have mentioned in this post:

Page 103 of the VASSAL Designer’s Guide has instructions for deleting unnecessary files. This was important in making the module size smaller when I deleted all the world territory files and replaced them with much less space from the Caribbean territories.
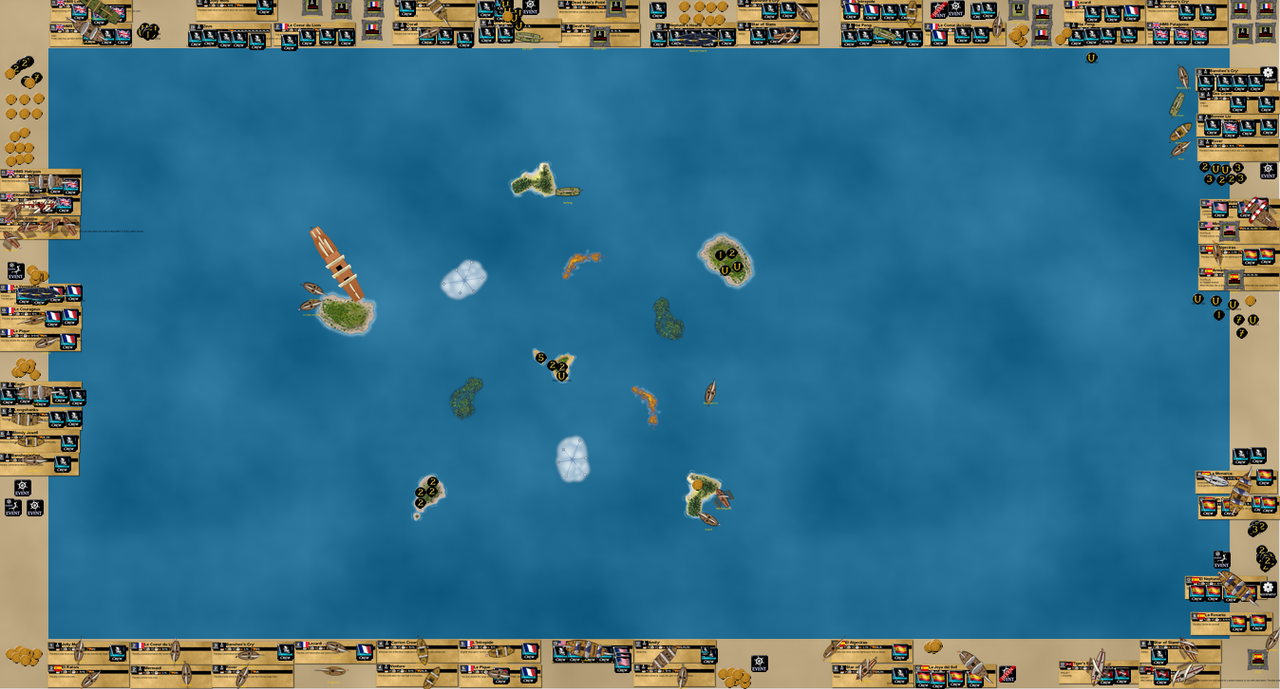
Not the most important thing to keep in mind while editing the module, but something I had to search for a while to get. Deleting files while in “editing mode” on the module itself is not the same as deleting the files permanently by going into the BuildFile.

Play virtually with VASSAL

VASSAL

VASSAL is a computer program that allows users to play on and build modules for board games.  Using an online server, you can play with anyone in the entire world with the Pirates CSG VASSAL module!
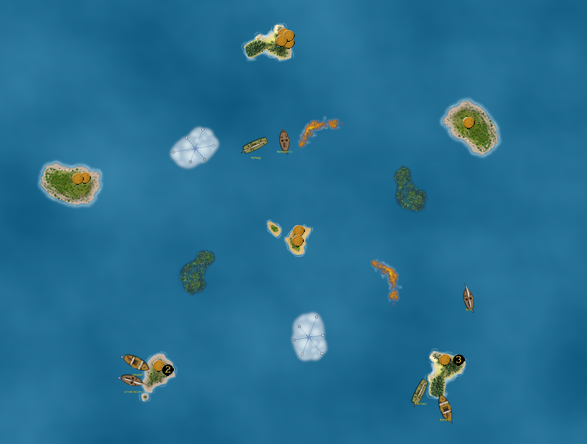
Get the latest Pirates CSG module HERE!  (version 2.8)

The official VASSAL website will have the latest version of the VASSAL program.

How to extract files from a .zip folder.

Check out my informative VASSAL tutorial:

3 campaign games have already been completed on the VASSAL module, with 2 more currently ongoing (the Caribbean game and CG4).  Check out the videos below for the epic fun to be had on VASSAL!  (scroll through the playlist to see them all)


Check out these VASSAL files you can use for playing specific scenarios:

Find some information and resources for editing the Pirates CSG module HERE.

Faction numbers for making ships: Americans=1, Barbary Corsairs=2, Cursed=3, English=4, French=5, Jade Rebellion=6, Mercenaries=7, Pirates=8, Spanish=9, Vikings=10, Dutch=11.


And finally, my original post on Miniature Trading from late 2015, since edited:

VASSAL

the Pirates module

(other/older module versions here)

~~~~~

The VASSAL module has been reborn!

This is a megapost. I’m hoping that people check this thread a lot, because I’ll definitely continue to post here even if it directly follows my previous post.

I thought I’d start with this. After corresponding with B.J. over the past day or so, I got his permission to share part of his email:
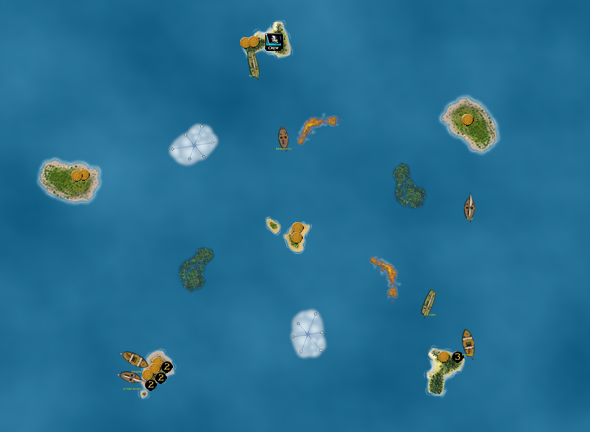
bj_o wrote:
As for modifying the module, I have no problem with that if anyone can figure it out. Vassal isn’t the most user friendly program. The module isn’t compiled or anything like that, so anyone should be able to edit it as-is. Vassal has gone through a couple of versions since this was created, but I don’t think that will cause any issues.
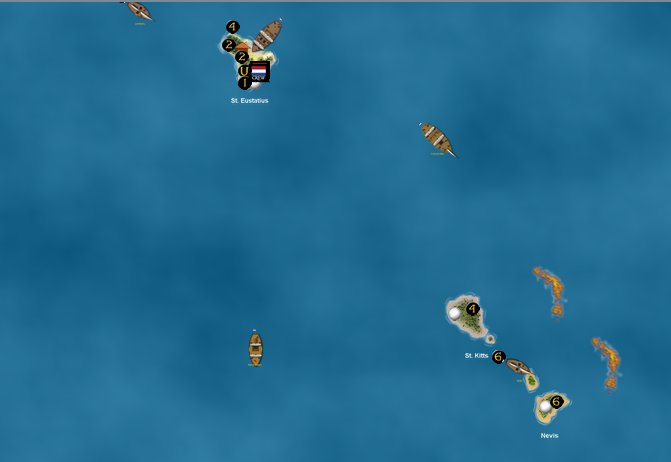
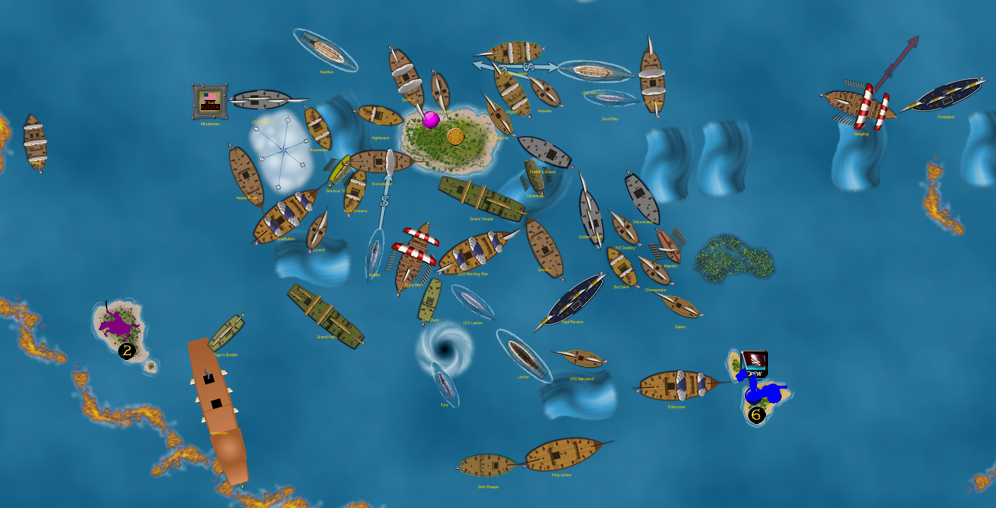
I doubt I’ll return, since there’s really not much I can contribute, but thanks!

This is great news that apparently anyone can make edits to the module! Now it will be up to us to do so and improve it.

Alright, here is the best sort of “Easy Startup Guide” I can do:

1. Download VASSAL and the Pirates module.
2.

el_cazador wrote:
From Vassal, you must use File>Open Module> (wherever you have bj_0’s .zip file)>the .zip folder. Vassal should recognize and load it.

3. VASSAL is now open. The Welcome screen doesn’t appear to have its own window that you can minimize. You can create a username and password.
4.

VASSAL User Guide wrote:
Select Play Mode: Under Select play mode, select one of the following:
a. Start a new game offline: choose this option for beginning an email game, playing
solitaire or hotseat, or to edit a module.
b. Look for a game online: to play on the Server or peer-to-peer.
c. Load a saved game: to play a previously saved game, or to review an email game log.

We’re generally going to go with the middle option. Solitaire games would be the first option, while I would assume that the third option could work for campaign games that are saved.

5. Now you should be in the Main Room.

VASSAL User Guide wrote:
To join a game on the Server,
1. In Module Manager, in the
Module Library window,
double-click the module you
want to play. The Welcome
Wizard opens.
2. In the Welcome Wizard,
under Select play mode,
choose Look for a game
online, and then follow the
other Wizard steps as the module requires.
3. On the Toolbar, click Connect.
4. On the right side of the screen, the Active Games window opens. The Active Games window
displays the Main Room for the module, which is the default location for all players who are not currently in a game, and any active game rooms under that. Only rooms running the current module
are displayed. The number of players is displayed in parentheses.
5. Double-click the name of the game room you wish to join.
6. If prompted, enter the password for the room. (This password is generally different from your Vassal
password.)

I hope that helps! You can also private message other users on the same module, which was helpful to el_cazador and I when trying to get the game set up. However, once the game starts, it’s easier to just use the chat at the top of the window, which is where the game transcript thread came from.

In terms of Pirates, the setup gets easier. Go to File at the top left, and then choose an Ocean Layout. It’s helpful to adjust the top panel and drag it up so you can see more of the water. At the top of the window, there are numerous command buttons, and the telescopes are very useful. They can be used for a basic zoom in and out, but the middle one allows you to fit the game to different percentages. Also very useful, the button to the right of the telescopes (looks like a map) allows you to see an “overworld” view of the entire game in a smaller box, regardless of how much zoom there is on the overall game.

To the left of the zoom buttons, there is a camera button where you can save snapshots of the game. You could also use a Snipping Tool to grab screenshots of the zoomed in details.

The question mark to the left of the camera button brings you to B.J.’s help guide, which is very useful when you’re starting out.

The treasure chest button allows you to have a “locker” where you can flip coins over without other players seeing them. Other than that, there is some transparency in the game – you can keep your crew “hidden”, but other players can still flip them over. Also, when crew are hidden, their names still appear below the crew chip, as long as you’ve defined their properties.

bj_o wrote:
Setup
-Placing Islands
The islands are available within the game piece palette (“ship” button) on the “Terrain” tab. Just drag and place them where you want them, rotating if necessary. After placement, islands cannot be selected unless you SHIFT+CLICK on them.
-Placing Treasure
Each player can drag the coins they want from the game piece palette. Unique treasure must have its properties (CTRL-P) defined before placing them on the islands. Once all players have selected their coins, make sure they are all showing the backs and not the values (flip if necessary with CTRL-F). Then one player can select all the coins and stack them (CTRL-S), which send them all to a stack in the upper left corner. A player can then pull coins off one at a time and place them on different islands.

Also, you can edit a ship’s properties in the pieces window before it’s introduced to the game. In this way, you can eliminate masts and start fires before it even shows up in the ocean, making my fireship idea even more intriguing. Also, forts can be on fire too!

I think I’m going to slowly start investigating how to edit the module (Designer’s Guide), and any help would be greatly appreciated! I’d love to add some more ship types.

Pirates CSG VASSAL module

Example of a small game being played on the Pirates CSG VASSAL module