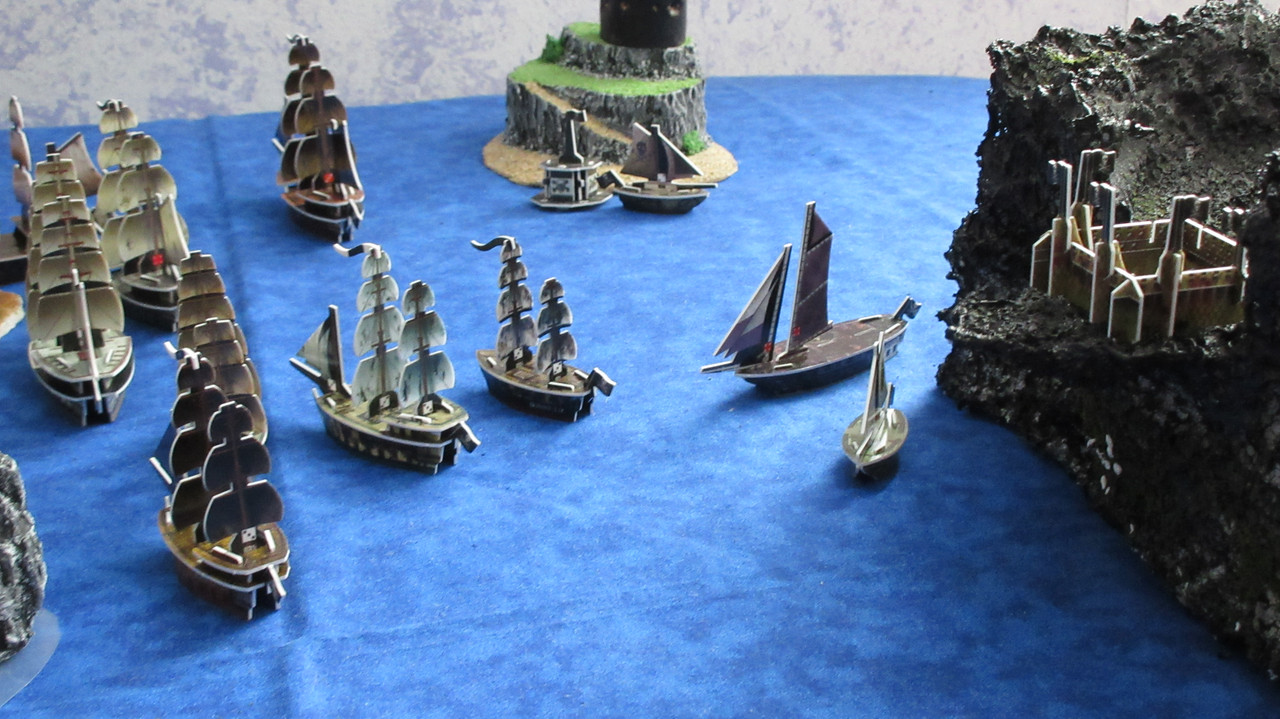
This is a picture-centric report, as I try to take more closeups and my time playing this epic game slowly comes to a close. Again, enjoy it while it lasts haha.
Jade Rebellion vs. the Cursed:
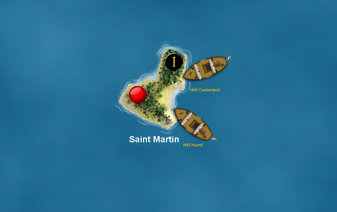
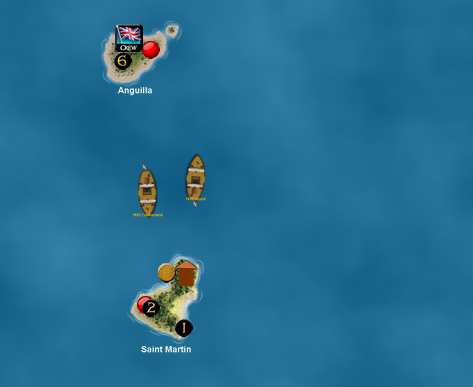
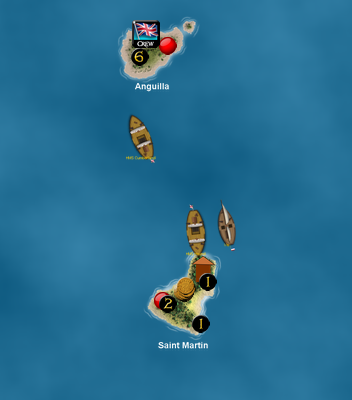
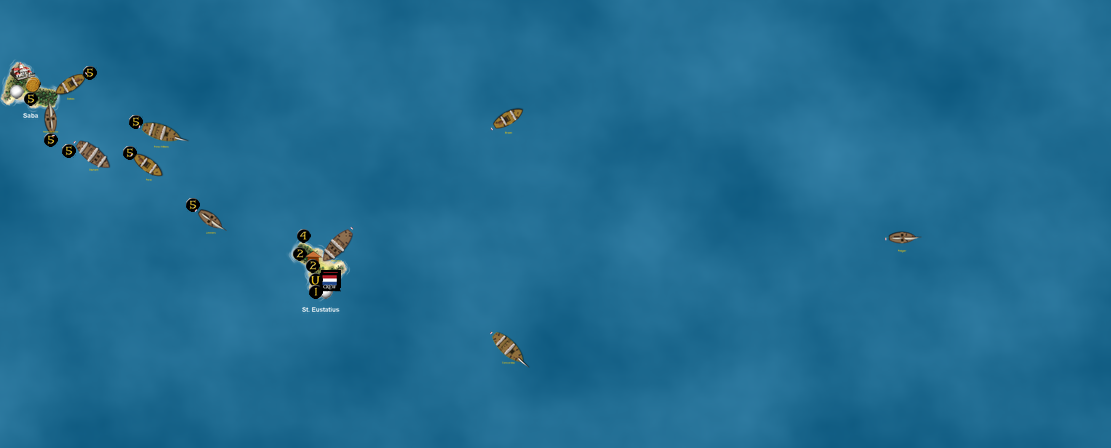
The Nubian Prince manages to eliminate two masts from the Loki’s Revenge and capture the ship’s captain!
Devastation. Desperation.
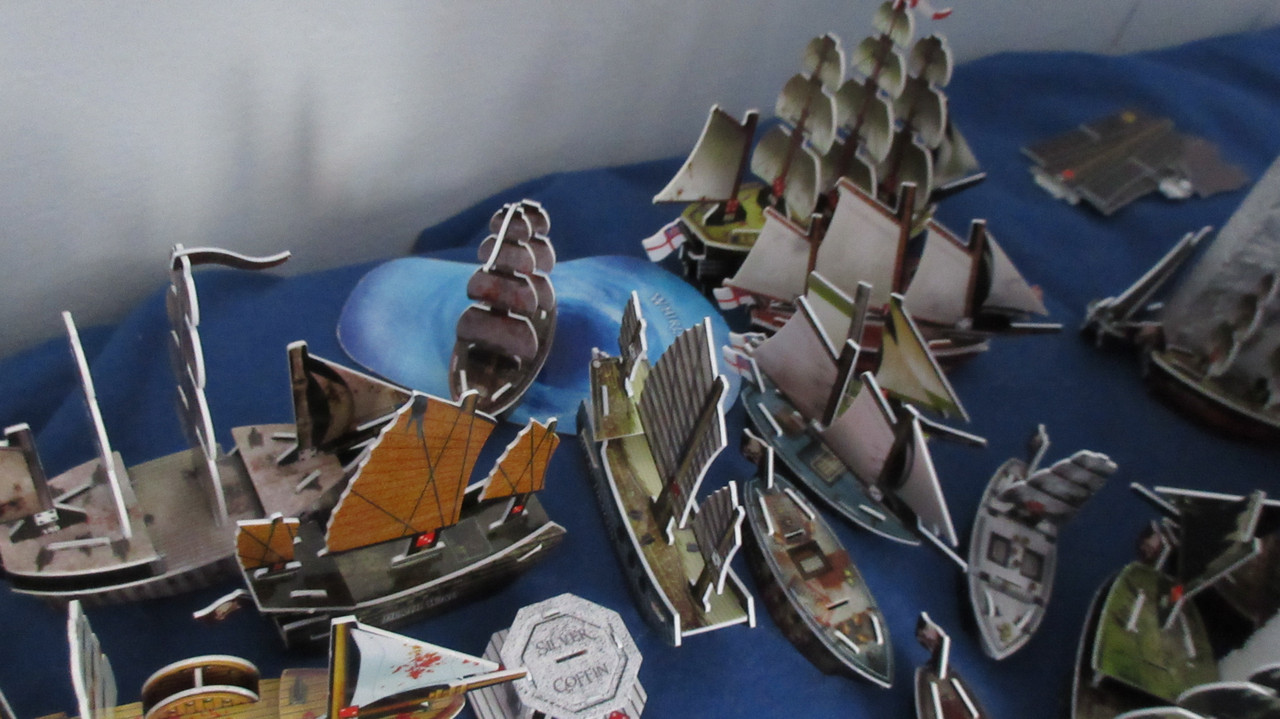
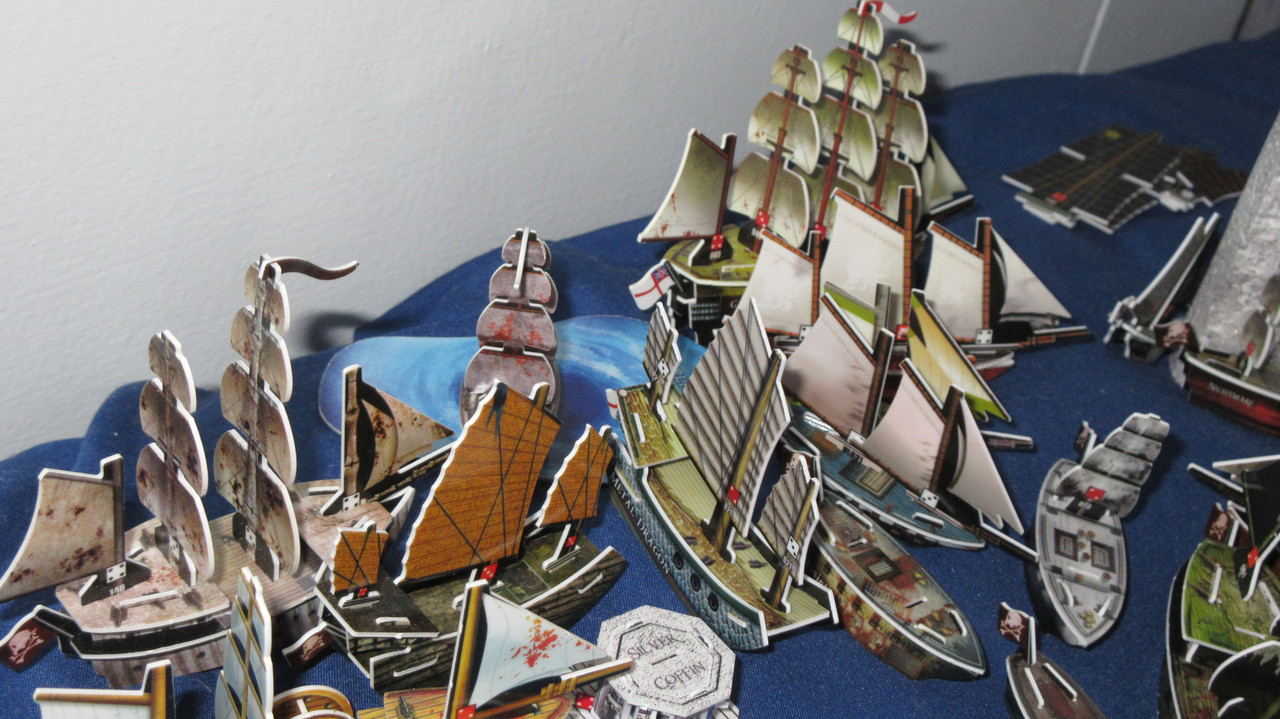
THE BAOCHUAN!!
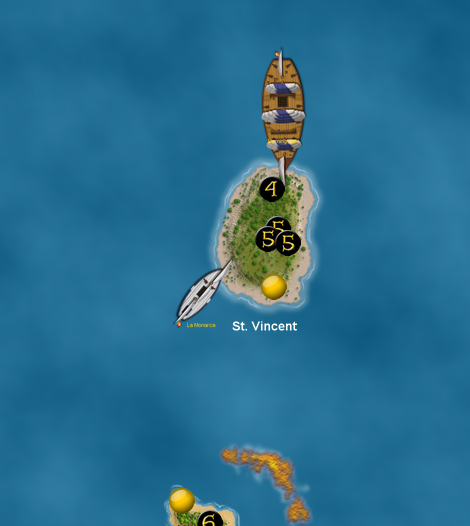
At long last, the flagship of the Jade Rebellion is here! The Jades spent all of their 108 gold on what will likely be their final three ships launched.
Almost forced to call upon Mercenary help at this point, the Forward and Revolution give them a rare chance to field regular square-rigged ships.
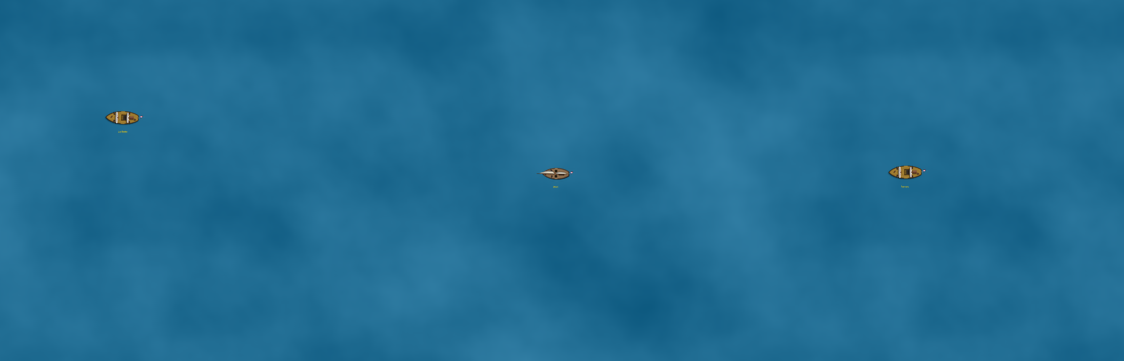
Ships in various states of disrepair sail out, unable to repair due to the shortage of resources, lumber, and manpower in the area.
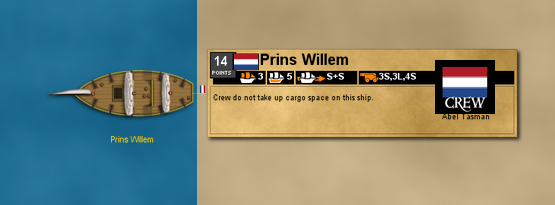
The Baochuan has a maxed out complement of crew, while the Forward carries the first canceller the Jades have possessed in this game.
The Cursed use Tsuro to move the Black Pearl onto a reef! This is the first direct Cursed vs. Pirate conflict in this game! Perhaps a sign of things to come?
Cleanup efforts. The Cursed reiterate how dominant they’ve become in the far west around Broken Horn Island, sinking various BC and Jade ships.
A theme we’ll get used to on this turn, with damaged ships sailing out to do battle.
With the change in combat rules, the ocean is becoming less crowded and lively, with a “no man’s land” starting to develop in an area that was hotly contested not long ago.
From the last few pictures you may have noticed additional ships in play…
Yes indeed…
THE DELUSION!!
The Skin Flayer gives the Cursed a very devastating new weapon, while the Crocodile is their other last 4+ masted ship to launch.
The Guinee cancelled the Nubian Prince’s ability, and she was sunk by a trio of Cursed ships.
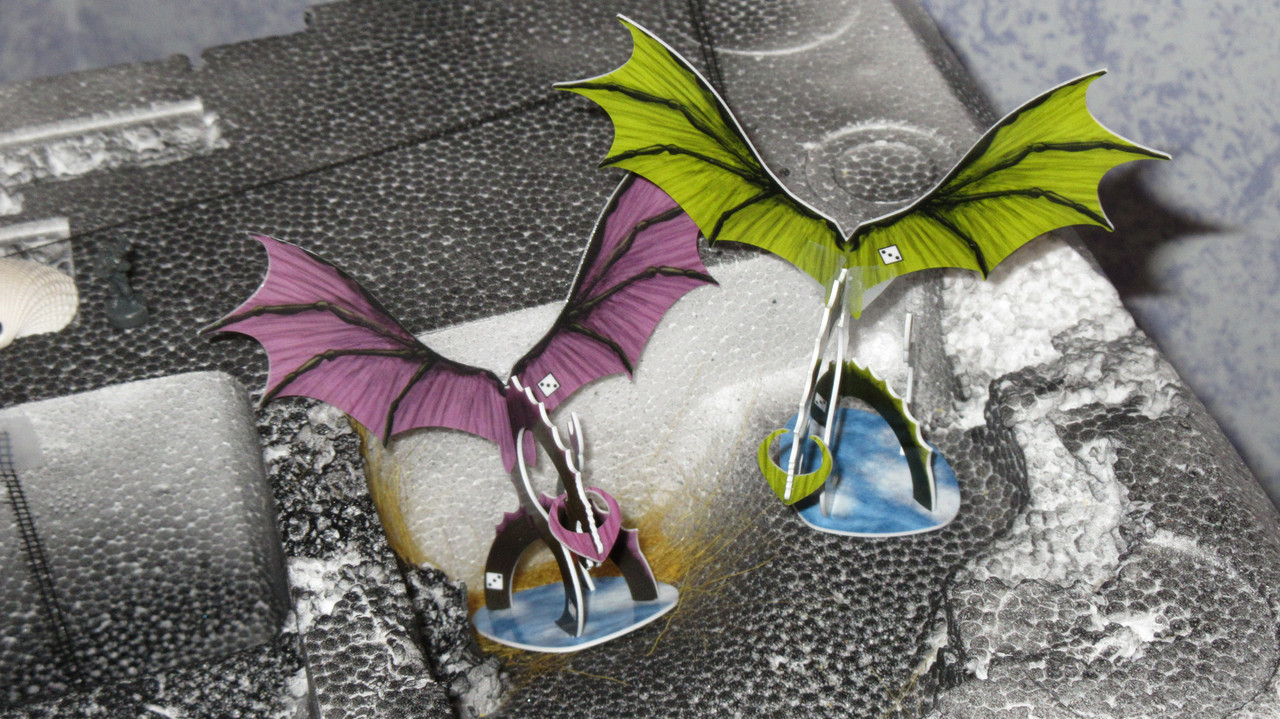
THE SPAWN OF SHAL-BALA!!!!!!!! ANGELICA IS HERE!!!!!!!!
After regenerating for two turns, Shal-Bala has returned to full health! The creature has mated and now has an offspring! XD Angelica will be Cursed for this game, giving them TWO sea dragons at the Roost!!!
The full Cursed launch, where they spent all of their 297 gold at once.
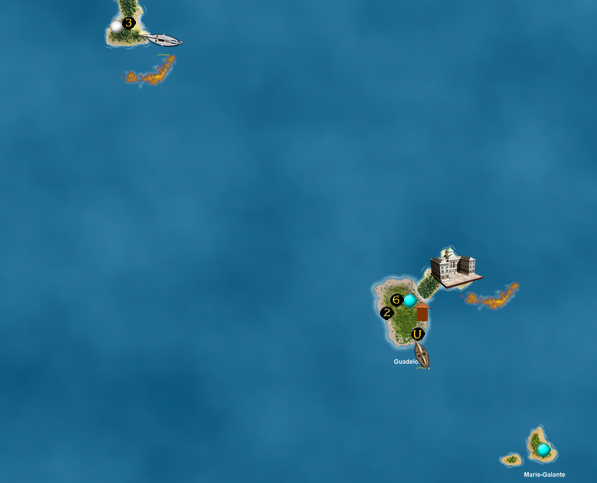
Did you think that was it?? Not quite!! Unable to carry out further repairs, El Fantasma gave the Divine Dragon his SAT and steered the ship towards the whirlpool created by Calypso. Using the Eye to find his way, Fantasma ended up in the Caribbean!! Words have already been exchanged, and the Cursed are recruiting the English to help fight the Pirates!!!! O_O With Davy Jones still able to copy Calypso (he did this turn but both rolls were 2’s; DJ has temporarily been transferred to the Fiddler’s Green for her reroll), you can immediately get some ideas about what could happen….
The graveyard for these two factions warring against each other on Turn 78. Many ships were sunk, mostly on the JR side.
The report for the action of December 6th will be split into two or three parts.
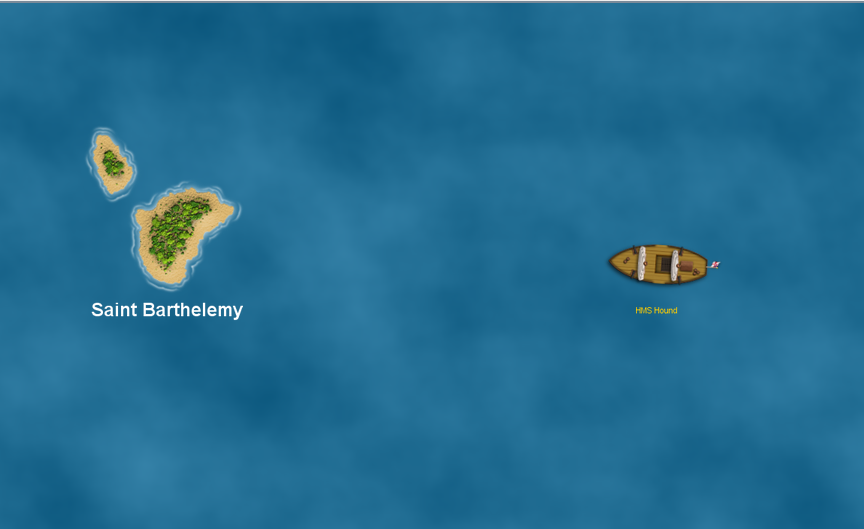
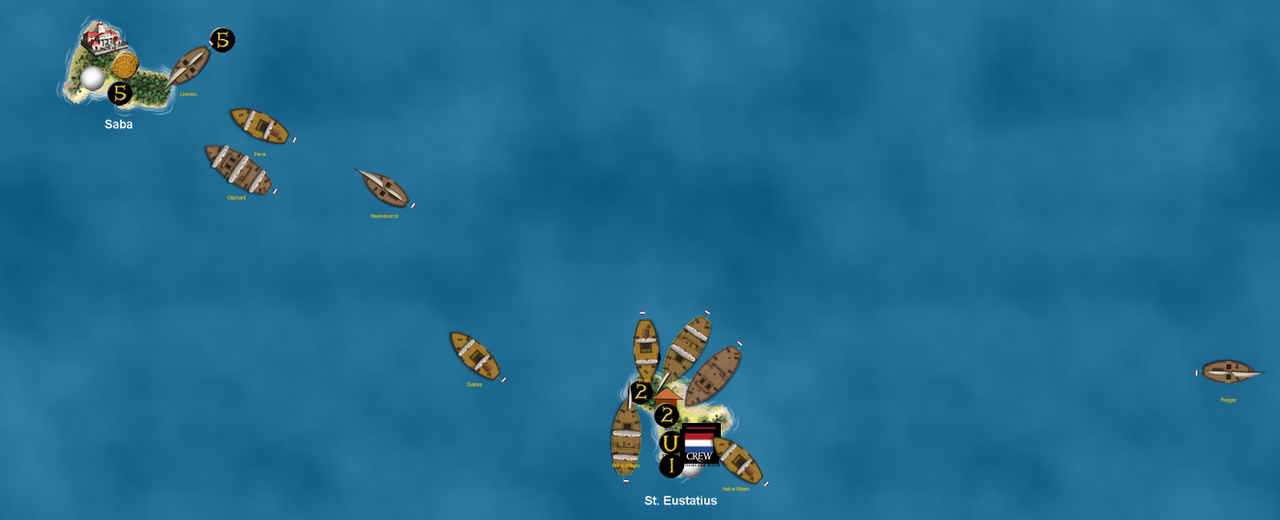
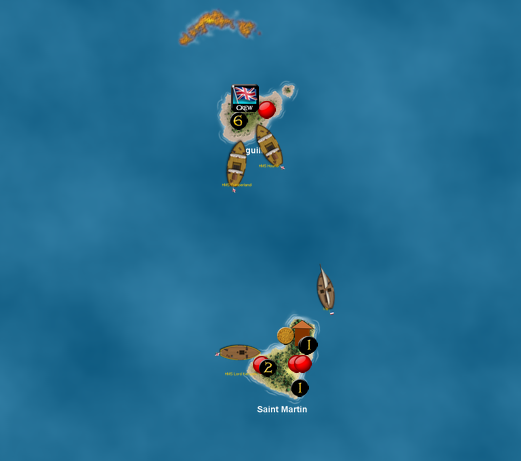
The Union Jack is back in the Sea of Allost! The English are here!
After El Fantasma told them the way, the English decided to commit ships to the cause of fighting the Pirate empire in the far east. Only 5 English gunships were able to fit at the other end of the whirlpool, but more will certainly arrive soon.
The English are ready to finally get full-scale revenge on the Pirates!
Almost the entire English fleet is now flocking to the Caribbean whirlpool:
The Spanish are doing the same thing, though for a different reason of course.
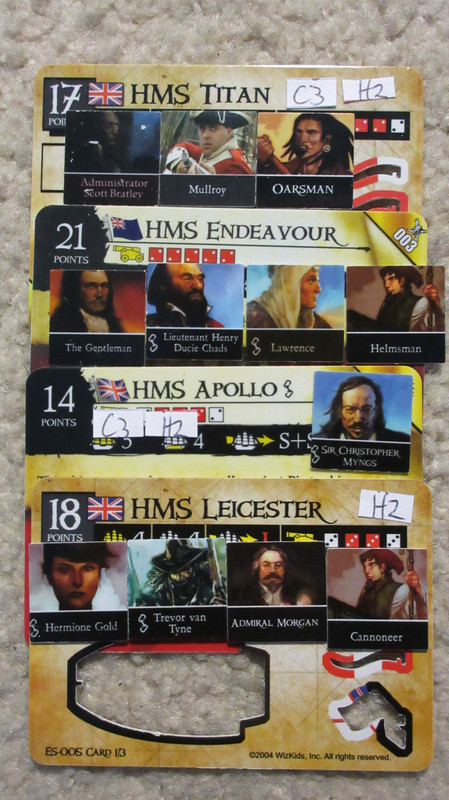
At the end of their turn, the English spent all of their 140 gold to get some of their best gunships! The Titan and Endeavour will have access to cancellers and multiple actions. Ducie Chads gives the Endeavour 1L guns against the Pirates, which of course will eliminate two masts with one hit! HMS Apollo has Pirate-hating built-in, and Christopher Myngs could give that ship up to 10 shots in a turn. The Leicester is crewed to her maximum point total and cargo restrictions, ready to dole out some serious damage.
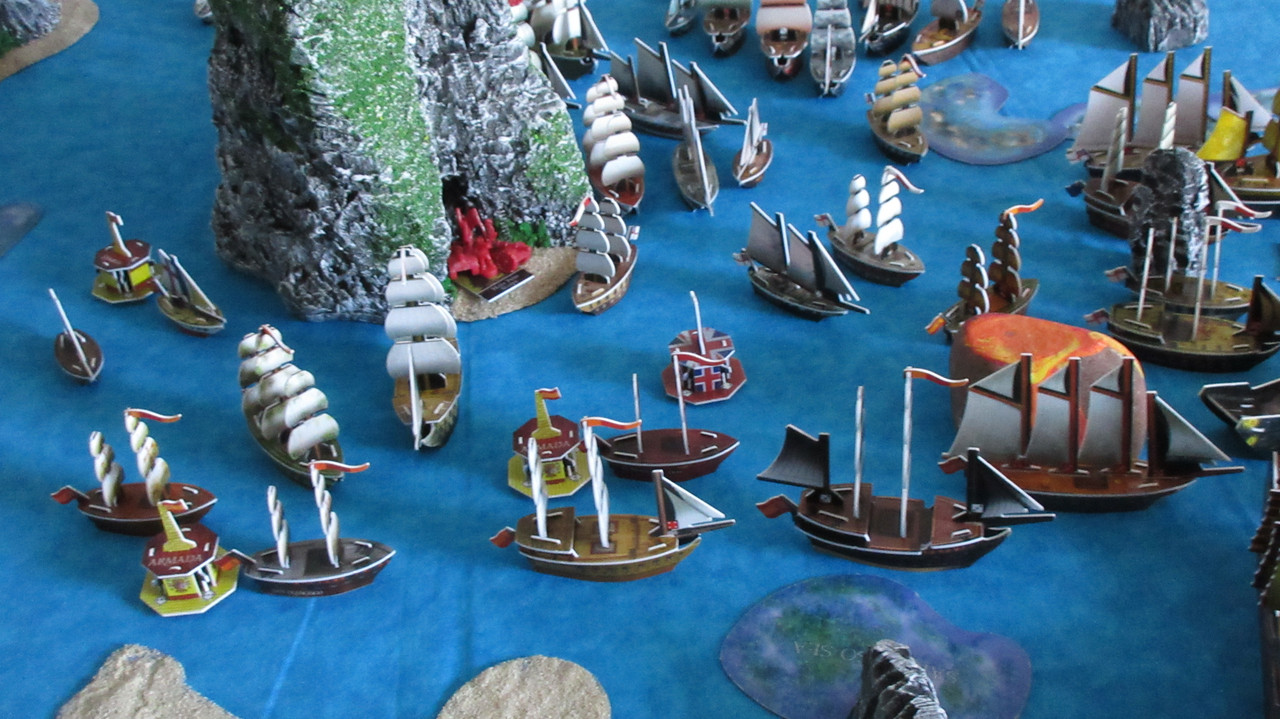
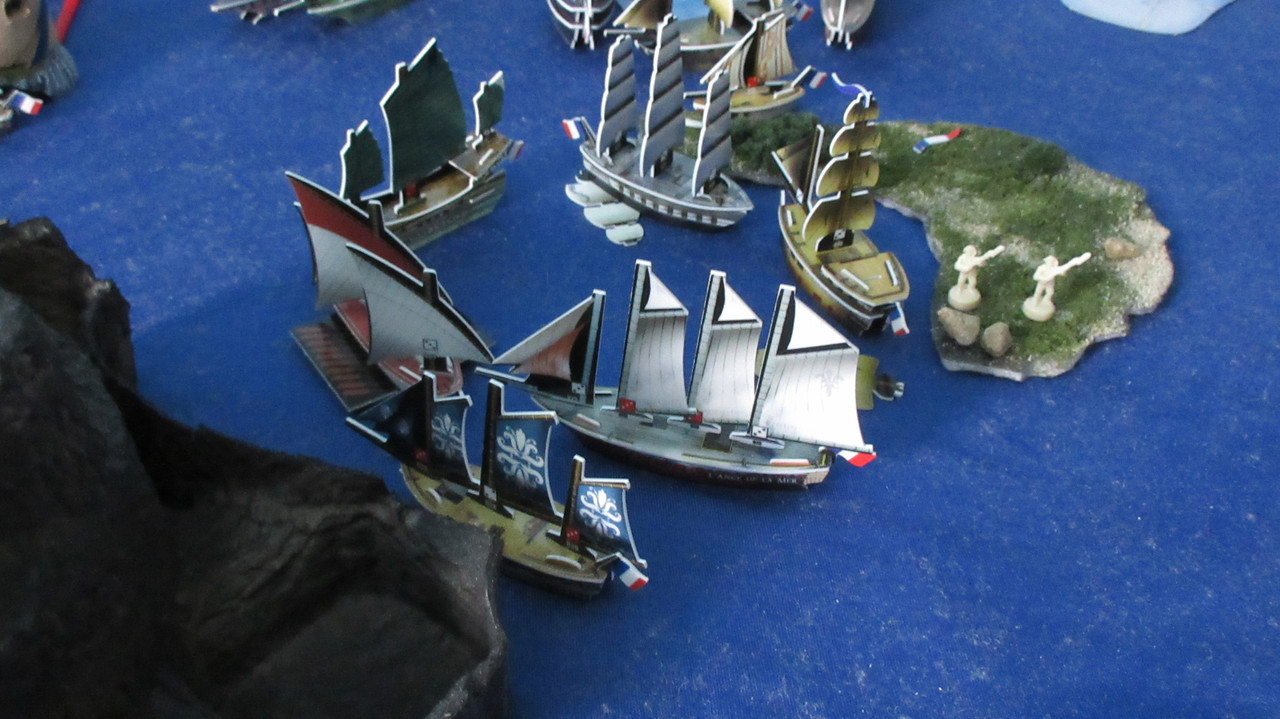
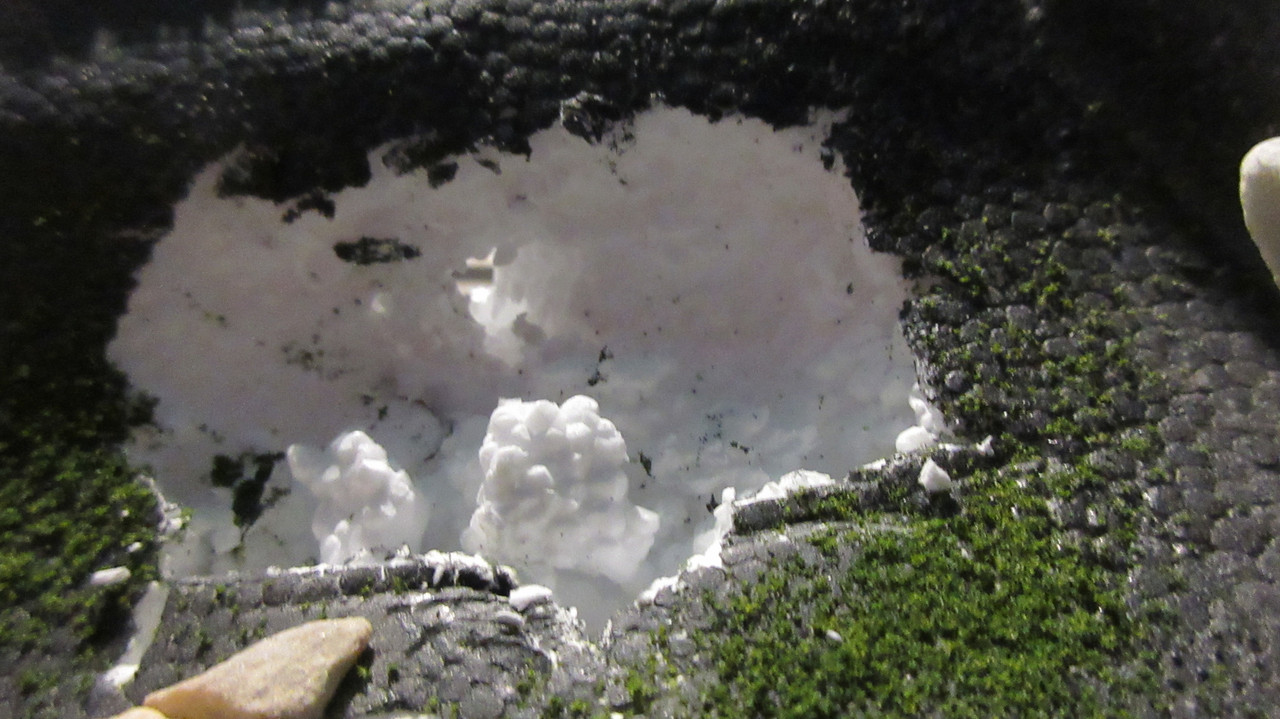
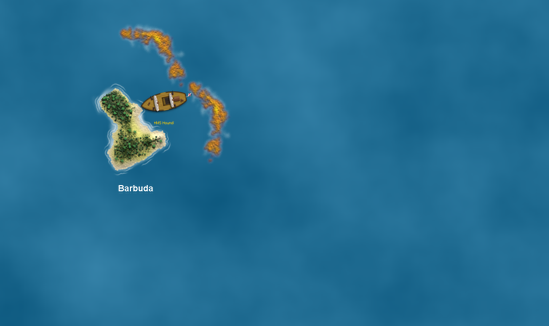
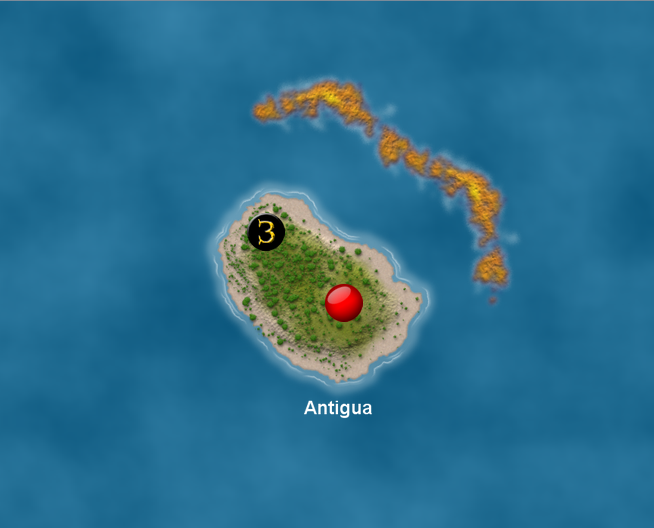
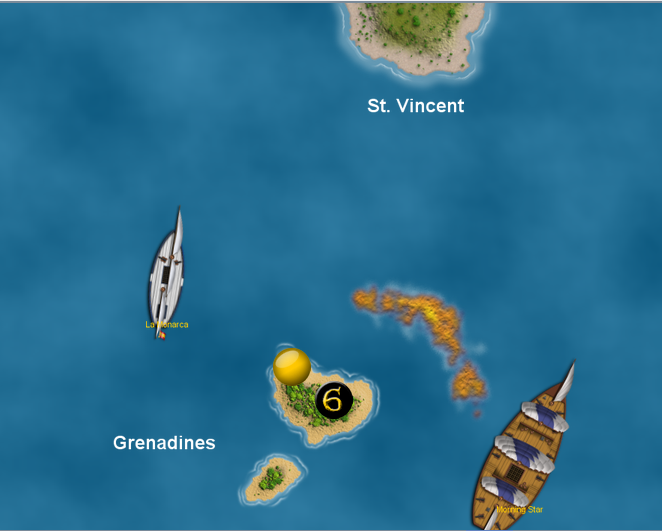
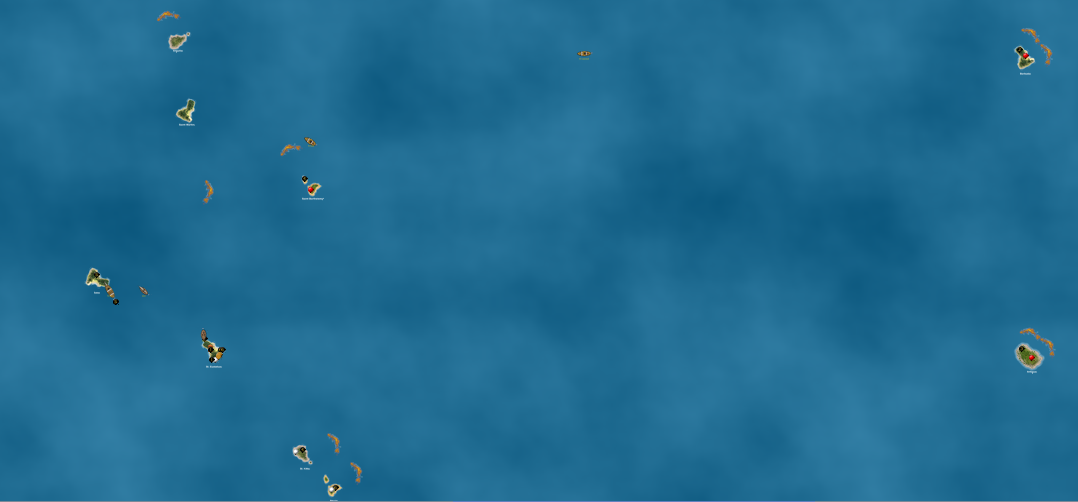
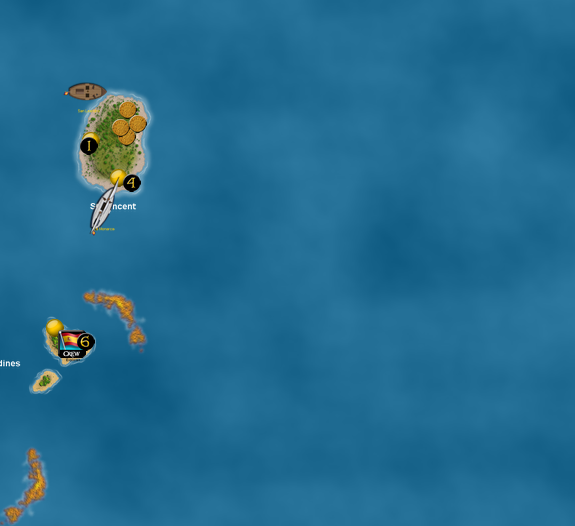
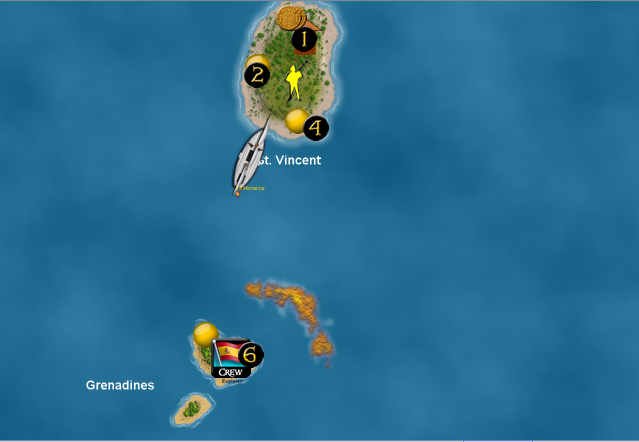
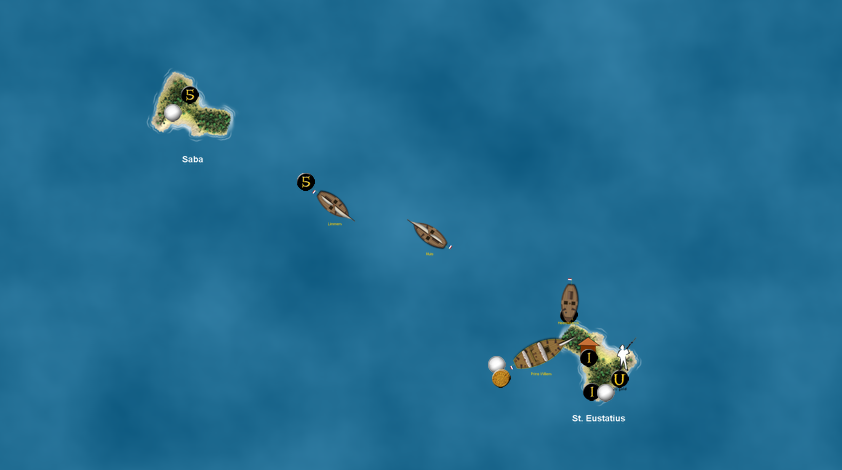
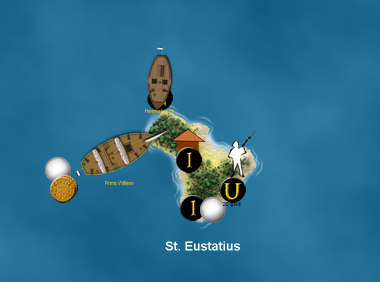
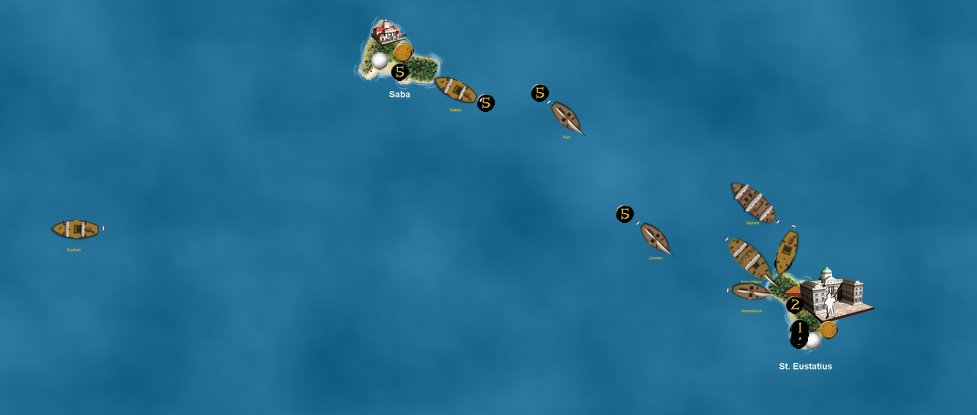
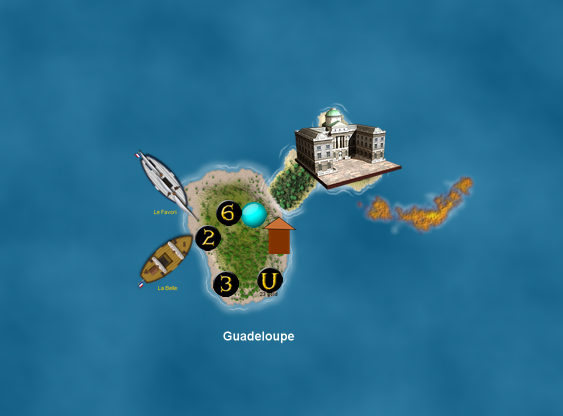
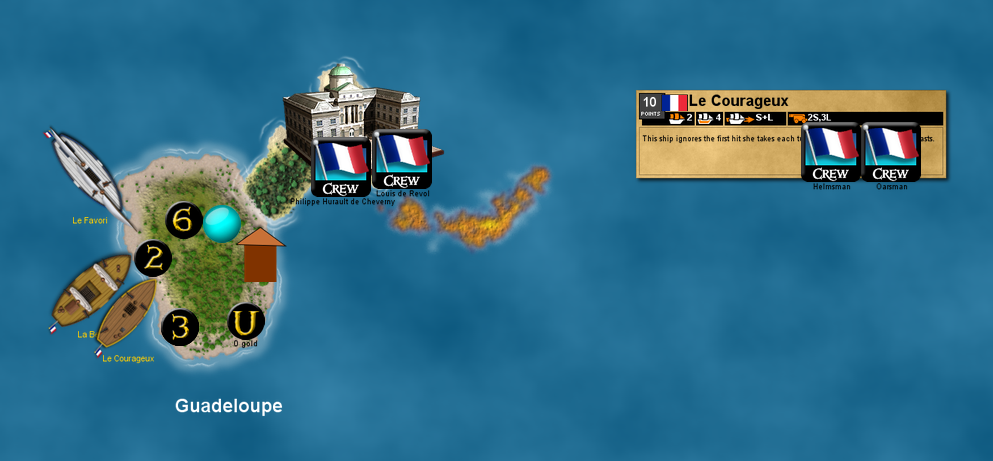
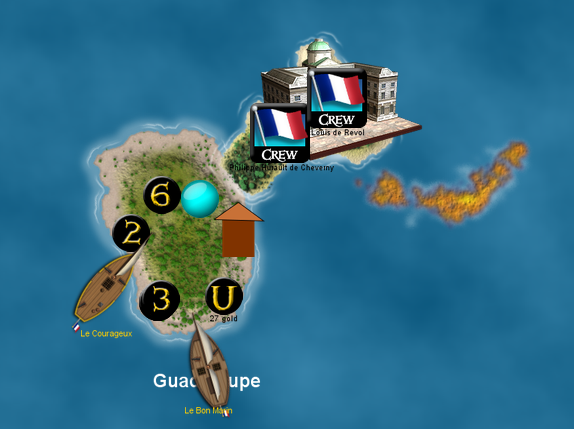
The Mercenaries have been eliminated! After sinking the Espadon, the Mercs were finished off by the French. Lucky that Nemo was even able to escape and dupe the French, the Mercenaries entered the game too late to realistically have a shot at winning. However, they made some waves by accident. XD Introducing a new custom submarine hideout that I hope to further develop after the game ends, they managed to trick the French into thinking they were still working for them. Of course, Nemo himself was duped in the end, with Eileen Brigid O’Brien taking his prized 10 master (the Celtic Fury) to the Pirates for more money and chances at glory. Shortly after this disaster the Mercs were unable to keep up the farce, and the French attacked them. The Mercs began to run out of food sourced from the nearby island pictured here, and needed to make a desperate attempt to literally stay alive. Naturally it failed against the mighty and flexible power of the French Navy, but the Mercenaries still had some impact on the game.
The Mohican is dismasted, and La Gaule emerges from the fog to go 4/5 and set the Enterprise alight!
New rule: Scuttling can occur on the same turn it is declared, and does not require a roll to be successful. Scuttling can occur even if a ship has an oarsman aboard and would not normally be considered derelict.
This is to clean up the battlefield faster, expedite things as I need to, and get useless ships out of the way so factions can fill in their holes with new ships. Since the derelicts can’t repair, ships like the Concordia and Belle of Exeter are the only dismasted ships worth keeping around.
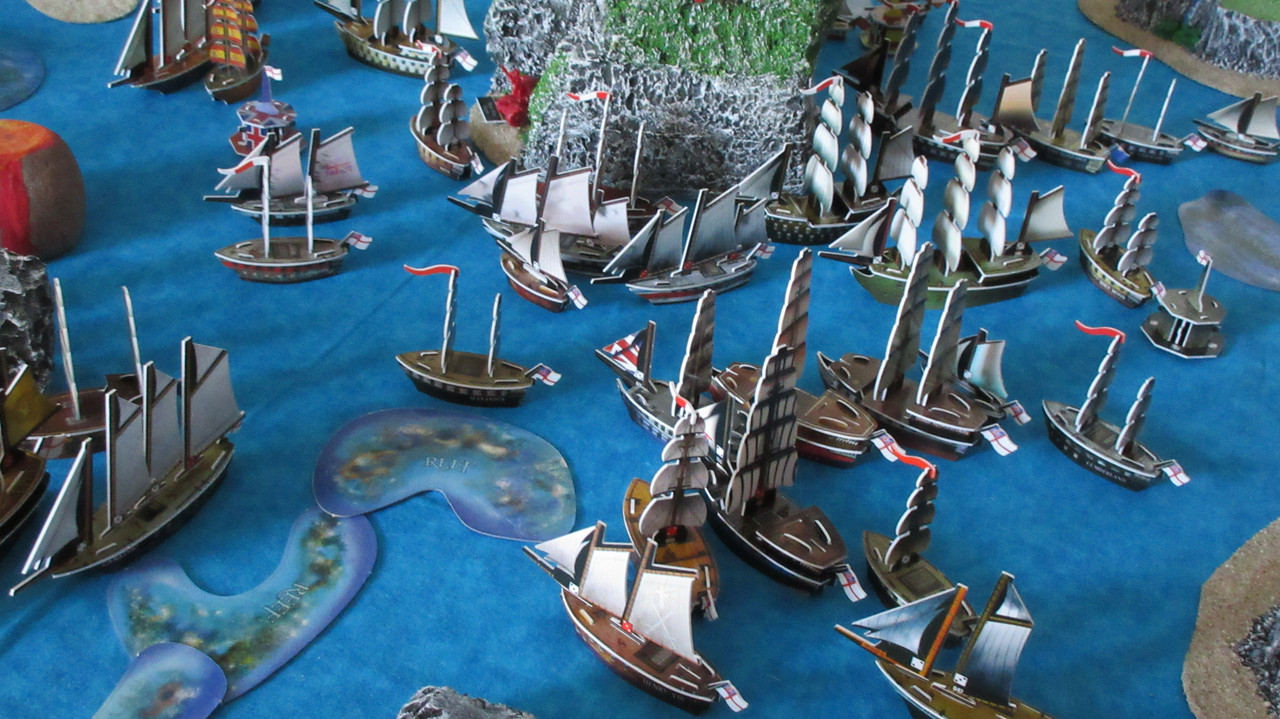
With the new Castle expansion, the fleets have even less room to maneuver. The battle now resembles two giant floods of ships meeting and duking it out.
The Providence is dismasted:
The Constitution damaged:
Here you can start to see the problem the Americans are having. The French flood of ships is massive and has many layers. Once the Dauphin is sunk, she will be replaced by the Delacroix, Hercule, etc. As has been the case lately, the American line of defense only rests on a few ships, and once they sink, the French advance will inch closer to the American HI before another ship is put in their path.
The Paladin is sunk by the French, but this is one area where the Americans have gained the advantage now that Le Gaule is gone.
Big French gunships are literally just waiting their turn to fire broadsides into American vessels. It has been a little frustrating how crowded this area is with islands and castle structures, since there can only be so many ships involved at one time. The intense bottlenecks have moved slightly away from “the spot” and closer to the American HI.
Just hull-to-hull ships:
The giant Castle complex would be a boon for the Americans, but they do not have the naval or land power to properly support it. Most of the infantry and artillery units have been eliminated by the seemingly endless supply of fresh French firepower that is now complementing the Spanish as well.
You may have noticed the final French launch.
Nine new “gunships”, though only 2 of them could even be classified as that here. (Breton and Danae) This is just about all the French can muster, as they have nearly “completed the fleet”as I call it. This means that they have every French ship from my collection in play! (other than sunken ships and one special ship) O_O
With my collection being quite large as this point, I didn’t think that this would happen in a physical campaign game. However, the French fleet is incredibly impressive in this game and they have pulled off the near-impossible!
(The Flat has run out of textiles, that is my mistake)
What’s impressive to me about this battle is that I almost cannot depict the entire scale of it in one picture. Between how far it stretches and the various islands and structures in the way, it’s tough to even show the full battle at once.
Suddenly the French round the western edge of the big wild island in the northwest corner, with Le Bonaparte sinking the Wasp!
Finally! The Enterprise is fully in action! She had a remarkable entrance to the battle, getting her EA, extinguishing her fire mast, and then going 6/6 to sink La Gaule!!
The Americans do some damage in the main battle area, especially with firepots.
The Toussaint and Auguste are sunk, leaving the Americans in solid control at this bottleneck. However, some French gunships that cannot repair are heading to plug the area back up.
The captured Charlemagne (with all masts standing, as I cannot feasibly get her masts out from underneath the carnage near The Flat) is ready to fight her old allies, setting fire to the Bonaparte!
USS Vermont is one of the little-known ships in this game, and not particularly noteworthy. However, on this turn her firepot specialist and fire shot both connected, turning the Scipion from a relatively healthy ship to a blazing inferno.
The Ghost Walker has set the Courageux aflame, and the French will scuttle her quickly next turn. Clearly the battle is being fought at extremely close quarters.
After Lenoir cancelled the captain of the Grampus, the Xiamen’s Claws set the Dauphin Royal on fire. The Providence has been scuttled, and the Gruesome sank the SCS version of the Coeur de Lion.
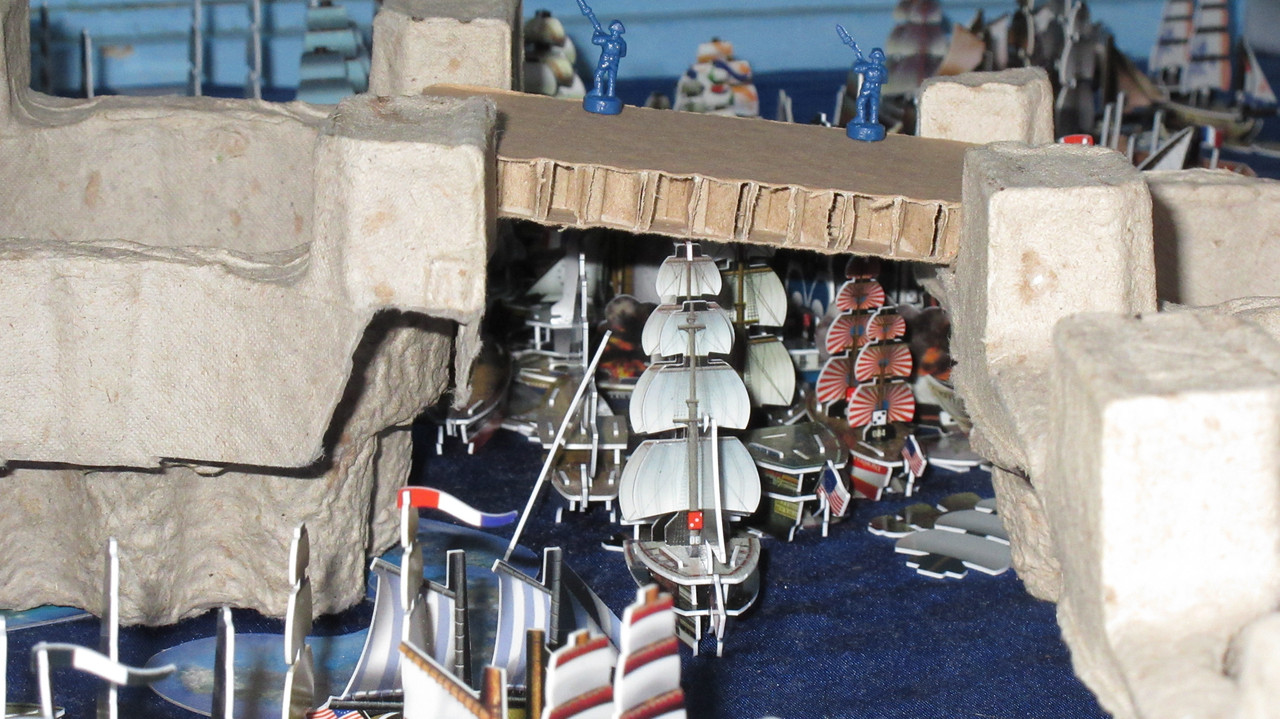
Looking between the two castle walls at an unprecedented sight. Ships sail over a dense layer of masts, sails, and debris. The smoke of the guns mixes with the fires that now burn aboard French ships. Hell has been found.
It is clear that whoever manages to survive this mess will be in bad shape.
The French do still have plenty of healthy ships that can eventually enter the battle, while the Americans are struggling to back up their front lines with comparable forces.
However, some American gunships are sailing out from the home island. At the right is an impressive trio that will boost American morale on the battlefield: Preble himself has gotten the President fully repaired, while the Kettering still has EA and cancelling available. The Thomas Jefferson has cancelling as well, with a superb armament to boot. At the left, the Jarvis and Full Moon head north to support the Charlemagne and make sure the French ships coming around the island cannot reach the American HI.
Various ships flock to the battle areas:
The Americans do a final launch with 163 gold. Similar to the French, they are almost out of ships to use! Here you can see the desperation, with even the Dark Fox and Annapolis serving in the line of duty.
Some of the ships were launched at the Castle:
The others at the home island, which was fortified with additional army units.
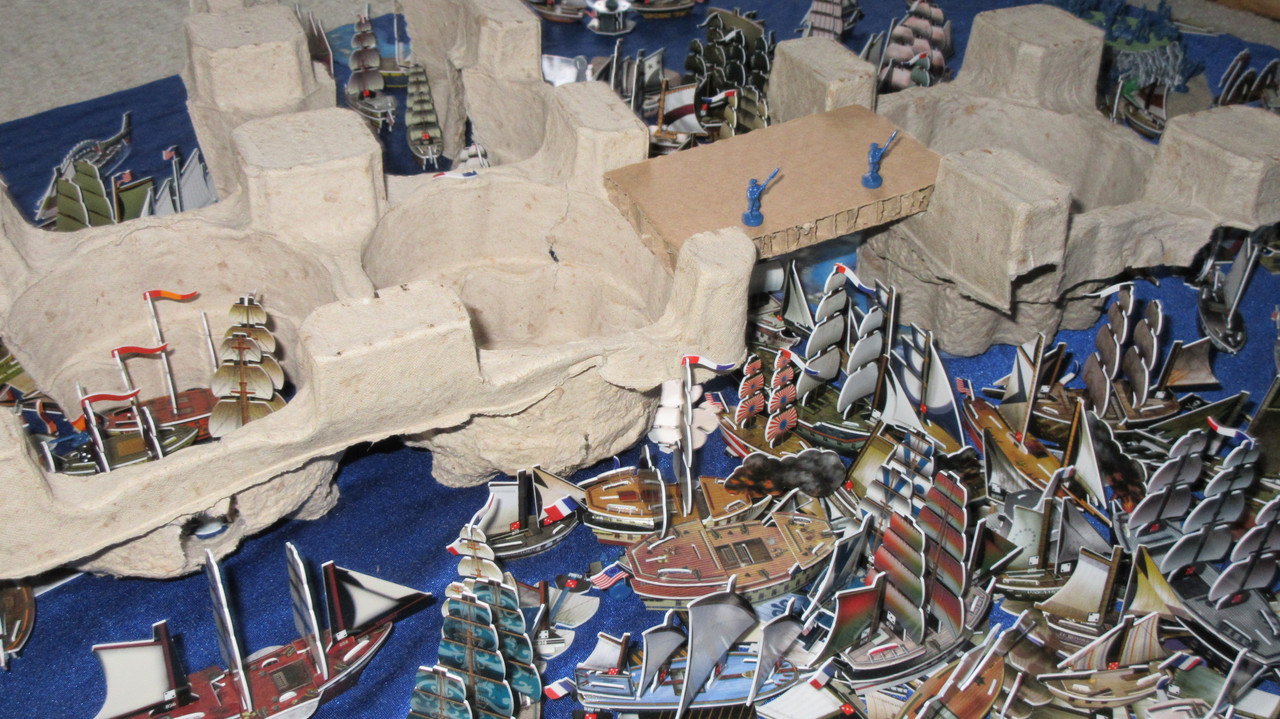
A turn after expanding the Castle, the Americans have now built a bridge to connect the two areas!!!!
O_O
The Americans spent 10 gold on the wooden bridge, as it shares the same characteristics as the docks of the French Harbor.
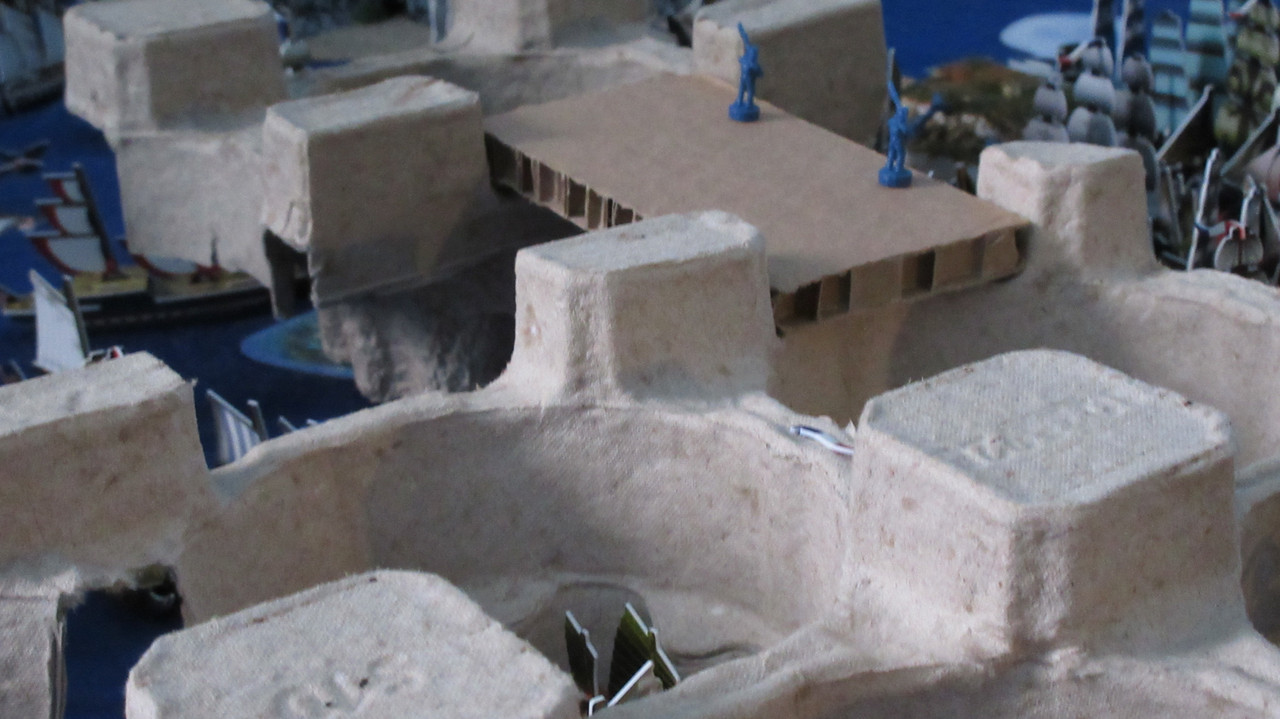
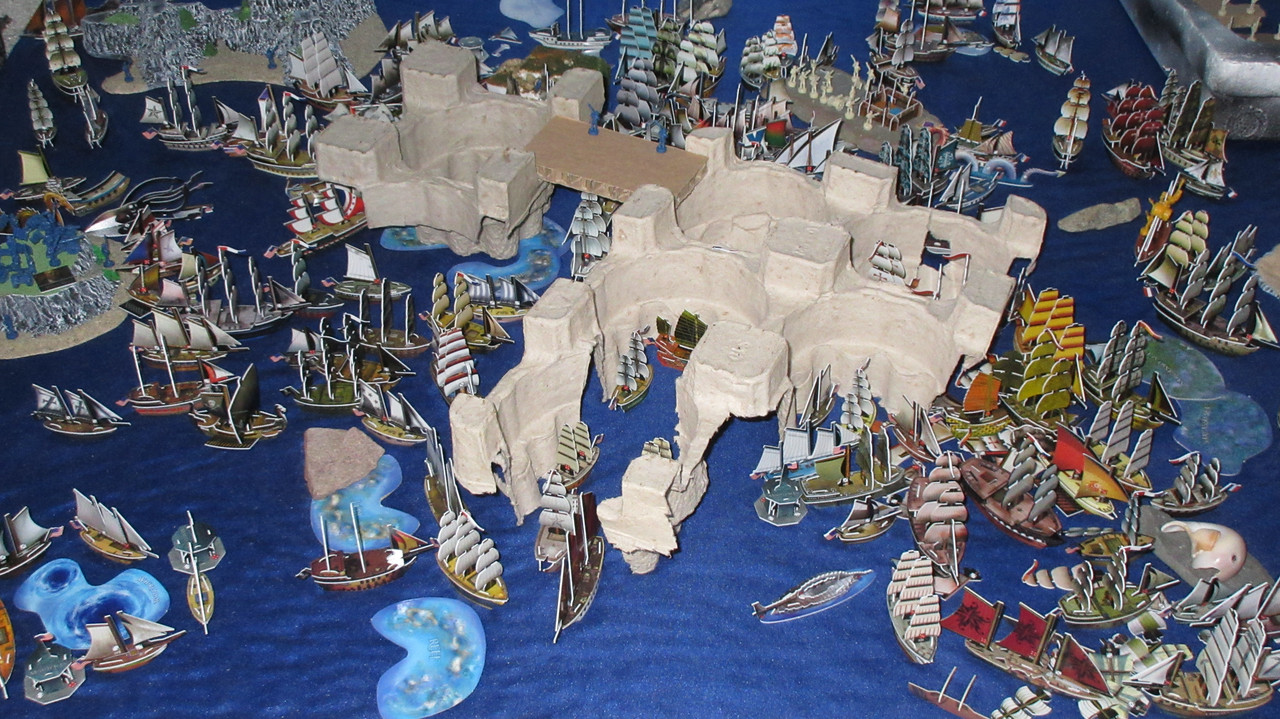
The Castle has become a monstrosity and has arguably eclipsed the Harbor as the most noticeable feature in the Sea of Karkuda:
American infantry have another great place from which to fire their muskets, and now the Americans can move things resources and troops from one side of the Castle to the other. (not that they have many of either)
What a scene!
When the game started 3 months ago, it was utterly unthinkable that such a situation could develop. The Castle was undiscovered, having sat uninhabited for many years after the Spanish were forced to abandon it. Now two powerful factions are fighting one of the biggest battles ever!
Someday I would love to play a game where armies battle across castle ramparts….
The Castle extension with bridge will hamper the French advance:
It was tough to get clear shots at some of these difficult angles.
Now for some neat views of Karkuda. I took a LOT of extra pictures at the end of this turn, some of which may be revealed after the game ends.
USS Appalachian:
The full breadth of the engagement, from the Bonaparte in the northwest corner to the Epee in the far south.
There are still French ships leaving the Harbor:
With no way to repair, the crippled Spanish ships simply join the French and head back to the Castle:
Wow… one of my favorite pictures so far. I didn’t even see this one when I did it since I was taking pictures so rapidly, but I love how the color came out. Not just the ships, but the water too. This would be fun to show someone who hasn’t read about this game, since it would lead to so many questions. XD I like how the lighthouse and hideout are just visible enough to be curious about them, while the true size of the Castle is somewhat hidden by the low angle of the shot.
One of my favorite pictures of The Flat, also showing the new Castle bridge and Rossinaz’s nice island in the distance.
The chaotic battle now just resembles a forest of masts, with raging smoke present at intervals.
Truly a war for the ages:
Some rare views out of the north:
The Castle obscures most of the main battle:
Tons of ships went to the depths today. The rule changes have sped the game up to a pace where I may actually be able to end it properly, with the last fleet afloat being declared the winner.
Turn 79 begins
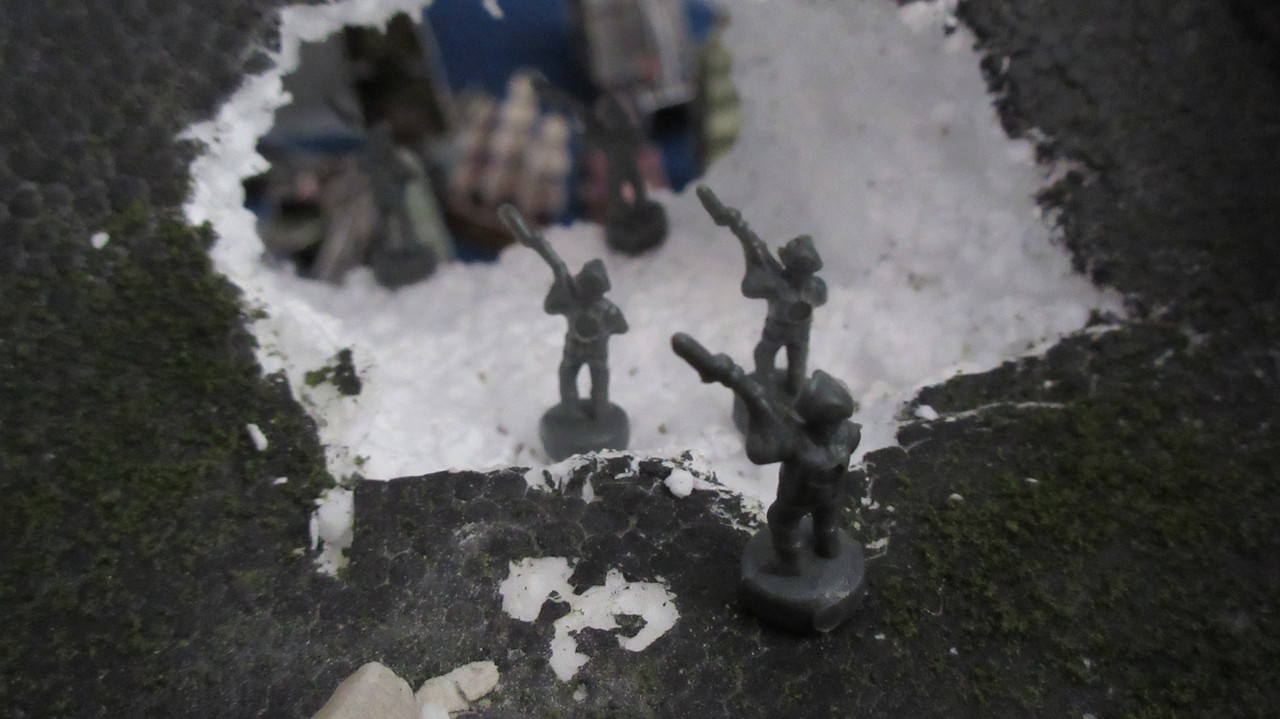
The Pirates continue moving troops and supplies around the Tunnel!
… where could those infantry be going?
The Madagascar and Otter (members of the former whirlpool squadron) carry additional army units to the Tunnel, and artillery cannons are being hoisted to the top!
The Pirates are beginning to fortify not just the top of the Tunnel, but inside it as well….
Unfortunately for the Pirates, the Black Pearl lost two more masts coming back over the reef. They may even transfer Tia Dalma to a new ship since the BP can’t repair.
The Pirates are more than ready to defend their home waters. XD
I forgot to show this off last time.
The troops have a nice view looking southeast towards the gold island.
You can just make out the ladder leading down to the Madagascar:
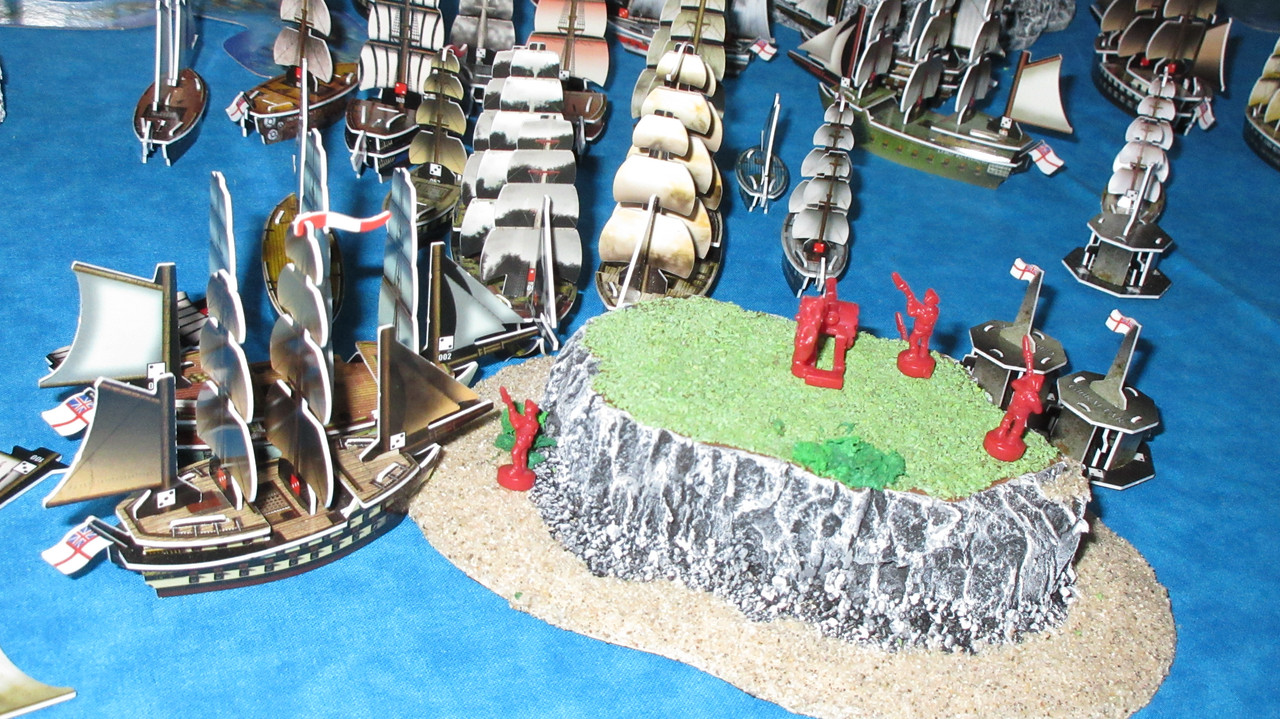
A long-term plan comes to fruition! The Pirates have thought about building a fort at the edge of the kingdom island itself, and now the Devil’s Maw is constructed.
The fort serves as an ideal place to station a garrison:
If you’ve seen the kingdom at all in this game, you could easily surmise that the ledge would be a perfect fort location.
The Eagle and others sail out and prepare for battle. Fort in the foreground, lighthouse in the background:
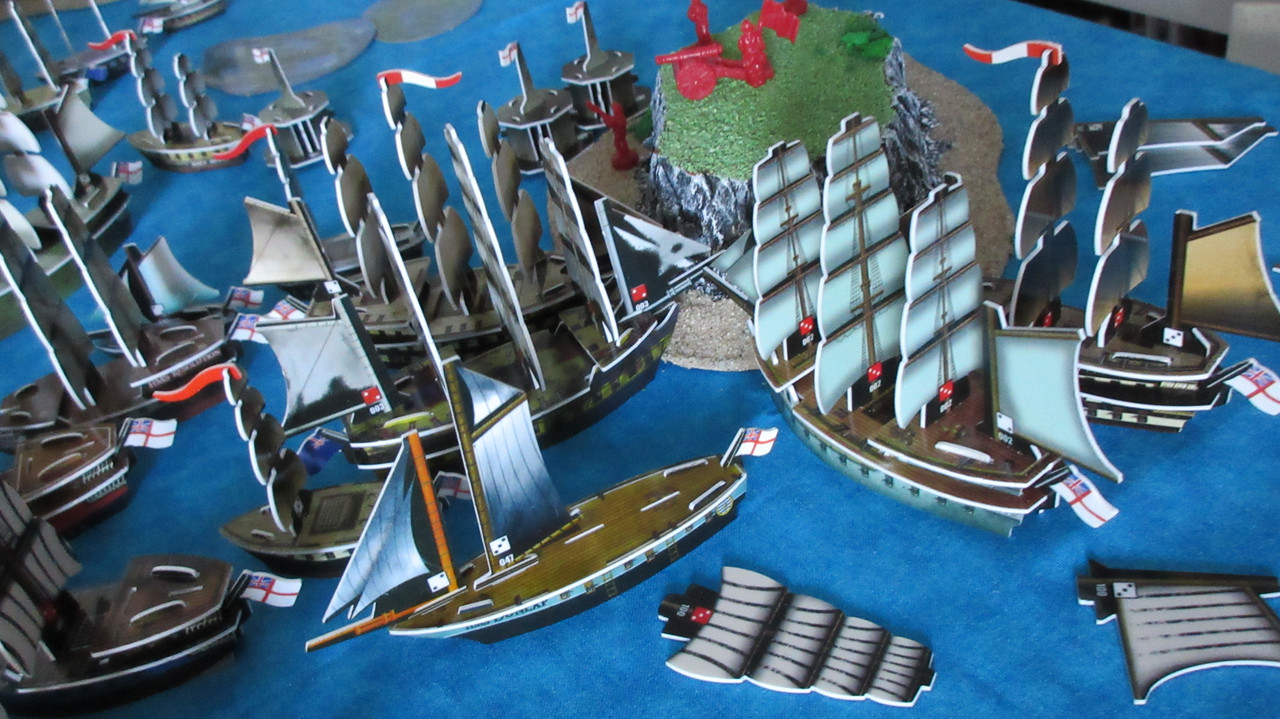
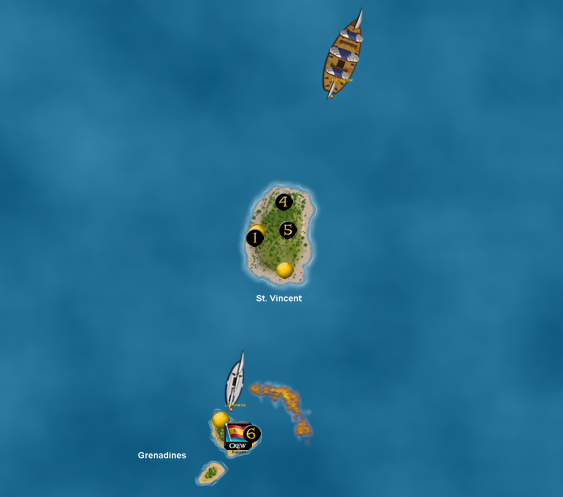
The Jade Rebellion sails out to do battle with a faction other than the Cursed!
Incredibly, the Cursed-JR War may be nearly at an end. After 4 full-scale battles and numerous other skirmishes, the Cursed now have a larger fleet than the Jades. The lack of good Corsair gunships, devastating strikes by Namazu, and the regular combat rules leading to a lot of sinkings has combined to doom the Jade fleet for the long term. They have been whittled down for a while, and have seen a LOT of ships sunk in the past couple turns. It is sad to see their once-great fleet reduced to a far more normal level.
The Sea Duck engages the Banshee’s Wail:
The Cursed sea monsters in the north have been eliminated or badly injured. In a perfect example of this attritional struggle, just as the final Cursed defences are falling in the north, the Jades have finally run out of fresh ships to send into the area.
The greatest concentration of firepower the Jades can muster. A shell of their former selves, the Jade Rebels have finally understood why the Cursed have been trying to emphasize the Pirates for so long. If the Jades continue to fight the Cursed, they will grind themselves into oblivion. By trying to take out the best faction in play, the Jades will at least give themselves a chance in case some of their ships can survive. Jade ships are now heading for the Tunnel.
Cursed on the move! New and old Cursed ships sail forward, heading east almost universally.
Terrox surrounds the Sea Duck!
Fantasma got his SAT to come back through the whirlpool and start heading for the Pirates. The Dark Pact picks up the last gold coins from Broken Horn Island, which are the final source of money to be loaded in the game.
A handful of Corsair ships were sunk this turn, with the Cursed firing upon anything in their path.
Sailing over the wreckage of the biggest battle of the JR-Cursed War, healthy ships and derelicts alike move east.
I feel the need to explicitly state that no alliances have been made to fight the Pirates. The Cursed and the Jades are still at war. The English are not allied with either. It is simply the three of them realizing that the Pirates need to be hampered to prevent them from running away with the game.
Despite the rushed ending, I hope you’ve been enjoying the action lately! Feel free to give your thoughts on any of it, or a few questions:
-Have your winner/ranking preferences changed at all?
-Do you think the Pirates can be defeated?
As I play the final part of the game, it is mostly just a giant deathmatch at this point. Too many ships and crew are being lost on a per-turn basis for me to have time to keep track and report on all of it. This is just a warning to expect very picture-heavy reports going forward, as strategic explanations are sadly a thing of the past for the most part. However, I am trying to take a lot of pictures to fully document the record-breaking carnage and enormity of the warfare that is currently taking place. In addition, there are some new developments in this report and there will be some in the last handful of reports as well!
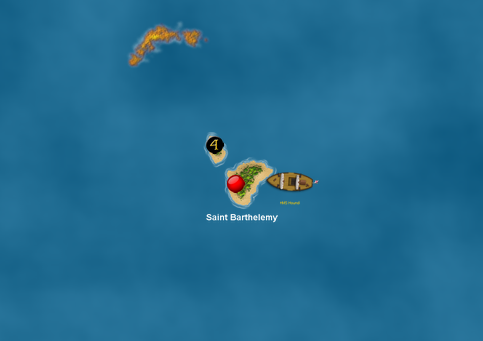
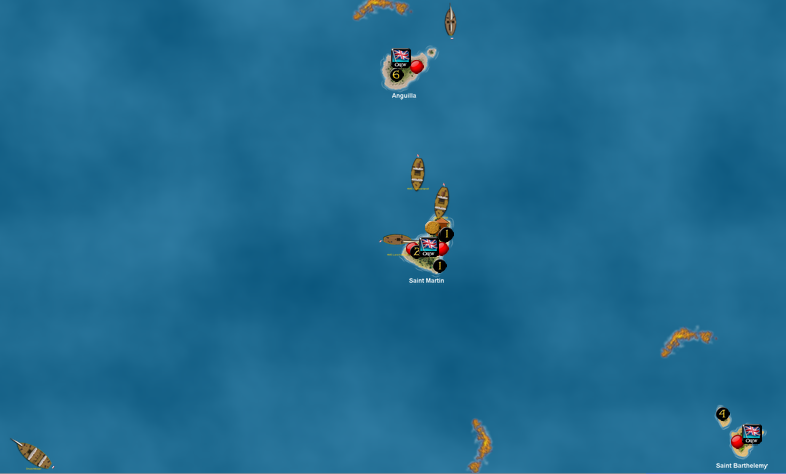
More English ships arrive in the Sea of Allost!
Others will arrive soon:
In a cool irony, this shows the Sea of Allost in the distance to the right, with Broken Horn Island and a few English ships visible.
The French blast away at the Americans! The Conquerant and Superbe are back in action.
The Bonaparte and Descharges manage to sink the Charlemagne, getting some measure of vengeance after the Americans captured the French capital ship!
At the main battlefield, the French continue to push and push.
Various French ships are making their way northwest to assist in that area of the battle where the French aren’t as strong. The recently launched ships join the back of the gunship assembly line and will wait their turn to enter combat.
The Speedy Return gets smashed by cannonballs:
The French have some burning issues aboard their ships, and both of these infernos would sink on their next turn.
The Ghost Walker is dismasted, with the Grampus sunk:
The flood of healthy French ships seemingly never ends:
However, a few French ships will not be partaking in the war, at least not yet. The Belle Etoile and Dijon have gathered up some infantry that were stationed on wild islands, and will take them back to the Harbor. The Voleur will join them at home. The French want at least a few ships on guard at the Harbor just in case they have to make a last stand where the bulk of their land-based firepower is.
The situation from far above:
With Deleflote’s action, the Grand Vainqueur managed to sink the Ghost Walker and dismast the Constitution!
Featuring USS Appalachian under the bridge:
The Americans start their turn, sinking the Lepanto and dooming the Acorazado.
Just like the French but in lesser quantities, almost all American ships are headed for the battle.
The Appalachian’s fire shot backfired, but the Xiamen’s Claws set the GV aflame.
Lenoir’s flagship is in serious trouble, burning with just two masts standing:
The Conquerant is sunk and the Superbe crippled:
At the left, the Full Moon and Jarvis have teamed up to sink the Bonaparte.
I’ve been greatly enjoying these views from under the bridge, as it gives a new dynamic to the shots.
Turn 80!
The Pirates didn’t walk all the way to the western end of the Tunnel for nothing!!! They have resumed rock-blasting operations, but this time on TOP of the Tunnel! O_O
First it was to get to the top, and now…. ??
Without such an abundance of units, the Pirates wouldn’t have the manpower to pull off such an endeavor.
The Otter is underneath the long ladder leading up to the eastern edge of the Tunnel, and infantry climb to the top!
You may have noticed that the Celtic Fury turned around! The second 2L ladder is now hung from the opening in the ceiling, and stretches down to sea level!!
It’s truly impressive what the Pirates have accomplished in this game.
There are now 3 artillery units atop the Tunnel, with additional infantry arriving this very turn.
Of course, the land forces pale in comparison to the greatest fleet ever assembled…. O_O
Whom dare enter Mission’s Kingdom?!?
Anyone who tries will be met with certain death.
But not without a good fight first!! The Jade Rebellion declares war on the Pirates!!!!
The Floating Stone and Kalaallit team up to dismast the Executioner:
The Jades are sending what ships they can muster towards the small Pirate force guarding the southern barrier reef.
The other ships are still heading for the Tunnel, which is starting to look like a bottleneck that could rival the Castle in terms of sheer intensity of broadsides.
The East Wind finished off the Poor Adams, but this area looks oddly barren after so many spirited JR-Cursed battles.
The Cursed declare war on the Pirates!!!! The Soul Crusher finally gets into action after guarding the northern Cursed wild island almost exclusively.
I wanted to capture the last moment of the Bey’s Revenge, just due to the mast and tentacle lying on her deck. XD
The dragon is unleashed!! SHAL-BALA USES FLAMETHROWER!!!!
LOL!
More from the dragon’s perspective this time. Davy Jones (now aboard the Fiddler’s Green at the Roost) copied Deleflote to give Shal-Bala an extra action so it could move and then “shoot”.
This is a more realistic take on the actual attack:
The fire attack works similar to Namazu: This ability can only be used once this sea dragon completes a successful swoop attack. Give this sea dragon a shoot action. A blast of fire S wide and 2L long leaves the dragon from the direction the snout is facing. Roll a d6 for every ship in the path of the blaze. The result is the number of fire masts placed on the ship. This ability cannot be used on consecutive turns.
Devastation is unleashed!!
O_O
The Cursed rolled quite well for the attack, with 5’s on the Pandora and Fool’s Gold.
Even a 2 for the Black Heart and 3 for the Foresight has those ships crippled and possibly doomed for good:
Shal-Bala surveys the damage. This was a premeditated attack, planned from much earlier in the game after Devereaux did some research on ancient dragons summoned by Cursed hordes. Shal-Bala’s successful swoop attack on the Sea Tiger made the dragon more confident in its abilities, as well as the human flesh and blood used to mix the fiery concoction in the beast’s belly. O_O
An ominous sight: Angelica has flown out from the nest for the first time! She may be eyeing the Sea Snake for a possible swoop attack!!
Terrox sweeps tentacles across the decks of the Sea Duck, showing that JR-Cursed hostilities will continue despite the massive Pirate threat.
Actually using a kraken in a game! XD
Unlike the French in Karkuda, most of the Cursed firepower is aboard Cursed ships farther from the front lines. This initial Cursed attack against the Pirates is just the beginning!
… there we go… the Cursed are certainly not capable of defeating the Pirates in a straight fight, but between Jade intervention and the eventual arrival of the English at the battlefield, the Pirates will be hard-pressed to resist the triple threat.
Unfortunately, some of the Cursed gunships are so damaged as to be almost irrelevant to the war effort. Unrelenting tension with the Jades will not help that fact.
Without Devereaux and either dragon, the Roost is desolate compared to its normal state.
The Pirates hold a very strong position: they have defensive lines from the south of the sea to the north, and not only control the waters of the Tunnel, but the top of it as well!
Shal-Bala’s sudden strike from behind Pirate lines has given new hope to the Cursed:
An armada is coming to the Pirates, even though it may be a disjointed one….
But of course, the Pirates are ready!
One of my favorite angles so far in the game:
Just awesome!
Here you can see the respective sides entering the opposite ends of the Tunnel:
The rare, occasional, and tough-to-get view from the Cursed perspective:
Three 10 masters are just visible here, with a possibly unprecedented forest of masts to the left.
Total dominance of one of my favorite custom pieces ever!
The English continue to arrive in force!
9 new ships from the Caribbean:
Not quite as many will arrive next turn, but the English have a decided role to play against the Pirates. The Jades and Cursed are severely diminished, not just in terms of their fleet sizes but also with how many of their ships are too damaged to be effective warships. The English fleet may possibly have the highest percentage of fresh ships (no masts gone) in the game as of now. They also hate the Pirates more than the Jades or Cursed do, and will soon present themselves as the Pirates’ main rival (but only after the Jades and Cursed exhaust considerable efforts against the Pirates, which could make it more of a fair fight).
The Neptune wades into the fray:
The Appalachian is doomed:
Ships burn all over the battlefield, with bodies falling off islands and decks of ships:
A unique shot showing the aggressive French flood:
The badly damaged Sioux and Julius Caesar signal the near-end of American resistance coming from between the castle areas.
The Satisfaction and Bartlett are not powerful enough to take down the Tepant and Monaque:
The Enterprise strikes again, and the Americans are beginning to win the battle around Fish Island!
Turn 81
I’ll be taking some pictures with the Tunnel removed so you can see what’s happening more easily.
The Celtic Fury is in action!
The Golden Medusa has an impressive turn, pounding the Soul Crusher. Just like that, and the old ship with some of Wraith’s captures aboard is useless and about to sink.
This area of the battle is developing slowly as Cursed ships sail into the Pirate lines.
This is not something you usually see. The Pirates don’t have just a line of defense, but a large pack of ships on both sides of the reef! In some places both lines are 5 ships deep, with reinforcements arriving in the far north every turn.
The Sea of Allost without the Tunnel:
As with the previous piratical activities in the Tunnel, I wanted to show some of the progress.
The Pirates have made it all the way through!!
The Pirates have blasted their way through the end of the Tunnel!!!!
There they are! Pirate infantry standing tall above the battle below! XD
An incredible sight!!
(I love how the wall actually looks like a sky with clouds here)
A few views from near the Roost:
The Pirates are HERE!
With their giant 10 master below them:
And so, the Pirates have completed another impressive operation at the Tunnel.
MISSION ACCOMPLISHED! XD
The eastern end of the Tunnel is well-fortified. The scale of the army units is way too small, but some of those rocks don’t look all that big…
The Pirates approach a boulder at the opportune moment…
With enough manpower…
… anything is possible! XD
The Pirates push the boulder over the edge and crashes down to the Sea Wind unknowingly waiting below!!!! O_O
The boulder smashes right through the ship’s hull and splinters her port side!!
The Jades have lost yet another ship, though this time not to cannon fire….
The Pirates on the Tunnel celebrate their nasty handiwork:
The Sea Wind was camped out by the Tunnel in an effort to surprise the Pirates on the other side of the southern reef line, but the Pirates were the ones to get the jump on her!
A Pirates’ View:
The Pirates still have both of their giant ladders set up in the Tunnel, but now concern themselves with sending as many ships to the western end as possible.
Rarely can I get such a nice shot inside the Tunnel itself:
This one is VERY weird. These shots are very difficult to get, as I almost have to maneuver the camera into the Tunnel, trying not to knock over ships at the eastern entrance in the process. Therefore I cannot aim the shot like I can with the other ones, and it’s mostly just luck on how they come out. A lot of them get deleted due to blurriness, not having the flash show in the right spot, or just poor quality in general.
I guess that’s a ladder in the foreground that looks like a spotlight shining on the Celtic Fury. XD O_O Perhaps it’s a sign of divine intervention, that O’Brien and the CF are here to bring the Pirates to the promised land of ultimate victory. XD
The cannons atop the Tunnel are ready to fire, and one finds the range on the Forward! (bad angle to show the actual firing arc) However, it missed.
The Foresight is doomed to burn, but the Black Heart has a chance to escape Shal-Bala’s fiery wrath:
From the main masts of the Neptune’s Hoard:
The Pirates still appear very strong, and even more so now that they’ve fortified the top of the Tunnel and worked their way to create a “tunnel in a Tunnel” from which they may be able to fire down upon the invaders.
Around 46 ships were sunk in the day’s action on December 8th.
Ending this report with a few shots from the infantry perspective as darkness falls on the action:
The War for Allost is officially underway!! The Pride, Feathered Hat, and Panda lose masts, though the Merc ships lose two masts each to the reefs. At the left, various Corsair ships with no chance of affecting the battle are deliberately wrecking themselves on reefs to make it harder for the Pirates to get at the Jade home island. However, this strategy may backfire since the Pirates haven’t shown any inclination to sail out of their home waters.
The combination of Jade ships sinks the Victoire!
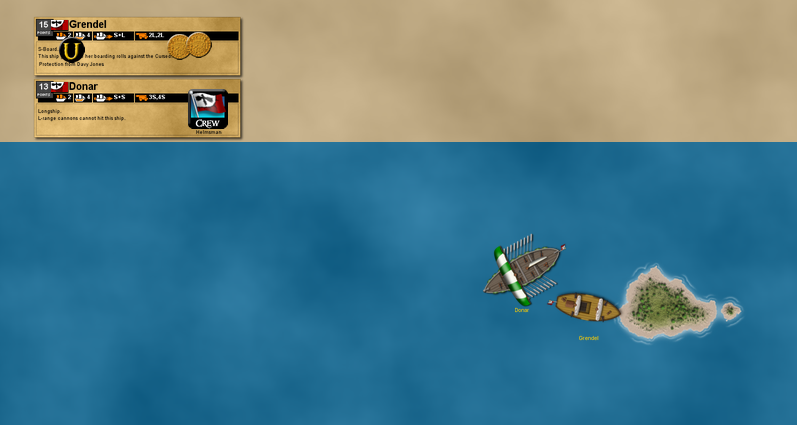
The crew of the Grendel hate the Cursed, and the Cursed have damaged the vessel multiple times in this game. Showing the bad blood between these two factions that just won’t dissipate, the Grendel sets fire to the Sickle, essentially sinking her!
Angelica swoops on the Sea Snake!! The attack is successful, which means that Angelica has gained the proper experience and flesh with which to use fire breathing attacks! O_O
Between the Sea Wind and recently wrecked galleys, shipwrecks are beginning to litter this area of the sea.
The Cursed press their attack! The Kirbac is sunk. The Fathom somehow goes 3/3 against the Golden Medusa without even needing her ability!
At the top of this photo you can see some of the more powerful Cursed ships approaching the battlefield. Namazu is submerged but has emerged from the fog.
The general advance. At the bottom right, the Cursed sabotage the Jades by firing upon those ships waiting their turn at the Tunnel battle.
The Cursed surge east, with powerful Royal Navy warships continuing to arrive in the background….
For indeed, the Endeavour and Leicester are here!
The continued exodus from the Caribbean:
It’s mostly French vs. Americans at the eastern part of the Castle. The Enterprise has been sunk!
The French inch closer with their numbers advantage:
One of my favorite pictures yet, showing the carnage near “the spot” from mast level. Ships literally just sailing over piles of masts. XD
The Delacroix and Monaque loom:
The final French gunships have left the Harbor, while the Frontier has dropped off (possibly the last) army units at the Castle.
L’Aube sinks as USS Mercury gets into action:
Almost from the infantry perspective, looking down at the French onslaught:
It’s a Battle of the Heroes! Amiral Louis Cartier and Jordan Dumas fight Commodore Preble himself in an epic clash!!
The Delacroix and President have been two of the most effective ships in their respective fleets, but only one will prevail in this showdown:
The Neptune is sunk and the Superbe is doomed to fire!
At the right you can see the trio of American ships providing a morale boost: the President, Kettering, and Thomas Jefferson are about the best ships they have left.
I think this will become one of my favorite shots from ANY game:
It is interesting that the Zanzibar and Tombstone have turned around; perhaps the Americans have given up that passageway under the bridge?
The ships sunk during the turn:
Turn 82
THE PIRATES HAVE BUILT A PARTIAL FORT ATOP THE TUNNEL!!!!!
This is a modified fort with just one wall of cannons since the Pirates cannot fit more walls facing the ocean. The two cannons are rank-3 but have a range of L+L or even L+L+L, similar to the Diamond Rock situation.
A barrage of musket fire from the top would be cool enough, but now there are actual cannons facing west!!
Tunnel on a Tunnel: XD
There are five infantry units stationed in the fort now, and they now have protection from the fort walls.
An incredible feat of engineering and persistence. Now it’s obvious why the Pirates had brought up some fort supplies from the main ladder.
Truly a Pirate stronghold:
I seem to notice a new absence of ships around the Harbinger…
The Harbinger sacced for a second action, and sank FOUR ships by herself! O_O (9/10 shooting I think, with world hater/sac crew Derrik the Red aboard)
Pirate cannons in the north aren’t nearly as effective, so the Jades took a much harder beating this turn than the Cursed.
Welp, there go the two Merc 4 masters! The Pride (successful BA) and Feathered Hat did most of the damage.
An inevitable clash may be obvious…
… three 10 masters in this picture….
It’s happening!! A 10 master duel!!
The Baochuan goes 6 for 10!
Debris falls upon all the surrounding ships:
In a curious move that only helps the Pirates, the Jades continue to fire upon the Cursed. Not only will it help the Pirates, it just makes it more likely that the Cursed will return the favor on their turn. The Jades are blinded by their hatred.
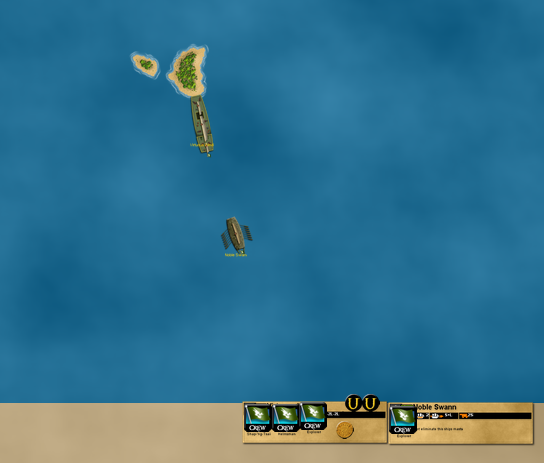
The Noble Swan misses Angelica, and the Jades appear incapable of sustaining any kind of offensive against the Pirates in the south.
The Cursed take their turn. You may remember that Trees has been on this wild island for ages! I said no repairing in any way, but I think this was worth breaking the rule.
The Guichuan suddenly has all her masts up again! O_O
The Cursed continue to advance their numbers towards the Pirate lines:
The Skin Flayer rips into the Thirty Tyrants!
It was tough to get the right angle where the blades would reflect the way I wanted them to.
The Thirty Tyrants is doomed!
Allost is very crowded as tons of ships sail to the battle areas:
The Cursed are trying to match the strength the Pirates have up north with their own strength. Along with the Skin Flayer, some of the better 3 and 4 masters in the Cursed fleet are up north. Namazu is swimming along, and now the Cursed have two healthy 10 masters!!
Throw in the Shui Xian and Baochuan, and the anti-Pirate factions have four 10 masters near the same area! The only Pirate 10 master is already hurting badly.
Didn’t expect to see the Cursed and English sailing together in this game, but the situation certainly calls for it.
Here are some nice shots I really liked. All five 10 masters in my collection.
More English ships have arrived:
Getting an intelligence report from the Cursed, the English are sending their smaller ships to the south where they will likely have to travel over reefs to reach the Pirates. The larger ships are headed to the hot actions at the Tunnel and north of it.
In a sneaky move, the Gibraltar tries to raid the Spanish HI, but there’s nothing left! The Spanish have truly packed up and gone, with the Magdalena being the final ship to leave the Caribbean next turn.
Even at the extreme southern edge of this ocean, there is considerable wreckage accumulating. The Carolina cannot sit flat in the water because of it.
The Mercury goes 2/4 against the San Cristobal in an interesting matchup.
Other than the San Cristobal and Resolucion, it’s worth noting that the Spanish are hardly engaged in the Battle for the Castle anymore. The French have largely taken over against the Americans, and in some cases, French ships have accidentally entered the action right between the Spanish and Americans, forming a wedge to protect the Spanish without intending to.
The rest of the Spanish fleet is arriving turn-by-turn at the Castle, at this point just waiting for more docking areas to open up slightly to the south so they can try to win back the Castle in a combined boarding party.
Not many American flags waving in this area:
On the French turn, the Delacroix shot a pitiful 1/6 in a double shoot action with all rank-2 cannons. O_O (she did FAR better earlier in the game) Preble took advantage by giving the President his own AA, vanquishing the ship and winning the battle! Against all odds Preble is surviving every battle he finds himself in. A true leader and brilliant admiral!
Love the color and brilliance of shots like these, with various damaged ships duking it out:
The Descharges will fall to the Jarvis and Champ, but at least 5 French ships are headed around the big island to come at the Americans from a different angle.
French ships are now free to pass underneath the bridge connecting the two Castles! Finally!
The Monaque was busy sinking the Julius Caesar:
Funny how the Castle can make the battle look so much smaller.
The Concordia sails out to fire her cannons again, with the dust and particles as a testament to how long this game has gone on for. (over 3 months now!)
Turn 83
Some pictures with the Tunnel off so you can see the battle better!
Between the Crusher, Celtic Fury, and an AA to the Revenant, the Baochuan is sunk!!
The Santa Molina is set aflame by the Accused, while the Freedom and Proud Tortoise break from the Pirate line to attack various Cursed ships.
Battles lines become blurred as the battle eventually disintegrates into a pell-mell engagement:
With the first 10 master sunk and another about to sink, this battle will clearly have no special survivors regardless of armament and durability. The cannon fire may sink everything! XD
In a slight break from Pirate policy, the Deliverance ghosts over the reefs to shoot at Jade ships in their own waters!
All the shots missed. Various ships are still entering the Tunnel
Gunners atop the Tunnel are still taking aim:
Almost impossible to keep the infantry standing up properly when I remove the Tunnel from the ocean to play the turn. They have been taking some shots against Cursed ships.
Captain Missions is like Commodore Preble: an active, lead-from-the-front admiral!
Even with their numbers and height advantage, the troops in the fort are intimidated by the Delusion:
And now the Guichuan is healthy again, just in time for the War on Pirates.
Caught in an intense crossfire, Mission cannot survive in the heat of battle!! Ironically, Warlord Cavendish (the Jade Admiral) sends him to his doom! The Grand Wind is finally being used as a warship, and makes up for quality with quantity.
The Crusher and Captain Mission are no more. Clearly a morale loss for the Pirates, but their numbers are so great and their leadership so diverse (the likes of Calico Cat, Bonny Peel, Lafitte, Swann, and others are still alive) that they should be able to carry on as normal. In fact, now the Pirates are determined to finish Mission’s legacy with a grandiose victory in the largest game of all time.
The Cursed have a very strong presence at the Tunnel and north of it, but actually penetrating Pirate territory will be very slow, and quite possibly, impossible. XD
The Grand Temple has sunk the Celtic Fury!!
Unsurprisingly, the Hades’ Realm takes some shots at the Crescent Moon:
The Cursed gang up and send the ship to her doom!
The Cursed take their turn by the Tunnel.
The Centurion falls to the Skin Flayer:
The Cursed sink the Freedom but most of their ships are still reaching the battle.
The Delusion retreats a bit, joining the Guichuan behind Cursed lines. Namazu is also still in play….
Love this view, essentially from the top edge of the Roost:
The English advance:
The two dragons have returned to the Roost as the War for Allost rages below.
Two tunnels in one:
The Royal Navy overruns Cursed territory in their quest for vengeance:
I love how the flash can bring out the sail and hull colors.
The Caribbean is now a “ghost ocean”. The Spanish have left for good, and only a handful of English ships remain.
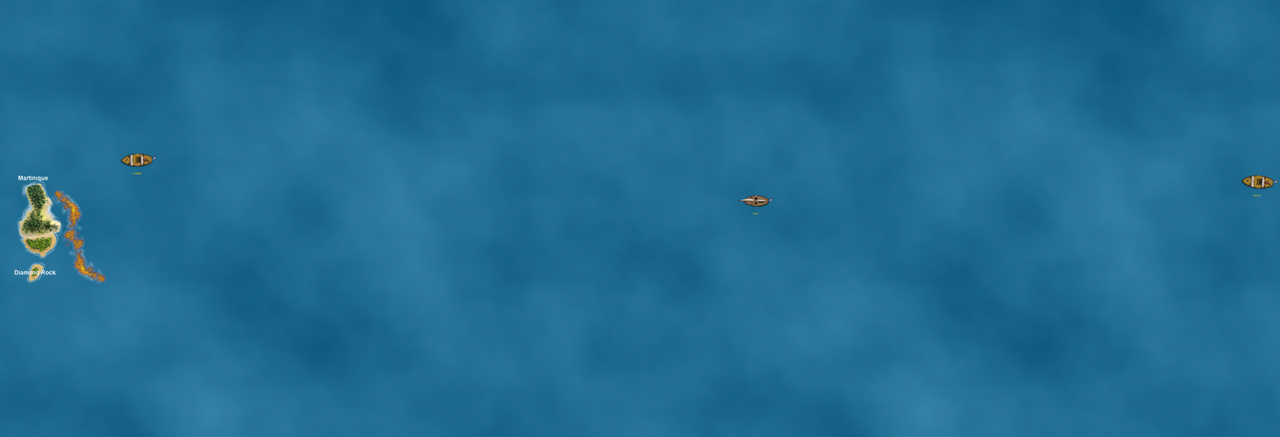
Diamond Rock may never need to be defended… at least not in this game perhaps….
A few dark pictures as the sun sets on this day’s action. The San Cristobal goes 3/3 against the Mercury!
The final Spanish ship has arrived from the Caribbean, but there is a logjam of ships that cannot enter the battle yet.
A new record 74 ships were sunk on December 9th. O_O This brings the two-day total to 120.
Forgot to mention that the last report got my Google doc with these reports to more than 400 pages… can’t wait to submit that as a single post at BGG once the game ends…. XD O_O
12/11/2017
The Cheyenne is set aflame:
Just to show the carnage in the hottest spot of the Spanish-American battle:
Having punched a hole in the American resistance, the French are finally free to send ships under the Castle bridge and into American waters!!
A scary sight for the American troops on the Castle:
Truly a cool shot that we’ve never really seen in a game:
The Monaque burns but soldiers on:
With almost no American defenses, the French cannot be contained!
The Eagan is finally sunk, allowing the French to make progress in this part of the battle as well.
Champ will soon have some competition in the northwest….
The War for Karkuda! The Hercule has sunk the President, eliminating Commodore Preble from the game!!
USS Thomas Jefferson enters the fray and nearly kills Amiral Gaston himself! The Bourbon is in serious trouble.
However, not many American ships stand in the way of the gradual French advance:
The Danae is sunk by the Kettering, but Preble’s death could mean the end for the Americans. Diamond Nelson Turner (aboard the Thomas Jefferson) becomes their first in command.
The Americans sink the San Cristobal!
Wreckage has accumulated in this area for many turns now:
The Poison Dagger sails atop a pile of masts around 5 high! O_O
Previously their weakest area for a short time, the southern waters of the Castle are now where the American resistance is the strongest.
Curiously enough, the American infantry moved off the bridge this turn instead of shooting.
The troops jump aside despite having the crew of the Tepant at point-blank musket range:
The Americans aren’t giving up though….
THEY HAVE RIGGED THE BRIDGE WITH EXPLOSIVES!!!!
With a huge explosion heard at the French Harbor, the Americans blow up their own bridge!!
The explosion rockets all over the area, raining debris and tons of wood down on the French ships sailing below!!!!
A catastrophic collapse!!
The bridge is no more…
… but what of the ships underneath it?
The force of the blast knocked over both masts on the Martinique, and scattered various debris.
The Monaque and Saber are both dismasted by the falling rubble:
You can just see that the Tepant was also damaged, with her foremast and forecastle coming off the ship’s hull! A crazy scene, showing how desperate the Americans are:
The American troops got out of the way just in time for the blast to go off, taking down the bridge along with 3+ French ships underneath it.
There was already considerable wreckage in this area from the intense fighting…
… and this will only add to it!
The Saber’s masts were snapped off when the eastern half of the bridge swung downwards (at high speed due to the force of the blast) and crushed everything.
The few survivors of the sabotage move will have a difficult time being rescued. If you can imagine the darkness as the smoke of the burning rubble and debris, this shows one of the most devastating moments in the history of naval warfare. Masts litter the seawater, partly from the never-ending battle and partly from the sudden detonation of the bridge. Wreckage is strewn everywhere.
Unfortunately, the explosion only served to amplify the fires still burning aboard the Monaque, as fire and fresh dry wood fill the air and main deck of the ship:
The fire reaches the powder magazine and the ship explodes!!!!
The Monaque is ripped apart by the second blast!! The western half of the bridge that fell near the Monaque is blown to bits, with debris thrown high in the air!!
The force of the blast has produced a shock wave that has moved the Monaque’s shattered masts along the water. A big piece of burning bridge falls near the reef. The Martinique is forced against the base wall of the Castle, and the Versailles is taking on water. The force of the blast has combined with wood splinters and iron shards to disembowel and maim some of the American infantry stationed on a nearby rampart.
Devastation. The western half of the bridge has been completely annihilated by the upward explosion.
The Americans were ready to sink some Frenchmen with their bridge falling into the gap, but they weren’t ready for a chain reaction that went beyond their simple demolition!
From the previous pictures, you could see the Saber listing heavily to starboard. This second explosion has hastened that development, and the ship has nearly capsized. This is a sad day for France, as two of their better gunships still afloat are gone. The Saber also carried valuable sac captain Capitaine Arazure with a full crew complement to support him.
Whoah! The Tepant is knocked around and heeled over to starboard, with a fire starting!
It appears as though the northern chunk of the western half of the bridge was thrown into the Tepant when the Monaque exploded, knocking the ship sideways and setting her aflame. Up top, you can see that more American troops have perished after being knocked backwards and hit with flying debris.
The Monaque has blown up, knocking the bridge mostly off of her but onto everything else nearby. Somehow the Monaque’s mainmast has ended up inside the Castle! O_O
I kept this picture to show the speed at which things happened, but of course it is worth writing about even though this all took place in a short period of time.
The Tepant is likely doomed: water began seeping into the ship when her bow was splintered by the first explosion, and now she is on fire and taking water on her starboard side as well. To make matters worse, the bridge chunk that slammed into her is still on fire too!
Truly unprecedented:
The total damage may be less than what the Cursed did with Neptune’s Trident, but unlike that attack, this one got away from the faction that instigated it. The Americans didn’t bargain for such a mammoth event, and fires are still burning all over the place.
The Martinique will be too badly damaged to continue:
A bizarre and shocking scene:
Here you can see how the eastern half of the bridge was bent and shaped by the Monaque blowing up. That part of the bridge was pushed into the Saber, helping to tip the ship over.
Not quite as impressive from afar, but it still has an impact on the War for Karkuda.
This is where the French have been the strongest so far in this war, but the catastrophic event could put a damper on their hopes. There isn’t a way to clear the wreckage quickly, so the French will likely have to sail around the Castle on either side to continue their advance into American waters.
OH MY GOD!!! As the Monaque was sinking, another explosion ricocheted along the length of the ship and shot towards the Castle extension!! Reaching a secret American gunpowder room, the third blast reaches an immense radius!!!!
This incredible THIRD EXPLOSION blasted through the wall of the Castle, destabilizing the entire structure itself!!!
The Castle wall is ripped apart by the blast, and the falling rubble caused some of the upper portions to fall down in an avalanche of debris!
O_O
Now we know the French definitely won’t be able to pass through the two castle areas again. XD
This shocking development has hurt not just the French but the Americans as well:
The Americans have lost all but one of their 4 infantry stationed at the Castle. They had the right idea with sabotaging their ill-fated bridge, but didn’t anticipate a chain reaction triple explosion that essentially destroyed the entire surrounding area. O_O
Turn 84
Whew! With that we move back to the Sea of Allost. HMS Durham has lost 3 masts… to what?
Havana Black’s Deliverance! The Pirate captain sacced to ghost through some dismasted Jade ships, shooting at the Durham. His second action was used to ghost the Deliverance through the wall of the Tunnel, thus making the ship immune to return fire on the English turn! A true hit and run, Pirates CSG style.
With the Tunnel removed, the War for Allost is evident.
The Grand Wind is sunk, and Jade Admiral Warlord Cavendish is no more!
The Pirates teamed up to sink the Skin Flayer, whose Eternal didn’t activate due to the no repairing rule (not much point in bringing the ship back).
If I could still afford to be using the house rules for combat, these battles would be even more crowded, but now there are dozens of ships sinking every turn.
The right angle can make even the smallest ship look like a giant:
Concentrated fire from the Pirates on the Tunnel take out a mast and 3 crew from the Guinee.
Artillery gunners at the eastern end of the Tunnel blast a panel off the Noble Swan:
Almost the last hope for the Jade Rebellion, the Beowulf knocks two masts off the Revenant!
The Cursed finally play one of their secret weapons!
Necklace of the Sky teleports the Delusion to the Pirate gold island, behind Pirate lines!!
The Seref, Empress, and Lady Newport were sunk outright after Davy Jones copied Deleflote to give the Delusion 2 actions and 20 shots. The Revenge is doomed after a firepot hit.
The Revenant is nearly dismasted and the Sea Nymph burns:
Cursed scorpion ships enter the fray, with the Delight and others sunk.
The Guichuan is joined by the Mist Walker, Hangman’s Joke, Pestilence, and Namazu as a sort of “mini super squadron” of concentrated power. The Apollo and Shui Xian only make it even more powerful, though by accident.
The English officially get involved against the Pirates!! Seeking revenge for past losses, the English announce their entrance into the battle just as the Jades were faltering to the point of extinction. The Apollo has sunk El Dorado and the Sister’s Rage.
HMS Victoria gets some cannons in range and sinks the Revenant! With that, Calico Cat and Griffin are dead, and the Pirate trio of “super 5 masters” for this game (Harbinger, Revenant, Victoire) is no more. (though they did incredible damage when they finally saw action)
Unlike the Cursed and Jades, the Cursed and the English are actually working together quite well! Using the Eye to see what the Delusion did in the east, the Cursed informed the English of the rare opening at the southern whirlpool. HMS Lord Kettering was the first English ship on the scene, and the English are ready to get revenge at the site of that horrific loss earlier in the game!
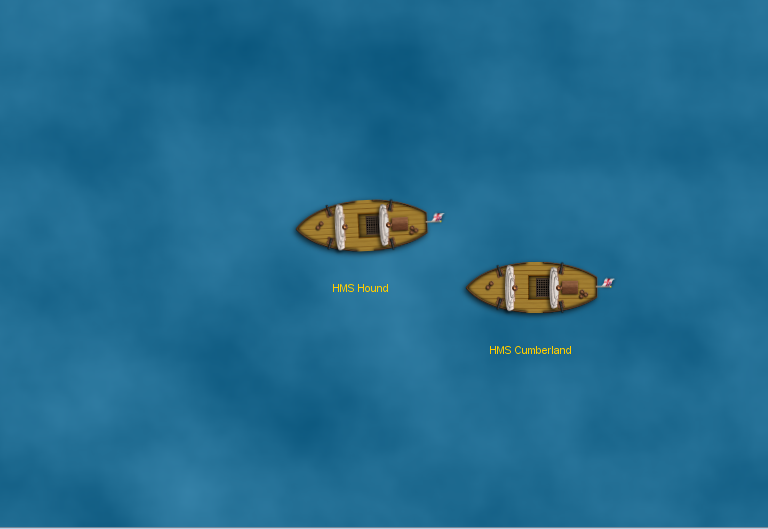
After the LK’s shooting and the emergence of a Gibraltar flotilla towed by the Half Moon, the Dragon’s Breath and Cacao lie derelict! The Cumberland also arrives, but with just one mast and no crew left, she won’t be able to make an impact on the battle.
This strategically brilliant invasion of Pirate home waters has bolstered English morale and shows that the Cursed and English can set aside any differences they might have in order to fight a superior common enemy.
The Tunnel entrance has quite the logjam, while more English ships will gradually arrive at the battlefields for many more turns.
Pirate lines are holding strong, but they have lost a lot of ships.
An English squadron numbering 14 ships has nearly reached the reef barrier in the south, where they will try to overwhelm the Pirates stationed there. 4 damaged Cursed ships will assist them, although lately they’ve been taking aim at the final few Jade ships in the area.
Will the English leave the Caribbean for good? Commodore Owen plans to guard the HI aboard HMS Caradoc and provide AA’s, but most or all of the other English ships will head to Allost.
Progress being made at the Battle for the Castle:
When the Jaguar and Resolucion sink, they will be replaced by other Franco-Spanish ships. The FS are working together pretty well now, though there is some lingering annoyance on the French side after so many Spanish arrivals have blocked the sea routes westward for French gunships traveling that way.
The Americans sink a few French ships on their turn, with wreckage in the foreground and background. This battle is more pell-mell than any of the others right now, but there are still defined areas.
Champ wrecks the St. Denis, but can the two American sea monsters and the Jarvis hold the area against all five French ships?
The few American guns remaining in this area barely manage ANY hits on this turn. The Thomas Jefferson was sunk by a combined effort from the French.
The Kettering is sunk! With the Soleil Royal likely sinking soon, the Hercule would become the French flagship.
One of my favorite shots from this report, with the French trying to expose as much of their broadside to the weakened Americans as possible:
The carnage and horror of the Castle has resulted in most French ships steering clear of the area.
The French ships lost in the dual disaster are mostly sunk, but the Saber has not disappeared entirely yet.
The Adventurous towed the Minuteman over to sink the pesky Vercingetorix, with the southwest Castle area as deserted as it’s been since the start of play.
Finally! For the first time a whirlpool guard squadron pulls off duty. However, this is not a good thing for the Americans, as these ships run home as a “last stand” squadron. O_O
In the background, some of the French ships are askew due to sailing over such dense wreckage:
With just a slight break near the island in the bottom right, there is nearly a solid block of pure debris and wreckage from the Castle “alley” to the big island in the northwest:
The Pirates sink the Lord Kettering and take 5 masts off the Delusion!
The Pirates sink the Cursed scorpions and deal major damage overall! It was an abysmal day at the cannons for the Cursed, though the Pirates and English both shot quite well.
With the top 5 Pirate gunships gone (trio of 5 masters plus the Celtic Fury and Crusher), the Pirates now have to plug the Tunnel entrance with lesser gunships.
On the Cursed turn, Devereaux turned the Delusion ghostly and sailed her through the whirlpool! After receiving an action from Davy Jones/Deleflote, she managed to do some damage on the other side. The Meropis blocks the Accused from getting to the nearby Guichuan on the Pirate turn.
The Cursed have their two 10 masters back in one place again after the Delusion took a short detour to allow the English to invade through the southern whirlpool. However, the Delusion is on half strength, and the Cursed have nearly run out of random gunships to throw at the Pirate lines. The Mystic is set aflame as the Cursed 10 masters reunite!
The Pirates lose masts as the Jades and Cursed begin to enter the Tunnel:
The Shui Xian finally fires her cannons! Sinking two ships, she signals how much of a disadvantage the Pirates will face in the near future: the anti-Pirate factions have three 10 masters between them, while the English now have more 5 masted capital ships than the Pirates.
The Pirates will let the English and Cursed brave the reefs down south. Even though only one of the ships has more than 3 masts, the English have sent a considerable force to this area. My “dark horse” candidate to win will finally be able to flex her full might.
The Apollo takes care of the Proud Tortoise and Coleoptera:
Clearing away Pirate defenders at the Tunnel:
Finally: the Battle for the Tunnel!
Something the Pirates should be scared of. From the top right to the bottom left: HMS Endeavour, Auckland, Gibraltar flotilla, Gallows, Titan, Dauntless, Orkney, Leicester. O_O At the bottom right you can see the opposite, as the Cursed are a shell of their former selves (Flying Dutchman and Divine Dragon limping along with one mast each).
For the first time in ages, the western part of Allost is remarkably empty.
A bit of an awkward situation in the south: the Akua Lapu went from the northern whirlpool to the southern whirlpool with an SAT to shoot at the Delusion, who has now done the opposite. The English would love to strike this area more definitively, but their ships are either headed to battle already or a turn or two away from reaching the Caribbean whirlpool. For now, the Gibraltar flotillas will have to protect the support ships.
Love this view:
Looking down the Pirate line of ships heading through the Tunnel towards the battle. With rumors going around that most of their leaders have been killed in intense combat with the Cursed hordes, confidence among the Pirate sailors has hit a new low. Confirmation that the best English warships ever built are sailing straight for the battle has not helped matters in the slightest. The crews of the ships in this picture have the worst experience of all. They enter the Tunnel to cheering comrades on the nice side of the Sea of Allost, with assurances that the Pirate troops atop the Tunnel are maiming anyone who dare enter Mission’s Kingdom. However, the cheering is quickly drowned out once they get inside the Tunnel, where the sounds of cannon fire, screaming, and death fill the air and reverberate along the entire length of it. The intense and frightening darkness in the middle is currently the last peaceful thing the Pirates experience before suddenly entering one of the biggest battles ever, with ships of not one, not two, but three (at this point) different flags firing at them from all angles in a dreadful scene.
The graveyard for the day, just for the Sea of Allost. O_O
The French and Americans are running out of ships at this area of the battlefield, so the Spanish stand a reasonable chance of retaking their beloved Castle.
Chaos!
Indeed, the Spanish stand to make a tidy profit (in the final standings, not in gold) from this war, which they accidentally reignited by declaring war on the Americans and starting the Battle for the Castle.
The Eroica’s SAT played the key role in Champ’s death, though the Jarvis is surviving the assault due to her ability alone.
The French continue to just blast their way through the Americans, with only a few ships standing in the way of an actual home island attack.
Both sides are utterly exhausted, with the Hercule, Orient, and Minuteman among the only true veteran French gunships in this area. It’s truly incredible that the Soleil Royal and Crete Argentee have survived this long.
The winner of this war is inevitable, but has anybody really won here? I have been surprised by how big a toll this war has taken on the French, who may not have the strength to compete with the winner of the war in Allost even if they prevail here. However, their Spanish allies may have something to say about that….
The debris field is huge, but the actual number of ships engaged now may not number even two dozen.
The full graveyard for the day’s action, with the Pirates and Americans looking like the biggest losers.
With that, only a few days of play remain. The Pirates and French still appear to be the favorites I suppose, but things feel very NOT clear-cut at all. In bizarre fashion, the Spanish actually have a “path to victory”, although that opportunity has officially left the Jades at this point. It will be interesting to see what happens; even if the game has a “lame” victor, the game’s legacy has already been etched by its epicness over time.
The Pirates sink the Beowulf, and the Jade Rebellion has been eliminated!!
The Shui Xian comes under fire from three different Pirate ships:
The Delusion sinks!! Devereaux, the Cursed Admiral, is no more. Command passes to the Headhunter aboard the Guichuan. The Crocodile suffers heavy damage and begins to burn.
The dense Pirate fleet is impressive, but what’s about to hit them is an accidentally combined elite task force bent on their elimination.
The Anglo-Cursed squadron of about 18 ships is almost upon the smaller Pirate squadron in the south!
Love the contrast of sails in this one – you can actually see the skull on the Deliverance’s sails for once, while the Black Swan, Victoria, and SX stand out as usual.
Angelica swoops on the Tunnel and unleashes a torrent of fire!!!
Flying up and over the Pirate stronghold, Angelica blasts the troops below with red-hot flame!
Another flamethrower attack:
The hastily built fortress is set aflame:
Two infantry units of the five stationed there are killed by the fire.
Miraculously, most of the Pirate troops at the other end of the Tunnel survived the attack.
However, they have lost a few infantry units and will have to extinguish the blazes that threaten to take out the small amount of foliage and grass atop the Tunnel:
Seeing the fort go up in smoke, the Pirate infantry on the eastern end of the Tunnel had just enough time to raise their muskets and unleash a volley of their own! Angelica suffered a large wound. Between that and the energy expended during the flamethrower attack (blasting most of the Tunnel’s top with fire, not just in one place – a flying mobile flamethrower! XD), Angelica did not have the strength to fly back to the Roost or somewhere else for safety.
Angelica lands in one of the most calm areas of Mission’s Kingdom, but will still face cannon fire on the Pirate turn.
Now it was Shal-Bala’s turn!!
Following up the flamethrower attack with a “troop drop”, Shal-Bala dumps a ladder with 4 Cursed infantry units on the Tunnel!! If you can’t beat them from the land or sea, beat them from the air!! XD
This dual attack by the dragons threatens Pirate control of the Tunnel itself:
The dragons were the only way any faction could get at the Pirates on the Tunnel without hoisting their own ladders up to the top, so this was a great and innovative move by the Cursed. The aerial bombardment serves as a nice counter to how dominant the Pirates have been at this island.
The Shui Xian sinks the ships attacking her, while the Victoria pulverizes the Deliverance:
The English and Cursed go over the reefs and attack! The Raven and Pride are sunk, while the Splinter takes heavy damage.
Partly due to the Jade wrecks, it will be a slow process to get this squadron into Pirate territory.
My first English 5 master in a scene reminiscent of her glory days!
This game has been a classic that I will reference and link to for the rest of my pirating career. The veteran warship has still got it! XD
With a BANG, the Guichuan, Apollo, and Endeavour show their might on the battlefield!! O_O
Things don’t look good for the Pirates in this area, with the Titan and Namazu lurking behind the colossal giants:
Carnage and chaos all over, from the Tunnel’s top to the waters of Allost:
The Pirates are suffering perhaps more than one could have expected:
Some English ships have sunk here, but they’re replaced by the Granville and Burma. Flotillas enjoy a distinct advantage in whirlpool travel: not only are they immune to damage since they don’t have masts, but their action is given independently of the towing ship, allowing them to shoot as soon as they exit the whirlpool.
The Flying Fish sinks a ship as the Americans prepare for their final stand against the French.
The French may not be nearly as strong as they were at the outset of this war, but the Americans have only a handful of ships left at this point. L’Hercule represents the height of French power now, with 5 cannons (Marine included) firing regardless of how many masts are standing on the ship.
The pitiful beast He’e is no match for mobile French firepower. The Jarvis has stuck around with her L-immunity, but former fleetmate the Pequod will finish her off soon.
I like this perspective: through the rubble and devastation the French tricolor still flies proudly from various warships sailing by the mess.
Indeed, France has more than enough strength to outlast the Americans. However, what about after that? Will they be able to defeat other factions?
The Americans have some fight left in them at the Castle, where continual Spanish reinforcements have augmented the French fleet.
Turn 86
A shocking development!! The Pirates’ Widowmaker flotilla, after sitting in this spot as a guard post for much of the game, hits 3 times with rank-4 accuracy to kill Angelica!!
The Pirates pound away at the Shui Xian and Victoria, taking them down to 4 masts combined.
Down south, the Pirate counterattack leaves the Gargantuan seriously hurting. However, this is just the natural progression of battle at this point – the lead ship will be sunk inevitably, and will be inevitably replaced by others in the group. Whoever has the most cannons and the best gun crews will win the day.
The Pirates concentrate their firepower on the Gibraltar flotilla at this whirlpool, and they do manage to eliminate it. However, the Granville and Burma are unscathed as a result.
Terrible shooting by the Pirates sees the English take almost no damage. The Guichuan should only have one mast here; I thought she would be sunk this turn so I didn’t want to take out the masts for no reason.
LAND COMBAT!!! Finally, after a near-miss on The Flat, we finally see some land warfare!
Army units engage! The Pirates lose a unit to the Cursed, who bring most of their new force atop the Tunnel to bear on the Pirates on the eastern side.
One Cursed unit goes west towards the fort, where they will likely be no match for the Pirate garrison stationed there.
Finally! Something the Cursed have been planning for ages pans out! Behemoth copies Namazu’s ability for a surprise tidal wave attack on the Pirates!!
However, it was a DOUBLE WAVE ATTACK!! That’s right, Davy Jones copied Deleflote to give the action of the Fiddler’s Green to Behemoth, allowing the creature to unleash two huge waves! Three ships are sunk outright, and Beastie’s strength is cut in half!
Scarily enough, that’s not all the Cursed have to offer here either, with Namazu himself lurking behind the Guichuan. Even after this second Cursed 10 master goes to the depths, the Juggernaut and Death’s Anchor will provide an 8-cannon “dreadnought” of sorts as a replacement.
Looking down the path of destruction:
Action at the west Tunnel entrance, where the Cursed and English are duking it out with the Pirates:
The Victoria and Black Swan will not survive this engagement:
Always love these tough shots inside the Tunnel itself. The flash is basically on the fire in a perfect irony, with the Victoria’s main royal sail a weird shade of blue. In the foreground, Pirate ships rush to the scene. In the dense background, various ships wait their turn to fight, with part of the Shui Xian’s broadside visible.
A more realistic perspective, with the horrors of war inside the Tunnel augmented by its darkness:
The English force their way through the Pirates!
Bad news for the Pirates and big news for the English: HMS Lord Algernon is here!! O_O Admiral Thomas Gunn’s flagship from the Caribbean, the Lord Algernon gives the English a morale boost in the area in addition to an obvious firepower upgrade.
What kind of havoc can my favorite ship wreak?
Pure incredible firepower. The Endeavour, Apollo, and Titan mostly got additional actions, and unleashed devastating broadsides that have sunk the remaining Pirate ships west of the reef barrier.
The English 5’s are tearing through the Pirate lines with ease. The flood of Royal Navy vessels is just beginning, and the Pirates may be hard-pressed to beat back them and the Cursed at the same time.
Meanwhile, HMS Caradoc is the only ship left in the Caribbean.
From the American perspective, facing down the French flood that has sunk the Flying Fish:
The Americans are at a severe disadvantage:
The Royal Louis and captured Minuteman are sunk, while the Valley Forge tows another Minuteman flotilla up from the south.
Still fighting strong against the Franco-Spanish:
Turn 87
Some of the big bad Pirate hybrids are getting into action against the English after receiving captain crew at the kingdom.
At the Battle for the Tunnel, both sides lose infantry units. The Cursed lose 2 to the Pirates’ 1. The Cursed unit trying to infiltrate the fort was caught, while Pirate units look to defend the artillery positions.
SHAL-BALA HAS SOMETHING TO SAY ABOUT THAT!!
(these pictures all depict things happening very fast, faster than anyone can take in the development)
Shal-Bala swoops on the Tunnel!!
THIS TIME THE PIRATE TROOPS ARE READY!!! Their muskets are pointed to the sky, and a large volley of musket balls goes up!! Some of the shots connect and hit Shal-Bala in the eyes and vital organs!! O_O
The dragon nosedives into the Tunnel and flips!
End over end, scattering troops and knocking soldiers great distances!!
Ailing and unable to take off into the sky, Shal-Bala crashes into the eastern end of the Tunnel!!
Shal-Bala goes off the end of the Tunnel, leaving a trail of destruction in its wake!!
A bizarre sight. The dragon’s momentum into the opening at the eastern end of the Tunnel ripped the wings from its body, leaving them literally hanging off the edge while Shal-Bala hurtled into the Sea of Allost waiting below. O_O
Shal-Bala is no more. Many of the Pirate troops atop the Tunnel died in the attack; you can see some of them got thrown down the same tunnel they climbed up to get to the top!
More of the English horde comes across the reef barrier. The Bonnie Liz and Silver Dagger are trying to head them off, but won’t be able to stem the tide at all.
A tribute to how much faster the pace of combat is with the regular rules. The Guichuan has sunk, in addition to the Pirate ships that had been harassing her. The Titan suffers heavy damage but is quickly replaced by the Leicester.
The change in combat rules has also had a dramatic effect on how much debris accumulates on the oceans:
The Shui Xian battles as the Pirates sink the Victoria:
Shal-Bala’s failed swooping strike evokes recent memories of the rigged bridge in Karkuda. A plan designed to benefit one faction has dramatically hurt both them and their target.
Some Pirate army units actually got knocked off the southern edge of the Tunnel, falling the long distance to the reefs and rocks below. The impact at the eastern end knocked the 2L bridge over, which has fallen into the ocean and will likely not be usable again for the Pirates.
The artillery position at the eastern end opening bore the greatest brunt of the impact:
In the background you can glimpse a chunk of the interior stairway the Pirates built, as well as one of the infantry units that fell down that tunnel after being killed by the rolling dragon.
The Martinette and others clean up against the Americans, sinking the Roanoke and getting close to having an open route to the American HI from the south.
Pitched battle erupts at the American HI! The Hercule is dismasted but takes USS Emerald with her. The Eroica is sunk by artillery fire from the island. Those units will be instrumental if the Americans are to somehow survive. At this point they would need a dramatic intervention from the Sea of Allost to stay alive.
The amount of carnage has now eclipsed the volume of fighting actually going on:
A different view, with the destroyed Castle extension sort of the “last gasp” of American defiance before this inevitable final stand.
American waters have finally been broached by the French:
Turn 88
The English form up and advance! The Grand Barnacle and Darkhawk II are ruined, with the Shadow next.
With the exception of a few stragglers, the English have made it over the reef barrier with mostly minimal damage.
A FINAL STANDOFF!! XD The last surviving infantry units on the Tunnel meet in an epic clash.
The Tunnel has been devastated. Above, ON, inside, below, you name it. Death everywhere.
The Pirates sink the Endeavour and Apollo! However, their numbers are looking inferior to the Anglo-Cursed force headed their way.
The Pirates are using the reefs to their best advantage, trying to goad the English ships into going over them. The smaller Pirate gunships have taken the minimal risk in passing over them but miss the Titan.
The Ranger has finally sunk as the Battle for the Tunnel kind of just peters out here at the end. The top has been just about nullified, while a small handful of severely damaged ships weakly fight each other underneath.
The Pirates have a few more reinforcements, but the Amity and Hades’ Flame aren’t exactly ships you want on the front lines of a battle.
O_O The immense pile of sunken ships grows with every turn.
A mountain of ships that reminds me of Shipwreck Cove from At World’s End:
Taller than the kingdom!
I didn’t actually want to do this at the end, but the finish was so rushed and I ran out of other places to put things that I almost had to.
With the Frontier and others finally sunk, the Franco-Spanish have won the Battle for the Castle!!!!
The French have also sunk the final American ships! Now only William Eaton’s army stands in the way of Franco-Spanish dominance in Karkuda. He has trained his troops well, but they are no match for the armada that now tightens the noose around the island….
The assault has begun:
Moving on from the unspeakable destruction near the Castle, the French are far from home but have maintained guard posts at various key points (whirlpools, Harbor, Flat) within their waters.
This ocean is starting to look decidedly empty compared to a few weeks ago….
This ocean features an impressive graveyard, but nothing on the scale of the War for Allost. (which however has been fought more suddenly with the combat rule changes affecting it nearly from the start)
12/16/2017
Turn 89
The Pirates try to block the English but fail to do much damage:
The Titan and Leicester are sunk, but the upcoming Anglo-Cursed advance is sure to be fast and furious. The Diamond Strike is Calypso’s newest bodyguard to protect the Stoneheart, and they flee the area to return to the kingdom.
As the giant Shui Xian finally slips beneath the waves, the Pirate fort atop the Tunnel is fully engulfed by flames! This marks the official end of Piratical activities on the Tunnel.
OR NOT!!! The lone survivor of the land warfare has defeated the Cursed unit to reclaim sole possession of the Tunnel for Pirates!
However, all of their comrades are dead, and the chances of getting back to the kingdom is slim.
The English blast their way through and advance towards Mission’s Pirate Kingdom itself!! O_O
The English and Cursed armada is confident they can take down the greatest faction in this game and the game overall.
Even the Nancy Nox is fighting now, in a classic shot that I like.
THE SPANISH HAVE RETAKEN THE CASTLE!!!!
The Spanish are busy regrouping and celebrating, but the French have better things to do, hastily sailing west to make sure their comrades are alive and properly supported in the attempt to knock the Americans from the game.
The French in the south needn’t worry, for the French have nearly done it! The Americans are down to their last two army units.
Turn 90
One of my favorite shots from the endgame, showing the English fleet sailing towards the unprotected kingdom belonging to the late Captain Mission.
Once mighty, the Pirates have fallen to this.
Soon Dead Man’s Point will be overrun by the Anglo-Cursed horde. The Pirates have mostly abandoned it in an attempt to save their home island.
The few Spanish troops left in play can now swarm over the Castle ramparts that their ancestors once built:
The French open fire again, and the Americans have been eliminated!!!!
After a valiant effort, the Americans have fallen to the combined strength of France and Spain.
The influx of French ships from the south shows that the Americans had no chance:
The Franco-Spanish have prevailed!! Of course, now the question everybody is wondering: what’s next?
It certainly wasn’t easy, as the unprecedented debris field shows how the Americans took a huge percentage of the French fleet with them to the depths.
Turn 91
The English converge on the Pirates!
Now the Sea of Allost looks decidedly empty, with the east having all of the action.
The Cursed make quick work of Dead Man’s Point, but some Pirate army units remain.
The Coral defiantly resists:
The Coral is a ship from my original collection of 49 ships from 2005-2006, but I built this new version of her to replace the original whose mast broke some years ago. I have to admit she’s an underrated ship, though that’s inevitable considering the competition within her own set.
Depending on who you’re rooting for, a sad scene. The Pirates have lost their fort and the upgrade associated with it that costed them 250 gold (that gold was not going to go on the island even if the game could continue longer and/or if the combat rules hadn’t changed).
The Spanish are now going to fortify and protect their precious Castle from any potential invaders. The French are fine with this, as they want their considerably powerful (at THIS point in the game!) ally to stay in their ocean and wait for enemies to approach them.
The French head home! The French will try to implement a plan similar to that of the Spaniards, regrouping at the Harbor in preparation for the final battle(s?).
Can anyone contest the Franco-Spanish?
Turn 92
The Stoneheart is dismasted and captured by the English!! One of the only ships to be captured in this late stage of the game where repairs are impossible, the English want the Cursed to be able to copy Calypso with Davy Jones, who is still aboard the Fiddler’s Green….
The inevitable. The Pirates are scrubbed off their formerly glorious island, and the Anglo-Cursed are strengthening from acquaintances to actual allies…. !
The Spanish have set up small ships with flotillas along their newly minted eastern border, while some other ships go south to protect that bottleneck. A few ships are protecting the northern approach to the Castle, while others are docked at the walls.
The army units are getting into optimal positions atop the ramparts:
It will take many turns for the French invasion fleet to return home to the Harbor, even more for the ships that have to come up from the south and round the Castle extension in order to go east due to the immense destruction in the “alley of death”.
The French are making all speed towards home:
It will be interesting to see if The Flat plays a role in the upcoming conclusion. The French have stationed a few ships at it, but Paradis de la Mer and the 11 (!) army units on it may be enough to deter any invaders.
The Musarde broke off earlier to be the first ship back home, where 4 other French ships are stationed. Both whirlpools are still heavily guarded by squadrons.
Turn 93
The English formation breaks up, but the Pirates have nearly been eliminated!
The forces converging on the Pirates from the north are about equal between English and Cursed.
The Cursed have won the Battle for the Tunnel!!!!
The Serpent’s Fang will be the first ship to emerge from the darkness, and the Cursed are coming out of this War for Allost a bit stronger than most people could anticipate….
Another head-on shot, with the impressive French ships (Seattle was captured) making their way over the supreme wreckage caused by them and their comrades just north of the Castle areas. Sailors (aboard the Pluton) and soldiers (Spanish infantry) alike salute the arrival of France’s finest!
Turn 94
THE PIRATES HAVE BEEN ELIMINATED!!!!!!!!!! O_O
After assembling the largest fleet of all-time, the Pirates have fallen to a loose coalition of Jade Rebels, Cursed, and Englishmen. Their fall was swift and somewhat shocking, but various factors played a role in their demise.
The Pirates in the fort have already surrendered, knowing they don’t stand a chance against the overwhelming superiority of the invaders.
On the doorstep of Mission’s Kingdom, the Anglo-Cursed have conquered the Pirates:
Cursed reinforcements are coming:
Here come the French!
Turn 95
Under joint command from Davy Jones and Admiral Thomas Gunn, the fort is demolished.
At long last, the Pirates have been ousted! At this point, the most powerful faction in the Sea of Allost may not be one that started the game in the ocean (the English).
It’s less impressive when viewed from this high above, but the sea is now an ocean of debris and death.
The first direct friction between the Cursed and the Franco-Spanish! Tsuro moves the Cristal del Obispo L onto a reef:
The first French ships are nearly home, but it is a long assembly line to refortify the Harbor.
Somehow, someway, the Soleil Royal has survived. She was the first French flagship of the game, before Gaston moved his flag to the Bourbon and Lenoir took over active command of the battle fleet aboard the Dauphin Royal. The ship is nearly mastless, but sails on regardless.
Turn 96 (getting harder to keep count, I lost track eventually… oh well)
Officially acting as allies, the English and Cursed collaborate! Davy Jones copies Calypso again to create a new whirlpool!!! O_O
The Cursed are wasting no time!! The second whirlpool is placed L away from the lighthouse island in the Sea of Karkuda, right in front of the Harbor!!! A submerged Namazu swims through the whirlpool (Cursed stuff doesn’t take damage remember), while the Grinder allows the Death’s Anchor flotilla to sink the Hercule and her 5 functioning cannons!
Losing the Hercule was inevitable with no masts left, but the French certainly did not expect this surprise attack so soon after they finished off the Americans. The Cursed have the Eye, but the Franco-Spanish have no idea what’s been going on in the Sea of Allost. They are surprised that the Pirates may have been completely defeated.
Five Cursed ships appear at the southwestern whirlpool near the former American HI!
Having almost no business in Karkuda so far in the game, the Cursed have now invaded in two different spots on the same turn.
The Sea of Allost is emptying out! But where did some of those ships go?
English ships arrive via DJ/Calypso’s new whirlpool!! The Tower flotilla sinks a French ship guarding the old whirlpool used to invade the Harbor so long ago!
With this new blockage, perhaps the French won’t return to the Harbor after all!
The Dauntless and three other English ships arrive at the southern whirlpool!
The Spanish take their turn, fighting the Cursed for the first time! The Cristal knocks two masts off the Boneyard:
The French fight back! Some English ships are sunk immediately, with most of the ships docked in the Harbor coming out to assist. The Seattle misses the Tower flotilla completely, but the French take out the Grinder and Death’s Anchor. In a cool move of naval “musical chairs”, the French rotate the guard squadron around the old whirlpool to allow the Belle Etoile to join the squadron to seal off the whirlpool once more. The French don’t want more invaders to come through, but it looks like an inevitable development.
The Felicite lights up HMS Forge, but the Hibernia and Tower will provide powerful firepower for the English next turn.
Turn 97
Namazu’s final attack is a dramatic suicide blast!! Literally a “last gasp”, the serpent issues a final tidal wave of destruction before dying. Sinking 4 French ships and taking 6 masts total off the Corse, Lyon, and Lurker Dessous, Namazu and its ability is no more in this game.
Davy Jones copies Deleflote to give the Juggernaut two actions through the whirlpool! This was part of the Cursed strategy to open up a third whirlpool in the Sea of Karkuda. It worked, with the Nox sinking and paving the way for the Nosso Lar and another Death’s Anchor flotilla.
The Cristal is sunk as the Hades’ Realm and Serpent’s Fang arrive:
No English ships remain in the Sea of Allost! They have taken the plunge and gone to Karkuda!
Here some of them are. They will try to provide a jolt to the Anglo-Cursed efforts to halt the French.
HMS Lord Algernon has arrived!
Suddenly the Sea of Karkuda is becoming quite crowded once again:
The Second War for Karkuda is just beginning!
The French rip into the English, sinking the Forge and Gallows!
Various ships come off whirlpool duty to assist the emergency situation at the Harbor.
Turn 98
At this point, it is clear that the Anglo-French alliance was not very strong. The English took it more seriously than the French, but have now broken the pact in order to align with the Cursed against the Franco-Spanish.
With multiple declarations of war occurring recently, it is now the English/Cursed vs. the French/Spanish!!
Terrox surrounds a ship immediately after arriving via the whirlpool, but the English and Cursed are lacking numbers here.
Despite many ships having damage, the French fleet looks strong relative to the others.
The Santa Ana is finally sunk as the Spanish come under attack at the southern part of the Castle.
Cursed reinforcements from the Tunnel finally arrive! The Corse and Musarde are dismasted.
I think what happened here was the Orkney got an AA and went 4/4, with the French electing to scuttle immediately so their next ships could advance to hit the Orkney.
The French are starting to dominate their home waters, but they cannot advance into the Harbor as they had planned.
Turn 99
The Cheshire gets involved, and it will be interesting to see if the Spanish can hold the Castle against the invaders.
In order to provide more immediate support in the southwest, the Spanish defensive line has moved west of Fish Island.
O_O The Fiddler’s Green and Stoneheart are the only ships left in the Sea of Allost!
(The troops on the Jade HI would have starved to death by now, or could be easily picked off by the last faction sailing)
Another Battle for the Castle:
TURN 100
Very happy to get here, as my other campaign games did not have turn counts in the triple digits that I know of (CotE 2013 was 62, EE 2015 was 45, and I didn’t keep count for other games, though CG1 likely reached 100 turns).
Terrox managed to beat Le Lyon and now surrounds the Floating Stone. Even as French strength around the Harbor grows, the Cursed are starting to infiltrate it.
The late stage of the endgame has been a bit of a “flotilla fight”, and this area looks no different. Unlike the first Cursed invasion of the Harbor, there are now almost no French ships inside the Harbor that can protect the French army units and even the docks themselves.
I took these pictures to highlight the Serpent’s Fang, whose devastating gun crews hit 7/8 this turn! (Davy Jones on the FG is now copying Deleflote instead of Calypso to give actions to a Cursed ship each turn that can make the biggest impact on the battle)
Turn 101?
The Bonne Chance is sunk, and the Cursed begin their assault!! The flotillas will be extra valuable here, with their range an asset against the army units on the docks.
Squalo is about to wreak havoc! XD
Two Cursed flotillas are sunk as the French try to defend their home. That whirlpool and Terrox have really been a thorn to the French lately, since it’s right in the path their ships would take to enter the Harbor. The constant arrivals from Allost and the lighthouse island have forced some ships to go around to the south for a better way in.
Turn 102 (just trying to keep track at this point, not likely to be off by more than 1 or 2)
As if on cue, the kraken surrounds another ship!
The Pequod puts an end to Terrox. The French have caught up to the Dark Pact and sunk the Nightmare and its flotilla.
Turn 103
With most of the Cursed ships sunk by the Spanish, the 4 English gunships left in play are ready to rumble! There was a pretty intense bottleneck at the southwestern edge of the Castle for a few turns, but now the English can fight the Spanish once more! Of course, this time it’s in Karkuda instead of the Caribbean. Still, it’s cool to see the game “come full circle”! XD At this point the factions mostly just see each other as obstacles to victory, with less hatred than the previous wars fought recently (French vs. Cursed is the matchup with the most animosity at this point). In fact, we weren’t too far off from seeing an “imperial alliance” of France, Spain, and England, and we likely would have if the Americans had been defeated earlier and the French went off to fight the Pirates.
The Dauntless loses two masts as the Spanish are forced to break formation to combat the threat.
After taking out just 3 army units at the Harbor, the Cursed invasion is over! The French can now concentrate their forces to the south.
The entire French fleet is now headed southwest to fight the English and what remains of the Cursed…
… which isn’t much. Tsuro is being given double actions via the Fiddler’s Green, but the Cursed only have those two ships left. Including the Caradoc in the Caribbean, the English only have 6 ships left. From this picture I see 8 Spanish ships and 22 French ones.
AND THUS THE REASON FOR THE TURN!!!!! The Spanish turn their guns to the north and declare war on the French!!!!
With basically a 30 on 8 fight in terms of pure ship count, it is clear that the Franco-Spanish would win. However, between the French having the most ships in play and the Spanish bearing the brunt of the English assault, the Spanish realized they would not win if they let the French overrun them after the Anglo-Cursed were finished off. Thus, a tipping of the scale. Now it will be a more fair fight, with the English/Cursed/Spanish fleet of 16 total ships against the 22 of France.
Also, despite their bloody past, the English and Spanish have been on relatively cordial terms ever since the revelation (by the French) that the Castle in Karkuda was being taken by the Americans. After a brief and forced renewal of their conflict, they have made up and can now focus their combined efforts against the French.
THE FINAL SHOWDOWN!!!!
(That was Turn 104 I believe)
Turn 105
HMS Caradoc arrives from the Caribbean!
In similarly surprising fashion, the Fiddler’s Green appears with Davy Jones himself at the helm! He copied EA to shoot at the Rocher Noir, but only hit once.
The Spanish prepare to defend their Castle from the north this time!
Turn 106
The French attack!! Wasting no time, the French start sinking Spanish ships to get revenge against the betrayers.
Turn 107
The Pluton is sunk, and the Santo Columba sets the Sabre on fire!
The Dauntless is the first English ship to fight the French. The allies have an ace in the hole with the Lord Algernon, which is easily the most powerful ship in play right now. The French have better quantity and their best ship is La Possession. Both sides have 2 flotillas.
Turn 108?
The Santo Columba and Dauntless are sunk, but the French lose a couple 3 masters. The Spanish have been mostly unable to slow the French onslaught.
Turn 109
Tsuro is finished off. Up north, the Rocher Noir and Favori managed to defeat the Fiddler’s Green after a long battle of misses, meaning the Cursed have been eliminated!!!! Only three factions remain, the most imperial factions: England, France, and Spain.
The Magdalena started retowing the Armada flotilla just to flip it into a better firing position. The English are down to their last three ships.
Turn 110
The English make some waves, sinking both French flotillas as the Lord Algernon enters the fray!
Only a handful of ships left in play!!
The Cheshire and Magdalena are sunk, and the French team up to take the Lord Algernon down to one mast!!
Guy LaPlante has been promoted to high Admiral out of necessity! No longer just a diplomat, he is now in command of the French fleet! XD The Possession vs. the Lord Algernon is the final clash of capital ships in this game.
Turn 111
HMS Lord Algernon is sunk! Admiral Thomas Gunn goes down with her, passing command of the English “fleet” to Commodore Owen. The last Armada flotilla is proving to be a tough sink for the French.
Turn 112
The Caradoc is the last hope for the English, and teams with the flotilla to smash the Possession down to a single mast!
The Cleveland sinks the flotilla (eliminating the Spanish from the game!!), while the French gang up on the Caradoc. The Martinette has a great shoot action, and the English are eliminated!!!!
THE FRENCH COMMAND THE OCEANS!!!!!!!!!!!!!!!!!!!!!!!!!!!!!!!!!!!
IT IS FINALLY OVER!! After more than 3 months of play and over 100 turns, Command the Oceans has ended!!!!!! Finally. Whew. Huzzah!!
Congratulations to the French!!!! This is their first victory in any of my campaign games, ending the longest drought for any of the “Big 4” factions. It was about time they won a CG of mine, and here they’ve done it on the grandest stage of them all. Easily the most epic physical campaign game ever, and quite possibly the most epic overall.
There is a BIG write-up below concerning my thoughts on the game and how each faction did. But first, to conclude this final report we can look back at the unrivaled, unprecedented level of devastation seen in this game.
The immense mountain of sunken ships in Allost:
You can almost see all the way through both tunnels:
A desolate wasteland:
Even if the Caradoc had stayed in the Caribbean, the French would have taken her out at the English HI and would have just enough firepower to blockade or take out Diamond Rock. (if we even pretend those troops are still alive)
The Sea of Karkuda has a wide swath of debris where one of the bloodiest wars was fought:
Now for some closeups of the carnage, so I can look back on it and see the proof of how insane this game was.
With the Castle complex removed so you can see the entire scope of the destruction:
I am actually saving some of the bigger chunks of wreckage as a memento. I have this fantasy that if Pirates were incredibly popular I could auction off some pieces on eBay lol. XD
The HUGE cleanup commences! These are all the masts from the Sea of Karkuda, in one giant pile. O_O
Thank you so much for reading about this game. Below is a reflection on the game that serves to wrap things up. The French have The Command of the Oceans!
Reflection post
Command the Oceans has finally ended, but the legacy of the game will continue for a long time. It represents my finest effort to date in my long history of playing campaign games going back to 2011. Never before have I done a physical game that lasted this long. Never before had I experienced a game so large it became unmanageable. Never before had I played the same game of Pirates CSG in two different rooms, on three different oceans. It was truly epic.
An analysis of the factions and their gameplay, in the order of play:
Pirates
Captain Mission’s Pirate Kingdom was both a blessing and a curse. It gave the Pirates a supreme defensive lair to hide out in, but it made launching extremely difficult. Purchasing a fort upgrade at Dead Man’s Point allowed them to become the biggest fleet ever seen in a game. After two disastrous whirlpool expeditions against the Americans, the Pirates developed an isolationist policy to not go anywhere. Focusing on home defense and the Tunnel, they set themselves up well for long-term success. Only by the efforts of 3 different factions were they finally defeated. I think the Pirates’ biggest mistake was making enemies. They inevitably were drawn into conflict with the Americans through Ralph David’s anti-Pirate zeal, but wasted a lot of ships in the whirlpool expeditions when it was clear that David could not take down the Pirates with his own expeditions. The Jade Rebels wanted help in their war against the Cursed, but the Pirates shied away from that. The Pirates had a strong alliance with the other top faction in the game, the French. However, the Deal with the Devil undid all that when the Cursed revealed the big secret to the French. The Cursed made themselves an enemy of the Pirates more than vice versa, but overall the Deal did not go remotely as planned. A foolhardy attack on the English by the regular (exploratory) whirlpool squadron earned the Pirates a underestimated enemy, and who proved to be their undoing in the end. With the whole O’Brien/Celtic Fury situation, even the Mercenaries didn’t like the Pirates. The Pirates made themselves the most hated faction in the game, and combined that with looking like a heavy favorite to win which was eventually their undoing. The Pirates wanted to use Calypso to create whirlpools behind Anglo-Cursed lines, but they were losing ships too quickly to devote such a force to that end and also were fearful of whirlpool disasters in general after their failed attacks on the Americans.
Jade Rebellion
Sailing into an ocean filled with Cursed and Pirates, the Jade Rebels didn’t know what they were up against. They had a fantastic early game, perfectly timing the resource changes at their sole wild island to the point of unfairness. Exploring deeper into the Sea of Allost, they discovered the Cursed. These two great rivals became embroiled in a war that completely defined the JR game. Jade hatred of the Cursed and their wretched dragons was so intense it blinded them when they had an opportunity to escape when the Pirate threat became so severe that the Cursed wanted to break off the conflict (albeit temporarily, in a perfect world). The Pirate-Cursed crossfire was far too much for the depleted Jade fleet to handle, and the various privateer help was less helpful than expected. Realistically though, the Jade Rebels did reasonably well in a bloody game where they were outnumbered by superior factions.
Cursed
The Cursed were a secret to the reader for quite a while, though there were some clear hints along the way as the Jades encountered strange things. Once fully revealed, the Cursed were a force to be reckoned with, although they struggled for a WHILE to defeat the Jades decisively in battle. Only at the end of their long war were they finally able to prevail. The Cursed then went after the Pirates, trying to dominate the Sea of Allost with the English. This was accomplished, but attention immediately had to move to the Sea of Karkuda, where the powerful Franco-Spanish alliance was busy entrenching themselves (or trying to) at the Harbor and Castle. Overall the Cursed finished ahead of both the Pirates and Americans, a testament to their generally wise gameplay. They didn’t make as many enemies as they usually do, which made for alliance opportunities and only one fleet (JR’s) coming after them relentlessly. The Cursed saw the Deal for what it was, with the Pirates trying to pit the Cursed and French against each other while the Pirates focused on the Americans. The Cursed turned the tables on the Pirates and didn’t bother losing their entire squadron to the French, indeed saving most of the ships from certain capture. The powerful Jade battle fleet whittled down Cursed numbers significantly, to the point where the Cursed were unable to take on France for very long at the end. The final battle saw the elimination of all but one faction, with the Cursed predictably being the first one out. I will say the Cursed used their advantages to a high degree, launching whirlpool attacks, throwing icewrecks around, copying and exploiting Namazu, and instilling fear and terror with the dragon duo. Overall an incredible game for the Cursed faction, both thematically and in terms of the final result.
English
Dominating the Caribbean via Diamond Rock through the first part of the game, the English suffered the unfortunate distinction of being the top dog of their ocean but paling in comparison to the giants of the larger oceans. Starting a feud with the Spanish, the Caribbean war took up most of their time and resources for quite a while. The English (and Spanish!) caught a break when the Americans unknowingly invaded the former Spanish Castle in Karkuda, which took the Spanish out of the Caribbean entirely and allowed the English to regroup and even relax a bit. However, Havana Black’s whirlpool squadron raid was heavy on the minds of the English, and they eventually sailed their entire fleet into the Sea of Allost to exterminate the Pirates. Improbably, they were successful, with their multi-action capital ships sinking a huge number of Pirate ships north of the Tunnel. With the help of the Cursed (and Jades a tiny bit) they took down the game’s strongest faction and came to dominate their second ocean of the game. However, the Second War for Karkuda saw them come up just short against the French. There is a possibility that if the English had convinced the Spanish to sway over to the Anglo-Cursed side earlier, that the French may have been defeated. However, between the French numerical superiority and the large army reserves at The Flat and Harbor, this is unlikely. Overall the English played a solid game, and the “dark horse” faction that nearly ended up winning. They were pretty much always 5th in the point and ship counts, but wound up finishing 2nd. This keeps their incredible CG track record alive, with low finishes quite rare.
Spanish
Plagued by mediocre exploring efforts and a lack of resource options in the Caribbean, the Spanish never had much of a chance in this game. Arguably the best underdog story of CTO, their position actually improved slightly throughout the game, with the poor getting slightly richer. A turn of the tide resulted in a semi-victory at the Battle of Paradise Island, which was huge for Spanish morale and a surprise to the English. After that, French news of the American conquest of the Castle infuriated the Spanish, who immediately set off to Karkuda to make things right. The Castle WAS eventually retaken with French help, but the Spanish were too weak to fight the French on their own. By the time they realized they needed to betray their ally, it was a little too late.
French
The French played a great game obviously. They established a strong gold system early on, building docks to optimize the Harbor and launching gunships to protect their interests. Their lighthouse helped them gather resources a bit faster, and also helped in the War for Karkuda as ships departing the Harbor reached the front lines faster. Establishing alliances with the Pirates, English, and Spanish, the French set themselves up VERY well for the late stages of the game. However, the dramatic and devastating Cursed attack on the Harbor and nearly simultaneous revelation that the Pirates had betrayed them threw a huge wrench into their plans. The French managed to recover, blasting the Cursed back to Allost and setting up whirlpool blockade squadrons to ensure the Pirates and Cursed could not harm them so easily. Of course, the French were defined in this game by their war against the Americans more than anything else. Starting with a weird alliance fakeout on the American side, The Flat was hotly contested more than once. Once the Battle for the Castle got underway, all hell broke loose in Karkuda. One of the bloodiest conflicts in history, the War for Karkuda saw the Franco-Spanish emerge victorious at the expense of the Americans and Mercenaries. Despite being humbled by the Cursed invasion, the Pirate betrayal, and the Merc drama, the French came out on top. Their final effort saw the elimination of three factions that were teaming up against them. The Harbor was a great “home island” for the French, and they utilized army units more than most other factions. Refusing to get tangled up with drama, they put an end to the factions that opposed them to win the biggest game ever.
Mercenaries
To be blunt, the Mercs were an also-ran from the time they officially broke off from the French as their own faction. By that point in the game some of the factions had massive fleets ready to go to war, and the Mercenaries would not be able to make up the deficit even if they were unhindered for dozens of turns. Nemo’s sub hideout has a coolness factor, but it wasn’t enough against the annoyed French. The betrayal by Eileen Brigid O’Brien was a final slap in the face to Nemo and by extension the French, and only served to make the rich richer and the poor poorer. The frustrated and hungry Mercenaries wanted to make a final stand, which was quickly quelled by the French.
Americans
The Americans were hindered by a line of reefs east of their home island for much of the early game, but eventually learned how to destroy them to explore the rest of Karkuda. However, soon after sailing out from their territory, they encountered the French, a powerful rival that would affect them for the rest of the game. Two separate whirlpool expeditions led by Ralph David led to an eventual declaration of war against the Pirates, which ended up going better than expected when the Pirates lost both battles of the American whirlpool. However, by the time the second battle was wrapping up, the French and Americans were engaged in all-out war. The discovery of the Castle was exciting for the Americans, but it turned out to be more bad than good. The Spanish intervention in Karkuda triggered the reopening of conflict between the Americans and French, and a war that would eventually see the demise of the Americans.
The final standings:
1. French
2. English
3. Spanish
4. Cursed
5. Pirates
6. Americans
7. Jade Rebellion
8. Mercenaries
This certainly comes as a surprise, including to myself. I thought the Pirates and Americans would finish higher up in the standings, but facing more than one faction at a time was difficult for them. The Pirates have to be especially disappointed to not even finish in the Top 3, beaten out by the Spanish (lol for this game) and their main late-game adversaries, the French and English.
I am quite proud to have completed the game, between having it set up for 3+ months without a disaster occurring and finishing the biggest game ever by last fleet afloat and not by point count. This game made up for what my other CG’s have lacked. CotE was cut short after 3 weeks, while EE had the same problem but due to a disaster that resulted in a lame ending. CTO will remain my legacy in the world of playing Pirates CSG for a long time… it is the best looking game I’ve played, the longest, the most difficult, the biggest, and quite possibly the best. Only the ease of playing on VASSAL (for CG1) and how obnoxious this game was at times could hold it back in my all-time ranking for best games I’ve ever played.
Notes and miscellaneous
Here are some of the things I wished had happened or things I wished I had done. Also, this section has some notes from my CTO doc that I kept updating throughout the game.
-More home island attacks
I was disappointed that the Harbor was the only home island seriously threatened by a specific attack. Of course some factions were eliminated at home (Pirates and Americans), but I was eager to see more shooting at HI’s. The Harbor specifically could have been even more epic and crazy, but the French established a strong position early on and were able to beat off a pretty solid Cursed attack. On this tack, I can say that the Jades were fully planning to invade the Roost. If the Cursed hadn’t held them back in that final battle of their war before turning the tide with the eventual Pirate entrance, the Jades would have tried very hard to knock the Cursed out of the game with a full-scale invasion of the Roost area and even the structure itself. I also wanted more Castle/Harbor shenanigans in general, but the naval wars took up most of the action and excitement.
-10 masters and dragon effects happened too late
By the time I launched most of the 10 masters, the combat rules had changed to expedite the finish or were about to change. I wish I had prioritized them earlier so they could have fought in more battles and played a bigger role as flagships. The Celtic Fury had the longest stay of them in the game, but she spent a TON of time just sitting in the Tunnel so the Pirates could exploit that island fully with her taller masts. The dragons worked well and I don’t have many regrets with those, but Angelica should have been born earlier so she could get into more action. I did greatly enjoy the flamethrower and swoop attacks. The dragons were clearly overpowered and got by too easily. The infantry volleys were a realistic and fair way of taking them out before they could conceivably dominate the endgame too much. I’m quite happy with how many advantages the Cursed got, though perhaps it was a little too much based on where they finished (but it’s nice to see them not last or second to last for once lol).
And yeah since I haven’t said it yet, this will bear repeating randomly throughout the years:
Charizard+Lord of the Rings+Tunnel=Epicness.
XD
I was thinking about the dragons picking up some JR or even English troops and dump them onto the top of the Tunnel, but Shal-Bala’s rolling death caused more Pirate troops to die than I thought, and by then it was too late.
The English and Cursed were going to collaborate on whirlpools in Allost before they defeated the Pirates. They had a plan to create a whirlpool behind Dead Man’s Point (near the kingdom) and come at the Pirates from the east. However, between the rushed pace of play, Davy Jones needing to copy Deleflote to keep the 10 masters alive as long as possible and to give ships shoot actions to stay alive, and the speed with which the Anglo-Cursed force fought through the Pirate hordes, it was unnecessary.
-Lighthouses: JR’s, Americans?
I had wanted to use more than the two lighthouses, and the Jades and the Americans were the best candidates based on nearby wild islands and general gold systems. Most of the islands weren’t fit for the structures, but the French and Pirates definitely benefited from theirs. Neither came under fire at any point, but it’s certainly an interesting idea that could use further playtesting (especially in more normal games haha).
-Alliances? (American/English? Cursed/English?)
The Cursed/English alliance obviously happened, but the Americans and English may have teamed up against the Pirates if the Americans had lasted longer and they weren’t busy fighting the French every single turn of the endgame.
Deal with the Devil
I can’t get over this, and will probably reference it many more times in the future. XD Here is my original writeup on it from my doc.
Pirates deal with Cursed: Cursed can copy Calypso for entire game if they use DJ to copy her and attack French at the Harbor (Pirates can take out 2 huge factions/rivals at once while denying involvement to the French, and can focus their efforts against the Americans. “The Pirates pull off a huge masterstroke of grand strategy, weakening two huge rival fleets with one deal while simultaneously able to focus on their other rival.”) And that’s about as good as it gets folks. For now…. O_O
-Fireships as equipment?
I just keep meaning to try out my fireship idea, but I just keep putting it off and/or forgetting about it. Another CG.
-How to shoot the higher altitude stuff?
I kind of glossed over this, but I had a general thought that ships could hit things at a higher altitude by rolling a 5 or 6 on their guns. Thematically it was tough to explain, with the cannons possibly being tilted at an angle on their carriages to fire almost like a mortar. XD However in that case the accuracy would have to be even worse. Luckily the dragons mostly took care of the Tunnel shenanigans and Diamond Rock didn’t play a role in combat after the English-Spanish war ended. I also had grand thoughts of a faction shooting off part of the ladder that the Pirates had let down from the top of the Tunnel to the bottom (the one going through the hole they blasted to the top). This would cause ladder fragments to be scattered inside the Tunnel battlefield, and possibly the troops on the Tunnel would starve. However, the Pirates were able to hold the western end until all their ships were sunk there, so there was nobody alive on the Tunnel by the time the Cursed sailed through it. Of course, I hope we haven’t seen the last of the Tunnel.
Ideas
Cursed
Custom Devereaux (AA with option of +1 cannon rolls to any ship in your fleet)
Spawn of Shal-Bala!
Dragons gain flamethrowing ability after gaining experience through successful swoops/attacks
Broken horn island defended by Brachyura?
These are mostly obvious at this point, and Angelica being Cursed was planned pretty much from the start. I don’t have Raptor Maw (or Vieil Homme ), and it wouldn’t be much of a Roost without at least one other dragon! Although Angelica showed up pretty late, it was probably for the best since her appearing earlier may have given the Cursed even more of an unfair advantage. Broken Horn Island was going to be Brachyura’s “home” after I slashed the base of that island with a knife to make it look slightly less artificial. However this didn’t pan out which is fine.
I also had the thought of Cursed named crew climbing aboard a dragon and using it as a flying steed! O_O Davy Jones could fly off to Karkuda or the Caribbean to give a message or information to another faction. However, this is an easy house rule that could be used in future games.
-What the heck is going on?!
I only did this once, but it’s a substantial effort to put forth when I could have been playing or finishing the regular report in the first place (aka I didn’t have time to do it as much as I wanted to).
-Harbor can be rented out if faction is needing money (can share)
Man this was something I thought about before the game even began. Once I got the Harbor concept down (modular and reusable/destructible), the possibilities became almost endless (hopefully you’ll see more of it in the future… oh yes). I was thinking that if the French were struggling, they could take a huge payment (200+ gold, maybe some insane amount like 600+ lol) to “rent” or sell the Harbor to another faction in order to stay in the game. The French would have settled a home island somewhere and the Harbor would have multiple “owners” throughout the game. Of course, this was all made incredibly irrelevant when the French did well for themselves and never truly struggled at any point, going on to even win the game overall.
-Factions send big fleets through whirlpools (myths, rumors of gold/etc, helping out a faction in need, desire to explore/expand)
This actually did happen a bit between the Pirates, English, and Cursed. However, whirlpool squadrons were incredibly ineffective, which is one of the lessons and lasting legacies of this game. The Pirates lost big-time against the Americans twice at the same whirlpool, and the Cursed and English were dominated by the French and Pirates when they tried to invade. Even at the end of the game, the factions coming through the whirlpools lost the battle. The French won, and happened to be the faction doing the least whirlpool traveling other than the Jades (and Mercs).
-“Night” turns, Night video?
This is perhaps the biggest thing I should have done since it wouldn’t have taken all that long. I was going to put the Delusion up to the light and take a video of the battlefield with the shadows of the ships against the glow in the dark 10 master, with some close shots and zoomed out as well. As far as an actual turn, I thought about playing a full turn at nighttime without using the flash for any of the pictures. However, the Caribbean was the only ocean really optimized for playing at night (due to the lighting in the rooms), and I didn’t end up doing this, especially since the flash can make the pictures and colors look so good. Along with the Delusion glowing, I was going to put tiny flashlights in the lighthouses since they have little openings in them. However, I couldn’t fit what I had inside the little lighthouses, and didn’t prioritize buying something just for that. Of course, these concepts are all things that can be tried out in future games, campaign or otherwise. I’m thinking a tiny electric candle could work well depending on the size of the custom lighthouse, but a stronger light would be needed to get a good practical effect that shines on the ships sailing by. That’s one thing about these final notes – although I could have done more (sort of, since I was VERY pressed for time when playing and reporting, so extra stuff got pushed aside by necessity), these are things I can look back on and prioritize more for future games.
I was a little disappointed not to say “Mission Accomplished!” as a pun at the end. The Pirates were farther from winning than anyone could have envisioned, but that’s part of what makes CG’s great – the rich often get richer, but that doesn’t mean they always win.
I am glad that I had the resource system change, since the 1’s rolled really mixed things up and led to some fun megalaunches. That is one part of Economy Edition that could possibly use an edit, since the random changes can also simulate sudden and unexpected market crashes that the predictable changes don’t.
Turns/Resources:
5 roll for 8 turns
3 roll for 7 turns
5 roll for 9 turns
3 roll for 6 turns
4 roll for 8 turns
3 roll for 5 turns
3 roll for 5 turns
4 roll for 3 turns (+1 turn random change)
5 roll for 5 turns (+2 1 turn random changes)
2 roll for 5 turns (+2 1 turn random changes)
1 roll for 8 turns
5 roll for 10 turns (didn’t roll after this since launches were done)
Official new records:
BIGGEST GAME EVER
Total points: 9,078
Total ships: 509
Largest recorded single-fleet point total: Pirates at 2,347 points (since broken by the Americans of VASSAL Campaign Game 3)
Largest fleet of any faction: Pirates at 131 ships
Stats
3 oceans, 2 rooms, 42 square feet of ocean, 8 factions, 7+ major NEW custom pieces in play (Kingdom, Tunnel, Roost, Diamond Rock, Harbor, Sub Hideout, Castle, other cool new islands like The Flat)
Unique stuff:
Multiple oceans
Multiple rooms
Kingdom
Roost
Tunnel
Castle
Harbor
Diamond Rock
All custom islands – none regular (!)
Only real icebergs
Breaking icebergs
Ladders
Army units
EE resource rules
House rules
Videos (tours, etc)
Lighthouses
Some final questions you can answer if you want:
What did you think of the ending?
Favorite parts of this last report?
Was it a satisfying conclusion?
What did you think of the game overall?
Thank you for reading, and thank you to those who have commented their thoughts on the game (especially Xerecs). Thanks for having patience with these massive reports and with the game itself. As I said, this is the last physical campaign game of a large size that I will play for a long time. My attention now shifts to other “Piratical activities”. As far as campaign games go, you can find me on VASSAL.
With considerable interest from various players, the fourth grand adventure on VASSAL has been planned!!
VASSAL Campaign Game 4 features 3 players and a whopping 12 factions, with each player controlling 4 factions completely independently. (as if they were separate players)
Without further ado, here are the participants in the order of play:
Xerecs
1. Spanish
2. Jade Rebellion
3. The Conglomerate/The Alliance
4. English
PirateAJ14
9. Dutch
10. Americans
11. Mercenaries
12. French
A few notes on the factions:
-“The Conglomerate” is made up of ANY and ALL custom game pieces not part of the main 11 factions (Wizkids’ 10 + the Dutch). Any customs from Hyrule/Ionics/Sweden/Russia/Venice/Ottoman Empire/etc are automatically part of this permanent alliance that functions as a single faction. Any new factions that are made are automatically part of The Conglomerate. Crew within factions that comprise the Conglomerate can use their abilities on each other’s ships. (ex: Swedish crew can use their abilities on Ionic ships, and vice versa/etc.)
-The Mercenary keyword will be ignored in full for the Mercenary faction. (including as part of the Ex-Patriot keyword)
Duplicates Rule – There cannot be duplicate Wizkids ships in play until a faction has purchased every single standard ship (including flavor duplicates (such as all three versions of the 5 master HMS Apollo, for example, but not including customs)) available to them. Once a faction has every official Wizkids ship in its fleet in play, that faction can launch duplicates of those official Wizkids ships. Only one duplicate ship is allowed, but if a faction has two of every ship in play, they can begin a third set of duplicates. However, once a ship is sunk, it MUST be replaced before duplicates can be launched again. (This is also known as the “complete the fleet” rule) Unreleased game pieces designed by Wizkids are not included in the Duplicates Rule. Wizkids faction fleets cannot have duplicate custom ships. Since the Dutch and Conglomerate factions have no official Wizkids ships, their entire fleets of custom ships are subject to the Duplicates Rule. For example, if ALL custom Dutch ships are in play at once, they can begin a second set of each custom Dutch ship.
-Named crew that have multiple versions can be used as long as it’s not at the same time by the same fleet (one has to be eliminated or removed from the game before hiring a different version). Generic crew may be used as many times as you can afford.
-Unique Treasure may be used, but note that due to the nature of some rule changes, they may no longer function as intended. There may be gold replenishments at some point in the game.
-Resources are represented through tokens; players may choose whatever kind of tokens they wish as long as all players agree. Ships can carry any number of any resource types up to their cargo limit. After a ship rolls for the resource type and loads resources, the ship will load face-up gold coins that correspond to the numbered resource (for example, a ship with lumber on board would have 1’s). When the ship unloads the resources at the home island, the 1’s (in this case) may be unloaded just like treasure. At any point during a player’s turn (usually at the beginning of the launch phase, after the play phase ends), any resources on the home island can be swapped out for the value of the resource in gold. If the value of lumber was 4, the 1’s are swapped for face-down gold 4’s on the home island (HI), which can then be used to purchase ships and crew during the launch phase at the end of the turn. Players may use UT tokens to represent total gold or resource quantities on their home islands, but should keep in mind that a UT worth 400 gold could be stolen by a home island raider with a single open cargo space.
-Game time is measured in rounds. A round begins with the start of the first player’s turn and ends with at the finish of the last player’s turn.
Starting Conditions
-Players begin with 30 points to design a pure nationality fleet.
-There are 48 total islands, all of which will be wild at the start of play. All islands currently have unique treasures on them, but most will produce resources.
-Factions will be sailing in from the edges of the map. The first island a faction explores immediately becomes that faction’s home island.
-Round earth rules are in effect.
-Map details are below.
Players take turns and move their ships, using normal Pirates CSG rules.
Victory Conditions
-Last Fleet Afloat: the final fleet remaining in the game will be the winning faction.
-If we cannot play until only one fleet remains, the fleet with the most total points in play will be the winner.
Players may surrender if they feel that they no longer have a chance at fulfilling any of these victory conditions.
Action Modifications
Explore Actions: An explore action at a wild island takes a turn, as usual. When a wild island is explored for the first time, the player that performed the action rolls a d6—match the result to the number of the corresponding resource. That island now produces that resource for all players, and you may load tokens of that resource onto this ship up to its cargo limit; each token fills one cargo space. Abilities that remove exploration markers may reset the resource of an island.
Repair Actions: Repair actions occur normally, with the exception that a ship carrying both lumber and textiles may repair a mast at a wild island, per the shipwright rules; these resources are used in the process.
Combat Actions: Combat actions occur normally, although boarding actions have received updates and new actions, blockading and razing, have been created.
Resources
Resources are the main source of gold production in the game, but must first be converted for a variable price at the home island into treasure coins, which can then be used to purchase ships, crew, equipment, etc. Resources count as cargo, and abilities that affect treasure coins also affect resources (i.e. each of these coins is worth +1 gold…turns to each of these resources is worth +1 of whichever resource is in question).
The value of a resource is determined by a die roll. At the beginning of the first player’s turn, a d6 and a d20 are rolled. The d6 roll determines the values of all resources (refer to the quick reference for exact values) while the d20 roll determines the number of turns this value will hold.
Lumber: (1) Fundamental for ship and settlement building, lumber is the basic building block of any naval civilization.
Textiles: (2) Needed for sails and clothing, textiles are a key part of the trading industry.
Metals: (3) Stronger than wood, metals allow for the construction of sturdier ships and deadlier weapons—as well as providing the means for paying for them.
Food: (4) A food source from the sea, fish are bountiful and whales provide a large source of oil.
Spices: (5) Useful for preserving and improving the taste of foods, spices were highly sought after
Luxuries: (6) The rare items crews find on their journeys through the world’s seas—from the beautiful to the wild to the truly cryptic.
Die Roll……1……2…….3…….4…….5…….6
Lumber……1……6…….5…….4…….3…….2
Textiles……2……1…….6…….5…….4…….3
Metals……..3……2…….1…….6…….5…….4
Food………..4……3…….2…….1…….6…….5
Spices……..5……4…….3…….2…….1…….6
Luxuries…..6……5…….4…….3…….2…….1
cannonfury wrote:
So let’s say hypothetically that I dock at an island and I roll a 1. That means that island now produces lumber. There are the two main die, a d6 and a d20, that control that market in the game. If I roll a 3 on the d6 and a 14 on the d20, you go to the chart value of 3 for die roll and read down. For the next 14 turns, lumber is worth 5 gold, textiles 6, metals 1, and so on.
-If an island produces a resource, it has that resource face up on it. If other resources are present on the island, they are placed face up next to the island or on the shoreline.
-Players may agree to change the resource system. Instead of simply rolling a d6 for values and two d6 for duration, other options may be added for more randomness.
Example: A round of turns begins with the d6 roll. A 1 is rolled (on a 2-6 the resources stay the same, until a 1 is rolled). Since a 1 was rolled, roll again. If the second roll is a 2-6 (anything other than a 1), the resources only change value for that turn. On the next turn, they revert back to whatever they were on the previous round, or a different system is once again agreed upon by all players (such as starting over with regular EE rolls, or using the system described in this example). However, if the second roll is a 1, the current EE rolls are disregarded, and new rolls are made (both for values and duration).
Changing the rules for how resources change could really make things interesting, so we may also implement additional/different economy/resource rules as we see fit.
Island Upgrades
Islands: An island upgrade is bought at the home island; a token representing that upgrade can be loaded onto any ship, and fills one cargo space. That ship must return to the previously explored island and may unload the token as a free action. On the next turn, the island is upgraded. If a ship is sunk on transit, the token is lost and another must be purchased. Upgrades must happen sequentially – an island can be explored in one turn, upgraded to a town on the following turn, and upgraded to a colony on the third turn. This cannot be accomplished faster, as there is no skipping levels.
-Encampment: Automatically created after an explore action. Abilities that remove explored island markers eliminate encampments. Encampments simply mark that this island has been explored by the player; enemy encampments may exist on the same island.
-Fort: An encampment may be upgraded to a fort by bringing the fort’s gold cost to an island (no teleporting the gold and fort like in a regular game). A fort generates no resources OR gold. Crew may be hired at this island. Resources can be unloaded at a fort, but they cannot be converted. Forts may be upgraded by paying 40 gold for a fort upgrade; a Shipyard token (in the module) must be taken to the fort to upgrade it. Once upgraded, forts can be used to buy ships, crew, and equipment using gold stored in the fort or gold from your home island. No more than 2 of the same custom fort can be in play at once.
-Lighthouse: An island can have a lighthouse built on it by bringing 3 times the lighthouse’s regular cost to the wild island, similar to how forts are built. Other island upgrades can be built on the same island a lighthouse is on, as if the lighthouse wasn’t there – the lighthouse still functions as normal. The island a lighthouse is on still produces resources or gold normally unless another island upgrade supersedes it. No more than 2 of the same custom lighthouse can be in play at once. Lighthouses will be represented by the tavern structure within the module.
-Town: An encampment may be upgraded to a town by paying 10 gold. Abilities that remove explore actions do not eliminate towns. Having a town on an island gives control of that island to a player; other players may no longer take resources from that island. Towns can be razed by enemy ships, they have no natural defenses and after three hits are considered destroyed. A town may also be captured through a boarding action. Once destroyed, the island becomes unexplored in regards to all players, and its resource value may be reset. Towns are represented by the associated faction’s infantry unit in the module.
-Colony: A town may be upgraded to a colony. Players have a choice between either a trading or a military port; an island can only accommodate one.
1) Trading Port: 25 gold. Allows a player to trade any two resources for one other resource, of any type. An opposing player’s ship may also dock at your trading port to trade commodities, but they must pay one resource to the owner in addition to the two resources being traded. Ships with the parley keyword do not have to pay this fee. A trading port can be blockaded by any ship. Trading ports are represented by cavalry units.
2) Military Port: 50 gold. Allows a player to repair ships docked at this island as if it were a home island. Ships, crew, and equipment may be purchased at a military port using gold from your home island. A military port cannot hold gold like an ordinary fort. A military port cannot be blockaded, and acts as an 8 flag fort with 3S cannons. Military ports are represented by artillery units.
Crew
-Explorer: Explorer crew has been updated. If a ship performs an explore action with an explorer on board, that ship may reroll for the initial resource value. Hoists also benefit from this ability.
-No 0LR +5 crew
-0LR reroller crew will cost 3 points so they’re not free; they will function as basic reroll crew without the Limit and Ransom keywords (no links either)
Updated/New Mechanics
-Boarding: after a successful boarding action, the winning ship may, in addition to taking gold or killing crew, take any resources of any type up to their available cargo space. A town can be considered to have 2 masts in a boarding roll, and is captured by the winning ship. If a ship loses a boarding roll against a town, the attacking ship must remove a mast and move +S away.
-When a ship wins a boarding party, the winner decides whether they will take gold/resources or eliminate crew. The winner chooses which gold/resources to take, but the loser chooses which crew is eliminated.
-Blockading: A trading port can be blockaded by a ship. If a ship docks at a trading port and declares hostilities, that port is considered to be blockaded; all trading ceases and the player loses all bonuses, including the production of commodities. The blockading player gains the resource bonuses, and can choose to take resources up to their cargo limit or remove them from the game.
-Razing: A colony can be razed after a successful boarding action, it is considered to be a 4 mast ship. If the boarding ship wins, the colony is removed from the game, and the boarding ship receives all the resources available, up to that ship’s cargo limit. If the colony wins, the opposing player takes that ship, but all crew on board are removed from the game.
-Raiding: A ship with the home-island raiding ability can dock at an enemy home island and take as many resources as she can carry, in addition to any gold. If able, she must leave on her next turn.
-Storm terrain: Storms are a custom terrain piece. At the end of a round of turns, a d6 is rolled. Match the result to the number printed on any Storms in play. Roll the d6 again. Match the result to the number printed around the edge of the Storm and move the Storm L in a straight line in that direction. If two or more Storms collide or move into contact with one another, they merge and move as one Storm. If any part of a game piece touches a Storm, it is immediately placed inside of it. Roll a d6, the result is the number of masts, segments, flags or damage points removed from the game piece. If the result is more than the number of remaining masts, segments, flags or damage points, the game piece is eliminated from the game. If a storm spends more than three rounds over a body of land, it is removed from the game. Storms can move over other terrain types and affect ships that are in/on that terrain.
House Rules
-All game pieces require two hits to eliminate one mast or flag. These hits do not need to come from the same shoot action or player, and do not need to occur on the same turn. Partial hits that do not eliminate a mast can be repaired with a repair action, but a fully eliminated mast only requires one repair action as normal. Any damage done due to fire needs to be done on the second hit of a mast, meaning you cannot just use fire hits to ignore the 2 hits per mast rule. Stinkpots and Chainshots are exempt from the 2 hits per mast rule (each hit of their type takes effect since they don’t eliminate masts). Flotillas must be hit 4 times overall in order to eliminate their flag (none of the hits have to come from a specific shoot action).
-Game pieces being towed behind ships do not have to be docked automatically at every island the towing ship docks at.
-Ships cannot do damage by ramming, with the exception of submarines which can do ram damage both surfaced and submerged.
-Ships docked at their home islands can be shot at.
-Ships can load face-down treasure and resources from their home island with an explore action. Face-up Unique Treasure can be loaded and unloaded to and from islands as part of the free transfer rules.
-If both players agree to it, opposing ships can touch without ramming, boarding or pinning. While touching, they can be given an explore action to transfer cargo freely between them.
-Home island raiders can look at all treasure on an opponent’s home island and choose which treasure to take, rather than having it be random.
-Forts can be given repair actions if they have a shipwright in them. They cannot repair and shoot on the same turn unless they have an extra action available.
-Terrain can be placed anywhere on the play area, and each piece can touch any other piece of terrain or islands as long as they are not directly on top of each other.
-Whirlpools take effect on a roll of 1-3 instead of 4-6 (since you almost never want to roll low in this game).
-On negative whirlpool rolls, equipment is now one of the items that players can choose to eliminate. (instead of just mast/crew/treasure if desired)
-Return to Savage Shores and Wizkids Unreleased game pieces are available (found in the Master Spreadsheet)
-Custom game pieces are allowed, but they may be modified or banned in-game (through a vote) if they are overpowered (OP). [Modifications: Streamlined Hull costs 3 points.]
-Trade-In Rule: If a faction brings a captured ship back to their home island, military port, or upgraded fort, after repairing ALL masts on the ship, they can then remove the ship and all her cargo from the game and convert the total points she and her cargo was worth into gold that is then placed on that island.
-Relaunching Rule: Non Big-6 factions (Big 6 being England, France, Spain, Pirate, America, Cursed) can relaunch Wizkids AND custom game pieces without restrictions other than the No-Duplicates rule being applied to their own fleet. (this is to give the minor factions more of a chance if their best pieces are captured and not traded in)
-Changing Home Islands: A faction may choose to move or relocate their home island. To do this a faction must remove ALL items from their current home island location. The island of choice must not have any island upgrades already on it; the target island must not be producing a resource when explored as a new home island; the target island must be unexplored to all factions; none of the 5 Archipelago islands can ever be a home island. Once a faction declares their new home island location they must explore it to make it official, at which point the island will not produce resources or gold. Once that happens, their previous home island reverts to an unexplored wild island that can produce resources.
-Celestine’s Charts and the S-Exploring ability will reset the resource values of islands.
-Native Canoes cannot be given an explore action on their first turn in play.
-Only up to 3 copies of each unique set of native canoes can be in play at a time.
-Other house rules may be instituted during the game if players are in favor of them.
Ban List: All Events, Odin’s Revenge, Kharmic Idol, Pirata Codex, Flood UT, Missionaries UT
~~~~~~~~~~
The Ocean
This ocean is my best VASSAL ocean outside of the Caribbean and World game oceans. It is 6 ocean tiles wide by 4 high, twice the dimensions of the oceans of CG1 and CG3 (3×2). It also has double borders on the edges, so hopefully we’ll have enough room for deckplates.
Islands: 48
All of these are wild as of now, but eventually there should be 12 home islands and 36 wild islands.
We rolled to determine both player and faction turn order. I then figured out how to place the factions in their starting locations. From my email to all players: It is hard to explain exactly how I went about doing this in text form, so it might be pretty confusing. XD
Each of the 4 sides of the map has 3 factions assigned to it. Each player has a faction assigned to 3 of the 4 sides, starting in player and faction order. I decided to go in reverse turn order, since that’s how we would have picked HI’s if we had done it that way. For example, I started with pirateaj14’s last faction (the Mercenaries) in the east, then one of his in the north, then west. This is because I was doing things backwards so the first player (gingerninja) would end up with the “leftover” spots. My whole thought process was basically one of each player’s factions on one side of the map, going clockwise the whole time. However, since I reversed the order, it makes it more confusing to read about. This gives us a bit of a clockwise motion for the turn order (which I don’t really care about, but with 12 factions it should help a little XD). I didn’t mix up the factions more because there is already a bunch of randomness built in when we rolled for faction order and player order.
From there, I went in reverse faction turn order (with each player’s third faction going last of their three) and rolled to see which of the three locations a faction would end up in on their side of the map. I went clockwise with the numbers (but anticlockwise with the factions!) so (in the north) 1-2=western location, 3-4=center, 5-6=eastern, etc.
Each player has one faction on three consecutive sides of the map, going clockwise and starting in the north with the first player. So gingerninja’s factions go clockwise from North-East-South, xerecs: E-S-W, a7xfanben: S-W-N, pirateaj14: W-N-E. Almost like 3 half-circles per player rotating around the map. The die rolls were to determine which of the 3 spots on a side that a faction would start in.
Now for a “map tour”. 😀
The grand ocean:
I have put nearly ALL of the game’s unique treasures into the stack, shuffled it up, and distributed multiple UT’s to each island! O_O This means it could be very interesting and chaotic from the start, with tons of UT’s being found early on. There are approximately 150 coins in play to start the game. The regular wild islands have 3 UT’s apiece, while the Archipelago islands in the middle have 4-5 apiece. Between the UT’s and the sailing in format, it should provide a unique and exciting start to the game.
Around the map starting in the northwest. The Archipelago in the center of play will be used as a center point of reference for the pictures. The 5 islands of the Archipelago cannot be home islands.
In the northwest, we see the Cursed and Hyrule on the west side (French to represent the Hyrule Conglomerate for now). On the north side are the Americans and Vikings. As a result, you could argue that it’s a somewhat weak area as far as factions are concerned, especially compared to the powerhouse of the southeast. In the middle of this quadrant is a lagoon, inside which there is an island with gold rather than resources. Unlike my Economy Edition game, the lagoon is surrounded by reefs that function normally. The lagoon island cannot be chosen as a home island, and is a gold island.
Here is “The Vortex”, a whirlpool that mysteriously appeared in the middle of a coral reef formation and has changed the orientation of the reefs themselves to match the spin of the whirlpool.
In the northeast, we see the Vikings again as the middle northern starting faction. A fitting location for the Norse raiders! East of them are the Barbary Corsairs, meaning that two (very) minor factions are starting on the north side of the map. On the east side we can see the English, and south of them the Mercenaries. This area features a bit less terrain, but some interesting things as well. There is a large island, as well as an island in the north that is connected to another island piece (considered one island for play purposes) via round earth! (we’ll see the other half in the SE picture)
You may have seen this oddity near the large island – a “fogpool”! This whirlpool is shrouded in a fog bank. Any ships that come out of the whirlpool are immediately lost inside, and anything trying to enter the whirlpool has to be given a separate move action once inside the fog.
The northeast corner has a whirlpool surrounded by sargasso seas, while a shipwreck is present on some reefs that connect to another feature via round earth… a dangerous area indeed.
The southeast, with the Mercenaries and Spanish on the east side, and the Pirates and Jade Rebellion on the south side. This area has some distinct features, including an island surrounded by whirlpools and the other half of the island in the north.
The southeast corner is dominated by “the Turbulence”, an area of uncertainty, chaos, and danger. No less than 3 whirlpools are concentrated here, but all of them are surrounded by terrain. Walled off from the southeast, using round earth from the other corners may be the best way to access this area. However, both wild islands are hard to get to, and the one surrounded by fog cannot be chosen as a home island (it is another gold island).
Finally we come to the southwest, where the Jade Rebellion and French will sail in from the south, and the Dutch from the west (Hyrule just out of sight north of the Dutch marker). This area features a lot of terrain, but slightly higher island density than the other areas.
The sargasso sea formation in the northwest continues via round earth to this area, culminating in an island surrounded by sargassos except for a potential foggy entrance. Just northeast of that, a whirlpool surrounded by multiple fog banks is the alternate of the new fogpool.
In the center of the map is the Archipelago, a chain of 5 wild islands that is hard to access from any angle. The waters are treacherous but plentiful, and it represents the “tropical paradise” of this game. There are various “squeeze” spots where there is a break in the terrain – I purposely did that to increase the chances of it becoming a bottleneck that can be strategically controlled for limited access. Also, despite the two whirlpools in the area, both are blocked somewhat by the large amount of terrain. The center island of the Archipelago will be the most valuable in the game, and could eventually contain both gold and resources.
BATTLE REPORT WARNING: With postimages recently changing their url’s and other image hosting sites not satisfactory, it is very likely that this game will see a variety of reporting styles. Youtube videos may be more common than regular text-and-picture reports. At any moment all of the pictures in this thread may disappear.
With that, we are about ready to begin! Time to GET HYPED with my CG4 trailer video!!
Play has started! As I said in the first post, picture reports will be less of a priority since the image hosting sites are prone to disasters. I’ll try my best to make any recordings informative and good, and do some video reporting as well.
The Jade Rebellion is the first to a wild island! The Virtuous Wind explores and the Jades have the first home island of the game! They also got the Forged Papers and Sword UT’s.
The Barbary Corsairs got hit with some “instant karma” when they found two negative UT’s (Missionary and Gauntlet of Pestilence) after not starting the game with the full 30 points (only 13 in fact). Here the Tiger’s Eye is in a fog bank created by the Gauntlet, which is a custom UT from Rizz the Bloody. This island will be the Corsairs’ home island, which will be interesting with that nasty fog bank right next to it.
The Vikings have fittingly settled on a home island in the far north near where they entered the ocean, with the Grendel finding Protection from Davy Jones.
The Dutch are off and running! With a hot start similar to their effort in the Caribbean game, they have already explored two islands. Led by Abel Tasman, they have a home island near the fog at the bottom of the picture, and some UT’s on the Prins Willem to the northeast.
Various factions are still without a home island, but it was a solid start to this epic adventure!
The game has continued, with the Virtuous Wind being the first ship (and the Jade Rebellion the first faction) to explore the Archipelago! The VW is now really loaded, with various UT’s along with newly found textiles aboard. The Vikings explored their first wild island, finding lumber in the far north.
Two of the greatest admirals in history, A7XfanBen and Xerecs, have begun planning the grandest adventure of all-time! After playing many campaign games over the years, including four together on the VASSAL module (CG1-4), we have decided to embark on something completely unprecedented, something no one has ever done. Something that is truly on a global scale. A “game to end all games”, if you will. Ironically enough, this game may actually never end!
I couldn’t find the post, but for a few years now I’ve had vague thoughts of creating a complex, all-encompassing “Game of Life” based around Pirates CSG that would be my masterpiece. A game not just about naval warfare, but land warfare, politics, governments, trade, economies, revolutions, civilizations, home fronts, and more. This first, initial post is the beginning of that idea. I mentioned it to Xerecs in one of our MANY emails about CG1, and the idea took off. For a few days in April, planning this “World” game even took our attention away from CG1! I originally thought this “Game of Life” idea would come to fruition in many, many years from now (many decades actually). However, the VASSAL module (thanks again B.J. Olejnik!) has dramatically sped things up, and now my “masterpiece” of a game can see the light of day as soon as this year! Xerecs and I have spent parts of April and especially May developing the ruleset; what you see here represents hundreds of emails and only a chunk of the google doc we are using to collaborate. Ironing out the details has been a very fun and exciting process.
Before I go any further, I’d like to point out two very important things:
-This game was originally scheduled to begin either August or September 2016, but due to our computers being unable to handle the game file, the game has been delayed and put on “permanent hiatus” until further notice.
-There will be opportunities for you to play in this game as well. These will be known as “cameo” (or guest) appearances, and more information is at the bottom of this post.
In terms of the start date, we’ve made a checklist based on all of the things we need to do before starting the game. Without going into too much detail, our schedule is as follows: Establish the base rules that form the World game (post thread by end of May), Flesh out all house rules (June), Edit the module (July), Create the map (August). We are currently on schedule!
The World game is just that, a game based on a map of the world. This is mostly possible through the VASSAL module, since creating an ocean large enough for such a map would require immense amounts of space and time (obviously not to scale, but even so it would have to be a HUGE ocean). With so many real life elements involved, the game is very loosely based on historical concepts, but NOT historical events (there will be no reenactments or reconstructions of history). These concepts form the backbone of many of the rules, and they also explain the need for a ban list for the game. However, it is still a game, so plenty of concepts will be cut out or underrepresented – to save time and effort, and also to focus on Pirates CSG, which is still the game’s core.
With the game file being saved at the end of every play session, this game has no timetable. Xerecs and I are both in our early 20’s, and you can see from our previous campaign game experience that we LOVE Pirates. As a result, this could sort of be “that game” – a game that goes on and on with no end in sight. A “forever-long game”, it could turn into just that. As of now we’re hoping to play for many years, though that could turn into multiple decades. Many things will get in our way, and we may have to put the game aside for months or even years at a time. However, we’ll always be able to return to it and resume playing once more. This also furthers the historical aspects of the game, since playing the game for many decades could represent decades or centuries of history, with the Age of Sail occurring in the general time period of 1500-1850. To put it simply, this thing has a chance to be BIG. Not just in terms of points in play, but in terms of impact and popularity as well. With enough complexity in the ruleset and enough time to play, it could turn into one of the most epic games in the history of gaming (tabletop/boardgaming/videogames/etc).
Without further ado, here is the first draft of our ruleset. It is not a finished product and we will likely have to edit it once the game begins. Feel free to peruse at your leisure!
A HUGE thanks to cannonfury, Sariouriel, captain_vendari, and woelf for creating those! Many parts of this ruleset directly borrows from the others.
Errata
Duplicates rule – There cannot be duplicate ships in play until a faction has purchased every single standard ship (including flavor duplicates (such as all three versions of the 5 master HMS Apollo, for example, but not including customs)) available to them. Once a faction has every ship in its fleet in play, that faction can launch duplicates. Only one duplicate ship is allowed; if a faction has two of every ship in play, they can begin a third set of duplicates. However, once a ship is sunk, it MUST be replaced before duplicates can be launched again. (This is also known as the “complete the fleet” rule)
-Named crew must be unique, but once a named crew is eliminated or removed from the game, a DIFFERENT version of that crew can then be purchased as long as they aren’t in play at the same time. This can be done ad infinitum; crew may be called “Thomas Gunn III”, for example.
-After a ship rolls for the resource type and loads resources, the ship will load face-up gold coins that correspond to the numbered resource (for example, a ship with lumber on board would have 1’s). When the ship unloads the resources at the home island, the 1’s (in this case) are swapped out for the value of the resource (IF they are being converted to gold). If the value of lumber was 4, when the ship docks at her HT (home territory), the 1’s come off the ship and face-down gold 4’s appear on the HT, which can then be used to purchase ships and crew.
-Players will NOT be required to pay one gold each turn for every ship not docked at their HI. Why? We want this game to be huge, so anything that slows the game down is getting cut out. I like this concept, since you have to pay the crew and supply them with food and rations, but for this game we can’t afford to be paying gold every turn when there are already going to be a ton of ships being launched all the time. Also, when this game reaches astronomical point totals, it would be extremely annoying to count how many ships each fleet had on their turns.
-Game time is measured in rounds. A round begins with the start of the first player’s turn and ends with the finish of the last player’s turn.
-Unique treasures may be used, but note that due to the nature of some rule changes, they may no longer function as intended.
-No duplicate 10 masters will be allowed at any point during the game. In order to build a 10 master, you must capture a 10 master from another faction in order to get the hull and ship plans (the Jade Rebellion will be the only faction capable of launching a 10 master from the start).
-The Jade Rebellion is the only faction that can have duplicate 10 masters (still following the duplicates rule, and only the Baochuan) (Zheng He first version is linked, then have other crew for future linked admirals)
-Return to Savage Shores game pieces may be used.
-Custom game pieces may be used, as long as they aren’t too overpowered.
-Non-historical factions (Hylia/Gallia/etc) are not available
Ban list:
-All Events
-Navigators/trade currents
-Cargo masters
-Sea creatures
-Abilities that move enemy ships
-Strange/unfair UT’s (Bad Maps, Blood Money, Cursed Natives, Elizabeth’s Piece of Eight, Eye of Insanity, Gem of Hades/Red Skull, Homing Beacon/Jack’s Compass, Lost, Kharmic Idol/Pirata Codex, Maps of Alexandria/Pirate Globe, Maps of Hades, Necklace of the Sky, Neptune’s Figurehead/Resurrection Codex, Neptune’s Trident, Odin’s Revenge, Poseidon’s Breath, Runes of Destruction/Magic/Odin/Serpent, The Cursed, Voodoo Doll, Jailhouse Dog)
-Certain named crew (Calypso, Captain Davy Jones/Wraith (SS version), Cursed Captain Jack)
-Other completely impossible abilities (fog hoppers, Captain Jack Sparrow (UPS), Davy Jones (DJC), “Spyer” abilities (look at face down stuff on an enemy ship), Eternal, trading treasure, “other ships do not block this ship’s line of fire”, Black Mark, Scorpion/Switchblade/Bombardier/Turbine
Modified abilities:
-Pandora’s Box: Cannot be used to pull in any of the banned UT’s
-Periscope: Perhaps allow from within S/L, but not anywhere
-Ransom: In addition to the stated rules for Ransom, factions may now bring the Ransom crew back to a territory, port, or fort controlled by the crew’s faction. If the faction can pay, they must pay 100 gold (with gold from that area!); the gold is transferred via a “UT” worth 100 gold to the ship, and the Ransom crew can now be used again by the original faction.
-Ghost Ship: Cannot move through solid obstacles (islands, ships, and icebergs), but can move through fog, sargassos, and reefs
-“Ramming cannot eliminate this ship’s masts”: Changed to “This ship gets +1 to her boarding rolls” (both abilities should cost 2 points, and both refer to the ramming/boarding aspect of the game)
-“You own any derelict this ship explores; both ships become docked at your home island.”: Changed to “This ship gets +1 to her cannon rolls against any ship.”
-”Give this ship a move action but do not move her. Instead, roll a d6. On a result of 5 or 6, move an enemy ship L in any direction.”: Changed to “Captain. Reroll.”
-“Whenever any crew is eliminated, roll a d6; on a result of 6, assign the crew to this ship. Its nationality changes to match the nationality of this ship and it becomes linked to this crew.”: Changed to regular “Possession” ability (“If an enemy ship is within S of this ship, you can use this ship’s action for the turn to try to possess a target crew on that ship. Roll a d6; on a result of 6, the target is immediately assigned to this ship. Its nationality changes to match the nationality of this ship.”)
-“If this ship (sea monster) ends her turn in a fog bank, on her next turn she may use her move action to move out of any other fog bank in play.”: Changed to “This ship ignores terrain, except icebergs, when she is given a move action (islands are not terrain).”
-”Once per turn, this ship may look at any one face-down treasure on any ship or island.” (and variations of): Changed to “Once per turn- if this ship is touching another ship- reveal all treasure aboard the other ship. This ship can take as much unique treasure from the other ship as she can carry- even those that otherwise can’t be removed.”
-Eternal: Changed to “This ship cannot sink, but she can be scuttled.”
-”After looking at treasure on a wild island, you may trade any one treasure from that island for a random treasure on any other wild island. This ship must load the traded treasure.”: Changed to “Once per turn, if this ship carries treasure and is within S of an enemy ship, you may randomly trade one treasure with that ship.”
-“Other ships do not block this ship’s line of fire”: Changed to “You may double the range of this ship’s cannons each turn, but you must roll a 6 to hit.”
-“If a sea monster begins its move within L of this ship, it gets +L to its base move.”: Changed to “This ships gets +L to its base move. This ship cannot be assigned a helmsman.”
-Calypso: Once per turn, give any ship in your fleet +L to it’s base move that action.
-Cursed Captain Jack: Parley. Canceller.
-Captain Jack Sparrow: Captain. Parley.
-Davy Jones (DJC): Changed to OE Davy Jones (All-Powerful)
-All-Powerful: A roll of 6 is effectively a 5 – you may give any ship in your fleet an extra action.
-Any abilities that refer to boarding bonuses against sea monsters are applied to ships instead.
“This ship may dock at an enemy home island and load one treasure. If able, she must leave on your next turn.”
-Ships with this ability (and variations of it that let ships raid home islands) now have an additional ability: “This ship may shoot at ships docked at their home territories.” The ship with the ability does not have to be docked at an opposing HT to use the ability, and HI raiding crew also gain the new ability.
-The Longship keyword no longer gives two shots per mast. To compensate, all longships will cost half of their regular point cost (rounded up), with the following exceptions (point costs subject to change):
Hrunting: 12 points
Naegling: 12 points
Huginn: 11 points
Muninn: 11 points
Asgard: 10 points
Hrothgar: 11 points
Donar: 9 points
Freya: 8 points
Hlidskjalf: 10 points
Elsinore: 10 points
Kalmar: 12 points
Sautez le Requin: 11 points
Baba Yaga: 10 points
Loki’s Revenge: 13 points
Verdani: 11 points
Kettering: 15 points
Icicle: 8 points
Dharma: 8 points
HMS Regent: 10 points
Serpent’s Fang: 10 points
Any potential custom longships will be dealt with on a ship-by-ship basis.
Temporary ban list:
These items will only be allowed after a certain amount of time has passed or a specific milestone is reached.
-”Instead of giving this ship an action this turn, you can give another ship in your fleet two actions.” (Available after the first 100 rounds have passed)
-Native canoes/chieftains (Available after a faction has discovered the New World)
-A faction cannot have more than 4 sets of native canoes (20 total) in play at the same time
-Native canoes may only be launched at military ports. The first set of native canoes that a faction “receives” will be a custom ruling, likely involving bribing the local natives and/or impressing them with a display or riches or firepower.
-Flotillas (TBD; likely not available for multiple years)
-Hoists (TBD; likely not available for multiple years)
-Submarines (TBD; likely not available for MANY years)
Starting conditions
-There will be 8 factions starting the game. The order of play will go as follows, but will change occasionally throughout the game:
-Fleets start out at 20 points. Each faction also gets one infantry unit to start the game. Factions must keep at least one infantry unit in their home territory at all times. All of the other territories will be “empty” (they will contain unknown resources and gold) at the start of the game. Despite the rules for shipyards, any ship type is allowed for the first starting fleet.
-A custom VASSAL ocean called the “World Map” will be the setting. This ocean will be the largest ocean ever used for a game of Pirates CSG, and will feature a ton of real-world locations, with many of them based on history (especially 1500-1850).
Starting Locations:
England: Great Britain
France: France
Spain: Spain
Pirates: Singapore
Barbary Corsairs: Tripoli (Libya)
Jade Rebellion: Hong Kong (China)
Vikings: Norway
Dutch: Netherlands
-The Americans and Cursed will not be present at the start of the game. The Mercenaries will be available for hire as privateers, as detailed below.
Resources
Resources are the main source of gold production in the game, but must first be converted for a variable price at the home island into treasure coins, which can then be used to purchase ships, crew, equipment, etc.
Resources count as cargo, and abilities that affect treasure coins also affect resources (i.e. each of these coins is worth +1 gold… turns to each of these resources is worth +1 of whichever resource is in question).
The value of a resource is determined by a die roll. At the beginning of the first player’s turn, a d6 and two d6 are rolled. The d6 roll determines the values of all resources (refer to the quick reference for exact values) while the pair of d6 rolls determines the number of turns this value will hold.
Lumber: (1) Fundamental for ship and settlement building, lumber is the basic building block of any naval civilization.
Textiles: (2) Needed for sails and clothing, textiles are a key part of the trading industry.
Metals: (3) Stronger than wood, metals allow for the construction of sturdier ships and deadlier weapons—as well as providing the means for paying for them.
Food: (4) From fish to spices, food is an essential part of every nation’s economy.
Medicine: (5) Derived from various sources, medicines are essential for having a healthy military.
Luxuries: (6) The rare items crews find on their journeys through the world’s seas—from the beautiful to the wild to the truly cryptic.
Die Roll…….1……2…….3…….4…….5…….6
Lumber…….1……6…….5…….4…….3…….2
Textiles…….2……1…….6…….5…….4…….3
Metals………3……2…….1…….6…….5…….4
Food………..4……3…….2…….1…….6…….5
Medicine…..5……4…….3…….2…….1…….6
Luxuries……6……5…….4…….3…….2…….1
Specific resource abilities
When 20 or more of these resources are at your home territory OR port, they give you special bonuses. Resource bonuses do not stack. Only one of these abilities can be used at a time. In order to change abilities, the resource in question must be decreased below 20 to select a new one. If these abilities combine with other abilities (such as those from political parties), nothing can ever cost 0 gold. 1 gold is the minimum cost for any purchase.
Lumber: (1) Ships cost 1 less gold than their point cost (point costs don’t change for all other purposes). Shipyard upgrades cost 5 less gold.
(Ships and shipyards both require vast amounts of lumber)
Textiles: (2) Ships cost 1 less gold than their point cost. Gain 1 loyalty per turn.
(Sails are used for the ships, and a great clothing industry keeps the populace happy, especially during winter time)
Metals: (3) Fortress upgrades cost 5 less gold. Army units cost 1 less gold.
(The fortress houses many guns and an armory, and that armory produces guns and swords for the soldiers, hence the lower cost of army units)
Food: (4) Army units cost 1 less gold. Gain 1 loyalty per turn.
(The faction does not have to supply the army with as much rations, and a healthy food market keeps the populace happy)
Medicine: (5) Gain 1 loyalty per turn. If a civil war occurs, the populace is decreased by 25%, rather than 50%.
(A healthy populace, and one that can bear disasters better than the average populace)
Luxuries: (6) Ransom payments can be for 50 gold instead of 100. Named crew cost 1 less gold.
(Thematically luxuries could be swapped for gold (you don’t have to fork over the luxuries during the ransom exchange), and giving named crew different jewelry and valuables could entice them to join your cause)
In regards to that “OR port”, it basically means that if you stockpile 20 or more of a specific resource at a military port, the bonus kicks in IF POSSIBLE. If a military port resource bonus ability says “gain loyalty”, nothing happens because the populace is way back in the HT. However, a military port could benefit greatly from the lumber resource bonus, since ships can be launched at MP’s and each MP will have its own shipyard, upgraded just like the shipyard(s) at a HT.
Theoretically each resource type should account for 16.67% of the territories and islands in the game.
These resource bonuses will not be applied until we are 20 turns into the game:
-If 10% or less of the islands produce the same resource, that resource is worth 1 more gold than usual.
-If 5% or less of the islands produce the same resource, that resource is worth 2 more gold than usual.
-If 50% or more of the islands produce the same resource, that resource is worth 3 less gold than usual (to a minimum of 1).
-If 33% or more of the islands produce the same resource, that resource is worth 2 less gold than usual (to a minimum of 1).
-If 25% or more of the islands produce the same resource, that resource is worth 1 less gold than usual (to a minimum of 1).
-An island’s resource will be represented by one of the tiny dice, which will be turned upright to the corresponding number. (In the VASSAL module, we will use face-up coins.)
-Nations cannot “make change” with their gold or resources.
-Factions are allowed to purchase resources from other factions.
-Certain islands or territories (such as the Moluccas, the famed spice islands) will have predetermined resource types on them.
-Some locations will also contain regular gold, especially locations that were/are historically rich with gold. To minimize potential lag within the module, most of the gold will not be present at the start of the game, but added when ships or troops discover it.
-Random timer idea (for resources changing, weather, etc.): At various points throughout the game, all players may agree to use a random timer for that session. When the timer goes off, roll for resource values as normal. Those values hold until the end of the session, or until the timer goes off again.
-Players may agree to change the resource system. Instead of simply rolling a d6 for values and two d6 for duration, other options may be added for more randomness.
Example: A round of turns begins with the d6 roll. A 1 is rolled (on a 2-6 the resources stay the same, until a 1 is rolled). Since a 1 was rolled, roll again. If the second roll is a 2-6 (anything other than a 1), the resources only change value for that turn. On the next turn, they revert back to whatever they were on the previous round, or a different system is once again agreed upon by all players (such as starting over with regular EE rolls, or using the system described in this example). However, if the second roll is a 1, the current EE rolls are disregarded, and new rolls are made (both for values and duration).
Changing the rules for how resources change could really make things interesting.
Upgrades
Home Territories
Each home territory starts with a level 1 shipyard, tavern, fortress, city, and city hall. These structures may be upgraded, and factions can construct up to 8 shipyards and 4 fortresses on their home territory. Fortresses, taverns, and shipyards must be within L of the coast.
The price of a ship is its point cost. When you purchase a ship, place only its hull at the shipyard. During each of your turns, that ship may be given build actions (only) to place masts until it’s been fully constructed. Shipyards can only build one ship at a time. Ships under construction can be shot at, but not rammed or boarded. If the port or shipyard where a ship is being constructed is destroyed, construction immediately halts and the ship may be given actions as though construction were complete.
-Each additional HT shipyard costs 50 gold
-Factions can have more than 4 HT shipyards (max of 8?)
-Crew cannot board a ship until it has been fully launched.
Tavern:
Level 1: Generic crew and equipment, 2 durability points, 20 gold to upgrade
Level 2: All crew (named crew, generic crew, and equipment), 6 durability points
City:
-Each faction has a “city” similar to their other structures. The faction’s city represents its populace. Factions start at level 0, and each upgrade costs 50 gold.
Level 1: Add 3 to populace at the beginning of each turn.
Level 2: Add 5 to populace at the beginning of each turn.
Level 3: Add 10 to populace at the beginning of each turn.
Level 4: Add 15 to populace at the beginning of each turn.
Level 5: Add 20 to populace at the beginning of each turn.
City Hall:
See rules for “Government” underneath Updated/New Mechanics; City Halls cannot be upgraded.
Islands
An island upgrade is bought at the home island; a token representing that upgrade and 10 gold used to pay for it can be loaded onto any ship(s); the token fills one cargo space. That ship must return to the previously explored island and may unload the token and 10 gold as a free action. The island is immediately upgraded, but it cannot function normally until the following turn (similar to forts). If a ship is sunk on transit, the token is lost and another must be purchased.
-Settlement: Automatically created after an explore action. Abilities that remove explore actions can eliminate settlements. Settlements simply mark that this island has been explored by the player; enemy settlements may exist on the same island.
-Fort: A settlement may be upgraded to a fort per the normal fort rules. A fort generates no resources. Generic crew may be hired at this island. Resources can be unloaded at a fort, but they cannot be converted. Forts must be hit twice in the same turn to eliminate one of their flags.
-Colony: A settlement may be upgraded to a colony by paying 10 gold. Abilities that remove explore actions do not eliminate colonies. Having a colony on an island gives control of that island to a player; other players may no longer take resources from that island. Colonies can be razed by enemy ships, they have no natural defenses and after three hits are considered destroyed. A colony may also be captured through a boarding action. Once destroyed, the island becomes unexplored in regards to all players, and its resource value may be reset.
-Port: A colony may be upgraded to a port. Players have a choice between either a trading or a military port; an island can only accommodate one. When upgrading to a port, that faction must bring the upgrade token to the colony in addition to 10 of the gold they used to purchase the upgrade. The 10 gold is removed from play when the token is unloaded at the island as a free action.
1) Trading Port (30 gold): Allows a player to trade any one resource for one other resource, of any type. An opposing player’s ship may also dock at your trading port to trade commodities, but they must pay one resource to the owner in addition to the resource(s) being traded. Ships with the Parley keyword do not have to pay this fee. A trading port can be blockaded by any ship. A trading port has 10 durability points; the 10th hit will eliminate it. Trading ports may be given repair actions – if so, no resources can be exchanged that turn. A trading port may use one lumber to repair itself, in which case resources can be exchanged that turn.
2) Military Port (100 gold): Allows a player to repair ships docked at this island as if it were a home island. Crew and ships may be purchased at a military port using gold from the port. A military port can hold resources and gold. A military port generates no resources. A military port cannot be blockaded, and acts as an eight flag fort with 3L cannons. These cannons must be hit twice in the same turn to be eliminated. In terms of purchasing ships and crew, a military port starts with a level 1 shipyard and tavern. The shipyard can be upgraded the same as home territory shipyards, but the tavern cannot (no named crew hired at military ports).
-In addition to the gold cost of island upgrades, when a colony upgrade is purchased, the populace decreases by 2 (to represent people leaving the HT). When a port upgrade is purchased, the populace decreases by 5.
-An island can only have one upgrade on it at a time.
-Upgrades must happen sequentially – factions cannot upgrade from a settlement to a port in one turn. This applies to HT upgrades as well – factions must upgrade their structures one level at a time.
RISK
1. In the map of the world, territories will be placed based on the Risk game board. When the map is finalized, some territories will be replaced by others and some will be split into multiple territories (it will be a custom Risk map). In addition to the main group of territories, there will also be MANY islands. These islands (not territories, so therefore essentially irrelevant to the Risk part of the game) function as wild islands, but they can have units from Risk placed on them. Due to space constraints, some locations will be absent or underrepresented.
2. All of the non-HT territories that are bordered by only water will start the game as wild islands, unless chosen as a home territory by a faction. These territories follow the normal rules for wild islands. All of the territories except for the home territories in the game will start as “wild”. This means that resources and gold can be acquired over land by armies.
3. Each faction has a home territory. The territory chosen as a home territory must be bordered by a body of water, and the territory chosen can be bordered by water on all sides (obviously that particular territory would not start the game as a wild island). Home territories can be conquered, but a faction is not automatically eliminated if their home territory is taken over by an opponent.
4. When invading an enemy territory across water or reinforcing a friendly territory across water, the army units must be transported by ships. The lines that connect territories on the Risk game board are totally irrelevant – armies cannot invade across water unless they are transported in ships. That being said, ships have no limits on where they can transport army units. Ex: Normally you can invade Iceland from Great Britain via the line connecting the territories, and you can still do that (as long as the units are transported in ships). However, movement across the seas is not limited to the lines: a fleet can transport an army going from Great Britain directly across the Atlantic to the Eastern United States, or from Madagascar all the way up to Alaska.
5. Invasions follow the standard rules for Risk, and combat due to an invasion happens as soon as the units disembark from the ships. In order to land the troops on the territory, an explore action is needed, unless the territory is friendly and/or has been invaded before (home territories do not require an explore action to land troops there if it is the landing player’s home territory).
6. Risk units cost 3 gold each (or 3 points). This may be adjusted during the game if needed. For the purposes of abilities and effects, army units are considered ‘crew’ when on board a ship, even though they have no abilities. However, they do not count against the ship’s point cost. When a ship loads army units, they take up one cargo space per unit. They can be loaded and unloaded like normal crew with the following exception: An explore action is required in order to load or unload army units. For flavor purposes, one unit represents 1,000 troops.
7. Ships can fire on army units on land (following the regular procedure for a shoot action) if the units are within S of the ocean. The number of hits needed on the same turn to eliminate a unit is the same as the number of units the piece represents (infantry=1 unit, 1 hit needed to eliminate, cavalry=5 units, 5 hits to eliminate, artillery=10 units, 10 hits in one turn to eliminate). This is a way to incentivize saving up for artillery, which became more important in land warfare as the years went on. Infantry and cavalry units cannot fire back; however, if a ship misses an individual unit three times in a row in a particular shoot action, she loses a mast. Artillery units (representing 10 army units) can function as a 2L cannon for coastal defence. If an artillery unit is given a shoot action to shoot at a ship, it cannot be given a move action that turn. Ships cannot shoot over an island representing a territory to hit a territory beyond, no matter what range her guns are.
8. In addition to the regular rules for forts, the rules for forts regarding land attacks are as follows: Army units can attack forts from land, in this way they must have already invaded the territory. A fort’s flags represent its defenses (a four flag fort functions as four army units). The rules for combat work the same, with the exception that due to the fortifications, the defender can roll up to three dice. The fort can contain army units of that particular faction, as a means of protecting them. The fort serves as the last line of defence if placed on a territory bordered by land. If a fort is to be built on a territory that is bordered by land, the territory must also be bordered by water. (These rules also apply to trading ports and military ports.)
9. There are three custom forts that I have designed for the game – forts that were key strategic points in real-life campaigns. These forts are stationary. They cannot be placed on any territory/island and rebuilt on other territories/islands later in the game. Other than that, they function as regular forts. Once the ocean is created, their stats and abilities may need adjusting. In addition, more stationary historical forts may be created.
Gibraltar (Gibraltar, located on the southern tip of Spain)
72 gold (6 times the original cost of 12 gold)
10 guns: 3S, 2L, 2L, 2L, 2L, 2L, 2L, 2L, 2L, 3S
When this fort hits an enemy ship, you choose which mast is eliminated. Once per turn you may double the range of ONE of this fort’s cannons.
Diamond Rock (off the southern coast of Martinique)
24 gold
2 guns: 2L, 2L
Extended Range.
El Morro (Havana, Cuba)
48 gold
8 guns: 3S, 2S, 2L, 3L, 3L, 2L, 2S, 3S
This fort’s L-range guns cannot be eliminated.
10. Unlike the regular rules for Risk, territories can be abandoned. However, a faction cannot abandon their home territory under any circumstances. They can move most of their units and/or ships and gold to another territory to avoid being annihilated, but they cannot abandon their home territory.
11. When moving army units, each individual unit can only move from one territory to another once per turn. If units are part of a successful invasion, they cannot immediately move onto the next territory and invade it as well. Units can only move into one territory at a time (once per turn) even if the territories they are moving through are abandoned. When fortifying their position, a player can only move from one territory to an adjacent territory.
When army units move to acquire gold or resources, each unit has one cargo space (ex: three army units moving together can carry up to three lumber). When carrying resources/gold, army units cannot attack, but they can defend as normal.
12. There are no reinforcements from the number of territories or continents a player controls. Since players are supposed to pay for their armies, there will be no free reinforcements – players cannot bypass the cost of army units.
13. No cards from Risk are being used. There will be no reinforcements.
14. Each faction gets 10 free army units for home territory defense ONLY. These units cannot be removed from the HT, and are not represented on the map because they are part of the populace. They can only be used if another faction invades their HT.
-Army units cannot move into a territory and explore it in the same turn. They must be given an explore action.
-For each faction’s army units, only every other territory can produce resources. (this may change)
-Similar to the RISK rules for army unit movement, crew and politicians can move across land. A move action can be used to move through one adjacent territory at a time. Equipment can be carried by army units; one piece of equipment takes up one cargo space.
-Mercenary army units can be hired at military ports for twice the usual cost of army units. (faction bonuses/minuses at the HT do not apply – Mercenary army units always cost 6 gold per unit)
-Factions can hire Mercenary army units at enemy HT’s. The gold used to pay for the units is removed from the game, not paid to the faction whose HT is in question.
Action modifications
-Explore Actions: An explore action at a wild island takes an action, as usual. When a wild island is explored for the first time, the player that performed the action rolls a d6—match the result to the number of the corresponding resource. That island now produces that resource for all players, and you may load tokens of that resource onto the ship up to its cargo limit; each token fills one cargo space. Abilities that remove exploration markers may reset the resource of an island.
-Repair Actions: Repair actions occur normally, with the exception that a ship carrying both lumber and textiles may repair a mast at a wild island, per the shipwright rules; these resources are used in the process. Also, a shipwright stationed at a fort or military port may use the fort’s action for the turn to repair one cannon per turn.
-Combat Actions: Combat actions occur normally, although boarding actions have received updates and new actions, blockading and razing, have been created.
Updated/New Mechanics
-Boarding: after a successful boarding action, the winning ship may, in addition to taking gold or killing crew, take up to three resources, of any type, up to their maximum cargo space. A colony is considered to have 2 masts in a boarding roll, and is captured by the winning ship. If a ship loses a boarding roll against a colony, the attacking ship must remove a mast and move S away.
-Blockading: A trading port can be blockaded by a ship. If a ship docks at a trading port and declares hostilities, that port is considered to be blockaded; all trading ceases and the player loses all bonuses, including the production of commodities. The blockading player gains the resource bonuses, and can choose to take resources up to their cargo limit or remove them from the game.
-Military ports and HT’s can be blockaded, which results in the blockaded faction losing any resource bonus abilities they had until the blockade ends.
-Razing: A trading port can be razed with a boarding action; it is considered to be a 5 mast ship. If the boarding ship wins, the trading port is removed from the game, and the boarding ship receives all the resources available, up to that ship’s cargo limit. If the trading port wins, the opposing player takes that ship, but all crew on board are removed from the game. (Military ports cannot be razed)
-Raiding: A ship with the home-island raiding ability can dock at an enemy home island and take as many resources as she can carry, in addition to any gold. If able, she must leave on her next turn.
-Privateering: Once a trading port has been established, Mercenaries may be hired by the major nations as privateers. The ship or crew is bought for gold worth its build cost at the trading port, with gold in the trading port paying for the cost. The ship comes into play immediately at that island; it is considered a member of your nation for all purposes except that once it docks at the home territory, a military port, or a trading port, it is removed from play, along with any crew of the same nationality aboard. It may be hired again once it has been removed from play for the same cost. If a Mercenary ship sinks, that player cannot rehire that ship until a different player has hired the ship and it sinks as well.
Taxes and Loyalty
-Factions can levy a tax on their populace. Each faction’s populace is based on their city and how many political parties exist in their city hall. For flavor purposes, each number or “unit” of the populace represents 10,000 civilians (ie. a faction with a populace of 1,000 represents a country of 10 million people).
-The number of the tax rate is the amount of gold (up to 6) that faction receives at its home territory at the beginning of each turn.
-The tax rate can only move up or down by 1 gold at a time.
-When a faction declares a new tax rate, that tax rate must remain constant for 5 turns.
-A faction’s loyalty (of their armed forces and populace) can rise and drop. This is based on the tax rate and other factors. When taxes are raised or lowered, the corresponding drop or increase in loyalty occurs over the course of 5 turns. Loyalty cannot drop below 0 or rise above 100.
-Factions can only tax their populace if it is greater than 200.
-Once all factions have a populace of at least 200, each faction must have a populace of at least 500 to levy a tax.
-If the populace falls to 0, there cannot be taxes, and army units and crew cannot be hired.
-If a faction’s loyalty is between 60-79, that faction can add 1 to their populace per turn.
-If a faction’s loyalty is 80-99, that faction can hire crew for 1 less gold.
-If a faction’s loyalty is 100, that faction can add 2 to their populace each turn. Army units cost 1 less gold.
These effects do not stack, and occur at the beginning of the faction’s turn.
The chart below illustrates how loyalty changes with the tax rate. If the tax rate is at 6 for 10 consecutive turns, desertion will occur. 5 units desert per turn starting on the 11th turn of the 6 gold tax rate. If they go into the negative they have to pay for the units until they have a zero balance, after which they can once again purchase army units.
If a faction’s loyalty drops to 0, roll a d6. On a 1-2, there is a civil war. On a 3-4, there is a revolution. On a 5-6, there is a government overthrow.
Civil war
-The faction crumbles into a civil war between the opposing parties involved. The faction’s populace is cut in half. Divide the faction’s home territory into two areas. Each half gets half of the army units present in the home territory. On the faction’s next turn, the civil war begins. The two sides square off in battle, following the regular RISK combat rules. Battles continue until one side is victorious, ending the civil war. While the civil war is being fought, any ships within L of the home territory fire upon formerly friendly vessels.
Revolution
-The current political party and its supporters in the populace face a revolution by the opposing party. If there are over 50 army units in the HT, the rebellion is quelled and nothing happens. If not, the current political party is eliminated along with their leader. The faction must now function without a government (see below) for 2 turns, after which time another election can be held.
Government overthrow
-Eliminate the entire political party currently in control of the faction. Replace that party with a new party and leader, following the rules for elections (hold one election between the two parties next in line). The tax rate is decreased to 0 and cannot be raised for 10 turns. The loyalty is increased to 100 and can decrease from there.
If the eliminated party is the last party in the city hall, the faction must now function without a government until a new one is hired or planted. In that case, there cannot be taxes, but the faction also cannot buy army units or ships at their home territory.
Government
Each faction will have a city hall, where their government resides. There is no limit to how many different political parties a faction has in its city hall. However, each political party introduced after the initial number results in a loss of 5 loyalty. In addition, each political party introduced after the initial parties adds 20 to the populace.
Each political party will have a leader. This leader will be represented by a crew, and will function similar to regular crew. The politicians will have specific abilities pertaining to their strengths and weaknesses. Most politicians will have abilities that can ONLY be used while in the faction’s HT, but some will have abilities that function while at sea. Land abilities cannot be used while at sea, and sea abilities cannot be used while on land.
Each faction will begin the game with one party in power. This party will be detrimental to the faction’s success and will have negative abilities. This incentivizes the factions to begin introducing political parties. To keep things fair, all factions will begin the game with the same “negative” government. The party’s ability says “lose 1 loyalty per turn”.
To introduce a political party, a faction must hire that party’s leader for a gold cost. This brings that political party into play; they and their leader are placed in the city hall. Once in the city hall, they can begin participating in political elections.
Elections
Once every five turns, a faction can have their city hall host an election. Select two political parties and roll a d6 for both of them. The party with the higher result either advances in the governmental system (similar to a tournament bracket) or becomes the leader of the faction (if it was a final election). If a new party comes to power, their abilities and the abilities of their leader come into play and replace the abilities of the old party. Political parties and leaders can only use their abilities when they are in power. If a final election is held when the loyalty is 80 or higher, the party in power gets +2 to its die roll in the election. There can also be elections within parties, to determine which candidate of a party becomes the leader of that party. If a faction has 4 or more parties in their city hall, elections can happen every 3 turns. If a faction has 8 or more parties in their city hall, elections can happen every 2 turns.
Political parties and their abilities:
-These will be the abilities of each political party, which only activate when the party is in power. Political leaders will have their own individual abilities.
Land party: Favors land warfare and expansion.
-Army units have a base cost of 2 (instead of 3). Ships’ point costs are doubled.
Sea party: Favors naval warfare and expansion.
-Army units have a base cost of 5. Captains and helmsmen only cost 1 gold each.
Home territory party: Favors building up the HT through upgrades and a strong home army, as well as a large populace.
-All home territory upgrades cost 10 less gold than usual.
Exploratory party: Favors exploring every corner of the world, at any cost.
-Army units have a base cost of 4. Three explorers can be hired for just 1 gold. Helmsmen cost 1 gold.
Imperial party: Favors aggressive colonial expansion, and declares war on other factions often.
-The cost of island upgrades are cut in half. Every 5 turns, declare war on a faction.
Colonial party: Favors having as many colonies as possible, and having strong upgrades on them such as ports and high-level shipyards.
-The cost of island upgrades are cut in half. Decrease the populace by 2 each turn.
People’s party: Favors increasing the populace, having very low or no taxes, and preserving the safety of the home territory.
-City upgrades cost 25 gold (instead of 50). The tax rate cannot exceed 2 gold. Island upgrades cost twice their normal amount.
Religious party: Favors going to war with specific factions whose religion conflicts with their own.
-Assign a number to each faction. Use a random number generator to choose a faction. Declare war on that faction. Pursue peace treaties and armistices with all other wars.
Upgrade party: Favors upgrading all structures, including those on colonies, before building up the army and navy.
-Halve the cost of all upgrades. Double the costs of ships and army units.
Trade party: Favors resources over gold, and pursues profitable commercial relationships with other factions.
-Halve the value of all gold unloaded at the home territory. Halve the cost of trading ports. Pursue commercial alliances with the factions you can profit most from.
Gold party: Favors gold above all else, including resources and actually spending that gold.
-Double the value of all gold unloaded at the home territory. Halve the value of all resources unloaded at the home territory. Cannot spend more than 20 gold per turn.
Power party: Favors an absolute monarchy/dictatorial state. Works to eliminate other political parties from contention. Potentially high taxes but a very clear sense of purpose. (centralized decision making)
-Hire political assassins to eliminate other parties from the city hall. When this political party comes into power, roll a d6. On a 1-3, loyalty drops by 20 immediately. On a 4-6, loyalty does not drop when taxes are increased. Cannot issue bonds.
Resource party: Favors collecting a specific resource, depending on the leader’s preference.
-Roll a d6. The result is the resource type that now doubles in value for this faction only.
Region Party: Favors having absolute control of a specific area (ex: the Mediterranean, Russia, etc)
Abilities: Roll two d6 and add their results. This number is the particular region the party is trying to control (refer to chart). Generally the higher the number, the more difficult it will be to control the region. There will be benefits for establishing and maintaining control of a region when the Region Party is in power.
-The cost of military ports are halved in the specific region. Any ships and army units not in the specific area get -1 to their cannon and combat rolls (only).
There will likely be other parties as well.
-Once every 10 turns, a faction can plant a political party and leader inside the city hall of another faction. This can be used to help that faction, or to hurt them. The leaders of these planted parties can have secret abilities known only to the player who planted them. The player must reveal the secret ability when they intend to use it. This is a way to simulate assassinations, though other possibilities exist as well. (Example of a secret ability: Select a political leader in this city hall. Roll a d6. On a 4-6, eliminate that leader from the game.)
-Sometimes there will be a frontrunner in the political race. That party will get to double its election rolls, but will disappoint the populace and therefore have subpar abilities. On the other hand, a party may have its rolls halved for elections, but might have very worthwhile abilities.
There will be a trade-off between loyalty, populace level, taxes, and long-term agendas. More political parties mean less loyalty, but a higher populace could give a faction the ability to tax. Introducing more political parties also increases how many elections there can be, but that can lead to high turnover in terms of government, which can hinder a faction’s overall progress.
Bonds
Factions can issue bonds to receive money from their populace.
-Bonds are an immediate influx of gold.
-A faction can receive a maximum bond value of 10% of their total populace (ex: a faction with a populace of 1,000 cannot receive a bond worth more than 100 gold)
-Factions must repay the value of the bond plus interest. Interest is paid at the end of the period.
-The minimum period of a bond is 10 turns. There is no maximum period.
-The interest rate is tied to the period. A 10 turn bond has a 10% interest rate. 10 turns after issuing the bond, a faction must pay 110 gold back to the populace by eliminating the gold from their home territory (following the 100 gold example).
-Factions are not required to issue maximum value bonds; they can receive gold equal to less than 10% of their populace value, but never more than 10%.
-Only one series of bonds may be issued at a time. More bonds cannot be issued until the current ones are paid off.
-If bonds are not paid back, loyalty drops by the amount that isn’t repaid.
Example: A faction has a populace of 1,186. The maximum amount they can get for their bonds is 119 gold. However, they don’t think they can pay back 131 gold in 10 turns, so they opt to receive 80 gold, with a 15 turn period. In 15 turns, they pay 92 gold back to their populace. If they can only pay most of the bond payment (70 gold), loyalty drops by 22.
Rumors and Missions
Named crew (only) may try to acquire rumors or missions, which may help them or their nation. Rumors are usually more esoteric or selfish in nature, while missions are more obvious and “patriotic”.
-Rumors may only be obtained while docked at another faction’s settlement or trading port (not colonies).
-Missions may only be obtained while docked at the fort or military port of the ship’s faction.
To acquire a rumor or mission, roll two d6. Add the results, and compare it to the point cost of the most expensive named crew on the ship. If the sum of the dice is lower than the point cost, that named crew has been successful. Place a Unique Treasure representing the rumor or mission on the ship’s deckplate. Rumors and missions are kept face down, but they do not take up cargo space. Rumors may be stolen as regular “treasure”, but missions cannot be stolen by any means. If a ship with a mission is captured or sunk, the mission is eliminated. If the named crew is eliminated, the rumor is eliminated as well. (Rumors are tied to their named crew; missions are tied to the crew and the ship.) News of a successful mission must be brought back to the home territory to get rewarded, while rumors have distinct success/failure conditions.
-There will be a neutral merchant ship that sails around once in awhile. This ship will be a 4 masted ship with L speed and 8 cargo spaces. All 8 cargo spaces will be filled up with one resource type. Ships can engage this merchant ship to trade goods on a 1:1 basis. The merchant ship cannot shoot or be shot at. Once all of the original resources are gone, the merchant ship leaves the game, but may reappear again.
Victory Conditions
-There are no victory conditions. This game is not expected to end.
House Rules
-All ships must be hit twice in the same turn to eliminate one of their masts. This ability also applies to ships such as El Acorazado, whose ability now reads “four hits in the same turn are required to eliminate one of this ship’s masts” (not necessarily the same shoot action). In some of the larger battles, this may become difficult to keep track of, in which case we will use the “same shoot action” rather than the “per turn” ruling.
-Ships cannot do damage by ramming.
-When a ship wins a boarding party, the winner decides whether they will take gold/resources or eliminate crew. The winner chooses which gold/resources to take, but the loser chooses which crew is eliminated.
-Marines are now a generic crew. They cost 5 points, and simply have the Marine keyword. Named marines cost the same as usual, but they get two shots per shoot action instead of one. Since generic marines are generic crew, they are subject to the no-stacking rule. However, named marines work the same as normal – they can stack. If multiple generic marines are present on the same island or territory, they can all be given shoot actions.
-Forts now cost 6 times their normal gold cost, with the exception of Paradis de la Mer, which costs 30 gold.
-When an enemy ship comes within range of a fort’s guns, that fort may fire ONE cannon.
-Forts can now be set on fire.
The rules for flaming forts will work like this: instead of the fort rolling for each fire every turn, it rolls one die regardless of how many fire masts it has and regardless of whether the fort is given an action during the turn. The roll follows the regular rules for fire masts. The fort will be automatically destroyed if the fire consumes all 8 areas (not how many guns the fort has). A shipwright can only put out one fire per turn, but no flag is raised in the fire’s place until another repair action is given.
-Incentivize captures – possibly an answer to the problem of sinking ships (ships sink more in Pirates CSG games than they did in real life combat). When a ship is captured, that faction can “rechristen” the ship as one of that nation’s ships instead once the captured ship is fully repaired, and pays the difference in gold cost. Ships exchanged in this manner MUST be of the same ship type. Factions do not get any kind of gold or resource bonus if the captured ship is worth more than the ship they are converting it to. If brought back to a shipyard that is not an adequate level (for example, bringing a captured 4 master back to a level 3 shipyard), the faction must upgrade the shipyard in order to rechristen the ship. (The normal rules for capturing ships still apply, and therefore it may be more advantageous to not use this rule and simply keep the captured ship and change it’s nationality flag.)
Very simple example: the Pirates capture the Couer de Lion from the French, tow her back to their home territory (or a military port where they can legally launch ships from), repair her, and “exchange” her (simply editing the stats) for the Banshee’s Cry by paying 1 gold for the cost differential.
-Factions can transport lumber for use as fire beacons, using the army unit and land movement rules. This is a means of communicating over great distances. One lumber resource is needed for each beacon. To make an effective chain of fire beacons, it would have to be a consecutive line through territories (one lumber needed per territory, and the territories need to share a boundary line). As a free action, army units from ANY faction can burn a beacon if they are in that territory. This will set off all other beacons that can be lit in the chain, at the rate of 2 beacons per turn. Any faction can also take the lumber resource as normal.
Storm terrain will occasionally be used. Storms
If any part of a ship touches a storm, place that game piece inside the storm; they are lost. Roll a d6. If the result is lower than the number of masts, segments, or flags on the game piece, eliminate one mast, segment or flag from that game piece. For game pieces with one mast remaining, treat a roll of 1 as a roll of 0. Ships exit storms by giving them a move action for their turn, and rolling a d6. Place the ship on her stern facing outward on the number rolled. (Moving out requires the full action, unlike fog banks.)
-It is possible there will be seasons (which mimic real life) where more storms are present than usual. Hurricanes may be introduced.
-Equipment
Letter of Marque
Type: Equipment
Point Cost: 5
This ship may shoot at ships docked at their home territories.
Dueling Pistols
Type: Equipment
Point Cost: 5
Reveal this event when within S of an enemy ship. The two ships involved cannot shoot at each other this round (including next round if needed). Specify a named crew on the opposing ship, and one on this ship. Roll a d6 for each crew and add the results to the crew’s point costs. The crew that rolled lowest is eliminated from the game. Eliminate Dueling Pistols from the game.
Trick Duel
Type: Equipment
Point Cost: 10
Reveal this event when within S of an enemy ship. Specify a named crew on the opposing ship; that crew is now assigned to this ship, but doesn’t take up cargo space, doesn’t count against the point limit of this ship, and cannot use its abilities. The opposing ship now gets a free shoot action, after which this ship can move L away. Eliminate Trick Duel from the game.
(Thematically: The captain or crew in question rows over to the other ship with a few members of his crew. These less important crew are quickly dispatched, and the key figure is taken hostage.)
Currently unknown house rules:
These are house rules that are either currently unknown, or are known only to the players playing the game. As a result, some of them will be left deliberately ambiguous.
-The chart for resource values and types may change.
-There will be custom UT’s with special rules.
-Factions must meet at sea or on land in order to exchange information. The players of the game cannot simply speak to one another or send messages through the module chat.
Quests
Nations can engage in quests. These are purposely ambiguous and subject to change. The nations do not know of the specific quests at the outset of the game. Only through certain means can they come to fruition. There may be various types of rewards for completing quests.
-Circumnavigation
-Finding the New World
-Finding Australia
Useful abbreviations and wordings
-Faction/nation/fleet/etc all mean the same thing.
HT=Home Territory
TP=Trading Port
MP=Military Port
WI=wild island
WMG=World Map Game
CG=campaign game (the C can also stand for cumulative, but that’s generally a more basic campaign game with a less complicated ruleset, such as CG1 and CG2)
Certain abilities will also be simplified:
EA=Extra Action
SAT=Same Action Twice
SAC=Sacrifice action
AA=Admiral’s Action
WH=World Hater
Canceller=“Once per turn, one crew or ship within S of this ship cannot use its ability this turn.”
HI raider=home island raider (effectively a “home territory raider” for this game)
Cameo/Guest appearances
As mentioned earlier, you can join this game! However, before doing so, we ask that you get comfortable with the Pirates module (helpful thread here), and get to know this ruleset pretty well. We realize that these are large barriers to entry, and we’re not expecting frequent or consistent guests, especially considering all of life’s numerous time obligations. As evidenced by CG2 (a VASSAL campaign game with three players), playing a campaign game with more than two players remotely is not easy. We still encourage anyone who is interested to participate. Guest appearances would likely consist of one or both of us relinquishing control of at least one of our factions for a specified period of time; this could be as short as one turn, to as long as a month or more. It all depends on your availability, aptitude, and passion/interest level. One of our favorite things to think about in terms of these “cameos” is how it simulates changing leadership, which is obviously one of the keys to history. Just let us know and we’ll fit you in!
Two of the greatest admirals in history, Admiral A7XfanBen and Xerecs, The Lord Sentinel, have begun their grandest adventure yet! After playing many campaign games over the years, including three together on the VASSAL module (CG1/2/3), we have decided to embark on something completely unprecedented, something no one has ever done. Something that is truly on a historic scale. A “game to end all games”, if you will. Ironically enough, this game may actually never end! Ever since the World game had to be put on hold, Xerecs and I have been planning this game as the replacement. However, we wanted to finish T2 first. Now that that’s over, we have been able to concentrate on this lately and are finally ready to start!
I couldn’t find the post, but for a few years now I’ve had vague thoughts of creating a complex, all-encompassing “Game of Life” based around Pirates CSG that would be my masterpiece. A game not just about naval warfare, but land warfare, politics, governments, trade, economies, revolutions, civilizations, home fronts, and more. Now that the World game has been put on indefinite “permanent” hiatus due to various technical issues, this game is the continuation of that idea. I mentioned it to Xerecs in one of our MANY emails about CG1, and the idea took off. I originally thought this “Game of Life” idea would come to fruition in many, many years from now (many decades actually). However, the VASSAL module (thanks again B.J. Olejnik!) has dramatically sped things up, and now my “masterpiece” of a game can see the light of day already! Xerecs and I spent parts of April and May 2016 developing the ruleset; what you see here represents hundreds of emails and only a chunk of the google doc we are using to collaborate. Ironing out the details has been a very fun and exciting process. We have recently edited the World ruleset to adapt it to the Caribbean game, though most of it has remained exactly the same.
Before I go any further, I’d like to point something out:
-There will be opportunities for you to play in this game as well. These will be known as “cameo” (or guest) appearances, and more information is at the bottom of this post.
The Caribbean game is just that, a game based on a map of the Caribbean. This is mostly possible through the VASSAL module, since creating an ocean large enough for such a map would require immense amounts of space and time (obviously not to scale, but even so it would have to be a HUGE ocean). With so many real life elements involved, the game is very loosely based on historical concepts, but NOT historical events (there will be no reenactments or reconstructions of history). These concepts form the backbone of many of the rules, and they also explain the need for a ban list for the game. However, it is still a game, so plenty of concepts will be cut out or underrepresented – to save time and effort, and also to focus on Pirates CSG, which is still the game’s core.
With the game file being saved at the end of every play session, this game has no timetable. Xerecs and I are both in our early 20’s, and you can see from our previous campaign game experience that we LOVE Pirates. As a result, this could sort of be “that game” – a game that goes on and on with no end in sight. A “forever-long game”, it could turn into just that. As of now we’re hoping to play for many years, though that could turn into multiple decades. Many things will get in our way, and we may have to put the game aside for months or even years at a time. However, we’ll always be able to return to it and resume playing once more. This also furthers the historical aspects of the game, since playing the game for many decades could represent decades or centuries of history, with the Age of Sail occurring in the general time period of 1500-1850. To put it simply, this thing has a chance to be BIG. Not just in terms of points in play, but in terms of impact and popularity as well. With enough complexity in the ruleset and enough time to play, it could turn into one of the most epic games in the history of gaming (tabletop/boardgaming/videogames/etc).
Without further ado, here is our ruleset. It is not a finished product and we will likely have to edit it once the game begins. Feel free to peruse at your leisure!
A HUGE thanks to cannonfury, sariouriel, captain_vendari, and woelf for creating those! Many parts of this ruleset directly borrows from the others.
Errata
Duplicates rule – There cannot be duplicate ships in play until a faction has purchased every single standard ship (including flavor duplicates (such as all three versions of the 5 master HMS Apollo, for example, but not including customs)) available to them. Once a faction has every ship in its fleet in play, that faction can launch duplicates. Only one duplicate ship is allowed; if a faction has two of every ship in play, they can begin a third set of duplicates. However, once a ship is sunk, it MUST be replaced before duplicates can be launched again. (This is also known as the “complete the fleet” rule)
-Named crew must be unique, but once a named crew is eliminated or removed from the game, a DIFFERENT version of that crew can then be purchased as long as they aren’t in play at the same time. This can be done ad infinitum; crew may be called “Thomas Gunn III”, for example.
-After a ship rolls for the resource type and loads resources, the ship will load face-up gold coins that correspond to the numbered resource (for example, a ship with lumber on board would have 1’s). When the ship unloads the resources at the home island, the 1’s (in this case) are swapped out for the value of the resource (IF they are being converted to gold). If the value of lumber was 4, when the ship docks at her HT (home territory), the 1’s come off the ship and face-down gold 4’s appear on the HT, which can then be used to purchase ships and crew.
-Players will NOT be required to pay one gold each turn for every ship not docked at their HI. Why? We want this game to be huge, so anything that slows the game down is getting cut out. I like this concept, since you have to pay the crew and supply them with food and rations, but for this game we can’t afford to be paying gold every turn when there are already going to be a ton of ships being launched all the time. Also, when this game reaches astronomical point totals, it would be extremely annoying to count how many ships each fleet had on their turns.
-Game time is measured in rounds. A round begins with the start of the first player’s turn and ends with the finish of the last player’s turn.
-Unique treasures may be used, but note that due to the nature of some rule changes, they may no longer function as intended.
-If 10 masters can be edited into the VASSAL module, no duplicate 10 masters will be allowed at any point during the game. In order to build a 10 master, you must capture a 10 master from another faction in order to get the hull and ship plans (the Jade Rebellion will be the only faction capable of launching a 10 master from the start).
-The Jade Rebellion is the only faction that can have duplicate 10 masters (still following the duplicates rule, and only the Baochuan) (Zheng He first version is linked, then have other crew for future linked admirals)
-Return to Savage Shores game pieces may be used.
-Custom game pieces may be used, as long as they aren’t too overpowered.
-Non-historical factions (Hylia/Gallia/etc) are not available
Ban list:
-All Events
-Whirlpools
-Navigators/trade currents
-Cargo masters
-Sea creatures
-Abilities that move enemy ships
-Strange/unfair UT’s (Bad Maps, Blood Money, Cursed Natives, Elizabeth’s Piece of Eight, Eye of Insanity, Gem of Hades/Red Skull, Homing Beacon/Jack’s Compass, Lost, Kharmic Idol/Pirata Codex, Maps of Alexandria/Pirate Globe, Maps of Hades, Necklace of the Sky, Neptune’s Figurehead/Resurrection Codex, Neptune’s Trident, Odin’s Revenge, Odin’s Revenge, Poseidon’s Breath, Runes of Destruction/Magic/Odin/Serpent, The Cursed, Voodoo Doll, Jailhouse Dog)
-Certain named crew (Calypso, Captain Davy Jones/Wraith (SS version), Cursed Captain Jack)
-Other completely impossible abilities (fog hoppers, Captain Jack Sparrow (UPS), Davy Jones (DJC), “Spyer” abilities (look at face down stuff on an enemy ship), Eternal, trading treasure, “other ships do not block this ship’s line of fire”, Turbine
Modified abilities:
-Pandora’s Box: Cannot be used to pull in any of the banned UT’s
-Periscope: Works within L, but not anywhere
-Ransom: In addition to the stated rules for Ransom, factions may now bring the Ransom crew back to a territory, port, or fort controlled by the crew’s faction. If the faction can pay, they must pay 100 gold (with gold from that area!); the gold is transferred via a “UT” worth 100 gold to the ship, and the Ransom crew can now be used again by the original faction.
-Ghost Ship: Cannot move through solid obstacles (islands, ships, and icebergs), but can move through fog, sargassos, and reefs
-“Ramming cannot eliminate this ship’s masts”: Changed to “This ship gets +1 to her boarding rolls” (both abilities should cost 2 points, and both refer to the ramming/boarding aspect of the game)
-“You own any derelict this ship explores; both ships become docked at your home island.”: Changed to “This ship gets +1 to her cannon rolls against any ship.”
-”Give this ship a move action but do not move her. Instead, roll a d6. On a result of 5 or 6, move an enemy ship L in any direction.”: Changed to “Captain. Reroll.”
-“Whenever any crew is eliminated, roll a d6; on a result of 6, assign the crew to this ship. Its nationality changes to match the nationality of this ship and it becomes linked to this crew.”: Changed to regular “Possession” ability (“If an enemy ship is within S of this ship, you can use this ship’s action for the turn to try to possess a target crew on that ship. Roll a d6; on a result of 6, the target is immediately assigned to this ship. Its nationality changes to match the nationality of this ship.”)
-“If this ship (sea monster) ends her turn in a fog bank, on her next turn she may use her move action to move out of any other fog bank in play.”: Changed to “This ship ignores terrain, except icebergs, when she is given a move action (islands are not terrain).”
-”Once per turn, this ship may look at any one face-down treasure on any ship or island.” (and variations of): Changed to “Once per turn, if this ship is touching another ship, reveal all treasure aboard the other ship. This ship can take as much unique treasure from the other ship as she can carry- even those that otherwise can’t be removed.”
-Eternal: Changed to “This ship cannot sink, but she can be scuttled.”
-”After looking at treasure on a wild island, you may trade any one treasure from that island for a random treasure on any other wild island. This ship must load the traded treasure.”: Changed to “Once per turn, if this ship carries treasure and is within S of an enemy ship, you may randomly trade one treasure with that ship.”
-“Other ships do not block this ship’s line of fire”: Changed to “You may double the range of this ship’s cannons each turn, but you must roll a 6 to hit.”
-“If a sea monster begins its move within L of this ship, it gets +L to its base move.”: Changed to “This ships gets +L to its base move. This ship cannot be assigned a helmsman.”
-Calypso: Once per turn, give any ship in your fleet +L to it’s base move that action.
-Cursed Captain Jack: Parley. Canceller.
-Captain Jack Sparrow: Captain. Parley.
-Davy Jones (DJC): Changed to OE Davy Jones (All-Powerful)
-All-Powerful: A roll of 6 is effectively a 5 – you may give any ship in your fleet an extra action.
-Any abilities that refer to boarding bonuses against sea monsters are applied to ships instead.
Temporary ban list:
These items will only be allowed after a certain amount of time has passed or a specific milestone is reached.
-”Instead of giving this ship an action this turn, you can give another ship in your fleet two actions.” (Available after the first 100 rounds have passed)
-Native canoes/chieftains (Available after a faction has discovered the New World territories in the far west of the map)
-A faction cannot have more than 4 sets of native canoes (20 total) in play at the same time (this is to reduce lag)
-Native canoes may only be launched at military ports. The first set of native canoes that a faction “receives” will be a custom ruling, likely involving bribing the local natives and/or impressing them with a display or riches or firepower.
-Flotillas (TBD; likely not available for multiple years)
-Hoists (TBD; likely not available for multiple years)
-Submarines (TBD; likely not available for MANY years)
Starting conditions
-There will be 4 factions starting the game, and the order of play will go as follows:
Xerecs:
English
Spanish
A7XfanBen:
Dutch
French
-Fleets start out at 20 points. Each faction also gets one infantry unit to start the game. Factions must keep at least one infantry unit in their home territory at all times. All of the other territories will be “empty” (they will contain unknown resources and gold) at the start of the game. Despite the rules for shipyards, any ship type is allowed for the first starting fleet.
-A custom VASSAL ocean called the “Caribbean Map” will be the setting. This ocean will be the largest ocean ever used for a game of Pirates CSG, and will feature a ton of real-world locations, with many of them based on history (especially 1500-1850).
-Factions will not start the game with a home island. Instead they will be sailing into the region from the far east, as the Caribbean has only recently been discovered. We are vaguely pretending that the year is approximately 1500, but this is not particularly important or relevant to gameplay. All four factions will start at the eastern edge of the map according to their historical locations in Europe. From north to south: English, Dutch, French, and Spanish.
-Once a faction establishes a home island, that island can produce only one resource per turn. Once a faction has upgraded all of their structures to Level 2, the island can produce 2 of that resource per turn.
-Other factions will not be present at the start of the game. The Mercenaries will be available for hire as privateers, as detailed below.
Resources
Resources are the main source of gold production in the game, but must first be converted for a variable price at the home island into treasure coins, which can then be used to purchase ships, crew, equipment, etc.
Resources count as cargo, and abilities that affect treasure coins also affect resources (i.e. each of these coins is worth +1 gold… turns to each of these resources is worth +1 of whichever resource is in question).
The value of a resource is determined by a die roll. At the beginning of the first player’s turn, a d6 and two d6 are rolled. The d6 roll determines the values of all resources (refer to the quick reference for exact values) while the pair of d6 rolls determines the number of turns this value will hold.
Lumber: (1) Fundamental for ship and settlement building, lumber is the basic building block of any naval civilization.
Textiles: (2) Needed for sails and clothing, textiles are a key part of the trading industry.
Metals: (3) Stronger than wood, metals allow for the construction of sturdier ships and deadlier weapons—as well as providing the means for paying for them.
Food: (4) From fish to spices, food is an essential part of every nation’s economy.
Medicine: (5) Derived from various sources, medicines are essential for having a healthy military.
Luxuries: (6) The rare items crews find on their journeys through the world’s seas—from the beautiful to the wild to the truly cryptic.
Die Roll…….1……2…….3…….4…….5…….6
Lumber…….1……6…….5…….4…….3…….2
Textiles…….2……1…….6…….5…….4…….3
Metals………3……2…….1…….6…….5…….4
Food………..4……3…….2…….1…….6…….5
Medicine…..5……4…….3…….2…….1…….6
Luxuries……6……5…….4…….3…….2…….1
Specific resource abilities
When 20 or more of these resources are at your home territory OR port, they give you special bonuses. Resource bonuses do not stack. Only one of these abilities can be used at a time. In order to change abilities, the resource in question must be decreased below 20 to select a new one. If these abilities combine with other abilities (such as those from political parties), nothing can ever cost 0 gold. 1 gold is the minimum cost for any purchase.
Lumber: (1) Ships cost 1 less gold than their point cost (point costs don’t change for all other purposes). Shipyard upgrades cost 5 less gold.
(Ships and shipyards both require vast amounts of lumber)
Textiles: (2) Ships cost 1 less gold than their point cost. Gain 1 loyalty per turn.
(Sails are used for the ships, and a great clothing industry keeps the populace happy, especially during winter time)
Metals: (3) Fortress upgrades cost 5 less gold. Army units cost 1 less gold.
(The fortress houses many guns and an armory, and that armory produces guns and swords for the soldiers, hence the lower cost of army units)
Food: (4) Army units cost 1 less gold. Gain 1 loyalty per turn.
(The faction does not have to supply the army with as much rations, and a healthy food market keeps the populace happy)
Medicine: (5) Gain 1 loyalty per turn. If a civil war occurs, the populace is decreased by 25%, rather than 50%.
(A healthy populace, and one that can bear disasters better than the average populace)
Luxuries: (6) Ransom payments can be for 50 gold instead of 100. Named crew cost 1 less gold.
(Thematically luxuries could be swapped for gold (you don’t have to fork over the luxuries during the ransom exchange), and giving named crew different jewelry and valuables could entice them to join your cause)
In regards to that “OR port”, it basically means that if you stockpile 20 or more of a specific resource at a military port, the bonus kicks in IF POSSIBLE. If a military port resource bonus ability says “gain loyalty”, nothing happens because the populace is way back in the HT. However, a military port could benefit greatly from the lumber resource bonus, since ships can be launched at MP’s and each MP will have its own shipyard, upgraded just like the shipyard(s) at a HT.
Theoretically each resource type should account for 16.67% of the territories and islands in the game.
These resource bonuses will not be applied until we are 20 turns into the game.
-If 10% or less of the islands produce the same resource, that resource is worth 1 more gold than usual.
-If 5% or less of the islands produce the same resource, that resource is worth 2 more gold than usual.
-If 50% or more of the islands produce the same resource, that resource is worth 3 less gold than usual (to a minimum of 1).
-If 33% or more of the islands produce the same resource, that resource is worth 2 less gold than usual (to a minimum of 1).
-If 25% or more of the islands produce the same resource, that resource is worth 1 less gold than usual (to a minimum of 1).
-An island’s resource will be represented by one of the tiny dice, which will be turned upright to the corresponding number. (In the VASSAL module, we will use face-up coins.)
-Nations can “make change” with their gold or resources.
-Factions are allowed to purchase resources from other factions. (and really anything else agreed upon for that matter)
-Certain islands or territories may have predetermined resource types on them, based on history.
-Some locations will also contain regular gold, especially locations that were/are historically rich with gold. To minimize potential lag within the module, most of the gold will not be present at the start of the game, but added when ships or troops discover it.
-If a wild island is very close to a faction’s home island (about 6S but especially less than that, with one or two move actions required to get there), that island will almost never produce resources due to the potential for abuse.
-Random timer idea (for resources changing, weather, etc.): At various points throughout the game, all players may agree to use a random timer for that session. When the timer goes off, roll for resource values as normal. Those values hold until the end of the session, or until the timer goes off again.
-Players may agree to change the resource system. Instead of simply rolling a d6 for values and two d6 for duration, other options may be added for more randomness.
Example: A round of turns begins with the d6 roll. A 1 is rolled (on a 2-6 the resources stay the same, until a 1 is rolled). Since a 1 was rolled, roll again. If the second roll is a 2-6 (anything other than a 1), the resources only change value for that turn. On the next turn, they revert back to whatever they were on the previous round, or a different system is once again agreed upon by all players (such as starting over with regular EE rolls, or using the system described in this example). However, if the second roll is a 1, the current EE rolls are disregarded, and new rolls are made (both for values and duration).
Changing the rules for how resources change could really make things interesting.
-Alternative economy rules may also be used.
Upgrades
Home Islands/Territories
Factions must build structures in order to establish their presence in the game. After a faction settles on a home island or territory, they must pay 10 gold in order to purchase any Level 1 structure (except for Cities). These structures may be upgraded, and factions can construct multiple shipyards and fortresses on their home territory (up to 4 of each, subject to change). These structures must be within L of the coast. Upgrades to home islands and upgrades to wild islands happen at the end of a faction’s turn during the launch/spending phase.
The price of a ship is its point cost. When you purchase a ship, place only its hull at the shipyard. During each of your turns, that ship may be given build actions (only) to place masts until it’s been fully constructed. Shipyards can only build a number of ships equal to their level (ex: a Level 3 shipyard can build up to 3 ships simultaneously). Ships under construction can be shot at, but not rammed or boarded. If the port or shipyard where a ship is being constructed is destroyed, construction immediately halts and the ship may be given actions as though construction were complete.
-Each additional HT shipyard costs 50 gold
-Factions can have up to 4 shipyards (subject to change)
-Crew cannot board a ship until it has been fully launched.
Tavern:
Level 1: Generic crew and equipment, 2 durability points, 20 gold to upgrade
Level 2: All crew (named crew, generic crew, and equipment), 6 durability points
City:
-Each faction will have a “city” similar to their other structures. The faction’s city represents its populace. Factions start at level 0, and each upgrade costs 50 gold.
Level 1: Add 3 to populace at the beginning of each turn.
Level 2: Add 5 to populace at the beginning of each turn.
Level 3: Add 10 to populace at the beginning of each turn.
Level 4: Add 15 to populace at the beginning of each turn.
Level 5: Add 20 to populace at the beginning of each turn.
City Hall:
See rules for “Government” underneath Updated/New Mechanics; City Halls cannot be upgraded.
-There are now game pieces in the VASSAL module that can be used to represent these structures; however, some of them may not be used in the interests of minimizing lag. In addition, they were designed with the World game in mind, so the structures will not fit properly on single island pieces. It is likely that simple face up coins will be used instead.
Islands
An island upgrade is bought at the home island; a token representing that upgrade and 10 gold used to pay for it can be loaded onto any ship(s); the token fills one cargo space. That ship must return to the previously explored island and may unload the token and 10 gold as a free action. The island is immediately upgraded, but it cannot function normally until the following turn (similar to forts). If a ship is sunk on transit, the token is lost and another must be purchased.
-Settlement: Automatically created after an explore action. Abilities that remove explore actions can eliminate settlements. Settlements simply mark that this island has been explored by the player; enemy settlements may exist on the same island.
-Fort: A settlement may be upgraded to a fort. However, a faction must physically sail the gold to the island where the fort will be built in order to construct it. A fort generates no resources. Generic crew may be hired at this island. Resources can be unloaded at a fort, but they cannot be converted.
-Colony: A settlement may be upgraded to a colony by paying 10 gold. Abilities that remove explore actions do not eliminate colonies. Having a colony on an island gives control of that island to a player; other players may no longer take resources from that island. Colonies can be razed by enemy ships, they have no natural defenses and after three hits are considered destroyed. A colony may also be captured through a boarding action. Once destroyed, the island becomes unexplored in regards to all players, and its resource value may be reset.
-Port: A colony may be upgraded to a port. Players have a choice between either a trading or a military port; an island can only accommodate one. When upgrading to a port, that faction must bring the upgrade token to the colony in addition to 10 of the gold they used to purchase the upgrade. The 10 gold is removed from play when the token is unloaded at the island as a free action.
1) Trading Port (30 gold): Allows a player to trade any one resource for one other resource, of any type. An opposing player’s ship may also dock at your trading port to trade commodities, but they must pay one resource to the owner in addition to the resource(s) being traded. Ships with the Parley keyword do not have to pay this fee. A trading port can be blockaded by any ship. A trading port has 5 durability points; a sixth hit will eliminate it. Trading ports may be given repair actions – if so, no resources can be exchanged that turn. A trading port may use one lumber to repair itself, in which case resources can be exchanged that turn.
2) Military Port (100 gold): Allows a player to repair ships docked at this island as if it were a home island. Crew and ships may be purchased at a military port using gold from the port. A military port can hold resources and gold. A military port generates no resources. A military port cannot be blockaded, and acts as an eight flag fort with 3L cannons. In terms of purchasing ships and crew, a military port starts with a level 1 shipyard and tavern. The shipyard can be upgraded the same as home territory shipyards, but the tavern cannot (no named crew hired at military ports).
-In addition to the gold cost of island upgrades, when a colony upgrade is purchased, the populace decreases by 2 (to represent people leaving the HT). When a port upgrade is purchased, the populace decreases by 5.
-An island can only have one upgrade on it at a time.
-Upgrades must happen sequentially – factions cannot upgrade from a settlement to a port in one turn. This applies to HT upgrades as well – factions must upgrade their structures one level at a time. An upgrade of any kind takes a turn to institute.
RISK
-Territory/island can be used interchangeably at this point.1. In the map of the Caribbean, we have placed 11 non-island territories that form the coast of the New World continent. In addition to the group of territories, there will also be MANY islands. These islands (not territories, so therefore essentially irrelevant to the Risk part of the game) function as wild islands, but they can have units from Risk placed on them. Due to space constraints, some locations will be absent or underrepresented.
2. All of the non-HT territories that are bordered by only water will start the game as wild islands, unless chosen as a home territory by a faction. These territories follow the normal rules for wild islands. All of the territories except for the home territories in the game will start as “wild”. This means that resources and gold can be acquired over land by armies.
3. Each faction has a home island or home territory. Home locations can be conquered, but a faction is not automatically eliminated if their home is taken over by an opponent.
4. When invading an enemy territory across water or reinforcing a friendly territory across water, the army units must be transported by ships. There are no lines from RISK that connect territories over water – armies cannot invade across water unless they are transported in ships. That being said, ships have no limits on where they can transport army units.
5. Invasions follow the standard rules for Risk, and combat due to an invasion happens as soon as the units disembark from the ships. In order to land the troops on the territory, an explore action is needed, unless the territory is friendly and/or has been invaded before (home territories do not require an explore action to land troops there if it is the landing player’s home territory).
6. Risk units cost 3 gold each (or 3 points). This may be adjusted during the game if needed. For the purposes of abilities and effects, army units are considered ‘crew’ when on board a ship, even though they have no abilities. However, they do not count against the ship’s point cost. When a ship loads army units, they take up one cargo space per unit. They can be loaded and unloaded like normal crew with the following exception: An explore action is required in order to load or unload army units. For flavor purposes, one unit represents 100 troops.
7. Ships can fire on army units on land (following the regular procedure for a shoot action) if the units are within S of the ocean. The number of hits needed on the same turn to eliminate a unit is the same as the number of units the piece represents (infantry=1 unit, 1 hit needed to eliminate, cavalry=5 units, 5 hits to eliminate, artillery=10 units, 10 hits in one turn to eliminate). This is a way to incentivize saving up for artillery, which became more important in land warfare as the years went on. Infantry and cavalry units cannot fire back; however, if a ship misses an individual unit three times in a row in a particular shoot action, she loses a mast. Artillery units (representing 10 army units) can function as a 2L cannon for coastal defence. If an artillery unit is given a shoot action to shoot at a ship, it cannot be given a move action that turn. Ships cannot shoot over an island to hit a territory beyond, no matter what range her guns are.
8. In addition to the regular rules for forts, the rules for forts regarding land attacks are as follows: Army units can attack forts from land, in this way they must have already invaded the territory. A fort’s flags represent its defenses multiplied by 4 (a 4 flag fort functions as 16 army units). The rules for combat work the same, with the exception that due to the fortifications, the defender can roll up to three dice. The fort can contain army units of that particular faction, as a means of protecting them. The fort serves as the last line of defence if placed on a territory bordered by land. (These rules also apply to trading ports and military ports, with 6 and 9 durability points respectively.)
9. There are three custom forts that I have designed for the game – forts that were key strategic points in real-life campaigns. These forts are stationary. They cannot be placed on any territory/island and rebuilt on other territories/islands later in the game. Other than that, they function as regular forts. Once the ocean is created, their stats and abilities may need adjusting. In addition, more stationary historical forts may be created.
Gibraltar (Gibraltar, located on the southern tip of Spain)
72 gold (6 times the original cost of 12 gold), 10 guns: 3S, 2L, 2L, 2L, 2L, 2L, 2L, 2L, 2L, 3S. Ability: When this fort hits an enemy ship, you choose which mast is eliminated. Once per turn you may double the range of ONE of this fort’s cannons.
Diamond Rock (off the southern coast of Martinique)
24 gold, 2 guns: 2L, 2L
Ability: Extended Range.
El Morro (Havana, Cuba)
48 gold, 8 guns: 3S, 2S, 2L, 3L, 3L, 2L, 2S, 3S. Ability: This fort’s L-range guns cannot be eliminated.
10. Unlike the regular rules for Risk, territories can be abandoned. However, a faction cannot abandon their home territory under any circumstances. They can move most of their units and/or ships and gold to another territory to avoid being annihilated, but they cannot abandon their home territory.
11. When moving army units, each individual unit can only move from one territory to another once per turn. If units are part of a successful invasion, they cannot immediately move onto the next territory and invade it as well. Units can only move into one territory at a time (once per turn) even if the territories they are moving through are abandoned. When fortifying their position, a player can only move from one territory to an adjacent territory.
When army units move to acquire gold or resources, each unit has one cargo space (ex: three army units moving together can carry up to three lumber). When carrying resources/gold, army units cannot attack, but they can defend as normal.
12. There are no reinforcements from the number of territories or continents a player controls. Since players are supposed to pay for their armies, there will be no free reinforcements – players cannot bypass the cost of army units.
13. No cards from Risk are being used. There will be no reinforcements.
14. Each faction gets 10 free army units for home territory defense ONLY. These units cannot be removed from the HT, and are not represented on the map because they are part of the populace. They can only be used if another faction invades their HT.
15. Army units cannot move into a territory and explore it in the same turn. They must be given an explore action.
16. Similar to the RISK rules for army unit movement, crew and politicians can move across land. A move action can be used to move through one adjacent territory at a time. Equipment can be carried by army units; one piece of equipment takes up one cargo space.
17. Mercenary army units can be hired at military ports for twice the usual cost of army units. (faction bonuses/minuses at the HT do not apply – Mercenary army units always cost 6 gold per unit)
Action modifications
-Explore Actions: An explore action at a wild island takes an action, as usual. When a wild island is explored for the first time, the player that performed the action rolls a d6—match the result to the number of the corresponding resource. That island now produces that resource for all players, and you may load tokens of that resource onto the ship up to its cargo limit; each token fills one cargo space. Abilities that remove exploration markers may reset the resource of an island.
-Repair Actions: Repair actions occur normally, with the exception that a ship carrying both lumber and textiles may repair a mast at a wild island, per the shipwright rules; these resources are used in the process. Also, a shipwright stationed at a fort or military port may use the fort’s action for the turn to repair one cannon per turn.
-Combat Actions: Combat actions occur normally, although boarding actions have received updates and new actions, blockading and razing, have been created.
Updated/New Mechanics
-Boarding: after a successful boarding action, the winning ship may, in addition to taking gold or killing crew, take resources of any type up to their maximum cargo space. A settlement can be considered to have 2 masts in a boarding roll, and is captured by the winning ship. If a ship loses a boarding roll against a settlement, the attacking ship must remove a mast and move S away.
-Blockading: A trading port can be blockaded by a ship. If a ship docks at a trading port and declares hostilities, that port is considered to be blockaded; all trading ceases and the player loses all bonuses, including the production of commodities. The blockading player gains the resource bonuses, and can choose to take resources up to their cargo limit or remove them from the game.
-Military ports and HT’s can be blockaded, which results in the blockaded faction losing any resource bonus abilities they had until the blockade ends.
-Razing: A trading port can be razed with a boarding action; it is considered to be a 4 mast ship. If the boarding ship wins, the trading port is removed from the game, and the boarding ship receives all the resources available, up to that ship’s cargo limit. If the trading port wins, the opposing player takes that ship, but all crew on board are removed from the game. (Military ports cannot be razed)
-Raiding: A ship with the home-island raiding ability can dock at an enemy home island and take as many resources as she can carry, in addition to any gold. If able, she must leave on her next turn.
-Privateering: Once a trading port has been established, Mercenaries may be hired by the major nations as privateers. The ship or crew is bought for gold worth its build cost at the trading port, with gold in the trading port paying for the cost. The ship comes into play immediately at that island; it is considered a member of your nation for all purposes except that once it docks at a friendly home island or trading port, it is removed from play, along with any crew of the same nationality aboard. It may be hired again once it has been removed from play for the same cost. If a Mercenary ship sinks, that player cannot rehire that ship until a different player has hired the ship and it sinks as well.
Taxes and Loyalty
-Factions can levy a tax on their populace. Each faction’s populace is based on their city and how many political parties exist in their city hall. For flavor purposes, each number or “unit” of the populace represents 10,000 civilians (ie. a faction with a populace of 1,000 represents a country of 10 million people).
-The number of the tax rate is the amount of gold (up to 6) that faction receives at its home territory at the beginning of each turn.
-The tax rate can only move up or down by 1 gold at a time.
-When a faction declares a new tax rate, that tax rate must remain constant for 5 turns.
-A faction’s loyalty (of their armed forces and populace) can rise and drop. This is based on the tax rate and other factors. When taxes are raised or lowered, the corresponding drop or increase in loyalty occurs over the course of 5 turns. Loyalty cannot drop below 0 or rise above 100.
-Factions can only tax their populace if it is greater than 200.
-If the populace falls to 0, there cannot be taxes, and army units and crew cannot be hired.
-If a faction’s loyalty is between 60-79, that faction can add 1 to their populace per turn.
-If a faction’s loyalty is 80-99, that faction can hire crew for 1 less gold.
-If a faction’s loyalty is 100, that faction can add 2 to their populace each turn. Army units cost 1 less gold.
These effects do not stack, and occur at the beginning of the faction’s turn.
The chart below illustrates how loyalty changes with the tax rate. If the tax rate is at 6 for 10 consecutive turns, desertion will occur. 5 units desert per turn starting on the 11th turn of the 6 gold tax rate. If they go into the negative they have to pay for the units until they have a zero balance, after which they can once again purchase army units.
If a faction’s loyalty drops to 0, roll a d6. On a 1-2, there is a civil war. On a 3-4, there is a revolution. On a 5-6, there is a government overthrow.
Civil war
-The faction crumbles into a civil war between the opposing parties involved. The faction’s populace is cut in half. Divide the faction’s home territory into two areas. Each half gets half of the army units present in the home territory. On the faction’s next turn, the civil war begins. The two sides square off in battle, following the regular RISK combat rules. Battles continue until one side is victorious, ending the civil war. While the civil war is being fought, any ships within L of the home territory fire upon formerly friendly vessels.
Revolution
-The current political party and its supporters in the populace face a revolution by the opposing party. If there are over 50 army units in the HT, the rebellion is quelled and nothing happens. If not, the current political party is eliminated along with their leader. The faction must now function without a government (see below) for 2 turns, after which time another election can be held.
Government overthrow
-Eliminate the entire political party currently in control of the faction. Replace that party with a new party and leader, following the rules for elections (hold one election between the two parties next in line). The tax rate is decreased to 0 and cannot be raised for 10 turns. The loyalty is increased to 100 and can decrease from there.
If the eliminated party is the last party in the city hall, the faction must now function without a government until a new one is hired or planted. In that case, there cannot be taxes, but the faction also cannot buy army units or ships at their home territory.
Government
Each faction will have a city hall, where their government resides. There is no limit to how many different political parties a faction has in its city hall. However, each political party introduced after the initial number results in a loss of 5 loyalty. In addition, each political party introduced after the initial parties adds 20 to the populace.
Each political party will have a leader. This leader will be represented by a crew, and will function similar to regular crew. The politicians will have specific abilities pertaining to their strengths and weaknesses. Most politicians will have abilities that can ONLY be used while in the faction’s HT, but some will have abilities that function while at sea. Land abilities cannot be used while at sea, and sea abilities cannot be used while on land.
To introduce a political party, a faction must hire that party’s leader for a gold cost. Every politician that can serve in government must be paid 5 gold when “hired” in addition to the regular cost of the “crew” (the cost of their actual abilities). This brings that political party into play; they and their leader are placed in the city hall. Once in the city hall, they can begin participating in political elections.
Elections
Once every five turns, a faction can have their city hall host an election. Select two political parties and roll a d6 for both of them. The party with the higher result either advances in the governmental system (similar to a tournament bracket) or becomes the leader of the faction (if it was a final election). If a new party comes to power, their abilities and the abilities of their leader come into play and replace the abilities of the old party. Political parties and leaders can only use their abilities when they are in power. If a final election is held when the loyalty is 80 or higher, the party in power gets +2 to its die roll in the election. There can also be elections within parties, to determine which candidate of a party becomes the leader of that party. If a faction has 4 or more parties in their city hall, elections can happen every 3 turns. If a faction has 8 or more parties in their city hall, elections can happen every 2 turns.
Political parties and their abilities:
-These will be the abilities of each political party, which only activate when the party is in power. Political leaders will have their own individual abilities.
Land party: Favors land warfare and expansion.
-Army units have a base cost of 2 (instead of 3). Ships’ point costs are doubled.
Sea party: Favors naval warfare and expansion.
-Army units have a base cost of 5. Captains and helmsmen only cost 1 gold each.
Home territory party: Favors building up the HT through upgrades and a strong home army, as well as a large populace.
-All home territory upgrades cost 10 less gold than usual.
Exploratory party: Favors exploring every corner of the world, at any cost.
-Army units have a base cost of 4. Three explorers can be hired for just 1 gold. Helmsmen cost 1 gold.
Imperial party: Favors aggressive colonial expansion, and declares war on other factions often.
-The cost of island upgrades are cut in half. Every 5 turns, declare war on a faction.
Colonial party: Favors having as many colonies as possible, and having strong upgrades on them such as ports and high-level shipyards.
-The cost of island upgrades are cut in half. Decrease the populace by 2 each turn.
People’s party: Favors increasing the populace, having very low or no taxes, and preserving the safety of the home territory.
-City upgrades cost 25 gold (instead of 50). The tax rate cannot exceed 2 gold. Island upgrades cost twice their normal amount.
Religious party: Favors going to war with specific factions whose religion conflicts with their own.
-Assign a number to each faction. Use a random number generator to choose a faction. Declare war on that faction. Pursue peace treaties and armistices with all other wars.
Upgrade party: Favors upgrading all structures, including those on colonies, before building up the army and navy.
-Halve the cost of all upgrades. Double the costs of ships and army units.
Trade party: Favors resources over gold, and pursues profitable commercial relationships with other factions.
-Halve the value of all gold unloaded at the home territory. Halve the cost of trading ports. Pursue commercial alliances with the factions you can profit most from.
Gold party: Favors gold above all else, including resources and actually spending that gold.
-Double the value of all gold unloaded at the home territory. Halve the value of all resources unloaded at the home territory. Cannot spend more than 20 gold per turn.
Power party: Favors an absolute monarchy/dictatorial state. Works to eliminate other political parties from contention. Potentially high taxes but a very clear sense of purpose. (centralized decision making)
-Hire political assassins to eliminate other parties from the city hall. When this political party comes into power, roll a d6. On a 1-3, loyalty drops by 20 immediately. On a 4-6, loyalty does not drop when taxes are increased. Cannot issue bonds.
Resource party: Favors collecting a specific resource, depending on the leader’s preference.
-Roll a d6. The result is the resource type that now doubles in value for this faction only.
Region Party: Favors having absolute control of a specific area
Abilities: Roll a d6. This number is the particular region the party is trying to control (refer to chart). Generally the lower the number, the more difficult it will be to control the region. There will be benefits for establishing and maintaining control of a region when the Region Party is in power.
-The cost of military ports are halved in the specific region. Any ships and army units not in the specific area get -1 to their cannon and combat rolls (only).
-We are still figuring out the specifics of this political party.
There will likely be other parties as well.
-Once every 10 turns, a faction can plant a political party and leader inside the city hall of another faction. This can be used to help that faction, or to hurt them. The leaders of these planted parties can have secret abilities known only to the player who planted them. The player must reveal the secret ability when they intend to use it. This is a way to simulate assassinations, though other possibilities exist as well. (Example of a secret ability: Select a political leader in this city hall. Roll a d6. On a 4-6, eliminate that leader from the game.)
-Sometimes there will be a frontrunner in the political race. That party will get to double its election rolls, but will disappoint the populace and therefore have subpar abilities. On the other hand, a party may have its rolls halved for elections, but might have very worthwhile abilities.
There will be a trade-off between loyalty, populace level, taxes, and long-term agendas. More political parties mean less loyalty, but a higher populace could give a faction the ability to tax. Introducing more political parties also increases how many elections there can be, but that can lead to high turnover in terms of government, which can hinder a faction’s overall progress.
Bonds
Factions can issue bonds to receive money from their populace.
-Bonds are an immediate influx of gold.
-A faction can receive a maximum bond value of 10% of their total populace (ex: a faction with a populace of 1,000 cannot receive a bond worth more than 100 gold)
-Factions must repay the value of the bond plus interest. Interest is paid at the end of the period.
-The minimum period of a bond is 10 turns. There is no maximum period.
-The interest rate is tied to the period. A 10 turn bond has a 10% interest rate. 10 turns after issuing the bond, a faction must pay 110 gold back to the populace by eliminating the gold from their home territory (following the 100 gold example).
-Factions are not required to issue maximum value bonds; they can receive gold equal to less than 10% of their populace value, but never more than 10%.
-Only one series of bonds may be issued at a time. More bonds cannot be issued until the current ones are paid off.
-If bonds are not paid back, loyalty drops by the amount that isn’t repaid.
Example: A faction has a populace of 1,186. The maximum amount they can get for their bonds is 119 gold. However, they don’t think they can pay back 131 gold in 10 turns, so they opt to receive 80 gold, with a 15 turn period. In 15 turns, they pay 92 gold back to their populace. If they can only pay most of the bond payment (70 gold), loyalty drops by 22.
Rumors and Missions
Named crew (only) may try to acquire rumors or missions, which may help them or their nation. Rumors are usually more esoteric or selfish in nature, while missions are more obvious and “patriotic”.
-Rumors may only be obtained while docked at another faction’s settlement or trading port (not colonies).
-Missions may only be obtained while docked at the fort or military port of the ship’s faction.
To acquire a rumor or mission, roll two d6. Add the results, and compare it to the point cost of the most expensive named crew on the ship. If the sum of the dice is lower than the point cost, that named crew has been successful. Place a Unique Treasure representing the rumor or mission on the ship’s deckplate. Rumors and missions are kept face down, but they do not take up cargo space. Rumors may be stolen as regular “treasure”, but missions cannot be stolen by any means. If a ship with a mission is captured or sunk, the mission is eliminated. If the named crew is eliminated, the rumor is eliminated as well. (Rumors are tied to their named crew; missions are tied to the crew and the ship.)
-There will be a neutral merchant ship that sails around once in awhile. This ship will be a 4 masted ship with L speed and 8 cargo spaces. All 8 cargo spaces will be filled up with one resource type. Ships can engage this merchant ship to trade goods on a 1:1 basis. The merchant ship cannot shoot or be shot at. Once all of the original resources are gone, the merchant ship leaves the game, but may reappear again.
Victory Conditions
-There are no victory conditions. This game is not expected to end.
House Rules
-Factions must meet at sea or on land in order to exchange information, or send messengers. The players of the game cannot simply speak to one another or send messages through the module chat.
-NO TELEPORTATION! (of any kind)
-All ships must be hit twice in the same turn to eliminate one of their masts. This ability also applies to ships such as El Acorazado, whose ability now reads “four hits are required to eliminate one of this ship’s masts” (not necessarily the same shoot action). In some of the larger battles, this may become difficult to keep track of, in which case we will use the “same shoot action” rather than the “per turn” ruling. In VASSAL, we are tentatively planning to use pennant flag markers to denote that a ship has been hit before the second hit eliminates a mast.
-Ships cannot do damage by ramming.
-When a ship wins a boarding party, the winner decides whether they will take gold/resources or eliminate crew. The winner chooses which gold/resources to take, but the loser chooses which crew is eliminated.
-Ships can be shot at while docked at their home islands.
-Marines are now a generic crew. They cost 5 points, and simply have the Marine keyword. Named marines cost the same as usual, but they get two shots per shoot action instead of one. Since generic marines are generic crew, they are subject to the no-stacking rule. However, named marines work the same as normal – they can stack. If multiple generic marines are present on the same island or territory, they can all be given shoot actions.
-Forts now cost 6 times their normal gold cost, with the exception of Paradis de la Mer, which costs 30 gold.
-When an enemy ship comes within range of a fort’s guns, that fort may fire ONE cannon.
-Forts can now be set on fire.
The rules for flaming forts will work like this: instead of the fort rolling for each fire every turn, it rolls one die regardless of how many fire masts it has and regardless of whether the fort is given an action during the turn. The roll follows the regular rules for fire masts. The fort will be automatically destroyed if the fire consumes all 8 areas (not how many guns the fort has). A shipwright can only put out one fire per turn, but no flag is raised in the fire’s place until another repair action is given.
-Incentivize captures – possibly an answer to the problem of sinking ships (ships sink more in Pirates CSG games than they did in real life combat). When a ship is captured, that faction can “rechristen” the ship as one of that nation’s ships instead once the captured ship is fully repaired, and pays the difference in gold cost. Ships exchanged in this manner MUST be of the same ship type. Factions do not get any kind of gold or resource bonus if the captured ship is worth more than the ship they are converting it to. If brought back to a shipyard that is not an adequate level (for example, bringing a captured 4 master back to a level 3 shipyard), the faction must upgrade the shipyard in order to rechristen the ship. (The normal rules for capturing ships still apply, and therefore it may be more advantageous to not use this rule and simply keep the captured ship and change it’s nationality flag.)
Very simple example: the Pirates capture the Couer de Lion from the French, tow her back to their home territory (or a military port where they can legally launch ships from), repair her, and “exchange” her (simply editing the stats) for the Banshee’s Cry by paying 1 gold for the cost differential.
-Factions can send ships back to their home countries in Europe for reinforcements. This is done by sailing at least one ship off the eastern edge of the map; it is removed from play. The ship(s) must roll for effect on one of Xerecs’ storm terrain on their way to Europe. The faction may get free reinforcements while out of play after arriving in Europe. If one ship reaches Europe, they can get up to 100 points of ships and crew. If two or more ships reach Europe, they can get up to 200 points of ships and crew. It takes 100 turns to reach Europe, and a number of turns equal to the largest new ship’s mast count to launch the reinforcements. It will then take another 100 turns to return to the eastern edge of the Caribbean in the same spot as the faction started the game in. Each of the starting factions can only do this once per game.
-Factions can transport lumber for use as fire beacons. This is a means of communicating over great distances. One lumber resource is needed for each beacon. To make an effective chain of fire beacons, it would have to be a consecutive line through territories (one lumber needed per territory, and the territories need to share a boundary line). As a free action, army units from ANY faction can burn a beacon if they are in that territory. This will set off all other beacons that can be lit in the chain, at the rate of 2 beacons per turn. Any faction can also take the lumber resource as normal. On islands, fire beacons are lit at the rate of 3 beacons per turn, and can be used at a range of up to 2 of the Long Range Rulers (basically 8L).
Storm terrain will occasionally be used.
Storms
If any part of a ship touches a storm, place that game piece inside the storm; they are lost. Roll a d6. If the result is lower than the number of masts, segments, or flags on the game piece, eliminate one mast, segment or flag from that game piece. For game pieces with one mast remaining, treat a roll of 1 as a roll of 0. Ships exit storms by giving them a move action for their turn, and rolling a d6. Place the ship on her stern facing outward on the number rolled. (Moving out requires the full action, unlike fog banks.)
-It is possible there will be seasons (which mimic real life) where more storms are present than usual. Hurricanes may be introduced.
-Equipment
Dueling Pistols
Type: Equipment
Point Cost: 5
Reveal this event when within S of an enemy ship. The two ships involved cannot shoot at each other this round (including next round if needed). Specify a named crew on the opposing ship, and one on this ship. Roll a d6 for each crew and add the results to the crew’s point costs. The crew that rolled lowest is eliminated from the game. Eliminate Dueling Pistols from the game.
Trick Duel
Type: Equipment
Point Cost: 10
Reveal this event when within S of an enemy ship. Specify a named crew on the opposing ship; that crew is now assigned to this ship, but doesn’t take up cargo space, doesn’t count against the point limit of this ship, and cannot use its abilities. The opposing ship now gets a free shoot action, after which this ship can move L away. Eliminate Trick Duel from the game.
(Thematically: The captain or crew in question rows over to the other ship with a few members of his crew. These less important crew are quickly dispatched, and the key figure is taken hostage.)
Currently unknown house rules:
These are house rules that are either currently unknown, or are known only to the players playing the game. As a result, some of them will be left deliberately ambiguous.
-The chart for resource values and types may change.
-There will be custom UT’s with special rules.
Quests
Nations can engage in quests. These are purposely ambiguous and subject to change. The nations do not know of the specific quests at the outset of the game. Only through certain means can they come to fruition. There may be various types of rewards for completing quests. This is a game mechanic we have not figured out yet.
Useful abbreviations and wordings
-Faction/nation/fleet/etc all mean the same thing.
MP=Military Port
TP=Trading Port
HI=home island
HT=Home Territory
WI=wild island
CG=campaign game (the C can also stand for cumulative, but that’s generally a more basic campaign game with a less complicated ruleset, such as CG1 and CG2)
Certain abilities will also be simplified:
EA=Extra Action
SAT=Same Action Twice
SAC=Sacrifice action
Canceller=“Once per turn, one crew or ship within S of this ship cannot use its ability this turn.”
HI raider=home island raider (effectively a “home territory raider” for this game)
In the Battle Reports for this game, I may use abbreviations that can be found here on the third sheet labeled “Information/keywords/abbreviations”.
Cameo/Guest appearances
As mentioned earlier, you can join this game! However, before doing so, we ask that you get comfortable with the Pirates module (helpful page here), and get to know this ruleset pretty well. We realize that these are large barriers to entry, and we’re not expecting frequent or consistent guests, especially considering all of life’s numerous time obligations. As evidenced by CG2 (a VASSAL campaign game with three players), playing a campaign game with more than two players remotely is not easy. We still encourage anyone who is interested to participate. Guest appearances would likely consist of one or both of us relinquishing control of at least one of our factions for a specified period of time; this could be as short as one turn, to as long as a month or more. It all depends on your availability, aptitude, and passion/interest level. One of our favorite things to think about in terms of these “cameos” is how it simulates changing leadership, which is obviously one of the keys to history. Just let us know and we’ll fit you in!
Thanks for reading, and welcome to the Caribbean!
3/10/2018 – The first turns of infinity….
Welcome to the Caribbean!
We know our map looks rather silly, but that is the cost of entry to even play this game. If the territories weren’t so small and low in quantity, we would have technical issues similar to the World game. As with just about everything else concerning this game, gameplay trumps everything, including the map and region itself. However, I am quite satisfied with the map now that it’s done.
The map features a ton of real world locations. It is a custom VASSAL ocean 20 ocean tiles wide by 10 ocean tiles high, with double borders on all sides to provide more space for deckplates.
I created 13 different territories, with 11 of them making up the landmass of the New World continent. Cuba and Hispaniola are the only island territories, though some bigger islands like Jamaica and Puerto Rico have two island pieces put together to form the larger island.
There are a whopping 75 islands. These are all islands from the real world, and I took detailed looks at them in Google maps to determine which of the 4 main island pieces I should use for each. As a result, each island is as closely represented in both shape, size, and orientation (rotated correctly) as I could get them. The scale is necessarily off by quite a bit, but we are happy with the final product. There are also some oddities with the map, as I took some leeway and added Bermuda in the far north. In addition, Antigua, Barbuda, and Barbados are farther east than they should be to expand the horizon a bit. There are a grand total of 86 land locations between the 75 islands and the 11 non-island territories.
Finally I added the reefs. There are not nearly as many as there should be, but once again that is to keep the file size small at the start to minimize overall lag. There are still many dozens of reefs, and all of them were added by looking at maps first. None of the reefs were placed randomly, and I did my best to put them in orientations most similar to real life. Even the few reefs you see a bit southeast of Jamaica are actual cays or banks in the actual Caribbean Sea.
In short, the map is about as accurate as can be had given the limitations of the VASSAL module and the gameplay itself. It took many hours to make, and is one of my all-time greatest map creations up there with the World map and Command the Oceans.
Now, for a tour of the Caribbean!
This is the northwest corner, where the coast of America starts with Florida and continues with Carolina, Louisiana, and Tampico. To the right you can see the Lucayan Archipelago, including the Bahamas. That region has 16 islands.
Continuing south, you can see Mexico and Southern Mexico as territories in the far west. This picture shows most of the Greater Antilles, comprised of 8 islands.
Moving to the northeast, we come upon the vast expanse of the sea and the Lesser Antilles.
In the southeast corner is the main island chain running north-to-south that includes some of the most important islands in the history of the West Indies. With factions sailing in from the east, it will also be possibly one of the busiest regions in the early part of the game. The Lesser Antilles as a whole comprise the largest region by map size and land locations, with 39 islands in the region.
Finally we come to the southwest, the region I’m calling the “South/Central American islands”. There are 11 islands in this region (Aruba and others are pictured to the east, but I looked it up and they are considered part of the Lesser Antilles). In addition, the southern hemisphere territories include Veracruz, Tabasco, Campeche, Honduras, and Yucatan. I really wanted to make the Florida/Yucatan channel closer, but it’s just not feasible with the constraints we have. I was pleasantly surprised with how many islands I found in the southern part of the Caribbean and Gulf of Mexico, so hopefully there won’t be a lot of “dead zones” in the long-term.
THE RACE TO COLONIZE THE CARIBBEAN IS ON!!!!
Recently discovered by a single European ship now repairing back in Europe, the Caribbean is open to exploration!! It could be considered to be the “year 1500” and the major powers of Europe are sending vessels across the Atlantic to seize new territory! However, they don’t know what’s out there, and may be shocked at the sheer size and scale of the venture….
In the order of play, here come the factions!! As detailed in the ruleset, we started with 20 point faction-pure fleets with no 0LR +5 crew.
The English, controlled by Xerecs, The Lord Sentinel. They have chosen two capacious ships to send west, with HMS Hound and HMS Cumberland on the scene. Both carry a helmsman, explorer, and oarsman.
The Spanish, controlled by Xerecs, The Lord Sentinel. La Monarca has an explorer, while the Morning Star carries a helmsman.
The Dutch, controlled by Admiral A7XfanBen. The historic Prins Willem has arrived with a legendary explorer at the helm: Abel Tasman!
Prins Willem
Faction Affiliation: Dutch
Rarity: C
Type: Ship
Point Value: 14
Number of Masts: 3
Cargo Space: 5
Base Move: S+S
Cannons: 3S,3L,4S
Ability: Crew do not take up cargo space on this ship.
Abel Tasman
Dutch
Crew
6 points
Ability: SAT (Born Leader). Helmsman. Explorer.
The French, controlled by Admiral A7XfanBen. The French also have a historical “all star” in their starting fleet they’ve sent to the Caribbean: Robert de la Salle aboard La Belle! They are also sailing in with the Terron (another historical custom) and the Jeux.
La Belle
Faction Affiliation: French
Rarity: C
Type: Ship
Point Value: 7
Number of Masts: 2
Cargo Space: 3
Base Move: S+S+S
Cannons: 4S,5S
Ability: This ship cannot be pinned.
Link: Robert de la Salle
Terron
Faction Affiliation: French
Rarity: C
Type: Ship
Point Value: 5
Number of Masts: 2
Cargo Space: 2
Base Move: S+S
Cannons: 4S,5S
Ability: Ship treasure trading. (Once per turn, if this ship carries treasure and is within S of an enemy ship, you may randomly trade one treasure with that ship.)
Robert de la Salle
French
Crew
3 points
Ability: Helmsman. Explorer.
Link: La Belle
With that, a final look at the undisturbed region before the game begins! The factions are starting on the far east side now that they have arrived from Europe. They are placed approximately equal distances apart from one another and only have vague inklings of the other factions in play and where they might be. They have been placed north-to-south according to their latitudes over in Europe. North to south: English, Dutch, French, Spanish.
If you want to really study the map and check out the locations, click on the picture below, then click to zoom in on postimages.cc. Then right-click it in the new tab and hit “open image in new tab”, and zoom in again. Then you can see the full picture in all its glory, at 9800×5000 pixels. O_O (may take a little time to load)
This is a combined report, so I have integrated part of Xerecs’ writings into this first battle report for the game. Some of the events may be slightly out of order, but we took a lot of turns and things were happening quickly as the session went on. However, this is the last time we will do this, as it gets far too confusing! XD After this report we will do separate reports; I’ll be covering as much as possible, but we’ll also be doing reports for our specific fleets.
We also streamed live to youtube, which we hope to do frequently with the live sessions for this game. You can hear our excitement and banter in the video, where we recorded all of the first session.
Xerecs wrote:
The English are the first to go in this ‘endless’ game, and their two ships the Hound and Cumberland set sail from the far eastern reaches of the sea. The crew of the Hound eagerly look forward to their adventures and exploits in the name of the crown, while the crew of the Cumberland look ahead to the potentially long voyage with mild apprehension. Sailors can go mad if they’re cooped up on a ship for too long after all….. Far to the south, the Spanish began their own voyage with excitement, unknowingly reflecting the sentiment of the Hound. The Monarca and Morning Star will both be able to keep pace with one another, which will come in handy should either ship’s captain suggest changes to their course.
The French sail along, with three ships moving at different speeds resulting in being quite spread out over time. Robert de la Salle forges ahead in his ship La Belle, eager to find land and plant the French tricolor!
The English make the first landfall in Barbuda! They would explore to find textiles.
The English sail south and soon come upon Antigua, finding metal! This means the English have explored the two islands in the most northeastern part of the region, but they didn’t like either as a home island due to the reefs nearby.
Quote:
The English made land ahead of the Spanish, but the journey was not an easy one. With a far superior speed, the Hound has left behind the Cumberland, and found two islands; first Barbuda in the north, and after finding textiles there and finding it not suitable as a Home Island, turned south. The Hound found Antigua soon afterward where Metals were discovered. Since then the Hound has turned back west, while the much slower Cumberland has finally made land at Barbuda. After resting at the island and taking one of the textile tokens, the Cumberland has once again resumed her sail westward, in what the crew believes to be the footsteps on the Hound.
Zooming ahead a bit, but the Dutch were the second faction to sight land! With the help of Abel Tasman’s SAT, they were able to explore 4 islands in short order, going northwest and “island hopping” from Montserrat to St. Kitts and Nevis, then up to St. Eustatius. Along the way they find 4 different types of resources – metals, luxuries, food, and lumber!
The French find land at last! La Belle approaches Martinique, ironically a French island in the historical Caribbean. Diamond Rock is not a separate island for play purposes – it’s labeled because that’s where the custom Diamond Rock fort can be built.
As the turns go on, the French fleet gets even more separated, with the Jeux and Terron lagging behind La Salle’s flagship.
The Dutch declare that St. Eustatius will be their home island!! With that, they are the first faction to settle on a home island. Wanting to cash in some resources, it was finally time for the first resource rolls! (on Turn 29!) A 6 for values meant that medicine (resource #5) was the most valuable resource, but the values would only hold for 4 turns, not long enough to even affect the other factions!
Cashing in some resources held in the cargo hold of the Prins Willem, the Dutch build the first structure of the game! Spending 10 gold to establish a Level 1 shipyard, they will be able to start construction on one 1 masted ship next turn. As detailed in the ruleset, upgrades of any kind must happen sequentially, and shipyards can only build as many ships as their level indicates. They also scale to the size of the ships, so at max capacity a Level 3 shipyard can build up to three 3 masted ships simultaneously.
Quote:
Some time later, with their stores nearly depleted the Spanish finally find land, the island of Grenada. They will explore it by their next turn, which will give their weary crews a much needed respite. The Spanish have found Medicine on Grenada, of which the Monarca takes one, and the Morning Star takes two. Neither crew is satisfied with the island in regards to a Home Island, given the reef off of the north shore which would make launching difficult. As such both ships turn sharply northward, and decide to follow the reef, in hopes that they have stumbled upon an island chain. Their hopes and hunches were in the end correct! A few turns later and the Spanish have discovered Grenadines, on which Luxuries were found. After exploring, the Monarca maneuvered around the reefs to move northwest, her smaller size allowing her to fit between the reefs without serious risk. Meanwhile, the Morning Star being larger kept sailing in a northward direction, under guidance from the crew of the Monarca before the two ships became separated by the island. Both ships have spotted St. Vincent, and both crews think that it could make a fine Home Island for them.
After finding lumber on Martinique, Robert de la Salle decides to brave more open ocean, taking La Belle north! The crews of the Jeux and Terron are certainly getting worried, but La Salle specifically instructed them to sail due west until they make landfall, excepting any hostile relations of course.
It was already time for the first actual resource change! (Turn 33) The 1 for values means that every resource is worth its number value (luxuries are the #6 resource and now worth 6 gold apiece), and the duration was for 10 turns, long enough for factions to actually take advantage of the values!
This certainly benefits the Spanish, who have found luxuries on the Grenadines:
A few turns later and the Dutch are in business! They found medicine (currently worth 5 gold apiece) on Saba, and the Prins Willem has brought some home for a small windfall of 25 gold! With the gold the Dutch purchase the first Tavern, which at Level 1 can be used to hire generic crew and purchase equipment. They also have nearly finished constructing the first new ship of the game, the Limmen! All of my customs and their stats can be found here.
A cheap resource runner with a negative ability to keep the cost down, the Limmen is officially the first ship launched in the Caribbean game. The Dutch fleet begins to expand and their focus is solely on trade and infrastructure.
Quote:
A turn later and the Spanish have explored St. Vincent, finding food in the process. Both crews scout the island and the surrounding terrain as thoroughly as they can, finding little terrain that would impede the launching of ships and the conducting of trade. Could it be their Home Island in these waters? The Answer is a definitive YES! Both the Morning Star (MS) and La Monarca unload their medicine tokens, which are now worth their face value of 5 gold apiece! They begin to formulate plans to upgrade the island, likely with a shipyard which will turn it into their HI for the foreseeable future. The English have not been inactive, they’ve simply been sailing for a longer time, and have not discovered an island chain as the other factions have. However, that could change as the Hound finds Saint Barthelemy. While it appears to be on the smaller side, from what the crew can see there are no dangerous reefs around the island which would impede launching and expanding.
Zoomed out quite a bit, and you can see that the Dutch and English aren’t that far apart from each other. The Dutch have planted their flag in a nice 5-island chain running to the northwest, with Montserrat out of the frame to the south. Now that the Limmen has been built and sailed out, the Dutch begin construction on another 1 master.
The French situation a bit to the south, where they have made a lot of progress! Robert de la Salle scouted and explored Dominica, finding medicine. Noting the reef on the northern side of the island, he didn’t think it would make for a great home island. However, he sailed north and quickly discovered both Marie-Galante and Guadeloupe! In addition, the Jeux has finally gotten to Martinique, relieved to see evidence of La Salle’s scouting efforts. She loads lumber, slowing her down, and heads north. The Terron brings up the rear.
The Spanish situation. They have explored St. Vincent and the Grenadines, while the Morning Star finds St. Lucia!
Quote:
An exciting few turns for the Spanish! They successfully upgraded St. Vincent to transform it into their HI! You can see their newly built shipyard on the western side of the island (represented by a yellow token and a 1 coin, to denote it’s level). At this stage, the shipyard can only build one ship at a time, up to one mast ships. With several valuable resources just to their south, the Spanish seem to be in good shape for the immediate future, with enough gold already brought back to launch and begin building the San Leandro!
The shipyard and Monarca:
Notice that for the first time the MS and Monarca are splitting up.The San Leandro being built: A turn later and the San Leandro is built and ready to sail! She turns sharply northward to follow the Morning Star’s last known heading, hoping to meet up with her at another island. Meanwhile the crew of the Monarca get busy hauling gold around, with another load brought in from Grenadines giving them 43 gold. The Spanish spend a good chunk of it on upgradeing their shipyard, and building a Tavern, from which they can hire crew, spending 20 and 10 gold respectively).
The Tavern is the structure on the north side of the island, with a 1 coin to denote it’s level.
Taking advantage of the valuable medicine on Saba, the Dutch spend more gold! Cashing in the medicine, they launch the Muis and Heemskerck (1 masted cargo ships here), upgrade their shipyard to Level 2 (next turn it can begin construction on up to 2 ships with up to 2 masts each), and purchase the first island upgrade of the game! The Prins Willem loads the upgrade and the 10 gold used to pay for it. As detailed in the ruleset from the first post, each faction gets a free army unit for their home island, but we may remove them since it is easy to select them and the home islands will be overcrowded even without them. Since the structures tab of the module was mostly for home territories of the World game, we are not likely to use those to represent structures unfortunately, with the exception of taverns since they are small. We generally plan to represent structures and their levels with a neat horizontal line of face up coins (number denoting level) on or just above/to the side of the HI. A lot of things are still up in the air, since the “home island settlement” house rules combine with the upgrade system to make for some confusion as compared to simply starting the game with a home island.
Ironically, Sint Eustatius was part of the Netherlands Antilles for a long time, so it’s perfect as the Dutch home island!
The French decide to settle on Guadeloupe! Robert de la Salle has finished scouting the island, and is satisfied enough to make it the French home island! Luxuries are found on the island, while La Belle has already unloaded her lumber from Martinique. Since Marie Galante is only a single move action away from Guadeloupe, we will be making a house rule that the islands are considered too close to be separate if one of them was a home island. The same goes for the Spanish, where the Grenadines will run out of luxuries at the end of the current resource duration. That island is even closer to St. Vincent than Marie Galante is to Guadeloupe, and of course “St. Vincent and the Grenadines” is how those islands are often grouped in real life anyway. This is all to prevent gamey situations where factions abuse islands right next to their home islands for maximum profit.
Quote:
As the first session came to a close, the Spanish found themselves doing reasonably well. They had established a Home Island, have the top 4 most valuable resources close at hand, and have begun to expand their fleet. The English have not done as well as the Spanish, but are making strides to catch up. After exploring Saint Barthelemy, the Hound moved north west and has discovered Saint Martin, which from first scouts and explores seems like a suitable island to make into a Home Island, as there are no reefs close to it, and it is a sizable island. The Cumberland is slowly making her way toward the small cluster of islands the Hound has stumbled into, once both ships meet and catch up, they will decide on a location from which to grow…….
With their Level 2 shipyard, the Dutch have begun construction on the Galias (a 2 master with 4 cargo spaces and S+L speed) and now have 5 total ships in play.
With that, the first session of gameplay is complete! We are exactly 40 turns into the game! There are only 2 turns left until the next change. The Dutch and Spanish are off to the fastest starts, but the French and English have been doing well of late now that they’ve made landfall. There is so much more to come that it would boggle the mind, so stay tuned!!
Note: Some of these pictures may be out of order slightly in the sequence of events. The turns are still going by quite quickly, and when it’s not my turn I’m constantly taking pictures and updating the spreadsheet we’re using for turn counter, upgrade stats, etc. My historical customs can be found here.
The Prins Willem carries the first wild island upgrade of the game towards Saba!
The Dutch have the first colony of the game! Saba is now a colony of the Netherlands, and the Dutch are off to a strong start with valuable medicine and a good fleet to haul it with.
To the southeast, the Terron finally reaches land! She loads lumber from Martinique and heads north after seeing an arrow on the beach left there (by de la Salle of course). The Jeux reloads her resources and also heads north, where La Belle has taken aboard some textiles from Marie Galante.
Soon after we started play, the resources changed. A 6 for value and 8 for duration meant that the Dutch would be even richer than they already were! (medicine worth 6 gold apiece) This also marked the end of resource production on Marie Galante and the Grenadines, the “partner” islands of the French and Spanish HI’s respectively.
The Spanish operation at St. Vincent:
Sailing due west in his appropriately linked ship Duyfken, the famous Willem Janszoon has been hired by the Dutch to explore west of St. Eustatius! The Dutch have also begun construction on the slow but capacious Oliphant.
The Cumberland sights St. Martin:
Having launched the San Francisco and Algeciras (SCS version), the Spanish go north to get resources from St. Lucia.
THE FRENCH CREW HAVE HOPE!! Frenchmen aboard the Jeux sight La Belle for the first time in a while, rousing a cheer from the deck. Robert de la Salle smiles and signals that he is going south to pursue the valuable medicine on Dominica.
The English decide to make St. Martin their home island!! The island currently produces lumber, with food and luxuries nearby.
In a somewhat momentous event, the Dutch build the first City in the Caribbean!! Spending a whopping 50 gold to get a Level 1 city that will increase their populace by 3 each turn, the Dutch are in business. When a faction purchases their first city, they also get a free City Hall as well – this means the Dutch are the first faction to get one, and next turn they can potentially start hiring politicians or doing governmental things. Yet another ship is being constructed at their shipyard, while Willem Janszoon ventures west in the Duyfken.
The English split up, happy to finally have a home island:
With their shipyard at Level 3, the Dutch begin construction on the Ridderschap, which will be helmed by none other than Philips van Almonde.
At some point during the session another resource change was needed! This time the value roll was 2, with a 7 for duration. This was great for the Dutch and English, whose home islands produce lumber. For now, we have a rule that home islands produce exactly one resource token per turn. If a faction gets all their structures to Level 2, the home island can produce 2 of that resource per turn.
The French are finally launching some ships! With a Level 1 shipyard they built Le Pique, and here they’ve upgraded the shipyard to Level 2 and have begun constructing the Favori and Bon Marin. The resources unloaded by the Jeux were of maximum values (5 and 6 gold apiece), which gave the French their Level 1 tavern as well. At the bottom, La Belle is already about to lap the Terron, whose crew is just happy to see La Salle again and hear of the great home island of Guadeloupe being set up.
LAND HO!!!! In a huge discovery, Willem Janszoon discovers a trio of islands west of St. Eustatius! The Dutch sent Janszoon due west to find whatever he came upon without changing his course, and here it’s paying off. Peter Island, Tortola, and St. John have all been sighted, and Willem Janszoon looks forward to exploring them soon.
IT HAS HAPPENED!!!! THE COMPLEXITIES BEGIN!! XD
With much excitement, the Dutch elect Olivier van Noort to be their first political leader!! He will head the newborn Exploratory Party!
Olivier van Noort
Dutch crew
4 points
Ability: Helmsman. This ship gets +1 to her die rolls against the Spanish.
Van Noort is proud to be the leader of the new Dutch Government, and carries with him a wealth of maritime experience. Neither of his abilities are land or politician-based, but that’s for a good reason – the Dutch wanted a true seaman and explorer to head their new and untested political system. Abel Tasman had a huge influence on the decision to choose van Noort, and was even considered as a candidate himself. However, Tasman would prefer to be at sea, while van Noort claims he is just fine directing operations from the Dutch home island of St. Eustatius.
In case you haven’t seen it yet, here are the details of the Exploratory Party:
Exploratory party: Favors exploring every corner of the world, at any cost.
-Army units have a base cost of 4. Three explorers can be hired for just 1 gold. Helmsmen cost 1 gold.
This is exactly in line with the Dutch strategy so far. Abel Tasman and Willem Janszoon are proven capable explorers, and van Noort completely subscribes to their mindset and aspirations. With so much unexplored territory to be gained for the Dutch Republic, it’s in the best interests of all parties involved to have a unified government that seeks to explore the region in its entirety. Van Noort is completely on board with the plan to colonize the Caribbean and plant the Dutch flag wherever possible!
To that end, the Dutch went on another mini spending spree immediately after selecting van Noort. The Snelle Ongedierte is the ship of Adriaen Block, yet another capable Dutch explorer who will map territory for the Netherlands. He is determined to find as many islands as he can, as fast as he can. To the point where there is even talk of a friendly rivalry between Janszoon (who has long since departed on his voyage of course), Block, Abel Tasman (still running medicine with the Prins Willem), and any other Dutch explorers that van Noort sees fit to hire. The fast and expensive Onzichtbaar is also now under construction, joining the Snelle and Ridderschap. Overall it is becoming a glorious time for the Dutch, whose fleet will soon number these 11 ships, and now contains 4 of their prominent exploring minds.
But unbeknownst to them, the Dutch aren’t the only faction in the Caribbean! The Spanish have been doing very well for themselves, becoming the first faction to get their shipyard to Level 4 and beginning construction on three new ships!
St. Vincent is crowded indeed, though a less fortunate resource change and the drying up of luxuries on the Grenadines may slow them in the short term.
Now for a couple zoomed-out shots. The Dutch and English are actually located remarkably close to each other, with St. Martin only a handful of move actions north of St. Eustatius. At the bottom, you can see that the Dutch have sent two of their ships southeast to St. Kitts and Nevis.
The French and Spanish aren’t as close to each other, but St. Vincent and Guadeloupe lie in the same island chain of the Lesser Antilles.
This was an exciting session that saw the first city built and various important developments. The Dutch are getting revenge in a way, since they should have appeared in Pirates CSG long before the Vikings and arguably other factions as well. What a grand opening to a well-deserved faction! We are 52 turns in and looking forward to more!
The warm waters of the Caribbean beckon to those looking to make a fortune establishing their trade…
The English continue to get both food and luxuries from the two wild islands near St. Martin.
Many Spaniards are busy at work in the shipyard of St. Vincent, where three impressive ships are under construction. The Morning Star has been sent west, presumably to explore and mark new territory for Spain! Smaller ships make trips to the north and south for resources.
Here come the Dutch! At the far left, Willem Janszoon moves on from Tortola after finding lumber there. At the right, three Dutch ships have gone southeast of St. Eustatius to get resources from St. Kitts and Nevis. These sort of zoomed-out pictures will become more common as factions begin to stretch the prior limits of their explored waters.
Southeast of the Dutch, the French are constructing two ships and making long trips to Dominica for medicine.
At the left, Philips van Almonde pilots the Ridderschap west. Dutch leader and Exploratory Party leader Olivier van Noort has sent Almonde west to meet up with Janszoon. Van Noort is worried that Janszoon could use support or an escort for the arduous journey ahead. However, with Janszoon’s excellent skills, the Duyfken is still faster than the swift Ridderschap! At the right, the newly launched Vis heads due north as the Dutch upgrade their shipyard to Level 4! At this point the Dutch are the early points leader (unbeknownst to them and the other factions), bringing in resources often, cashing them in, and launching new ships at a fast pace.
As the French save up for something, the Favori leaves port. Heading north, her crew have disobeyed La Salle’s orders to sail south to Dominica until a stronger presence can be established in the unknown waters north of the French home island of Guadeloupe. At the bottom, you may have noticed that the Terron is finally leaving the French home island – it took her a while (over 50 turns!), but she has finally reached and docked at the French HI!
The English spend 40 gold to upgrade their shipyard to Level 2 and buy a Tavern!
The French reveal what they’ve been saving for! The second city of the game!! This gives them a city hall, so they can begin government operations next turn. Northwest of Guadeloupe, the crew of Le Favori come upon Montserrat, which is the first island in the Caribbean to be discovered by two factions!
Turn 58 marked the need for new resource rolls! A 1 for values meant that all resources are worth their face value (luxuries best at 6, lumber crashing to 1), the same values as the second resource change from turns 33-42. The duration was for 9 turns, so factions will be able to take some advantage of this time period.
With the very speedy Vis sailing due north, the Dutch discover the English! This is the first contact of the game between any factions! The Dutch came in peace, for the Vis was just one of many exploratory ships christened by Olivier van Noort. Here is how the conversation went:
<a7xfanben> – (captain of Vis, in Dutch XD): Ahoy!!
<Xerecs> – (captain of Honud): Eh?
<Xerecs> – (captain of hound): SPEAK ENGLISH!!!
<Xerecs> – (captain of hound): Who’re you, and where’d you come from?
<a7xfanben> – Dutch captain: wij komen uit Nederland.
<Xerecs> – (CoH): You’re a Neanderthal?
<a7xfanben> – D: wanneer ben je hier aangekomen?
<Xerecs> – CoH: Eh?
<a7xfanben> – D: wat zei je?
<a7xfanben> – D: we kijken ernaar uit om met u te handelen.
<Xerecs> – CoH: Can’t understand a word you’re saying
~~~~~
<a7xfanben> – welp I guess the actual Dutch won’t help! XD
<a7xfanben> – might have to get Tasman up here… XD
<a7xfanben> – Dutch may spend
<a7xfanben> – going to French
<a7xfanben> – a peaceful but confusing first encounter!
<Xerecs> – English can’t understand a word they said.
As you can see from Google translate or your own knowledge of Dutch, it was a conversation lacking in hostility, but also understanding. XD We’ll see if they can communicate better in the future. Still, a big moment in the game, for neither faction knew of any other nations present in the Caribbean region….
The Dutch continue their spending, with multiple ships constantly being built at their shipyard. The Reijger is one of their new additions, and has been sent due east….
The English break off from the visiting Vis to make some major strides! They build a city and launch their first ship, the Lord Kenyon!
Happy and amused, the crew of the Vis continue speeding due north, noting Anguilla’s English presence as they go. To the southwest, the Onzichtbaar is heading northwest….
The Morning Star is now quite aways from St. Vincent, venturing off into the unknown by herself:
Willem Janszoon is overjoyed! After finding lumber on Tortola, he explored the nearby island of St. John and found metals! Continuing a bit further west (and out of this picture), he discovered a new island! St. Thomas was explored, and much food was found. Truly an “all-star” explorer, Janszoon has now found 4 new islands for the Dutch and explored all of them! (using S-exploring to mark Peter Island) With these very important discoveries and the Duyfken’s hold full of various resources, Janszoon decided to turn for home to inform his comrades. On the way back, you can see he ran into Philips van Almonde! Almonde was just relieved to see Janszoon alive, let alone in high spirits. The Ridderschap is meant to be the Duyfken’s escort, but Janszoon may not be able to contain his excitement and could sail ahead at a faster pace!
With that and the following pictures, it is time to reveal the Dutch plan!! Olivier van Noort is overseeing the construction of 8 ships that will sail directly in the 8 main directions of the compass rose!
After many turns of building and spending, the “exploratory squadron” is complete! Here you can see the final 3 ships departing from St. Eustatius: the Reijger heads due east, the Concordia (with Joseph van Ghent aboard!) heads southeast, and the Braek heads northeast.
With the Concordia still in the picture, the Halve Maen can be seen heading due south.
All alone heading southwest, the Snelle Ongedierte has blazing speed and Adriaen Block at the helm.
The Onzichtbaar heads northwest:
The Vis north:
Clearly the Dutch have big ambitions to explore not only their surrounding area, but possibly the entire region! They have sent ships in all direction as a “probe” of sorts to find out what is out there. In addition, if it’s worth harvesting, colonizing, attacking, or exploring.
In a big move, the English hired Governor Lynch to be their leader and the head of the Sea Party!!
Sea party: Favors naval warfare and expansion.
-Army units have a base cost of 5. Captains and helmsmen only cost 1 gold each.
With that, here are the stats so far from our spreadsheet.
The Dutch are off to the fastest start, with a Level 4 shipyard and both their Tavern and City at Level 2. This means their city is adding 5 to the populace every turn, which the Dutch have a big lead in so far. Van Noort is happy with his progress as leader of the Exploratory Party, and has completed the 8-ship squadron that will explore the region for the Dutch. The French are lagging a bit but have some good things going for them, specifically (currently) valuable medicine on Dominica.
The Spanish are off to a good start, but the English made much bigger news than them in this session, purchasing a bunch of stuff and surprising people by being the second faction to have a government. In addition to the Lord Kenyon, the English have launched the Prince of Chichester.
The turn and resource change log. With two value rolls dominating the first five changes, we have already begun talking about instituting the random change rule. It was used to solid effect in Command the Oceans and can be found in the first post. (I will note when it is introduced; we are tentatively thinking around Turn 75)
We have completed Turn 61, with a few developments.
Philips van Almonde docks at Peter Island and finds lumber, now the most common resource in the game and the most plentiful that the Dutch have found. Willem Janszoon passes him in the Duyfken, who is on her way home. At the far left you can see the island of St. Thomas.
The Dutch launch the Mercurius with today’s historical custom of the day, Steven van der Hagen! The Meermin is nearly ready for action and will be transporting resources to St. Eustatius from nearby islands.
Robert de la Salle gets home at the same time as the Favori, whose crew disobeyed his orders to sail south! However, la Salle is more intrigued than angry after hearing about the discovery of Montserrat and the wealth of metals found there. In fact, la Salle is now excited by the prospect of having another island near Guadeloupe.
The French hire two politicians! Philippe Hurault de Cheverny of the Home Territory Party and Louis de Revol of the Resource Party have been hired for a cost of 10 gold, as neither have any special abilities yet. Next turn will be France’s first election, and indeed the first election of the game!! Emptying the coffers, the French also launched the Courageux with crew, as la Salle is interested in heading a small squadron up to Montserrat in the near future.
6/25/2018 – An election?
That’s absurd. Wouldn’t you say? But no!! It is happening!