
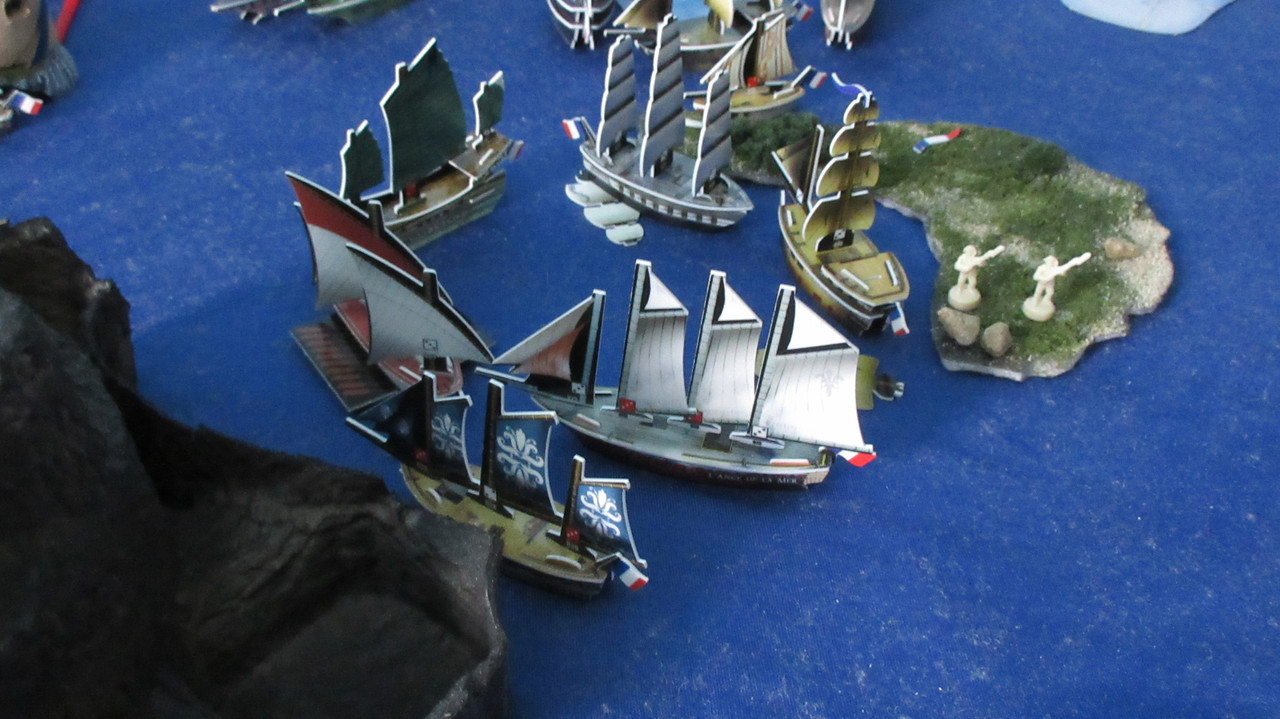
The Mercenaries have been eliminated! After sinking the Espadon, the Mercs were finished off by the French. Lucky that Nemo was even able to escape and dupe the French, the Mercenaries entered the game too late to realistically have a shot at winning. However, they made some waves by accident. XD Introducing a new custom submarine hideout that I hope to further develop after the game ends, they managed to trick the French into thinking they were still working for them. Of course, Nemo himself was duped in the end, with Eileen Brigid O’Brien taking his prized 10 master (the Celtic Fury) to the Pirates for more money and chances at glory. Shortly after this disaster the Mercs were unable to keep up the farce, and the French attacked them. The Mercs began to run out of food sourced from the nearby island pictured here, and needed to make a desperate attempt to literally stay alive. Naturally it failed against the mighty and flexible power of the French Navy, but the Mercenaries still had some impact on the game.
The Mohican is dismasted, and La Gaule emerges from the fog to go 4/5 and set the Enterprise alight!

New rule: Scuttling can occur on the same turn it is declared, and does not require a roll to be successful. Scuttling can occur even if a ship has an oarsman aboard and would not normally be considered derelict.
This is to clean up the battlefield faster, expedite things as I need to, and get useless ships out of the way so factions can fill in their holes with new ships. Since the derelicts can’t repair, ships like the Concordia and Belle of Exeter are the only dismasted ships worth keeping around.

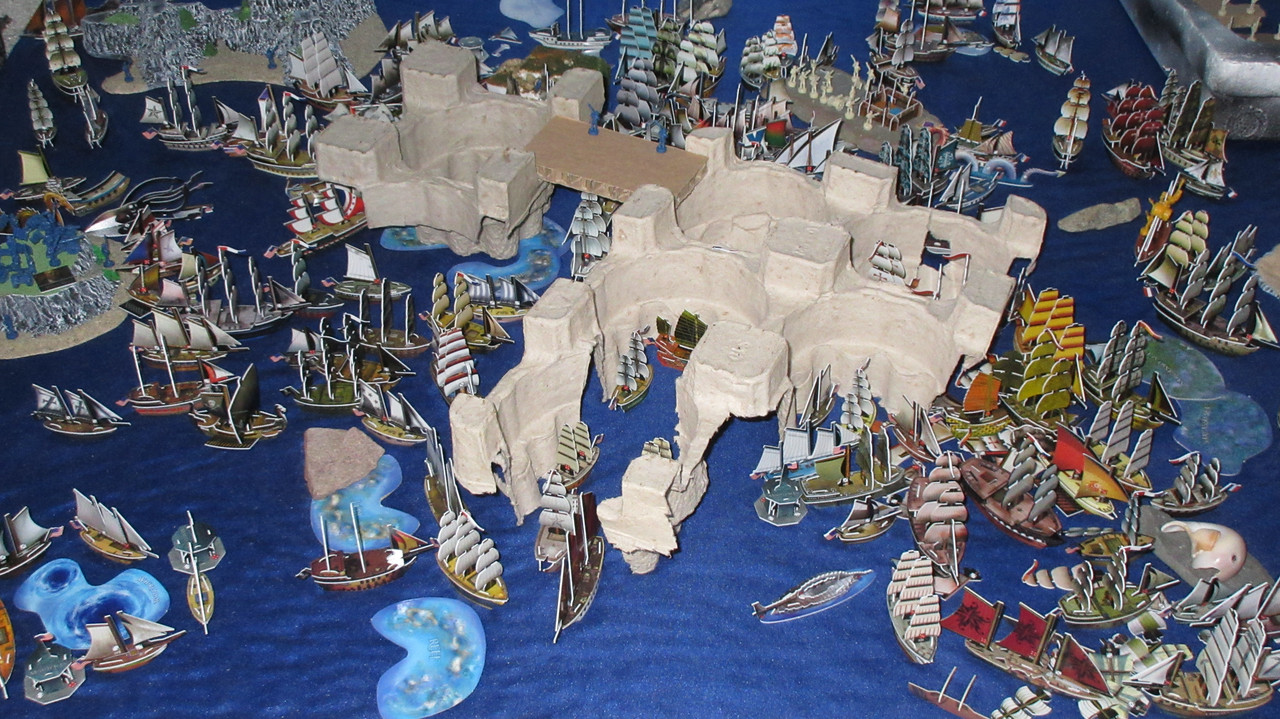
With the new Castle expansion, the fleets have even less room to maneuver. The battle now resembles two giant floods of ships meeting and duking it out.

The Providence is dismasted:

The Constitution damaged:

Here you can start to see the problem the Americans are having. The French flood of ships is massive and has many layers. Once the Dauphin is sunk, she will be replaced by the Delacroix, Hercule, etc. As has been the case lately, the American line of defense only rests on a few ships, and once they sink, the French advance will inch closer to the American HI before another ship is put in their path.

The Paladin is sunk by the French, but this is one area where the Americans have gained the advantage now that Le Gaule is gone.

Big French gunships are literally just waiting their turn to fire broadsides into American vessels. It has been a little frustrating how crowded this area is with islands and castle structures, since there can only be so many ships involved at one time. The intense bottlenecks have moved slightly away from “the spot” and closer to the American HI.

Just hull-to-hull ships:


The giant Castle complex would be a boon for the Americans, but they do not have the naval or land power to properly support it. Most of the infantry and artillery units have been eliminated by the seemingly endless supply of fresh French firepower that is now complementing the Spanish as well.

You may have noticed the final French launch.

Nine new “gunships”, though only 2 of them could even be classified as that here. (Breton and Danae) This is just about all the French can muster, as they have nearly “completed the fleet”as I call it. This means that they have every French ship from my collection in play! (other than sunken ships and one special ship) O_O

With my collection being quite large as this point, I didn’t think that this would happen in a physical campaign game. However, the French fleet is incredibly impressive in this game and they have pulled off the near-impossible! ![]()
![]()

(The Flat has run out of textiles, that is my mistake)
What’s impressive to me about this battle is that I almost cannot depict the entire scale of it in one picture. Between how far it stretches and the various islands and structures in the way, it’s tough to even show the full battle at once.

Suddenly the French round the western edge of the big wild island in the northwest corner, with Le Bonaparte sinking the Wasp!

Finally! The Enterprise is fully in action! She had a remarkable entrance to the battle, getting her EA, extinguishing her fire mast, and then going 6/6 to sink La Gaule!!

The Americans do some damage in the main battle area, especially with firepots.


The Toussaint and Auguste are sunk, leaving the Americans in solid control at this bottleneck. However, some French gunships that cannot repair are heading to plug the area back up.

The captured Charlemagne (with all masts standing, as I cannot feasibly get her masts out from underneath the carnage near The Flat) is ready to fight her old allies, setting fire to the Bonaparte!

USS Vermont is one of the little-known ships in this game, and not particularly noteworthy. However, on this turn her firepot specialist and fire shot both connected, turning the Scipion from a relatively healthy ship to a blazing inferno.

The Ghost Walker has set the Courageux aflame, and the French will scuttle her quickly next turn. Clearly the battle is being fought at extremely close quarters.

After Lenoir cancelled the captain of the Grampus, the Xiamen’s Claws set the Dauphin Royal on fire. The Providence has been scuttled, and the Gruesome sank the SCS version of the Coeur de Lion.

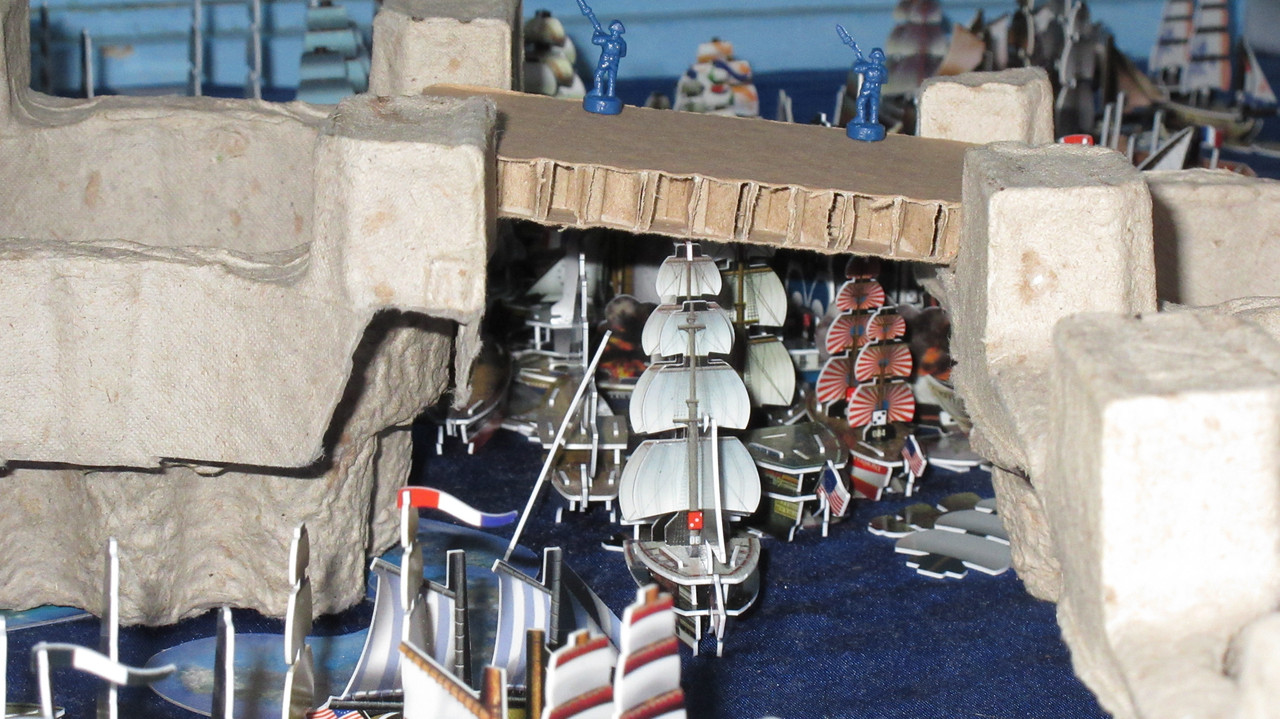
Looking between the two castle walls at an unprecedented sight. Ships sail over a dense layer of masts, sails, and debris. The smoke of the guns mixes with the fires that now burn aboard French ships. Hell has been found.

It is clear that whoever manages to survive this mess will be in bad shape.

The French do still have plenty of healthy ships that can eventually enter the battle, while the Americans are struggling to back up their front lines with comparable forces.

However, some American gunships are sailing out from the home island. At the right is an impressive trio that will boost American morale on the battlefield: Preble himself has gotten the President fully repaired, while the Kettering still has EA and cancelling available. The Thomas Jefferson has cancelling as well, with a superb armament to boot. At the left, the Jarvis and Full Moon head north to support the Charlemagne and make sure the French ships coming around the island cannot reach the American HI.

Various ships flock to the battle areas:

The Americans do a final launch with 163 gold. Similar to the French, they are almost out of ships to use! Here you can see the desperation, with even the Dark Fox and Annapolis serving in the line of duty.

Some of the ships were launched at the Castle:

The others at the home island, which was fortified with additional army units.

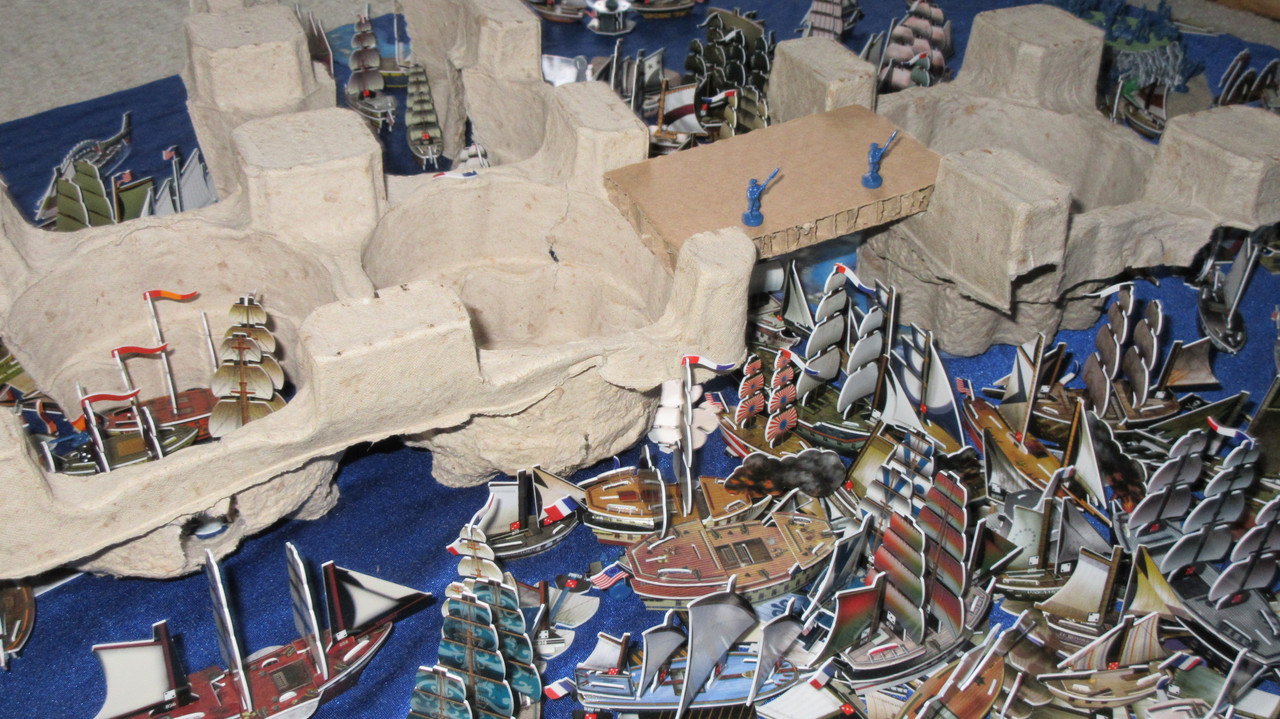
A turn after expanding the Castle, the Americans have now built a bridge to connect the two areas!!!!

O_O

The Americans spent 10 gold on the wooden bridge, as it shares the same characteristics as the docks of the French Harbor.

The Castle has become a monstrosity and has arguably eclipsed the Harbor as the most noticeable feature in the Sea of Karkuda:

American infantry have another great place from which to fire their muskets, and now the Americans can move things resources and troops from one side of the Castle to the other. (not that they have many of either)

What a scene!

When the game started 3 months ago, it was utterly unthinkable that such a situation could develop. The Castle was undiscovered, having sat uninhabited for many years after the Spanish were forced to abandon it. Now two powerful factions are fighting one of the biggest battles ever!


Someday I would love to play a game where armies battle across castle ramparts….
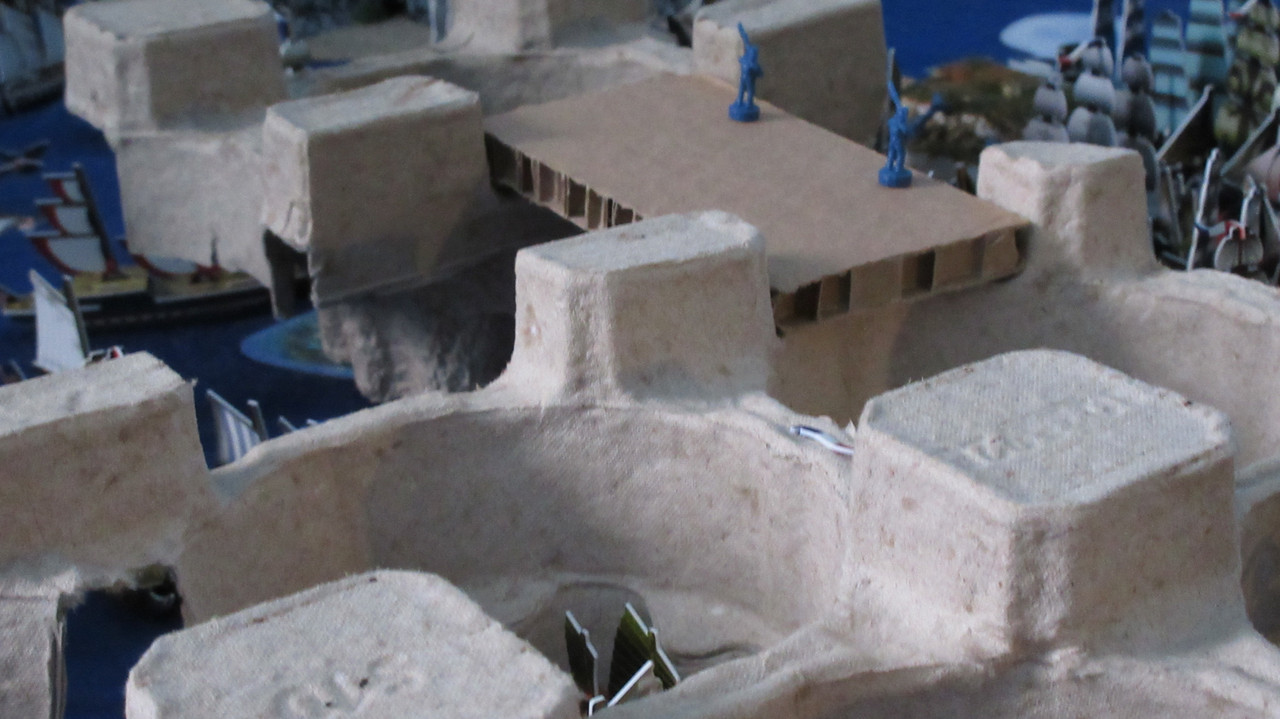
The Castle extension with bridge will hamper the French advance:


It was tough to get clear shots at some of these difficult angles.


Now for some neat views of Karkuda. I took a LOT of extra pictures at the end of this turn, some of which may be revealed after the game ends.


USS Appalachian:

The full breadth of the engagement, from the Bonaparte in the northwest corner to the Epee in the far south.


There are still French ships leaving the Harbor:

With no way to repair, the crippled Spanish ships simply join the French and head back to the Castle:

Wow… one of my favorite pictures so far. I didn’t even see this one when I did it since I was taking pictures so rapidly, but I love how the color came out. Not just the ships, but the water too. This would be fun to show someone who hasn’t read about this game, since it would lead to so many questions. XD I like how the lighthouse and hideout are just visible enough to be curious about them, while the true size of the Castle is somewhat hidden by the low angle of the shot.

One of my favorite pictures of The Flat, also showing the new Castle bridge and Rossinaz’s nice island in the distance.

The chaotic battle now just resembles a forest of masts, with raging smoke present at intervals.

Truly a war for the ages:

Some rare views out of the north:


The Castle obscures most of the main battle:


Tons of ships went to the depths today. The rule changes have sped the game up to a pace where I may actually be able to end it properly, with the last fleet afloat being declared the winner.

Turn 79 begins
The Pirates continue moving troops and supplies around the Tunnel!

… where could those infantry be going?

The Madagascar and Otter (members of the former whirlpool squadron) carry additional army units to the Tunnel, and artillery cannons are being hoisted to the top!

The Pirates are beginning to fortify not just the top of the Tunnel, but inside it as well….

Unfortunately for the Pirates, the Black Pearl lost two more masts coming back over the reef. They may even transfer Tia Dalma to a new ship since the BP can’t repair.

The Pirates are more than ready to defend their home waters. XD


I forgot to show this off last time.

The troops have a nice view looking southeast towards the gold island.


You can just make out the ladder leading down to the Madagascar:

A long-term plan comes to fruition! The Pirates have thought about building a fort at the edge of the kingdom island itself, and now the Devil’s Maw is constructed.

The fort serves as an ideal place to station a garrison:


If you’ve seen the kingdom at all in this game, you could easily surmise that the ledge would be a perfect fort location.

The Eagle and others sail out and prepare for battle. Fort in the foreground, lighthouse in the background:


The Jade Rebellion sails out to do battle with a faction other than the Cursed!

Incredibly, the Cursed-JR War may be nearly at an end. After 4 full-scale battles and numerous other skirmishes, the Cursed now have a larger fleet than the Jades. The lack of good Corsair gunships, devastating strikes by Namazu, and the regular combat rules leading to a lot of sinkings has combined to doom the Jade fleet for the long term. They have been whittled down for a while, and have seen a LOT of ships sunk in the past couple turns. It is sad to see their once-great fleet reduced to a far more normal level.

The Sea Duck engages the Banshee’s Wail:

The Cursed sea monsters in the north have been eliminated or badly injured. In a perfect example of this attritional struggle, just as the final Cursed defences are falling in the north, the Jades have finally run out of fresh ships to send into the area.

The greatest concentration of firepower the Jades can muster. A shell of their former selves, the Jade Rebels have finally understood why the Cursed have been trying to emphasize the Pirates for so long. If the Jades continue to fight the Cursed, they will grind themselves into oblivion. By trying to take out the best faction in play, the Jades will at least give themselves a chance in case some of their ships can survive. Jade ships are now heading for the Tunnel.

Cursed on the move! New and old Cursed ships sail forward, heading east almost universally.

Terrox surrounds the Sea Duck!

Fantasma got his SAT to come back through the whirlpool and start heading for the Pirates. The Dark Pact picks up the last gold coins from Broken Horn Island, which are the final source of money to be loaded in the game.

A handful of Corsair ships were sunk this turn, with the Cursed firing upon anything in their path.

Sailing over the wreckage of the biggest battle of the JR-Cursed War, healthy ships and derelicts alike move east.

I feel the need to explicitly state that no alliances have been made to fight the Pirates. The Cursed and the Jades are still at war. The English are not allied with either. It is simply the three of them realizing that the Pirates need to be hampered to prevent them from running away with the game.

Despite the rushed ending, I hope you’ve been enjoying the action lately! Feel free to give your thoughts on any of it, or a few questions:
-Have your winner/ranking preferences changed at all?
-Do you think the Pirates can be defeated?