
Circle of Blood with 3 players
The first game of the planned VASSAL weekend was a 3 player Circle of Blood game between myself, repkosai, and wifey!
Repkosai went first with a diverse fleet, followed by yours truly with my ship stealing fleet (its first game!), and then wifey with a fast Pirate fleet. Thanks to Rizz for making such a cool game setup; it would be my second go-round at CoB, and the first experience for repkosai and wifey.
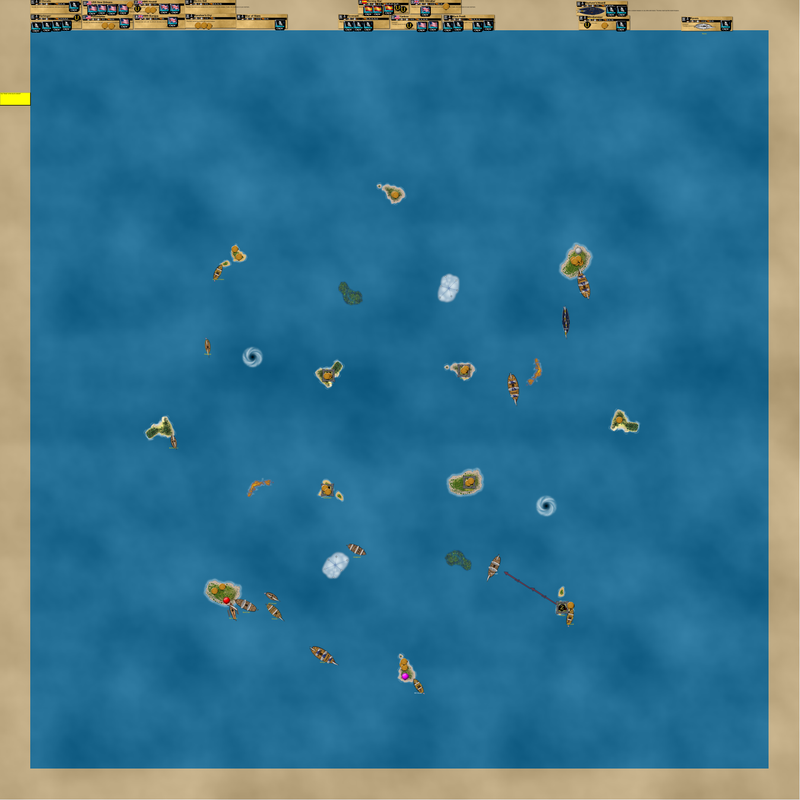
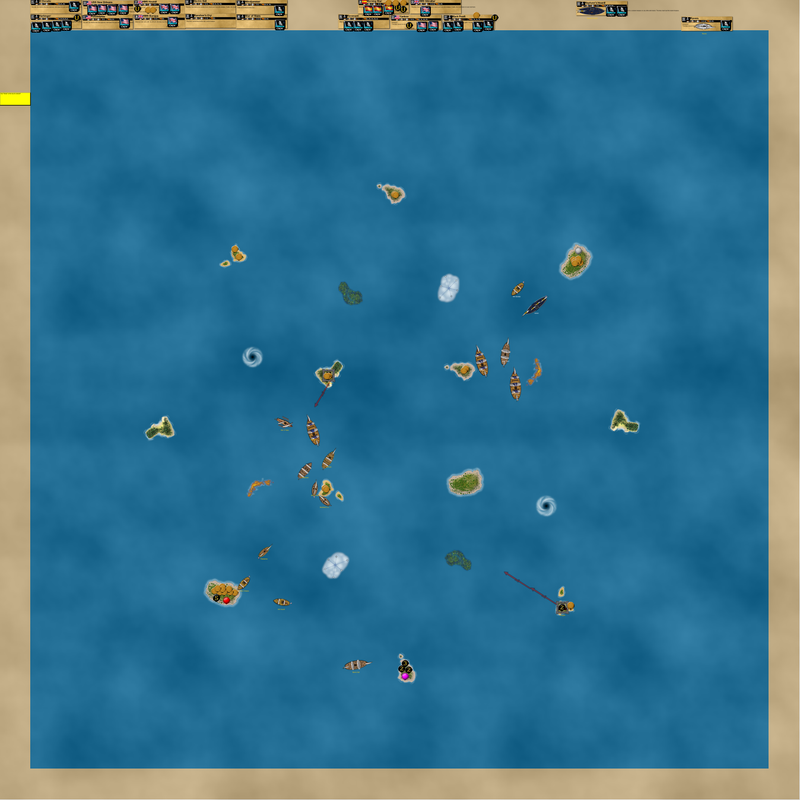
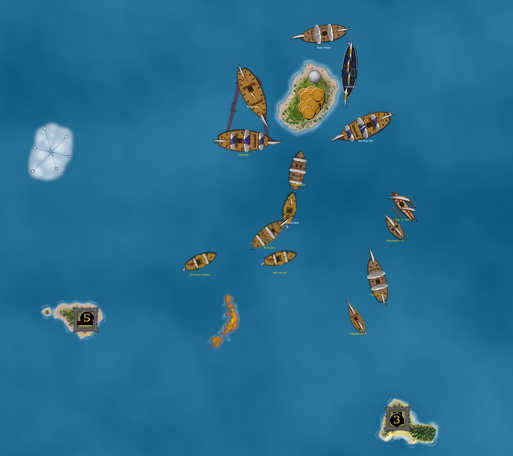
With an odd number of players, we had to improvise the last chunk of picking fleet locations, which is why repkosai’s HMS Gibraltar is in the middle of the play area between the hostile forts.
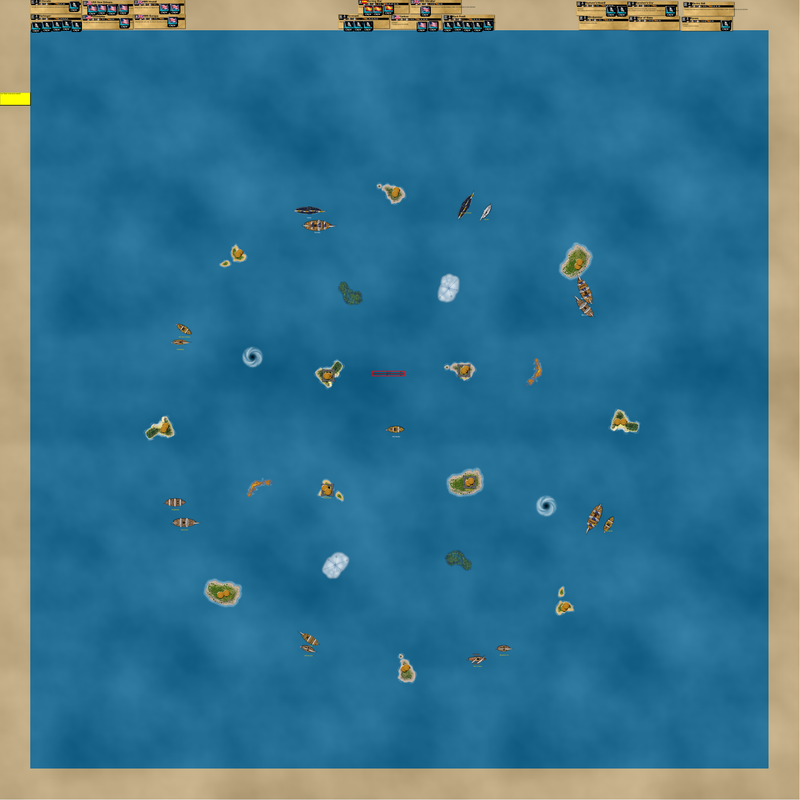
This shows the first of two major coups (“a notable or successful stroke or move”; feat, master stroke) by a7xfanben’s ship stealers in the early part of this game. Looking back at the first picture, the Banshee’s Cry moved towards the SE island, and was pursued by the Harbinger to the north. Because of the unique home island rules (the first island you explore becomes your home island), there was considerable strategy in essentially being able to choose a location. With some intimidating Pirates to the north (repkosai’s Black Pearl crushed the Raven and Neptune’s Hoard in a single turn, with the Revenant also lurking), I wanted a location far from them.
In a very important die roll that allowed the move to work, I rolled a 6 with Preble to get an AA (Admiral’s Action). The Electric Eel (of wifey’s fleet) had docked at the SW island, with my El Dorado also headed there. I had other options, such as exploring the SE island with the Hound or trying to get an island in the NW area. After some strategic thinking, I made my choice, trusting the Harbinger to not roll a bunch of 1’s in a row lol.
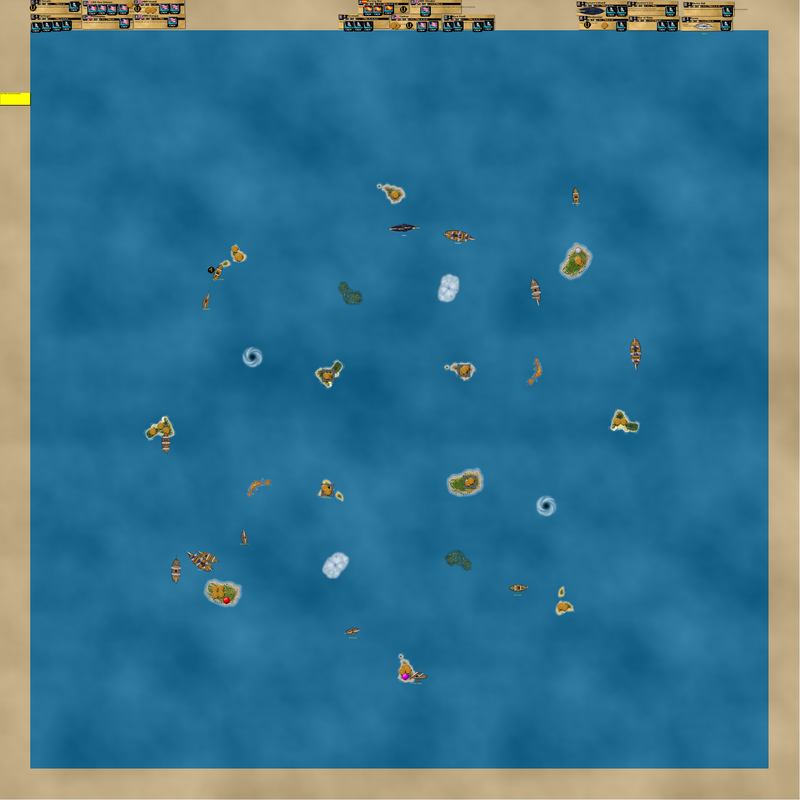
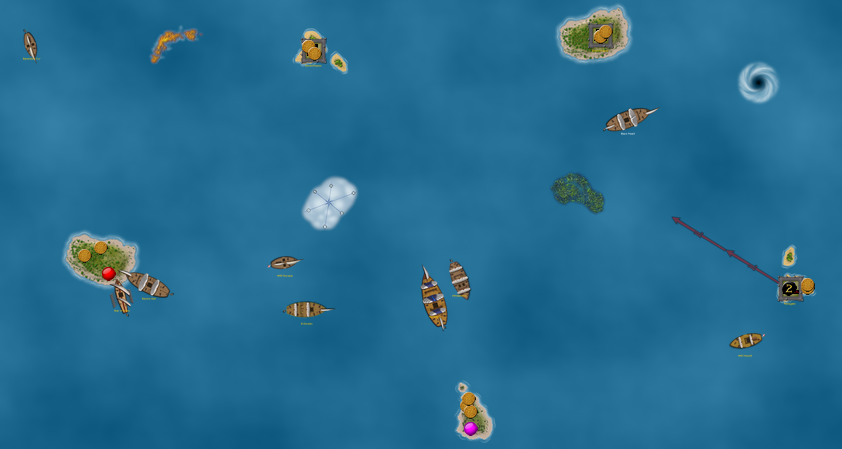
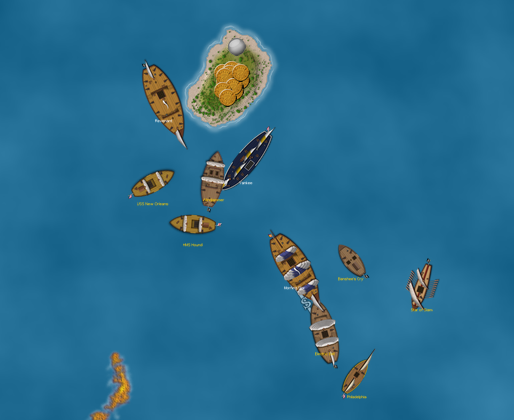
El Dorado used her action to dock at the SW island. She then used the AA to explore it, making it my home island. Suddenly the Electric Eel was caught docked at an enemy home island, with no chance left to explore. The Harbinger surged forward, ramming the Banshee’s Cry but taking care not to sink the ship, simply dismasting her with a shot. Then Havana Black sacced an oarsman to EXPLORE the Cry, triggering the Harbinger’s ability. To complete the coup, the Harbinger warped to her new home with the BC, suddenly docking right next to the flabbergasted crew of the Electric Eel! The ship stealers were living up to their name, going from not having a home island to capturing a ship, getting it home, and simultaneously denying another ship from that island’s gold!

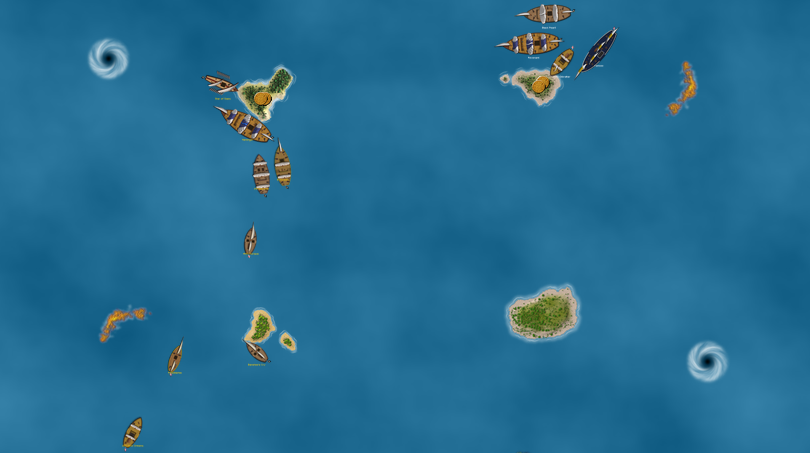
Clockwise from the top: repkosai has sunk the Raven and Neptune’s Hoard, putting wifey in a major predicament. In the SE, the Hound has explored the SE island while the Star of Siam makes the southern island wifey’s HI. The Harbinger knocks two masts off the fleeing Eel, while El Dorado looks to transfer Weapons to the flagship. The northwest is a scene of considerable delay, with the Windjammer finding Rum and the New Orleans finding Natives.
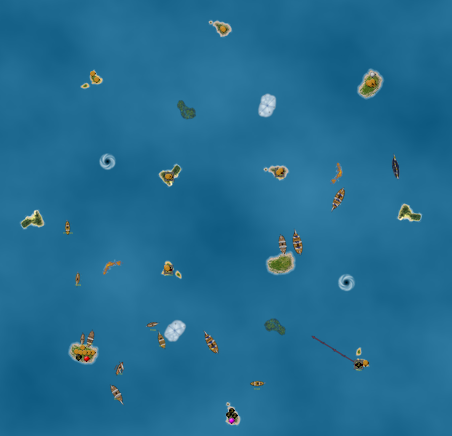
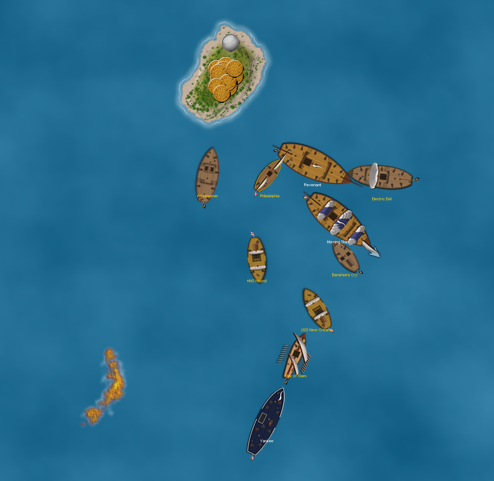
Repkosai’s fleet gets gold while my ship stealers continue to bother wifey’s fleet. The Harbinger dismasts the Eel, leaving her carcass to the less-important El Dorado while the Harbinger gets ready to make full sail towards the south. The Hound is hounding the Star of Siam, ramming a mast off but failing to hit with cannons. The Europa is slow without a helmsman but lurks to the west of the Hound, which would soon become important….
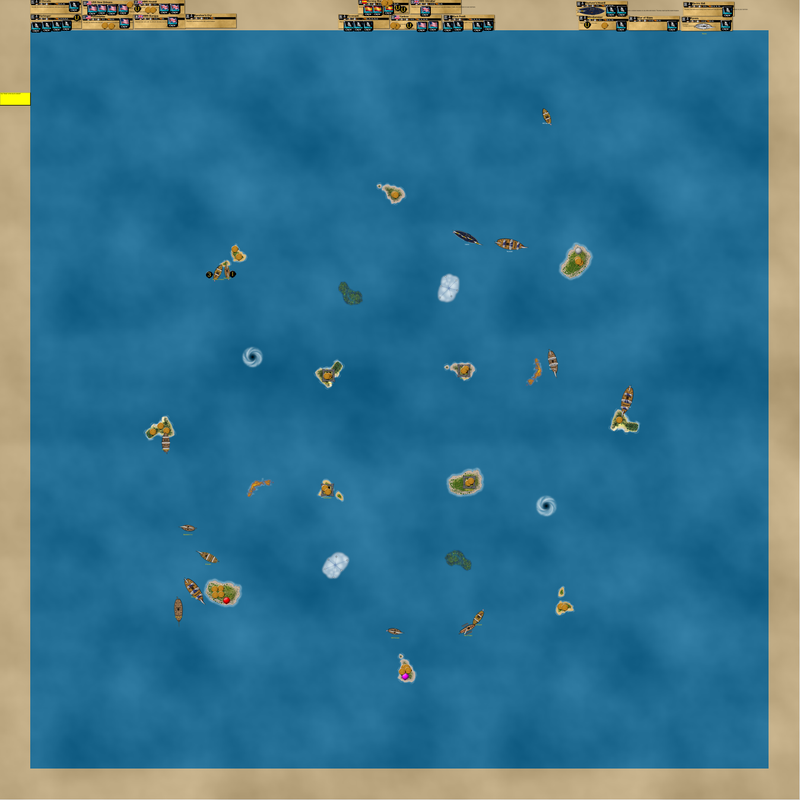
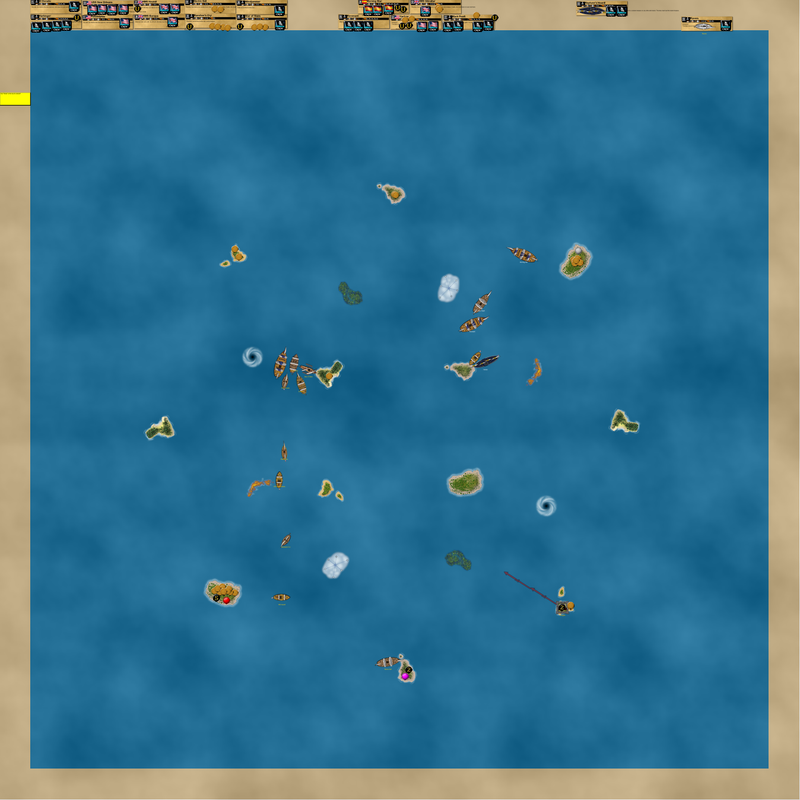
Another major coup! (Sorry if it sounds like I’m tooting my own horn too much, but honestly these two moves are some of my favorite that I’ve pulled off in a Pirates game) You may be wondering where the Star of Siam went. Well, she was snagged like the Banshee’s Cry.
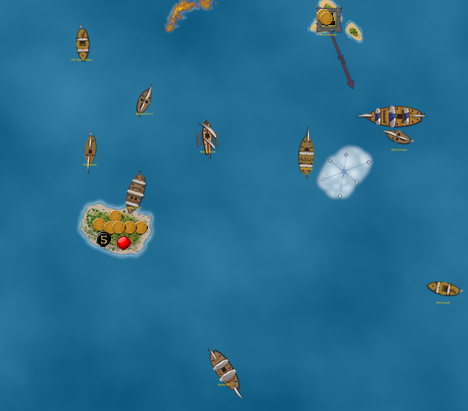
Once again, the situation was more complicated than a simple picture can show. The super-fast Black Pearl was bearing down on the southern tier of the sea, likely in support of HMS Gibraltar raiding wifey’s unprotected home island (repkosai has made some great plays of his own this game). The Hound’s captain was worried about the BP, but reckoned that he still needed to pursue the SoS, who had picked up a certain Calico Cat who had been “cast away” for some reason. ![]()
![]() Now, I will admit that I got lucky once more, but it was perfect timing for the second time too. The Hound had caught the SoS at the SE island and knocked off her final mast. The SoS lost Calico Cat in a boarding party but rowed a bit to the south at S+S. To mitigate the Hound’s fear of the Black Pearl arriving imminently from the north, the Harbinger was sailing at full speed towards the general area of interest.
Now, I will admit that I got lucky once more, but it was perfect timing for the second time too. The Hound had caught the SoS at the SE island and knocked off her final mast. The SoS lost Calico Cat in a boarding party but rowed a bit to the south at S+S. To mitigate the Hound’s fear of the Black Pearl arriving imminently from the north, the Harbinger was sailing at full speed towards the general area of interest.
The Hound captured the SoS, towing her so the ship would be as far from the Black Pearl as possible. The luck occurred with the Europa getting an extra action from her built-in ability! I was originally going to move the Europa 4S and get her on the starboard side, to protect her from a potentially hostile Black Pearl. The Europa could not reach the SoS with her first action, and therefore couldn’t teleport her home with the second since she would need the second just to reach the SoS. Then I suddenly realized that because the SoS could move S+S but was still technically derelict, the Hound could tow her and then immediately release her, upon which the SoS turned around and moved S+S towards the Europa! This saved the Europa valuable movement. The Europa was then able to reach the SoS with her first action, and explore the derelict with her second action, using Commander Temple to warp both ships home!
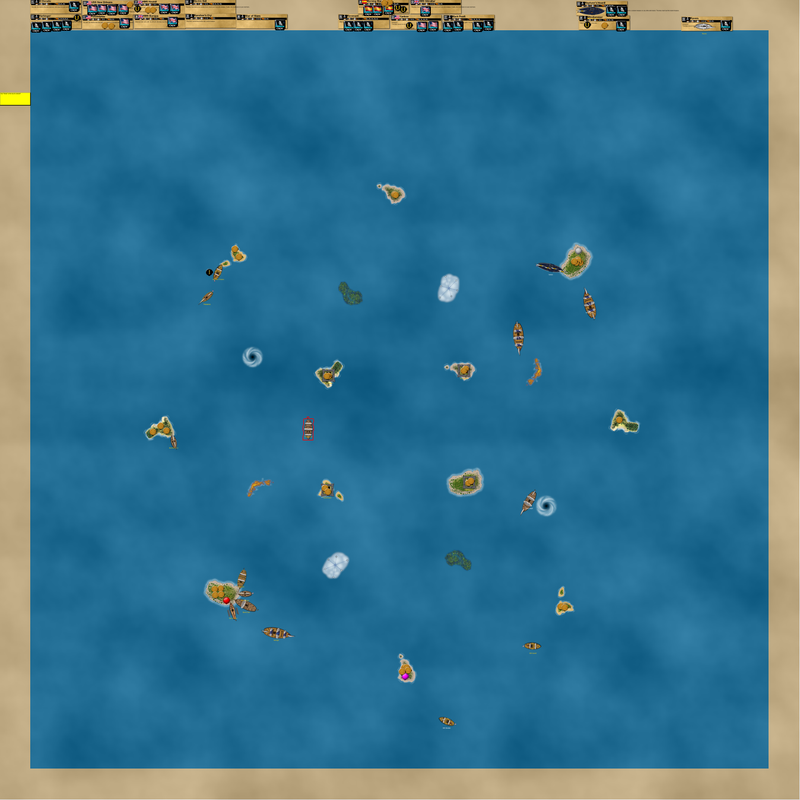
This second coup of the game for me was triply effective – it made the Hound less of a target, it got the SoS and Europa out of harms’ way (the Black Pearl), and it gave me another capable gold runner in my fleet. All in all one of my favorite moves I’ve pulled off in this game, showing how important it is to consider all options and really think through how you want to tow or “untow” things to your greatest benefit.
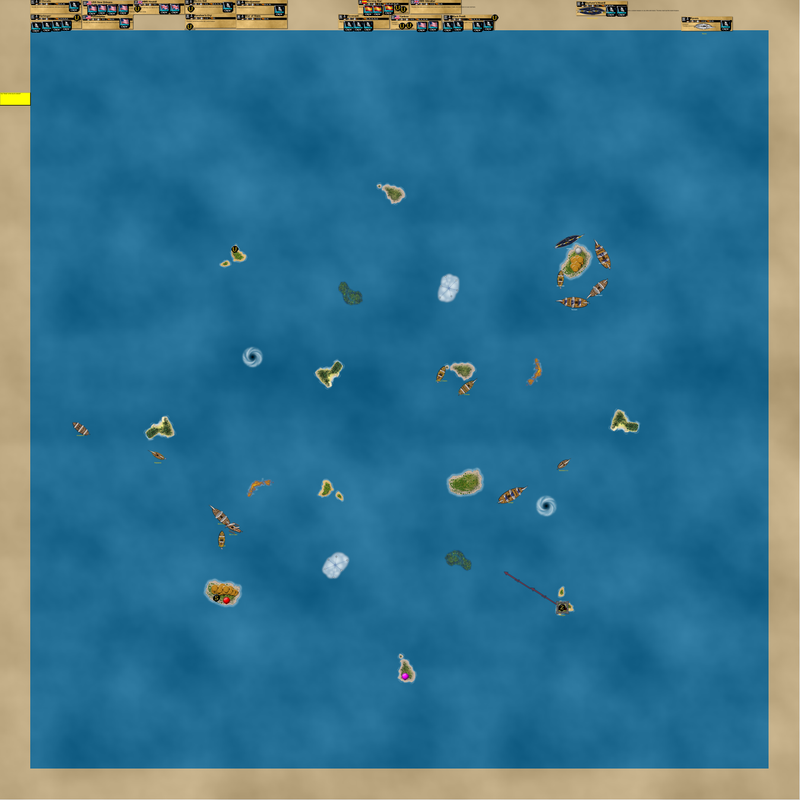
However, for all my bragging, repkosai had gained a steady lead in the gold race, and many of my ships with treasure on them were far from home. Here, the Philadelphia and New Orleans are finally getting sails unfurled after their encounter with the Natives. The BC has explored the western island, while HMS Gibraltar raids wifey’s HI for a 7 coin (which I saw with the Hound’s spying ability). The Electric Eel and Star of Siam repair at their new HI, while the Dorado and Europa follow the Harbinger to support her potential intervention in the southern theater. With the Hound in a bad spot on the ocean anyway, I decided to have her redock at the SE island just to build Ramsgate, which could serve to not only deter the Black Pearl from coming after the Hound, but also to potentially protect my gold from being stolen off my HI by the Gibraltar.
Here the Harbinger is about to dismast the Windjammer.
The Windjammer was captured, eliminating wifey from the game and giving my fleet yet another captured ship.
Here you can see all 10 of the ships in my fleet, in a rare instance of them being relatively close to one another.
Each fleet was busy wrecking forts on the sides their HI’s were on. The northwest island (with Natives) looked like a potential future hotspot.
The last forts are finished off and the two imposing fleets are about as close as they had been all game.
My fleet masses near the northern whirlpool, anticipating a conflict.
However, a somewhat unfortunate situation played out, with each fleet inevitably being content with getting local gold. My fleet got the last of the native gold, while repkosai’s Morning Star grabbed the final coins from the northern island.

Repkosai’s fleet made a move towards the ships I had getting gold from Ramsgate in the southeast, but the distances and lack of whirlpools prevented a major encounter. Soon afterwards the Europa made a surprise attack, using an EA to burst through the eastern whirlpool and ram the valuable HMS Gibraltar! Thomas Gunn was lost in the boarding party, and the Gibraltar scurried home for repairs, the rest of her fleet covering her stern.

At this point it is worth noting that all gold (except for Ramsgate) had been unloaded to home islands. However, the game was quite “live” as both fleets had a HI raider: HMS Gibraltar for repkosai and a captured (no surprise there!) Electric Eel in my fleet. In addition, the gold race was a complete mystery but we both knew that it was likely very close. With that, the endgame was decided: it would be a raiding challenge, with neither side wanting to completely vacate their HI in fear of the other player making a move towards it.
Repkosai conceded that he didn’t think he would be able to pull off a successful HI raid without TGunn aboard the Gibraltar along with his numerical disadvantage. Thus he formed a protective barrier around his HI with all of his ships, and waited it out. This let me formulate any strategy I wanted, and of course I thought of a many plans. I decided to round earth part of my fleet, with the Electric Eel as the most important ship. Other ships headed to meet up with them in the northeast near repkosai’s HI.

With infinite time to orchestrate what I wanted, I set things up to perfection. With my ships in position, my plan was sprung. Two forts were built, to provide places for repairing and any gun assistance in case of a chase. The Harbinger hid in the fog, ready to pop out and start the assault!

The Harbinger tore into the Gibraltar and Revenant. I made sure to target the Gibraltar, so I could possibly capture another HI raider and gain a decided advantage, simultaneously securing my own gold for the duration. I managed to capture the Gibraltar with the Windjammer, but couldn’t get an extra action to the Dorado to warp her home.
Repkosai’s counterattack was devastating, with the Black Pearl sinking the Harbinger and Gibraltar with a double action! This denied me from using the Gibraltar, and took out my flagship as well. The Yankee rammed the Windjammer, while the Morning Star attempted to stop the Electric Eel from raiding the HI.

I managed to dismast the Black Pearl with a combination of ships, and then used a lucky AA from Preble to capture the ship with the Dorado! This netted me another capture, but it was doubtful the BP could be used in time to affect the results.
Captain Jack Sparrow: “I’m going after the Black Pearl…. I know where it’s going to be, and I’m going to take it.”
The Electric Eel was continually foiled by the MS, Yankee, and Revenant until she was dismasted, which ended the game!
After the gold count:
1. a7xfanben: 85 gold
2. repkosai: 81
3. wifey: 0 (she had 7 or 8 before it was stolen)
What an amazing conclusion to a fun game! In the end, wifey’s captured Rum (worth 5 gold) made the difference in a way, since it got my score from 80 to 85! Very high scores, and very close as well. I must admit being very happy about the victory, since I played one of my favorite games ever in the early going, and certainly felt deserving of the win after the plays I made.
Another successful Circle of Blood game, and it’s a great scenario that I would recommend. As far as potential changes for us, I would say that making the islands a bit closer together and/or adding more whirlpools could help. Also, the forts were easy to eliminate, so they should probably have at least 6 3L cannons instead of 4.
Thanks for reading! This was played over the course of three different sessions on VASSAL. We’ll be back with more sometime, and until then, may your swords stay sharp!
Check out the video footage of this game!