
I will start by saying that I think this is probably one of my biggest and best reports I’ve written!! Prepare yourself! XD
I was able to play 5 turns today, Turns 36-40. At the outset of Turn 36, there were 3 turns remaining until resources would change again, with metals and textiles the most valuable resources. As a side note, I will admit that I began the day’s play not really “feeling” it like I usually do, in terms of how excited I was about the game. However, by the end of the session I was completely the opposite! Also, I just recently noticed that I have completely forgotten about the return fire house rule, which means I may or may not use it going forward. Oops!
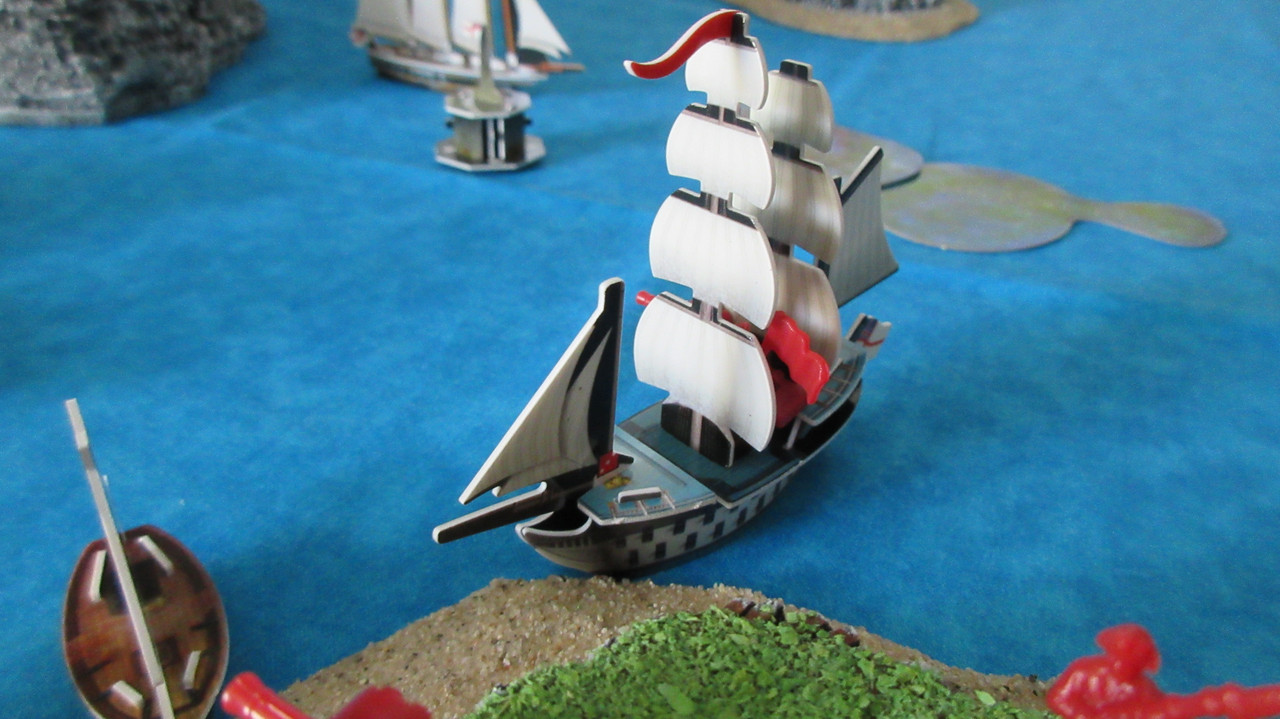
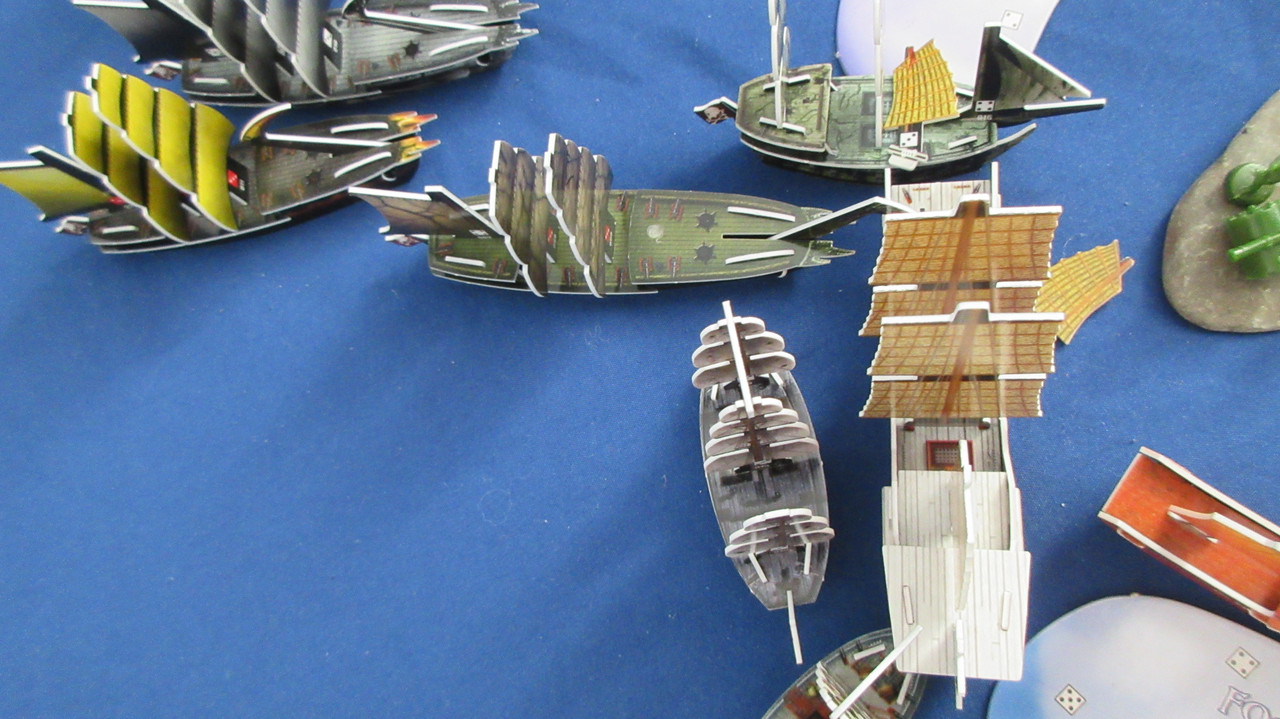
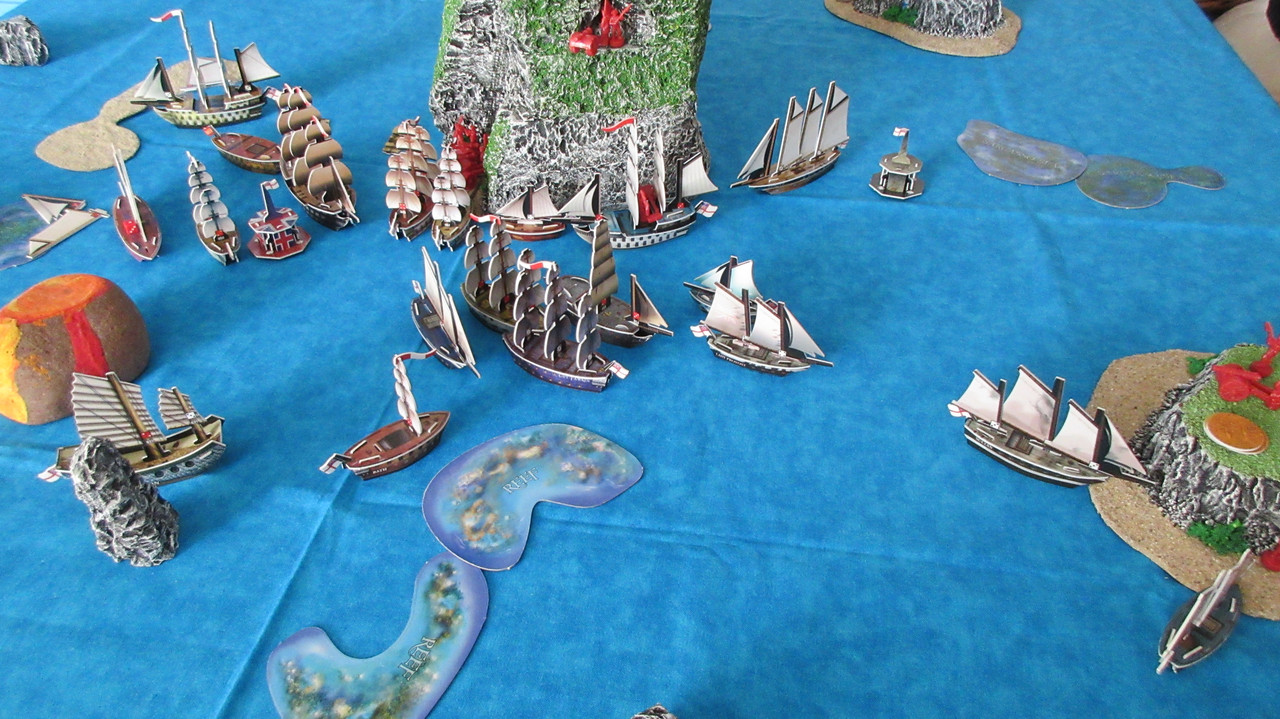
The Pirates gather their whirlpool squadron around the southern whirlpool in the Sea Allost. The Feathered Hat, Madagascar, and Sunrise Fire prepare to take the plunge! In addition, the Deliverance is standing by, with Havana Black considering joining them for protection and for his own curiosity.

SHAL-BALA ATTACKS!! In a sudden, unexpected flyover, the giant sea dragon from hell swoops in on the Jade Rebellion’s own home island! Troops and equipment were scattered in all directions. And just like that, the dragon flew up and away. Clearly this is no ordinary sea dragon, as I’ve taken the liberty of giving it some special rules for this particular game. Here I physically had the dragon swoop over the island itself and simply smash whatever happened to get hit in the swift but deadly attack. However, to be more fair, I ruled that anything on land had survived, so the JR’s only lost one infantry unit and one artillery unit in the sneak attack. (combined that would cost them 4 gold, so trivial as to be completely irrelevant in a game like this)

However, the attack was important, as it demonstrated Shal-Bala’s power and range. This taught the Jades something: in order to combat the dragon, they would have to go to its hiding place and kill it themselves. Even with lots of ships docked at home and plenty of infantry with muskets stationed there, they were no match for the dragon, whose attack was too fast for any damage to be done in return. The Jades had already been planning to go northwest with a stronger squadron than before, but now they doubled their efforts.
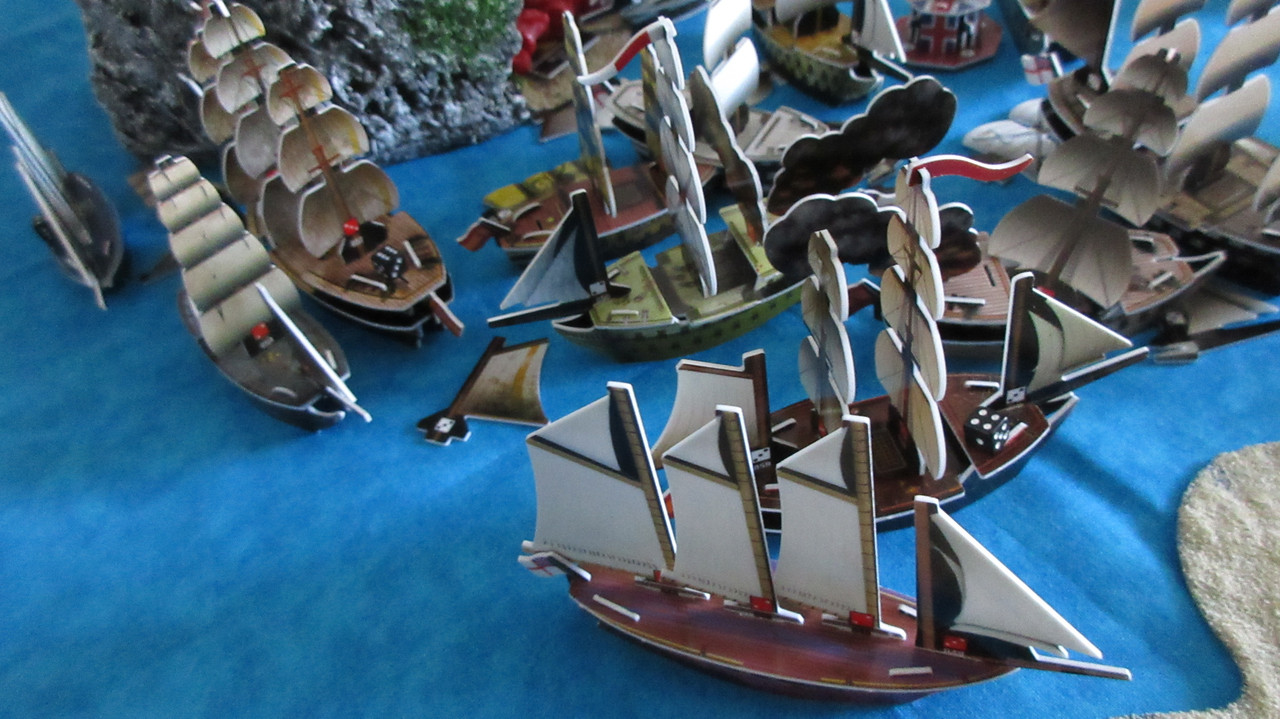
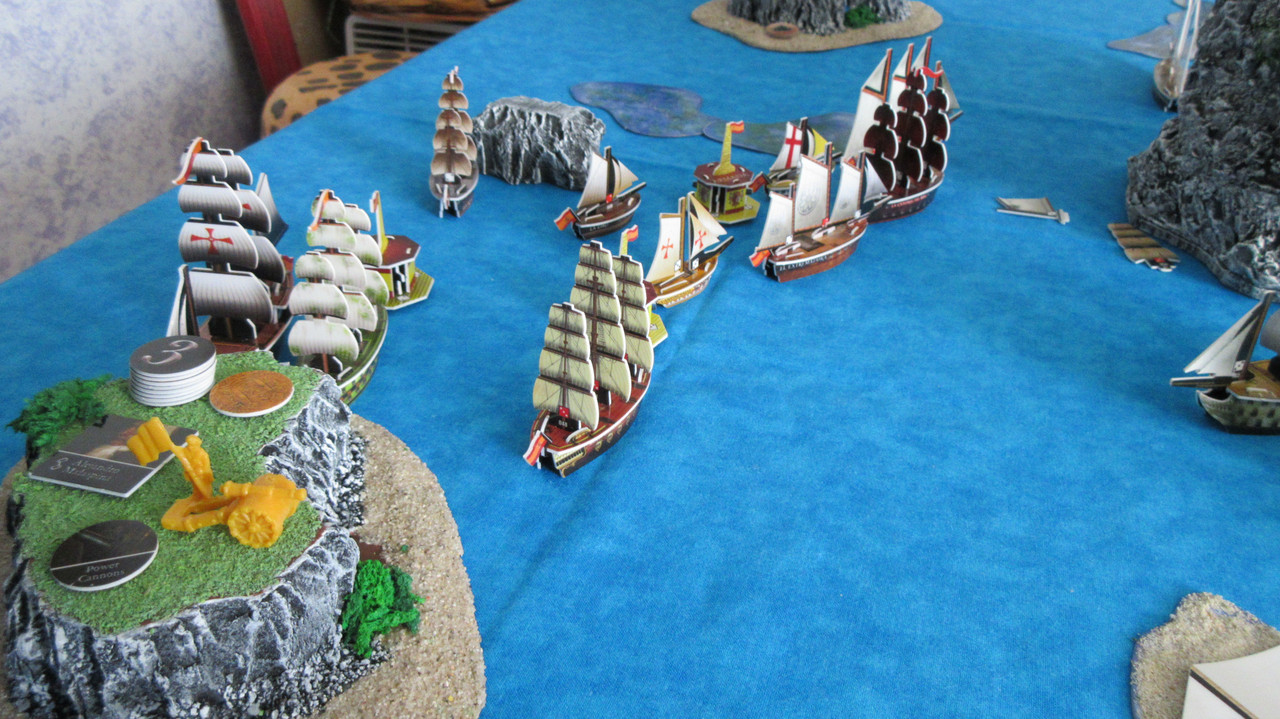
Back in the Caribbean, the English strike back! The Bretwalda matches the Tartessos’ effort from the previous turn, going 4/4! Her second hit set the Matthias Vospero aflame. The London was unable to knock a full mast off the San Estaban, but notice HMS Lord Algernon sailing up at the lower right….

Here HMS Victor arrives from around the northern side of Diamond Rock to blast a mast off the Tartessos!

The extremely effective Spanish counterattack! From left to right, the Victor, London, and Bretwalda have all lost masts. However, the Bretwalda was by far the hardest hit – she had been damaged earlier, so three well-placed shots from the Matthias and San Estaban combined to give her two fire masts!

Off on a treasure run with the Alquimista, the gunners inside the Diablo flotilla tested their range using my new S+S cardboard range ruler, and found their mark! They only did a bit of damage to HMS Serapis, but it showed off the range of flotillas, which I anticipate being a reasonably big factor in this game.

The Rafael and Magdalena are nearly home with valuable metals, while other ships have begun the return journey as well. Notice that Diablo had to shoot before the Alquimista moved away from the English gunship – this is another great thing about flotillas, as the flexibility of having their own shoot actions allows a reverse captain type thing with gold runners.

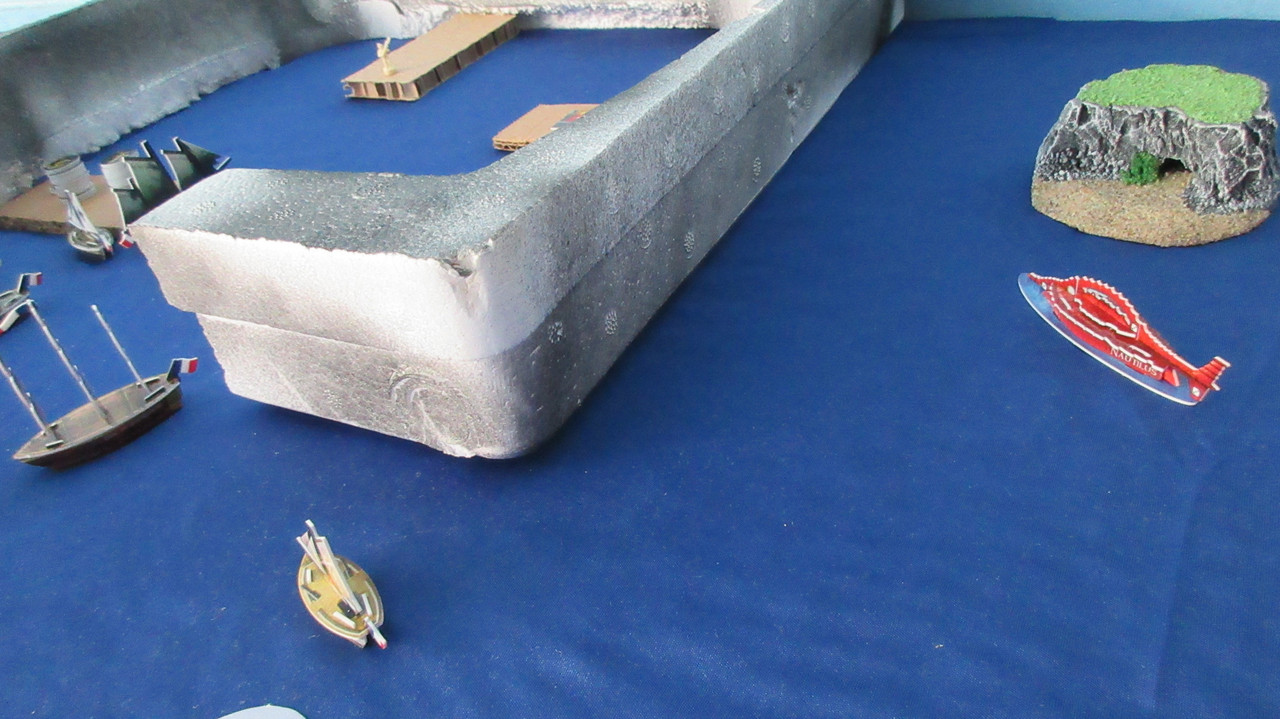
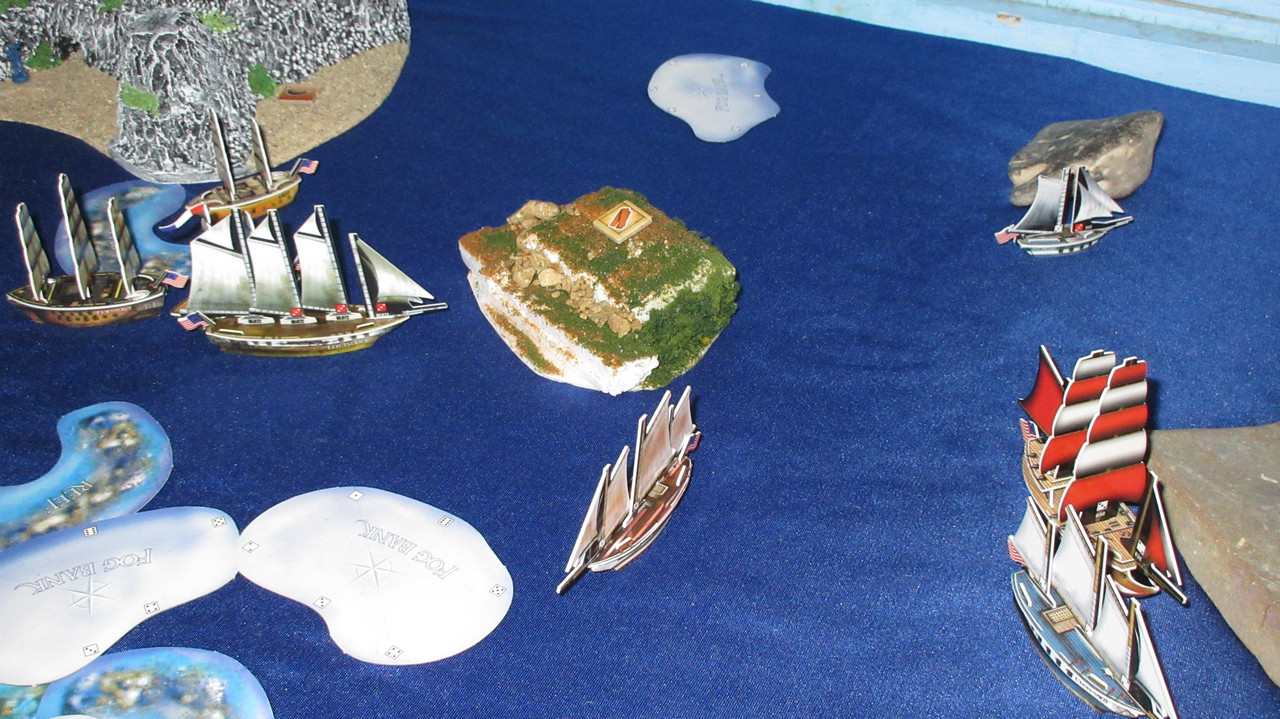
Tasked with exploring east of the Harbor, Nemo surfaces the Nautilus to discover a new island just outside the Harbor walls!
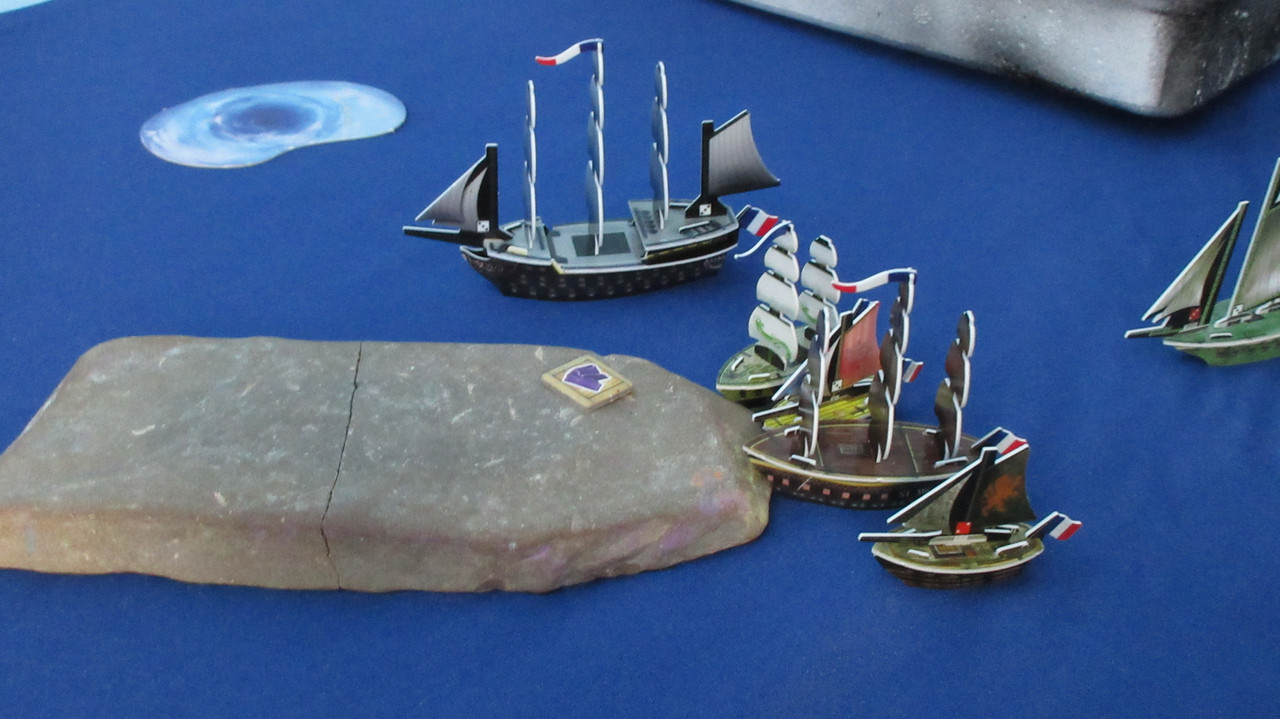
The Jeux is the first ship to dock at The Flat, and will explore next turn! Who knows what she’ll find? In the meantime, other French ships make their way to the large island while Monsieur Lenoir watches from the Dauphin Royal:

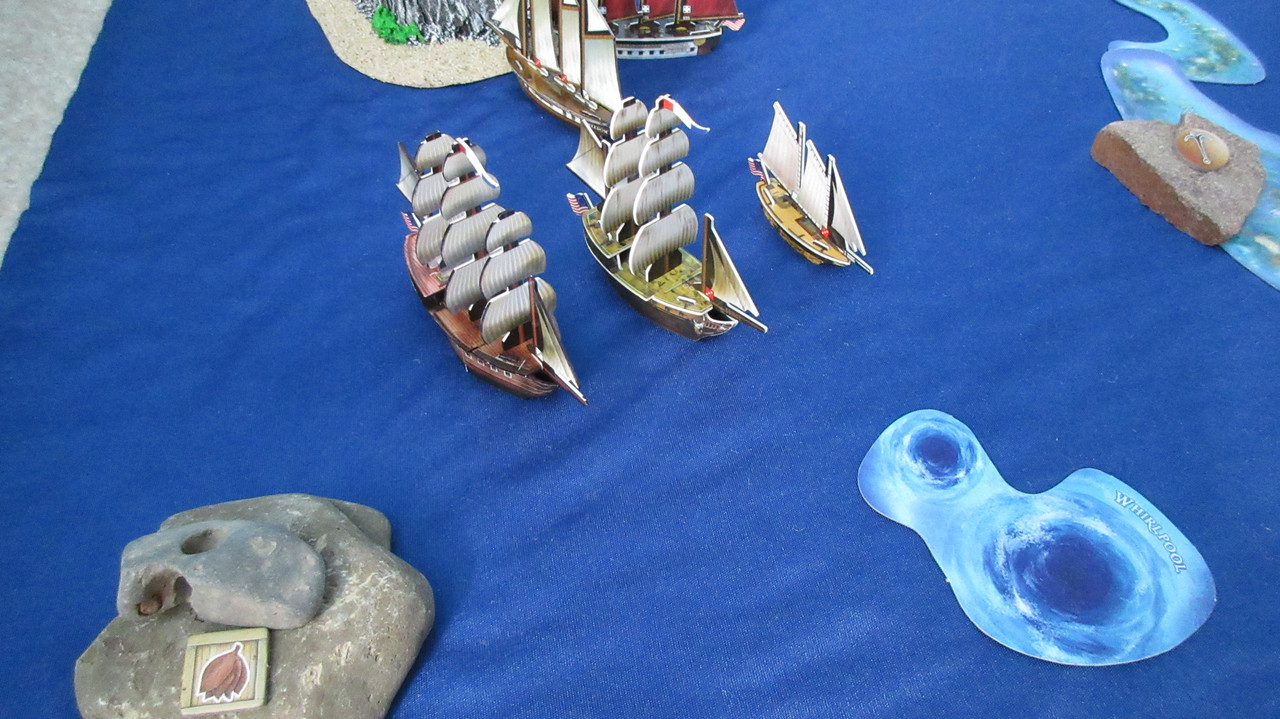
Setting out! The Concord and Flying Fish will soon be followed by the Freedom through the whirlpool, with the express purpose of putting some hurt on the Pirates. Do you think Brent Rice aboard the Bonhomme Richard will join them?
The Americans finally discover that they can reach the rest of Karkuda by sailing all the way around the big island to the north! However, this would take far longer than their new route east, so they don’t have any regrets about blowing up that reef. (this confirms that the island in question has 5 beaches, although that would have been obvious if you have read my previous BR’s using that island)

The Congress, Concord, and Delaware are well-armed and ready to mark new territory for America:

The first cargo ships for the Americans venture east!

And more are on the way! The Yankee and Pawtucket are launched, with the same purpose of getting resources and gold from the area east of the reefs.

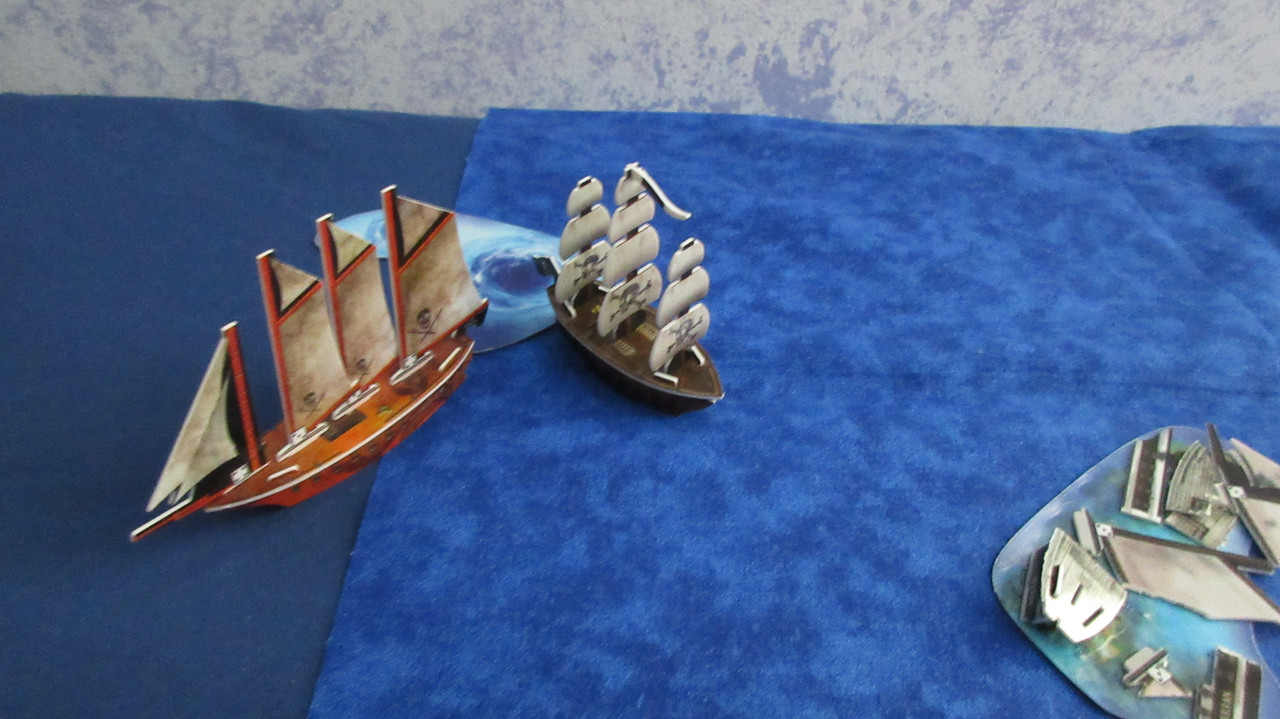
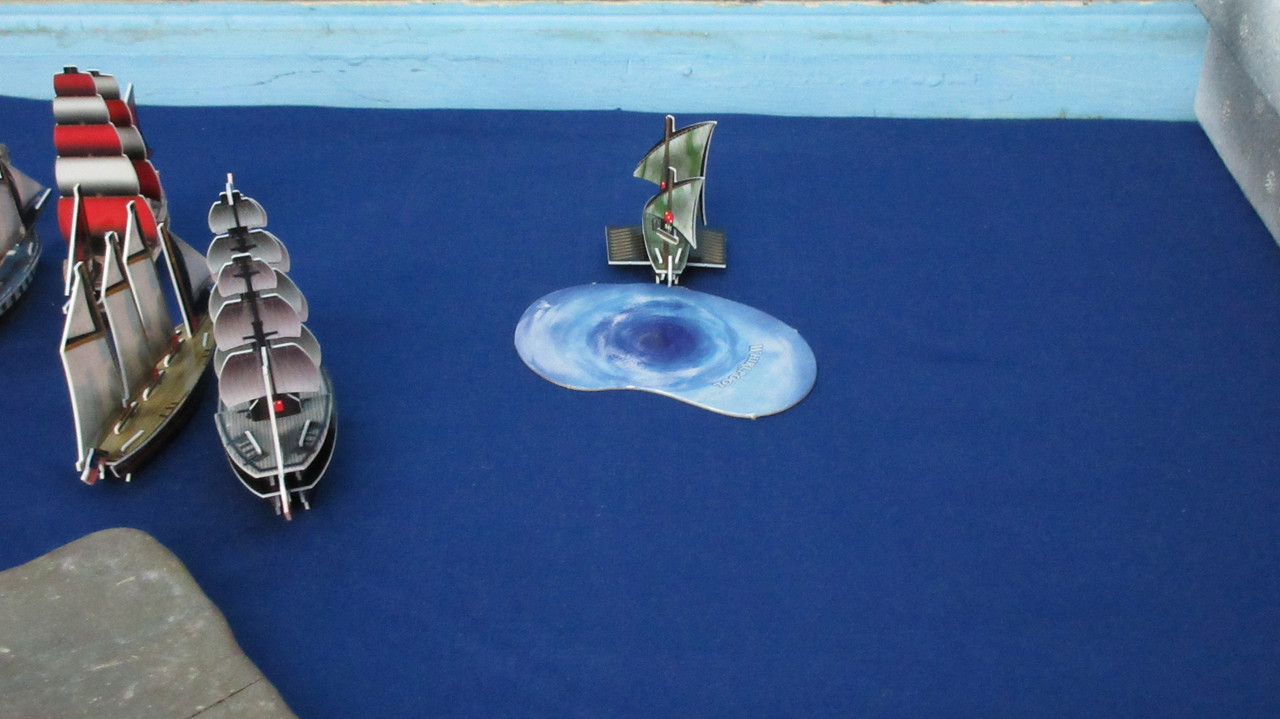
Turn 36! The Pirates brave the whirlpool for the first time! The flagship of the squadron is immediately spun back out after rolling a 1 to emerge from the same exact whirlpool! XD

The Sunrise Fire and Madagascar roll 2’s to emerge from the other whirlpool in the Sea of Allost, where the Freedom came out! This not what the Pirates wanted, or expected. They are trying to discover new lands and/or discover where the hostile Ralph David came from.
Back in Caribbean waters, the English roll poorly to not even damage the San Estaban! However the Bretwalda got lucky that neither of her fire masts spread. Her captain considered running for home, but between the low probability of making it in time to put out the flames, and seeing his fellow Englishmen in danger (HMS London nearly derelict at the right), he decided to forge ahead and press the attack! Indeed, both sides showed bravery and honor in this fight.

She’s not rolling 1’s! Thomas Gunn announces his huge entrance into the battle with HMS Lord Algernon’s first shots of the game!! The super-accurate gunnery crews obliterate the final two masts aboard the Matthias Vospero, who is now doomed due to her fire mast and zero percent chance of being towed home in time.
The Galapagos only manages two hits on the Galeon de Gibraltar (Galeon for short), but one of them is an all-important Stinkpot Shot!One of the most underrated things in the history of this game, this equipment shuts down ALL crew aboard the enemy ship during their next turn if the shot it’s assigned to is successful. From here I can confirm that shots that don’t eliminate masts do not need to hit on the mast elimination hit (the second hit needed to take out the mast for example, following the 2 hits per mast house rule) in order to take effect. For example, a successful grape shot would eliminate a crew on the enemy ship regardless of how many hits the enemy ship had taken in terms of mast elimination. This applies to stinkpot shot as well of course, and this shut down the Galeon’s impressive cohort of crew for her next turn (captain, helmsman, cannoneer). Since the Galeon’s cannons were not quite in range of the Lord Algernon at this point, this saved Gunn’s flagship from taking damage on the Spanish turn.
At the left, the Victor has scored a hit on the Tartessos while the Serapis enters the fray as well.
I think the San Estaban had her mizzenmast eliminated by HMS London. At this point you are invited to view a video of the situation if you’d like. That was released as a youtube exclusive almost 12 hours before this report was posted, and before the rest of the day’s turns were even played!
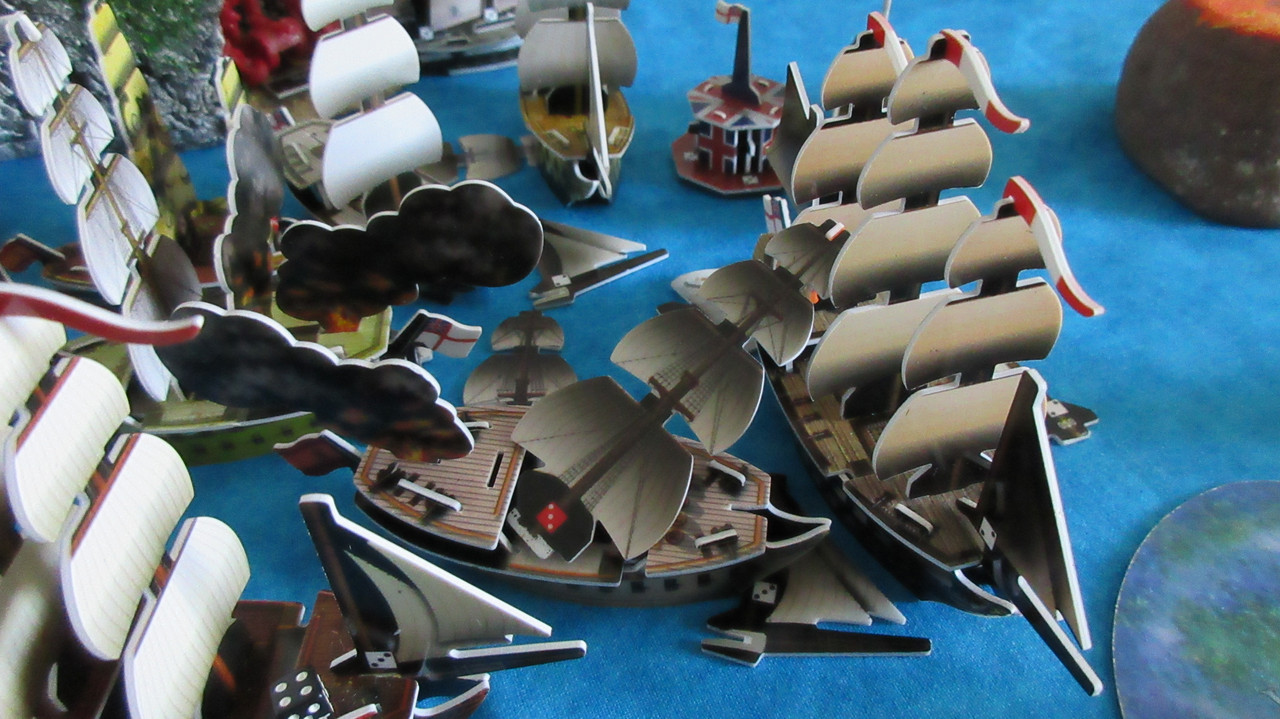
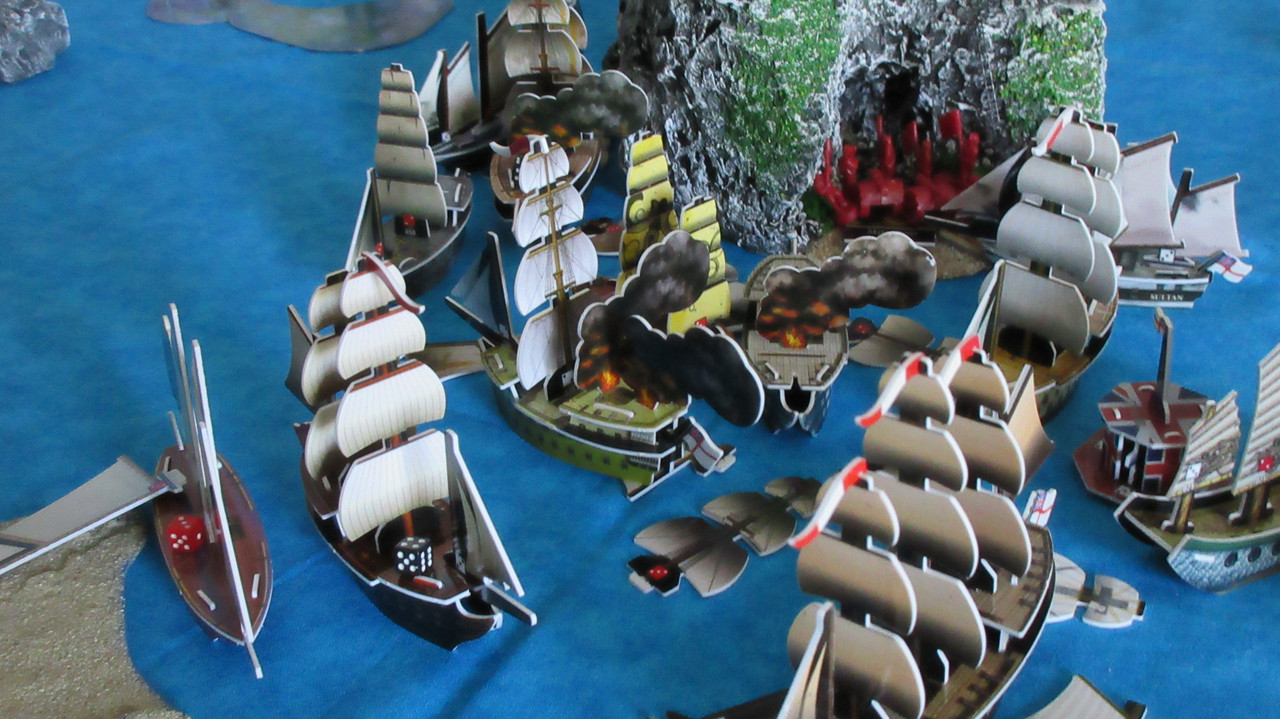
This shows the Spanish turn in the battle area, with the fire aboard La Tartessos spreading. However, the Spanish inflicted some fiery hits of their own – the San Estaban has connected with her firepot specialist against HMS London, dooming the ship in a devastating blow to English morale! In addition, although the Galeon’s captain was immobilized by stinkpot shot, she managed to connect on 3 of 4 shots against the Galapagos, getting some measure of revenge by setting the ship aflame with exploding shot. I will remark that it was a big-time shot – the exploding shot not only took out the first mast on the Galapagos (reducing her speed due to her ship’s ability of getting +L with all masts up), but it also killed her helmsman. This meant that the one die roll was responsible for a huge loss of speed aboard the Galapagos – the ship went from a max speed of S+L+S to just S in one turn!

The Matthias Vospero burns and sinks, but both sides are already suffering heavy damage. At the far right, the Metal Dragon has arrived and awaits orders from Admiral Gunn as to her role.
The Spanish take in 42 gold and launch two new gunships! The Catedral del Mar and El Extremadura give the Spanish a half dozen rank-2 cannons to throw at the English. As is becoming somewhat standard, they are also equipped with some variety of fiery equipment or crew. (I wanted to emphasize all sorts of “extra weaponry” in this game, from the different shot equipment to specialists, musketeers, and cannoneers – so far, not only have I been remembering them, but they’ve played large roles in the battles too!)
Also notice that the Spanish have unloaded Power Cannons at their HI – I have house-ruled that face up UT’s can be unloaded to home islands as if they were equipment or crew.
The French find textiles on The Flat! This gives them a third resource near their Harbor, with food and luxuries available as well.
And there it is! My uglier but playable version of the Phare de l’ile de Batz! This is not my idea at all, but rather one from vixenishcoder66 on Miniature Trading. Here is the revised post with other lighthouses, some of which I may also use in this game. Ironically, that post was made around the same time that I was seriously considering starting this game, though I didn’t know how grand it would be or what I could fit into it. At this point, I’m going all-in on everything I can possibly do lol. This is more proof of that.

The smallest island I have from RossinAZ is perfect for a lighthouse – the size of the cylinder I used fits great on the slightly raised grassy part of the island! I found a thick cardboard cylinder at my job, and decided it could be turned into a handful of makeshift lighthouses. I cut it into different pieces with various heights, and added a little paint to them to make them less plain (though this was a trying experience because I hate paint and hardly care about what it looks like lol). Actually, before I painted them (most of them anyway, as a few aren’t painted) I poked some holes where the “light” would come from, in addition to windows and various openings. Clearly the lighthouse is not designed to look like a real-life one – I made the lighthouses randomly and blue is my color of choice for France, and thus they have this one for the lighthouse I chose from the French ones vixenishcoder66 designed. And of course, as I said in the first post of this thread, the aesthetics of the pieces are a joke compared to the actual gameplay, so spending a lot of time on the lighthouses is the opposite of my thesis as a hardcore player. I’m just glad I got lucky and found something I could use to make use of someone else’s custom idea!

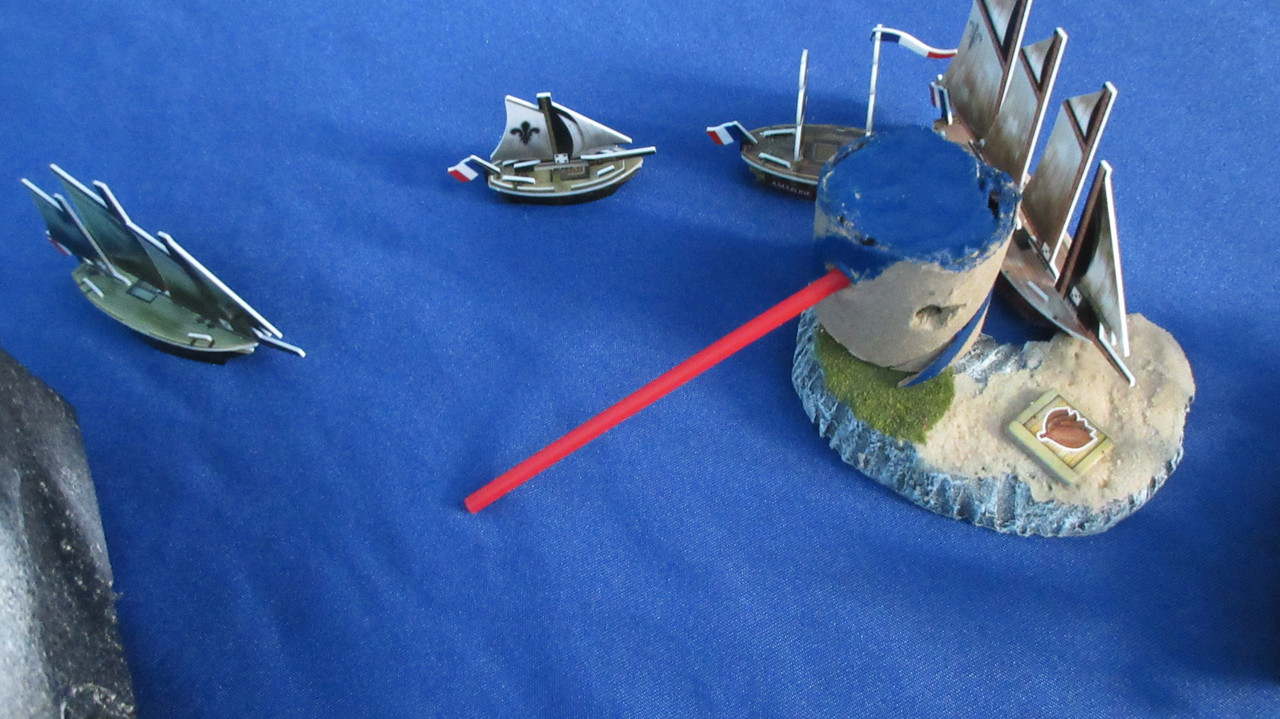
As the Vengeance takes off for The Flat (textiles are currently worth 5 gold apiece), you can see I’ve used one of the L-range straws (which I didn’t make either – I received those randomly in a trade or eBay lot a while back) to temporarily represent the lighthouse’s effect range. I don’t plan to cut out clear plastic for the base in this game, especially since they will often be elevated as I’m not planning to use ANY standard islands this whole game! However, now the “light” is coming from the top, which makes sense and works for now.
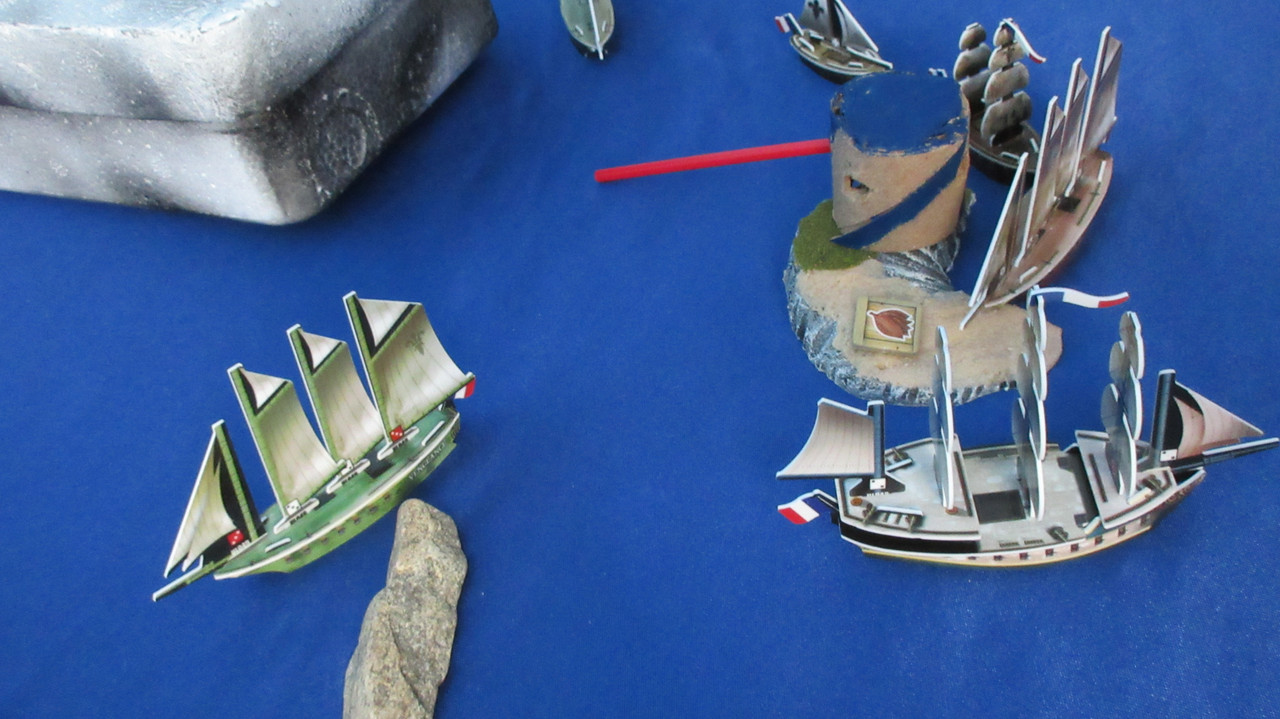
Believe it or not, this wasn’t just to show off the lighthouse – there was genuine French strategy behind this decision! lol. The French have placed it near their Harbor but on the island that leads to the west, where around 2/3 of the Sea of Karkuda lies. It can give French cargo ships a little boost on their trips out and back into the Harbor, in addition to providing a thematic “light” near the Harbor mouth. The food islands to the east don’t have as much stuff near them, so this island was absolutely perfect for the first (hopefully not last, but they will not just be built for the heck of it haha) lighthouse of the game!
With the Freedom fully repaired and two additional gunships at his disposal, Ralph David is ready to return to his Pirate-hunting antics!

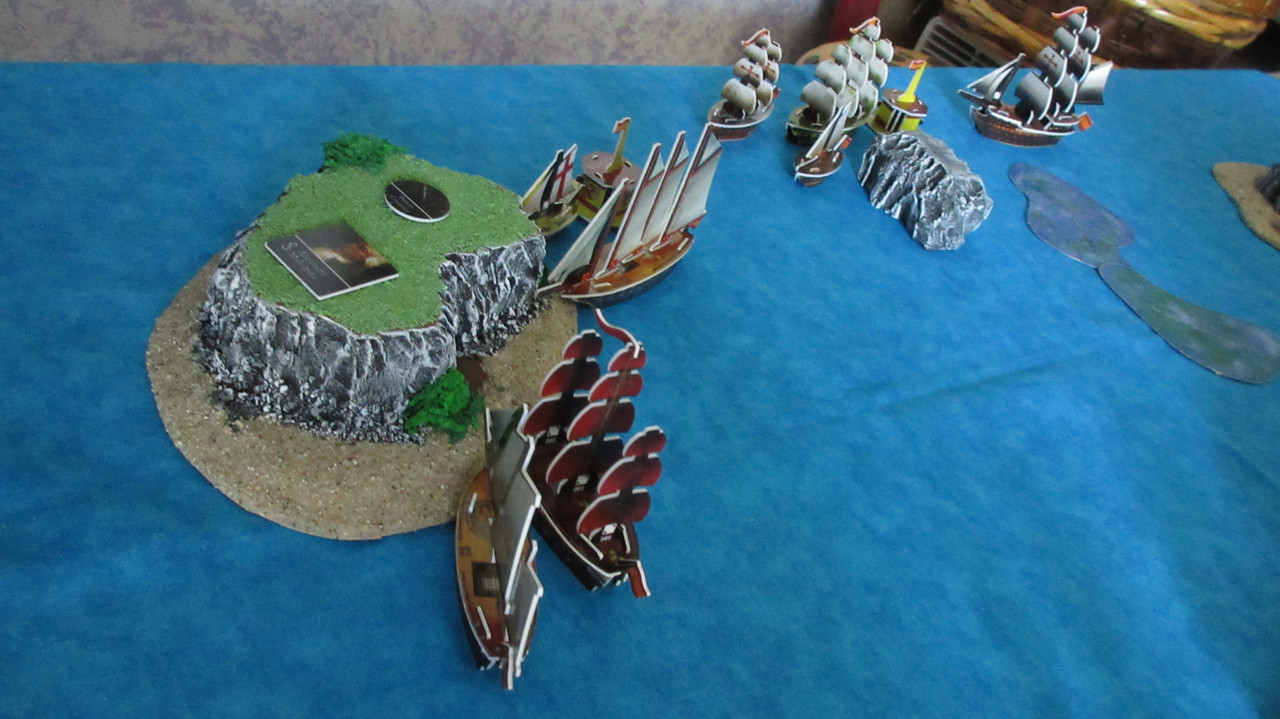
The Providence docks at the new island just beyond the reef opening! Another exploration will happen next turn! You can see more American cargo ships coming up from the southwest, while the canoe team continues to gather food in the northwest corner.

Oh my!! Just east of the island the Providence docked at, the Concord and Delaware discover The Flat! The French are just beyond on the other side, so a meeting between the two factions in the Sea of Karkuda finally seems imminent!

(and yes, that does mean that there is not another faction secretly lurking in Karkuda lol…)
This shows the island in greater detail, although I already talked about it in my Economy Edition reports. It’s still one of my favorite islands I’ve made; even though the foam layers are still visible, it reminds me of the White Cliffs of Dover and features some nice heavy shrubbery and rocks on various parts of it. This picture also shows the wide exploratory efforts by the Americans, with the President, Congress, and Minuteman all checking things out and nearing The Flat.

With the Feathered Hat awaiting her fleetmates, she is rewarded when the Sunrise Fire and Madagascar emerge from the whirlpool. Thus was their plan – if they didn’t all end up at the same whirlpool, go back to the original and compare notes. The Pirates can now travel through the two whirlpools in the Sea of Allost, but must roll for location to get to any other whirlpools. Slow progress, but progress indeed. The poor crew of the Otter have been told to do whatever they want by the Pirates back at the kingdom – galleys are a huge headache for the narrow arch entryways, so the Otter has been dismissed from the active cargo fleet. Her depressed crew perk up when told about the whirlpool expedition by the captain of the Feathered Hat, who is puzzled but determined after the latest event when his ship was simply tossed around the same whirlpool he entered.

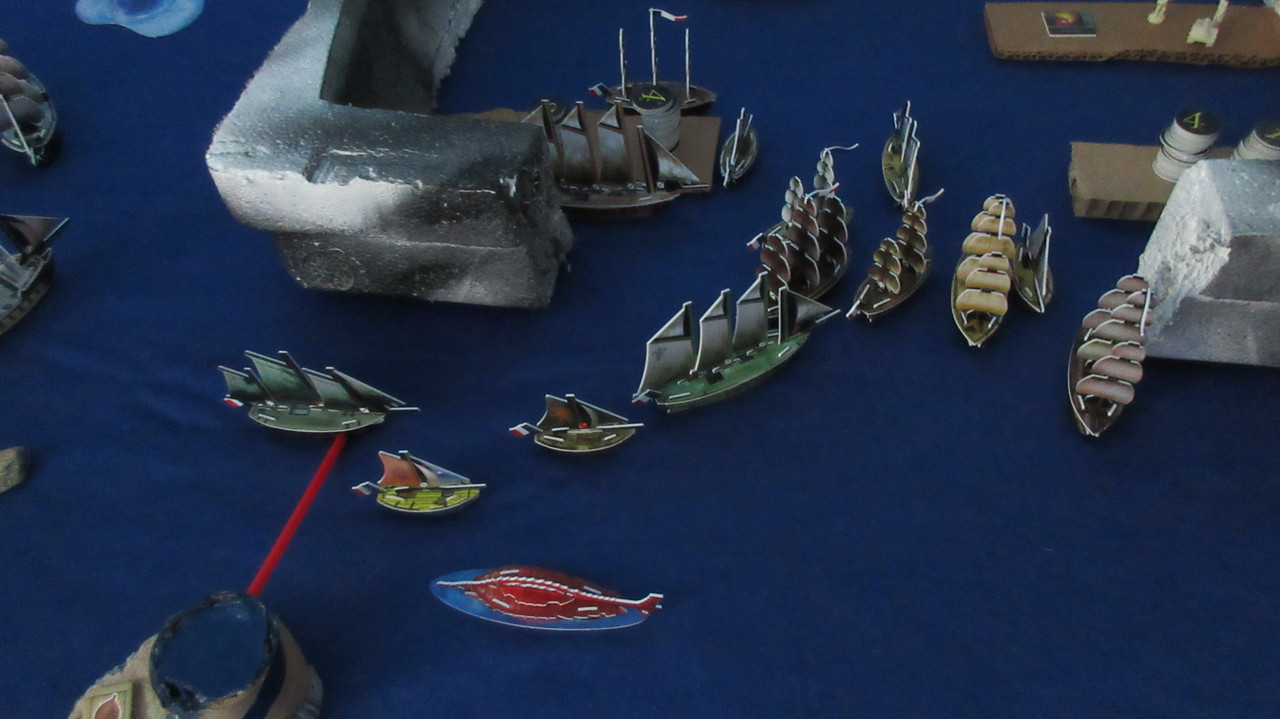
The Jade Rebels sail out in force! Realizing that further reinforcing their HI with additional infantry is pointless against such a powerful foe, they send plenty of ships to seek out Shal-Bala.

Leading the pack is mostly hired Viking ships, but also a familiar sight: the Divine Wind. Her captain is now more ready than ever to face what lies at the “Gates of Hell”.

Further strengthening the general Jade position, the Grand Temple moves just west of their sole resource island and readies the guns. The similarly repaired Sea Phoenix and Glorious Treasure join her.

Back to the Caribbean! (obviously I enjoy saying that for some reason haha)
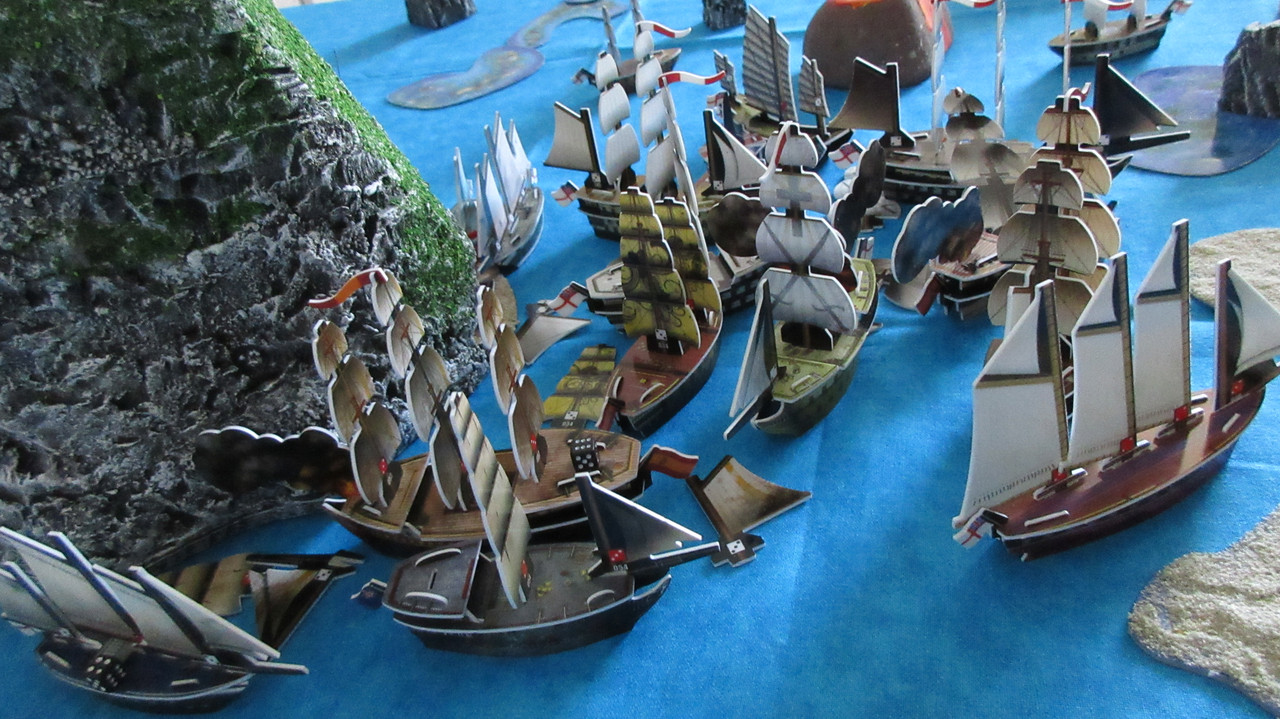
Devastation is unleashed as the Lord Algernon looses a full broadside! Combined with shots from the Galapagos, the Galeon de Gibraltar is reduced to a burning hulk in just one turn!

War at sea! Splintered masts fall everywhere, while smoke from the flames obscures the deck of the Galeon from view of sharpshooters in the main top of HMS Lord Algernon:

War indeed, for the English have declared war on the Spanish!! This happened shortly after the battle commenced, but clearly it seemed like an inevitability at this point. After the London sank due to fire, HMS Burma finally entered combat by dismasting the San Estaban. The captain of the Burma was happy to finally command her in battle, after spending many turns aboard other ships and waiting for operations at Diamond Rock to be completed (which they haven’t been of course, but more on that later!). The Victor has captured the San Estaban for what I believe is the first capture of the game! However, sadly the London is no more. She met the same fate as the Viceroy, with fire dooming both ships.

The Serapis shoots at the Tartessos, who may soon meet a similar fate:

Spending some gold, the English launch 3 ships. You can see their newest purpose-built warships here, as the very accurate Duke of York and Guy Fawkes are launched. They are ready to fight Spain. HMS Duke of York in particular is a bruiser I’ve wanted to use for a while.
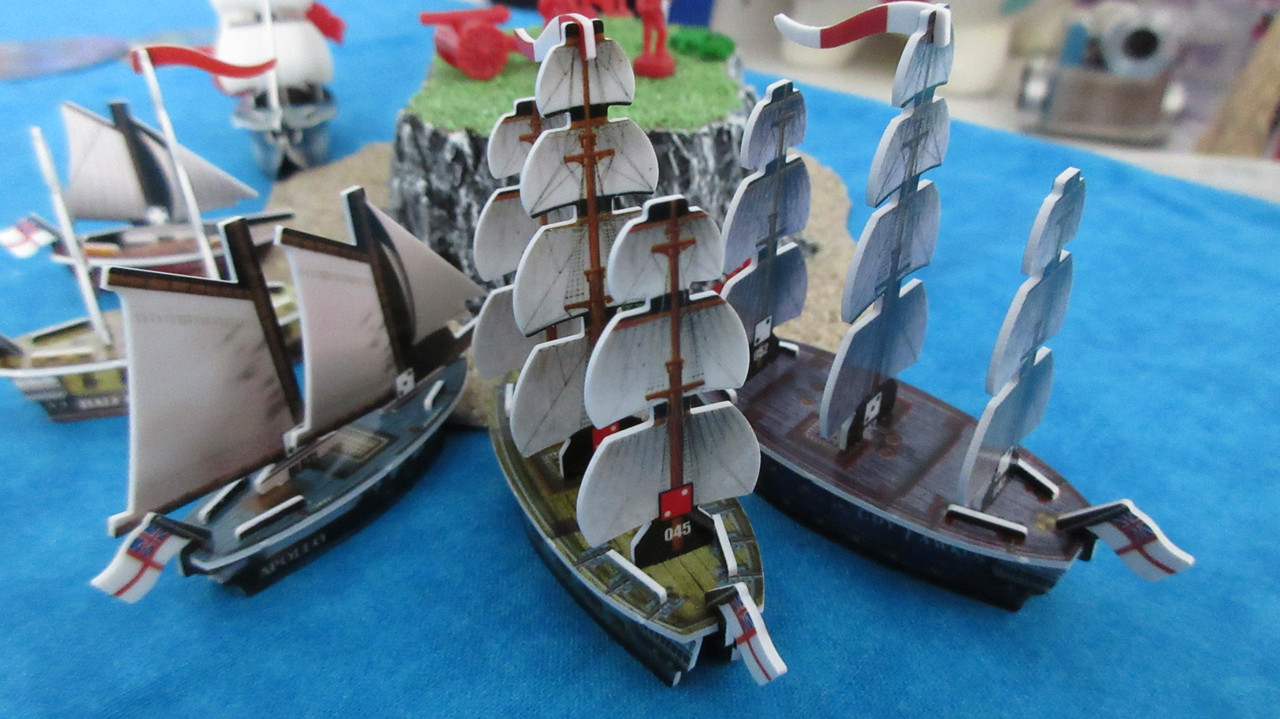
But yes, they launched 3 ships. Here is the other one: HMS Malton. She is a beauty, on par with many French ships for aesthetics, at least in my opinion. However, her purpose in this game is more practical. With the Burma off fighting in combat, the Malton has been tasked with continuing the operations around Diamond Rock’s fortifications. She carries a new 2L length of cable, along with the artillery unit you see here and a captain and helmsman. Those crew give her the opportunity to fight Spain sooner rather than later in the case of disaster out west, but in the meantime her current job may also be fraught with perils, although of a different nature.
Amid the deafening roar of his own cannons, Admiral Gunn signals for the Metal Dragon to resume her mission with the Bath to explore whirlpools. Gunn sees that English victory is near, and knows the King John (off the starboard bow of the Bretwalda) can do an admirable job standing in for the Metal Dragon.
With more metals coming in, the Spanish continue to launch, as they should in such circumstances. The Anunciada and Santa Catalina come into play, along with the first duplicate flotilla of the game – another Armada is right behind the Anunciada!

Oh no! My worst fears had been confirmed: another great warship lost to fire! La Tartessos burns to the waterline, marking yet another casualty to fire shot and firepots. I wanted to emphasize them in this game, but they may be becoming too powerful. Despite following the two hits per mast rule and not ignoring it, they are still extremely valuable for their point costs. With the house rules, I really didn’t expect this many ships to be sinking this early in the combat parts of this game. I haven’t decided upon anything yet, but I may rule that fire needs a 1 to spread and a 6 to be put out, instead of a 1-2 and 5-6. I will admit that I am partly annoyed simply because of which ships have been doomed by fire – the first English flagship (HMS Viceroy), and now some of the powerful gunships I was really looking forward to using a bunch (HMS London, HMS Bretwalda, the Tartessos, etc).

Nemo keeps the Nautilus above water and excitedly tells the French about the island east of the Harbor. They seem relatively unconcerned by the considerable development and tell Nemo to inform Admiral Gaston personally.

French ships collect luxuries and textiles near the new lighthouse:

The Dauphin Royal sights the Concord, marking the first Franco-American contact of the game! This also puts an end to the French streak of not discovering any other factions, as they are the final fleet to find another source of humanity in the game. (though what the Jades have found is not particularly human… XD)

Now you can get an idea of the Sea of Karkuda’s layout, with only a handful of wild islands between the American area and the French Harbor.

American canoes in their preferred V formation, heading home with yet more fish/food.

A meeting of the minds! Commodore Preble meets with Monsieur Lenoir. The crews of the Congress and Concord try to listen in for information, but the sound of the waves drowns out the important conversation.

The Rattlesnake and Argo simultaneously dock at the eastern beach of the big island!

HUZZAH!! Lumber has been found! ![]()
![]() This made be very happy, as it’s one of my favorite resources for thematic purposes (essential for ships obviously!) and it took nearly 40 turns to finally discover the last resource.
This made be very happy, as it’s one of my favorite resources for thematic purposes (essential for ships obviously!) and it took nearly 40 turns to finally discover the last resource.

I don’t think I’ve ever been happier to roll a 1! lol!
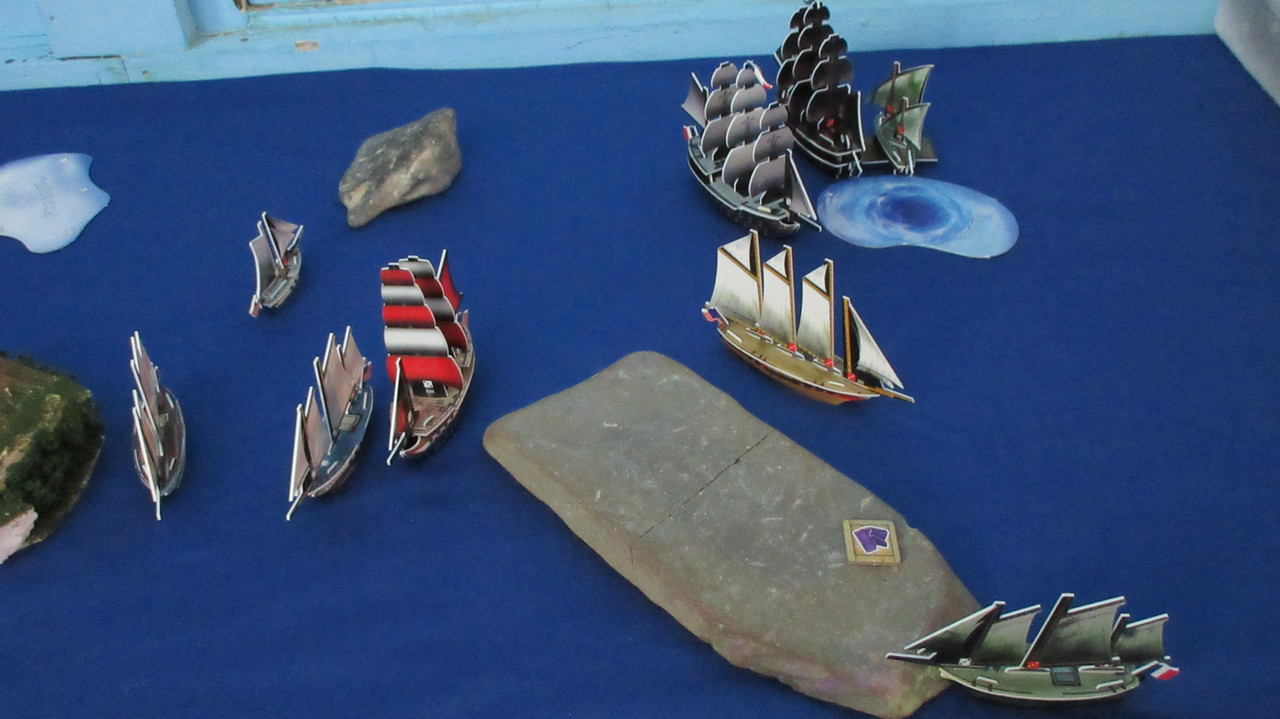
Ralph David returns to Allost! The Freedom, Concord, and Flying Fish emerge from the whirlpool in the north.

Turn 39 marked the need for another resource change! Yet another 3 was rolled for value, meaning that textiles were worth 6 once again and crashing the metals market! This was a disaster for the Spanish, but the values would only hold for 5 turns, the shortest duration of the game thus far.

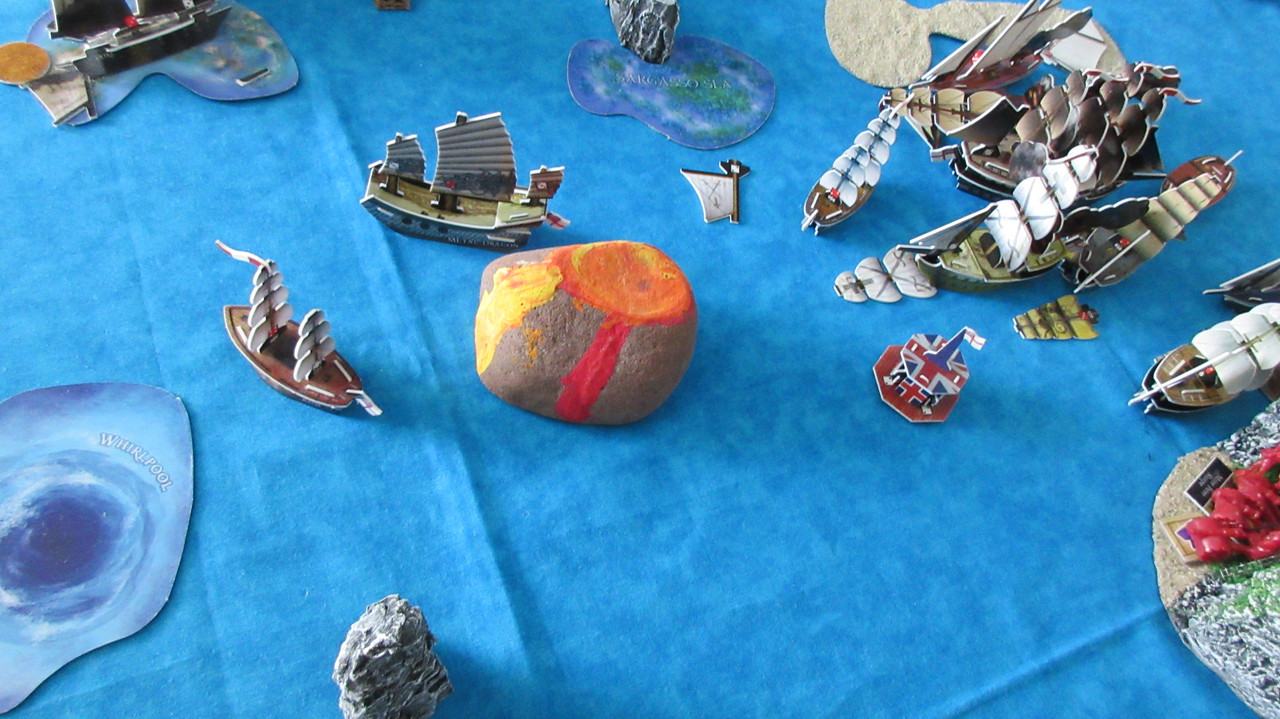
The Pirate whirlpool squadron was ready to try again! With the Madagascar and Sunrise Fire rolling 5’s, they appeared at the southwestern whirlpool in the Sea of Karkuda! Right next to the Americans who don’t like them! XD

With terrible luck, the Otter rolls a 4 and ends up at the northern whirlpool in Karkuda! She is exposed to the powerful Congress and President, and she better hope the Americans don’t spot her! XD
LOL!! For the second time in a row, the Feathered Hat gets spun out of the same whirlpool she entered! XD

With a rare overhead view from the east, the Deliverance showed up next to the Otter to protect her. Now the Pirates have clear routes to 3 of the other 4 whirlpools that currently exist, with the Caribbean whirlpool the only one they haven’t traveled to from their own near the kingdom.

Determined and willing to risk everything, the Jades charge onwards. The Sea Lion has not mounted the icewreck, I just had to make room in the fog bank for both. Despite the supernatural inclinations the icewrecks seem to have, even they cannot locate other ships in the same fog bank.

With a bunch of Jade ships in the fog, the slow 6 masters sail up from the south:

Ouch! The icewrecks come out of nowhere and ram masts off the Grand Mountain and Muninn!
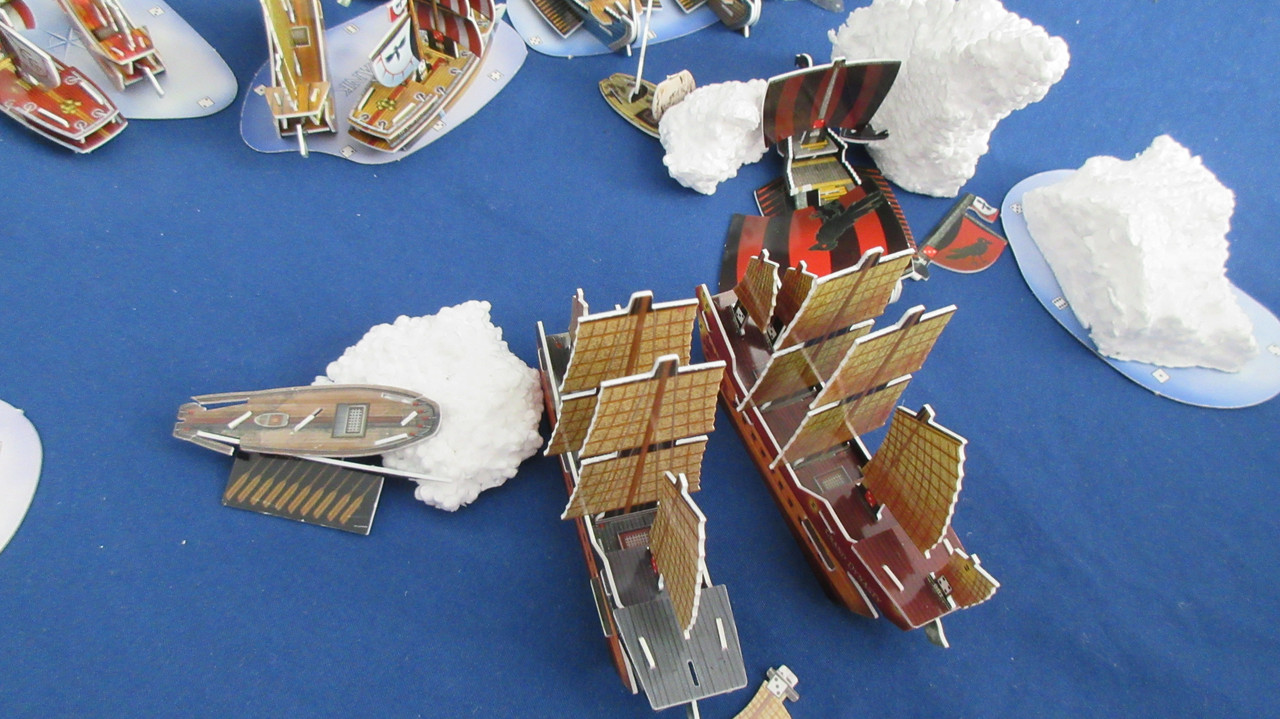
Just as suddenly, a ghostly shadow pops out of a fog bank next to the Jade resource island, and then travels through the Glorious Treasure to shoot directly at Jade cargo ships!! The Crushed Skull has turned ghostly, and takes a mast off the Sea Duck!

Suddenly it’s a Cursed swarm attack! The Jikininki, Spilled Salt, and Banshee’s Wail sail out of the west and descend upon the Grand Temple! However, they only eliminate one mast combined.

An ominous sight: Sammy the Skull shows up in the Monkey’s Paw! This ship was damaged in the Battle of Fog and Ice, but has been repaired somewhere and is ready for action again!

The Pestilence appears! Her blade strikes a mast off the Grand Temple, and you can see other scorpion ships aren’t far behind!
Well what was that all about?! XD
-Back to the Caribbean-
With a very unlucky three consecutive 1’s, the Bretwalda loses her last two masts and the Galapagos loses a mast! This is another blow to English morale, as they will not be able to get the Bretwalda home in time before she burns.

The Bretwalda is doomed. ![]()
![]() Gunn tells the Victor to drop the captured San Estaban so she can go home and repair. The Lord Algernon takes up towing duty for now, as the Serapis goes home for repairs as well. The Burma guards the area. Despite considerable losses, the English have won the First Battle of Diamond Rock!
Gunn tells the Victor to drop the captured San Estaban so she can go home and repair. The Lord Algernon takes up towing duty for now, as the Serapis goes home for repairs as well. The Burma guards the area. Despite considerable losses, the English have won the First Battle of Diamond Rock!

New and old English ships sail out, with different tasks to be completed.

With the Spanish threat at least temporarily contained, the Metal Dragon returns to escort the Bath through the Caribbean whirlpool! Funny enough they both roll 3’s to simply get spun around and dizzy! XD

Unfortunately for the English they both lost masts in the effort.

With the loss of all four gunships in the battle (3 burnt and 1 captured), this shows the entire Spanish fleet. They have formed a defensive wall with gunships and the new flotilla to protect their cargo ships. With metals plummeting to 1 in value, the Spanish may not be able to launch for the next bunch of turns.
Armada was already in play, but the second part of the flavor text is fitting: Spain was the last of the nations to create a flotilla, but now uses them aggressively to protect its precious ports in the New World.
Spain’s impressive line of battle, although it wouldn’t hold up if England threw their full might against it.

A wide shot of pretty much the entire Caribbean, with the Duke shipwreck in the deep south and Paradise Island in the north corner.

Back in Karkuda, the French experience a large influx of ships entering the Harbor area, with the new lighthouse providing some assistance.

Another meeting of the minds near The Flat! Although, this one is less cordial. Lenoir shouts a greeting to Havana Black, who seems hurried and tells the French that he made a mistake and will be escorting the Otter back through the whirlpool. Commodore Preble watches the maneuvers, unimpressed. He and the Congress stay where they are and avoid contact with the Pirates, as they don’t want blood on their hands and will wait for Ralph David’s report to determine how to proceed with such criminals.

It is worth noting that the French were previously “alone”, and now find themselves in the company of two other factions in just a few turns, surprising them and alerting them to the fact that they may not be as dominant in these waters as they thought!
A friend of Ralph David, Brent Rice saw the suspicious Pirates emerge from the whirlpool south of the American HI, and orders the Bonhomme Richard to attack! However, the gunners have a miserable day, hitting just once in 5 tries to damage the already-hurting Madagascar. The Colonial Trader loads metals, her crew smelling the smoke of battle for the first time.

The Rattlesnake explores the final beach of the big island up north, finding textiles! She and the Argo load some and prepare to go home. This gives the Americans 5 of the 6 resources relatively close to their HI, which is fantastic for their long-term wealth. Throw in the spices they have saved up from when Luck Island produced that resource, and they are the most diversified faction in the game.

I ran out of textile tokens from M&M so I used the Hammocks one instead. The extra sails token would be next, and I can always just use a face up coin to denote which resource the island or beach produces as I did for Economy Edition.
The Providence and Yankee head back with lumber (now worth 5 gold after the change) while the Pawtucket and Louisiana look to do the same:

The Americans investigate The Flat, impressed by its position and sizing it up as a potential spot for their future operations…. The French will no doubt be sending more ships there soon, as textiles recently became the most valuable resource in the game for the third time in six resource rolls.
With some considerable damage done by the travels, the Pirate whirlpool squadron meets up back in Pirate waters. They are disoriented and disgrunteld, annoyed at how random the results seemed to be. However, they can now travel without rolling for location from this whirlpool to all others except the one in the Caribbean, which they don’t know exists (and therefore they have no idea of the English and Spanish presence in the game lol).

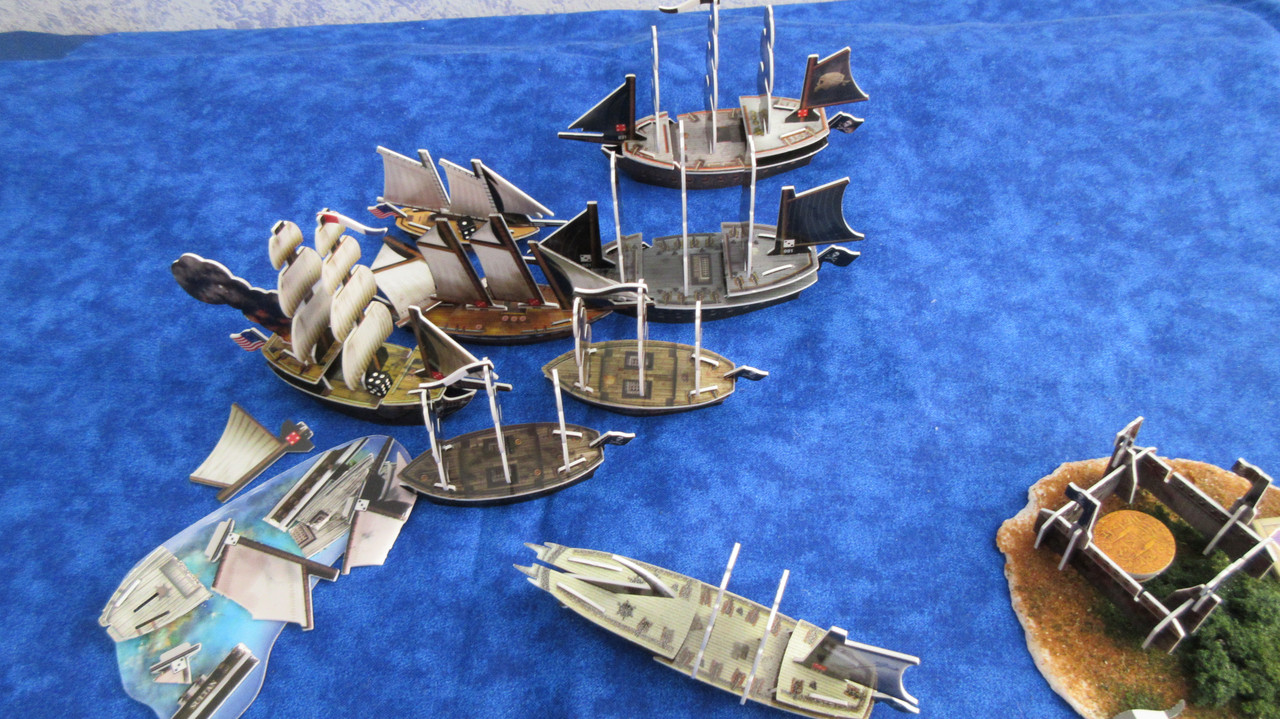
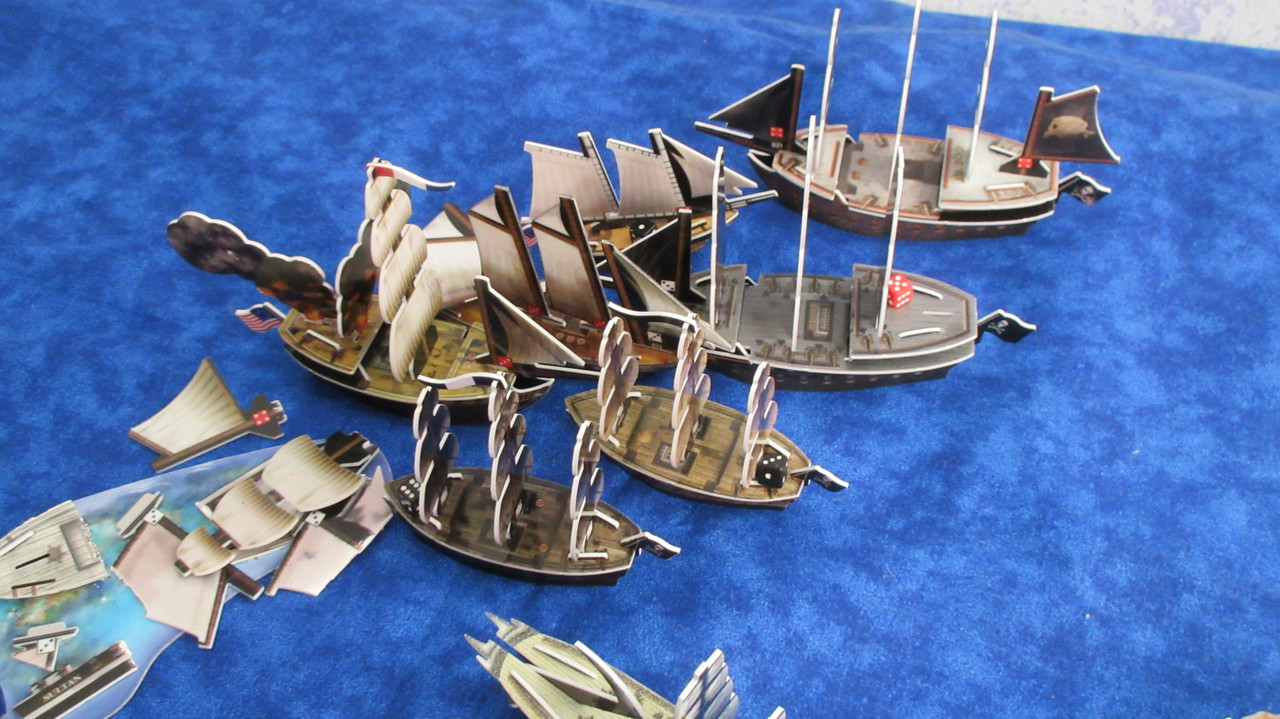
Ralph David was ready for action, and that was exactly what he would get! This time though, the Pirates were more than ready for him. With a squadron of four Pirate gunships tasked specifically with defending Dead Man’s Point, David’s squadron quickly came under attack. The Recreant, Accused, Fool’s Hope and Lady’s Scorn have hit the Americans pretty hard, with the Concord suffering an ominous fire on board. Mission hears the gunfire and gives the Crusher an extra action, trusting the gunships to dispatch the Americans quickly but ready to deal the final blows if necessary…. In fact, this is as close to combat as Mission has gotten in this game, but it’s nice to see that it doesn’t look like he’ll be an “armchair admiral” for the Pirates.
You may have noticed that the Pirates didn’t seem to launch much if anything this session, and you’d be right. This is not just because I’m a little fed up with how difficult the logistics of the kingdom are (bumping it, measuring distance out, logjams, etc). The Pirates have been taking in considerable riches, but they are saving it for now.
Elsewhere in Allost, the Rebels strike back! Turtle ships and the Sea Phoenix team up to take two masts off the Crushed Skull, who is still ghostly and therefore immune to the great ability of the Glorious Treasure (eliminate a mast and crew after being pinned). The Jades are a little shocked and dazed that the Cursed suddenly hit one of their resource ships, but those ships return home and continue to pile up spices.

The Grand Temple uses a reroll from Katsura-chan to get Tsai’s SAT, shooting 6/8 to take three masts off the Pestilence and Spilled Salt combined!

The Beowulf rams an icewreck, actually breaking the ice:

A revelation! Some of the dense fog lifts, but only after the Jade ships inside roll to come out of it. The 6 masters reach a fog bank that stays in play.

The Polaris rams a big icewreck coming out of the fog, while the Divine Wind approaches something she’s seen before!!

Is it? Could it be?? Amid some unfamiliar sails, the Divine Wind comes upon the area she discovered many turns ago!

From the main mast of a hired Viking vessel, it’s obvious: the “Gates of Hell” are upon them!!

Completely optional, but at this point you may want to get some thematic music up to further experience what the JR’s experienced here! (NO connection to the movie or character! Just thought the song fit this part) (and maybe read this part slightly slower to get the effect …. … )
With no dragon in sight and less fog and gloom blocking their view, the Jade Rebels and Vikings look up around the “gates” for the first time… and DREAD fills them up…..
….
As more fog lifts, a view from the Beowulf, who isn’t even that close to the “gate”….
REEE!!
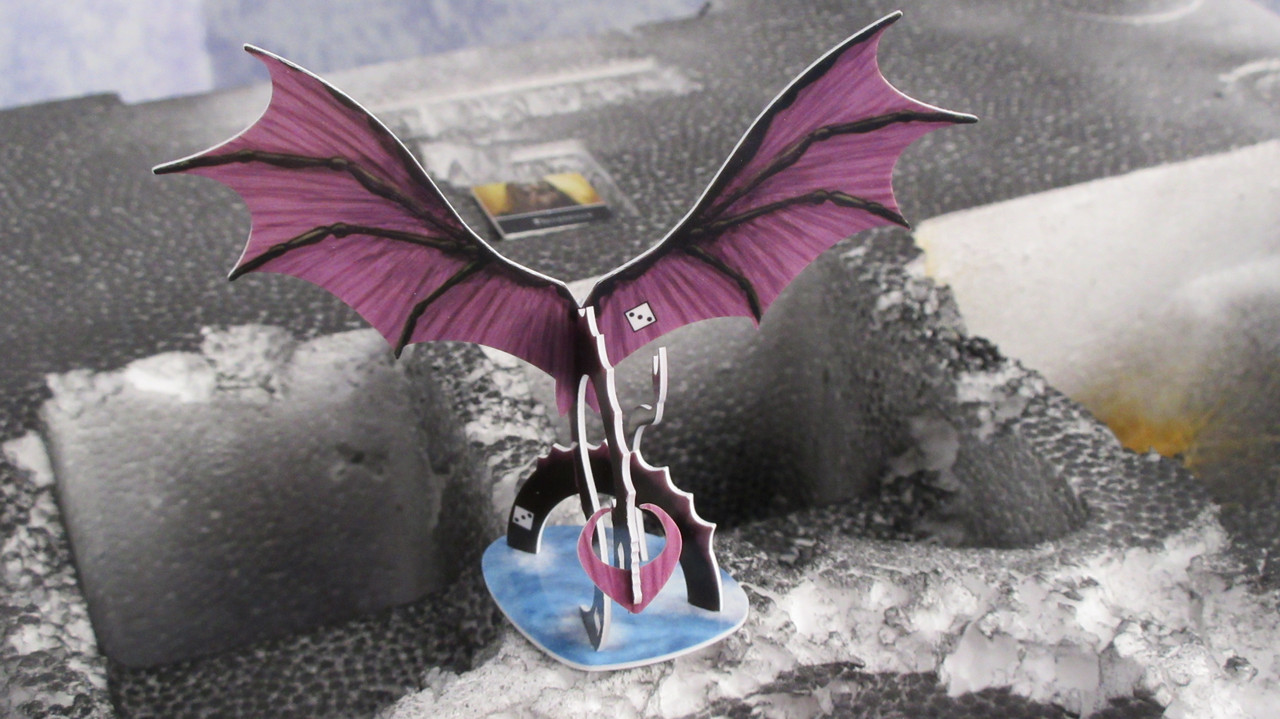
With a shriek, Shal-Bala descends from above!! The dragon swoops again, taking out a mast on the Divine Wind and Polaris.

And then Shal-Bala again flies up, but with most of the fog around this massive structure disappearing, we see where the dragon goes!! Up, and up, and up! O_O
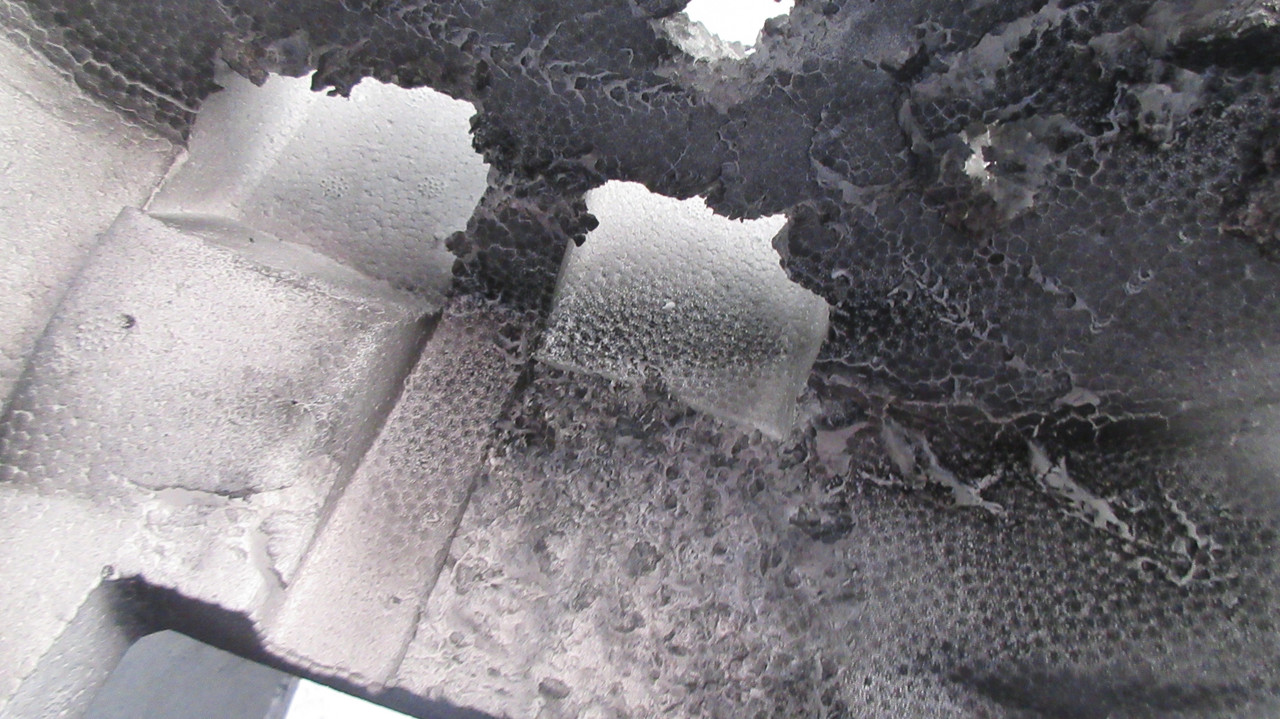
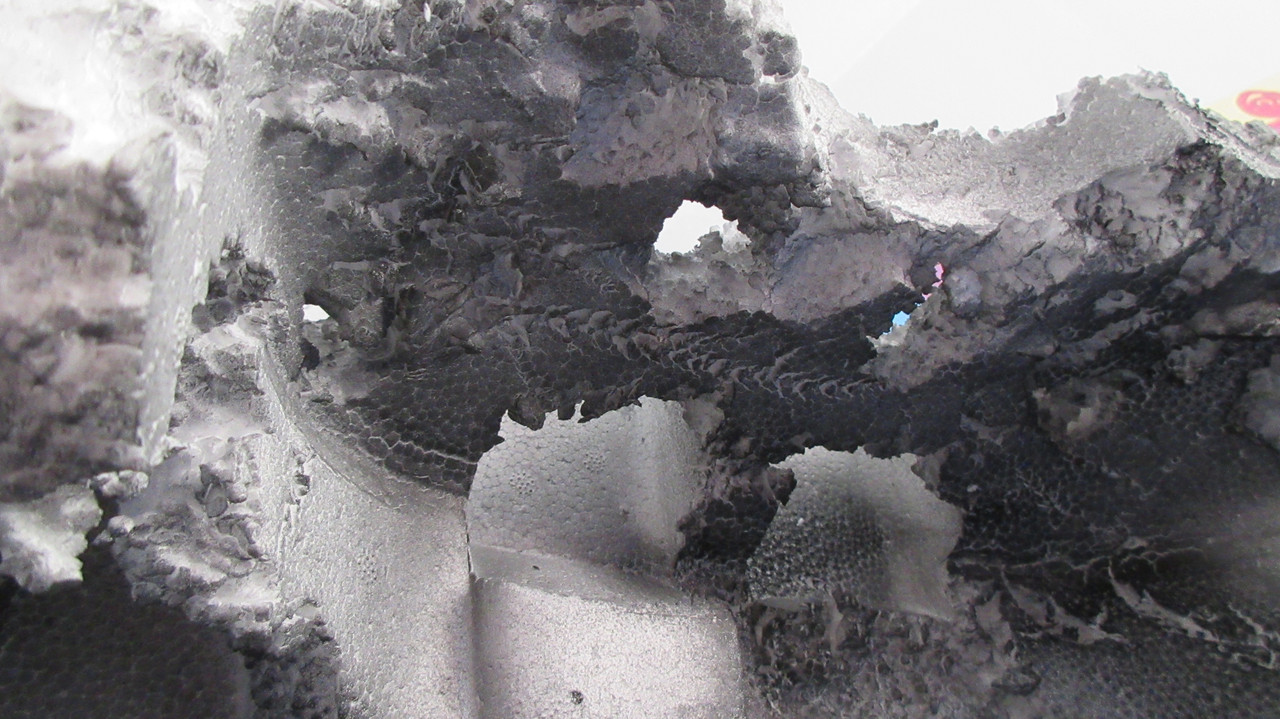
Introducing: The Cursed Dragon Roost!
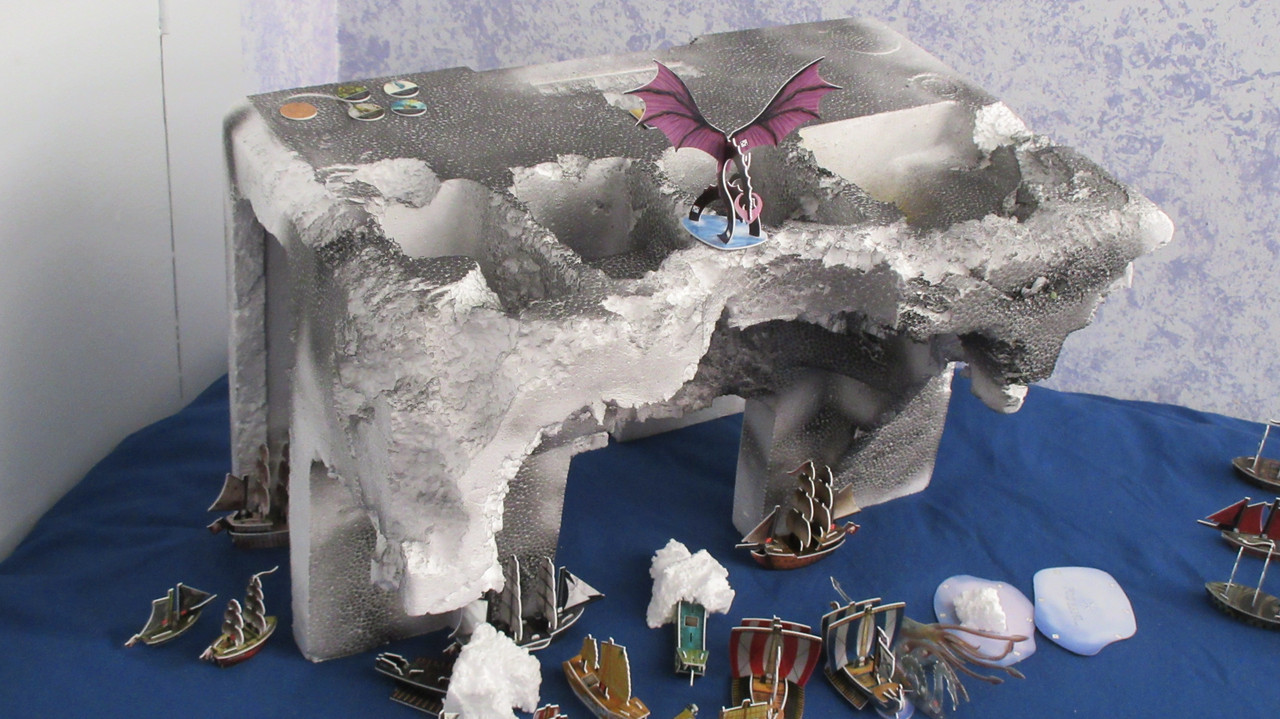
One of the biggest structures ever used in a Pirates CSG game!!
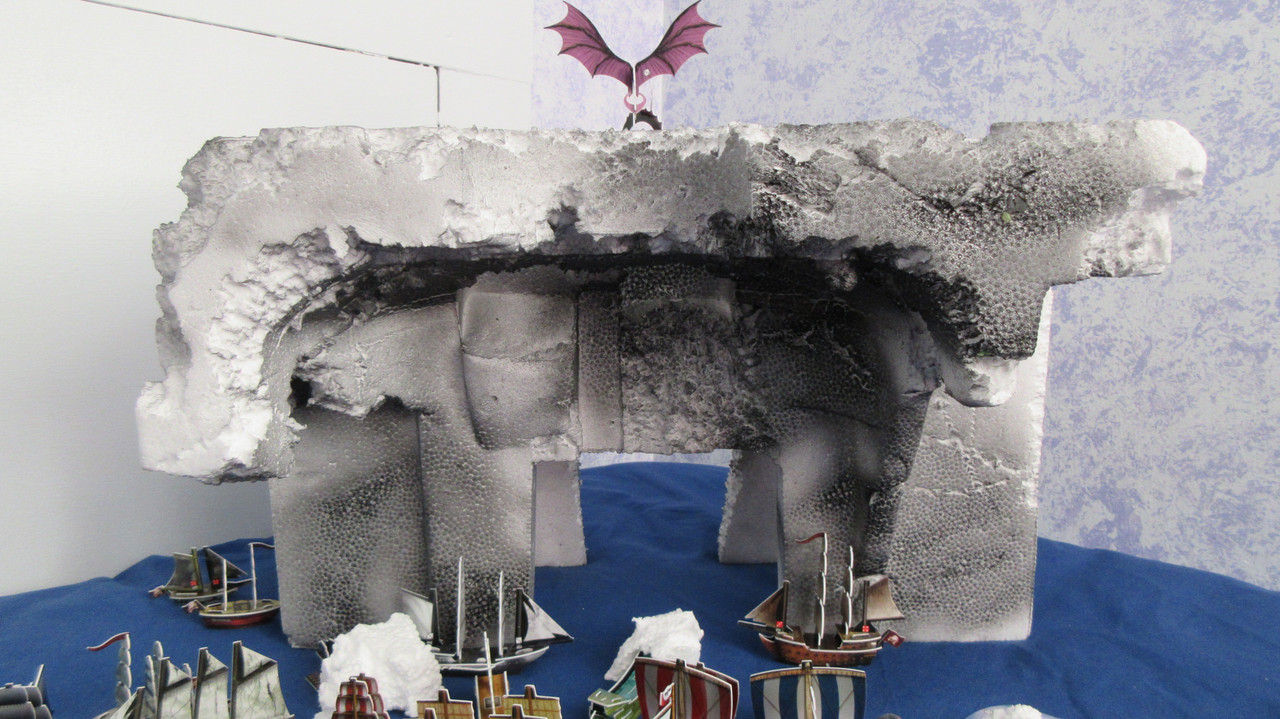
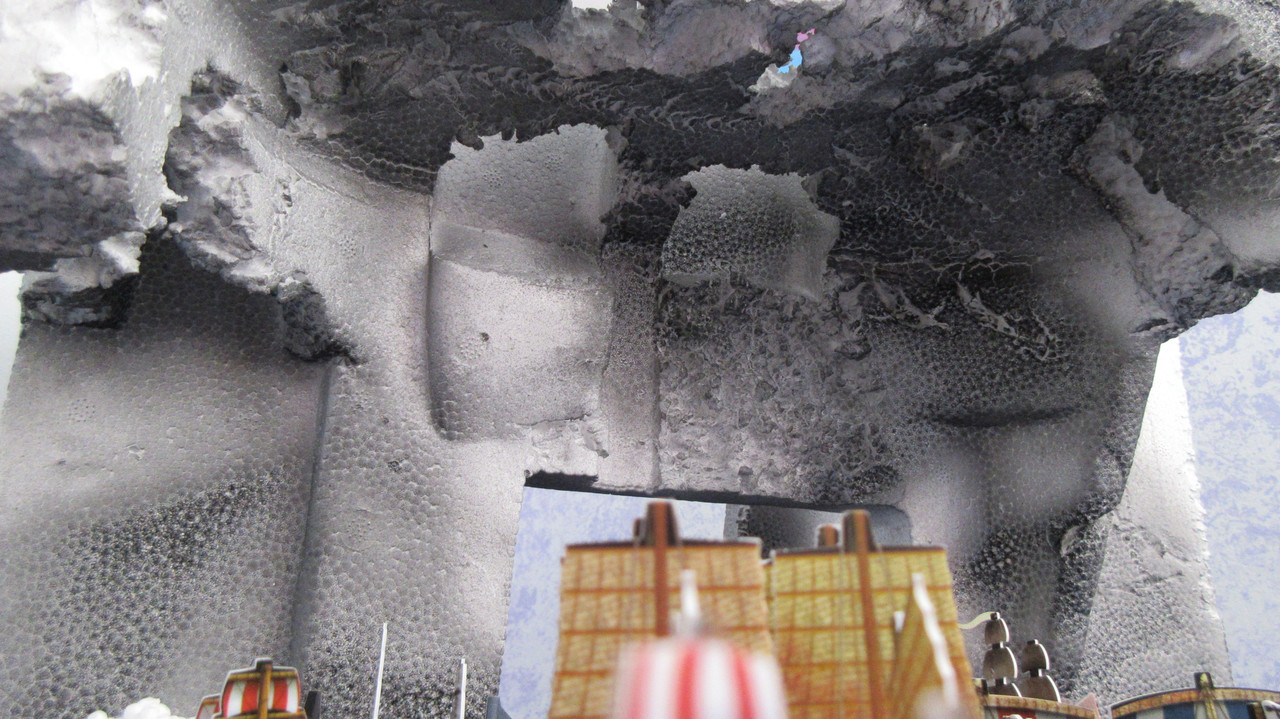
These aren’t the “gates of hell”! This is THE ROOOOOOOSSSSSSSTTTTTTT!!!!!!! XD Another head-on view (almost from sea level!) for maximum shock value:

The Cursed have been here all along!
Starting the game with the Roost as their home island, and with 30 points to build a fleet, the Cursed have been one of the original 7factions since the beginning of the game! Only now, as the Jades discover the full scale of their operations, is their epic “grand reveal” appropriate!

Cursed cargo ships load luxuries from what I’ve been calling Broken Horn Island, just as they’ve done for nearly 40 turns now! The Dark Pact is a recent launch, but the Grinder and Death Wind have been in play for a while now.
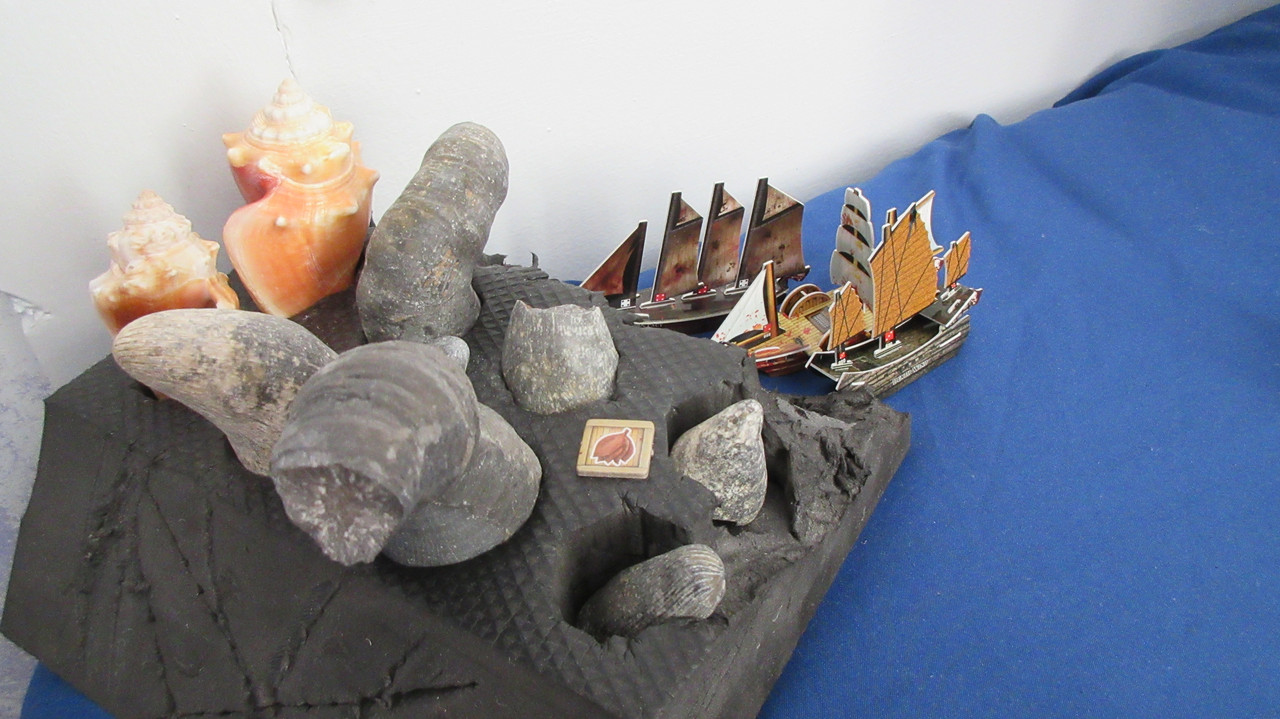
East of the Roost, the Cursed have a gold island that has already replenished a few times! The 100 gold coin and other valuable goodies found there are the biggest reason for their current strength. The Nightmare, Guinee, Sea Monkey, Crypt, and Maman Brigitte are collecting gold from the island, while the Soul Crusher stands guard. The Soul Crusher costed the Cursed 33 points, as she carries Wraith (who has already possessed a few dead crew!) along with a captain, helmsman, and musketeer.

Cursed game summary
The Cursed found gold and luxuries on the southwestern island, but the gold has run dry. They also found tons of gold and UT’s but also Wolves up north with Crypt. The Soul Crusher with her musketeer was launched to eliminate the Wolves, after which the gold could be taken aboard other ships. They got a 60 coin (a 6 with a gold-painted back, as I explained earlier) and a 100 coin (no number, just gold on both sides), and then proceeded to launch 201 points of stuff in 2 separate turns. Shal-Bala savaged the Sea Serpent and ate the crew. They had the biggest fleet (231 points) at first point count, although this was completely unknown since I didn’t report it lol. They had 303 points at the second point count, which would mean that the game had actually reached 1,760 total points at that count! And then they recently found another 100 coin after the Battle of Fog and Ice ended.
And here you see why I’ve called it the Roost – Shal-Bala is nesting on top! The giant piece of foam I used had some natural recessed areas, which is perfect for an evil Cursed Sea Dragon nest. Shal-Bala has finished up eating the remains of the Jade musketeer that was taken from the Divine Wind such a long time ago. This “food” helped Shal-Bala regrow its tail, and yes, that means that Sea Dragons can repair on top of the Roost!! O_O

Shal-Bala has transported a skeletal, pale figure to the top of the Roost… Devereaux!

At this point it is necessary to explain his “experiments” via his flavor text, first with his Revolution version:
Originally a French privateer, Devereaux has lost his sanity to his obsession with finding the Dragon’s Eye, a gem that legend says grants the owner immortality.
Of course, that’s the DJC Cursed version of Devereaux on the Roost: that is who the Cursed started the game with. (their original fleet was the Boneyard with Devereaux and a helmsman, along with the Crypt. However, Devereaux has long since left his ship to tend to his work at the Roost….)
Flavor text from DJC version:
Devereaux found his great obsession, the Eye of the Dragon. It’s power was everything he hoped it was – and more: Its power condemned him to a living death under its control.
And he has indeed found “his great obsession”, but that is not where this story ends. O_O
You may have also noticed some face up UT’s on the Roost. In addition to being able to store face up UT’s at their HI, the Cursed have a special power that lets them store face down UT’s until they are ready to be loaded aboard ships.
Would you believe that all that actually just happened at the conclusion of the Jade Rebellion turn? That’s right, the Roost was revealed as the fog lifted, meaning that the Jades were still taking their turn as they discovered the Roost, and can still spend gold!
Anxiously ready for reinforcements to face whatever bizarre foes emerged from the northwest, the Jades spent well over 100 gold for another anti-Cursed squadron! From left to right, the Grand Path, Grendel, Hrunting, Naegling, and Huginn! The Grand Path is finally unleashed! This is the 5th and final Jade 6 master to be launched in the game.

The Cursed are next! They officially go third in the turn order, behind the Jades and just before the English go in the Caribbean.
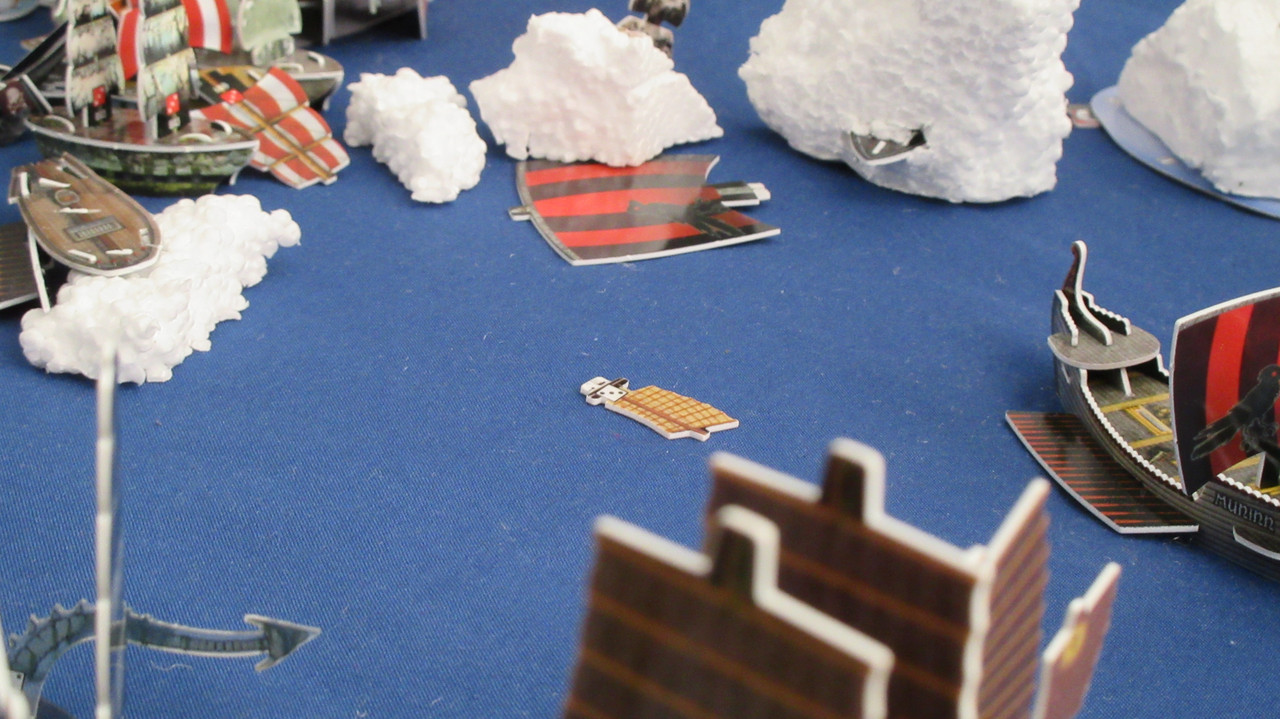
A FULL-SCALE CURSED ATTACK!!!! TOTAL CHAOS!

The Crushed Skull turned ghostly to zoom through the turtle ships and for the first time in this game, utilized the house rule where you can shoot at ships docked at their home islands! Alas, her one shot missed the newly launched Grand Path. The Cursed recently launched a fog-hopping squadron! The Sea Hag and Mist Walker started in a fog bank near the Roost, and popped out of the one next to the Jade resource island! They combined to knock a mast off the Grand Wind, flagship of Warlord Cavendish, who was stunned by the development! At the left, the Monkey’s Paw only shoots 2/5 but knocks both panels off the Floating Stone. You may have noticed the Grand Temple is in trouble…

… and she is! The Spilled Salt and Pestilence eliminated a mast apiece, and the GT is really in dire straits because she can’t escape (even with her reverse captain ability, which would normally come in quite handy with so much fog to run into) since the scorpion keyword keeps her pinned!

A big bite from Mist Walker nearly decapitates Warlord Cavendish! XD

Bam! The Scythe wrecks a mast and pins the Beowulf, who comes under attack on both sides by fog hoppers. The Needle and Hangman’s Joke have arrived!

Something the Cursed had been planning nearly all game: Behemoth copies the fog hopper ability and comes out to ram the Polaris and pin her in place!

Near the gateway of the Roost, icewrecks combine with the newly launched Sickle and Hellfire to make short work of the Divine Wind and Asgard!

From the main masts of the Grand Path, you can see the Muninn running home for repairs caused by ice damage, while one of the icewrecks that rammed her is a new big one. If the Jades lose their icebreakers, they may have no defense against the icewrecks! At this point, it is probably obvious to you that the icewrecks have been controlled by the Cursed the entire time. They follow the rules for icebergs (mostly), except that the Cursed can move them S in any direction on the Cursed turns. The icewrecks are formed from wrecked Pirate ships destroyed long ago and possessed by the Cursed to form a barrier between the Roost and any invading factions….
The entire Cursed/Jade situation. The Roost and the new battle take up a huge amount of space. In fact, seeing the extent of the Cursed threat, the Jade Rebellion has declared war on the Cursed!

Whew! Here we are back in the Caribbean, with a wide shot of the English. The Duke of York and Guy Fawkes make their way to the battlefield (though it’s now over), while the Bath and Metal Dragon join the Victor and Serapis as ships headed home for repairs, since the whirlpool expedition was an utter failure. HMS Apollo docks at home to load a captain, she happens to have Claw Cannon aboard as well, which she discovered back at the Duke shipwreck….
The Galapagos rolls good and bad, eliminating one fire mast but gaining one as well. This leaves her with just one mast, and at S speed, it’s unlikely she’ll reach home before it’s too late. The King John has arrived to reinforce the Diamond Rock squadron, but with the Lord Algernon possibly towing the San Estaban home, the English guard is about as weak as it’s been in a while.

However, the Spanish are still reeling from the First Battle of Diamond Rock, and here you can see they’ve taken up a defensive position. This is a rare shot looking from the northwest, showing their whole fleet.

By coincidence/bad timing, the French have a bit of a logjam at their Harbor, as the Nautilus goes west past the cargo ships and the lighthouse:
An alliance is struck! Commodore Preble meets with Admiral Gaston of the Soleil Royal, and the French and Americans make the first alliance of the game!

The Delaware and Minuteman guard some islands, while at the upper left the Argo looks to take a shortcut over a reef using her ability.
The American offensive in the northern part of Allost is somewhat disappointing, resulting in 5 total hits on Pirate gunships but also another fire mast on the Concord:
And that is it! The first 40 turns of the game have been completed! Three turns remain in the current resource duration.
Clearly the game has gone through a lot of interesting developments!
In this report alone:
Shal-Bala strikes the Jade Rebellion HI directly
English win the First Battle of Diamond Rock
French discover new island east of Harbor
Lumber is finally found!
Various whirlpool shenanigans occurred, no doubt with more to come much to my amusement (lol)
Jade Rebels reach the Roost, revealing the extent and history of the Cursed operation
English declare war on the Spanish
Jade Rebellion declare war on the Cursed
French and Americans start alliance together
Thank you so much for reading and commenting! I know that these reports take a while to get through, especially since they take me so long to write up haha. I appreciate the feedback and would love continual thoughts on the game. It’s been an amazing adventure so far but there is SO much more to come it boggles the mind! XD